

QR4174-418 QSWeb.pdf - Q-See
QR4174-418 QSWeb.pdf - Q-See
QR4174-418 QSWeb.pdf - Q-See

Create successful ePaper yourself
Turn your PDF publications into a flip-book with our unique Google optimized e-Paper software.
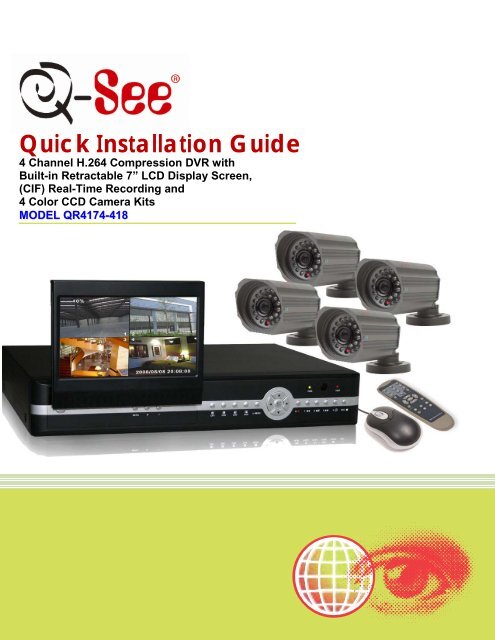
Q-SEE QUICK INSTALLATION GUIDEMODEL NUMBER <strong>QR4174</strong>-<strong>418</strong>PART 1 - PACKAGE CONTENTS:QSDR74RTS DVR4 Cameras with Standsw/Built-in Retractable (2) QSDS0612D Cameras (6mm Lens)7” LCD Display Screen (2) QSDS3612D Cameras (3.6mm Lens)Pre-InstalledHard DriveUser’sManualPower SupplyFor DVRPower Supply &4 -Way SplitterFor CamerasCamera Cables(4 Included)BNC (M) – RCA (F)AdapterSoftwareCDEthernetCableUSB 2.0MouseRemoteControl1 | P age
Q-SEE QUICK INSTALLATION GUIDEMODEL NUMBER <strong>QR4174</strong>-<strong>418</strong>PART 2 - DVR CAMERA AND POWER CONNECTIONS(Figure 1)1. Connect one end of the 60 Ft. extension cables to the cables that are connected to the cameras.2. Connect the other end of the 60 Ft. extension cable to the DVR as illustrated in Figure 1.3. Following the illustration in Figure 1, plug the power connecter of the 60 Ft. extension cable to the 4way splitter. Repeat steps 1 through 3 for each camera.4. Plug the end of the camera power adapter into the 4 way splitter.5. Plug the power adapter into the surge protector. Repeat steps 1-4 until all cameras are connected toa power adapter.6. Plug the power adapter for the DVR into the back of the DVR as illustrated in Figure 1.7. Plug the power chord of the power adapter into the surge protector.8. Plug the surge protector in to an electricity outlet.Please note that it is STRONGLY recommended to use a surge protector that is UL-1449 rated.Look for a clamping voltage of 330 or lower, a Joule rating of at least 400 and a response time of10 nanoseconds or less.2 | P age
PART 3 - DVR CONTROLS: FRONT PANELQ-SEE QUICK INSTALLATION GUIDEMODEL NUMBER <strong>QR4174</strong>-<strong>418</strong>1. Enter/Exit Display Screen2. 7” LCD Screen for Monitoring3. Show Menu4. Scroll Down in Menu5. Scroll Up in Menu6. Numeric Keys and Channel Select7. View All Channels8. Menu/Escape/Left9. Enter or Exit PTZ10. Up Button11. Power LED12. IR Receiver13. Hard Drive LED14. Down Button15. Select/Edit/Right16. Reverse/PTZ Focus17. Pause/Auto Sequence18. Play19. Forward20. Stop Recording21. RecordPART 4 - ACCESSING THE DVR MENUSChoose MENU by right clicking on the mouse or by pushing theMENU button on the DVR front panel or remote control.The Main Menu offers the following Setup Features:CAMERA: Setup name display, position, image view, and recordquality of each channel (cameras).RECORD: Enable recording & audio, set resolution & quality,recording mode and file size.NETWORK: Setup Network access (Remote Internet Monitoring).SEARCH: Find files for playback and backup.DEVICES: Manage & Format hard drive and USB devices, setupalarms, PTZ cameras, mobile phone access and motion detection.SYSTEM: Setup time, date, password, and video mode.3 | P age
Q-SEE QUICK INSTALLATION GUIDEMODEL NUMBER <strong>QR4174</strong>-<strong>418</strong>PART 5 - SETTING UP CAMERAS FOR VIEWING AND RECORDINGFrom the Main menu, select CAMERA. Here youcan setup the name display (up to 8 characters)and position of each channel (cameras). SelectCOLOR SETUP to adjust the image brightness,saturation, contrast and hue settings for eachchannel (camera). You can also choose whethereach channel can be previewed in LIVE MODEand/or RECORDING MODE.PART 6 - TO START RECORDINGThis System offers 3 modes for recording:1. Manual 2. Time Schedule 3. Motion Detection.From the main menu, select RECORD to enter into theRecord Setup menu (shown at right).CHANNEL: “ON” enables video to record from therespective camera. If the channel is set to “OFF”, videofrom that channel will not record.RESOLUTION: D1=704x480, HD1=704x240,CIF=352x240QUALITY: Best, Good, NormalUsing higher resolution and quality settings results in better video quality, but takes up more space on the harddrive. Choosing lower settings result in lower video quality, but takes up less space on the hard drive.AUDIO: If audio is ENABLED sound will be recorded with the video from the channels, and will have audiooutput in playback mode. If audio is DISABLED, sound will not record, and there will be no audio output inplayback mode (Audio cameras or a microphone is required to record the sound).REC MODE: Sets DVR to record on Manual, Motion Detection & Time Schedule Recording (instructionsbelow).PACK TIME: Choose the time length of all recorded files: 15, 30, 45, 60 min.(Max = 60 min)4 | P age
Q-SEE QUICK INSTALLATION GUIDEMODEL NUMBER <strong>QR4174</strong>-<strong>418</strong>Grid Explanation:Red = Alarm (motion detection) recordingGreen = General (time schedule) recordingTransparent = No recordingBlue = The channel and date selected.Manual Recording:From the Record Setup screen set the Rec Mode to “ALWAYS”. Your DVR will continuously record and separatefiles will be created with the Pack Time intervals you selected.Time Schedule Recording:From the Record Setup screen, set the Rec Mode to “TIME SCHEDULE RECORD” and click “SCHEDULE” ingreen. This will display the Schedule menu (see below image). Select the channels (cameras) that you wish torecord on a schedule. The options are: All, CH-1, CH-2, CH-3, and CH-4 respectively. The channel you select willbe highlighted in “Blue”, and the unselected channels will be “Grey. Click on the green GENERAL option box thenclick on the boxes for the days and times that you want to record using this option on the timeline. You can use the[From – To] pull-down menus and COPY button to copy settings from one day to another day, or all days. Your DVRwill record on it’s Time Schedule, and separate files with the Pack Time Interval you selected. Click APPLY toactivate your customized schedule, and then reboot the DVR.You can also click on the DEFAULT button to use the system defaults. The system default settings are:Hr 01:00 am-07:59 am : No recordingHr 08:00 am-18:59 pm : General recording (Time Schedule)Hr 19:00 pm- 00:59 am : Alarm recording (Motion Detection)Motion Detection Recording:From the Record Setup screen, set the Rec Mode to “TIME SCHEDULE RECORD” and click “SCHEDULE” ingreen. This will display the Schedule menu (<strong>See</strong> picture above). The options are: All, CH-1, CH-2, CH-3, and CH-4respectively. The channel you select will be highlighted in “Blue”, and the unselected channels will be “Grey. Clickon the red ALARM option box then click on the boxes for the days and times that you want to record using thisoption on the timeline. You can use the [From – To] pull-down menus and COPY button to copy settings from oneday to another day, or all days. Your DVR will record on Motion Detection. Click APPLY to activate your customizedschedule, and then go to the Devices option (red box in first below picture) and select the Motion Option (red box insecond picture below), which will display the Motion Detect Box.5 | P age
Q-SEE QUICK INSTALLATION GUIDEMODEL NUMBER <strong>QR4174</strong>-<strong>418</strong>The Motion detection Menu has three sections, includingChannel Status, Sensitivity and Motion area.STATUS: This option allows you enable motion detectionon any channel.SENSITIVITY: This option allows you to set sensitivitylevel of motion detection from 1 to 4, with 4 being thehighest.Next, click on the MD AREA SETUP button, which willdisplay the picture on the left. This option allows you toselect the area you want to be sensitive to motion. Thearea in red is sensitive to motion. You can set this area byusing the mouse or REV, FWD, and SEL keys on the frontpanel. Once you have set the area, right click with themouse or push the ESC key to save the setting. After youhave set all of the cameras, click on the Apply button tosave the settings.PART 7 - SETTING UP THE DVR TO PLAYBACKSearch Playback:From the Main Menu select SEARCH to display the VideoSearch Menu shown to the right. If you input a specific dateand click Search, you will find all the recordings for thatday. When you select an item, you will playback therecordings in 4 channel mode; or, click [File list] button todisplay File list interface, where you can playback orbackup the file you selected. <strong>See</strong> File List heading below.In the playback window you can play video Forward at 2x,4x, and 8x speeds, Slow play at 1/2x, 1/4x, and 1/8x, ornormal play, pause and play frame by frame using theplayback control bar, and adjust volume by clicking orsliding tune control bar. When playback has finished,system will return to previous menu.6 | P age
Q-SEE QUICK INSTALLATION GUIDEMODEL NUMBER <strong>QR4174</strong>-<strong>418</strong>File List:On the Video search menu mode, click File list to displaythe sub-menu shown in the picture on the left.This option will allow you to view all of the available files bychannel and type (all, normal, or alarm).You can select a file and push the SEL button to playbackthe file, or use the FWD button and down button to selectthe backup option and backup the recorded file youselected. You can also put a checkmark in the BAK box atthe end of multiple files if you want to backup more thanone file. <strong>See</strong> section 5.2.4 Search Recordings in the UserManual for more information on using the File List option.PART 8 - BACKING UP THE VIDEO ON THE DVRAttach a USB flash drive or USB hard drive to the USB backup port and follow the instructions in Part 8 to go tothe File List in the Search menu.If you want to backup a single recorded file from the file list, from the File List dialog box pictured above, select thefile you wish to back up by placing a check mark in the accompanying green box and hit the [BACKUP] button onthe right of the screen. You will then receive a pop up screen as illustrated in the first picture below showing you theprogression of your backup. Once backup is complete, you will then receive a pop up message informing you thatyou have backed up your files successfully as illustrated in the second picture below. Note that all files will be in anH264 format that can be converted to AVI using the Multi Player program that comes with the DVR or through thenet-viewer program. Once converted, you can then view these files through any program that supports an AVIformat.7 | P age
Q-SEE QUICK INSTALLATION GUIDEMODEL NUMBER <strong>QR4174</strong>-<strong>418</strong>Questions or Comments?Contact Us:Mailing Address:Customer Service:DPS, Inc. Phone: 877-998-3440 x 5388015 E. Crystal Dr. Email: cs@dpsi-usa.comAnaheim, CA 92807Live Chat from our WebsiteWebsite:Tech Support:http://www.q-see.com Phone: 877-998-3440 x 539Fax:Email: ts@dpsi-usa.com714-998-3509 Live Chat from our WebsiteREVISED 4/14/20108 | P age


