Nurse aide only â orientation list - Oakwood Healthcare System
Nurse aide only â orientation list - Oakwood Healthcare System
Nurse aide only â orientation list - Oakwood Healthcare System
You also want an ePaper? Increase the reach of your titles
YUMPU automatically turns print PDFs into web optimized ePapers that Google loves.
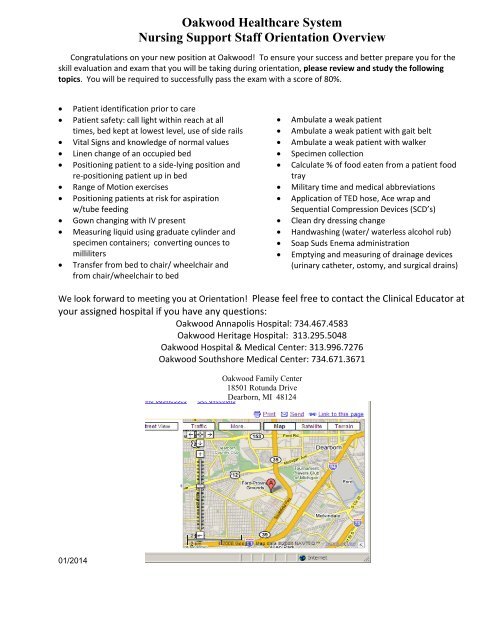
<strong>Oakwood</strong> <strong>Healthcare</strong> <strong>System</strong>Nursing Support Staff Orientation OverviewCongratulations on your new position at <strong>Oakwood</strong>! To ensure your success and better prepare you for theskill evaluation and exam that you will be taking during <strong>orientation</strong>, please review and study the followingtopics. You will be required to successfully pass the exam with a score of 80%.Patient identification prior to carePatient safety: call light within reach at alltimes, bed kept at lowest level, use of side railsVital Signs and knowledge of normal valuesLinen change of an occupied bedPositioning patient to a side‐lying position andre‐positioning patient up in bedRange of Motion exercisesPositioning patients at risk for aspirationw/tube feedingGown changing with IV presentMeasuring liquid using graduate cylinder andspecimen containers; converting ounces tomillilitersTransfer from bed to chair/ wheelchair andfrom chair/wheelchair to bedAmbulate a weak patientAmbulate a weak patient with gait beltAmbulate a weak patient with walkerSpecimen collectionCalculate % of food eaten from a patient foodtrayMilitary time and medical abbreviationsApplication of TED hose, Ace wrap andSequential Compression Devices (SCD’s)Clean dry dressing changeHandwashing (water/ waterless alcohol rub)Soap Suds Enema administrationEmptying and measuring of drainage devices(urinary catheter, ostomy, and surgical drains)We look forward to meeting you at Orientation! Please feel free to contact the Clinical Educator atyour assigned hospital if you have any questions:<strong>Oakwood</strong> Annapolis Hospital: 734.467.4583<strong>Oakwood</strong> Heritage Hospital: 313.295.5048<strong>Oakwood</strong> Hospital & Medical Center: 313.996.7276<strong>Oakwood</strong> Southshore Medical Center: 734.671.3671<strong>Oakwood</strong> Family Center18501 Rotunda DriveDearborn, MI 4812401/2014
Nursing Support Staff Skills Study SheetBefore and After All Procedures: (you may explain these rather than demonstrate each time)Always use good body mechanics: wide base of support, bend knees to lift, pivot to turn, lock bed wheels, raise bed whenperforming care, lower bed following care or to assist patient getting out of bed. Wash or disinfect hands when entering & leaving room Provide privacy, assure patient safety, and ask what Introduce self & verify patient IDelse you can do for the patient before leaving Explain procedure & ask if patient has any questions Notify RN immediately of anything abnormalAmbulation (by self, with gait belt, and with walker):Assist patient to stand: Lower bed, apply non‐slip footwear, dangle patient on side of bed, stand in front of patient, blocktheir feet & knees with yours, assist patient to stand by grasping gait belt underhand or arms around torso while patientleans/rocks forward, pull up and forward to standing while straightening your bent knees and keeping your back straight.Walking patient: Stand slightly behind & to side of patient, have patient hold onto side rail, your arm around patient’sback & hand under closest elbow or grasp gait belt, have patient look forward & not shuffle feet, if patient is dizzy havepatient sit down/call nurse, assist to sit down or get back into bed by standing in front of patient, blocking their feet andknees with yours.With gait belt: place snuggly on lower waist (one hand width between patient and belt), when walking hold onto back &side of belt with underhand grip. Patient should hold onto handrail walking in hallway.Intake and Elimination:Estimate % food eaten and calculate amount of liquids consumed: pour remaining liquid into graduate, measure in mls ateye level then subtract amount from full container to determine ml consumed.Hemovac and Jackson Pratt (JP): unpin from patient. gown, remove stopper w/out contaminating, let expand, pour liquidinto measuring container, squeeze out all air (on flat surface for Hemovac) using one hand & replace stopper w/ otherhand while still squeezed, pin Hemovac back to patient gown.Foley Bag: unclip spout, unclamp drain, empty bag into graduate, be careful not to contaminate the spout, re‐clamp &reposition drain.Ostomy Bag: unclip, empty bag into graduate, clean neck of bag, reclampTED Hose (anti‐embolism stockings):Best if applied after patient lies down for 1+ hour with feet up or in morning so feet/legs are less swollen. Turn stockinginside‐out over arm down to heel. Slip foot of stocking over toes/foot then grasp top of stocking and pull up overpatient’s leg. (Do not bunch like pantyhose). Smooth out wrinkles and assure opening allows you to see toes. Frequentlycheck neurovascular status (skin warm, capillary return in 2‐3 seconds, bilateral pedal pulses, no increased edema, toemovement, sensation) & smooth wrinkles. Remove stockings to inspect skin 3X/day including during bath.Hand Hygiene:Wash or disinfect hands as enter or leave room, between patients, after “dirty” tasks, removal of gloves, before eating orpreparing food, and at the start or end of each shift. Vigorously wash all surfaces of wrist, hand, fingers, and under nailsfor at least 10‐15+ seconds with soap and water whenever hands visibly soiled or exposure to stool, otherwise may usealcohol waterless hand rub using 2 pumps of gel rubbing thoroughly as with soap and water until dry.Range of Motion (ROM):Expose <strong>only</strong> the body part being exercised to maintain privacy, support the extremity with both hands above and belowjoint, use slow and smooth movements, avoid jerking motion. Do not force a joint beyond its present ROM or cause pain.Monitor patient’s comfort. Usually perform 3 repetitions moving through normal movement for each joint exercised(ADDuction = towards body, abduction = away from body, rotation, flexion, extension).Page 2 of 3
Transfers (bed to and from chair):Bed to Wheelchair: Lower bed, place WC near bed with wheels locked so it will not move (brace against wall if able), movefootrests out, apply non‐slip footwear, dangle on side of bed, brace patient’s knees with yours, assist patient to stand withgait belt or arms around torso as per above under “Ambulation”. Pivot to turn patient towards WC, assure patient’s backof knees are against chair, have patient grasp far armrest if able, lower slowly into chair bending at your knees.Wheelchair to Bed: Slide patient to front of chair and stand per instructions above, then pivot to sit patient on side of bed.Place one arm around the patient’s shoulders and one arm under his legs, assist patient to swing legs onto the bed andalign.Vital Signs with Pulse Oximeter: (notify RN of VS results, especially if any change, as normal VS values vary)Pulse: With 2 fingers, count & record radial pulse on thumb side of wrist for full 60 seconds (do not use your thumb, youmay count for 30 seconds and multiply X 2 if rhythm is regular). Note strength and regularity of pulse.Respirations: Count & record breaths for full 60 seconds without being obvious (continue holding wrist as you do notwant the patient to know you’re watching and change their breathing). Note breath pattern. Normal Adult= 12‐20.B/P (with Dinemap): Place cuff over brachial pulse (antecubital/inner side of elbow) as marked on cuff and assure cuff islarge enough to cover 2/3 of arm. Record systolic and diastolic pressure. Adult B/P preferred less than 120/80.Electronic Temperature (oral): Apply probe cover, place probe fully under tongue with patient’s lips closed, record inFahrenheit after beep. Dispose of probe cover in wastebasket. Normal Adult Oral= 97.6 ‐ 99.6º F.Pulse Oximeter: Assure fingertip is clean and has adequate circulation (capillary return in 2‐3 seconds), turn on machine,attach oximeter clip to fingertip, record % of oxygenation. Normal= 95‐100 (down to 93 w/ some conditions)The following skills will be taught in class and validated with re‐demonstration:Removing a Peripheral IV CatheterRemoving a Foley catheterPoint of Care: Glucose Testing – quality control and patient testRestraint ApplicationSequential Compression Device (SCDs)Page 3 of 3


