BAKER'S OVEN Instructions and Recipes - Breville
BAKER'S OVEN Instructions and Recipes - Breville
BAKER'S OVEN Instructions and Recipes - Breville

Create successful ePaper yourself
Turn your PDF publications into a flip-book with our unique Google optimized e-Paper software.
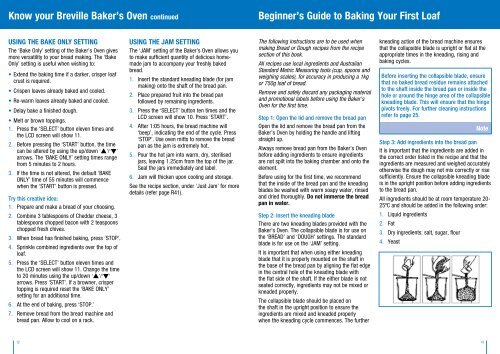
Know your <strong>Breville</strong> Baker’s Oven continuedBeginner’s Guide to Baking Your First LoafUsing the Bake Only SettingThe ‘Bake Only’ setting of the Baker’s Oven givesmore versatility to your bread making. The ‘BakeOnly’ setting is useful when wishing to:• Extend the baking time if a darker, crisper loafcrust is required.• Crispen loaves already baked <strong>and</strong> cooled.• Re-warm loaves already baked <strong>and</strong> cooled.• Delay bake a finished dough.• Melt or brown toppings.1. Press the ‘Select’ button eleven times <strong>and</strong>the LCD screen will show 11.2.3.Before pressing the ‘Start’ button, the timecan be altered by using the up/down ‘’/‘’arrows. The ‘Bake Only’ setting times rangefrom 5 minutes to 2 hours.If the time is not altered, the default ‘BAKEONLY’ time of 55 minutes will commencewhen the ‘Start’ button is pressed.Try this creative idea:1. Prepare <strong>and</strong> make a bread of your choosing.2.3.4.5.6.7.Combine 3 tablespoons of Cheddar cheese, 3tablespoons chopped bacon with 2 teaspoonschopped fresh chives.When bread has finished baking, press ‘STOP’.Sprinkle combined ingredients over the top ofloaf.Press the ‘Select’ button eleven times <strong>and</strong>the LCD screen will show 11. Change the timeto 20 minutes using the up/down ‘’/‘’arrows. Press ‘Start’. If a browner, crispertopping is required reset the ‘BAKE ONLY’setting for an additional time.At the end of baking, press ‘STOP.’Remove bread from the bread machine <strong>and</strong>bread pan. Allow to cool on a rack.Using the Jam SettingThe ‘JAM’ setting of the Baker’s Oven allows youto make sufficient quantity of delicious homemadejam to accompany your freshly bakedbread.1.2.3.4.5.6.Insert the st<strong>and</strong>ard kneading blade (for jammaking) onto the shaft of the bread pan.Place prepared fruit into the bread panfollowed by remaining ingredients.Press the ‘SELECT’ button ten times <strong>and</strong> theLCD screen will show 10. Press ‘START’.After 1:05 hours, the bread machine will‘beep’, indicating the end of the cycle. Press‘STOP’. Use oven mitts to remove the breadpan as the jam is extremely hot.Pour the hot jam into warm, dry, sterilisedjars, leaving 1.25cm from the top of the jar.Seal the jars immediately <strong>and</strong> label.Jam will thicken upon cooling <strong>and</strong> storage.See the recipe section, under ‘Just Jam’ for moredetails (refer page R41).The following instructions are to be used whenmaking Bread or Dough recipes from the recipesection of this book.All recipes use local ingredients <strong>and</strong> AustralianSt<strong>and</strong>ard Metric Measuring tools (cup, spoons <strong>and</strong>weighing scales), for accuracy in producing a 1kgor 750g loaf of bread.Remove <strong>and</strong> safely discard any packaging material<strong>and</strong> promotional labels before using the Baker’sOven for the first time.Step 1: Open the lid <strong>and</strong> remove the bread panOpen the lid <strong>and</strong> remove the bread pan from theBaker’s Oven by holding the h<strong>and</strong>le <strong>and</strong> liftingstraight up.Always remove bread pan from the Baker’s Ovenbefore adding ingredients to ensure ingredientsare not spilt into the baking chamber <strong>and</strong> onto theelement.Before using for the first time, we recommendthat the inside of the bread pan <strong>and</strong> the kneadingblades be washed with warm soapy water, rinsed<strong>and</strong> dried thoroughly. Do not immerse the breadpan in water.Step 2: Insert the kneading bladeThere are two kneading blades provided with theBaker’s Oven. The collapsible blade is for use onthe ‘BREAD’ <strong>and</strong> ‘DOUGH’ settings. The st<strong>and</strong>ardblade is for use on the ‘JAM’ setting.It is important that when using either kneadingblade that it is properly mounted on the shaft inthe base of the bread pan by aligning the flat edgein the central hole of the kneading blade withthe flat side of the shaft. If the either blade is notseated correctly, ingredients may not be mixed orkneaded properly.The collapsible blade should be placed onthe shaft in the upright position to ensure theingredients are mixed <strong>and</strong> kneaded properlywhen the kneading cycle commences. The furtherkneading action of the bread machine ensuresthat the collapsible blade is upright or flat at theappropriate times in the kneading, rising <strong>and</strong>baking cycles.Before inserting the collapsible blade, ensurethat no baked bread residue remains attachedto the shaft inside the bread pan or inside thehole or around the hinge area of the collapsiblekneading blade. This will ensure that the hingepivots freely. For further cleaning instructionsrefer to page 25.NoteStep 3: Add ingredients into the bread panIt is important that the ingredients are added inthe correct order listed in the recipe <strong>and</strong> that theingredients are measured <strong>and</strong> weighed accuratelyotherwise the dough may not mix correctly or risesufficiently. Ensure the collapsible kneading bladeis in the upright position before adding ingredientsto the bread pan.All ingredients should be at room temperature 20-25ºC <strong>and</strong> should be added in the following order:1.2.3.4.Liquid ingredientsFatDry ingredients: salt, sugar, flourYeast12 13