10 - Sea-Doo.net
10 - Sea-Doo.net
10 - Sea-Doo.net

You also want an ePaper? Increase the reach of your titles
YUMPU automatically turns print PDFs into web optimized ePapers that Google loves.
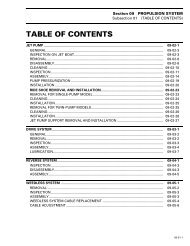
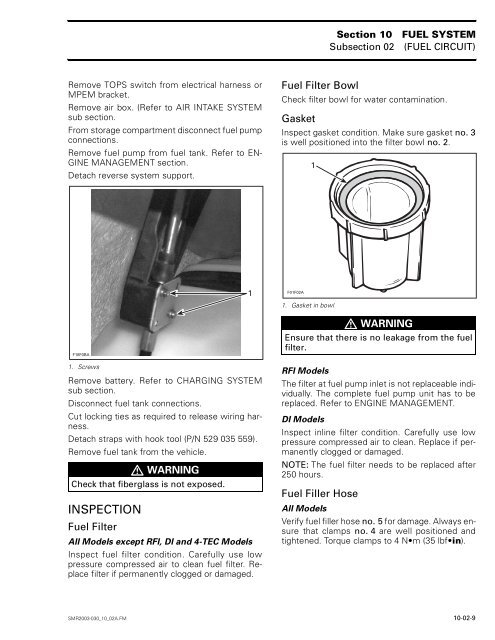
Section <strong>10</strong>Subsection 02FUEL SYSTEM(FUEL CIRCUIT)Remove TOPS switch from electrical harness orMPEM bracket.Remove air box. (Refer to AIR INTAKE SYSTEMsub section.From storage compartment disconnect fuel pumpconnections.Remove fuel pump from fuel tank. Refer to EN-GINE MANAGEMENT section.Detach reverse system support.Fuel Filter BowlCheck filter bowl for water contamination.GasketInspect gasket condition. Make sure gasket no. 3is well positioned into the filter bowl no. 2.1F18F0BA1. ScrewsRemove battery. Refer to CHARGING SYSTEMsub section.Disconnect fuel tank connections.Cut locking ties as required to release wiring harness.Detach straps with hook tool (P/N 529 035 559).Remove fuel tank from the vehicle. WARNINGCheck that fiberglass is not exposed.INSPECTIONFuel FilterAll Models except RFI, DI and 4-TEC ModelsInspect fuel filter condition. Carefully use lowpressure compressed air to clean fuel filter. Replacefilter if permanently clogged or damaged.1F01F02A1. Gasket in bowl WARNINGEnsure that there is no leakage from the fuelfilter.RFI ModelsThe filter at fuel pump inlet is not replaceable individually.The complete fuel pump unit has to bereplaced. Refer to ENGINE MANAGEMENT.DI ModelsInspect inline filter condition. Carefully use lowpressure compressed air to clean. Replace if permanentlyclogged or damaged.NOTE: The fuel filter needs to be replaced after250 hours.Fuel Filler HoseAll ModelsVerify fuel filler hose no. 5 for damage. Always ensurethat clamps no. 4 are well positioned andtightened. Torque clamps to 4 N•m (35 lbf•in).SMR2003-030_<strong>10</strong>_02A.FM <strong>10</strong>-02-9