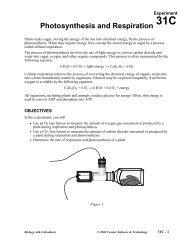
Photosynthesis
Photosynthesis
Photosynthesis
You also want an ePaper? Increase the reach of your titles
YUMPU automatically turns print PDFs into web optimized ePapers that Google loves.
Experiment 7MATERIALSLabPro interfacePalm handheld250 mL beakertwo small test tubesData Pro programVernier Colorimeter5 mL pipettwo eyedroppers or Beral pipetstwo cuvettes with lids 10 mL DPIP/phosphate buffer solutionaluminum foil covered cuvette with lid unboiled chloroplast suspension100 watt floodlight boiled chloroplast suspensionwatch or clock with second hand ice600 mL beakerPROCEDURE1. Obtain and wear goggles.2. Obtain two plastic Beral pipets, two cuvettes with lids, and one aluminum foil coveredcuvette with a lid. Mark one Beral pipet with a U (unboiled) and one with a B (boiled). Markthe lid for the cuvette with aluminum foil with a D (dark). For the remaining two cuvettes,mark one lid with a U (unboiled) and one with a B (boiled).3. Plug the Colorimeter into Channel 1 of the LabPro interface. Connect the handheld to theLabPro using the interface cable. Firmly press in the cable ends.4. Press the power button on the handheld to turn it on. To start Data Pro, tap the Data Pro iconon the Applications screen. Choose New from the Data Pro menu or tap to reset theprogram.5. Prepare a blank by filling an empty cuvette ¾ full with distilled water. Seal the cuvette witha lid. To correctly use a Colorimeter cuvette, remember:• All cuvettes should be wiped clean and dry on the outside with a tissue.• Handle cuvettes only by the top edge of the ribbed sides.• All solutions should be free of bubbles.• Always position the cuvette with its reference mark facing toward the white referencemark at the right of the cuvette slot on the Colorimeter.6. Set up the handheld and interface for the Colorimeter.a. Place the blank in the cuvette slot of the Colorimeter and close the lid.b. If the handheld displays ABSORBANCE in CH 1, press the < or > button on theColorimeter to select a wavelength of 635 nm (Red). Then calibrate by pressing the CALbutton on the Colorimeter and proceed directly to Step 7. If the handheld does not displayABSORBANCE in CH 1, continue with this step to set up your sensor manually.c. On the Main screen, tap .d. On the Setup screen, tap , then choose COLORIMETER from the list of sensors.e. Tap , then tap .7 - 2 Biology with Handhelds


