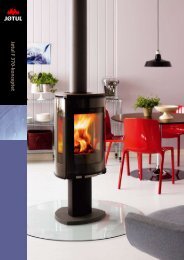
Manual - Jøtul stoves and fireplaces
Manual - Jøtul stoves and fireplaces
Manual - Jøtul stoves and fireplaces

You also want an ePaper? Increase the reach of your titles
YUMPU automatically turns print PDFs into web optimized ePapers that Google loves.
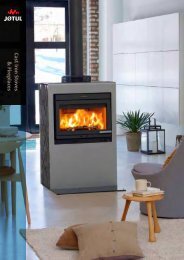
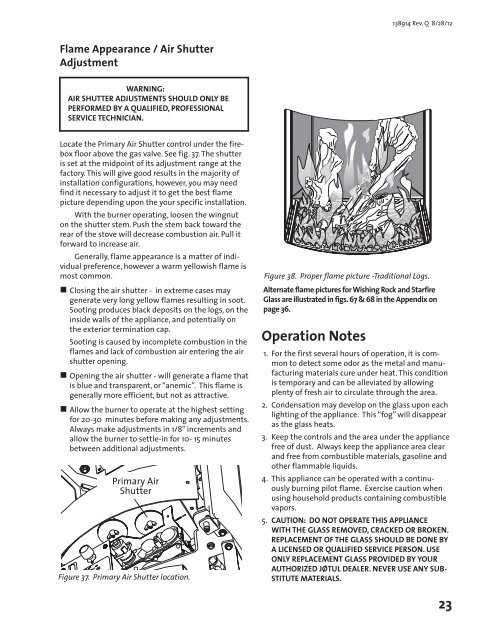
138914 Rev. Q 8/28/12Flame Appearance / Air ShutterAdjustmentWARNING:AIR SHUTTER ADJUSTMENTS SHOULD ONLY BEPERFORMED BY A QUALIFIED, PROFESSIONALSERVICE TECHNICIAN.Locate the Primary Air Shutter control under the fireboxfloor above the gas valve. See fig. 37. The shutteris set at the midpoint of its adjustment range at thefactory. This will give good results in the majority ofinstallation configurations, however, you may needfind it necessary to adjust it to get the best flamepicture depending upon the your specific installation.With the burner operating, loosen the wingnuton the shutter stem. Push the stem back toward therear of the stove will decrease combustion air. Pull itforward to increase air.Generally, flame appearance is a matter of individualpreference, however a warm yellowish flame ismost common.• Closing the air shutter - in extreme cases maygenerate very long yellow flames resulting in soot.Sooting produces black deposits on the logs, on theinside walls of the appliance, <strong>and</strong> potentially onthe exterior termination cap.Sooting is caused by incomplete combustion in theflames <strong>and</strong> lack of combustion air entering the airshutter opening.• Opening the air shutter - will generate a flame thatis blue <strong>and</strong> transparent, or “anemic”. This flame isgenerally more efficient, but not as attractive.• Allow the burner to operate at the highest settingfor 20-30 minutes before making any adjustments.Always make adjustments in 1/8” increments <strong>and</strong>allow the burner to settle-in for 10- 15 minutesbetween additional adjustments.Primary AirShutterFigure 37. Primary Air Shutter location.Figure 38. Proper flame picture -Traditional Logs.Alternate flame pictures for Wishing Rock <strong>and</strong> StarfireGlass are illustrated in figs. 67 & 68 in the Appendix onpage 36.Operation Notes1. For the first several hours of operation, it is commonto detect some odor as the metal <strong>and</strong> manufacturingmaterials cure under heat. This conditionis temporary <strong>and</strong> can be alleviated by allowingplenty of fresh air to circulate through the area.2. Condensation may develop on the glass upon eachlighting of the appliance. This “fog” will disappearas the glass heats.3. Keep the controls <strong>and</strong> the area under the appliancefree of dust. Always keep the appliance area clear<strong>and</strong> free from combustible materials, gasoline <strong>and</strong>other flammable liquids.4. This appliance can be operated with a continuouslyburning pilot flame. Exercise caution whenusing household products containing combustiblevapors.5. CAUTION: DO NOT OPERATE THIS APPLIANCEWITH THE GLASS REMOVED, CRACKED OR BROKEN.REPLACEMENT OF THE GLASS SHOULD BE DONE BYA LICENSED OR QUALIFIED SERVICE PERSON. USEONLY REPLACEMENT GLASS PROVIDED BY YOURAUTHORIZED JØTUL DEALER. NEVER USE ANY SUB-STITUTE MATERIALS.23