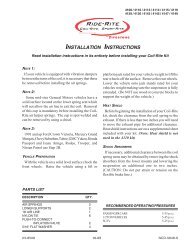
instructions - Firestone Industrial Products
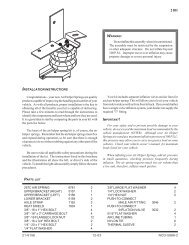
instructions - Firestone Industrial Products
instructions - Firestone Industrial Products
- No tags were found...

You also want an ePaper? Increase the reach of your titles
YUMPU automatically turns print PDFs into web optimized ePapers that Google loves.
2430WARNING!Do not inflate this assembly when it isunrestricted. The assembly must be restricted bythe suspension or other adequate structure. Donot inflate beyond 100 P.S.I. Improper use orover inflation may cause property damage orsevere personal injury.INSTALLATION INSTRUCTIONSCongratulations - your new Air Helper Springs are qualityproducts capable of improving the handling and comfort of yourvehicle. As with all products, proper installation is the key toobtaining all of the benefits your kit is capable of delivering.Please take a few minutes to read through the <strong>instructions</strong> toidentify the components and learn where and how they are used.It is a good idea to start by comparing the parts in your kit withthe parts list below.The heart of the Air Helper Spring kit is, of course, the airhelper springs. Remember that the air helper springs must flexand expand during operation, so be sure that there is enoughclearance to do so without rubbing against any other part of thevehicle.Be sure to take all applicable safety precautions during theinstallation of the kit. The <strong>instructions</strong> listed in this brochureand the illustrations all show the left, or driver’s side of thevehicle. To install the right side assembly simply follow the sameprocedures.Your kit includes separate inflation valves and air lines foreach air helper spring. This will allow you to level your vehiclefrom side to side as well as from front to back. If you would ratherhave a single valve inflation system, your dealer can supply therequired "T" fitting.IMPORTANT!For your safety and to prevent possible damage to yourvehicle, do not exceed the maximum load recommended bythe vehicle manufacturer (GVWR). Although your Air HelperSprings are rated at a maximum inflation pressure of 100psi, this pressure may allow you to carry too great a load onsome vehicles. It is best to have your vehicle weighed onceit is completely loaded and compare that weight to themaximum allowed. Check your vehicle owner’s manual ordata plate on driver side door for maximum loads listed foryour vehicle.When inflating your Air Helper Springs, add air pressurein small quantities, checking pressure frequently duringinflation. The air spring requires much less air volumethan a tire and, therefore, inflates much quicker.PARTS LISTAIR SPRING 6397 2UPPER BRACKET 5528 2LOWER BRACKET 5529 2SPACER 5224 210MM X 50MM FLAT HEAD BOLT 23/8"-16 X 3/4" FLANGED HEX BOLT 2J-BOLT 85/8" -18 JAM NUT 25/16" -18 FLANGED LOCK NUT 85/16" FLAT WASHER 418 ft. TUBING 0938 1INFLATION VALVE 3032 2MALE FITTING 3055 2THERMAL SLEEVE 0899 2NYLON TIES 6CAUTION TAG 221-8353 05-09 NAD-35472-1
FIGURE "A"NO TE:NOTE: THE JOUNCE BUMPER CUPSTAYS ON THE FRAME AFTER THEJOUNCE BUMPER IS REMOVED.THE UPPER BRACKET FITS AROUNDTHE JOUNCE BUMPER CUP.UPPERBRACKETSPACERALIGNMENT PIN10MM X 50MMAIRSPRING5/16” -18FLANGE DHEX NUTLOWERBRACKET5/16” -18FLANGEDHEX NUT3/8” -16 x 3/4”FLANGED HEX BOLTJ-BOLTINSTALLATIOLOCATIO NJOUNCEPADNJ-BOLTLEAF STACKWHEELFRONTAXLE
COMBO STUD NOTICE:THE ALIGNMENT PIN ON THE AIR SPRING MUST BE INSTALLEDINTO THE HOLE IN THE UPPER BRACKET.FAILURE TO DO SO WILL CAUSE THE ALIGNMENT PIN TO BEPUSHED INTO THE BEAD PLATE, CREATING AN AIR LEAK,AND RESULTING IN AN AIR SPRING FAILURE THAT ISNOT WARRANTABLE.ALIGNMENTPINBEADPLATE21-8403 05-11 NBD-16881
Operating Instructions andTrouble Shooting GuideThank you for purchasing <strong>Firestone</strong> air helper springs. You have purchased a quality product from the world’s numberone air spring manufacturer.This guide will provide answers to some of your questions regarding the use and operation of your new air helpersprings. Following the guidelines in this manual will help provide you with many years of trouble-free service fromyour <strong>Firestone</strong> air helper springs.For vehicle applications, air pressure requirements, air compressor CFM, maintainance, or air spring technical data,contact us at:www.ride-rite.com1-800-888-0650INSTALLER: Please leave this manual with the vehicle’s owner.21-1083 4-12
SAFETY TIPSNever exceed the manufacturer’s recommended Gross Vehicle Weight Rating (GVWR)As with your vehicle’s tires, an air helper spring is a pneumatic device that supports a portion of the vehicle’s weight.The air helper spring may fail as a result of punctures, impact damage, improper inflation, improper installation, orimproper usage. To reduce the risk of failure, we strongly recommend the following:2Never overload your vehicle. The manufacturer’s gross vehicle weight rating (GVWR) is stated on the specificationplate on the chassis. You should weigh your vehicle on a truck scale when it is fully loaded and in a levelcondition to determine if your are exceeding the manufacturer’s recommended GVWR.Inspect the inflated air springs to verify that they do not contact any component of the vehicle under normalsuspension operation. The air helper spring must flex and expand during normal operation. There must be atleast 1/2” of clearance between the inflated air spring and any other component of the vehicle under normalsuspension operation.The kit is designed to clear all chassis components. If there is any interference, please call <strong>Firestone</strong> at 1 (800)888-0650.Inspect the air line tubing and the air spring to verify that they have not been too close to the exhaust system.If the distance between any portion of the air spring or air line tubing and the exhaust system is less than 6”, aheat shield should be used.Never inflate the air helper springs beyond the maximum pressure indicated in the installation manual.Never attempt to remove any component of the air spring assembly when the air springs are inflated.If an air helper spring has failed while you are on the road, operate your vehicle at reduced speeds. High speedover rough roads will result in severe bottoming of the air spring and may damage other vehicle components.Never attempt to drive the vehicle in an unleveled condition. Failure to level a heavily loaded vehicle may resultin excessive body roll and possible damage or injury.If unidentifiable problems exist with your air helper spring kit, visit <strong>Firestone</strong> on the web at www.riderite.com orcall 1 (800) 888-0650 for technical assistance.Never cut, weld, or modify the air helper springs or brackets.Do not use aerosol tire repair products in the air helper springs or a tire patch of any kind on the air helper spring.If there is a hole in the air spring it must be replaced.GENERAL INFORMATION<strong>Firestone</strong> air helper springs are heavy duty, quality air springs designed to supplement your vehicle's existing suspensionsystem. These durable air springs allow you to maximize your vehicle's load carrying capacity through theuse of air pressure. Proper installation, use, and operation will provide the maximum service life and performanceyour air spring kit is capable of delivering. These <strong>instructions</strong> will help you obtain the maximum benefits availablefrom your air spring kit.RIDE-RITE AIR HELPER SPRINGSRide-Rite air helper springs are installed between the frame and the suspension of trucks, vans, and motorhomes.Ride-Rite air helper springs are capable of supporting loads up to 5000 lbs per pair.*SPORT-RITE AIR HELPER SPRINGSSport-Rite air helper springs are installed between the frame and suspension of light trucks, and utilize a sleevestyleair spring to enhance the ride when the vehicle is loaded or unloaded. Sport-Rite air helper springs arecapable of supporting loads up to 3000 lbs per pair.*LEVEL-RITE AIR HELPER SPRINGSLevel-Rite air helper springs replace the existing shock absorber with a fully-protected, reversible sleeve airspring paired it with a high-performance Bilstein monotube shock absorber for perfectly matched performancecharacteristics over the entire operation spectrum. Level-Rite air helper springs are capable of supporting loadsup to 1000 lbs per pair.*BASIC OPERATIONAs your vehicle is loaded, the stock suspension is compressed under the weight of the load. Your vehicle's stocksuspension system has been designed so that it will provide optimum performance and handling with a specificload on the vehicle. When your vehicle is loaded, its performance, handling characteristics, and ride quality maybe compromised. As the stock suspension is compressed, the ride may become "mushy", and you may encountersway and handling problems. As weight is added to the vehicle, the air helper springs become an active part of*Do not exceed the vehicle’s recommended gross vehicle weight rating (GVWR)
the suspension system. As more air pressure is added to the air springs, they will support more weight. You will beable to compensate for a heavy load by adding air pressure to the air springs, thereby reducing sway and handlingproblems associated with a heavily loaded vehicle.TABLE “A”ALL TORQUE SPECIFICATIONSUsing a torque wrench, torque the threaded fasteners to the following specifications:Fasteners used on studs and blind holes in air springsHex nuts installed on axle strapsHex nuts installed on 3/8" hex boltsHex nuts and bolts used to secure brackets to frameHex nuts installed on U-boltsHex bolts securing tapered sleeve style air spring to lower bracket15 – 20 ft lbs10 – 15 ft lbs28 – 32 ft lbs28 – 32 ft lbs15 – 20 ft lbs10 – 12 ft lbsPREVAILING-TORQUE LOCK NUTSIn order to assure trouble-free operation, your air spring kit includes a variety of self-locking threaded fasteners.Your kit may include prevailing-torque lock nuts. Prevailing-torque lock nuts may be more difficult to install, but willnot come loose under normal suspension operation.THREAD LOCKING COMPOUNDThe hex bolts used to secure the air spring to the brackets may have a locking compound applied to the threads.Lock washers are not required when using a fastener with pre-applied thread locking compound. When installingfasteners with thread locking compound, follow the torque recommendations listed in table.HELICAL LOCK WASHERSYour air helper spring kit may include helical lock washers. In order to properly use the lock washer, tighten thenut/bolt fastener just enough to flatten the lock washer. Overtightening the fastener may damage the nut or bolt.When using helical lock washers, follow the torque recommendations listed in Table “A”.AIR FITTINGSYour kit will include one of two types of push-to-connect air fittings: fittings with a thread locking compound preappliedto the threads or fittings with a Nylon collar in place of the thread locking compound.The pre-applied thread sealant, thread the air fitting into the air spring and tighten the fitting securely to engagethe pre-applied thread sealant.The Nylon collar, thread the air fitting into the threaded hole on the air spring so that the Nylon collar makes contactwith the top of the air spring and then tighten 1/2 turn. No thread sealant is required.Both types of air fittings allow easy connection between the air fitting and the air line tubing. To install the air linein the fittings, cut the tubing as square as possible using a sharp utility knife or razor blade. Push the air line intothe fitting as far as possible. If the tubing must be removed from the fitting, first release the air pressure from theair spring. Push the collar towards the body of the fitting and then pull the tubing out.PRESSURE DIFFERENTIAL BETWEEN AIR SPRINGSIt is not uncommon to have different pressures between the air springs after the vehicle has been brought to a levelcondition. If the vehicle is within the manufacturer's recommended gross vehicle weight and you have not achieveda level condition after inflating the air springs to 100 psi, there may be a problem with your stock suspension. Theleaf springs may have become fatigued over time or a leaf spring may be fractured. There may be an obstructionin the air system, not allowing the air pressure to reach the air helper springs.AIR SPRING ALIGNMENT AND HEIGHTUpon completion of the installation, the air springs should be inspected for proper alignment. Although the airhelper springs can function with some misalignment, it is preferred that the air springs be mounted so that theyare aligned with as little top to bottom offset as possible.Check the distance between the upper bracket and lower bracket (design height). The dimensions shown on Page5 are a guide to assist in determining the ideal operating height for your air helper springs.3
INFLATING THE AIR SPRINGSWith the air helper springs installed on your vehicle and the vehicle sitting on a level surface, visually verify thatthe vehicle is in a level state. If the vehicle is not level (front-to-back or from side-to-side) it can be brought to alevel position by inflating the air springs. Each air spring has a separate inflation valve. To level the vehicle fromfront-to-back, add air pressure to both air springs in equal amounts. To level the vehicle from side-to-side, addmore air pressure to the air spring on the lower side of the vehicle. When inflating the air springs, add air pressurein small quantities, checking the pressure frequently. The air spring requires much less air volume than a tire, andtherefore, will inflate and deflate quickly.WARNING: DO NOT EXCEED THE MAXIMUM PRESSURE AS INDICATED IN THE INSTALLATION MANUAL.LEVELING THE VEHICLECheck the level of your vehicle visually. If it is not level, either from front to back or from side to side, level it byinflating your air springs. (If your vehicle is equipped with a cab control unit or automatic control system refer tothe directions for that device.) There is one inflation valve for each air spring. To level from front to back, add airpressure to both air springs equally. For side to side, add air pressure to the air springs on the side of the vehiclethat is low. When adding air pressure to the air springs, remember that they have a much smaller volume of air thata tire so they will inflate much quicker. Add air pressure in short bursts until the vehicle is level. (NEVER EXCEED100psi IN EACH AIR SPRING.)MAINTENANCEIt is considered normal for air helper springs to lose some air pressure over time. Normal pressure loss should notexceed 3 – 4 psi per week when the air springs are inflated to 50 psi. If the pressure loss is greater than 3 – 4 psiper week, there may be a leak in the system. Each time you check the pressure in the air springs, you will lose 1 – 3psi. The air pressure should be checked at regular intervals.It is recommended that the air pressure be checked according to the following guidelines:At least monthly intervals during the continuous operation of the vehicle (see above)When the vehicle is removed from long-term storageIf the air springs are used to assist in leveling an RV or camper on uneven ground, ensure that the vehicle isreturned to a level ride height before departing.The brackets used to secure the air helper spring to the vehicle should be inspected periodically for damage andfor loose fasteners. Ensure that the air line tubing is clear of any sharp edges and routed away from the exhaustsystem. The brackets and air line tubing should be inspected every 6 months. Ensure that the threaded fastenersare torqued to the specifications listed on Page 3.Accumulated sand, gravel, or other road debris on the air springs or brackets should be rinsed away with a gardenhose each time the vehicle is washed.If it is necessary to lift the vehicle by the frame, first release the air pressure from the air springs. This will allow the airsprings to extend to their maximum length without being damaged. The uninflated air springs are capable of supportingthe weight of the axle when the vehicle is lifted by the frame. After servicing of the vehicle is complete, lower the vehicleto the ground and reinflate the air helper springs to the desired pressure. NOTE: On Sport-Rite kits the air helper springsmust be aired up to 50 psi and then release the air until the air helper springs are to the desired pressure.ONLINE AUCTION PURCHASES<strong>Firestone</strong> will not replace missing components from any kit purchased through an online auction.4
AIR SPRING TECHNICAL DATA“X”“X”“X”“X”“X”ReversibleSleeveTapered SleeveSingleConvolutedDoubleConvoluted1T ReversibleSleevePartNumber“X”Description Style Ride HeightMin/Max AirPressureMax Load @100 psi(per pair)6868 Single Convoluted 160BY 5.0" - 6.0" 5 / 100 psi 3600 lbs67626764 Double Convoluted 268C 4.5" - 5.5" 5 / 100 psi 3200 lbs676663976410 Double Convoluted 267C1.5 5.5" - 6.5" 5 / 100 psi 4800 lbs678164016873 Double Convoluted 224C 5.5" - 7.0" 5 / 100 psi 5000 lbs685976897701Double Convoluted 26C 7.0" - 8.0" 5 / 100 psi 5640 lbs7076 Reversible Sleeve 70mm 6.0" x 8.0" 10 / 100 psi 2000 lbs9000 Tapered Sleeve 110/70 mm 7.75" - 8.75" 10 / 100 psi 3000 lbs9001 Tapered Sleeve 110/70 mm 5.88" - 6.88" 10 / 100 psi 3000 lbs9002 Tapered Sleeve 110/70 mm 6.75" - 7.75" 10 / 100 psi 3000 lbs5405 1T Reversible Sleeve 1T14C-3 8.0" - 12.0" 5 / 100 psi 6400 lbsThis information is provided for reference purposes only. The bracketry and air springs in the Ride-Rite and Sport-Rite kitsare designed to work with the original suspension and within the manufacture’s Gross Vehicle Weight Rating (GVWR) for theintended vehicle. Brackets and air springs should not be interchanged or modified.5
TROUBLE SHOOTING GUIDEAir spring will not inflateEnsure that the air line tubing is inserted into the air fittings as far as possible. The tubing should go in the fitting 3/4 ofan inch. You will feel some resistance when the tubing goes past the o-ring.Clear any dirt of debris from inside the inflation valves.Inspect the entire length of air line tubing to ensure that it is not kinked, damaged from exhaust heat, or cut due to contactwith sharp edgesAir spring will not hold airNormal pressure loss is no more than 3 - 4 psi per week when the air spring is inflated to 50 psi.Using the inflation valve cap as a core tool, ensure that the valve stem core is installed securely.Apply a solution of soap and water to the air fittings, air line, and air springs to check for leaks. Tighten the air fitting orre-install the tubing in the air fitting to stop the leak. Rinse the soap and water solution from the system when complete.If a leak can not be detected with the soap and water solution, deflate the air springs and remove them from the vehicle.Re-install the tubing and inflation valve on the air spring and inflate the air spring to a maximum of 20 psi. Submerge theair spring in a bucket of water to check for leaks.Locations of air leaksLeaks occur most often at the threaded connection between the air fittings and the air springs. Tighten the fitting toengage the pre-applied orange thread sealant or until the nylon collar makes contact with the air spring, plus 1/2 turn,depending on which type of fitting is included in your kit. (See air fittings on page 3)The end of the air line tubing must be cut square and clean to avoid burrs in the connection to the air fittings. Thepush-to-connect fittings require a square cut to properly seal. The tubing can be removed from the fitting by firstreleasing the air pressure from the air spring. Push the collar on the fitting toward the body of the fitting. While holdingthe collar in, pull out the tubing. Cut the tubing squarely and push thetubing into the fitting as far as possible.The vehicle is not levelCheck for proper inflation of the air springs on each side of the vehicle.IMPORTANTNYLON TUBE CUTTING:FOLLOW THESE INSTRUCTIONSTO AVOID LEAKSSHARPBLADECheck for obstructions in the air system or vehicle components thatmay be restricting suspension travel.CUT OFFSQUARENYLON TUBESIDEUTILITYKNIFEOR TUBECUTTERRIGHTWRONG6
WARRANTY QUESTIONSFIRESTONE LIMITED LIFETIME AIR SPRING WARRANTY<strong>Firestone</strong> <strong>Industrial</strong> <strong>Products</strong> Company LLC (“<strong>Firestone</strong>”) warrants that its Ride Rite Air Spring Assembly will performaccording to the manufacturer’s specifications for as long as the vehicle on which the system was originally installedis owned by the original retail purchaser. This limited warranty does not include installation or other service chargesfor replacement.Warranty PeriodThe Air Spring is warranted for as long as the original purchaser owns the vehicle on which it was originallyinstalled. The fasteners and upper and lower brackets which accompany the air spring are warranted for a periodof twenty-four (24) months or 24,000 miles whichever occurs first. This warranty begins on the original retaildelivery date.What is CoveredAny implied warranties are limited in duration to the coverage period of this warranty (some states do not allowlimitation on how long an implied warranty lasts so the above limitation may not apply to you). This Warranty runsin favor of the original retail purchaser when the Ride Rite Air Spring Assembly is used under normal operatingconditions according to <strong>Firestone</strong>’s specifications and installed on the appropriate application. This warranty does notapply to Ride Rite Air Spring Assemblies that have been improperly applied, improperly installed, used in racing or offroad applications or used for commercial purposes. In addition, the warranty will not apply to products which havenot been maintained and serviced according to the <strong>instructions</strong> that accompany the air spring assembly. Theconsumer will be responsible for any costs incurred in removing the product from the vehicle and the cost to returnthe air spring assembly to the dealer or installer from which it was purchased. If it is determined that the Ride RiteAir Spring Assembly failed as a result of a manufacturing defect, <strong>Firestone</strong> will repair or replace, at its option, anyproduct or components subject to this warranty. You should retain a copy of your contract with your installer andyour receipt as proof of the date of installation. This warranty is non-transferable and is not assignable in any way.<strong>Firestone</strong> specifically excludes any obligation for consequential damages or incidental expenses including claims for loss of use ofthe product, loss of time, inconvenience, or commercial loss. This warranty gives you specific legal rights. You may also have otherrights that may vary from state-to-state. Some states do not allow limitations on how long an implied warranty lasts or allow theexclusion or limitation of incidental or consequential damages. The above limitation or exclusion may not apply to you. There areno warranties, express or implied, including implied warranty of merchantability and fitness which extend beyond this warranty.IS A LEAKING AIR SPRING COVERED UNDER WARRANTY?An air helper spring with a leak does not necessarily indicate that the air spring is defective. Inspect the air springfor obvious punctures or abrasions. A failure caused by a puncture or abrasion to the air spring would not be coveredby the material and workmanship warranty. An air helper spring kit that has not been installed according tothe published installation manual will not be covered by the warranty. Warranty consideration will only be given ifthe kit listed in our published application guide is installed on the proper vehicle.WHAT DO I DO IF I HAVE A DEFECTIVE PART THAT IS COVERED UNDER WARRANTY?If you live in the U.S.or Canada, contact <strong>Firestone</strong> directly at 1-800-888-0650 for warranty assistance. All othercustomers should contact their purchasing dealer. If the warranty claim is questionable, you may need to purchasea replacement part until the warranty claim can be submitted and reviewed by <strong>Firestone</strong>. If the warranty claim isdetermined to be a valid warranty claim, a credit for the purchased part will be issued.<strong>Firestone</strong> has made every attempt to assure that your air helper spring kit will properly fit your vehicle. Revisedvehicle designs, new model year vehicles, and changes made to the vehicle by the manufacturer can affect properfit. Any aftermarket chassis or suspension modification made to the vehicle may affect suspension dimensions andmay not allow the air helper spring kit to fit the vehicle as intended.7
AIR-RITE AIR CONTROL SYSTEMS<strong>Firestone</strong> has expanded the offering of Air-Rite Air Control Systems, which provides an instant air source for airsuspension products. Adjust the ride for various load and road conditions with a flip of a switch or even a click ona remote. Individual air accessory components are also available, including compressors, air tanks, and mountingsolutions, providing a wide variety of air control assist solutions.Choosing among the Air Command products has now become easier. To select an Air Command Kit from thetable below, consider the level of air source and the style of gauge that best fits the application.STEP: #1: Based uponusage, considerthe level of airsource.UsageExamplesLIGHTDUTYIdeal forCoil-Rite, Level-Rite, or consistentloadsSTANDARDDUTYModerate useMost 1/2 tonsHEAVY DUTY XTRA XTREMERegular use8-lug or RVsWide load rangesHeavy UseSmall Fills(Motorcycle Tires)Heavy UseLarge Fills(RV/Truck Tires)PRESSUREMONITORONLYNoCompressorNo TankSTEP #2:Select from theassortment ofgauge styles.CompressorIncludedCompressorNo.9377CompressorNo.9284CompressorNo.9285CompressorNo.9285CompressorNo.9287N/AAir TankIncludedN/A N/A N/AN/ASTEP #3:Use the table to choosethe Air Command Kitthat matches your airsource and gaugeselection.9124 1/2 gal. 9420 2 gal.Air CommandCLASSICELECTRONICREMOTESingle 2538 2158 2097 2266 2543 2196Dual 2178 2219 2168 2549Single 2490 2544Dual 2491 2545Dual 2489 2540 2541 2546 2547Warranty Period 1 yr. 1 yr. 2 yr. 2 yr. 2 yr. 2 yr.Telephone: 317-818-8600 1-800-888-0650 www.ride-rite.com8© 2011 <strong>Firestone</strong> <strong>Industrial</strong> <strong>Products</strong> Company