HP LaserJet 3015/3020/3030 all-in-one Service Manual - Market Point
HP LaserJet 3015/3020/3030 all-in-one Service Manual - Market Point
HP LaserJet 3015/3020/3030 all-in-one Service Manual - Market Point
- No tags were found...

Create successful ePaper yourself
Turn your PDF publications into a flip-book with our unique Google optimized e-Paper software.
<strong>HP</strong> <strong>LaserJet</strong> <strong>3015</strong>, <strong>3020</strong>, and <strong>3030</strong> <strong>all</strong>-<strong>in</strong>-<strong>one</strong><strong>Service</strong> <strong>Manual</strong>
Copyright Information© Copyright 2004 Hewlett-PackardDevelopment Company, L.P.Reproduction, adaptation or translationwithout prior written permission is prohibited,except as <strong>all</strong>owed under the copyright laws.The <strong>in</strong>formation conta<strong>in</strong>ed here<strong>in</strong> is subjectto change without notice.The only warranties for <strong>HP</strong> products andservices are set forth <strong>in</strong> the express warrantystatements accompany<strong>in</strong>g such productsand services. Noth<strong>in</strong>g here<strong>in</strong> should beconstrued as constitut<strong>in</strong>g an additionalwarranty. <strong>HP</strong> sh<strong>all</strong> not be liable for technicalor editorial errors or omissions conta<strong>in</strong>edhere<strong>in</strong>.Part number Q2665-90901Edition 1, 01/2004Trademark CreditsAdobe ® and PostScript ® are trademarks ofAdobe Systems Incorporated.Microsoft ® , W<strong>in</strong>dows ® , and W<strong>in</strong>dows NT ®are U.S. registered trademarks of MicrosoftCorporation.Safety InformationWARNING!Potential Shock HazardAlways follow basic safety precautions whenus<strong>in</strong>g this product to reduce risk of <strong>in</strong>juryfrom fire or electric shock.Read and understand <strong>all</strong> <strong>in</strong>structions <strong>in</strong> theuser guide.Observe <strong>all</strong> warn<strong>in</strong>gs and <strong>in</strong>structionsmarked on the product.Use only a grounded electrical outlet whenconnect<strong>in</strong>g the <strong>HP</strong> <strong>LaserJet</strong> <strong>3015</strong>, <strong>3020</strong>, and<strong>3030</strong> <strong>all</strong>-<strong>in</strong>-<strong>one</strong> products to a power source.If you don't know whether the outlet isgrounded, check with a qualified electrician.Do not touch the contacts on the end of anyof the sockets on the <strong>HP</strong> <strong>LaserJet</strong> <strong>3015</strong>,<strong>3020</strong>, or <strong>3030</strong> <strong>all</strong>-<strong>in</strong>-<strong>one</strong>. Replace damagedcords immediately.Unplug this product from w<strong>all</strong> outlets beforeclean<strong>in</strong>g.Do not <strong>in</strong>st<strong>all</strong> or use this product near wateror when you are wet.Inst<strong>all</strong> the product securely on a stablesurface.Inst<strong>all</strong> the product <strong>in</strong> a protected locationwhere no <strong>one</strong> can step on or trip over thepower cord and the power cord will not bedamaged.If the product does not operate norm<strong>all</strong>y, seethe onl<strong>in</strong>e user guide.Refer <strong>all</strong> servic<strong>in</strong>g questions to qualifiedpersonnel.
Table of contents1 Product InformationProduct configurations...............................................................................................................2<strong>HP</strong> <strong>LaserJet</strong> <strong>3015</strong>, <strong>3020</strong>, and <strong>3030</strong> <strong>all</strong>-<strong>in</strong>-<strong>one</strong> products......................................................2<strong>HP</strong> <strong>LaserJet</strong> <strong>3015</strong> <strong>all</strong>-<strong>in</strong>-<strong>one</strong> product...................................................................................3<strong>HP</strong> <strong>LaserJet</strong> <strong>3020</strong>/<strong>3030</strong> <strong>all</strong>-<strong>in</strong>-<strong>one</strong> product..........................................................................3Product features ........................................................................................................................4Overview of products.................................................................................................................5Hardware comp<strong>one</strong>nts........................................................................................................5Product identification..................................................................................................................7Model and serial numbers...................................................................................................7Product specifications................................................................................................................8Physical specifications.........................................................................................................8Environmental specifications (<strong>all</strong> models)...........................................................................8<strong>HP</strong> <strong>LaserJet</strong> <strong>3015</strong> performance specifications....................................................................8<strong>HP</strong> <strong>LaserJet</strong> <strong>3020</strong>/<strong>3030</strong> performance specifications.........................................................10Electrical specifications (<strong>all</strong> models)..................................................................................12Acoustic emissions (<strong>all</strong> models)........................................................................................12Skew specifications (<strong>all</strong> models).......................................................................................12<strong>HP</strong> <strong>LaserJet</strong> <strong>3030</strong> fax capabilities.....................................................................................13<strong>HP</strong> <strong>LaserJet</strong> <strong>3015</strong>, <strong>3020</strong>, and <strong>3030</strong> <strong>all</strong>-<strong>in</strong>-<strong>one</strong> battery.......................................................14Warranty statement..................................................................................................................15<strong>HP</strong>’s Premium Protection pr<strong>in</strong>t-cartridge warranty...................................................................16Extended warranty...................................................................................................................17Pr<strong>in</strong>t-cartridge <strong>in</strong>formation .......................................................................................................18Refilled pr<strong>in</strong>t cartridges ....................................................................................................18<strong>HP</strong> <strong>LaserJet</strong> pr<strong>in</strong>t<strong>in</strong>g supplies ...........................................................................................18<strong>HP</strong> Pr<strong>in</strong>t<strong>in</strong>g Supplies Returns and Recycl<strong>in</strong>g Program <strong>in</strong>formation..................................18FCC regulations.......................................................................................................................20Teleph<strong>one</strong> Consumer Protection Act (United States)..............................................................22IC CS-03 requirements............................................................................................................23Declaration of Conformity ........................................................................................................24Safety statements....................................................................................................................25Laser safety statement......................................................................................................25Canada DOC regulations..................................................................................................25Laser statement for F<strong>in</strong>land...............................................................................................26Korean EMI statement.......................................................................................................26Australian EMC requirements............................................................................................26Regulatory <strong>in</strong>formation for the European Union countries/regions .........................................272 OperationOperat<strong>in</strong>g environment.............................................................................................................30Identify<strong>in</strong>g the control-panel comp<strong>one</strong>nts................................................................................31Control-panel menu structure..................................................................................................33To use the control-panel buttons.......................................................................................33To pr<strong>in</strong>t the control-panel menu structure.........................................................................33ENWWiii
Product media specifications ..................................................................................................37Ma<strong>in</strong> <strong>in</strong>put tray (<strong>all</strong> models) ..............................................................................................37Automatic document feeder (ADF) specifications.............................................................38To ga<strong>in</strong> access to the optimiz<strong>in</strong>g feature...........................................................................38Guidel<strong>in</strong>es for us<strong>in</strong>g media.......................................................................................................39Paper and transparencies ................................................................................................39Common media problems table........................................................................................39Labels................................................................................................................................ 40Envelopes..........................................................................................................................40Card stock and heavy media ............................................................................................41Load<strong>in</strong>g media .........................................................................................................................43Media <strong>in</strong>put tray ................................................................................................................43Priority <strong>in</strong>put tray ...............................................................................................................43Specific types of media .....................................................................................................43Media <strong>in</strong>formation for ADF orig<strong>in</strong>als .................................................................................43Media <strong>in</strong>formation for the flatbed (<strong>HP</strong> <strong>LaserJet</strong> <strong>3020</strong> and <strong>3030</strong>) .....................................44Load<strong>in</strong>g orig<strong>in</strong>als to copy or scan......................................................................................44Load<strong>in</strong>g orig<strong>in</strong>als <strong>in</strong>to the LJ <strong>3020</strong> and <strong>3030</strong> ADF <strong>in</strong>put tray............................................45Load<strong>in</strong>g orig<strong>in</strong>als onto the LJ <strong>3020</strong> and <strong>3030</strong> flatbed scanner.........................................463 Ma<strong>in</strong>tenanceLife expectancies of parts that wear .......................................................................................48Scanner calibration .................................................................................................................49Clean<strong>in</strong>g the product ...............................................................................................................50To clean the pr<strong>in</strong>t path ......................................................................................................50Clean<strong>in</strong>g the glass.............................................................................................................50Clean<strong>in</strong>g the pr<strong>in</strong>t-cartridge area.............................................................................................54To clean<strong>in</strong>g the pr<strong>in</strong>t-cartridge area (<strong>all</strong> models)...............................................................54Clean<strong>in</strong>g the pr<strong>in</strong>ter pickup roller (<strong>all</strong> models)...................................................................55Clean<strong>in</strong>g the pr<strong>in</strong>ter separation pad (<strong>all</strong> models)..............................................................56User replaceable parts.............................................................................................................57Pr<strong>in</strong>ter pickup roller (<strong>all</strong> models)........................................................................................57Pr<strong>in</strong>ter separation pad (<strong>all</strong> models)...................................................................................59Pr<strong>in</strong>ter ma<strong>in</strong> <strong>in</strong>put tray (<strong>all</strong> models)....................................................................................60<strong>HP</strong> <strong>LaserJet</strong> <strong>3015</strong> ADF pickup roller ................................................................................61<strong>HP</strong> <strong>LaserJet</strong> <strong>3015</strong> ADF separation pad set.......................................................................62<strong>HP</strong> <strong>LaserJet</strong> <strong>3015</strong> ADF <strong>in</strong>put tray......................................................................................62<strong>HP</strong> <strong>LaserJet</strong> <strong>3015</strong> ADF output b<strong>in</strong>.....................................................................................63<strong>HP</strong> <strong>LaserJet</strong> <strong>3020</strong> and <strong>3030</strong> ADF pickup roller.................................................................63<strong>HP</strong> <strong>LaserJet</strong> <strong>3020</strong> and <strong>3030</strong> ADF separation pad............................................................66<strong>HP</strong> <strong>LaserJet</strong> <strong>3020</strong> and <strong>3030</strong> control-panel bezel..............................................................664 Operational overviewBasic functions (<strong>all</strong> models) ....................................................................................................70Basic sequence of operation ...................................................................................................71Formatter system ....................................................................................................................75Central process<strong>in</strong>g unit .....................................................................................................75L<strong>in</strong>e <strong>in</strong>terface unit (<strong>HP</strong> <strong>LaserJet</strong> <strong>3015</strong> and <strong>3030</strong> only) .....................................................75Standard boot process .....................................................................................................75RAM ..................................................................................................................................76Par<strong>all</strong>el <strong>in</strong>terface or universal serial bus (USB) <strong>in</strong>terface .................................................76Control panel ....................................................................................................................76EconoMode ....................................................................................................................... 76MEt .................................................................................................................................... 77Enhanced I/O ....................................................................................................................77ivENWW
PJL overview .................................................................................................................... 77Pr<strong>in</strong>ter functions (<strong>all</strong> models)...................................................................................................78Eng<strong>in</strong>e control system (eng<strong>in</strong>e control unit and power-supply assembly)........................78Image-formation system....................................................................................................83Pr<strong>in</strong>t cartridge....................................................................................................................84Pr<strong>in</strong>ter paper-feed system.................................................................................................84Jam detection <strong>in</strong> the pr<strong>in</strong>ter ..............................................................................................85<strong>HP</strong> <strong>LaserJet</strong> <strong>3015</strong> <strong>all</strong>-<strong>in</strong>-<strong>one</strong> unique comp<strong>one</strong>nts....................................................................87Basic operation..................................................................................................................87<strong>HP</strong> <strong>LaserJet</strong> <strong>3020</strong> and <strong>3030</strong> <strong>all</strong>-<strong>in</strong>-<strong>one</strong> unique comp<strong>one</strong>nts....................................................93Scanner and ADF functions and operation ......................................................................93Fax functions and operation (<strong>HP</strong> <strong>LaserJet</strong> <strong>3015</strong> and <strong>3030</strong> only) ...........................................96PSTN operation ................................................................................................................96The fax subsystem ...........................................................................................................96Formatter <strong>in</strong> the fax subsystem ........................................................................................96LIU <strong>in</strong> the fax subsystem ..................................................................................................96Fax page storage <strong>in</strong> flash memory ...................................................................................995 Removal and replacementRemoval and replacement strategy.......................................................................................103Required tools..................................................................................................................103Before perform<strong>in</strong>g service...............................................................................................103After perform<strong>in</strong>g service..................................................................................................104Parts removal order.........................................................................................................104<strong>HP</strong> <strong>LaserJet</strong> <strong>3015</strong> <strong>all</strong>-<strong>in</strong>-<strong>one</strong>..................................................................................................107L<strong>in</strong>k assemblies and scanner support frame spr<strong>in</strong>gs......................................................107Scanner side covers........................................................................................................110Separation-pad set..........................................................................................................111Control-panel bezel.........................................................................................................112Control-panel assembly...................................................................................................113Media lever and media lever torsion spr<strong>in</strong>g....................................................................114Separation pad assembly................................................................................................115Scanner assembly...........................................................................................................118Scanner assembly top cover...........................................................................................126Top-cover assembly........................................................................................................129Pickup roller ....................................................................................................................130White platen.....................................................................................................................131<strong>HP</strong> <strong>LaserJet</strong> <strong>3020</strong> and <strong>3030</strong> <strong>all</strong>-<strong>in</strong>-<strong>one</strong>..................................................................................133ADF <strong>in</strong>put tray..................................................................................................................133Flatbed lid........................................................................................................................134L<strong>in</strong>k assemblies and scanner support frame spr<strong>in</strong>gs......................................................136Control-panel bezel.........................................................................................................139Control-panel assembly...................................................................................................139ADF separation pad ........................................................................................................140ADF <strong>in</strong>put-tray flag...........................................................................................................141ADF pickup roller ............................................................................................................142ADF scanner glass..........................................................................................................143Scanner assembly...........................................................................................................145Pr<strong>in</strong>ter (product base)............................................................................................................153Pr<strong>in</strong>ter separation pad.....................................................................................................154Pr<strong>in</strong>t cartridge..................................................................................................................154Pr<strong>in</strong>ter pickup roller..........................................................................................................156Media <strong>in</strong>put tray...............................................................................................................158Transfer roller..................................................................................................................159Pr<strong>in</strong>ter side covers...........................................................................................................161ENWWv
Pr<strong>in</strong>t-cartridge door..........................................................................................................163Rear cover and fuser cover.............................................................................................164Front cover.......................................................................................................................165Inst<strong>all</strong><strong>in</strong>g the scanner cushions.......................................................................................167Speaker assembly...........................................................................................................168Power supply...................................................................................................................169Formatter and l<strong>in</strong>e <strong>in</strong>terface unit (LIU).............................................................................171Scanner support frame ...................................................................................................175Eng<strong>in</strong>e controller unit.......................................................................................................177Laser/scanner assembly..................................................................................................181Ma<strong>in</strong> motor.......................................................................................................................182Fuser................................................................................................................................ 184Paper-pickup assembly...................................................................................................1866 Troubleshoot<strong>in</strong>gBasic troubleshoot<strong>in</strong>g ............................................................................................................188Control-panel messages .......................................................................................................193Alert and warn<strong>in</strong>g messages ..........................................................................................193Critical error messages ...................................................................................................201Event-log codes...............................................................................................................204Solv<strong>in</strong>g image-quality problems ............................................................................................206Check<strong>in</strong>g the pr<strong>in</strong>t cartridge ............................................................................................206Solv<strong>in</strong>g pr<strong>in</strong>t image-quality problems .............................................................................206Solv<strong>in</strong>g scann<strong>in</strong>g (copy<strong>in</strong>g) image-quality problems ............................................................216Repetitive image defect ruler ................................................................................................222Solv<strong>in</strong>g paper-feed problems ................................................................................................223Jams occur <strong>in</strong> the pr<strong>in</strong>ter.................................................................................................223Solv<strong>in</strong>g pr<strong>in</strong>t paper-feed problems .................................................................................225Jams occur <strong>in</strong> the automatic document feeder (ADF).....................................................227Solv<strong>in</strong>g scanner (copier) paper-feed problems ..............................................................229Solv<strong>in</strong>g problems with digital subscriber l<strong>in</strong>e (DSL) connections..........................................231Connect<strong>in</strong>g additional devices.........................................................................................231Functional checks .................................................................................................................235Control-panel test............................................................................................................235Half self-test functional check .........................................................................................235Drum rotation functional check ......................................................................................237High-voltage contacts check ..........................................................................................238Updat<strong>in</strong>g the firmware code...................................................................................................240Troubleshoot<strong>in</strong>g tools ............................................................................................................241Pr<strong>in</strong>t<strong>in</strong>g a configuration report, demonstration page, or menu structure ........................241Pr<strong>in</strong>t<strong>in</strong>g <strong>all</strong> fax reports at once (<strong>HP</strong> <strong>LaserJet</strong> <strong>3015</strong> and <strong>3030</strong> only) ...............................241T.30 protocol trace (<strong>HP</strong> <strong>LaserJet</strong> <strong>3015</strong> and <strong>3030</strong> only) .................................................241<strong>Service</strong>-mode functions .........................................................................................................262Secondary service menu ................................................................................................262Developer’s menu ...........................................................................................................263Adjust<strong>in</strong>g the country/region code parameters................................................................264Soft reset.........................................................................................................................265NVRAM <strong>in</strong>it .....................................................................................................................265System sett<strong>in</strong>gs for localized products............................................................................266Pr<strong>in</strong>ter job language (PJL) software commands ............................................................268Ma<strong>in</strong> wir<strong>in</strong>g ............................................................................................................................269Comp<strong>one</strong>nt locations, <strong>HP</strong> <strong>LaserJet</strong> <strong>3015</strong> <strong>all</strong>-<strong>in</strong>-<strong>one</strong> .............................................................272Comp<strong>one</strong>nt locations, <strong>HP</strong> <strong>LaserJet</strong> <strong>3020</strong> and <strong>3030</strong> <strong>all</strong>-<strong>in</strong>-<strong>one</strong>..............................................276Comp<strong>one</strong>nt locations, <strong>HP</strong> <strong>LaserJet</strong> <strong>3015</strong>, <strong>3020</strong> and <strong>3030</strong> pr<strong>in</strong>ter (product base)................277viENWW
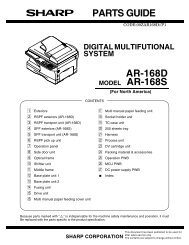
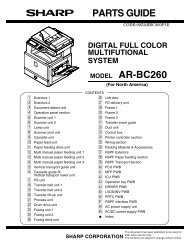
7 Parts and diagramsOrder<strong>in</strong>g parts and supplies ..................................................................................................282Parts that wear ................................................................................................................282Parts ............................................................................................................................... 282World-wide customer support .........................................................................................282Accessories ...........................................................................................................................284Common hardware .........................................................................................................284How to use the parts lists and diagrams ........................................................................285<strong>HP</strong> <strong>LaserJet</strong> <strong>3015</strong> scanner assembly ...................................................................................286<strong>HP</strong> <strong>LaserJet</strong> <strong>3020</strong>/<strong>3030</strong> scanner assembly ..........................................................................296<strong>HP</strong> <strong>LaserJet</strong> <strong>3015</strong>/<strong>3020</strong>/<strong>3030</strong> pr<strong>in</strong>ter base............................................................................304Alphabetical parts list.............................................................................................................320Numerical parts list.................................................................................................................326IndexENWWvii
viiiENWW
List of tablesTable 1-1. Physical specifications.......................................................................................8Table 1-2. Environmental specifications (<strong>all</strong> models)..........................................................8Table 1-3. <strong>HP</strong> <strong>LaserJet</strong> <strong>3015</strong> performance specifications..................................................8Table 1-4. <strong>HP</strong> <strong>LaserJet</strong> <strong>3020</strong>/<strong>3030</strong> performance specifications.......................................10Table 1-5. Electrical specifications (<strong>all</strong> models)................................................................12Table 1-6. Acoustic emissions (<strong>all</strong> models).......................................................................12Table 1-7. Skew specifications (<strong>all</strong> models) .....................................................................12Table 1-8. <strong>HP</strong> <strong>LaserJet</strong> <strong>3030</strong> fax capabilities....................................................................13Table 1-9. <strong>HP</strong> <strong>LaserJet</strong> <strong>3015</strong>, <strong>3020</strong>, and <strong>3030</strong> <strong>all</strong>-<strong>in</strong>-<strong>one</strong> battery.....................................14Table 2-1. Control-panel menu structure..........................................................................33Table 2-2. Supported media types....................................................................................37Table 3-1. Life expectancies of parts that wear ...............................................................48Table 4-1. <strong>HP</strong> <strong>LaserJet</strong> <strong>3015</strong> basic sequence of operation..............................................71Table 4-2. <strong>HP</strong> <strong>LaserJet</strong> <strong>3020</strong> and <strong>3030</strong> basic sequence of operation..............................71Table 4-3. <strong>HP</strong> <strong>LaserJet</strong> <strong>3015</strong>, <strong>3020</strong> and <strong>3030</strong> pr<strong>in</strong>ter (product base) basicsequence of operation......................................................................................73Table 4-4. Product startup messages...............................................................................76Table 4-5. Dc power distribution........................................................................................80Table 6-1. Alert and warn<strong>in</strong>g messages ........................................................................193Table 6-2. Critical error messages..................................................................................201Table 6-3. Event-log codes.............................................................................................204Table 6-4. Fax receive codes..........................................................................................243Table 6-5. Fax send codes..............................................................................................248Table 6-6. Fax phase sequence (<strong>HP</strong> <strong>LaserJet</strong> <strong>3015</strong> and <strong>3030</strong> only).............................254Table 6-7. Appropriate responses (<strong>HP</strong> <strong>LaserJet</strong> <strong>3015</strong> and <strong>3030</strong> only)...........................256Table 6-8. Fax abbreviations (<strong>HP</strong> <strong>LaserJet</strong> <strong>3015</strong> and <strong>3030</strong> only)..................................257Table 6-9. System sett<strong>in</strong>gs..............................................................................................266Table 7-1. Technical support websites and related documentation................................282Table 7-2. Accessories....................................................................................................284Table 7-3. Common fasteners .......................................................................................284Table 7-4. Alphabetical parts list.....................................................................................320Table 7-5. Numerical parts list.........................................................................................326ENWWix
xENWW
List of figuresFigure 1-1. <strong>HP</strong> <strong>LaserJet</strong> <strong>3015</strong>, <strong>3020</strong>, and <strong>3030</strong> <strong>all</strong>-<strong>in</strong>-<strong>one</strong> products....................................2Figure 1-2. <strong>HP</strong> <strong>LaserJet</strong> <strong>3015</strong> <strong>all</strong>-<strong>in</strong>-<strong>one</strong> hardware comp<strong>one</strong>nts..........................................5Figure 1-3. <strong>HP</strong> <strong>LaserJet</strong> <strong>3020</strong> <strong>all</strong>-<strong>in</strong>-<strong>one</strong> hardware comp<strong>one</strong>nts..........................................6Figure 1-4. <strong>HP</strong> <strong>LaserJet</strong> <strong>3030</strong> <strong>all</strong>-<strong>in</strong>-<strong>one</strong> hardware comp<strong>one</strong>nts..........................................6Figure 1-5. Sample Identification label (on the back of the product)....................................7Figure 1-6. Location of additional serial number label.........................................................7Figure 2-1. <strong>HP</strong> <strong>LaserJet</strong> <strong>3015</strong> dimensions.........................................................................30Figure 2-2. <strong>HP</strong> <strong>LaserJet</strong> <strong>3020</strong>/<strong>3030</strong> dimensions................................................................30Figure 2-3. <strong>HP</strong> <strong>LaserJet</strong> <strong>3015</strong> <strong>all</strong>-<strong>in</strong>-<strong>one</strong> control panel.......................................................31Figure 2-4. <strong>HP</strong> <strong>LaserJet</strong> <strong>3020</strong> <strong>all</strong>-<strong>in</strong>-<strong>one</strong> control panel.......................................................32Figure 2-5. <strong>HP</strong> <strong>LaserJet</strong> <strong>3030</strong> <strong>all</strong>-<strong>in</strong>-<strong>one</strong> control panel.......................................................32Figure 2-6. Envelope construction......................................................................................41Figure 2-7. Load<strong>in</strong>g the LJ <strong>3015</strong> ADF (1 of 3)....................................................................44Figure 2-8. Load<strong>in</strong>g the LJ <strong>3015</strong> ADF (2 of 3)....................................................................45Figure 2-9. Load<strong>in</strong>g the LJ <strong>3015</strong> ADF (3 of 3)....................................................................45Figure 2-10. Load<strong>in</strong>g the LJ <strong>3020</strong> and <strong>3030</strong> ADF (1 of 2)....................................................46Figure 2-11. Load<strong>in</strong>g the LJ <strong>3020</strong> and <strong>3030</strong> ADF (2 of 2)....................................................46Figure 2-12. Load<strong>in</strong>g the LJ <strong>3020</strong> and <strong>3030</strong> flatbed scanner...............................................46Figure 3-1. Clean<strong>in</strong>g the LJ <strong>3015</strong> glass..............................................................................51Figure 3-2. Clean<strong>in</strong>g the LJ <strong>3015</strong> white platen...................................................................51Figure 3-3. Clean<strong>in</strong>g the LJ <strong>3020</strong> and <strong>3030</strong> glass (1 of 2).................................................52Figure 3-4. Clean<strong>in</strong>g the LJ <strong>3020</strong> and <strong>3030</strong> glass (2 of 2).................................................52Figure 3-5. Clean<strong>in</strong>g the LJ <strong>3020</strong> and <strong>3030</strong> lid back<strong>in</strong>g.....................................................52Figure 3-6. Clean<strong>in</strong>g the pr<strong>in</strong>t-cartridge area (1 of 3).........................................................54Figure 3-7. Clean<strong>in</strong>g the pr<strong>in</strong>t-cartridge area (2 of 3).........................................................54Figure 3-8. Clean<strong>in</strong>g the pr<strong>in</strong>t-cartridge area (3 of 3).........................................................55Figure 3-9. Clean<strong>in</strong>g the separation pad............................................................................55Figure 3-10. Clean<strong>in</strong>g the pickup roller (1 of 3)....................................................................55Figure 3-11. Clean<strong>in</strong>g the pickup roller (2 of 3)....................................................................56Figure 3-12. Clean<strong>in</strong>g the pickup roller (3 of 3)....................................................................56Figure 3-13. Clean<strong>in</strong>g the separation pad (1 of 2)................................................................56Figure 3-14. Clean<strong>in</strong>g the separation pad (2 of 2)................................................................56Figure 3-15. Replac<strong>in</strong>g the pickup roller (1 of 7)..................................................................57Figure 3-16. Replac<strong>in</strong>g the pickup roller (2 of 7)..................................................................57Figure 3-17. Replac<strong>in</strong>g the pickup roller (3 of 7)..................................................................57Figure 3-18. Replac<strong>in</strong>g the pickup roller (4 of 7)..................................................................58Figure 3-19. Replac<strong>in</strong>g the pickup roller (5 of 7)..................................................................58Figure 3-20. Replac<strong>in</strong>g the pickup roller (6 of 7) .................................................................58Figure 3-21. Replac<strong>in</strong>g the pickup roller (7 of 7) .................................................................58Figure 3-22. Replac<strong>in</strong>g the pr<strong>in</strong>ter separation pad (1 of 5)..................................................59Figure 3-23. Replac<strong>in</strong>g the pr<strong>in</strong>ter separation pad (2 of 5)..................................................59Figure 3-24. Replac<strong>in</strong>g the pr<strong>in</strong>ter separation pad (3 of 5)..................................................60Figure 3-25. Replac<strong>in</strong>g the pr<strong>in</strong>ter separation pad (4 of 5) .................................................60Figure 3-26. Replac<strong>in</strong>g the pr<strong>in</strong>ter separation pad (5 of 5) .................................................60Figure 3-27. Remove the media <strong>in</strong>put tray (1 of 2)...............................................................61Figure 3-28. Remove the paper pickup tray (2 of 2).............................................................61ENWWxi
Figure 3-29. Remove the separation pad.............................................................................62Figure 3-30. Replac<strong>in</strong>g the ADF <strong>in</strong>put tray...........................................................................63Figure 3-31. Replac<strong>in</strong>g the ADF output b<strong>in</strong>..........................................................................63Figure 3-32. Replac<strong>in</strong>g the ADF pickup-roller assembly (1 of 9) ........................................63Figure 3-33. Replac<strong>in</strong>g the ADF pickup-roller assembly (2 of 9) ........................................64Figure 3-34. Replac<strong>in</strong>g the ADF pickup-roller assembly (3 of 9) ........................................64Figure 3-35. Replac<strong>in</strong>g the ADF pickup-roller assembly (4 of 9) ........................................64Figure 3-36. Replac<strong>in</strong>g the ADF pickup-roller assembly (5 of 9) ........................................64Figure 3-37. Replac<strong>in</strong>g the ADF pickup-roller assembly (6 of 9) ........................................65Figure 3-38. Replac<strong>in</strong>g the ADF pickup-roller assembly (7 of 9) ........................................65Figure 3-39. Replac<strong>in</strong>g the ADF pickup-roller assembly (8 of 9) ........................................65Figure 3-40. Replac<strong>in</strong>g the ADF pickup-roller assembly (9 of 9) ........................................65Figure 3-41. Remove the separation pad.............................................................................66Figure 3-42. Replac<strong>in</strong>g the control-panel bezel (1 of 4).......................................................66Figure 3-43. Replac<strong>in</strong>g the control-panel bezel (2 of 4).......................................................67Figure 3-44. Replac<strong>in</strong>g the control-panel bezel (3 of 4).......................................................67Figure 3-45. Replac<strong>in</strong>g the control-panel bezel (4 of 4).......................................................67Figure 4-1. Product configuration ......................................................................................70Figure 4-2. <strong>HP</strong> <strong>LaserJet</strong> <strong>3015</strong>, <strong>3020</strong>, and <strong>3030</strong> pr<strong>in</strong>ter (product base) tim<strong>in</strong>gdiagram .........................................................................................................74Figure 4-3. Pr<strong>in</strong>ter functional block diagram.......................................................................78Figure 4-4. Laser/scanner operation..................................................................................80Figure 4-5. High-voltage power supply circuit....................................................................82Figure 4-6. Image-formation block diagram ......................................................................83Figure 4-7. Pr<strong>in</strong>ter paper path ...........................................................................................85Figure 4-8. Basic operation block diagram.........................................................................87Figure 4-9. <strong>HP</strong> <strong>LaserJet</strong> <strong>3015</strong> optical and feed systems...................................................88Figure 4-10. <strong>HP</strong> <strong>LaserJet</strong> <strong>3015</strong> feed control (1 of 2)............................................................89Figure 4-11. <strong>HP</strong> <strong>LaserJet</strong> <strong>3015</strong> feed control (2 of 2)............................................................90Figure 4-12. <strong>HP</strong> <strong>LaserJet</strong> <strong>3015</strong> optical system (1 of 2)........................................................91Figure 4-13. <strong>HP</strong> <strong>LaserJet</strong> <strong>3015</strong> optical system (2 of 2)........................................................92Figure 4-14. <strong>HP</strong> <strong>LaserJet</strong> <strong>3020</strong> and <strong>3030</strong> optical system ...................................................93Figure 4-15. <strong>HP</strong> <strong>LaserJet</strong> <strong>3020</strong> and <strong>3030</strong> ADF path ...........................................................95Figure 5-1. <strong>HP</strong> <strong>LaserJet</strong> <strong>3015</strong>, <strong>3020</strong>, and <strong>3030</strong> products................................................104Figure 5-2. Parts removal order for the <strong>HP</strong> <strong>LaserJet</strong> <strong>3015</strong> <strong>all</strong>-<strong>in</strong>-<strong>one</strong>..............................105Figure 5-3. Parts removal order for the <strong>HP</strong> <strong>LaserJet</strong> <strong>3020</strong> and <strong>3030</strong> <strong>all</strong>-<strong>in</strong>-<strong>one</strong> .............105Figure 5-4. Parts removal order for the pr<strong>in</strong>ter (product base, <strong>all</strong> models)......................106Figure 5-5. Parts removal order <strong>HP</strong> <strong>LaserJet</strong> <strong>3015</strong> scanner assembly...........................107Figure 5-6. Remove the l<strong>in</strong>k assemblies and scanner support frame spr<strong>in</strong>gs (1 of 4) ....108Figure 5-7. Remove the l<strong>in</strong>k assemblies and scanner support frame spr<strong>in</strong>gs (2 of 4).....108Figure 5-8. Remove the l<strong>in</strong>k assemblies and scanner support frame spr<strong>in</strong>gs (3 of 4).....109Figure 5-9. Remove the l<strong>in</strong>k assemblies and scanner support frame spr<strong>in</strong>gs (4 of 4).....109Figure 5-10. Remove the scanner side covers (1 of 3)......................................................110Figure 5-11. Remove the scanner side covers (2 of 3)......................................................110Figure 5-12. Remove the scanner side covers (3 of 3)......................................................111Figure 5-13. Remove the separation pad...........................................................................112Figure 5-14. Remove the control-panel bezel (1 of 3)........................................................112Figure 5-15. Remove the control-panel bezel (2 of 3)........................................................113Figure 5-16. Remove the control-panel bezel (3 of 3)........................................................113Figure 5-17. Remove the control-panel assembly (1 of 2).................................................114Figure 5-18. Remove the control-panel assembly (2 of 2).................................................114Figure 5-19. Remove the media lever and media lever torsion spr<strong>in</strong>g (1 of 2)..................115Figure 5-20. Remove the media lever and media lever torsion spr<strong>in</strong>g (2 of 2)..................115Figure 5-21. Remove the separation pad assembly (1 of 3)..............................................116Figure 5-22. Remove the separation pad assembly (2 of 3)..............................................117Figure 5-23. Remove the separation pad assembly (3 of 3)..............................................117xiiENWW
Figure 5-24. Remove the scanner assembly (1 of 15).......................................................118Figure 5-25. Remove the scanner assembly (2 of 15).......................................................118Figure 5-26. Remove the scanner assembly (3 of 15).......................................................119Figure 5-27. Remove the scanner assembly (4 of 15).......................................................119Figure 5-28. Remove the scanner assembly (5 of 15) ......................................................120Figure 5-29. Remove the scanner assembly (6 of 15).......................................................120Figure 5-30. Remove the scanner assembly (7 of 15).......................................................121Figure 5-31. Remove the scanner assembly (8 of 15).......................................................121Figure 5-32. Remove the scanner assembly (9 of 15).......................................................122Figure 5-33. Remove the scanner assembly (10 of 15).....................................................122Figure 5-34. Remove the scanner assembly (11 of 15) ....................................................123Figure 5-35. Remove the scanner assembly (12 of 15) ....................................................124Figure 5-36. Remove the scanner assembly (13 of 15).....................................................125Figure 5-37. Remove the scanner assembly (14 of 15).....................................................125Figure 5-38. Remove the scanner assembly (15 of 15).....................................................126Figure 5-39. Remove the scanner assembly top cover (1 of 4).........................................127Figure 5-40. Remove the scanner assembly top cover (2 of 4).........................................127Figure 5-41. Remove the scanner assembly top cover (3 of 4).........................................128Figure 5-42. Remove the scanner assembly top cover (4 of 4) ........................................128Figure 5-43. Re<strong>in</strong>st<strong>all</strong><strong>in</strong>g the scanner assembly top cover................................................129Figure 5-44. Align the scanner assembly top cover and base...........................................129Figure 5-45. Remove the top-cover assembly (1 of 2).......................................................130Figure 5-46. Remove the top-cover assembly (2 of 2) ......................................................130Figure 5-47. Remove the pickup roller (1 of 2)...................................................................131Figure 5-48. Remove the pickup roller (2 of 2)...................................................................131Figure 5-49. Remove the white platen (1 of 2)...................................................................132Figure 5-50. Remove the white platen (2 of 2) ..................................................................132Figure 5-51. Parts removal order <strong>HP</strong> <strong>LaserJet</strong> <strong>3020</strong> and <strong>3030</strong> scanner assembly...........133Figure 5-52. Remove the ADF <strong>in</strong>put tray............................................................................133Figure 5-53. Remove the flatbed lid (1 of 5) ......................................................................134Figure 5-54. ADF cover correctly <strong>in</strong>st<strong>all</strong>ed.........................................................................134Figure 5-55. Remove the flatbed lid (2 of 5).......................................................................135Figure 5-56. Remove the flatbed lid (3 of 5).......................................................................135Figure 5-57. Remove the flatbed lid (4 of 5).......................................................................136Figure 5-58. Remove the flatbed lid (5 of 5).......................................................................136Figure 5-59. Remove the l<strong>in</strong>k assemblies and scanner support frame spr<strong>in</strong>gs (1 of 4).....137Figure 5-60. Remove the l<strong>in</strong>k assemblies and scanner support frame spr<strong>in</strong>gs (2 of 4).....137Figure 5-61. Remove the l<strong>in</strong>k assemblies and scanner support frame spr<strong>in</strong>gs (3 of 4).....138Figure 5-62. Remove the l<strong>in</strong>k assemblies and scanner support frame spr<strong>in</strong>gs (4 of 4).....138Figure 5-63. Remove the control-panel bezel ...................................................................139Figure 5-64. Remove the control panel assembly (1 of 2).................................................139Figure 5-65. Remove the control panel assembly (2 of 2) ................................................140Figure 5-66. Remove the separation pad...........................................................................140Figure 5-67. Remove the ADF <strong>in</strong>put-tray flag.....................................................................141Figure 5-68. Correct position<strong>in</strong>g of the ADF <strong>in</strong>put-tray spr<strong>in</strong>g ...........................................141Figure 5-69. Remove the ADF pickup roller (1 of 2)..........................................................142Figure 5-70. Remove the ADF pickup roller (2 of 2)..........................................................142Figure 5-71. Remove the ADF scanner glass (1 of 3)........................................................143Figure 5-72. Remove the ADF scanner glass (2 of 3)........................................................143Figure 5-73. Remove the ADF scanner glass (3 of 3)........................................................144Figure 5-74. Inst<strong>all</strong> the ADF scanner glass........................................................................144Figure 5-75. Remove the scanner assembly (1 of 13).......................................................145Figure 5-76. Remove the scanner assembly (2 of 13) ......................................................145Figure 5-77. Remove the scanner assembly (3 of 13).......................................................146Figure 5-78. Remove the scanner assembly (4 of 13).......................................................146Figure 5-79. Remove the scanner assembly (5 of 13).......................................................147ENWWxiii
Figure 5-80. Remove the scanner assembly (6 of 13).......................................................147Figure 5-81. Remove the scanner assembly (7 of 13).......................................................148Figure 5-82. Remove the scanner assembly (8 of 13).......................................................148Figure 5-83. Remove the scanner assembly (9 of 13).......................................................149Figure 5-84. Remove the scanner assembly (10 of 13) ....................................................150Figure 5-85. Remove the scanner assembly (11 of 13) ....................................................151Figure 5-86. Remove the scanner assembly (12 of 13).....................................................151Figure 5-87. Remove the scanner assembly (13 of 13).....................................................152Figure 5-88. Parts removal order for the pr<strong>in</strong>ter (product base, <strong>all</strong> models)......................153Figure 5-89. Remove the pr<strong>in</strong>ter separation pad (1 of 2)...................................................154Figure 5-90. Remove the pr<strong>in</strong>ter separation pad (2 of 2)...................................................154Figure 5-91. Remove the pr<strong>in</strong>t cartridge (1 of 2)................................................................155Figure 5-92. Remove the pr<strong>in</strong>t cartridge (2 of 2)................................................................155Figure 5-93. Remove the pr<strong>in</strong>ter pickup roller (1 of 5).......................................................156Figure 5-94. Remove the pr<strong>in</strong>ter pickup roller (2 of 5).......................................................156Figure 5-95. Remove the pr<strong>in</strong>ter pickup roller (3 of 5).......................................................157Figure 5-96. Remove the pr<strong>in</strong>ter pickup roller (4 of 5).......................................................157Figure 5-97. Remove the pr<strong>in</strong>ter pickup roller (5 of 5).......................................................158Figure 5-98. Remove the media <strong>in</strong>put tray (1 of 3).............................................................158Figure 5-99. Remove the media <strong>in</strong>put tray (2 of 3).............................................................159Figure 5-100. Remove the media <strong>in</strong>put tray (3 of 3).............................................................159Figure 5-101. Remove the transfer roller (1 of 3).................................................................160Figure 5-102. Remove the transfer roller (2 of 3).................................................................160Figure 5-103. Remove the transfer roller (3 of 3).................................................................161Figure 5-104. Remove the pr<strong>in</strong>ter side covers (1 of 3).........................................................161Figure 5-105. Remove the pr<strong>in</strong>ter side covers (2 of 3) ........................................................162Figure 5-106. Remove the pr<strong>in</strong>ter side covers (2 of 3) ........................................................162Figure 5-107. Remove the pr<strong>in</strong>ter side covers (3 of 3).........................................................163Figure 5-108. Remove the pr<strong>in</strong>t-cartridge door (1 of 2)........................................................163Figure 5-109. Remove the pr<strong>in</strong>t-cartridge door (2 of 2)........................................................164Figure 5-110. Remove the rear cover and fuser cover (1 of 3)............................................164Figure 5-111. Remove the rear cover and fuser cover (2 of 3)............................................165Figure 5-112. Remove the rear cover and fuser cover (3 of 3)............................................165Figure 5-113. Remove the front cover (1 of 3).....................................................................166Figure 5-114. Remove the front cover (2 of 3).....................................................................166Figure 5-115. Remove the front cover (3 of 3).....................................................................167Figure 5-116. Front-cover lock<strong>in</strong>g tabs.................................................................................167Figure 5-117. Inst<strong>all</strong><strong>in</strong>g the scanner cushions......................................................................168Figure 5-118. Remove the speaker assembly (1 of 2).........................................................168Figure 5-119. Remove the speaker assembly (2 of 2).........................................................169Figure 5-120. Remove the power supply (1 of 3).................................................................170Figure 5-121. Remove the power supply (2 of 3).................................................................170Figure 5-122. Remove the power supply (3 of 3).................................................................171Figure 5-123. Correct rout<strong>in</strong>g of the power-supply wire-harnesses.....................................171Figure 5-124. <strong>HP</strong> <strong>LaserJet</strong> <strong>3015</strong> formatter and LIU.............................................................173Figure 5-125. <strong>HP</strong> <strong>LaserJet</strong> <strong>3020</strong> formatter without LIU........................................................173Figure 5-126. <strong>HP</strong> <strong>LaserJet</strong> <strong>3030</strong> formatter and LIU.............................................................173Figure 5-127. Remove the formatter (1 of 2) (and LIU <strong>in</strong>st<strong>all</strong>ed).........................................174Figure 5-128. Remove the formatter (2 of 2)........................................................................174Figure 5-129. Remove the scanner support frame (1 of 3)..................................................175Figure 5-130. Remove the scanner support frame (2 of 3)..................................................176Figure 5-131. Remove the scanner support frame (3 of 3)..................................................176Figure 5-132. Remove the chassis re<strong>in</strong>forcement plate.......................................................177Figure 5-133. Remove the ECU (1 of 6)...............................................................................178Figure 5-134. Remove the ECU (2 of 6)...............................................................................178Figure 5-135. Remove the ECU (3 of 6)...............................................................................179xivENWW
Figure 5-136. Remove the ECU (4 of 6)...............................................................................179Figure 5-137. Remove the ECU (5 of 6)...............................................................................180Figure 5-138. Remove the ECU (6 of 6)...............................................................................180Figure 5-139. Laser/scanner assembly shutter arm.............................................................181Figure 5-140. Remove the laser/scanner assembly.............................................................182Figure 5-141. Remove the ma<strong>in</strong> motor (1 of 2)....................................................................183Figure 5-142. Remove the ma<strong>in</strong> motor (2 of 2) ...................................................................183Figure 5-143. Remove the fuser assembly (1 of 2)..............................................................184Figure 5-144. Remove the fuser assembly (2 of 2)..............................................................185Figure 5-145. Fragile tab on fuser assembly........................................................................185Figure 5-146. Remove the paper-pickup assembly..............................................................186Figure 6-1. Repetitive image defect ruler ........................................................................222Figure 6-2. Clear a jam <strong>in</strong> the product base (1 of 3)........................................................223Figure 6-3. Clear a jam <strong>in</strong> the product base (2 of 3)........................................................224Figure 6-4. Clear a jam <strong>in</strong> the product base (3 of 3)........................................................224Figure 6-5. Clear<strong>in</strong>g output b<strong>in</strong> jams (<strong>HP</strong> LJ <strong>3015</strong>) .........................................................225Figure 6-6. Clear<strong>in</strong>g ADF output b<strong>in</strong> jams (<strong>HP</strong> <strong>LaserJet</strong> <strong>3015</strong>) ......................................225Figure 6-7. Clear<strong>in</strong>g output b<strong>in</strong> jams (<strong>HP</strong> <strong>LaserJet</strong> <strong>3020</strong> and <strong>3030</strong>) ...............................225Figure 6-8. ADF lid open (<strong>HP</strong> <strong>LaserJet</strong> <strong>3015</strong>)..................................................................228Figure 6-9. ADF lid open (<strong>HP</strong> <strong>LaserJet</strong> <strong>3020</strong> and <strong>3030</strong>)..................................................228Figure 6-10. Clear an ADF jam (<strong>HP</strong> <strong>LaserJet</strong> <strong>3015</strong>)..........................................................229Figure 6-11. Clear an ADF jam (<strong>HP</strong> <strong>LaserJet</strong> <strong>3020</strong> and <strong>3030</strong>; 1 of 2)...............................229Figure 6-12. Clear an ADF jam (<strong>HP</strong> <strong>LaserJet</strong> <strong>3020</strong> and <strong>3030</strong>; 2 of 2)...............................229Figure 6-13. Check the fuser connectors on the fuser.......................................................237Figure 6-14. Check the fuser connectors on the power supply..........................................237Figure 6-15. Pr<strong>in</strong>t-cartridge high-voltage contacts ............................................................238Figure 6-16. High-voltage contacts ....................................................................................239Figure 6-17. Example of a T.30 trace of a successfully sent fax ......................................260Figure 6-18. Example of a T.30 trace of a successfully received fax ................................261Figure 6-19. Ma<strong>in</strong> wir<strong>in</strong>g, <strong>HP</strong> <strong>LaserJet</strong> <strong>3015</strong> scanner assembly .......................................269Figure 6-20. Ma<strong>in</strong> wir<strong>in</strong>g, <strong>HP</strong> <strong>LaserJet</strong> <strong>3020</strong> and <strong>3030</strong> scanner assembly ......................270Figure 6-21. Ma<strong>in</strong> wir<strong>in</strong>g, <strong>HP</strong> <strong>LaserJet</strong> <strong>3015</strong>, <strong>3020</strong>,and <strong>3030</strong> product base......................271Figure 6-22. Major comp<strong>one</strong>nts..........................................................................................272Figure 6-23. Ma<strong>in</strong> parts.......................................................................................................273Figure 6-24. Sensors and motors ......................................................................................274Figure 6-25. PCBs..............................................................................................................275Figure 6-26. <strong>HP</strong> <strong>LaserJet</strong> <strong>3020</strong> and <strong>3030</strong> comp<strong>one</strong>nts.....................................................276Figure 6-27. Major comp<strong>one</strong>nts..........................................................................................277Figure 6-28. Solenoid, sensors, switches, and motor........................................................278Figure 6-29. PCBs..............................................................................................................279Figure 7-1. <strong>HP</strong> <strong>LaserJet</strong> <strong>3015</strong> .........................................................................................286Figure 7-2. ADF <strong>in</strong>put and delivery assemblies (<strong>HP</strong> <strong>LaserJet</strong> <strong>3015</strong>)...............................288Figure 7-3. Internal comp<strong>one</strong>nts (<strong>HP</strong> <strong>LaserJet</strong> <strong>3015</strong>) .....................................................290Figure 7-4. Frame assembly (<strong>HP</strong> <strong>LaserJet</strong> <strong>3015</strong>)............................................................292Figure 7-5. Guide assembly (<strong>HP</strong> <strong>LaserJet</strong> <strong>3015</strong>).............................................................294Figure 7-6. <strong>HP</strong> <strong>LaserJet</strong> <strong>3020</strong>/<strong>3030</strong> scanner assembly ..................................................296Figure 7-7. L<strong>in</strong>k assembly (<strong>HP</strong> <strong>LaserJet</strong> <strong>3020</strong>/<strong>3030</strong>) ......................................................298Figure 7-8. Major assemblies (<strong>HP</strong> <strong>LaserJet</strong> <strong>3020</strong>/<strong>3030</strong>) .................................................300Figure 7-9. <strong>HP</strong> <strong>LaserJet</strong> <strong>3015</strong>/<strong>3020</strong>/<strong>3030</strong> pr<strong>in</strong>ter base....................................................304Figure 7-10. Pickup and delivery tray assemblies (LJ <strong>3015</strong>/<strong>3020</strong>/<strong>3030</strong> pr<strong>in</strong>ter base).......306Figure 7-11. External covers (LJ <strong>3015</strong>/<strong>3020</strong>/<strong>3030</strong> pr<strong>in</strong>ter base)........................................308Figure 7-12. Internal comp<strong>one</strong>nts 1 of 1 (LJ <strong>3015</strong>/<strong>3020</strong>/<strong>3030</strong> pr<strong>in</strong>ter base)......................310Figure 7-13. Internal comp<strong>one</strong>nts 2 of 2 (LJ <strong>3015</strong>/<strong>3020</strong>/<strong>3030</strong> pr<strong>in</strong>ter base)......................312Figure 7-14. Internal comp<strong>one</strong>nts 3 of 3 (LJ <strong>3015</strong>/<strong>3020</strong>/<strong>3030</strong> pr<strong>in</strong>ter base)......................314Figure 7-15. Paper-pickup assembly (LJ <strong>3015</strong>/<strong>3020</strong>/<strong>3030</strong> pr<strong>in</strong>ter base)...........................316Figure 7-16. Fuser (fix<strong>in</strong>g assy) assembly (LJ <strong>3015</strong>/<strong>3020</strong>/<strong>3030</strong> pr<strong>in</strong>ter base)...................318ENWWxv
xviENWW
1ProductInformationThis chapter provides <strong>in</strong>formation about the follow<strong>in</strong>g topics.Product configurations...............................................................................................................2<strong>HP</strong> <strong>LaserJet</strong> <strong>3015</strong>, <strong>3020</strong>, and <strong>3030</strong> <strong>all</strong>-<strong>in</strong>-<strong>one</strong> products......................................................2<strong>HP</strong> <strong>LaserJet</strong> <strong>3015</strong> <strong>all</strong>-<strong>in</strong>-<strong>one</strong> product...................................................................................3<strong>HP</strong> <strong>LaserJet</strong> <strong>3020</strong>/<strong>3030</strong> <strong>all</strong>-<strong>in</strong>-<strong>one</strong> product..........................................................................3Product features ........................................................................................................................4Overview of products.................................................................................................................5Hardware comp<strong>one</strong>nts........................................................................................................5Product identification..................................................................................................................7Model and serial numbers...................................................................................................7Product specifications................................................................................................................8Physical specifications.........................................................................................................8Environmental specifications (<strong>all</strong> models)...........................................................................8<strong>HP</strong> <strong>LaserJet</strong> <strong>3015</strong> performance specifications....................................................................8<strong>HP</strong> <strong>LaserJet</strong> <strong>3020</strong>/<strong>3030</strong> performance specifications.........................................................10Electrical specifications (<strong>all</strong> models)..................................................................................12Acoustic emissions (<strong>all</strong> models)........................................................................................12Skew specifications (<strong>all</strong> models).......................................................................................12<strong>HP</strong> <strong>LaserJet</strong> <strong>3030</strong> fax capabilities.....................................................................................13<strong>HP</strong> <strong>LaserJet</strong> <strong>3015</strong>, <strong>3020</strong>, and <strong>3030</strong> <strong>all</strong>-<strong>in</strong>-<strong>one</strong> battery.......................................................14Warranty statement..................................................................................................................15<strong>HP</strong>’s Premium Protection pr<strong>in</strong>t-cartridge warranty...................................................................16Extended warranty...................................................................................................................17Pr<strong>in</strong>t-cartridge <strong>in</strong>formation .......................................................................................................18Refilled pr<strong>in</strong>t cartridges ....................................................................................................18<strong>HP</strong> <strong>LaserJet</strong> pr<strong>in</strong>t<strong>in</strong>g supplies ...........................................................................................18<strong>HP</strong> Pr<strong>in</strong>t<strong>in</strong>g Supplies Returns and Recycl<strong>in</strong>g Program <strong>in</strong>formation..................................18FCC regulations.......................................................................................................................20Teleph<strong>one</strong> Consumer Protection Act (United States)..............................................................22IC CS-03 requirements............................................................................................................23Declaration of Conformity ........................................................................................................24Safety statements....................................................................................................................25Laser safety statement......................................................................................................25Canada DOC regulations..................................................................................................25Laser statement for F<strong>in</strong>land...............................................................................................26Korean EMI statement.......................................................................................................26Australian EMC requirements............................................................................................26Regulatory <strong>in</strong>formation for the European Union countries/regions .........................................27ENWW 1
Product configurations<strong>HP</strong> <strong>LaserJet</strong> <strong>3015</strong>, <strong>3020</strong>, and <strong>3030</strong> <strong>all</strong>-<strong>in</strong>-<strong>one</strong> productsFigure 1-1.<strong>HP</strong> <strong>LaserJet</strong> <strong>3015</strong>, <strong>3020</strong>, and <strong>3030</strong> <strong>all</strong>-<strong>in</strong>-<strong>one</strong> products● Pr<strong>in</strong>ts up to 15 pages per m<strong>in</strong>ute (less than a 10-second wait for the first page to pr<strong>in</strong>t)● 150-sheet pr<strong>in</strong>ter <strong>in</strong>put tray with a 10-page priority <strong>in</strong>put tray● 600 by 600 dpi pr<strong>in</strong>t<strong>in</strong>g us<strong>in</strong>g Resolution Enhancement technology (REt)● 2,000-page pr<strong>in</strong>t cartridge (us<strong>in</strong>g an average of 5 percent t<strong>one</strong>r coverage on pr<strong>in</strong>ted A4-or letter-size pages)● 4 MB of ROM, 32 MB of RAM● Universal serial bus (USB) port● 1284-B compliant par<strong>all</strong>el port● V.34 fax modem that supports speeds up to 33.6 kbps (<strong>HP</strong> <strong>LaserJet</strong> <strong>3015</strong> and <strong>3030</strong> only)● Two RJ-11 ports (<strong>one</strong> l<strong>in</strong>e and <strong>one</strong> accessory port)● Two-l<strong>in</strong>e LCD display (16 characters per l<strong>in</strong>e)● Additional 2 MB flash ROM for fax storage (up to 110 pages based on a slerexe testpage) (<strong>HP</strong> <strong>LaserJet</strong> <strong>3015</strong> and <strong>3030</strong> only)● Expandable <strong>in</strong>put/output (I/O) us<strong>in</strong>g the <strong>HP</strong> Jetdirect 10/100Base-TX● Individual speed-dial memory and group speed-dial memory (120 entries us<strong>in</strong>g theToolbox) (<strong>HP</strong> <strong>LaserJet</strong> <strong>3015</strong> and <strong>3030</strong> only)2 Chapter 1 Product Information ENWW
●●Supported software● <strong>HP</strong> Toolbox● <strong>HP</strong> <strong>LaserJet</strong> Scan● TWAIN or WIA Scan Driver● <strong>HP</strong> <strong>LaserJet</strong> Fax● Readiris OCR (not <strong>in</strong>st<strong>all</strong>ed with other software; separate <strong>in</strong>st<strong>all</strong>ation is required)● Pr<strong>in</strong>ter drivers (PCL 5e, PCL 6, and PS● Inst<strong>all</strong>er/unist<strong>all</strong>erSupported operat<strong>in</strong>g systems● W<strong>in</strong>dows 98Se (second edition)● W<strong>in</strong>dows Millennium Edition (Me)● W<strong>in</strong>dows 2000● W<strong>in</strong>dows XP (32-bit)● Mac OS 9.1 or 9.2.x● Mac OS X (10.2.x only)Note Driver-only support for W<strong>in</strong>dows 98 (first edition), W<strong>in</strong>dows XP 64-bit, and W<strong>in</strong>dows 2003Server.<strong>HP</strong> <strong>LaserJet</strong> <strong>3015</strong> <strong>all</strong>-<strong>in</strong>-<strong>one</strong> product●●●●Contact image scanner (CIS) 600 ppi, 24-bit color scanner30-sheet automatic document feeder (ADF) feeds pages at up to 12 pages per m<strong>in</strong>ute(ppm)Three status LEDs, a numeric keypad, and menu navigation buttons on the control panelSelectable s<strong>in</strong>gle- or multiple-sheet lever for the ADF<strong>HP</strong> <strong>LaserJet</strong> <strong>3020</strong>/<strong>3030</strong> <strong>all</strong>-<strong>in</strong>-<strong>one</strong> product●●●●Coupled charged device (CCD) 600 ppi 24-bit color scannerLetter/A4-sized flatbed scanner glass50-sheet automatic document feeder (ADF) feeds pages at up to 12 pages per m<strong>in</strong>ute(ppm)Status LEDs, a numeric keypad, and menu navigation buttons on the control panel (the <strong>HP</strong><strong>LaserJet</strong> <strong>3020</strong> has two status LEDs; the <strong>HP</strong> <strong>LaserJet</strong> <strong>3030</strong> has three status LEDs)NoteThe <strong>HP</strong> <strong>LaserJet</strong> <strong>3020</strong> does not have fax capabilities.ENWW Product configurations 3
Product featuresThe <strong>HP</strong> <strong>LaserJet</strong> <strong>3015</strong>, <strong>3020</strong>, and <strong>3030</strong> <strong>all</strong>-<strong>in</strong>-<strong>one</strong> products are designed to perform thefollow<strong>in</strong>g tasks:● Pr<strong>in</strong>t: Pr<strong>in</strong>t documents with <strong>HP</strong> <strong>LaserJet</strong> quality.●●●Copy: Make up to 99 laser-quality copies of a 50-page orig<strong>in</strong>al. It also enlarges, reduces,and lightens/darkens copies. (The <strong>HP</strong> <strong>LaserJet</strong> <strong>3020</strong> and <strong>3030</strong> also collate copies.)Scan: Scan documents to create electronic text or graphics files.Fax: Send and receive documents by us<strong>in</strong>g standard fax communications (<strong>HP</strong> <strong>LaserJet</strong><strong>3015</strong> and <strong>3030</strong> only).4 Chapter 1 Product Information ENWW
Overview of productsHardware comp<strong>one</strong>ntsUse the follow<strong>in</strong>g illustrations to identify the hardware comp<strong>one</strong>nts.Figure 1-2. <strong>HP</strong> <strong>LaserJet</strong> <strong>3015</strong> <strong>all</strong>-<strong>in</strong>-<strong>one</strong> hardware comp<strong>one</strong>nts (1 of 2)Figure 1-2. <strong>HP</strong> <strong>LaserJet</strong> <strong>3015</strong> <strong>all</strong>-<strong>in</strong>-<strong>one</strong> hardware comp<strong>one</strong>nts (2 of 2)1 Automatic document feeder (ADF) <strong>in</strong>put tray2 ADF media lever3 Control panel4 ADF output b<strong>in</strong>5 Pr<strong>in</strong>t-cartridge-door release6 Output b<strong>in</strong>7 Priority <strong>in</strong>put slot8 Media <strong>in</strong>put tray9 Par<strong>all</strong>el port10 USB port11 Fax <strong>in</strong>terface ports12 Power switch13 Power receptacleENWW Overview of products 5
Figure 1-3.<strong>HP</strong> <strong>LaserJet</strong> <strong>3020</strong> <strong>all</strong>-<strong>in</strong>-<strong>one</strong> hardware comp<strong>one</strong>nts1 Automatic document feeder (ADF) <strong>in</strong>put tray2 Flatbed scanner lid and ADF output b<strong>in</strong>3 Control panel4 Pr<strong>in</strong>t-cartridge-door release5 Output b<strong>in</strong>6 Priority <strong>in</strong>put tray7 Media <strong>in</strong>put tray8 Par<strong>all</strong>el port9 USB port10 Power switch11 Power receptacleFigure 1-4.<strong>HP</strong> <strong>LaserJet</strong> <strong>3030</strong> <strong>all</strong>-<strong>in</strong>-<strong>one</strong> hardware comp<strong>one</strong>nts1 Automatic document feeder (ADF) <strong>in</strong>put tray2 Flatbed scanner lid and ADF output b<strong>in</strong>3 Control panel4 Pr<strong>in</strong>t-cartridge-door release5 Output b<strong>in</strong>6 Priority <strong>in</strong>put tray7 Media <strong>in</strong>put tray8 Par<strong>all</strong>el port9 USB port10 Fax <strong>in</strong>terface ports11 Power switch12 Power receptacle6 Chapter 1 Product Information ENWW
Product identificationModel and serial numbersAn identification label is located on the back of the product. This label conta<strong>in</strong>s the model andserial numbers. The serial number conta<strong>in</strong>s <strong>in</strong>formation about the country/region of orig<strong>in</strong>,revision level, production code, and production number of the product. The label also conta<strong>in</strong>spower-rat<strong>in</strong>g and regulatory <strong>in</strong>formation.Figure 1-5.NoteSample Identification label (on the back of the product)An additional identification label is located on the top-left side of the scanner support frame.Open the pr<strong>in</strong>t cartridge door to f<strong>in</strong>d this label.The additional serial number label is <strong>in</strong> the same location on the scanner support frame for <strong>all</strong>of the <strong>HP</strong> <strong>LaserJet</strong> <strong>3015</strong>, <strong>3020</strong>, and <strong>3030</strong> <strong>all</strong>-<strong>in</strong>-<strong>one</strong> products.Figure 1-6.Location of additional serial number labelENWW Product identification 7
Product specificationsPhysical specificationsTable 1-1. Physical specificationsProduct Height Depth Width Weight<strong>HP</strong> <strong>LaserJet</strong> <strong>3015</strong>product445 mm(17.5 <strong>in</strong>ches)440 mm(17.3 <strong>in</strong>ches)430 mm(16.9 <strong>in</strong>ches)9.1 kg(20 pounds)<strong>HP</strong> <strong>LaserJet</strong><strong>3020</strong>/<strong>3030</strong>product556 mm21.89 <strong>in</strong>ches)483 mm(19.02 <strong>in</strong>ches)497 mm(19.6 <strong>in</strong>ches)11.34 kg(25 pounds)Environmental specifications (<strong>all</strong> models)Table 1-2. Environmental specifications (<strong>all</strong> models)CategoryOperat<strong>in</strong>g environment (unit plugged <strong>in</strong>to an acoutlet)Storage environment (unit not plugged <strong>in</strong>to an acoutlet)Specification● Temperature: 15° to 32.5° C ( 59° to 90.5° F)●Humidity: 10 percent to 80 percent relativehumidity (no condensation)● Temperature: -20° to 40° C (-4° to 104° F)●Humidity: Less than 95 percent relativehumidity (with no condensation)<strong>HP</strong> <strong>LaserJet</strong> <strong>3015</strong> performance specificationsTable 1-3. <strong>HP</strong> <strong>LaserJet</strong> <strong>3015</strong> performance specificationsCategorySpecificationPr<strong>in</strong>ter capacities and rat<strong>in</strong>gsPr<strong>in</strong>t speed ● 15 pages per m<strong>in</strong>ute (ppm) for letter size paper and 14 ppm forA4-size paper●First page out <strong>in</strong> less than 10 secondsMedia <strong>in</strong>put tray capacity 150 sheets of regular-weight 60-g/m 2 (16-lb) paper or up to 30envelopesPriority <strong>in</strong>put slot capacityOutput b<strong>in</strong> capacityM<strong>in</strong>imum paper size10 sheets of regular-weight 75-g/m 2 (20-lb) paper or 1 envelopeUp to 125 sheets of regular-weight 16-lb (60-g/m 2 ) paper76 by 127 mm (3 by 5 <strong>in</strong>ches)8 Chapter 1 Product Information ENWW
Table 1-3. <strong>HP</strong> <strong>LaserJet</strong> <strong>3015</strong> performance specifications (cont<strong>in</strong>ued)CategorySpecificationMaximum paper sizeMedia weightBase memoryPr<strong>in</strong>t resolution216 by 356 mm (8.5 by 14 <strong>in</strong>ches). The output b<strong>in</strong> holds <strong>one</strong> sheetof legal-size media 215 by 356 mm (8.5 by 14 <strong>in</strong>ches). Subsequentsheets of legal-size media slide off of the output b<strong>in</strong>.Media <strong>in</strong>put tray: 60- to 163-g/m 2 (16- to 43-lb) cut sheet paperPriority <strong>in</strong>put slot: 60- to 90-g/m 2 (16- to 24-lb) s<strong>in</strong>gle thicknessenvelopesPr<strong>in</strong>t paper output: 135- to 176-g/m 2 (36- to 47-lb) postcards4 MB of ROM and 32 MB of RAM (9 MB for the product and 23 MBavailable to the user)1,200 dpiDuty cycle ● 7,000 s<strong>in</strong>gle-sided pages per month (maximum)●800 s<strong>in</strong>gle-sided pages per month (average)PCL (Pr<strong>in</strong>ter Control Language) Level 5e and 6PostScript ® (PS) Emulates Adobe ® PostScript level 2Copier capacities and rat<strong>in</strong>gsCopy speedMultiple copiesCopy reduction or enlargementAcoustic emissions (per ISO9296) while copy<strong>in</strong>gUp to 15 ppmUp to 99 per job25 percent to 400 percent6.3 Bel sound power levelScanner capacities and rat<strong>in</strong>gsMarg<strong>in</strong>s for scanned itemsScanner duty cycleScan resolution3.05 mm (0.12 <strong>in</strong>ch) right and left4.23 mm (0.17 <strong>in</strong>ch) top and bottom2,000 s<strong>in</strong>gle-sided items per month600 dpi colorAutomatic document feeder (ADF) <strong>in</strong>put tray specificationsInput capacityUp to 30 sheets of flat 60- to 75-g/m 2 (16- to 20-lb) mediaMedia weight (<strong>in</strong>put and output) S<strong>in</strong>gle sheet sett<strong>in</strong>g ( blue media lever set to the right): 42- to 260-g/m 2 (11- to 69-lb)Multiple sheet sett<strong>in</strong>g ( blue media lever set to the left): 46- to 105-g/m 2 (12- to 28-lb)Media size 74 by 105 mm (2.9 by 4.1 <strong>in</strong>ches) to 216 mm by 381 mm (8.5 by 15<strong>in</strong>ches). The ADF output b<strong>in</strong> holds <strong>one</strong> sheet of legal-size media215 by 356 mm (8.5 by 14 <strong>in</strong>ches). Subsequent sheets of legal-sizemedia slide off of the ADF output b<strong>in</strong>.SpeedDuty cycleUp to 12 ppm for letter-size or A4-size media1,000 pages per monthPort availabilityENWW Product specifications 9
Table 1-3. <strong>HP</strong> <strong>LaserJet</strong> <strong>3015</strong> performance specifications (cont<strong>in</strong>ued)CategorySpecificationUSBCompatible with USB 2.0 specificationPar<strong>all</strong>el ● IEEE 1284-B level 2 device with an IEEE 1284-B receptacle●Set the host computer to ECP (enhanced capabilities mode)Fax capabilities and rat<strong>in</strong>gsFax transmission speed 3 seconds per page (ITU-T Test Image #1)Right/left marg<strong>in</strong>s for pr<strong>in</strong>tedpagesTop/bottom marg<strong>in</strong>s for pr<strong>in</strong>tedpagesFax compatibilityFax cod<strong>in</strong>g schemesModem speedSpeed dial<strong>in</strong>gDist<strong>in</strong>ctive r<strong>in</strong>g detectFax resolution (standard)Fax resolution (f<strong>in</strong>e)Fax resolution (superf<strong>in</strong>e)Fax resolution (photo)Fax page storage6.3 mm (0.25 <strong>in</strong>ch)5.08 mm (0.2 <strong>in</strong>ch)ITU Group 3; ECMMH, MR, and MMRUp to 33,600 bits per second (bps)YesYes203 by 98 dpi203 by 196 dpi300 by 300 dpi (no halft<strong>one</strong>)300 by 300 dpi (halft<strong>one</strong> enabled)Up to 110 slerexe pages<strong>HP</strong> <strong>LaserJet</strong> <strong>3020</strong>/<strong>3030</strong> performance specificationsTable 1-4. <strong>HP</strong> <strong>LaserJet</strong> <strong>3020</strong>/<strong>3030</strong> performance specificationsCategorySpecificationPr<strong>in</strong>ter capacities and rat<strong>in</strong>gsPr<strong>in</strong>t speed ● 15 pages per m<strong>in</strong>ute (ppm) for letter-size paper and 14 ppm forA4-size paper●First page out <strong>in</strong> less than 9 secondsMedia <strong>in</strong>put tray capacity 150 sheets of regular-weight 60-g/m 2 (16-lb) paper or up to 30envelopesPriority <strong>in</strong>put tray capacityOutput b<strong>in</strong> capacityM<strong>in</strong>imum paper sizeMaximum paper size10 sheets of regular-weight 75-g/m 2 (20-lb) paper or 1 envelopeUp to 125 sheets of regular-weight 75-g/m 2 (20-lb) paper76 by 127 mm (3 by 5 <strong>in</strong>ches)216 by 356 mm (8.5 by 14 <strong>in</strong>ches)10 Chapter 1 Product Information ENWW
Table 1-4. <strong>HP</strong> <strong>LaserJet</strong> <strong>3020</strong>/<strong>3030</strong> performance specifications (cont<strong>in</strong>ued)CategorySpecificationMedia weightBase memoryPr<strong>in</strong>t resolutionMedia <strong>in</strong>put tray: 60- to 163-g/m 2 (16- to 43-lb) cut sheet paperPriority <strong>in</strong>put slot: 60- to 90-g/m 2 (16- to 24-lb) s<strong>in</strong>gle thicknessenvelopesPr<strong>in</strong>t paper output: 135- to 176-g/m 2 (36- to 47-lb) postcards4 MB of ROM and 32 MB of RAM (9 MB for the product and 23 MBavailable to the user)1,200 dpiDuty cycle ● 7,000 s<strong>in</strong>gle-sided pages per month (maximum)●1,000 s<strong>in</strong>gle-sided pages per month (average)PCL (Pr<strong>in</strong>ter Control Language) Level 5e and 6PostScript (PS) Emulates Adobe PostScript level 2Copier capacities and rat<strong>in</strong>gsCopy speedMultiple copiesCopy reduction or enlargementAcoustic emissions (per ISO9296) while copy<strong>in</strong>gUp to 15 ppmUp to 99 per job25 percent to 400 percent6.3 Bel sound power levelScanner capacities and rat<strong>in</strong>gsMarg<strong>in</strong>s for scanned itemsMedia sizeScanner duty cycleScan resolution3.05 mm (0.12 <strong>in</strong>ch) right and left4.06 mm (0.16 <strong>in</strong>ch) top and bottom(216 by 356 mm) (8.5 by 11.7 <strong>in</strong>ches) no m<strong>in</strong>imum size2,000 s<strong>in</strong>gle-sided items per month600 dpi colorAutomatic document feeder (ADF) <strong>in</strong>put tray specificationsInput capacityMedia weight (<strong>in</strong>put and output)Up to 50 sheets of flat 60 to 75-g/m 2 (16- to 20-lb) media60- to 90-g/m 2 (16- to 24-lb)Media size 127 by 127 mm (5 by 5 <strong>in</strong>ches) to 216 by 381 mm (8.5 by 15<strong>in</strong>ches)SpeedDuty cycleUp to 15 ppm for letter-size or A4-size media1,000 pages per monthPort availabilityUSBCompatible with USB 2.0 specificationPar<strong>all</strong>el ● IEEE 1284-B level 2 device with an IEEE 1284-B receptacle●Set the host computer to ECP (enhanced capabilities mode)ENWW Product specifications 11
Electrical specifications (<strong>all</strong> models)NoteThe values are subject to change. See http://www.hp.com/support/lj<strong>3015</strong> orhttp://www.hp.com/support/lj<strong>3030</strong> for the most current <strong>in</strong>formation. The 110-volt and 220-voltpower sources are not <strong>in</strong>terchangeable.Table 1-5. Electrical specifications (<strong>all</strong> models)Item 110-volt models 220-volt modelsPower supply 110 to 127 V (± 10%)50 to 60 Hz (± 2 Hz)220 to 240 V (± 10%)50 to 60 Hz (± 2 Hz)Power consumption (typical)Pr<strong>in</strong>t<strong>in</strong>gStandbyPower SaveOff300 W (average)14 W (average)14 W (average)0 W300 W (average)14 W (average)14 W (average)0 WM<strong>in</strong>imum recommended circuitcapacity4.5 A 2.3 AAcoustic emissions (<strong>all</strong> models)NoteThe values are subject to change. See http://www.hp.com/support/lj<strong>3015</strong> orhttp://www.hp.com/support/lj<strong>3030</strong> for the most current <strong>in</strong>formation. Dur<strong>in</strong>g other operations,acoustic emissions can vary.Table 1-6. Acoustic emissions (<strong>all</strong> models)ActivitylevelOperator (
Table 1-7. Skew specifications (<strong>all</strong> models) (cont<strong>in</strong>ued)CategorySpecificationFirst l<strong>in</strong>e/lead<strong>in</strong>g edge skew:the distance of the first scan l<strong>in</strong>efrom the lead<strong>in</strong>g edge of themedia.Left marg<strong>in</strong>: the distance of theleft-most vertical l<strong>in</strong>e (first twodots of each scan l<strong>in</strong>e) from theleft edge of the media.4.23 mm (0.16 <strong>in</strong>ch) ± 2.0 mm (0.07 <strong>in</strong>ch) for cut-sheet media.4.23 mm (0.16 <strong>in</strong>ch) ± 2.5 mm (0.09 <strong>in</strong>ch) for thick media over105-g/m 2 (28 pounds).15.0 mm (0.59 <strong>in</strong>ch) ± 3.5 mm (0.13 <strong>in</strong>ch) for envelopes andpostcards.4.23 mm (0.16 <strong>in</strong>ch) ± 2.0 mm (0.07 <strong>in</strong>ch) for cut-sheet media.15.0 mm (0.59 <strong>in</strong>ch) ± 3.5 mm (0.13 <strong>in</strong>ch) for envelopes andpostcards.Par<strong>all</strong>elism All vertical l<strong>in</strong>es must be par<strong>all</strong>el with<strong>in</strong> an absolute value of 2percent (1.5 mm [0.05 <strong>in</strong>ch] over a 250 mm [9.85 <strong>in</strong>ch] length forcut-sheet media).<strong>HP</strong> <strong>LaserJet</strong> <strong>3030</strong> fax capabilitiesTable 1-8. <strong>HP</strong> <strong>LaserJet</strong> <strong>3030</strong> fax capabilitiesCategorySpecificationFax transmission speed 3 seconds/page (ITU-T Test Image #1)Right/left marg<strong>in</strong>s for pr<strong>in</strong>tedpagesTop/bottom marg<strong>in</strong>s for pr<strong>in</strong>tedpagesFax compatibilityFax cod<strong>in</strong>g schemesModem speedSpeed dial<strong>in</strong>gDist<strong>in</strong>ctive r<strong>in</strong>g detectFax resolution (standard)Fax resolution (f<strong>in</strong>e)Fax resolution (superf<strong>in</strong>e)Fax resolution (photo)Fax page storage6.3 mm (0.25 <strong>in</strong>ch)5.08 mm (0.2 <strong>in</strong>ch)ITU Group 3; ECMMH, MR, and MMRUp to 33,600 bits per second (bps)YesYes203 by 98 dpi203 by 196 dpi300 by 300 dpi (no halft<strong>one</strong>)300 by 300 dpi (halft<strong>one</strong> enabled)Up to 110 slerexe pagesENWW Product specifications 13
<strong>HP</strong> <strong>LaserJet</strong> <strong>3015</strong>, <strong>3020</strong>, and <strong>3030</strong> <strong>all</strong>-<strong>in</strong>-<strong>one</strong> batteryTable 1-9. <strong>HP</strong> <strong>LaserJet</strong> <strong>3015</strong>, <strong>3020</strong>, and <strong>3030</strong> <strong>all</strong>-<strong>in</strong>-<strong>one</strong> batteryCategoryBattery materialBattery typeSpecificationPolycarbon Monoflouride LithiumButton or co<strong>in</strong> cell batteryQuantity per device 1NoteThe battery is permanently attached to the formatter and cannot beremoved or replaced.WeightLithium typeBattery manufacturersApproximately 1 gram (0.04 ounce)SolidRayovac of Madison, Wiscons<strong>in</strong>, USA; and Panasonic of Secaucus,New Jersey, USA14 Chapter 1 Product Information ENWW
Warranty statement<strong>HP</strong> PRODUCT<strong>HP</strong> <strong>LaserJet</strong> <strong>3015</strong>/<strong>3020</strong>/<strong>3030</strong> pr<strong>in</strong>tersDURATION OF LIMITED WARRANTYOne year from date of purchase<strong>HP</strong> warrants to you, the end-user customer, that <strong>HP</strong> hardware, accessories, and supplies will be free from defects<strong>in</strong> materials and workmanship after the date of purchase, for the period specified above. If <strong>HP</strong> receives notice ofsuch defects dur<strong>in</strong>g the warranty period, <strong>HP</strong> will, at its option, either repair or replace products which prove to bedefective. Replacement products may be either new or equivalent <strong>in</strong> performance to new.<strong>HP</strong> warrants to you that <strong>HP</strong> software will not fail to execute its programm<strong>in</strong>g <strong>in</strong>structions after the date of purchase,for the period specified above, due to defects <strong>in</strong> material and workmanship when properly <strong>in</strong>st<strong>all</strong>ed and used. If <strong>HP</strong>receives notice of such defects dur<strong>in</strong>g the warranty period, <strong>HP</strong> will replace software which does not execute itsprogramm<strong>in</strong>g <strong>in</strong>structions due to such defects.<strong>HP</strong> does not warrant that the operation of <strong>HP</strong> products will be un<strong>in</strong>terrupted or error free. If <strong>HP</strong> is unable, with<strong>in</strong> areasonable time, to repair or replace any product to a condition as warranted, you will be entitled to a refund of thepurchase price upon prompt return of the product.<strong>HP</strong> products may conta<strong>in</strong> remanufactured parts equivalent to new <strong>in</strong> performance or may have been subject to<strong>in</strong>cidental use.Warranty does not apply to defects result<strong>in</strong>g from (a) improper or <strong>in</strong>adequate ma<strong>in</strong>tenance or calibration, (b)software, <strong>in</strong>terfac<strong>in</strong>g, parts, or supplies not supplied by <strong>HP</strong>, (c) unauthorized modification or misuse, (d) operationoutside of the published environmental specifications for the product, or (e) improper site preparation orma<strong>in</strong>tenance.TO THE EXTENT ALLOWED BY LOCAL LAW, THE ABOVE WARRANTIES ARE EXCLUSIVE ANDNO OTHER WARRANTY OR CONDITION, WHETHER WRITTEN OR ORAL, IS EXPRESSED OR IMPLIED AND<strong>HP</strong> SPECIFICALLY DISCLAIMS ANY IMPLIED WARRANTIES OR CONDITIONS OF MERCHANTABILITY,SATISFACTORY QUALITY, AND FITNESS FOR A PARTICULAR PURPOSE. Some countries/regions, states, orprov<strong>in</strong>ces do not <strong>all</strong>ow limitations on the duration of an implied warranty, so the above limitation or exclusion mightnot apply to you. This warranty gives you specific legal rights and you might also have other rights that vary fromcountry/region to country/region, state to state, or prov<strong>in</strong>ce to prov<strong>in</strong>ce.<strong>HP</strong>’s limited warranty is valid <strong>in</strong> any country/region or locality where <strong>HP</strong> has a support presence for this product andwhere <strong>HP</strong> has marketed this product. The level of warranty service you receive may vary accord<strong>in</strong>g to localstandards. <strong>HP</strong> will not alter form, fit, or function of the product to make it operate <strong>in</strong> a country/region for which itwas never <strong>in</strong>tended to function for legal or regulatory reasons.TO THE EXTENT ALLOWED BY LOCAL LAW, THEREMEDIES IN THIS WARRANTY STATEMENT ARE YOUR SOLE AND EXCLUSIVE REMEDIES. EXCEPT ASINDICATED ABOVE, IN NO EVENT WILL <strong>HP</strong> OR ITS SUPPLIERS BE LIABLE FOR LOSS OF DATA OR FORDIRECT, SPECIAL, INCIDENTAL, CONSEQUENTIAL (INCLUDING LOST PROFIT OR DATA), OR OTHERDAMAGE, WHETHER BASED IN CONTRACT, TORT, OR OTHERWISE. Some countries/regions, states, orprov<strong>in</strong>ces do not <strong>all</strong>ow the exclusion or limitation of <strong>in</strong>cidental or consequential damages, so the above limitation orexclusion may not apply to you.THE WARRANTY TERMS CONTAINED IN THIS STATEMENT, EXCEPT TO THEEXTENT LAWFULLY PERMITTED, DO NOT EXCLUDE, RESTRICT, OR MODIFY AND ARE IN ADDITION TOTHE MANDATORY STATUTORY RIGHTS APPLICABLE TO THE SALE OF THIS PRODUCT TO YOU.ENWW Warranty statement 15
<strong>HP</strong>’s Premium Protection pr<strong>in</strong>t-cartridge warrantyLimited Warranty StatementThis <strong>HP</strong> Pr<strong>in</strong>t Cartridge is warranted to be free from defects <strong>in</strong> materials and workmanship.This warranty does not apply to pr<strong>in</strong>t cartridges that (a) have been refilled, refurbished,remanufactured or tampered with <strong>in</strong> any way, (b) experience problems result<strong>in</strong>g from misuse,improper storage, or operation outside of the published environmental specifications for thepr<strong>in</strong>ter product or (c) exhibit wear from ord<strong>in</strong>ary use.To obta<strong>in</strong> warranty service, please return the product to place of purchase (with a writtendescription of the problem and pr<strong>in</strong>t samples) or contact <strong>HP</strong> customer support. At <strong>HP</strong>’s option,<strong>HP</strong> will either replace products that prove to be defective or refund your purchase price.TO THE EXTENT ALLOWED BY LOCAL LAW, THE ABOVE WARRANT IS EXCLUSIVE ANDNO OTHER WARRANTY OR CONDITION, WHETHER WRITTEN OR ORAL, ISEXPRESSED OR IMPLIED AND <strong>HP</strong> SPECIFICALLY DISCLAIMS ANY IMPLIEDWARRANTIES OR CONDITIONS OF MERCHANTABILITY, SATISFACTORY QUALITY, ANDFITNESS FOR A PARTICULAR PURPOSE.TO THE EXTENT ALLOWED BY LOCAL LAW, IN NO EVENT WILL <strong>HP</strong> OR ITS SUPPLIERSBE LIABLE FOR DIRECT, SPECIAL, INCIDENTAL, CONSEQUENTIAL (INCLUDING LOSTPROFIT OR DATA), OR OTHER DAMAGE, WHETHER BASED IN CONTRACT, TORT, OROTHERWISE.THE WARRANTY TERMS CONTAINED IN THIS STATEMENT, EXCEPT TO THE EXTENTLAWFULLY PERMITTED, DO NOT EXCLUDE, RESTRICT OR MODIFY AND ARE INADDITION TO THE MANDATORY STATUTORY RIGHTS APPLICABLE TO THE SALE OFTHIS PRODUCT TO YOU.16 Chapter 1 Product Information ENWW
Extended warrantyIn most countries/regions, <strong>HP</strong> Care Pack provides additional coverage, beyond standardwarranty, for the <strong>HP</strong> device and for <strong>all</strong> <strong>HP</strong>-supplied <strong>in</strong>ternal comp<strong>one</strong>nts. This hardwarema<strong>in</strong>tenance can uplift the standard warranty, for example, from next-day to same-dayservice, and/or extend it up to 5 years. <strong>HP</strong> Care Pack can also provide Express Exchange oronsite service. For more <strong>in</strong>formation, see the support flyer that came with your device for theappropriate ph<strong>one</strong> numbers and <strong>in</strong>formation.ENWW Extended warranty 17
Pr<strong>in</strong>t-cartridge <strong>in</strong>formationThe pr<strong>in</strong>t cartridge is designed to simplify replacement of the major consumable parts. Thepr<strong>in</strong>t cartridge conta<strong>in</strong>s the pr<strong>in</strong>t<strong>in</strong>g mechanism and a supply of t<strong>one</strong>r.At 5-percent page coverage, a standard pr<strong>in</strong>t cartridge will pr<strong>in</strong>t approximately 2,000 pages.As the percentage of t<strong>one</strong>r coverage on the page <strong>in</strong>creases, the number of pages that can bepr<strong>in</strong>ted from a standard pr<strong>in</strong>t cartridge decreases. These estimates are only approximate;usage conditions and pr<strong>in</strong>t patterns can cause results to vary.Refilled pr<strong>in</strong>t cartridgesWhile Hewlett-Packard does not prohibit the use of refilled pr<strong>in</strong>t cartridges dur<strong>in</strong>g the warrantyperiod or while the product is under a ma<strong>in</strong>tenance contract, it is not recommended for thefollow<strong>in</strong>g reasons:●●●●Repairs result<strong>in</strong>g from the use of refilled cartridges are not covered under Hewlett-Packardwarranty or ma<strong>in</strong>tenance contracts.Hewlett-Packard has no control or process to ensure that a refilled cartridge functions atthe high level of reliability of a new <strong>HP</strong> <strong>LaserJet</strong> t<strong>one</strong>r cartridge. Hewlett-Packard alsocannot predict the long-term reliability effect on the product from us<strong>in</strong>g different t<strong>one</strong>rformulations found <strong>in</strong> refilled cartridges.The pr<strong>in</strong>t quality of <strong>HP</strong> <strong>LaserJet</strong> pr<strong>in</strong>t cartridges <strong>in</strong>fluences customer perception of theproduct. Hewlett-Packard has no control over the actual pr<strong>in</strong>t quality of a refilled cartridge.Parts that are critical to pr<strong>in</strong>t quality might not be replaced when the cartridge is refilledwith t<strong>one</strong>r.<strong>HP</strong> <strong>LaserJet</strong> pr<strong>in</strong>t<strong>in</strong>g suppliesIn many countries/regions, this product's pr<strong>in</strong>t<strong>in</strong>g supplies (for example the pr<strong>in</strong>t cartridge) canbe returned to <strong>HP</strong> through the <strong>HP</strong> Pr<strong>in</strong>t<strong>in</strong>g Supplies Returns and Recycl<strong>in</strong>g Program. Aneasy-to-use and free take-back program is available <strong>in</strong> more than 30 countries/regions.Multil<strong>in</strong>gual program <strong>in</strong>formation and <strong>in</strong>structions are <strong>in</strong>cluded <strong>in</strong> every new <strong>HP</strong> <strong>LaserJet</strong> pr<strong>in</strong>tcartridge and supplies package.<strong>HP</strong> Pr<strong>in</strong>t<strong>in</strong>g Supplies Returns and Recycl<strong>in</strong>g Program<strong>in</strong>formationS<strong>in</strong>ce 1990, the <strong>HP</strong> Pr<strong>in</strong>t<strong>in</strong>g Supplies Returns and Recycl<strong>in</strong>g Program has collected millionsof used <strong>LaserJet</strong> pr<strong>in</strong>t cartridges that otherwise might have been discarded <strong>in</strong> the world'slandfills. The <strong>HP</strong> <strong>LaserJet</strong> pr<strong>in</strong>t cartridges and supplies are collected and bulk shipped to ourresource and recovery partners, who disassemble the cartridges. Rema<strong>in</strong><strong>in</strong>g materials areseparated and converted <strong>in</strong>to raw materials for use by other <strong>in</strong>dustries to make a variety ofuseful products.U.S. returnsFor a more environment<strong>all</strong>y responsible return of used cartridges and supplies, <strong>HP</strong>encourages the use of bulk returns. Simply bundle two or more cartridges together and usethe s<strong>in</strong>gle, pre-paid, pre-addressed UPS label that is supplied <strong>in</strong> the package that the newcartridge comes <strong>in</strong>. For more <strong>in</strong>formation <strong>in</strong> the U.S., c<strong>all</strong> (1) (800) 340-2445 or visit the <strong>HP</strong><strong>LaserJet</strong> Supplies website at http://www.hp.com/recycle.18 Chapter 1 Product Information ENWW
FCC regulationsThis equipment has been tested and found to comply with the limits for a Class B digitaldevice, pursuant to Part 15 of the FCC rules. These limits are designed to provide reasonableprotection aga<strong>in</strong>st harmful <strong>in</strong>terference <strong>in</strong> a residential <strong>in</strong>st<strong>all</strong>ation. This equipment generates,uses, and can radiate radio frequency energy. If not <strong>in</strong>st<strong>all</strong>ed and used <strong>in</strong> accordance with the<strong>in</strong>structions, it may cause harmful <strong>in</strong>terference to radio communications. However, there is noguarantee that <strong>in</strong>terference will not occur <strong>in</strong> a particular <strong>in</strong>st<strong>all</strong>ation. If this equipment doescause harmful <strong>in</strong>terference to radio or television reception, which can be determ<strong>in</strong>ed by turn<strong>in</strong>gthe equipment off and on, the user is encouraged to try to correct the <strong>in</strong>terference by <strong>one</strong> ormore of the follow<strong>in</strong>g measures:● Reorient or relocate the receiv<strong>in</strong>g antenna.● Increase separation between equipment and receiver.●●Connect equipment to an outlet on a circuit different from that to which the receiver islocated.Consult your dealer or an experienced radio/TV technician.NoteNoteAny changes or modifications to the product that are not expressly approved by <strong>HP</strong> could voidthe user’s authority to operate this equipment.Use of a shielded <strong>in</strong>terface cable is required to comply with the Class B limits of Part 15 ofFCC rules.FCC Part 68 Requirements (United States)This equipment complies with FCC rules, Part 68. On the back of this equipment is a labelthat conta<strong>in</strong>s, among other <strong>in</strong>formation, the FCC registration number and r<strong>in</strong>ger equivalencenumber (REN) for this equipment. If requested, this <strong>in</strong>formation must be provided to theteleph<strong>one</strong> company. The REN is used to determ<strong>in</strong>e the quantity of devices which may beconnected to the teleph<strong>one</strong> l<strong>in</strong>e. Excessive RENs on the teleph<strong>one</strong> l<strong>in</strong>e may result <strong>in</strong> thedevices not r<strong>in</strong>g<strong>in</strong>g <strong>in</strong> response to an <strong>in</strong>com<strong>in</strong>g c<strong>all</strong>. In most, but not <strong>all</strong>, areas, the sum of theRENs should not exceed five (5.0). To be certa<strong>in</strong> of the number of devices that may beconnected to the l<strong>in</strong>e, as determ<strong>in</strong>ed by the total RENs, contact the teleph<strong>one</strong> company todeterm<strong>in</strong>e the maximum REN for the c<strong>all</strong><strong>in</strong>g area.This equipment uses the follow<strong>in</strong>g USOC jack: RJ11C.20 Chapter 1 Product Information ENWW
An FCC-compliant teleph<strong>one</strong> cord and modular plug is provided with this equipment. Thisequipment is designed to be connected to the teleph<strong>one</strong> network or premises wir<strong>in</strong>g us<strong>in</strong>g acompatible modular jack which is Part 68 compliant. This equipment cannot be used onteleph<strong>one</strong> company-provided co<strong>in</strong> service. Connection to Party L<strong>in</strong>e <strong>Service</strong> is subject to statetariffs. If this equipment causes harm to the teleph<strong>one</strong> network, the teleph<strong>one</strong> company willnotify you <strong>in</strong> advance that temporary discont<strong>in</strong>uance of service may be required. If advancenotice is not practical, the teleph<strong>one</strong> company will notify the customer as soon as possible.Also, you will be advised of your right to file a compla<strong>in</strong>t with the FCC if you believe it isnecessary. The teleph<strong>one</strong> company may make changes <strong>in</strong> its facilities, equipment,operations, or procedures that could affect the operation of the equipment. If this happens, theteleph<strong>one</strong> company will provide advance notice <strong>in</strong> order for you to make the necessarymodifications <strong>in</strong> order to ma<strong>in</strong>ta<strong>in</strong> un<strong>in</strong>terrupted service. If trouble is experienced with thisequipment, please see the numbers <strong>in</strong> the front of this manual for repair and (or) warranty<strong>in</strong>formation. If the trouble is caus<strong>in</strong>g harm to the teleph<strong>one</strong> network, the teleph<strong>one</strong> companymay request you remove the equipment from the network until the problem is resolved. Thefollow<strong>in</strong>g repairs can be d<strong>one</strong> by the customer: Replace any orig<strong>in</strong>al equipment that came withthe product. This <strong>in</strong>cludes the pr<strong>in</strong>t cartridge, the supports for trays and b<strong>in</strong>s, the power cord,and the teleph<strong>one</strong> cord. It is recommended that the customer <strong>in</strong>st<strong>all</strong> an ac surge arrestor <strong>in</strong> theac outlet to which this device is connected. This is to avoid damage to the equipment causedby local lightn<strong>in</strong>g strikes and other electrical surges.ENWW FCC regulations 21
Teleph<strong>one</strong> Consumer Protection Act (United States)The Teleph<strong>one</strong> Consumer Protection Act of 1991 makes it unlawful for any person to use acomputer or other electronic device, <strong>in</strong>clud<strong>in</strong>g fax mach<strong>in</strong>es, to send any message unlesssuch message clearly conta<strong>in</strong>s, <strong>in</strong> a marg<strong>in</strong> at the top or bottom of each transmitted page oron the first page of the transmission, the date and time it is sent and an identification of thebus<strong>in</strong>ess, other entity, or <strong>in</strong>dividual send<strong>in</strong>g the message and the teleph<strong>one</strong> number of thesend<strong>in</strong>g mach<strong>in</strong>e or such bus<strong>in</strong>ess, other entity, or <strong>in</strong>dividual. (The teleph<strong>one</strong> number providedcannot be a 900 number or any other number for which charges exceed local or long-distancetransmission charges.) In order to program this <strong>in</strong>formation <strong>in</strong>to your facsimile, please see thefax guide.22 Chapter 1 Product Information ENWW
IC CS-03 requirementsNOTICE: The Industry Canada label identifies certified equipment. This certification means theequipment meets certa<strong>in</strong> telecommunications network protective, operational, and safetyrequirements as prescribed <strong>in</strong> the appropriate Term<strong>in</strong>al Equipment Technical Requirementdocument(s). The Department does not guarantee the equipment will operate to the user’ssatisfaction. Before <strong>in</strong>st<strong>all</strong><strong>in</strong>g this equipment, users should ensure that it is permissible for theequipment to be connected to the facilities of the local telecommunications company. Theequipment must also be <strong>in</strong>st<strong>all</strong>ed us<strong>in</strong>g an acceptable method of connection. The customershould be aware that compliance with the above conditions may not prevent degradation ofservice <strong>in</strong> some situations. Repairs to certified equipment should be coord<strong>in</strong>ated by arepresentative designated by the supplier. Any repairs or alterations made by the user to thisequipment, or equipment malfunctions, may give the telecommunications company cause torequest the user to disconnect the equipment. Users should ensure for their own protectionthat the electrical ground connections of the power utility, teleph<strong>one</strong> l<strong>in</strong>es, and <strong>in</strong>ternal met<strong>all</strong>icwater pipe system, if present, are connected together. This precaution can be particularlyimportant <strong>in</strong> rural areas.CAUTIONUsers should not attempt to make such connections themselves, but should contact theappropriate electric <strong>in</strong>spection authority, or electrician, as appropriate. The R<strong>in</strong>ger EquivalenceNumber (REN) of this device is 0.7.Notice: The R<strong>in</strong>ger Equivalence Number (REN) assigned to each term<strong>in</strong>al device provides an<strong>in</strong>dication of the maximum number of term<strong>in</strong>als <strong>all</strong>owed to be connected to a teleph<strong>one</strong><strong>in</strong>terface. The term<strong>in</strong>ation on an <strong>in</strong>terface may consist of any comb<strong>in</strong>ation of devices subjectonly to the requirement that the sum of the R<strong>in</strong>ger Equivalence Number of <strong>all</strong> the devices doesnot exceed five (5.0). The standard connect<strong>in</strong>g arrangement code (teleph<strong>one</strong> jack type) forequipment with direct connections to the teleph<strong>one</strong> network is CA11A.ENWW IC CS-03 requirements 23
Declaration of ConformityDeclaration of Conformityaccord<strong>in</strong>g to ISO/IEC Guide 22 and EN 45014Manufacturer’s Name:Manufacturer’s Address:Hewlett-Packard Company11311 Ch<strong>in</strong>den BoulevardBoise, Idaho 83714-1021, USAdeclares that the productProduct Name:Regulatory Model Number:Product Options:<strong>LaserJet</strong> <strong>3015</strong>/<strong>3020</strong>/<strong>3030</strong> productsLJ <strong>3015</strong> 3 : BOISB-707-00LJ <strong>3020</strong> 3 : BOISB-0306-00LJ <strong>3030</strong> 3 : BOISB-0306-01Allconforms to the follow<strong>in</strong>g Product Specifications:Safety: IEC 60950:1999 / EN 60950:2000IEC 60825-1:1993 + A1:1996 + A2:2001 / EN 60825-1:1994 + A11:1996 + A2:2001 (Class 1 Laser/LED Product)GB4943-1995EMC: CISPR 22:1998 / EN 55022:1998 - Class B 1EN 61000-3-2:1995 / A14:2000EN 61000-3-3:1995EN 55024:1998FCC Title 47 CFR, Part 15 Class B 2 / ICES-003, Issue 3GB9254-1998Telecom: TBR-21:1998; EG 201 121:1998Supplementary Information:The product herewith complies with the requirements of the EMC Directive 89/336/EEC, the Low Voltage Directive 73/23/EEC, the R&TTEDirective 1995/5/EC (Annex II), and carries the CE-Mark<strong>in</strong>g accord<strong>in</strong>gly:1The product was tested <strong>in</strong> a typical configuration with Hewlett-Packard Personal Computer Systems.2This Device complies with Part 15 of the FCC Rules. Operation is subject to the follow<strong>in</strong>g two Conditions: (1) this device may not causeharmful <strong>in</strong>terference, and (2) this device must accept any <strong>in</strong>terference received, <strong>in</strong>clud<strong>in</strong>g <strong>in</strong>terference that may cause undesired operation.3For regulatory purposes, this product is assigned a Regulatory model number. This number should not be confused with the market<strong>in</strong>g name(<strong>HP</strong> <strong>LaserJet</strong> <strong>3015</strong>/<strong>3020</strong>/<strong>3030</strong>) or the product number (Q2669A for the <strong>HP</strong> <strong>LaserJet</strong> <strong>3015</strong> and Q2665A for the <strong>HP</strong> <strong>LaserJet</strong> <strong>3020</strong> and Q2666Afor the <strong>HP</strong> <strong>LaserJet</strong> <strong>3030</strong>).For regulatory topics only:Boise, Idaho 83714-1021, U.S.A.November 1, 2003Australia ContactEuropean ContactProduct Regulations Manager, Hewlett-Packard Australia, Ltd. 31-41 Joseph Street Blackburn, Victoria 3130, AustraliaYour Local Hewlett-Packard Sales and <strong>Service</strong> Office or Hewlett-Packard Gmbh, Department HQ-TRE / StandardsEurope Herrenberger Strasse 140 Böbl<strong>in</strong>gen, D-71034, (+49-7031-14-3143)USA Contact Product Relations Manager, Hewlett-Packard Company PO Box 15, Mail Stop 160 Boise, ID 83707-0015, USA (208-396-6000)24 Chapter 1 Product Information ENWW
Safety statementsLaser safety statementThe Center for Devices and Radiological Health (CDRH) of the U.S. Food and DrugAdm<strong>in</strong>istration has implemented regulations for laser products manufactured s<strong>in</strong>ce August 1,1976. Compliance is mandatory for products marketed <strong>in</strong> the United States. This pr<strong>in</strong>ter iscertified as a “Class 1” laser product under the U.S. Department of Health and Human<strong>Service</strong>s (DHHS) Radiation Performance Standard accord<strong>in</strong>g to the Radiation Control forHealth and Safety Act of 1968. S<strong>in</strong>ce radiation emitted <strong>in</strong>side this pr<strong>in</strong>ter is completelyconf<strong>in</strong>ed with<strong>in</strong> protective hous<strong>in</strong>gs and external covers, the laser beam cannot escape dur<strong>in</strong>gany phase of normal user operation.WARNING!Us<strong>in</strong>g controls, mak<strong>in</strong>g adjustments, or perform<strong>in</strong>g procedures other than those specified <strong>in</strong>this manual can result <strong>in</strong> exposure to hazardous radiation.Canada DOC regulationsThis equipment complies with Canadian EMC Class B requirements.Conforme á la classe B des normes canadiennes de compatibilité électromagnétiques. .ENWW Safety statements 25
Laser statement for F<strong>in</strong>landLASERTURVALLISUUSLUOKAN 1 LASERLAITEKLASS 1 LASER APPARAT<strong>HP</strong> <strong>LaserJet</strong> 3315/<strong>3020</strong>/<strong>3030</strong> <strong>all</strong>-<strong>in</strong>-<strong>one</strong>-laserkirjoit<strong>in</strong> on käyttäjän kannalta turv<strong>all</strong><strong>in</strong>en luokan 1laserlaite. Normaalissa käytössä kirjoittimen suojakotelo<strong>in</strong>ti estää lasersäteen pääsyn laitteenulkopuolelle.Laitteen turv<strong>all</strong>isuusluokka on määritetty standard<strong>in</strong> EN 60825-1:1994 + A11:1996 + A2:2001mukaisesti.VAROITUS!Laitteen käyttäm<strong>in</strong>en muulla ku<strong>in</strong> käyttöohjeessa ma<strong>in</strong>itulla tav<strong>all</strong>a saattaa altistaa käyttäjänturv<strong>all</strong>isuusluokan 1 ylittävälle näkymättömälle lasersäteilylle.VARNING!Om apparaten används på annat sätt än i bruksanvisn<strong>in</strong>g specificerats, kan användarenutsättas för osynlig laserstråln<strong>in</strong>g, som överskrider gränsen för laserklass 1.HUOLTO<strong>HP</strong> <strong>LaserJet</strong> <strong>3015</strong>/<strong>3020</strong>/<strong>3030</strong> <strong>all</strong>-<strong>in</strong>-<strong>one</strong>-kirjoittimen sisällä ei ole käyttäjän huollettavissa oleviakohteita. Laitteen saa avata ja huoltaa a<strong>in</strong>oastaan sen huoltamiseen koulutettu henkilö.Tällaiseksi huoltotoimenpiteeksi ei katsota väria<strong>in</strong>ekaset<strong>in</strong> vaihtamista, paperiradanpuhdistusta tai muita käyttäjän käsikirjassa lueteltuja, käyttäjän tehtäväksi tarkoitettujaylläpitotoimia, jotka voidaan suorittaa ilman erikoistyökaluja.VARO!Mikäli kirjoittimen suojakotelo avataan, olet altti<strong>in</strong>a näkymättömälle lasersäteilylle laitteenollessa toim<strong>in</strong>nassa. Älä katso säteeseen.VARNING!Om laserpr<strong>in</strong>terns skyddshölje öppnas då apparaten är i funktion, utsättas användaren förosynlig laserstråln<strong>in</strong>g. Betrakta ej strålen.Tiedot laitteessa käytettävän laserdiod<strong>in</strong> säteilyom<strong>in</strong>aisuuksista:A<strong>all</strong>onpituus 770-795 nmTeho 5 mWLuokan 3B laserKorean EMI statementAustralian EMC requirementsThis equipment complies with Australian EMC requirements.26 Chapter 1 Product Information ENWW
Regulatory <strong>in</strong>formation for the European Union countries/regionsThis equipment has been designed to work <strong>in</strong> <strong>all</strong> of the countries/regions of the EuropeanEconomic Area (Public Switched Teleph<strong>one</strong> Networks) only. Network compatibility isdependent on <strong>in</strong>ternal software sett<strong>in</strong>gs. Contact your equipment supplier if it is necessary touse the equipment on a different teleph<strong>one</strong> network. For further product support, contactHewlett-Packard at the ph<strong>one</strong> numbers provided <strong>in</strong> the support flyer that came with theproduct.ENWW Regulatory <strong>in</strong>formation for the European Union countries/regions 27
28 Chapter 1 Product Information ENWW
2 OperationThis chapter provides <strong>in</strong>formation about the follow<strong>in</strong>g topics.Operat<strong>in</strong>g environment.............................................................................................................30Identify<strong>in</strong>g the control-panel comp<strong>one</strong>nts................................................................................31Control-panel menu structure..................................................................................................33To use the control-panel buttons.......................................................................................33To pr<strong>in</strong>t the control-panel menu structure.........................................................................33Product media specifications ..................................................................................................37Ma<strong>in</strong> <strong>in</strong>put tray (<strong>all</strong> models) ..............................................................................................37Automatic document feeder (ADF) specifications.............................................................38To ga<strong>in</strong> access to the optimiz<strong>in</strong>g feature...........................................................................38Guidel<strong>in</strong>es for us<strong>in</strong>g media.......................................................................................................39Paper and transparencies ................................................................................................39Common media problems table........................................................................................39Labels................................................................................................................................ 40Envelopes..........................................................................................................................40Card stock and heavy media ............................................................................................41Load<strong>in</strong>g media .........................................................................................................................43Media <strong>in</strong>put tray ................................................................................................................43Priority <strong>in</strong>put tray ...............................................................................................................43Specific types of media .....................................................................................................43Media <strong>in</strong>formation for ADF orig<strong>in</strong>als .................................................................................43Media <strong>in</strong>formation for the flatbed (<strong>HP</strong> <strong>LaserJet</strong> <strong>3020</strong> and <strong>3030</strong>) .....................................44Load<strong>in</strong>g orig<strong>in</strong>als to copy or scan......................................................................................44Load<strong>in</strong>g orig<strong>in</strong>als <strong>in</strong>to the LJ <strong>3020</strong> and <strong>3030</strong> ADF <strong>in</strong>put tray............................................45Load<strong>in</strong>g orig<strong>in</strong>als onto the LJ <strong>3020</strong> and <strong>3030</strong> flatbed scanner.........................................46ENWW 29
Operat<strong>in</strong>g environmentPlace the product on a sturdy, level surface <strong>in</strong> a well-ventilated area that meets the follow<strong>in</strong>genvironmental requirements:● temperature (operat<strong>in</strong>g): 15° to 32.5° C (59° to 90.5° F)temperature (storage): -20° to 40° C (-4° to 104° F)● humidity (operat<strong>in</strong>g): 10 to 80 percent relative humidity (no condensation)humidity (storage): less than 95 percent relative humidity (no condensation)● away from direct sunlight, open flames, and ammonia fumes● sufficient space around the product to <strong>all</strong>ow for access and ventilationFigure 2-1.<strong>HP</strong> <strong>LaserJet</strong> <strong>3015</strong> dimensionsFigure 2-2.<strong>HP</strong> <strong>LaserJet</strong> <strong>3020</strong>/<strong>3030</strong> dimensions30 Chapter 2 Operation ENWW
Identify<strong>in</strong>g the control-panel comp<strong>one</strong>ntsThis section provides details about the control-panel comp<strong>one</strong>nts.Figure 2-3.<strong>HP</strong> <strong>LaserJet</strong> <strong>3015</strong> <strong>all</strong>-<strong>in</strong>-<strong>one</strong> control panel1 Fax controls. Use the fax controls to send and receive faxes and to change commonly used faxsett<strong>in</strong>gs. See the fax guide for <strong>in</strong>formation about us<strong>in</strong>g the fax controls.2 Alphanumeric buttons. Use the alphanumeric buttons to type data <strong>in</strong>to the product control-paneldisplay and to dial ph<strong>one</strong> numbers for fax<strong>in</strong>g. For <strong>in</strong>formation about us<strong>in</strong>g alphanumeric buttons, seethe fax guide.3 Menu and cancel controls. Use these controls to select menu options, determ<strong>in</strong>e the productstatus, and cancel the current job.4 Copy controls. Use these controls to change commonly used default sett<strong>in</strong>gs and to start copy<strong>in</strong>g.5 Scan controls. Use these controls to scan to e-mail or to a folder.ENWW Identify<strong>in</strong>g the control-panel comp<strong>one</strong>nts 31
Figure 2-4.<strong>HP</strong> <strong>LaserJet</strong> <strong>3020</strong> <strong>all</strong>-<strong>in</strong>-<strong>one</strong> control panel1 Scan controls. Use these controls to scan to e-mail or to a folder.2 Alphanumeric buttons. Use the alphanumeric buttons to type data <strong>in</strong>to the product control paneldisplay.3 Menu and cancel controls. Use these controls to select menu options, determ<strong>in</strong>e the productstatus, and cancel the current job.4 Copy controls. Use these controls to change commonly used default sett<strong>in</strong>gs and to start copy<strong>in</strong>g.Figure 2-5.<strong>HP</strong> <strong>LaserJet</strong> <strong>3030</strong> <strong>all</strong>-<strong>in</strong>-<strong>one</strong> control panel1 Fax controls. Use the fax controls to change commonly used fax sett<strong>in</strong>gs. For <strong>in</strong>formation aboutus<strong>in</strong>g the fax controls, see the fax guide.2 Alphanumeric buttons. Use the alphanumeric buttons to type data <strong>in</strong>to the product control-paneldisplay and to dial ph<strong>one</strong> numbers for fax<strong>in</strong>g. For <strong>in</strong>formation about us<strong>in</strong>g alphanumeric buttons, seethe fax guide.3 Menu and cancel controls. Use these controls to select menu options, determ<strong>in</strong>e the productstatus, and cancel the current job.4 Copy controls. Use these controls to change commonly used default sett<strong>in</strong>gs and to start copy<strong>in</strong>g.5 Scan controls. Use these controls to scan to e-mail or to a folder.32 Chapter 2 Operation ENWW
Control-panel menu structureUse the follow<strong>in</strong>g hierarchical diagram of the control-panel menu structure to make changes tosett<strong>in</strong>gs and features.To use the control-panel buttons1. Press MENU/ENTER to beg<strong>in</strong>.2. Use the < or > button to scroll to select <strong>one</strong> of the options from the ma<strong>in</strong> menu, and thenpress MENU/ENTER.3. Use the < or > button to scroll to select <strong>one</strong> of the options from the submenu, and thenpress MENU/ENTER.4. If applicable, use the < or > button to select <strong>one</strong> of the options from the second submenu,and then press MENU/ENTER.To pr<strong>in</strong>t the control-panel menu structure1. Press MENU/ENTER.2. Use the < or > button to select Reports, and then press MENU/ENTER.3. Use the < or > button to select Menu structure, and then press MENU/ENTER. The productexits the menu sett<strong>in</strong>gs and pr<strong>in</strong>ts the report.To see which sett<strong>in</strong>gs are currently selected, pr<strong>in</strong>t a configuration report. See Troubleshoot<strong>in</strong>gtools for <strong>in</strong>structions.NoteSome menu items might not be available depend<strong>in</strong>g on the product model. For example, theFax Job Status menu item does not apply to the <strong>HP</strong> <strong>LaserJet</strong> <strong>3020</strong> because that productdoes not have fax capabilities.Table 2-1. Control-panel menu structureMa<strong>in</strong> Menu Submenu Submenu SubmenuFax Job statusFax FunctionsTime/Date, HeaderSend fax laterStop Recv to PCRepr<strong>in</strong>t lastPoll<strong>in</strong>g receiveClear saved faxsTime/DateFax HeaderENWW Control-panel menu structure 33
Table 2-1. Control-panel menu structure (cont<strong>in</strong>ued)Ma<strong>in</strong> Menu Submenu Submenu SubmenuCopy setupReportsDefault QualityDef. Light/DarkDef. CollationDef. # of copiesDef. Redu/EnlrgDemo PageFax Activity logFax C<strong>all</strong> reportPr<strong>in</strong>t log nowAuto Log Pr<strong>in</strong>tPr<strong>in</strong>t report nowPr<strong>in</strong>t reportInclude 1st pagePh<strong>one</strong>Book reportMenu structureConfig reportBlock Fax listBill<strong>in</strong>g reportUsage pagePCL Font listPS Font listAll fax reports34 Chapter 2 Operation ENWW
Table 2-1. Control-panel menu structure (cont<strong>in</strong>ued)Ma<strong>in</strong> Menu Submenu Submenu SubmenuFax setup Ph<strong>one</strong> Book Individual setup AddDeleteGroup setupAdd/Edit groupDelete groupDel. # In groupDelete <strong>all</strong>Fax Send setupFax Recv. setupDef. ResolutionDef. Light/DarkDef. Glass SizeDial<strong>in</strong>g ModeRedial if busyRedial-no answerRedial Comm Err.Dial PrefixDetect dial t<strong>one</strong>Bill<strong>in</strong>g codesAnswer modeR<strong>in</strong>gs To answerAnswer R<strong>in</strong>g TypeExtension Ph<strong>one</strong>Silence DetectFit to pageStamp faxesForward faxBlock faxesAdd entryDelete entryClear <strong>all</strong>All faxesError correctionV.34Common sett<strong>in</strong>gsLanguageDef. Paper SizePr<strong>in</strong>t DensityVolume sett<strong>in</strong>gsAlarm volumeR<strong>in</strong>g volumeKey Press volumePh<strong>one</strong>L<strong>in</strong>e VolumeENWW Control-panel menu structure 35
Table 2-1. Control-panel menu structure (cont<strong>in</strong>ued)Ma<strong>in</strong> Menu Submenu Submenu Submenu<strong>Service</strong>Pr<strong>in</strong>t T.30 traceRestore defaultsClean<strong>in</strong>g ModePower Save time(<strong>HP</strong> <strong>LaserJet</strong> <strong>3020</strong>and <strong>3030</strong> only)Less paper curl36 Chapter 2 Operation ENWW
Product media specificationsThe product accepts a variety of media. Properties such as weight, gra<strong>in</strong>, and moisturecontent are important factors that affect pr<strong>in</strong>ter performance and output quality. Media shouldconform to the guidel<strong>in</strong>es <strong>in</strong> the user guide on the product CD. Media that does not meet <strong>HP</strong>guidel<strong>in</strong>es might cause poor pr<strong>in</strong>t quality, <strong>in</strong>creased jams, or premature wear on the product.CAUTIONDamage caused by media that does not meet <strong>HP</strong>'s specifications is not covered by the <strong>HP</strong>warranty or service agreements.Ma<strong>in</strong> <strong>in</strong>put tray (<strong>all</strong> models)The pr<strong>in</strong>ter supports media with<strong>in</strong> this size range:● M<strong>in</strong>imum: 76 by 127 mm (3 by 5 <strong>in</strong>ches)● Maximum: 216 by 356 mm (8.5 by 14 <strong>in</strong>ches)Media-type sett<strong>in</strong>gs control the temperature of the fuser. To optimize the pr<strong>in</strong>t quality, changethe sett<strong>in</strong>gs to match the media that you are us<strong>in</strong>g. The follow<strong>in</strong>g are the media types that theproduct supports and the associated fuser mode.Table 2-2. Supported media typesMedia typePla<strong>in</strong>Prepr<strong>in</strong>tedLetterheadTransparencyPrepunchedLabelsBondRecycledColorLight
Automatic document feeder (ADF) specifications<strong>HP</strong> <strong>LaserJet</strong> <strong>3015</strong> product● Input capacity: The ADF holds up to 30 sheets of flat 16 lb copier-grade paper.● Media weight: See <strong>HP</strong> <strong>LaserJet</strong> <strong>3015</strong> performance specifications.● Media size: Use copier-grade paper that is with<strong>in</strong> the follow<strong>in</strong>g size ranges only:● M<strong>in</strong>imum: 74 by 105 mm (2.9 by 4.1 <strong>in</strong>ches)● Maximum: 215.9 by 356 mm (8.5 by 14 <strong>in</strong>ches)<strong>HP</strong> <strong>LaserJet</strong> <strong>3020</strong> and <strong>3030</strong>● Input capacity: The ADF holds up to 50 sheets of flat 16 lb copier-grade paper.● Media weight: See <strong>HP</strong> <strong>LaserJet</strong> <strong>3020</strong>/<strong>3030</strong> performance specifications.● Media size: Use copier-grade paper that is with<strong>in</strong> the follow<strong>in</strong>g size ranges only:● M<strong>in</strong>imum: 127 by 127 mm (5 by 5 <strong>in</strong>ches)● Maximum: 215.9 by 381 mm (8.5 by 15 <strong>in</strong>ches)To ga<strong>in</strong> access to the optimiz<strong>in</strong>g featureYou can ga<strong>in</strong> access to the optimiz<strong>in</strong>g feature on the Paper tab or the Paper/Quality tab <strong>in</strong>the device properties (pr<strong>in</strong>ter driver).NotePr<strong>in</strong>t<strong>in</strong>g speeds might vary depend<strong>in</strong>g on the type and size of media used.You might need to change the sett<strong>in</strong>g aga<strong>in</strong> to optimize for the type of media on which younorm<strong>all</strong>y pr<strong>in</strong>t.38 Chapter 2 Operation ENWW
Guidel<strong>in</strong>es for us<strong>in</strong>g mediaUse the <strong>in</strong>formation <strong>in</strong> this section to choose the proper pr<strong>in</strong>t media.Paper and transparenciesPaper must be of good quality and free of cuts, nicks, tears, spots, loose particles, dust,wr<strong>in</strong>kles, holes, and curled or bent edges. Check the label on the paper package for detailsabout the type of paper (such as bond or recycled).Some paper causes pr<strong>in</strong>t-quality problems, jamm<strong>in</strong>g, or damage to the pr<strong>in</strong>ter.NoteDo not use letterhead that is pr<strong>in</strong>ted with low-temperature <strong>in</strong>ks, such as those used <strong>in</strong> sometypes of thermography; raised letterhead; or colored paper or prepr<strong>in</strong>ted forms that use <strong>in</strong>ks<strong>in</strong>compatible with the pr<strong>in</strong>ter temperature (200° C, or 392° F, for 0.1 second).Transparencies must be able to withstand 200° C (392° F), the pr<strong>in</strong>ter's maximumtemperature.Common media problems tableSymptom Problem with media SolutionPoor pr<strong>in</strong>t quality or t<strong>one</strong>radhesion, or problems withfeed<strong>in</strong>g.Poor t<strong>one</strong>r adhesion.Too moist, too rough, toosmooth, or embossed.Faulty lot.Fuser temperature is too low.Too smooth.Try another k<strong>in</strong>d of mediabetween 100 and 250 Sheffield.Use a fresh media.Try a higher fuser temperaturesett<strong>in</strong>g.Try another k<strong>in</strong>d of mediabetween 100 and 250 Sheffield.Dropouts, jamm<strong>in</strong>g, or curl. Stored improperly. Store paper flat <strong>in</strong> its moistureproofwrapp<strong>in</strong>g.Increased gray backgroundshad<strong>in</strong>g over the entire page.Increased gray backgroundshad<strong>in</strong>g along the edges orbottom of the page.Excessive curl, or problems withfeed<strong>in</strong>g.Media is not white enough or thecontrast sett<strong>in</strong>g is set too high.The media weight is too heavy.The contrast sett<strong>in</strong>g is set toohigh.Too moist, wrong gra<strong>in</strong> direction,or short-gra<strong>in</strong> construction.Use whiter paper. Lower thecontrast sett<strong>in</strong>g,Use lighter weight paper.Lower the contrast sett<strong>in</strong>g,Use long-gra<strong>in</strong> paper.For copy or fax jobs, select lesspaper curl <strong>in</strong> the service menu.For pr<strong>in</strong>t jobs, select a lighterweightmedia type from thepr<strong>in</strong>ter driver or the <strong>HP</strong> Toolbox.Jamm<strong>in</strong>g, or damage to device. Cutouts or perforations. Do not use media with cutouts orperforations.Problems with feed<strong>in</strong>g. Ragged edges. Use good-quality media.ENWW Guidel<strong>in</strong>es for us<strong>in</strong>g media 39
LabelsNoteFor best results, use only <strong>HP</strong>-brand labels. To order <strong>HP</strong> supplies, visit http://www.hp.com.When select<strong>in</strong>g labels, consider the quality of the follow<strong>in</strong>g factors:● Adhesives: The adhesive material should be stable at 200° C (392° F), the productsmaximum temperature.● Arrangement: Use only labels that have no exposed back<strong>in</strong>g between them. Labels canpeel off sheets that have spaces between the labels, caus<strong>in</strong>g serious jams.● Curl: Before pr<strong>in</strong>t<strong>in</strong>g, labels must lie flat with no more than 13 mm (0.5 <strong>in</strong>ch) of curl <strong>in</strong> anydirection.● Condition: Do not use labels that have wr<strong>in</strong>kles, bubbles, or other <strong>in</strong>dications ofseparation. Never use a sheet of labels that has already been run through the device.EnvelopesWhen select<strong>in</strong>g envelopes, consider the quality of the follow<strong>in</strong>g factors.Envelope constructionEnvelope construction is critical. Envelope fold l<strong>in</strong>es can vary considerably, not only betweenmanufacturers, but also with<strong>in</strong> a box from the same manufacturer. Successful pr<strong>in</strong>t<strong>in</strong>g <strong>one</strong>nvelopes depends on the quality of the envelopes, which <strong>in</strong>cludes the follow<strong>in</strong>g factors:●●●●Weight: The weight of the envelope paper should not exceed 105 g/m 2 (28 lb), or jamm<strong>in</strong>gmight result.Construction: Before pr<strong>in</strong>t<strong>in</strong>g, envelopes should lie flat with less than 6 mm (0.25 <strong>in</strong>ch)curl and should not conta<strong>in</strong> air. Envelopes that trap air might cause problems.Condition: Make sure that the envelopes are not wr<strong>in</strong>kled, nicked, or otherwisedamaged.Sizes: Supported envelope sizes range from 90 by 160 mm (3.5 by 6.3 <strong>in</strong>ches) to 178 by254 mm (7 by 10 <strong>in</strong>ches).40 Chapter 2 Operation ENWW
Envelopes with double-side seamsAn envelope with double-side-seam construction has vertical seams at both ends of theenvelope rather than diagonal seams. This style is more likely to wr<strong>in</strong>kle dur<strong>in</strong>g pr<strong>in</strong>t<strong>in</strong>g. Makesure that the seam extends <strong>all</strong> the way to the corner of the envelope as shown <strong>in</strong> the follow<strong>in</strong>gillustration:Figure 2-6.Envelope constructionEnvelopes with adhesive strips or flapsEnvelopes with a peel-off adhesive strip or with more than <strong>one</strong> flap that folds over to sealmust use adhesives that are compatible with the heat and pressure <strong>in</strong> the device (200° C or392° F). The extra flaps and strips might cause wr<strong>in</strong>kl<strong>in</strong>g, creas<strong>in</strong>g, or jams.Envelope storageProper storage of envelopes contributes to good pr<strong>in</strong>t quality. Store envelopes flat to ensuregood pr<strong>in</strong>t quality. If air is trapped <strong>in</strong> an envelope, creat<strong>in</strong>g an air bubble, the envelope mightwr<strong>in</strong>kle dur<strong>in</strong>g pr<strong>in</strong>t<strong>in</strong>g.Card stock and heavy mediaSome card stock performs better than others because the construction is better suited forfeed<strong>in</strong>g through a laser device. For optimum device performance, do not use media heavierthan 157 g/m 2 (42 lb). Media that is too heavy might cause misfeeds, stack<strong>in</strong>g problems,media jams, poor t<strong>one</strong>r fus<strong>in</strong>g, poor pr<strong>in</strong>t quality, or excessive mechanical wear.NoteYou might be able to pr<strong>in</strong>t on heavier media if you do not fill the <strong>in</strong>put trays to capacity and ifyou use media with a smoothness rat<strong>in</strong>g of 100 to 180 Sheffield.Card stock construction●●Smoothness: 135 to 157 g/m 2 (36 to 42 lb) card stock should have a smoothness rat<strong>in</strong>gof 100 to 180 Sheffield. 60 to 135 g/m 2 (16 to 36 lb) card stock should have a smoothnessrat<strong>in</strong>g of 100 to 250 Sheffield.Construction: Card stock should lie flat with less than 5 mm (0.2 <strong>in</strong>ch) of curl.ENWW Guidel<strong>in</strong>es for us<strong>in</strong>g media 41
●●Condition: Make sure that the card stock is not wr<strong>in</strong>kled, nicked, or otherwise damaged.Sizes: Use card stock that is with<strong>in</strong> the follow<strong>in</strong>g size ranges only:● M<strong>in</strong>imum: 76 by 127 mm ( (3 by 5 <strong>in</strong>ches))● Maximum: 216 by 356 mm ( (8.5 by 14 <strong>in</strong>ches))NoteThe <strong>HP</strong> <strong>LaserJet</strong> <strong>3015</strong> ADF output b<strong>in</strong> holds <strong>one</strong> sheet of legal-size media (215 by 356 mm[8.5 by 14 <strong>in</strong>ches]). Subsequent sheets of legal-size media slide off of the ADF output b<strong>in</strong>.Card stock guidel<strong>in</strong>esSet marg<strong>in</strong>s at least 2 mm ( 0.08 <strong>in</strong>ch) away from the edges.42 Chapter 2 Operation ENWW
Load<strong>in</strong>g mediaThis section provides <strong>in</strong>formation about load<strong>in</strong>g media <strong>in</strong> the <strong>in</strong>put trays.Media <strong>in</strong>put trayThe media <strong>in</strong>put tray holds up to 150 sheets of 60-g/m 2 (16-lb) paper or a 25-mm (0.98-<strong>in</strong>ch)stack of heavier media. Load media with the top forward and the side to be pr<strong>in</strong>ted on fac<strong>in</strong>gup. To prevent jams and skew, always adjust the side media guides.Priority <strong>in</strong>put trayThe priority <strong>in</strong>put tray holds up to 10 pages of 75-g/m 2 (20-lb) paper or <strong>one</strong> envelope,transparency, or card. Load media with the top forward and the side to be pr<strong>in</strong>ted on fac<strong>in</strong>gup. To prevent jams and skew, always adjust the side media guides.If you try to pr<strong>in</strong>t on media that is wr<strong>in</strong>kled, folded, or damaged <strong>in</strong> any way, a jam might occur.See the user guide on the product CD for more <strong>in</strong>formation.NoteWhen you add new media, make sure that you remove <strong>all</strong> of the media from the <strong>in</strong>put tray andstraighten the stack of new media. This helps prevent multiple sheets of media from feed<strong>in</strong>gthrough the pr<strong>in</strong>ter at <strong>one</strong> time, reduc<strong>in</strong>g jams.Specific types of media●●●●Transparencies and labels: Load transparencies and labels with the top forward and theside to be pr<strong>in</strong>ted on fac<strong>in</strong>g up. See the user guide on the product CD for more<strong>in</strong>formation.Envelopes: Load envelopes with the narrow, stamp side forward and the side to bepr<strong>in</strong>ted on fac<strong>in</strong>g up. See the user guide on the product CD for more <strong>in</strong>formation.Letterhead and prepr<strong>in</strong>ted forms: Load with the top forward and the side to be pr<strong>in</strong>tedon fac<strong>in</strong>g up. See the user guide for more <strong>in</strong>formation.Cards and custom-sized media: Load with the narrow side forward and the side to bepr<strong>in</strong>ted on fac<strong>in</strong>g up. See the user guide on the product CD for more <strong>in</strong>formation.Media <strong>in</strong>formation for ADF orig<strong>in</strong>alsNote<strong>HP</strong> <strong>LaserJet</strong> <strong>3015</strong>: you must use a carrier sheet to scan or copy sm<strong>all</strong> or delicate orig<strong>in</strong>als(such as newspr<strong>in</strong>t, bus<strong>in</strong>ess cards, and photos), or documents that have tears, perforations,or punch holes.<strong>HP</strong> <strong>LaserJet</strong> <strong>3020</strong> and <strong>3030</strong>: you must use the flatbed to scan or copy sm<strong>all</strong> or delicateorig<strong>in</strong>als (such as newspr<strong>in</strong>t, bus<strong>in</strong>ess cards, and photos), or documents that have tears,perforations, or punch holes. If you want to fax such items, first make a copy on the flatbedand then fax the copy.Perform the follow<strong>in</strong>g actions to m<strong>in</strong>imize the possibility of jams:● Remove self-stick notes.● Remove staples and paper clips.● Straighten any curls, folds, or wr<strong>in</strong>kles <strong>in</strong> documents before putt<strong>in</strong>g them <strong>in</strong>to thedocument feeder tray.ENWW Load<strong>in</strong>g media 43
●●●●Do not <strong>in</strong>sert any document that conta<strong>in</strong>s glue, correction fluid, or wet <strong>in</strong>k.Do not <strong>in</strong>sert gum-backed paper or labels.Avoid multiple-copy forms.Do not scan orig<strong>in</strong>als that are larger or sm<strong>all</strong>er than supported size limitations.NoteTo obta<strong>in</strong> good results, it is important to use the correct re-entry and color sett<strong>in</strong>gs for the job.See the user guide on the product CD for more <strong>in</strong>formation.Media <strong>in</strong>formation for the flatbed (<strong>HP</strong> <strong>LaserJet</strong> <strong>3020</strong> and <strong>3030</strong>)Use the flatbed scanner for copy<strong>in</strong>g, scann<strong>in</strong>g, and fax<strong>in</strong>g if the media is fragile, th<strong>in</strong>, thick, ordamaged (folded, wr<strong>in</strong>kled), or to produce a high-quality copy or file. The flatbed scannerprovides the best copy and scan quality.The flatbed has no m<strong>in</strong>imum size specification, and accepts a maximum size of letter- (215.9mm by 279 mm, or 8.5 <strong>in</strong>ches by 11 <strong>in</strong>ches) or A4- (210 mm by 297 mm, or 9.26 <strong>in</strong>ches by11.69 <strong>in</strong>ches) size media.NoteTo scan a legal-size document us<strong>in</strong>g the <strong>HP</strong> <strong>LaserJet</strong> <strong>3020</strong> or <strong>3030</strong>, use the automaticdocument feeder.Load<strong>in</strong>g orig<strong>in</strong>als to copy or scanUse these <strong>in</strong>structions to load orig<strong>in</strong>als <strong>in</strong>to the product for copy<strong>in</strong>g or scann<strong>in</strong>g. See thespecific <strong>in</strong>structions for the model that you are servic<strong>in</strong>g.NoteAutomatic document feeder (ADF) capacity is up to 30 sheets of 75-g/m 2 (20-lb) media(depend<strong>in</strong>g on the thickness of the media), or until the ADF <strong>in</strong>put tray is full.The m<strong>in</strong>imum size for media <strong>in</strong> the ADF <strong>in</strong>put tray is 74 by 105 mm (2.9 by 4.1 <strong>in</strong>ches). Themaximum size for media <strong>in</strong> the ADF <strong>in</strong>put tray is 215 by 356 mm (8.5 by 14 <strong>in</strong>ches).1. Adjust the ADF media lever, if necessary.NoteMove the ADF media lever to the right (s<strong>in</strong>gle-sheet sett<strong>in</strong>g) if you are pr<strong>in</strong>t<strong>in</strong>g on a s<strong>in</strong>glesheet of thick media.Figure 2-7. Load<strong>in</strong>g the LJ <strong>3015</strong> ADF (1 of 3)44 Chapter 2 Operation ENWW
2. Put the top end of the orig<strong>in</strong>al media stack <strong>in</strong>to the ADF <strong>in</strong>put tray, with the media stackface down and the first page to be scanned at the bottom of the stack.Figure 2-8. Load<strong>in</strong>g the LJ <strong>3015</strong> ADF (2 of 3)3. Slide the media stack <strong>in</strong>to the ADF until the media does not move any farther. You mighthave to tap the stack <strong>in</strong>to the ADF.4. Adjust the media guides until they are snug.Figure 2-9. Load<strong>in</strong>g the LJ <strong>3015</strong> ADF (3 of 3)5. The document is now ready to be scanned.CAUTIONTo prevent damag<strong>in</strong>g the device, do not use an orig<strong>in</strong>al that has correction fluid, correctiontape, or staples.If you moved the ADF media lever to the right <strong>in</strong> step 1, move it back to the left when you havef<strong>in</strong>ished pr<strong>in</strong>t<strong>in</strong>g. Pr<strong>in</strong>t<strong>in</strong>g on regular media with the ADF media lever moved to the right cancause jams.Load<strong>in</strong>g orig<strong>in</strong>als <strong>in</strong>to the LJ <strong>3020</strong> and <strong>3030</strong> ADF <strong>in</strong>put trayNoteThe ADF capacity is up to 50 sheets of 75-g/m 2 (20-lb) media.The m<strong>in</strong>imum size for media <strong>in</strong> the ADF is 127 by 127 mm (5 by 5 <strong>in</strong>ches). For sm<strong>all</strong>er sizes,use the flatbed scanner. The maximum size for media <strong>in</strong> the ADF is 216 by 381 mm (8.5 by 15<strong>in</strong>ches).1. Make sure that the flatbed scanner conta<strong>in</strong>s no media.ENWW Load<strong>in</strong>g media 45
2. Close the flatbed scanner cover and put the top end of the stack of orig<strong>in</strong>als <strong>in</strong>to the ADF<strong>in</strong>put tray, with the media stack face-up and the first page to be copied on top of thestack.Figure 2-10. Load<strong>in</strong>g the LJ <strong>3020</strong> and <strong>3030</strong> ADF (1 of 2)3. Slide the stack <strong>in</strong>to the ADF until it does not move any farther.4. Adjust the media guides until they are snug aga<strong>in</strong>st the media.Figure 2-11. Load<strong>in</strong>g the LJ <strong>3020</strong> and <strong>3030</strong> ADF (2 of 2)5. The document is now ready to be copied.CAUTIONTo prevent damag<strong>in</strong>g the device, do not use an orig<strong>in</strong>al that conta<strong>in</strong>s correction tape,correction fluid, or staples.Load<strong>in</strong>g orig<strong>in</strong>als onto the LJ <strong>3020</strong> and <strong>3030</strong> flatbed scanner1. Make sure that the automatic document feeder (ADF) conta<strong>in</strong>s no media.2. Lift the flatbed scanner cover.3. Place the orig<strong>in</strong>al document face-down on the flatbed scanner with the top, left corner ofthe document at the lower-right corner of the glass.4. Gently close the lid.5. The document is ready to be copied.Figure 2-12.CAUTIONLoad<strong>in</strong>g the LJ <strong>3020</strong> and <strong>3030</strong> flatbed scannerTo prevent damag<strong>in</strong>g the device, do not <strong>all</strong>ow the scanner lid to f<strong>all</strong> onto the flatbed scannersurface. Always close the scanner lid when the device is not <strong>in</strong> use.46 Chapter 2 Operation ENWW
3 Ma<strong>in</strong>tenanceThis chapter provides <strong>in</strong>formation about the follow<strong>in</strong>g topics.Life expectancies of parts that wear .......................................................................................48Scanner calibration .................................................................................................................49Clean<strong>in</strong>g the product ...............................................................................................................50To clean the pr<strong>in</strong>t path ......................................................................................................50Clean<strong>in</strong>g the glass.............................................................................................................50Clean<strong>in</strong>g the pr<strong>in</strong>t-cartridge area.............................................................................................54To clean<strong>in</strong>g the pr<strong>in</strong>t-cartridge area (<strong>all</strong> models)...............................................................54Clean<strong>in</strong>g the pr<strong>in</strong>ter pickup roller (<strong>all</strong> models)...................................................................55Clean<strong>in</strong>g the pr<strong>in</strong>ter separation pad (<strong>all</strong> models)..............................................................56User replaceable parts.............................................................................................................57Pr<strong>in</strong>ter pickup roller (<strong>all</strong> models)........................................................................................57Pr<strong>in</strong>ter separation pad (<strong>all</strong> models)...................................................................................59Pr<strong>in</strong>ter ma<strong>in</strong> <strong>in</strong>put tray (<strong>all</strong> models)....................................................................................60<strong>HP</strong> <strong>LaserJet</strong> <strong>3015</strong> ADF pickup roller ................................................................................61<strong>HP</strong> <strong>LaserJet</strong> <strong>3015</strong> ADF separation pad set.......................................................................62<strong>HP</strong> <strong>LaserJet</strong> <strong>3015</strong> ADF <strong>in</strong>put tray......................................................................................62<strong>HP</strong> <strong>LaserJet</strong> <strong>3015</strong> ADF output b<strong>in</strong>.....................................................................................63<strong>HP</strong> <strong>LaserJet</strong> <strong>3020</strong> and <strong>3030</strong> ADF pickup roller.................................................................63<strong>HP</strong> <strong>LaserJet</strong> <strong>3020</strong> and <strong>3030</strong> ADF separation pad............................................................66<strong>HP</strong> <strong>LaserJet</strong> <strong>3020</strong> and <strong>3030</strong> control-panel bezel..............................................................66ENWW 47
Life expectancies of parts that wearInspect any parts that wear when servic<strong>in</strong>g the product. Replace them as needed, based onfailure or wear, rather than on usage.The follow<strong>in</strong>g table lists approximate schedules for replac<strong>in</strong>g confusables.Table 3-1. Life expectancies of parts that wearDescription Part number Life (estimated) RemarksPr<strong>in</strong>t cartridge (userreplaceable)PC1Q2612A 2,000 pages (at 5percent t<strong>one</strong>r coverage)When pr<strong>in</strong>t becomesfa<strong>in</strong>t, redistribute t<strong>one</strong>r<strong>in</strong> the cartridge bygently shak<strong>in</strong>g thecartridge from side toside.Product base pickuprollerProduct baseseparation padFuser assembly (100-127 V)Fuser assembly (220-240 V)<strong>HP</strong> <strong>LaserJet</strong> <strong>3015</strong> ADFseparation pad set<strong>HP</strong> <strong>LaserJet</strong> <strong>3015</strong> ADFseparation padassembly<strong>HP</strong> <strong>LaserJet</strong><strong>3020</strong>/<strong>3030</strong> ADFseparation pad<strong>HP</strong> <strong>LaserJet</strong> <strong>3015</strong> ADFpickup rollerRL1-0266-000CN 50,000 pages Look for glaz<strong>in</strong>g and/orcracks.Can affect pr<strong>in</strong>t qualityand paper movement.RC1-1985-000CN 50,000 pages Can affect papermovement.RM1-0862-000CN 50,000 pages Can affect pr<strong>in</strong>t qualityand paper movement.RM1-0863-000CN 50,000 pages Can affect pr<strong>in</strong>t qualityand paper movement.RM1-0891-000CN 25,000 pages Can affect movement ofdocuments to bescanned or copied.RM1-0890-000CN 25,000 pages Can affect movement ofdocuments to bescanned or copied.C7309-60009 50,000 pages Can affect movement ofdocuments to bescanned or copied.RM1-0885-000CN 25,000 pages Can affect movement ofdocuments to bescanned or copied.<strong>HP</strong> <strong>LaserJet</strong><strong>3020</strong>/<strong>3030</strong> ADF pickuprollerC709-60109 50,000 pages Can affect movement ofdocuments to bescanned or copied.PC1The estimated pr<strong>in</strong>t cartridge life is based on letter- or A4-sized paper with an average of5-percent t<strong>one</strong>r coverage and a medium density sett<strong>in</strong>g. Pr<strong>in</strong>t cartridge life can be extendedfurther by us<strong>in</strong>g draft-mode sett<strong>in</strong>gs to conserve t<strong>one</strong>r.48 Chapter 3 Ma<strong>in</strong>tenance ENWW
Scanner calibrationThe scanner calibrates itself automatic<strong>all</strong>y at the start of scan of copy jobs. Norm<strong>all</strong>y, you donot need to <strong>in</strong>itiate the calibration, but you can <strong>in</strong>itiate the calibration through the secondaryservice menu and produce a report that shows the calibration results. See Secondary servicemenu.ENWW Scanner calibration 49
Clean<strong>in</strong>g the productWARNING!Before you perform these steps, unplug the product to avoid the shock hazard.To ma<strong>in</strong>ta<strong>in</strong> quality, thoroughly clean the product when these conditions exist:● any time a new pr<strong>in</strong>t cartridge is <strong>in</strong>st<strong>all</strong>ed● after pr<strong>in</strong>t<strong>in</strong>g approximately 2,000 pages● whenever pr<strong>in</strong>t quality problems appearClean the outside of the product by us<strong>in</strong>g a water-dampened cloth. Clean the <strong>in</strong>side by us<strong>in</strong>gonly a dry, l<strong>in</strong>t-free cloth (such as a lens tissue).To avoid permanent damage to the pr<strong>in</strong>t cartridge, do not use ammonia-based or ethylalcohol-based cleaners on or around the product.WARNING!CAUTIONAvoid touch<strong>in</strong>g the heat<strong>in</strong>g element <strong>in</strong> the fuser. It might be very hot and can cause burns.Do not touch the surface of the black-sponge transfer roller. Contam<strong>in</strong>ants on the roller cancause pr<strong>in</strong>t-quality problems.To clean the pr<strong>in</strong>t pathThe product features a special clean<strong>in</strong>g mode to clean the paper path.This process requires us<strong>in</strong>g a transparency to remove dust and t<strong>one</strong>r from the pr<strong>in</strong>t paperpath. Do not use bond or rough paper.Make sure that the transparency used <strong>in</strong> this clean<strong>in</strong>g process meets the media requirementsfor the pr<strong>in</strong>ter.If transparency film is unavailable, you can use paper. If you must use paper, perform theprocedure two or three times to ensure proper clean<strong>in</strong>g.To clean the pr<strong>in</strong>t path1. If <strong>one</strong> is available, load a transparency <strong>in</strong> the priority <strong>in</strong>put tray.2. Make sure that the product is <strong>in</strong> the Ready state.3. Press MENU/ENTER, and then use the < or > button to scroll to <strong>Service</strong> and press MENU/ENTER4. Use the < or > button to scroll to Clean<strong>in</strong>g Mode and press MENU/ENTER.5. The transparency feeds through the pr<strong>in</strong>ter slowly. Discard the transparency.NoteThe FAX/SEND (<strong>HP</strong> <strong>LaserJet</strong> <strong>3015</strong> and <strong>3030</strong> only) and CANCEL lights bl<strong>in</strong>k until the clean<strong>in</strong>gprocess is complete.Clean<strong>in</strong>g the glassUse the follow<strong>in</strong>g procedures to clean the glass on the scanner.To clean the exterior (<strong>all</strong> models)Use a soft, damp, l<strong>in</strong>t-free cloth to wipe dust, smudges, and sta<strong>in</strong>s off the exterior of thedevice.50 Chapter 3 Ma<strong>in</strong>tenance ENWW
To clean the LJ <strong>3015</strong> glass and white platenOver time, specks of debris might collect on the scanner glass and white platen, which canaffect performance. Use the follow<strong>in</strong>g procedure to clean the scanner glass and white platen.1. Use the power switch to turn off the product, and then unplug the power cord from theelectrical socket.2. Tilt the device control panel forward.3. Clean the glass strip and the white platen with a soft cloth or sponge that has beenmoistened with nonabrasive glass cleaner.Figure 3-1.Clean<strong>in</strong>g the LJ <strong>3015</strong> glassFigure 3-2.CAUTIONClean<strong>in</strong>g the LJ <strong>3015</strong> white platenDo not use abrasives, acet<strong>one</strong>, benzene, ammonia, ethyl alcohol, or carbon tetrachloride onany part of the device; these can damage the device. Do not place liquids directly on the glassor platen. They might seep and damage the device.4. Dry the glass and platen with a chamois or cellulose sponge to prevent spott<strong>in</strong>g.5. Plug the product <strong>in</strong> and use the power switch to turn on the product.To clean the LJ <strong>3020</strong> and <strong>3030</strong> glassDirty glass, from f<strong>in</strong>gerpr<strong>in</strong>ts, smudges, hair, and so on, slows down performance and affectsthe accuracy of special features such as fit-to-page and copy.NoteIf streaks or other defects appear only on copies produced us<strong>in</strong>g the automatic documentfeeder (ADF), clean the scanner strip (step 3). It is not necessary to clean the scanner glass.1. Use the power switch to turn off the device, unplug the power cord from the electricalsocket, and then raise the lid.ENWW Clean<strong>in</strong>g the product 51
2. Clean the glass by us<strong>in</strong>g a soft cloth or sponge that has been moistened with nonabrasiveglass cleaner.Figure 3-3. Clean<strong>in</strong>g the LJ <strong>3020</strong> and <strong>3030</strong> glass (1 of 2)CAUTIONDo not use abrasives, acet<strong>one</strong>, benzene, ammonia, ethyl alcohol, or carbon tetrachloride onany part of the device; these can damage the device. Do not place liquids directly on theglass. They might seep and damage the device.3. Clean the scanner strip by us<strong>in</strong>g a soft cloth or sponge that has been moistened withnonabrasive glass cleaner.Figure 3-4. Clean<strong>in</strong>g the LJ <strong>3020</strong> and <strong>3030</strong> glass (2 of 2)4. To prevent spott<strong>in</strong>g, dry the glass by us<strong>in</strong>g a chamois or cellulose sponge.5. Plug the product <strong>in</strong> and use the power switch to turn on the product.Clean<strong>in</strong>g the LJ <strong>3020</strong> and <strong>3030</strong> lid back<strong>in</strong>gDebris can accumulate on the white document lid back<strong>in</strong>g that is located underneath thedevice lid.1. Use the power switch to turn off the device, unplug the power cord from the electricalsocket, and raise the lid.NoteTurn the power switch to the off position.2. Clean the white document lid back<strong>in</strong>g by us<strong>in</strong>g a soft cloth or sponge that has beenmoistened with a mild soap and warm water.Figure 3-5.Clean<strong>in</strong>g the LJ <strong>3020</strong> and <strong>3030</strong> lid back<strong>in</strong>g3. Wash the back<strong>in</strong>g gently to loosen debris; do not scrub the back<strong>in</strong>g.52 Chapter 3 Ma<strong>in</strong>tenance ENWW
4. Dry the back<strong>in</strong>g by us<strong>in</strong>g a chamois or soft cloth.CAUTIONDo not use paper-based wipes because they might scratch the back<strong>in</strong>g.5. Plug the product <strong>in</strong> and use the power switch to turn on the product.6. If this procedure does not clean the back<strong>in</strong>g thoroughly, repeat the previous steps but useisopropyl alcohol to dampen the cloth or sponge, and then wipe the back<strong>in</strong>g thoroughlywith a damp cloth to remove any residual alcohol.ENWW Clean<strong>in</strong>g the product 53
Clean<strong>in</strong>g the pr<strong>in</strong>t-cartridge areaYou do not need to clean the pr<strong>in</strong>t-cartridge area often. However, clean<strong>in</strong>g this area canimprove the quality of your pr<strong>in</strong>ted sheets. Dur<strong>in</strong>g the pr<strong>in</strong>t<strong>in</strong>g process, paper, t<strong>one</strong>r, and dustparticles can accumulate <strong>in</strong>side the product. Over time, this buildup can cause pr<strong>in</strong>t-qualityproblems, such as t<strong>one</strong>r specks or smear<strong>in</strong>g. To correct and prevent these types of problems,you can clean the pr<strong>in</strong>t-cartridge area and the media path.To clean<strong>in</strong>g the pr<strong>in</strong>t-cartridge area (<strong>all</strong> models)WARNING!Wait for the product to cool before beg<strong>in</strong>n<strong>in</strong>g this procedure.1. Use the power switch to turn the product off, and then unplug the power cord.Figure 3-6. Clean<strong>in</strong>g the pr<strong>in</strong>t-cartridge area (1 of 3)2. Open the pr<strong>in</strong>t-cartridge door, and remove the pr<strong>in</strong>t cartridge.CAUTIONTo prevent damage, do not expose the pr<strong>in</strong>t cartridge to light. Cover the pr<strong>in</strong>t cartridge, ifnecessary. Do not touch the transfer roller (the black rubber roller located underneath thepr<strong>in</strong>t cartridge). Sk<strong>in</strong> oils on the roller can affect pr<strong>in</strong>t quality.3. Use a dry, l<strong>in</strong>t-free cloth, or an <strong>HP</strong> t<strong>one</strong>r cloth (part number 5090-3379) to wipe anyresidue from the paper-path area and the pr<strong>in</strong>t-cartridge cavity.Figure 3-7. Clean<strong>in</strong>g the pr<strong>in</strong>t-cartridge area (2 of 3)4. Replace the pr<strong>in</strong>t cartridge, and close the pr<strong>in</strong>t-cartridge door.54 Chapter 3 Ma<strong>in</strong>tenance ENWW
5. Plug the product <strong>in</strong>, and then use the power switch to turn on the product.Figure 3-8. Clean<strong>in</strong>g the pr<strong>in</strong>t-cartridge area (3 of 3)WARNING!NoteDo not spray or use water <strong>in</strong>side the product. Failure to follow this warn<strong>in</strong>g can result <strong>in</strong> severedamage to the product or serious personal <strong>in</strong>jury.If t<strong>one</strong>r gets on your cloth<strong>in</strong>g or other fabric, wipe off the t<strong>one</strong>r with a dry cloth. Wash the items<strong>in</strong> cold water and air-dry them. If t<strong>one</strong>r gets on your hands, wash your hands <strong>in</strong> cold water.Hot water or heat from a dryer can set t<strong>one</strong>r <strong>in</strong>to fabric.Clean<strong>in</strong>g the pr<strong>in</strong>ter pickup roller (<strong>all</strong> models)If the product regularly picks up multiple sheets of media at <strong>one</strong> time or picks up no sheets at<strong>all</strong>, clean or replace the pickup roller. Before replac<strong>in</strong>g the pickup roller, try to clean it. To cleanthe pickup roller, use the follow<strong>in</strong>g <strong>in</strong>structions.NoteIf the product does not pick up media from the tray, the cause is almost always a dirty ordamaged pickup roller. If clean<strong>in</strong>g the pickup roller does not resolve the problem, replace thepickup roller. See Pr<strong>in</strong>ter pickup roller (<strong>all</strong> models) for <strong>in</strong>structions.1. Use the power switch to turn the product off and then unplug the power cord.Figure 3-9.Clean<strong>in</strong>g the separation pad2. Remove the pickup roller. See Pr<strong>in</strong>ter pickup roller (<strong>all</strong> models).3. Dampen a l<strong>in</strong>t-free cloth with isopropyl alcohol, and scrub the roller.4. Us<strong>in</strong>g a dry l<strong>in</strong>t free cloth, wipe the pickup roller to remove loosened dirt.Figure 3-10. Clean<strong>in</strong>g the pickup roller (1 of 3)ENWW Clean<strong>in</strong>g the pr<strong>in</strong>t-cartridge area 55
5. Allow the pickup roller to dry completely before you re<strong>in</strong>st<strong>all</strong> it <strong>in</strong> the product. See steps 6through 8 of Pr<strong>in</strong>ter pickup roller (<strong>all</strong> models).Figure 3-11. Clean<strong>in</strong>g the pickup roller (2 of 3)6. Plug the product <strong>in</strong>, and then use the power switch to turn on the product.Figure 3-12. Clean<strong>in</strong>g the pickup roller (3 of 3)Clean<strong>in</strong>g the pr<strong>in</strong>ter separation pad (<strong>all</strong> models)1. Use the power switch to turn the product off and then unplug the power cord.Figure 3-13. Clean<strong>in</strong>g the separation pad (1 of 2)2. Remove the separation pad. See Pr<strong>in</strong>ter separation pad (<strong>all</strong> models).3. Dampen a l<strong>in</strong>t-free cloth with isopropyl alcohol, and scrub the separation pad.4. Re<strong>in</strong>st<strong>all</strong> the separation pad. See steps 1 through 3 of Pr<strong>in</strong>ter separation pad (<strong>all</strong> models)5. Plug the product <strong>in</strong>, and then use the power switch to turn on the product.Figure 3-14. Clean<strong>in</strong>g the separation pad (2 of 2)56 Chapter 3 Ma<strong>in</strong>tenance ENWW
User replaceable partsThe follow<strong>in</strong>g sections provide procedures that the user can follow to replace certa<strong>in</strong> parts.Pr<strong>in</strong>ter pickup roller (<strong>all</strong> models)CAUTIONFailure to complete <strong>all</strong> of the steps <strong>in</strong> this procedure might damage the pr<strong>in</strong>ter.1. Use the power switch to turn the product off and then unplug the power cord.Figure 3-15. Replac<strong>in</strong>g the pickup roller (1 of 7)2. Open the pr<strong>in</strong>t-cartridge door, and remove the pr<strong>in</strong>t cartridge.CAUTIONTo prevent damage, do not expose the pr<strong>in</strong>t cartridge to light. Cover the pr<strong>in</strong>t cartridge orplace it <strong>in</strong> a black plastic bag, if necessary. Also, do not touch the black-sponge transfer roller<strong>in</strong>side the product. Touch<strong>in</strong>g the transfer roller can damage the product.3. Locate the pickup roller.Figure 3-16. Replac<strong>in</strong>g the pickup roller (2 of 7)4. Gently release the sm<strong>all</strong>, white tabs on each side of the pickup roller by push<strong>in</strong>g themaway from the roller, and then rotate the pickup roller toward the front.CAUTIONUse gentle pressure to release the sm<strong>all</strong> white tabs to avoid break<strong>in</strong>g them.Figure 3-17. Replac<strong>in</strong>g the pickup roller (3 of 7)ENWW User replaceable parts 57
5. Gently pull the pickup roller up and out.Figure 3-18. Replac<strong>in</strong>g the pickup roller (4 of 7)6. Position the cleaned or replacement pickup roller <strong>in</strong> the slots on the pickup roller frame.H<strong>in</strong>tCircular and rectangular pegs on each side prevent you from <strong>in</strong>correctly position<strong>in</strong>g the pickuproller.Figure 3-19. Replac<strong>in</strong>g the pickup roller (5 of 7)7. Rotate the top of the pickup roller <strong>in</strong>to position until the white tabs on each side of theroller snap <strong>in</strong>to place.NoteTouch<strong>in</strong>g the transfer roller can damage the product.Figure 3-20. Replac<strong>in</strong>g the pickup roller (6 of 7)8. Re<strong>in</strong>st<strong>all</strong> the pr<strong>in</strong>t cartridge and close the pr<strong>in</strong>t-cartridge door.9. Plug the product <strong>in</strong>, and then use the power switch to turn on the product.Figure 3-21. Replac<strong>in</strong>g the pickup roller (7 of 7)58 Chapter 3 Ma<strong>in</strong>tenance ENWW
Pr<strong>in</strong>ter separation pad (<strong>all</strong> models)H<strong>in</strong>tNoteBefore chang<strong>in</strong>g the separation pad, clean the pickup roller. If the product cont<strong>in</strong>ues to pick upmore than <strong>one</strong> page at a time, replace the separation pad. See Clean<strong>in</strong>g the pr<strong>in</strong>ter pickuproller (<strong>all</strong> models).The follow<strong>in</strong>g procedure requires a #2 Phillips screwdriver.1. Use the power switch to turn the product off and unplug the power cord.Figure 3-22. Replac<strong>in</strong>g the pr<strong>in</strong>ter separation pad (1 of 5)2. At the back of the product, unscrew the two screws that fasten the separation pad andframe to the product.Figure 3-23. Replac<strong>in</strong>g the pr<strong>in</strong>ter separation pad (2 of 5)ENWW User replaceable parts 59
3. Remove the separation pad and frame.Figure 3-24. Replac<strong>in</strong>g the pr<strong>in</strong>ter separation pad (3 of 5)4. Insert the replacement separation pad and frame and fasten it to the product with the twoscrews.Figure 3-25. Replac<strong>in</strong>g the pr<strong>in</strong>ter separation pad (4 of 5)5. Plug the product <strong>in</strong>, and then use the power switch to turn on the product.Figure 3-26. Replac<strong>in</strong>g the pr<strong>in</strong>ter separation pad (5 of 5)Pr<strong>in</strong>ter ma<strong>in</strong> <strong>in</strong>put tray (<strong>all</strong> models)1. Open the media <strong>in</strong>put tray lid.60 Chapter 3 Ma<strong>in</strong>tenance ENWW
2. Slide the adjustable media guides (c<strong>all</strong>out 1) to the center of the tray.Figure 3-27. Remove the media <strong>in</strong>put tray (1 of 2)3. Depress the tray lock<strong>in</strong>g tabs (c<strong>all</strong>out 2), and then remove the tray.Figure 3-28. Remove the paper pickup tray (2 of 2)<strong>HP</strong> <strong>LaserJet</strong> <strong>3015</strong> ADF pickup rollerWARNING!The <strong>HP</strong> <strong>LaserJet</strong> <strong>3015</strong> ADF pickup roller is not a user replaceable assembly. Only tra<strong>in</strong>edservice personnel should attempt to replace the LJ <strong>3015</strong> pickup roller. See Pickup roller <strong>in</strong>chapter 5.ENWW User replaceable parts 61
<strong>HP</strong> <strong>LaserJet</strong> <strong>3015</strong> ADF separation pad setNoteThe separation pad set and the separation pad assembly are two different assemblies.The separation pad set consists of the pad, clear plastic sheet, and the pad cover. Theseparation pad set is a user replaceable assembly.The separation-pad assembly consists of the separation lever, tension spr<strong>in</strong>g, feed arm, andthe comp<strong>one</strong>nts of the separation pad set. The separation-pad assembly is not a userreplaceable assembly.Only tra<strong>in</strong>ed service personnel should attempt to replace the separation-pad assembly.1. Use the power switch to turn the product off and unplug the power cord.2. Open the scanner top cover.3. Carefully push the replacement separation pad set onto the guide assembly. Close theADF lid.CAUTIONWhen <strong>in</strong>st<strong>all</strong><strong>in</strong>g the replacement pad, be careful not to bend or break the reta<strong>in</strong>er-clip p<strong>in</strong>s.Do not touch the grey separation pad. Sk<strong>in</strong> oils and f<strong>in</strong>gerpr<strong>in</strong>ts on the separation pad mightcause paper-feed problems.Figure 3-29.Remove the separation pad4. Plug the product <strong>in</strong>, and then use the power switch to turn on the product.<strong>HP</strong> <strong>LaserJet</strong> <strong>3015</strong> ADF <strong>in</strong>put tray1. Rotate the ADF <strong>in</strong>put tray toward the front of the product.62 Chapter 3 Ma<strong>in</strong>tenance ENWW
2. Lift the tray up and off of the product.Figure 3-30.Replac<strong>in</strong>g the ADF <strong>in</strong>put tray<strong>HP</strong> <strong>LaserJet</strong> <strong>3015</strong> ADF output b<strong>in</strong>1. Flex the wire ADF output tray until it fits <strong>in</strong>to the slots on the ADF.2. Release the output tray, and then verify that the ends of the tray are seated <strong>in</strong> the holes <strong>in</strong>the ADF.Figure 3-31.Replac<strong>in</strong>g the ADF output b<strong>in</strong><strong>HP</strong> <strong>LaserJet</strong> <strong>3020</strong> and <strong>3030</strong> ADF pickup rollerIf the ADF has trouble pick<strong>in</strong>g paper, see Troubleshoot<strong>in</strong>g to try to resolve the problem. Ifnecessary, replace the ADF pickup roller assembly. To remove the exist<strong>in</strong>g assembly, followthese <strong>in</strong>structions.1. Use the power switch to turn off the product, and then unplug the power cord.Figure 3-32. Replac<strong>in</strong>g the ADF pickup-roller assembly (1 of 9)ENWW User replaceable parts 63
2. Remove the <strong>in</strong>put tray and open the ADF cover.Figure 3-33. Replac<strong>in</strong>g the ADF pickup-roller assembly (2 of 9)3. Press the round, green button while lift<strong>in</strong>g the green lever. Rotate the green lever until itstops <strong>in</strong> the open position. The old pickup roller assembly should rema<strong>in</strong> on the blacksurface.Figure 3-34. Replac<strong>in</strong>g the ADF pickup-roller assembly (3 of 9)4. Remove the old assembly and put the new <strong>one</strong> <strong>in</strong> exactly the same place. The largestroller goes <strong>in</strong> back, and the gear side is away from you.Figure 3-35. Replac<strong>in</strong>g the ADF pickup-roller assembly (4 of 9)5. Lower the green lever so that the flat green part fits between the rollers. Press down onthe green lever until you hear it snap <strong>in</strong>to place.Figure 3-36. Replac<strong>in</strong>g the ADF pickup-roller assembly (5 of 9)64 Chapter 3 Ma<strong>in</strong>tenance ENWW
6. To check for proper <strong>in</strong>st<strong>all</strong>ation, lift the green lever until it rema<strong>in</strong>s <strong>in</strong> the open position.The new pickup roller assembly should be secured to the lever assembly and should notf<strong>all</strong> out.Figure 3-37. Replac<strong>in</strong>g the ADF pickup-roller assembly (6 of 9)7. Make sure that both sides of the assembly are secured by the green hooks.Figure 3-38. Replac<strong>in</strong>g the ADF pickup-roller assembly (7 of 9)8. Lower the green lever assembly and close the ADF lid. Re<strong>in</strong>st<strong>all</strong> the <strong>in</strong>put tray.Figure 3-39. Replac<strong>in</strong>g the ADF pickup-roller assembly (8 of 9)NoteIf you are experienc<strong>in</strong>g jams <strong>in</strong> the ADF, see Troubleshoot<strong>in</strong>g.9. Plug the product <strong>in</strong>, and then use the power switch to turn on the product.Figure 3-40. Replac<strong>in</strong>g the ADF pickup-roller assembly (9 of 9)ENWW User replaceable parts 65
<strong>HP</strong> <strong>LaserJet</strong> <strong>3020</strong> and <strong>3030</strong> ADF separation padCAUTIONAvoid touch<strong>in</strong>g the flatbed glass or the ADF separation pad. Sk<strong>in</strong> oils and f<strong>in</strong>gerpr<strong>in</strong>ts cancontam<strong>in</strong>ate the glass or pad and cause pr<strong>in</strong>t quality or paper pickup problems.1. Use the power switch to turn the product off and unplug the power cord.2. Open the ADF cover and lift up the ADF pickup-roller assembly.3. Use a #8 torx screwdriver to remove two torx screws (c<strong>all</strong>out 1) and remove theseparation-pad assembly.CAUTIONWhen <strong>in</strong>st<strong>all</strong><strong>in</strong>g the replacement pad, be careful not to bend or break the reta<strong>in</strong>er-clip p<strong>in</strong>s.Figure 3-41.Remove the separation pad4. Inst<strong>all</strong> the replacement ADF separation-pad assembly. Close the ADF lid.5. Plug the product <strong>in</strong>, and then use the power switch to turn on the product.<strong>HP</strong> <strong>LaserJet</strong> <strong>3020</strong> and <strong>3030</strong> control-panel bezel1. Use the power switch to turn off the product, and then unplug the power cord.Figure 3-42. Replac<strong>in</strong>g the control-panel bezel (1 of 4)66 Chapter 3 Ma<strong>in</strong>tenance ENWW
2. Gently pry up the outside edge of the control-panel bezel to remove it.Figure 3-43. Replac<strong>in</strong>g the control-panel bezel (2 of 4)CAUTIONBe careful not to touch any comp<strong>one</strong>nts or buttons <strong>in</strong>side the exposed product control-panelarea.3. Position the replacement bezel over the control panel. Work<strong>in</strong>g from the outside cornerstowards the middle of the bezel, push down until the bezel snaps <strong>in</strong>to place.Figure 3-44. Replac<strong>in</strong>g the control-panel bezel (3 of 4)4. Plug the product <strong>in</strong>, and then use the power switch to turn on the product.Figure 3-45. Replac<strong>in</strong>g the control-panel bezel (4 of 4)ENWW User replaceable parts 67
68 Chapter 3 Ma<strong>in</strong>tenance ENWW
4OperationaloverviewThis chapter conta<strong>in</strong>s <strong>in</strong>formation about the follow<strong>in</strong>g topics.Basic functions (<strong>all</strong> models) ....................................................................................................70Basic sequence of operation ...................................................................................................71Formatter system ....................................................................................................................75Central process<strong>in</strong>g unit .....................................................................................................75L<strong>in</strong>e <strong>in</strong>terface unit (<strong>HP</strong> <strong>LaserJet</strong> <strong>3015</strong> and <strong>3030</strong> only) .....................................................75Standard boot process .....................................................................................................75RAM ..................................................................................................................................76Par<strong>all</strong>el <strong>in</strong>terface or universal serial bus (USB) <strong>in</strong>terface .................................................76Control panel ....................................................................................................................76EconoMode ....................................................................................................................... 76MEt .................................................................................................................................... 77Enhanced I/O ....................................................................................................................77PJL overview .................................................................................................................... 77Pr<strong>in</strong>ter functions (<strong>all</strong> models)...................................................................................................78Eng<strong>in</strong>e control system (eng<strong>in</strong>e control unit and power-supply assembly)........................78Image-formation system....................................................................................................83Pr<strong>in</strong>t cartridge....................................................................................................................84Pr<strong>in</strong>ter paper-feed system.................................................................................................84Jam detection <strong>in</strong> the pr<strong>in</strong>ter ..............................................................................................85<strong>HP</strong> <strong>LaserJet</strong> <strong>3015</strong> <strong>all</strong>-<strong>in</strong>-<strong>one</strong> unique comp<strong>one</strong>nts....................................................................87Basic operation..................................................................................................................87<strong>HP</strong> <strong>LaserJet</strong> <strong>3020</strong> and <strong>3030</strong> <strong>all</strong>-<strong>in</strong>-<strong>one</strong> unique comp<strong>one</strong>nts....................................................93Scanner and ADF functions and operation ......................................................................93Fax functions and operation (<strong>HP</strong> <strong>LaserJet</strong> <strong>3015</strong> and <strong>3030</strong> only) ...........................................96PSTN operation ................................................................................................................96The fax subsystem ...........................................................................................................96Formatter <strong>in</strong> the fax subsystem ........................................................................................96LIU <strong>in</strong> the fax subsystem ..................................................................................................96Fax page storage <strong>in</strong> flash memory ...................................................................................99ENWW 69
Basic functions (<strong>all</strong> models)This chapter presents a functional overview of the <strong>HP</strong> <strong>LaserJet</strong> <strong>3015</strong>, <strong>3020</strong>, and <strong>3030</strong> <strong>all</strong>-<strong>in</strong><strong>one</strong>products. The follow<strong>in</strong>g systems are discussed:● pr<strong>in</strong>ter functions and operation– eng<strong>in</strong>e controller unit (ECU) system/power system– laser/scanner system– image-formation system– paper-feed system (pr<strong>in</strong>ter) and document-feed system (document scanner)● formatter functions● scanner and ADF functions and operation● fax functions and operation (<strong>HP</strong> <strong>LaserJet</strong> <strong>3015</strong> and <strong>3030</strong> only)The full product consists of the follow<strong>in</strong>g comp<strong>one</strong>nts:● the scanner and ADF● the <strong>HP</strong> <strong>LaserJet</strong> <strong>3015</strong> uses a fixed contact image scanner (CIS)● the <strong>HP</strong> <strong>LaserJet</strong> <strong>3020</strong> and <strong>3030</strong> use a flatbed charged-coupled device (CCD)● the pr<strong>in</strong>ter● the formatter● the l<strong>in</strong>e <strong>in</strong>terface unit (LIU) (<strong>HP</strong> <strong>LaserJet</strong> <strong>3015</strong> and <strong>3030</strong> only)Each of these systems br<strong>in</strong>gs its own characteristic functionality to the product: scann<strong>in</strong>g,pr<strong>in</strong>t<strong>in</strong>g, and telecommunications (<strong>HP</strong> <strong>LaserJet</strong> <strong>3015</strong> and <strong>3030</strong> only), respectively. Thesesystems <strong>in</strong>teract to provide copy<strong>in</strong>g and fax<strong>in</strong>g capability (only the <strong>HP</strong> <strong>LaserJet</strong> <strong>3015</strong> and <strong>3030</strong>have fax<strong>in</strong>g capability).● The scanner and pr<strong>in</strong>ter work together to make copies.● The scanner and LIU work together to send faxes (<strong>HP</strong> <strong>LaserJet</strong> <strong>3015</strong> and <strong>3030</strong> only).● The LIU and pr<strong>in</strong>ter work together to receive faxes (<strong>HP</strong> <strong>LaserJet</strong> <strong>3015</strong> and <strong>3030</strong> only).The ECU controls the operation sequences of the pr<strong>in</strong>ter. The formatter controls the operationsequences of the LIU (<strong>HP</strong> <strong>LaserJet</strong> <strong>3015</strong> and <strong>3030</strong> only) and document scanner.Figure 4-1.Product configuration70 Chapter 4 Operational overview ENWW
Basic sequence of operationThe microprocessor (CPU) on the ECU controls the operation sequence of the pr<strong>in</strong>ter. Thefollow<strong>in</strong>g events take place dur<strong>in</strong>g normal pr<strong>in</strong>ter operation:Table 4-1. <strong>HP</strong> <strong>LaserJet</strong> <strong>3015</strong> basic sequence of operationPeriod Purpose RemarksWAIT. After the product is turnedon until READY appears on thecontrol-panel display.READY. From the end of theWAIT period until the user<strong>in</strong>itiates action or a fax isreceived.CALIBRATION. From the timethe copy, scan, or fax button ispressed until the STAGE period.STAGE. From the end of theCALIBRATION period until theSCAN period.SCAN. From the end of the briefpause dur<strong>in</strong>g the STAGE perioduntil the EJECT or follow<strong>in</strong>gpageSTAGE period.EJECT. From the end of theSCAN period until the orig<strong>in</strong>aldocument page is completelyejected from the scanner.To perform the firmware<strong>in</strong>itialization.To keep the product ready topr<strong>in</strong>t, copy, scan, or fax.To compensate for variables <strong>in</strong>the scann<strong>in</strong>g system.To position the lead<strong>in</strong>g edge ofthe orig<strong>in</strong>al document at thescann<strong>in</strong>g position.To scan <strong>one</strong> page of the orig<strong>in</strong>aldocument.To clear the last page of theorig<strong>in</strong>al document from thescanner.Tests RAM and establishes andcommunication with the controlpanel.This occurs before media movespast the scanner.The page feeds partway <strong>in</strong>to thescanner, and then briefly stops.Another STAGE period follows ifanother page of the orig<strong>in</strong>aldocument is present <strong>in</strong> the ADF.Otherwise, the EJECT periodbeg<strong>in</strong>s.The product returns to theREADY period at the end of theEJECT period.Table 4-2. <strong>HP</strong> <strong>LaserJet</strong> <strong>3020</strong> and <strong>3030</strong> basic sequence of operationPeriod Purpose RemarksWAIT. After the product is turnedon until the message ScannerBulb warm<strong>in</strong>g up appears onthe control-panel display.AMBIENT LIGHT DETECT.From the end of the WAIT perioduntil the scanner bulb is turnedon.To perform the firmware<strong>in</strong>itialization.To determ<strong>in</strong>e the level ofambient light <strong>in</strong> the environment.Tests RAM and establishescommunication with the controlpanel.The scanner makes a shortmove toward the ADF. Ifambient light is too bright, thescanner moves away from theADF until it is under the bezel (<strong>in</strong>shadow). At the end of thisperiod, the scanner bulb isturned on.ENWW Basic sequence of operation 71
Table 4-2. <strong>HP</strong> <strong>LaserJet</strong> <strong>3020</strong> and <strong>3030</strong> basic sequence of operation (cont<strong>in</strong>ued)Period Purpose RemarksINITIAL WARMUP. From theend of the AMBIENT LIGHTDETECT period until thescanner beg<strong>in</strong>s mov<strong>in</strong>g.HOME FIND. From the end ofINITIAL WARMUP until theReady message appears on thecontrol-panel display.READY. From the end of HOMEFIND until the STANDBY period.STANDBY. Occurs 10 m<strong>in</strong>utesafter the start of the READYperiod, or 10 m<strong>in</strong>utes after thelast scanner usage (copy/scan/fax).POWERSAVE. Occurs am<strong>in</strong>imum of 2 hours and amaximum of 12 hours (userconfigurable) after the start ofthe READY period, or after thelast scanner usage.CALIBRATION. From the timethe copy/scan/fax button ispressed until the STAGE period.STAGE. From the end ofCALIBRATION until the SCANperiod.To warm up the scanner bulb.To position the scanner at thehome position under the bezel atthe document-orig<strong>in</strong> end of theflatbed, and to perform the f<strong>in</strong><strong>all</strong>amp warmup checks.To keep the product ready topr<strong>in</strong>t, scan, copy, or fax with noscanner warmup delay.To reduce power consumptionand <strong>in</strong>crease scanner bulb life.To reduce power consumptionand <strong>in</strong>crease scanner-bulb lifebeyond what can be achievedwith STANDBY.To compensate for variability <strong>in</strong>the scann<strong>in</strong>g system.For an ADF scan: to position thescanner under the ADFscann<strong>in</strong>g w<strong>in</strong>dow, and then toposition the orig<strong>in</strong>al document'slead<strong>in</strong>g edge at the scann<strong>in</strong>gposition.For a flatbed scan: to positionthe scanner at the documentorig<strong>in</strong>position before scann<strong>in</strong>gthe orig<strong>in</strong>al.The length of this period variesdepend<strong>in</strong>g on product age andenvironmental conditions.However, this period will timeout(end) if the scanner bulb doesnot warm up with<strong>in</strong> 2 m<strong>in</strong>utes,and an error message appearson the control panel.The scanner performs severalback-and-forth movementsdur<strong>in</strong>g this period. The scannerf<strong>in</strong>ds its home position byscann<strong>in</strong>g, not by us<strong>in</strong>g any sortof sensor.The scanner rema<strong>in</strong>s <strong>in</strong> theREADY state for 10 m<strong>in</strong>utesfollow<strong>in</strong>g HOME FIND orfollow<strong>in</strong>g the last scanner usage.The scanner performs a HOMEFIND before go<strong>in</strong>g <strong>in</strong>to standby.A workday model<strong>in</strong>g algorithmgoverns the actual powersavebehavior.Calibration is performed bymov<strong>in</strong>g the scanner back-andforthseveral times near thehome position. If the previousperiod was STANDBY orPOWERSAVE, a short delayoccurs. The message ScannerBulb warm<strong>in</strong>g up appears onthe control-panel display dur<strong>in</strong>gthis delay.For an ADF scan, the page feedspartway <strong>in</strong>to the scanner, thenstops briefly.For a flatbed scan, the STAGEperiod is built-<strong>in</strong> to the SCANperiod, so STAGE is not visibleextern<strong>all</strong>y.72 Chapter 4 Operational overview ENWW
Table 4-2. <strong>HP</strong> <strong>LaserJet</strong> <strong>3020</strong> and <strong>3030</strong> basic sequence of operation (cont<strong>in</strong>ued)Period Purpose RemarksSCAN.For an ADF scan: From the endof the brief pause that follows theSTAGE period until the EJECTor follow<strong>in</strong>g-page STAGEperiod.For a flatbed scan: From the endof CALIBRATION until theREHOME period.EJECT. (ADF only) From theend of the SCAN period until theorig<strong>in</strong>al document page iscompletely ejected from thescanner.REHOME. From the end of theEJECT period (ADF) or theSCAN period (flatbed) until theReady message appears on thecontrol-panel display.To scan <strong>one</strong> page of the orig<strong>in</strong>aldocument.To clear the last page of theorig<strong>in</strong>al document from thescanner.To return the scanner to thehome position.For an ADF scan: anotherSTAGE period follows thisperiod if another page of theorig<strong>in</strong>al document is present <strong>in</strong>the ADF. Otherwise, the EJECTperiod follows.For a flatbed scan: TheREHOME period follows thisperiod.A short back-and-forth sequenceoccurs as the scanner reachesthe home position before theReady message appears on thecontrol-panel display.Table 4-3. <strong>HP</strong> <strong>LaserJet</strong> <strong>3015</strong>, <strong>3020</strong> and <strong>3030</strong> pr<strong>in</strong>ter (product base) basic sequence ofoperationPeriod Purpose RemarksWAIT After the product is turnedon until the end of the <strong>in</strong>itialrotation of the ma<strong>in</strong> motor.STBY (Standby) From the end ofthe WAIT period or the LSTRperiod until the pickup commandis sent from the formatter. Or,from the end of the LSTR perioduntil the product is turned off.INTR (Initial Rotation Period)After the pickup command hasbeen sent from the formatteruntil the media reaches the topof-pagesensor (PS801).PRINT (Pr<strong>in</strong>t) From the end ofthe <strong>in</strong>itial rotation until theprimary voltage goes OFF.LSTR (Last Rotation Period)After the primary voltage goesOFF until the ma<strong>in</strong> motor stopsrotat<strong>in</strong>g.To clear the drum surface ofpotential and to clean theprimary charg<strong>in</strong>g roller.To pause until the product isready to pr<strong>in</strong>t.To stabilize the photosensitivedrum sensitivity <strong>in</strong> preparationfor pr<strong>in</strong>t<strong>in</strong>g. Also to clean theprimary charg<strong>in</strong>g roller.To form images on thephotosensitive drum based onthe VIDEO signals (/VDO, VDO)sent from the formatter and totransfer the t<strong>one</strong>r image onto themedia.To deliver the last page. Also toclean the primary charg<strong>in</strong>g roller.Detects whether or not thecartridge is <strong>in</strong>st<strong>all</strong>ed.When the pickup command issent from the video controller,the pr<strong>in</strong>ter enters the INTRperiod immediately after the endof the LSTR period.ENWW Basic sequence of operation 73
234567891011121314151617181920Power Switch ON(Unit:Seconds)SEQUENCEWAIT STBYINTR PRINT LSTRSTBYAbout 0.25Fix<strong>in</strong>g Heater (H701)100°C Control About 0.1 Pr<strong>in</strong>t Temperature ControlBetween-sheets Temperature ControlAbout 1.1 About 1.1Pr<strong>in</strong>t CommandAbout 1.1Scanner MotorAbout 0.45About 0.1Scanner ReadyMax. 122Max. 3.0Ma<strong>in</strong> Motor (M1)0.04Pick-up Solenoid (SL1)About 0.2 About 0.2Top of Paper Sensor (PS801)About 3.0About 0.7 About 0.7Paper Delivery Sensor (PS803)About 1.5About 1.5About 0.99About 0.6About 1.5Primary Charg<strong>in</strong>g Bias (AC)Primary Charg<strong>in</strong>g Bias (DC)0.65Develop<strong>in</strong>g Bias (AC)About 0.16 About 0.17About 0.17Develop<strong>in</strong>g Bias (DC)About 0.16About 0.5 About 0.47About 0.4 About 0.4 About 2.2Transfer Charg<strong>in</strong>g BiasAbout Negative BiasMax. 1.50.2 Forced emissionAbout 0.47Laser DiodePr<strong>in</strong>t BiasBetween-sheets Bias About 0.20.2LASER BEAM signal (BD)1.7 1.8 1.0Max. 1.5About 0.08About 0.08About 0.02About 0.021Figure 4-2.<strong>HP</strong> <strong>LaserJet</strong> <strong>3015</strong>, <strong>3020</strong>, and <strong>3030</strong> pr<strong>in</strong>ter (product base) tim<strong>in</strong>g diagram74 Chapter 4 Operational overview ENWW
Formatter systemThe formatter coord<strong>in</strong>ates the major systems. It is responsible for the follow<strong>in</strong>g tasks oractions:● formatt<strong>in</strong>g and controll<strong>in</strong>g copies● receiv<strong>in</strong>g and process<strong>in</strong>g pr<strong>in</strong>t data from the pr<strong>in</strong>ter <strong>in</strong>terface● monitor<strong>in</strong>g the control panel and relay<strong>in</strong>g pr<strong>in</strong>ter-status <strong>in</strong>formation● develop<strong>in</strong>g and coord<strong>in</strong>at<strong>in</strong>g data placement and tim<strong>in</strong>g with the pr<strong>in</strong>t eng<strong>in</strong>e● communicat<strong>in</strong>g with the host computer through the bidirectional <strong>in</strong>terface● communicat<strong>in</strong>g fax data to and from the LIU (<strong>HP</strong> <strong>LaserJet</strong> <strong>3015</strong> and <strong>3030</strong> only)The formatter receives pr<strong>in</strong>t data from the bidirectional enhanced capabilities port (ECP) mode<strong>in</strong>terface or universal serial bus (USB) <strong>in</strong>terface and converts it <strong>in</strong>to a dot image. The ECUsynchronizes the image-formation system with the paper-feed system and signals theformatter to send the pr<strong>in</strong>t-image data. The formatter sends the pr<strong>in</strong>t-image data (dots) <strong>in</strong> theform of a video signal, and the pr<strong>in</strong>t<strong>in</strong>g process beg<strong>in</strong>s.Central process<strong>in</strong>g unitThe formatter <strong>in</strong>corporates an embedded Coldfire V4 processor operat<strong>in</strong>g at 133 MHz.L<strong>in</strong>e <strong>in</strong>terface unit (<strong>HP</strong> <strong>LaserJet</strong> <strong>3015</strong> and <strong>3030</strong> only)The l<strong>in</strong>e <strong>in</strong>terface unit (LIU) provides the required safety isolation, signal coupl<strong>in</strong>g, andimpedance match<strong>in</strong>g between the teleph<strong>one</strong> l<strong>in</strong>e and the modem chipset that is located on theformatter.Standard boot processWhen the product is unplugged or the power is off, the firmware code is stored on theformatter <strong>in</strong> two blocks. The first block of code is an executable boot block (about 64 K ofcode). The second block of code is a compressed version of the product control code.When the product is turned on, the boot block decompresses the product control code andstores it <strong>in</strong> RAM. Then the product performs a full startup with the control code runn<strong>in</strong>g fromRAM.Product startup messagesThe LED display conta<strong>in</strong>s different messages depend<strong>in</strong>g upon the progress of the bootprocess:ENWW Formatter system 75
Table 4-4. Product startup messagesMessage Cause Solution-blank-(Blank display for many secondsafter power-on.) Boot-blockfailure.Use the power switch to turn thepower to the product off. Check<strong>all</strong> wire-harness connectors andFFCs to make sure that they arefirmly connected.Replace the formatter. SeeFormatter and l<strong>in</strong>e <strong>in</strong>terface unit(LIU).Contact <strong>Service</strong> Control-code failure. Replace the formatter. SeeFormatter and l<strong>in</strong>e <strong>in</strong>terface unit(LIU).Hewlett Packard
NoteWhen us<strong>in</strong>g EconoMode image quality (both clarity and contrast) will be considerablydecreased because less t<strong>one</strong>r is applied to the page.MEt<strong>HP</strong> Memory Enhancement technology (MEt) effectively doubles the standard memory througha variety of font- and data-compression methods.Enhanced I/OThe enhanced I/O (EIO) feature <strong>all</strong>ows product memory to be used for stor<strong>in</strong>g data receivedfrom the host computer. When EIO is enabled, you can send more data to the product <strong>in</strong>shorter amounts of time, so that you can return to the software program more quickly. The EIOfeature has the follow<strong>in</strong>g options:●●Auto —the product uses EIO memory <strong>all</strong>ocation to <strong>in</strong>crease the speed of data transferfrom the host computer to the product, if necessary. The default sett<strong>in</strong>g is Auto.Off —the m<strong>in</strong>imum amount of product memory is used to store data that is sent from thehost computer.● Page Protect—the formatter creates the entire page image <strong>in</strong> page-buffer memory beforephysic<strong>all</strong>y mov<strong>in</strong>g the media through the pr<strong>in</strong>ter. This process ensures that the entire pagewill be pr<strong>in</strong>ted.Page complexity (rul<strong>in</strong>g l<strong>in</strong>es, complex graphics, or dense text) can exceed the pr<strong>in</strong>ter’s abilityto create the page image fast enough to keep pace with the image-formation process. If PageProtect is disabled and a page is too complex, the page might pr<strong>in</strong>t <strong>in</strong> sections (for example,the top half on <strong>one</strong> page and the bottom half on the next page). Some pr<strong>in</strong>t-data loss is likely<strong>in</strong> these <strong>in</strong>stances, and an error message will appear on the control-panel display.PJL overviewPr<strong>in</strong>ter job language (PJL) is an <strong>in</strong>tegral part of configuration, <strong>in</strong> addition to the standardpr<strong>in</strong>ter command language (PCL). With standard ECP cabl<strong>in</strong>g, the product can use PJL toperform the follow<strong>in</strong>g functions:●●Two-way communication with the host computer through a bidirectional par<strong>all</strong>elconnection. The product can communicate <strong>in</strong>formation to the host (such as the controlpanelstatus).Isolation of pr<strong>in</strong>t environment sett<strong>in</strong>gs from <strong>one</strong> pr<strong>in</strong>t job to the next. For example, if apr<strong>in</strong>t job is sent to the product <strong>in</strong> landscape mode, the subsequent pr<strong>in</strong>t jobs pr<strong>in</strong>t <strong>in</strong>landscape only if they are formatted for landscape pr<strong>in</strong>t<strong>in</strong>g.ENWW Formatter system 77
Pr<strong>in</strong>ter functions (<strong>all</strong> models)Pr<strong>in</strong>ter functions are divided <strong>in</strong>to five groups:● eng<strong>in</strong>e control● formatter● image formation● laser/scanner● pickup and feedThe follow<strong>in</strong>g figure is a block diagram of the pr<strong>in</strong>ter:To external device(host computer, etc.)Output trayLASER/SCANNER UNITScann<strong>in</strong>g mirrorFORMATTERLaserdiodeScannermotorBDsensorENGINE CONTROL SYSTEMEng<strong>in</strong>e power assemblyECUFuserunitIMAGE-FORMATIONSYSTEMClean<strong>in</strong>gunitPrimarycharg<strong>in</strong>grollerPhotosensitivedrumTransfercharg<strong>in</strong>grollerDevelop<strong>in</strong>gunitPickupcontrolunitPriority <strong>in</strong>put trayMa<strong>in</strong> <strong>in</strong>put trayPAPER PICKUP/FEEDSYSTEMFigure 4-3.Pr<strong>in</strong>ter functional block diagramEng<strong>in</strong>e control system (eng<strong>in</strong>e control unit and power-supplyassembly)The eng<strong>in</strong>e control system coord<strong>in</strong>ates <strong>all</strong> pr<strong>in</strong>t eng<strong>in</strong>e activities. The eng<strong>in</strong>e control system<strong>in</strong>cludes both the eng<strong>in</strong>e control unit (ECU) pr<strong>in</strong>ted circuit assembly (PCA) and the powersupplyassembly PCA.78 Chapter 4 Operational overview ENWW
NoteIn other <strong>HP</strong> <strong>LaserJet</strong> products, the ECU and power functions are comb<strong>in</strong>ed onto <strong>one</strong> PCAknown as the controller PCA or the DC controller PCA. In the <strong>HP</strong> <strong>LaserJet</strong> <strong>3015</strong>, <strong>3020</strong>, and<strong>3030</strong>, the control functions are primarily relegated to the ECU PCA and the power functions tothe power-supply assembly PCA.The ECU controls the follow<strong>in</strong>g systems and functions:● Pr<strong>in</strong>ter eng<strong>in</strong>e control● paper-motion monitor<strong>in</strong>g and control (pr<strong>in</strong>t<strong>in</strong>g)● motor● Pr<strong>in</strong>ter laser/scanner unitThe power-supply assembly provides the follow<strong>in</strong>g functions to the power system:● ac power distribution● dc power distribution● overcurrent/overvoltage protection● high-voltage power distributionPr<strong>in</strong>ter eng<strong>in</strong>e control systemPaper motion monitor<strong>in</strong>g and control. The ECU controls paper motion <strong>in</strong> the pr<strong>in</strong>ter bycont<strong>in</strong>uously monitor<strong>in</strong>g the two paper sensors and coord<strong>in</strong>at<strong>in</strong>g the tim<strong>in</strong>g with the other pr<strong>in</strong>tprocesses.Motor. The ECU controls the motor. The motor drives <strong>all</strong> of the pr<strong>in</strong>ter paper movement.ENWW Pr<strong>in</strong>ter functions (<strong>all</strong> models) 79
Pr<strong>in</strong>ter laser/scanner unitThe ECU sends signals to the laser/scanner assembly to modulate the laser-diode on and offmodes and to drive the laser/scanner motor.VDO/VDO/BDICNT0CNT1Laser driver PCBBDsensorCyl<strong>in</strong>drical lens/BD/ACC/DECPhotosensitivedrumFormatterEng<strong>in</strong>econtrollerPCBFour-sidedmirrorScanner motorFocus<strong>in</strong>g lensFigure 4-4.Laser/scanner operationPower system on the power-supply assemblyThe ac, dc, and high-voltage power supply circuits are <strong>all</strong> provided by the power-supplyassembly.Ac power distributionThe ac power circuitry supplies ac voltage whenever the power cord is connected to the acpower source and the power switch is on. The ac voltage is distributed to the dc power supplycircuitry and to the ac driver circuitry, which controls ac voltage to the fuser assembly heat<strong>in</strong>gelement.Dc power distributionThe dc power distribution circuitry, located on the eng<strong>in</strong>e power assembly, distributes +3.3Vdc, +5 Vdc, and +24 Vdc as follows:Table 4-5. Dc power distribution+3.3 Vdc ECU, sensors, formatter+5 Vdc Par<strong>all</strong>el <strong>in</strong>terface on the 1015 formatter80 Chapter 4 Operational overview ENWW
Table 4-5. Dc power distribution (cont<strong>in</strong>ued)+24 Vdc Ma<strong>in</strong> motor, laser/scanner motor, solenoid, highvoltagepower supply, fuser, safety circuit, doorswitchOvercurrent/overvoltageThere are two overvoltage devices <strong>in</strong> this product:● Fuse F101 provides overcurrent protection for the fus<strong>in</strong>g system circuitry.● Fuse F102 (110 V products only) provides overcurrent protection to the pr<strong>in</strong>ter dc powersupply circuitry.You can check or replace the fuses by remov<strong>in</strong>g the left cover.NoteIf either of these fuses fail, replace the eng<strong>in</strong>e power supply. See Power supply.High-voltage power distributionThe high-voltage power supply applies an overlap of dc and ac voltage to the primary charg<strong>in</strong>groller and to the develop<strong>in</strong>g roller. This circuit also applies a positive or negative dc voltage tothe transfer roller accord<strong>in</strong>g to the <strong>in</strong>structions from the eng<strong>in</strong>e control unit.ENWW Pr<strong>in</strong>ter functions (<strong>all</strong> models) 81
This circuit also controls the image density by chang<strong>in</strong>g the primary ac voltage and thedevelop<strong>in</strong>g ac bias accord<strong>in</strong>g to the pr<strong>in</strong>t density sett<strong>in</strong>g (which is set by us<strong>in</strong>g the <strong>HP</strong>Toolbox). High voltage is disabled when the pr<strong>in</strong>t-cartridge door is open. The follow<strong>in</strong>g Figure4-5. High-voltage power supply circuit figure shows this process.Eng<strong>in</strong>e controller PCBPower supply PCBIC902CPUHigh-voltage power supply circuitPrimary charg<strong>in</strong>g bias circuitPRPWMJ902-10 J201-14PRACJ902-9 J201-15IC301IC301IC301DC voltagegenerationcircuitComb<strong>in</strong>edAC voltagegenerationcircuitPR1J304J303Primarycharg<strong>in</strong>g rollerPhotosensitivedrumDevelop<strong>in</strong>g bias circuitDVACJ902-8 J201-16IC301rollerDC voltagegenerationcircuitComb<strong>in</strong>edAC voltagegenerationcircuitDEVJ301Develop<strong>in</strong>gcyl<strong>in</strong>derTRPDCJ902-6 J201-18Transfer charg<strong>in</strong>g bias circuitPositive voltagegeneration circuitTRSJ302Transfercharg<strong>in</strong>gTRNDCJ902-7 J201-17TRCRNTJ902-2 J201-22IC501Negative voltagegeneration circuitFigure 4-5.High-voltage power supply circuit82 Chapter 4 Operational overview ENWW
Image-formation systemLaser pr<strong>in</strong>t<strong>in</strong>g requires the <strong>in</strong>teraction of several different technologies <strong>in</strong>clud<strong>in</strong>g electronics,optics, and electrophotographics to provide a pr<strong>in</strong>ted page. Each process functions<strong>in</strong>dependently and must be coord<strong>in</strong>ated with the other pr<strong>in</strong>ter processes. Image formationconsists of seven processes:Writ<strong>in</strong>g StageFlow of paperDirection of drum rotation2. Scann<strong>in</strong>g exposure1. Primary charg<strong>in</strong>g3. Develop<strong>in</strong>g stageDrum clean<strong>in</strong>gstage7. Drum clean<strong>in</strong>gPaper deliveryFus<strong>in</strong>g stage5. Separation 4. TransferPickup6. Fus<strong>in</strong>gTransfer stageFigure 4-6.Image-formation block diagramThe seven image-formation processes1. Condition<strong>in</strong>g stage (primary charg<strong>in</strong>g)—This process applies a uniform negativecharge to the surface of the drum with the primary charg<strong>in</strong>g roller, which is located <strong>in</strong> thepr<strong>in</strong>t cartridge. The primary charg<strong>in</strong>g roller is coated with conductive rubber. An ac bias isapplied to the roller to erase any residual charges from any previous image. In addition,the primary charg<strong>in</strong>g roller applies a negative dc bias to create a uniform negativepotential on the drum surface. The pr<strong>in</strong>t density sett<strong>in</strong>g modifies the dc voltage.2. Writ<strong>in</strong>g stage (scann<strong>in</strong>g exposure)—Dur<strong>in</strong>g this process, a modulated laser diodeprojects the beam onto a rotat<strong>in</strong>g scann<strong>in</strong>g mirror. As the mirror rotates, the beam reflectsoff the mirror, first through a set of focus<strong>in</strong>g lenses, then off a mirror, and f<strong>in</strong><strong>all</strong>y through aslot <strong>in</strong> the top of the pr<strong>in</strong>t cartridge, and onto the photosensitive drum. The beam sweepsthe drum from left to right, discharg<strong>in</strong>g the negative potential wherever the beam strikesthe surface. This creates a latent electrostatic image, which later is developed <strong>in</strong>to avisible image. Because the beam sweeps the entire length of the drum while the drumrotates, the entire surface area of the drum can be covered. At the end of each sweep, thebeam strikes the beam-detect lens, generat<strong>in</strong>g the beam-detect signal (BD signal). The BDsignal is sent to the ECU where it is converted to an electrical signal used to synchronizethe output of the next scan l<strong>in</strong>e of data.3. Develop<strong>in</strong>g stage—Dur<strong>in</strong>g this process, the latent electrostatic image is present on thedrum. The t<strong>one</strong>r particles obta<strong>in</strong> a negative surface charge by rubb<strong>in</strong>g aga<strong>in</strong>st thedevelop<strong>in</strong>g cyl<strong>in</strong>der, which is connected to a negative dc supply. The negatively chargedt<strong>one</strong>r is attracted to the discharged (exposed, grounded) areas of the drum, and it isrepelled from the negatively charged (unexposed) areas.4. Transfer stage—Dur<strong>in</strong>g this process, the t<strong>one</strong>r image on the drum surface is transferredto the media. The transfer roller applies a positive charge to the back of the media, whichattracts the negatively charged t<strong>one</strong>r on the drum surface to the media. After separation,the drum is cleaned and conditi<strong>one</strong>d for the next image.5. Separation stage—Dur<strong>in</strong>g this process, the media separates from the drum. To stabilizethe feed system and prevent t<strong>one</strong>r dropouts on the pr<strong>in</strong>ted image at low temperature andhumidity, the static elim<strong>in</strong>ator reduces the charge on the back of the media.ENWW Pr<strong>in</strong>ter functions (<strong>all</strong> models) 83
6. Fus<strong>in</strong>g stage—Dur<strong>in</strong>g this process, the heat and pressure fuse the t<strong>one</strong>r <strong>in</strong>to the mediato produce a permanent image. The media passes between a heated fus<strong>in</strong>g element and asoft pressure roller, which melt the t<strong>one</strong>r and press it <strong>in</strong>to the media.7. Drum-clean<strong>in</strong>g stage—Dur<strong>in</strong>g this process, the clean<strong>in</strong>g blade is <strong>in</strong> contact with thesurface of the drum at <strong>all</strong> times. As the drum rotates dur<strong>in</strong>g pr<strong>in</strong>t<strong>in</strong>g, the clean<strong>in</strong>g bladewipes excess t<strong>one</strong>r off the drum and stores it <strong>in</strong> the waste t<strong>one</strong>r receptacle.Pr<strong>in</strong>t cartridgeAs the focal po<strong>in</strong>t of the image-formation system, the pr<strong>in</strong>t cartridge conta<strong>in</strong>s t<strong>one</strong>r and housesthe clean<strong>in</strong>g, condition<strong>in</strong>g, and develop<strong>in</strong>g stages of the process. The pr<strong>in</strong>t cartridge conta<strong>in</strong>sthe photosensitive drum, primary charg<strong>in</strong>g roller, develop<strong>in</strong>g station, t<strong>one</strong>r cavity, and clean<strong>in</strong>gstation. By <strong>in</strong>clud<strong>in</strong>g these comp<strong>one</strong>nts (which wear, degrade, or are consumed) <strong>in</strong> thereplaceable pr<strong>in</strong>t cartridge, the need for many service c<strong>all</strong>s is elim<strong>in</strong>ated. The specialphotosensitive properties of the drum form an image on the drum surface and then transfer theimage to media.CAUTIONThe pr<strong>in</strong>t cartridge does not <strong>in</strong>clude a light-block<strong>in</strong>g shutter. Do not expose the drum to light,which can permanently damage the drum. Protect the pr<strong>in</strong>t cartridge whenever you remove itby cover<strong>in</strong>g it with paper.Pr<strong>in</strong>ter paper-feed systemThe ma<strong>in</strong> <strong>in</strong>put tray and the priority <strong>in</strong>put tray merge <strong>in</strong>to <strong>one</strong> ma<strong>in</strong> <strong>in</strong>put area. The pr<strong>in</strong>ter usesthe top-of-page sensor (PS801) to senses the paper as it enters the paper feed path. It doesnot sense the presence of media before beg<strong>in</strong>n<strong>in</strong>g the pr<strong>in</strong>t cycle. The follow<strong>in</strong>g steps occurwhen the product receives a pr<strong>in</strong>t job:Step 1Step 2Step 3Step 4Step 5The ECU activates the motor (M1). Paper motionbeg<strong>in</strong>s when the ECU energizes the pick-upsolenoid (SL1).The paper-pickup roller rotates once. The paperliftplate pushes the media aga<strong>in</strong>st the pickuproller.The friction of the pickup roller grabs the top sheetand advances it to the feed-assembly driverollers. To ensure that only <strong>one</strong> sheet is fed, ama<strong>in</strong> separation pad holds the rema<strong>in</strong>der of thestack <strong>in</strong> place.The feed-assembly drive rollers advance themedia to the top-of-page sensor (PS801). Thissensor <strong>in</strong>forms the ECU of the exact location ofthe lead<strong>in</strong>g edge of media, so that the image be<strong>in</strong>gwritten on the photosensitive drum can beprecisely positi<strong>one</strong>d on the page.The feed assembly drive rollers then advance themedia to the transfer area where the t<strong>one</strong>r imageon the photosensitive drum is transferred to themedia.84 Chapter 4 Operational overview ENWW
Step 6Step 7After the image is transferred, the media entersthe fuser assembly where heat from the fuser andpressure from the pressure roller permanentlybond the t<strong>one</strong>r image to media. The paperdeliverysensor (PS803) determ<strong>in</strong>es that themedia has successfully moved out of the fus<strong>in</strong>garea.The fuser-assembly exit rollers deliver media tothe output b<strong>in</strong> face-down.Figure 4-7.Pr<strong>in</strong>ter paper pathJam detection <strong>in</strong> the pr<strong>in</strong>terThe top-of-page sensor (PS801) and the paper-delivery sensor (PS803) detect media mov<strong>in</strong>gthrough the pr<strong>in</strong>ter. If a jam is detected, the ECU immediately stops the pr<strong>in</strong>t<strong>in</strong>g process andthe Attention (Cancel) light illum<strong>in</strong>ates on the control panel.ENWW Pr<strong>in</strong>ter functions (<strong>all</strong> models) 85
Conditions of jam detection● Pickup delay jam—Paper does not reach the top-of-page sensor (PS801) with<strong>in</strong> 1.4seconds after the pickup solenoid (SL1) has been turned on, a second pickup operation isattempted, and paper aga<strong>in</strong> does not reach the top-of-page sensor with<strong>in</strong> 1.4 seconds.●●●●●●Pickup stationary jam—The top-of-page sensor (PS801) does not detect the trail<strong>in</strong>gedge of media with<strong>in</strong> 4.6 seconds of detect<strong>in</strong>g the lead<strong>in</strong>g edge.Delivery-delay jam—The paper-delivery sensor (PS803) does not detect the lead<strong>in</strong>gedge of media with<strong>in</strong> 2.1 seconds after the top-of-page sensor (PS801) detects thelead<strong>in</strong>g edge.Wrapp<strong>in</strong>g jam—The paper-delivery sensor (PS803) does not detect the trail<strong>in</strong>g edge ofthe media with<strong>in</strong> 1.5 seconds after the top-of-page sensor (PS801) detects the lead<strong>in</strong>gedge and with<strong>in</strong> ten seconds after the paper-delivery sensor (PS803) detects the lead<strong>in</strong>gedge.Delivery-stationary jam—The paper-delivery sensor (PS803) does not detect the lead<strong>in</strong>gedge of media with<strong>in</strong> 2.2 seconds after the top-of-page sensor (PS801) detects the trail<strong>in</strong>gedge.Residual-paper jam—The top-of-page sensor (PS801) or the paper-delivery sensor(PS803) detects media <strong>in</strong> the <strong>in</strong>itial rotation period.Door-open jam—The top-of-page sensor (PS801) or the paper-delivery sensor (PS803)detects media while the pr<strong>in</strong>t cartridge door is open.86 Chapter 4 Operational overview ENWW
<strong>HP</strong> <strong>LaserJet</strong> <strong>3015</strong> <strong>all</strong>-<strong>in</strong>-<strong>one</strong> unique comp<strong>one</strong>ntsThis section presents an overview of the relationships between unique major comp<strong>one</strong>nts <strong>in</strong>the <strong>HP</strong> <strong>LaserJet</strong> <strong>3015</strong> <strong>all</strong>-<strong>in</strong>-<strong>one</strong>. This section describes the optical scann<strong>in</strong>g system and ADFpickup and feed system used <strong>in</strong> the <strong>HP</strong> <strong>3015</strong> product. It does not describe the imageformationsystem that is common to the <strong>HP</strong> <strong>LaserJet</strong> <strong>3015</strong>/<strong>3020</strong>/<strong>3030</strong> products. For<strong>in</strong>formation about image formation, see Image-formation system.Basic operationThe <strong>HP</strong> <strong>LaserJet</strong> <strong>3015</strong> <strong>all</strong>-<strong>in</strong>-<strong>one</strong> uses a pickup and feed system (document transportation)and an optical scann<strong>in</strong>g system. Figure 4-8. Basic operation block diagram shows therelationship of the two systems.Figure 4-8.Basic operation block diagramA document is placed <strong>in</strong>to the ADF tray. When the formatter sends a signal to the opticalscann<strong>in</strong>g system, the document is picked up and fed <strong>in</strong>to the optical system through a seriesof rollers and a separation pad (the separation pad prevents the pickup system from feed<strong>in</strong>gmultiple pages if more than <strong>one</strong> page is loaded <strong>in</strong> the ADF tray).ENWW <strong>HP</strong> <strong>LaserJet</strong> <strong>3015</strong> <strong>all</strong>-<strong>in</strong>-<strong>one</strong> unique comp<strong>one</strong>nts 87
As the document passes the contact image scanner, the scanner illum<strong>in</strong>ates the document.The optical scann<strong>in</strong>g system captures and amplifies the reflected light and converts it to adigital signal, and then sends the digital signal to the formatter for image-process<strong>in</strong>g.Figure 4-9.<strong>HP</strong> <strong>LaserJet</strong> <strong>3015</strong> optical and feed systems1 Optical scann<strong>in</strong>g system2 ADF pickup and feed systemADF pickup and feed systemThe ADF pickup and feed system uses a pickup roller, a feed roller, and a delivery roller totransport the document <strong>in</strong>to, through, and out of the optical scann<strong>in</strong>g system. The opticalscann<strong>in</strong>g system motor drives the rollers when the formatter signals the optical scann<strong>in</strong>gsystem that a job to pr<strong>in</strong>t or copy is present.There are two sensors along the ADF pickup and feed paper path. The document sensor(PS1201) detects the presence of a document <strong>in</strong> the ADF <strong>in</strong>put tray. The document-topsensor (PS 1202) detects the document <strong>in</strong> the ADF paper path. The formatter processes thesignals from the sensors and the product operates accord<strong>in</strong>gly.88 Chapter 4 Operational overview ENWW
When the contact image scanner motor rotates, it causes the pickup, feed, and delivery rollersto rotate. The ADF document pickup roller pushes a document <strong>in</strong>to the ADF paper path. Theseparation pad prevents multiple pages from enter<strong>in</strong>g the ADF paper path by creat<strong>in</strong>g frictionaga<strong>in</strong>st the document and the pickup roller. The document feed roller advances the documentpast the contact image sensor (CIS). The document delivery roller advances the documentout of the ADF paper path to the output area.Figure 4-10. <strong>HP</strong> <strong>LaserJet</strong> <strong>3015</strong> feed control (1 of 2)ENWW <strong>HP</strong> <strong>LaserJet</strong> <strong>3015</strong> <strong>all</strong>-<strong>in</strong>-<strong>one</strong> unique comp<strong>one</strong>nts 89
The contact image scanner motor drives the pickup roller, the feed roller, a <strong>one</strong>-way clutch,and the delivery roller. A gear differential causes the pickup roller to rotate at a slower speedthan the feed roller. The slower speed <strong>all</strong>ows for a consistent space between pages of amultiple-page document, which is necessary for correct document scann<strong>in</strong>g. The <strong>one</strong>-wayclutch varies the rotation speeds of the pickup roller and feed roller to prevent the rollers fromtear<strong>in</strong>g the document.Figure 4-11. <strong>HP</strong> <strong>LaserJet</strong> <strong>3015</strong> feed control (2 of 2)90 Chapter 4 Operational overview ENWW
Optical scann<strong>in</strong>g systemThe contact image sensor (CIS) is the major comp<strong>one</strong>nt of the optical scann<strong>in</strong>g system. TheCIS consists of three LEDs (red, green, and blue), a light guide, the scann<strong>in</strong>g glass, the rodlens array, and a sensor array. When the CIS scans a document, the CIS does not move.Instead, documents move past the CIS.Figure 4-12. <strong>HP</strong> <strong>LaserJet</strong> <strong>3015</strong> optical system (1 of 2)The formatter controls the CIS. To beg<strong>in</strong> scann<strong>in</strong>g, the formatter sends a signal to the CIS.The LEDs illum<strong>in</strong>ate and the light passes through the light guide and scann<strong>in</strong>g glass andstrikes the document. Light that the document reflects passes back through the scann<strong>in</strong>gglass and rod lens array <strong>in</strong>to the sensor array. The sensor array consists of 5,148photosensors (468 photosensors on each of 11 sensor driver circuits). The sensor arraycollects and amplifies the reflected light and converts it <strong>in</strong>to serial data <strong>in</strong> the driver circuits.The CIS sends the data to the formatter for image formation.ENWW <strong>HP</strong> <strong>LaserJet</strong> <strong>3015</strong> <strong>all</strong>-<strong>in</strong>-<strong>one</strong> unique comp<strong>one</strong>nts 91
Figure 4-13. <strong>HP</strong> <strong>LaserJet</strong> <strong>3015</strong> optical system (2 of 2)92 Chapter 4 Operational overview ENWW
<strong>HP</strong> <strong>LaserJet</strong> <strong>3020</strong> and <strong>3030</strong> <strong>all</strong>-<strong>in</strong>-<strong>one</strong> unique comp<strong>one</strong>ntsThis section presents an overview of the relationships between unique major comp<strong>one</strong>nts <strong>in</strong>the <strong>HP</strong> <strong>LaserJet</strong> <strong>3020</strong>/<strong>3030</strong> <strong>all</strong>-<strong>in</strong>-<strong>one</strong>. This section describes the optical scann<strong>in</strong>g system andADF pickup and feed system used <strong>in</strong> the <strong>HP</strong> <strong>3020</strong> and <strong>3030</strong> product. It does not describe theimage-formation system that is common to the <strong>HP</strong> <strong>LaserJet</strong> <strong>3015</strong>, <strong>3020</strong>, and <strong>3030</strong> products.For <strong>in</strong>formation about image formation, see Image-formation system.Scanner and ADF functions and operationThe follow<strong>in</strong>g sections describe how the document scanner and the automatic documentfeeder (ADF) function.Scanner functionsThe scanner uses a light source, a color-separation method, and a charge-coupled devicearray (CCD) to collect optical <strong>in</strong>formation about the document and transform that <strong>in</strong>to an imagefile. The scanner consists of these elements:● a lamp (cold-cathode fluorescent bulb)● five mirrors and a lens● a CCDFigure 4-14.<strong>HP</strong> <strong>LaserJet</strong> <strong>3020</strong> and <strong>3030</strong> optical systemThe scanner lamp illum<strong>in</strong>ates a sm<strong>all</strong> strip of the document (c<strong>all</strong>ed the raster l<strong>in</strong>e). The mirrorsdirect the light through the lens to the CCD. The CCD senses and records the light, creat<strong>in</strong>gan analog representation of the raster l<strong>in</strong>e. If the ADF is be<strong>in</strong>g used, the document thenadvances <strong>in</strong> the ADF to the next raster l<strong>in</strong>e. If the flatbed is be<strong>in</strong>g used, the scanner moduleadvances to the next raster l<strong>in</strong>e. This advanc<strong>in</strong>g and collection process cont<strong>in</strong>ues to the endof the sheet.The image data is collected <strong>in</strong> the motor controller board, where it is processed and sent to theformatter. The formatter then handles the image data, outputt<strong>in</strong>g it as a copy, send<strong>in</strong>g itthrough the LIU as a fax (<strong>in</strong> the LJ <strong>3030</strong>), or direct<strong>in</strong>g it to the computer as scanner output.ENWW <strong>HP</strong> <strong>LaserJet</strong> <strong>3020</strong> and <strong>3030</strong> <strong>all</strong>-<strong>in</strong>-<strong>one</strong> unique comp<strong>one</strong>nts 93
The image data collected is 600 pixels per <strong>in</strong>ch (ppi). Each pixel has 8 bits for each of thethree colors (256 gray scale levels for each color) or a total of 24 bits per pixel (24-bit color).Scanner operationAt startup and periodic<strong>all</strong>y at other times, the scanner assembly moves systematic<strong>all</strong>y tolocate its home position. It then calibrates to a white strip located under the glass at the rightend of the scan tub.If the product detects a document <strong>in</strong> the ADF when a copy or scan is <strong>in</strong>itiated (from thesoftware or the control panel), the scan module moves to the left side of the scan tub andstops. The image is acquired as the paper is fed through the ADF past the scanner module.If no document is detected <strong>in</strong> the ADF, or if the model does not have an ADF, the scan moduleacquires the image from the flatbed glass while slowly mov<strong>in</strong>g with<strong>in</strong> the scan tub.ADF operationStandby (paper-load<strong>in</strong>g) mode: In standby mode, the pickup roller is up and the stack-stopis down, prevent<strong>in</strong>g the user from <strong>in</strong>sert<strong>in</strong>g the orig<strong>in</strong>al document too far. When a document is<strong>in</strong>serted correctly, the paper-present sensor detects its presence.The standard operation of the ADF consists of the pick, feed, and lift steps.Pick: When it receives a copy or scan command, the ADF motor engages the gear tra<strong>in</strong> tolower the pickup-roller assembly and raise the stack-stop. The first roller, c<strong>all</strong>ed the pre-pickroller, moves the top few sheets forward <strong>in</strong>to the ADF. The next roller is the pickup roller. Thisroller contacts the ADF separation pad, which separates multiple pages <strong>in</strong>to s<strong>in</strong>gle sheets.Feed: The s<strong>in</strong>gle sheet cont<strong>in</strong>ues through the path. Along the way, the form sensor, which is aset distance from the ADF glass, detects the sheet. This alerts the scanner to start when thepage reaches the glass. The scanner acquires the image, <strong>one</strong> raster l<strong>in</strong>e at a time, until itdetects the end of the page. The page is then ejected. The pick and feed steps are repeatedas long as paper is detected <strong>in</strong> the ADF <strong>in</strong>put tray.Lift: When no more paper is detected <strong>in</strong> the ADF <strong>in</strong>put tray and the form sensor detects thetrail<strong>in</strong>g edge of the last page, the last sheet is ejected and the motor turns <strong>in</strong> a sequence thatlifts the pick roller assembly to standby (paper-load<strong>in</strong>g) mode aga<strong>in</strong>.The ADF will not function when the ADF lid is open. The paper path is <strong>in</strong>complete if the ADFlid is lifted from the glass.94 Chapter 4 Operational overview ENWW
ADF paper path and ADF sensorsThe follow<strong>in</strong>g diagram shows the ADF paper path.Figure 4-15.<strong>HP</strong> <strong>LaserJet</strong> <strong>3020</strong> and <strong>3030</strong> ADF pathThe paper-present sensor determ<strong>in</strong>es if paper is <strong>in</strong> the ADF. The form sensor detects the topand bottom edges of the document. One other sensor detects an open ADF door.ADF jam detectionThe ADF has two sensors that detect paper. The paper-present sensor detects the presenceof media <strong>in</strong> the ADF <strong>in</strong>put tray. The form sensor detects media mov<strong>in</strong>g through the ADF. If ajam is detected, the ADF immediately stops the paper feed<strong>in</strong>g and a jam message appears onthe control-panel display.A jam can be detected under any of the follow<strong>in</strong>g conditions:● Document-feeder jam—When documents are detected <strong>in</strong> the ADF <strong>in</strong>put tray, and acommand to copy, scan or fax is received, the scan module travels to the left side of thescan assembly and stops beneath the ADF scanner glass. The ADF then attempts threetimes, or for about ten seconds, to advance the paper to the form sensor. If the paperdoes not advance, the scan module travels back to the home position on the right side ofthe scanner assembly. The message Document feeder mispick. Reload. appears on thecontrol-panel display.● Long-document jam—If the paper has advanced to trigger the form sensor, but thetrail<strong>in</strong>g edge is not detected with<strong>in</strong> the time <strong>all</strong>owed for a 381-mm (15-<strong>in</strong>ch) document (themaximum <strong>all</strong>owable page length for the ADF), the scanner returns to the home position atthe right side of the scanner assembly. The message Doc feeder jam. Clear, Reload.appears on the control-panel display.● St<strong>all</strong> jam—When a page that is less than 381 mm (15 <strong>in</strong>ches) long has advanced to theform sensor but has not left it with<strong>in</strong> the expected time, the paper has probably st<strong>all</strong>ed orjammed. The scanner returns to the home position at the right side of the scannerassembly. The message Doc feeder jam. Clear, Reload. appears on the control-paneldisplay.● Other—If the paper stops <strong>in</strong> the ADF and the scan module rema<strong>in</strong>s under the ADFscanner glass, an <strong>in</strong>ternal firmware error has probably occurred. This is usu<strong>all</strong>y remediedby cycl<strong>in</strong>g the power.ENWW <strong>HP</strong> <strong>LaserJet</strong> <strong>3020</strong> and <strong>3030</strong> <strong>all</strong>-<strong>in</strong>-<strong>one</strong> unique comp<strong>one</strong>nts 95
Fax functions and operation (<strong>HP</strong> <strong>LaserJet</strong> <strong>3015</strong> and <strong>3030</strong> only)The follow<strong>in</strong>g sections describe the fax capabilities of the product.PSTN operationThe public switched teleph<strong>one</strong> network (PSTN) operates by hav<strong>in</strong>g a central office (CO) thatgenerates a constant voltage on the TIP and RING wires (48 V, usu<strong>all</strong>y). A device goes onhookby connect<strong>in</strong>g impedance (such as 600 ohms for the U.S.) across TIP and RING,<strong>all</strong>ow<strong>in</strong>g a l<strong>in</strong>e current to flow. The CO can detect this current and can send impulses like dialt<strong>one</strong>s. The product generates more signal<strong>in</strong>g t<strong>one</strong>s, such as dial<strong>in</strong>g digits, to tell the CO howto connect the c<strong>all</strong>. The product can also detect t<strong>one</strong>s, such as a busy t<strong>one</strong> from the CO, thattell it how to behave.When the c<strong>all</strong> is f<strong>in</strong><strong>all</strong>y connected, the CO behaves as if it were a piece of wire connect<strong>in</strong>g thesender and receiver. This is the period dur<strong>in</strong>g which <strong>all</strong> of the fax signal<strong>in</strong>g and data transferoccurs. When a c<strong>all</strong> is completed, the circuit opens aga<strong>in</strong> and l<strong>in</strong>e current flow ceases,remov<strong>in</strong>g the CO connection from both the sender and the receiver.All of this is d<strong>one</strong> with a two-wire arrangement. The two wires are c<strong>all</strong>ed TIP and RING on <strong>all</strong>ph<strong>one</strong> systems. On most ph<strong>one</strong> systems, the wires appear on p<strong>in</strong>s 3 and 4 of the RJ-11modular jack (the <strong>one</strong> on the LIU). These two wires do not have to be polarized because <strong>all</strong>the equipment works with either TIP or RING on p<strong>in</strong> 3 and the other wire on p<strong>in</strong> 4. This meansthat cables of either polarity can <strong>in</strong>terconnect and will still work.These are the basic functions of PSTN operation that are assumed <strong>in</strong> the design of the faxsubsystem. The product generates and detects the signal<strong>in</strong>g t<strong>one</strong>s, currents, and data signalsthat are required to transmit and receive faxes on the PSTN.The fax subsystemThe formatter, LIU, firmware, and software <strong>all</strong> contribute to the fax functionality. The designsof the formatter and LIU, along with parameters <strong>in</strong> the firmware, determ<strong>in</strong>e the majority of theregulatory requirements for telephony on the product.The fax subsystem is designed to support V.34 fax transmission, lower speeds (such as V.17fax), and older fax mach<strong>in</strong>es.Formatter <strong>in</strong> the fax subsystemThe formatter conta<strong>in</strong>s the modem chipset (DSP and CODEC) that controls the basic faxfunctions of t<strong>one</strong> generation and detection, along with channel control for the faxtransmissions.The CODEC and its associated circuitry act to control transmit and receive ga<strong>in</strong>s, and tocompensate for transmission signal coupl<strong>in</strong>g <strong>in</strong>to the receive channel. The formatter alsoconta<strong>in</strong>s circuitry that adds term<strong>in</strong>ation impedance to help match the teleph<strong>one</strong> networkimpedance.LIU <strong>in</strong> the fax subsystemTwo versions of LIU are used <strong>in</strong> the <strong>HP</strong> <strong>LaserJet</strong> <strong>3015</strong> and <strong>3030</strong> <strong>all</strong>-<strong>in</strong>-<strong>one</strong>. One is used <strong>in</strong> theNorth American, South American, and Asian countries/regions. The other is used primarily <strong>in</strong>European countries/regions.96 Chapter 4 Operational overview ENWW
The follow<strong>in</strong>g are features that are different <strong>in</strong> the European version:● a different voltage-protection device● current limit<strong>in</strong>g of the dc current● filter<strong>in</strong>g for the countries/regions that use bill<strong>in</strong>g or meter<strong>in</strong>g t<strong>one</strong>s● control of the impedance of the dc circuit through the SHUNT signalBecause the TIP and RING are not polarized, <strong>all</strong> LIU circuitry that connects to TIP and RINGis bidirectional. The LIU operates identic<strong>all</strong>y when TIP and RING are reversed.Safety isolationThe most important function of the LIU is the safety isolation between the high-voltage,transient-pr<strong>one</strong> environment of the teleph<strong>one</strong> network (TNV [teleph<strong>one</strong> network voltage]) andthe low-voltage analog and digital circuitry of the formatter (SELV [secondary extra-lowvoltage]). This safety isolation provides both customer safety and product reliability <strong>in</strong> thetelecom environment.Any signals that cross the isolation barrier do so either optic<strong>all</strong>y or magnetic<strong>all</strong>y. Thebreakdown voltage rat<strong>in</strong>g of barrier-critical comp<strong>one</strong>nts is greater than 1.5 kV.Safety-protection circuitryIn addition to the safety barrier, the LIU protects aga<strong>in</strong>st RING and over-current events.Teleph<strong>one</strong> over-voltages can be either differential mode or common mode. The RING can betransient <strong>in</strong> nature (a lightn<strong>in</strong>g-<strong>in</strong>duced surge or ESD) or cont<strong>in</strong>uous (a power l<strong>in</strong>e crossed with aph<strong>one</strong> l<strong>in</strong>e). The LIU protection circuitry provides marg<strong>in</strong> aga<strong>in</strong>st comb<strong>in</strong>ations of RINGevents.Common mode protection is provided by the selection of high-voltage-barrier criticalcomp<strong>one</strong>nts (transformer, relay, and optoisolators). The safety barrier of the LIU PCB tracesand the clearance between the LIU and surround<strong>in</strong>g comp<strong>one</strong>nts also contribute to commonmode protection.A voltage suppressor (a crowbar-type SIDACTOR) provides differential protection. This devicebecomes low impedance at approximately 300 V differential, and crowbars to a low voltage. Aseries thermal switch works <strong>in</strong> conjunction with the crowbar for cont<strong>in</strong>uous RING events, suchas crossed power l<strong>in</strong>es.When the differential RING is cont<strong>in</strong>uous, the result<strong>in</strong>g over-current causes the thermal switchto become high impedance, disconnect<strong>in</strong>g RING from the network and protect<strong>in</strong>g the crowbarfrom thermal overload. The thermal switch automatic<strong>all</strong>y resets to low impedance after theover-current condition is removed, reconnect<strong>in</strong>g RING to the network.Data pathThe magnetic<strong>all</strong>y coupled signals that cross the isolation barrier go either through atransformer or a relay. The TIP and RING signals use a transformer to cross the isolationbarrier.TIP and RING are the two-wire paths for <strong>all</strong> signals from the teleph<strong>one</strong> network. All signal<strong>in</strong>gand data <strong>in</strong>formation comes across them, <strong>in</strong>clud<strong>in</strong>g fax t<strong>one</strong>s and fax data.The teleph<strong>one</strong> network uses dc current to determ<strong>in</strong>e the hook state of the teleph<strong>one</strong>, so l<strong>in</strong>ecurrent must be present dur<strong>in</strong>g a c<strong>all</strong>. On some l<strong>in</strong>e <strong>in</strong>terfaces this current flows through thetransformer, but on the LIU, a capacitor blocks the current from go<strong>in</strong>g <strong>in</strong>to the transformer.ENWW Fax functions and operation (<strong>HP</strong> <strong>LaserJet</strong> <strong>3015</strong> and <strong>3030</strong> only) 97
Block<strong>in</strong>g the current with a capacitor prevents the core of the transformer from be<strong>in</strong>g saturatedby the high dc voltage, which can affect the ac signal quality. Rather than permitt<strong>in</strong>g thecurrent to flow through the transformer, this LIU directs the current through another circuitc<strong>all</strong>ed a gyrator or dc hold circuit. This creates the path for the central office-current flow when ac<strong>all</strong> is <strong>in</strong> progress.Hook stateAnother magnetic<strong>all</strong>y coupled signal is the control signal that disconnects the downstreamteleph<strong>one</strong> devices (such as a ph<strong>one</strong> or answer<strong>in</strong>g mach<strong>in</strong>e). A control signal orig<strong>in</strong>at<strong>in</strong>g on theformatter can change the relay state, caus<strong>in</strong>g the auxiliary jack (downstream jack) to bedisconnected from the circuit.The product takes control of c<strong>all</strong>s that it recognizes as fax c<strong>all</strong>s. If the product does not directlypick up the c<strong>all</strong>, it monitors <strong>in</strong>com<strong>in</strong>g c<strong>all</strong>s for the fax t<strong>one</strong> or for the user to direct it to receive afax. This idle mode is also c<strong>all</strong>ed eavesdropp<strong>in</strong>g. This mode is active when the product is onhookbut current exists <strong>in</strong> the downstream ph<strong>one</strong> l<strong>in</strong>e because another device is off-hook.Dur<strong>in</strong>g eavesdropp<strong>in</strong>g, the receive circuit is enabled but has a different ga<strong>in</strong> from the currentthat is generated dur<strong>in</strong>g normal fax transmissions.The product does not take control of the l<strong>in</strong>e unless it detects a fax t<strong>one</strong> or the operator tells itto connect manu<strong>all</strong>y. This feature <strong>all</strong>ows the user to make voice c<strong>all</strong>s from a ph<strong>one</strong> that isconnected to the product without be<strong>in</strong>g cut off if a fax is received.Downstream current detectionThe aux ph<strong>one</strong> detect signal is optic<strong>all</strong>y coupled. This signal tells the firmware that an activeph<strong>one</strong> (or modem or answer<strong>in</strong>g mach<strong>in</strong>e) is connected to the auxiliary port of the product (theright side of the RJ-11 jack).A circuit that can detect current above a certa<strong>in</strong> threshold generates the downstream-currentdetectionsignal. The downstream current goes through a resistor, generat<strong>in</strong>g a voltage. If thisvoltage is above the threshold level, the signal changes state.The downstream-current-detection signal is coupled back to the formatter through anoptoisolator and across the safety isolation barrier. The firmware uses this signal to ensurethat the product does not go off-hook (and disconnect a downstream c<strong>all</strong>) until it has beenauthorized to do so (by a manual fax start or detection of the appropriate t<strong>one</strong>s).Hook switch controlAnother optic<strong>all</strong>y coupled signal is the hook switch control. This signal from the formattercauses an optoisolator on the LIU to activate (mak<strong>in</strong>g an open circuit <strong>in</strong>to a short circuit).When shorted, the circuit is draw<strong>in</strong>g dc current from the central office and is considered “onhook.”When open, no dc current flows and the state is considered to be “off-hook.”For pulse dial<strong>in</strong>g, the optoisolator is toggled on and off with a particular tim<strong>in</strong>g sequence togenerate pulses that the central offices of the teleph<strong>one</strong> company recognizes as dial<strong>in</strong>g digits.R<strong>in</strong>g detectAnother optic<strong>all</strong>y coupled signal on the LIU is r<strong>in</strong>g detect. R<strong>in</strong>g detect is a comb<strong>in</strong>ation ofvoltage levels and cadence (time on and time off). Both must be present <strong>in</strong> order for theproduct to detect a valid r<strong>in</strong>g.The LIU works with the firmware to determ<strong>in</strong>e if an <strong>in</strong>com<strong>in</strong>g signal is an answerable r<strong>in</strong>g.When circuits on the LIU detect a r<strong>in</strong>g voltage above a certa<strong>in</strong> threshold, a correspond<strong>in</strong>gsignal is passed to the formatter to <strong>in</strong>dicate that the r<strong>in</strong>g is above the threshold. The firmwarethen measures the amount of time that the signal is high and low, and qualifies the cadence todeterm<strong>in</strong>e whether it is a valid r<strong>in</strong>g.98 Chapter 4 Operational overview ENWW
L<strong>in</strong>e current controlThe dc current from the CO needs to have a path to flow from TIP to RING. Because thecurrent does not flow <strong>in</strong> the transformer, a path through some transistors and diodes (the dchold circuit) acts like a simulated <strong>in</strong>ductor (thus replac<strong>in</strong>g the function of the transformer). Thisdc hold circuit is the ma<strong>in</strong> comp<strong>one</strong>nt of the voltage-current characteristic between TIP andRING.Two other functions of this block of circuits are the current limit and the SHUNT for Europe.Current limit basic<strong>all</strong>y ma<strong>in</strong>ta<strong>in</strong>s a constant current from TIP to RING after the voltage reachesabout 50 mA. Even if the voltage varies, the current will rema<strong>in</strong> the same.The SHUNT function changes the impedance (the current-voltage characteristic) dur<strong>in</strong>gcerta<strong>in</strong> special events, such as pulse dial<strong>in</strong>g and when the devices goes on-hook.Dur<strong>in</strong>g such an event, the firmware tells the DSP on the formatter to activate SHUNT. Asignal goes to the LIU through an optoisolator (optic<strong>all</strong>y coupled), which changes the state ofsome transistors so that the board has a l<strong>in</strong>ear current characteristic (norm<strong>all</strong>y, it is currentlimited).Then more current can flow to the network, as required by these special events.Bill<strong>in</strong>g (meter<strong>in</strong>g) t<strong>one</strong> filtersSwitzerland and Germany provide high-frequency ac signals on the ph<strong>one</strong> l<strong>in</strong>e <strong>in</strong> order to billcustomers. The LC (<strong>in</strong>ductor, capacitor) notch filters are provided on the European LIUs toprevent these bill<strong>in</strong>g signals from adversely affect<strong>in</strong>g the data path and the dc hold circuit.An additional filter <strong>in</strong> the cable (for certa<strong>in</strong> countries/regions) can, <strong>in</strong> some cases, supplementthese LC notch filters. Because these bill<strong>in</strong>gs signals are not used <strong>in</strong> the U.S., these filters arenot present on the U.S. LIU.Fax page storage <strong>in</strong> flash memoryFax pages are the electronic images of the document page. They can be created <strong>in</strong> any ofthree ways: scanned to be sent to another fax mach<strong>in</strong>e, generated to be sent by thecomputer, or received from a fax mach<strong>in</strong>e to be pr<strong>in</strong>ted.The product stores <strong>all</strong> fax pages <strong>in</strong> flash memory automatic<strong>all</strong>y. After these pages are written<strong>in</strong>to flash memory they are stored until the pages are sent to another fax mach<strong>in</strong>e, pr<strong>in</strong>ted onthe product, transmitted to the computer, or erased by the user.These pages are stored <strong>in</strong> flash memory, which is the nonvolatile memory that can berepeatedly read from, written to, and erased. The product has 4 MB of flash memory, of which3.4 MB is available for fax storage. The rema<strong>in</strong><strong>in</strong>g 0.6 MB is used for the file system andreclamation. Add<strong>in</strong>g RAM does not affect the fax page storage because the product does notuse RAM for stor<strong>in</strong>g fax pages.Stored fax pagesThe user can repr<strong>in</strong>t stored fax pages <strong>in</strong> case of errors. The product will re-send stored faxpages after a busy signal, comm error, no answer, or a power failure. Other fax devices storefax pages <strong>in</strong> either normal RAM or short-term RAM. Normal RAM immediately loses its datawhen power is lost, while short-term RAM loses its data about 60 m<strong>in</strong>utes after a powerfailure. Flash memory ma<strong>in</strong>ta<strong>in</strong>s its data for years without any applied power.Advantages of flash memory storageFax pages stored <strong>in</strong> flash memory are persistent. They are not lost as a result of a powerfailure, no matter how long the power is off. Users can repr<strong>in</strong>t faxes <strong>in</strong> case the pr<strong>in</strong>t cartridgeruns out of t<strong>one</strong>r or the product experiences other errors while pr<strong>in</strong>t<strong>in</strong>g faxes.ENWW Fax functions and operation (<strong>HP</strong> <strong>LaserJet</strong> <strong>3015</strong> and <strong>3030</strong> only) 99
The product also has scan-ahead functionality that makes use of flash memory. Scan-aheadautomatic<strong>all</strong>y scans pages <strong>in</strong>to flash memory before a fax job is sent. This <strong>all</strong>ows the sender topick up their orig<strong>in</strong>al document immediately after it is scanned, elim<strong>in</strong>at<strong>in</strong>g the need to waituntil the fax is transmission is complete.Because fax pages are stored <strong>in</strong> flash memory, not RAM, more RAM is available to handlelarger and more complicated copy and pr<strong>in</strong>t jobs.100 Chapter 4 Operational overview ENWW
5Removaland replacementThis chapter provides <strong>in</strong>formation about the follow<strong>in</strong>g topics.Removal and replacement strategy.......................................................................................103Required tools..................................................................................................................103Before perform<strong>in</strong>g service...............................................................................................103After perform<strong>in</strong>g service..................................................................................................104Parts removal order.........................................................................................................104<strong>HP</strong> <strong>LaserJet</strong> <strong>3015</strong> <strong>all</strong>-<strong>in</strong>-<strong>one</strong>..................................................................................................107L<strong>in</strong>k assemblies and scanner support frame spr<strong>in</strong>gs......................................................107Scanner side covers........................................................................................................110Separation-pad set..........................................................................................................111Control-panel bezel.........................................................................................................112Control-panel assembly...................................................................................................113Media lever and media lever torsion spr<strong>in</strong>g....................................................................114Separation pad assembly................................................................................................115Scanner assembly...........................................................................................................118Scanner assembly top cover...........................................................................................126Top-cover assembly........................................................................................................129Pickup roller ....................................................................................................................130White platen.....................................................................................................................131<strong>HP</strong> <strong>LaserJet</strong> <strong>3020</strong> and <strong>3030</strong> <strong>all</strong>-<strong>in</strong>-<strong>one</strong>..................................................................................133ADF <strong>in</strong>put tray..................................................................................................................133Flatbed lid........................................................................................................................134L<strong>in</strong>k assemblies and scanner support frame spr<strong>in</strong>gs......................................................136Control-panel bezel.........................................................................................................139Control-panel assembly...................................................................................................139ADF separation pad ........................................................................................................140ADF <strong>in</strong>put-tray flag...........................................................................................................141ADF pickup roller ............................................................................................................142ADF scanner glass..........................................................................................................143Scanner assembly...........................................................................................................145Pr<strong>in</strong>ter (product base)............................................................................................................153Pr<strong>in</strong>ter separation pad.....................................................................................................154Pr<strong>in</strong>t cartridge..................................................................................................................154Pr<strong>in</strong>ter pickup roller..........................................................................................................156Media <strong>in</strong>put tray...............................................................................................................158Transfer roller..................................................................................................................159Pr<strong>in</strong>ter side covers...........................................................................................................161Pr<strong>in</strong>t-cartridge door..........................................................................................................163Rear cover and fuser cover.............................................................................................164Front cover.......................................................................................................................165Inst<strong>all</strong><strong>in</strong>g the scanner cushions.......................................................................................167Speaker assembly...........................................................................................................168Power supply...................................................................................................................169Formatter and l<strong>in</strong>e <strong>in</strong>terface unit (LIU).............................................................................171Scanner support frame ...................................................................................................175Eng<strong>in</strong>e controller unit.......................................................................................................177ENWW 101
Laser/scanner assembly..................................................................................................181Ma<strong>in</strong> motor.......................................................................................................................182Fuser................................................................................................................................ 184Paper-pickup assembly...................................................................................................186102 Chapter 5 Removal and replacement ENWW
Removal and replacement strategyThis chapter documents the removal and replacement of field replaceable parts (FRUs) only.Re<strong>in</strong>st<strong>all</strong>ation is gener<strong>all</strong>y the reverse of removal. Occasion<strong>all</strong>y, notes and h<strong>in</strong>ts are <strong>in</strong>cludedto provide directions for difficult or critical replacement procedures.WARNING!CAUTIONCAUTIONNoteH<strong>in</strong>tUnplug the power cord from the power outlet (at the w<strong>all</strong> receptacle) before attempt<strong>in</strong>g toservice the product. It this warn<strong>in</strong>g is not followed, severe <strong>in</strong>jury can result. Certa<strong>in</strong> functionalchecks dur<strong>in</strong>g troubleshoot<strong>in</strong>g must be performed with power supplied to the product.However, the power supply should be disconnected dur<strong>in</strong>g removal.Sheet-metal and plastic edges <strong>in</strong> the product can be sharp. Use caution when servic<strong>in</strong>g thisproduct.Never operate or service the product with the protective cover removed from the laser/scanner assembly. The <strong>in</strong>visible reflected beam can damage your eyes.The product conta<strong>in</strong>s comp<strong>one</strong>nts that are sensitive to electrostatic discharge (ESD). Alwaysperform service work an an ESD-protected workstation. If an ESD-protected workstation is notavailable, discharge body static by grasp<strong>in</strong>g the pr<strong>in</strong>t eng<strong>in</strong>e chassis before touch<strong>in</strong>g anESD-sensitive comp<strong>one</strong>nt. Ground the pr<strong>in</strong>t eng<strong>in</strong>e chassis before servic<strong>in</strong>g the product.Do not bend or fold the FFCs dur<strong>in</strong>g the removal or re<strong>in</strong>st<strong>all</strong>ation process.For service purposes, the upper part of the <strong>HP</strong> <strong>LaserJet</strong> <strong>3015</strong>, <strong>3020</strong>, and <strong>3030</strong> is, <strong>in</strong> effect, the"scanner" and the lower part is the "pr<strong>in</strong>ter". Together, they also act as a photocopier or faxmach<strong>in</strong>e (the <strong>HP</strong> <strong>LaserJet</strong> <strong>3020</strong> does not have fax capabilities), but the service descriptionhere is simplified by referr<strong>in</strong>g to copier or fax functionality only when specific<strong>all</strong>y necessary.To <strong>in</strong>st<strong>all</strong> a self-tapp<strong>in</strong>g screw, first turn it counterclockwise to align it with the exist<strong>in</strong>g threadpattern, then carefully turn it clockwise to tighten. Do not overtighten.Required tools● #2 Phillips screwdriver with magnetic tip● Sm<strong>all</strong> flat-blade screwdriver● #8 and #10 torx screwdrivers● Needle-nose pliers● ESD mat (if available)● Penlight (optional)● Long flat-blade screwdriver (optional)CAUTIONDo not use a pozidrive screwdriver or any motorized screwdriver. These can damage screwsor screw threads on the product.Before perform<strong>in</strong>g service●●●If possible, pr<strong>in</strong>t a configuration page (to record customer sett<strong>in</strong>gs) and menu structurereport. See Troubleshoot<strong>in</strong>g tools.Remove <strong>all</strong> media from the product and remove the ma<strong>in</strong> <strong>in</strong>put tray. See Pr<strong>in</strong>ter ma<strong>in</strong><strong>in</strong>put tray (<strong>all</strong> models).Turn off the power by us<strong>in</strong>g the power switch.ENWW Removal and replacement strategy 103
●●●Unplug the power cord from the w<strong>all</strong> receptacle.Place the product on an ESD mat, if available. If an ESD-protected workstation is notavailable, discharge body static and ground the pr<strong>in</strong>t eng<strong>in</strong>e chassis before servic<strong>in</strong>g theproduct.Remove the pr<strong>in</strong>t cartridge. See Pr<strong>in</strong>t cartridge.After perform<strong>in</strong>g service●●●Replace the pr<strong>in</strong>t cartridge.Reload the <strong>in</strong>put tray with media.Restore customer configuration sett<strong>in</strong>gs.Parts removal orderUse the follow<strong>in</strong>g diagrams to determ<strong>in</strong>e which parts of the product must be removed beforeservic<strong>in</strong>g.Note<strong>HP</strong> <strong>LaserJet</strong> <strong>3020</strong> and <strong>3030</strong>: The scanner assembly might be contam<strong>in</strong>ated if it is openedoutside of a cleanroom environment. For this reason, the entire scanner assembly isreplaceable only as a unit. Replac<strong>in</strong>g the scanner assembly as an entire assembly replacesthe CIS or CCD scan module, the CCD scan motor, and the cable. If the ADF fails, it too isreplaceable only as an entire assembly. Replac<strong>in</strong>g the ADF replaces the ADF cable and otherADF submechanisms.Figure 5-1.<strong>HP</strong> <strong>LaserJet</strong> <strong>3015</strong>, <strong>3020</strong>, and <strong>3030</strong> products1 Product number Q2669A (<strong>HP</strong> <strong>LaserJet</strong> <strong>3015</strong>)2 Product number Q2665A (<strong>HP</strong> <strong>LaserJet</strong> <strong>3020</strong>); Q2666A (<strong>HP</strong> <strong>LaserJet</strong> <strong>3030</strong>)3 The pr<strong>in</strong>ter (product base) does not have a product number, but is similar to product numberQ2460A (<strong>HP</strong> <strong>LaserJet</strong> 1010)104 Chapter 5 Removal and replacement ENWW
Figure 5-2.NoteParts removal order for the <strong>HP</strong> <strong>LaserJet</strong> <strong>3015</strong> <strong>all</strong>-<strong>in</strong>-<strong>one</strong>The separation pad set and the separation pad assembly are two different assemblies.The separation pad set consists of the pad, clear plastic sheet, and the pad cover. Theseparation pad set is a user replaceable assembly.The separation pad assembly consists of the separation lever, tension spr<strong>in</strong>g, feed arm, andthe comp<strong>one</strong>nts of the separation pad set. The separation pad assembly is not a userreplaceable assembly.Only tra<strong>in</strong>ed service personnel should attempt to replace the separation pad assembly.Figure 5-3.Parts removal order for the <strong>HP</strong> <strong>LaserJet</strong> <strong>3020</strong> and <strong>3030</strong> <strong>all</strong>-<strong>in</strong>-<strong>one</strong>ENWW Removal and replacement strategy 105
Figure 5-4.Parts removal order for the pr<strong>in</strong>ter (product base, <strong>all</strong> models)106 Chapter 5 Removal and replacement ENWW
<strong>HP</strong> <strong>LaserJet</strong> <strong>3015</strong> <strong>all</strong>-<strong>in</strong>-<strong>one</strong>This section documents removal and replacement <strong>in</strong>structions for comp<strong>one</strong>nts that are uniqueto the <strong>HP</strong> <strong>LaserJet</strong> <strong>3015</strong> product.Figure 5-5.NoteParts removal order <strong>HP</strong> <strong>LaserJet</strong> <strong>3015</strong> scanner assemblyThe separation pad set and the separation pad assembly are two different assemblies.The separation pad set consists of the pad, clear plastic sheet, and the pad cover. Theseparation pad set is a user replaceable assembly.The separation pad assembly consists of the separation lever, tension spr<strong>in</strong>g, feed arm, andthe comp<strong>one</strong>nts of the separation pad set. The separation pad assembly is not a userreplaceable assembly.Only tra<strong>in</strong>ed service personnel should attempt to replace the separation pad assembly.L<strong>in</strong>k assemblies and scanner support frame spr<strong>in</strong>gs1. Push the pr<strong>in</strong>t-cartridge access button and raise the the scanner assembly until it is lockedopen.ENWW <strong>HP</strong> <strong>LaserJet</strong> <strong>3015</strong> <strong>all</strong>-<strong>in</strong>-<strong>one</strong> 107
2. Use a sm<strong>all</strong> flat-blade screwdriver to release the l<strong>in</strong>k tabs on each l<strong>in</strong>k assembly.WARNING!CAUTIONWhen the l<strong>in</strong>k assemblies are disengaged, the scanner assembly can easily f<strong>all</strong> off of theproduct base if it is rotated too far towards the back of the product.Do not push too hard on the l<strong>in</strong>k tabs or the tab might break.Figure 5-6. Remove the l<strong>in</strong>k assemblies and scanner support frame spr<strong>in</strong>gs (1 of 4)3. Rotate a l<strong>in</strong>k assembly toward the front of the pr<strong>in</strong>ter until the l<strong>in</strong>k disengages from thescanner support frame.Figure 5-7. Remove the l<strong>in</strong>k assemblies and scanner support frame spr<strong>in</strong>gs (2 of 4)108 Chapter 5 Removal and replacement ENWW
4. Remove the l<strong>in</strong>k assembly. Repeat this step with the rema<strong>in</strong><strong>in</strong>g l<strong>in</strong>k.Figure 5-8. Remove the l<strong>in</strong>k assemblies and scanner support frame spr<strong>in</strong>gs (3 of 4)5. Use needle-nose pliers to remove the scanner support frame spr<strong>in</strong>g. Repeat this step forthe other scanner support frame spr<strong>in</strong>g.Figure 5-9. Remove the l<strong>in</strong>k assemblies and scanner support frame spr<strong>in</strong>gs (4 of 4)ENWW <strong>HP</strong> <strong>LaserJet</strong> <strong>3015</strong> <strong>all</strong>-<strong>in</strong>-<strong>one</strong> 109
Scanner side covers1. Use a sm<strong>all</strong> flat-blade screwdriver to release the right-side cover back tab.Figure 5-10. Remove the scanner side covers (1 of 3)2. Release the right-side cover center tab.Figure 5-11. Remove the scanner side covers (2 of 3)110 Chapter 5 Removal and replacement ENWW
3. Rotate the right-side cover toward the front of the product, and remove it. Repeat thisprocedure for the left-side cover.Figure 5-12. Remove the scanner side covers (3 of 3)Separation-pad setNoteThe separation pad set and the separation pad assembly are two different assemblies.The separation pad set consists of the pad, clear plastic sheet, and the pad cover. Theseparation pad set is a user replaceable assembly.The separation pad assembly consists of the separation lever, tension spr<strong>in</strong>g, feed arm, andthe comp<strong>one</strong>nts of the separation pad set. The separation pad assembly is not a userreplaceable assembly.Only tra<strong>in</strong>ed service personnel should attempt to replace the separation pad assembly.1. Open the scanner top cover.ENWW <strong>HP</strong> <strong>LaserJet</strong> <strong>3015</strong> <strong>all</strong>-<strong>in</strong>-<strong>one</strong> 111
2. Carefully pry the separation-pad set away from the guide assembly.CAUTIONWhen <strong>in</strong>st<strong>all</strong><strong>in</strong>g the replacement pad, be careful not to bend or break the reta<strong>in</strong>er-clip p<strong>in</strong>s.Figure 5-13.Remove the separation padControl-panel bezel1. Carefully release the three front lock<strong>in</strong>g tabs (c<strong>all</strong>out 1).Figure 5-14. Remove the control-panel bezel (1 of 3)112 Chapter 5 Removal and replacement ENWW
2. Slightly raise the control-panel bezel. Then disconnect <strong>one</strong> FFC (c<strong>all</strong>out 2) and <strong>one</strong> wireharnessconnector (c<strong>all</strong>out 3).CAUTIONDo not bend or fold the FFCs dur<strong>in</strong>g the removal or re<strong>in</strong>st<strong>all</strong>ation process.Figure 5-15. Remove the control-panel bezel (2 of 3)3. Push the control-panel bezel toward the back of the product to release the rear lock<strong>in</strong>gtabs (c<strong>all</strong>out 4) and then remove it.Figure 5-16. Remove the control-panel bezel (3 of 3)Control-panel assemblyCAUTIONThe control panel is an ESD-sensitive comp<strong>one</strong>nt.1. Remove the control-panel bezel. See Control-panel bezel.ENWW <strong>HP</strong> <strong>LaserJet</strong> <strong>3015</strong> <strong>all</strong>-<strong>in</strong>-<strong>one</strong> 113
2. Remove three screws (c<strong>all</strong>out 1).Figure 5-17. Remove the control-panel assembly (1 of 2)3. Rotate the control-panel button assembly away from the control-panel cover and removeit.Figure 5-18. Remove the control-panel assembly (2 of 2)Media lever and media lever torsion spr<strong>in</strong>g1. Remove the control-panel bezel. See Control-panel bezel.114 Chapter 5 Removal and replacement ENWW
2. Carefully dislodge and remove the media lever torsion spr<strong>in</strong>g.Figure 5-19. Remove the media lever and media lever torsion spr<strong>in</strong>g (1 of 2)3. Lift the media lever up and out of the guide assembly to remove it.Figure 5-20. Remove the media lever and media lever torsion spr<strong>in</strong>g (2 of 2)Separation pad assembly1. Remove the control-panel bezel. See Control-panel bezel.ENWW <strong>HP</strong> <strong>LaserJet</strong> <strong>3015</strong> <strong>all</strong>-<strong>in</strong>-<strong>one</strong> 115
2. Remove four screws (c<strong>all</strong>out 1) and the sheet-metal plate.CAUTIONNoteDo not touch the grey separation pad. Sk<strong>in</strong> oils and f<strong>in</strong>gerpr<strong>in</strong>ts on the separation pad mightcause paper-feed problems.Press down on the plate as the screws are removed. There are four compression spr<strong>in</strong>gsunder the plate. The separation pad assembly also has <strong>one</strong> compression spr<strong>in</strong>g attached tothe shield. Do not loose any spr<strong>in</strong>gs when the shield is removed.The separation pad set and the separation pad assembly are two different assemblies.The separation pad set consists of the pad, clear plastic sheet, and the pad cover. Theseparation pad set is a user replaceable assembly.The separation pad assembly consists of the separation lever, tension spr<strong>in</strong>g, feed arm, andthe comp<strong>one</strong>nts of the separation pad set. The separation pad assembly is not a userreplaceable assembly.Only tra<strong>in</strong>ed service personnel should attempt to replace the separation pad assembly.Figure 5-21. Remove the separation pad assembly (1 of 3)116 Chapter 5 Removal and replacement ENWW
3. Rotate the separation pad assembly up until the keyed h<strong>in</strong>ges can clear the h<strong>in</strong>gereta<strong>in</strong>ers. .Figure 5-22. Remove the separation pad assembly (2 of 3)4. Remove the separation pad assembly.Figure 5-23. Remove the separation pad assembly (3 of 3)Re<strong>in</strong>st<strong>all</strong>ation tipMake sure that the separation pad assembly compression spr<strong>in</strong>g is <strong>in</strong>st<strong>all</strong>ed correctly and thatthe assembly can move freely.ENWW <strong>HP</strong> <strong>LaserJet</strong> <strong>3015</strong> <strong>all</strong>-<strong>in</strong>-<strong>one</strong> 117
Scanner assembly1. Rotate the automatic document feeder ( ADF) <strong>in</strong>put tray assembly toward the front of theproduct, and then lift it up and off of the product.Figure 5-24. Remove the scanner assembly (1 of 15)2. Squeeze the wire ADF output b<strong>in</strong> until the the ends of the wire clear the mount<strong>in</strong>g holes <strong>in</strong>the scanner assembly.Figure 5-25. Remove the scanner assembly (2 of 15)118 Chapter 5 Removal and replacement ENWW
3. Remove the right-side cover-mount<strong>in</strong>g screw (c<strong>all</strong>out 1).Figure 5-26. Remove the scanner assembly (3 of 15)4. Release the upper-back (c<strong>all</strong>out 2).Figure 5-27. Remove the scanner assembly (4 of 15)ENWW <strong>HP</strong> <strong>LaserJet</strong> <strong>3015</strong> <strong>all</strong>-<strong>in</strong>-<strong>one</strong> 119
5. Release the bottom tab (c<strong>all</strong>out 3).Figure 5-28. Remove the scanner assembly (5 of 15)6. Rotate the back side of the cover away from the product, and then slide the cover towardthe front of the product to remove itCAUTIONMake sure that the par<strong>all</strong>el connector bales are <strong>in</strong> the closed position. If they are <strong>in</strong> the openposition, they might spr<strong>in</strong>g off when the cover is removed and be misplaced.Figure 5-29. Remove the scanner assembly (6 of 15)120 Chapter 5 Removal and replacement ENWW
7. Disconnect two flat flexible cables (FFCs; c<strong>all</strong>out 4) and <strong>one</strong> wire-harness connector(c<strong>all</strong>out 5).CAUTIONDo not bend or fold the FFCs dur<strong>in</strong>g the removal or re<strong>in</strong>st<strong>all</strong>ation process.Figure 5-30. Remove the scanner assembly (7 of 15)8. Push the blue pr<strong>in</strong>t cartridge door release button and then raise the scanner assemblyuntil it locks open.Figure 5-31. Remove the scanner assembly (8 of 15)ENWW <strong>HP</strong> <strong>LaserJet</strong> <strong>3015</strong> <strong>all</strong>-<strong>in</strong>-<strong>one</strong> 121
9. Grasp the tab on the gear-drive arm bracket and carefully flex it away from the scannerassembly to release the bracket.Figure 5-32. Remove the scanner assembly (9 of 15)10. Pull the bracket toward the right side of the product until its mount<strong>in</strong>g tabs clear the holes<strong>in</strong> the scanner assembly.Figure 5-33. Remove the scanner assembly (10 of 15)122 Chapter 5 Removal and replacement ENWW
11. Use a sm<strong>all</strong> flat-blade screwdriver to release the l<strong>in</strong>k tabs on each l<strong>in</strong>k assembly.WARNING!CAUTIONWhen the l<strong>in</strong>k assemblies are disengaged, the scanner assembly can easily f<strong>all</strong> off of theproduct base if it is rotated too far towards the back of the product.Do not push too hard on the l<strong>in</strong>k tabs or the tabs might break.Figure 5-34. Remove the scanner assembly (11 of 15)ENWW <strong>HP</strong> <strong>LaserJet</strong> <strong>3015</strong> <strong>all</strong>-<strong>in</strong>-<strong>one</strong> 123
12. Use <strong>one</strong> of the follow<strong>in</strong>g three separate methods to support the scanner assembly so thatit does not f<strong>all</strong> off of the product base.● A Use the <strong>HP</strong> scanner-support tool (part number: 5185-7441).NoteRemove the left-side l<strong>in</strong>k before us<strong>in</strong>g the support tool.●●B Rest the scanner assembly aga<strong>in</strong>st a w<strong>all</strong>.C Rest the scanner assembly aga<strong>in</strong>st your chestFigure 5-35. Remove the scanner assembly (12 of 15)124 Chapter 5 Removal and replacement ENWW
13. Remove <strong>one</strong> screw (c<strong>all</strong>out 6). Carefully remove the ground<strong>in</strong>g shield (c<strong>all</strong>out 7) from thewire loom. Feed the two FFCs and the wire-harness through the hole <strong>in</strong> the chassis, andremove them from the wire loom.67Figure 5-36. Remove the scanner assembly (13 of 15)H<strong>in</strong>tTo remove the ground<strong>in</strong>g shield easily, <strong>in</strong>sert the shaft of a long flat-blade screwdriver underthe shield at the edge of the chassis. Pull up on the screwdriver shaft to release the shield,and then remove the shield from the wire loom.Figure 5-37. Remove the scanner assembly (14 of 15)ENWW <strong>HP</strong> <strong>LaserJet</strong> <strong>3015</strong> <strong>all</strong>-<strong>in</strong>-<strong>one</strong> 125
14. Rotate the scanner assembly toward the rear of the product until the rear h<strong>in</strong>ges clear thechassis h<strong>in</strong>ge p<strong>in</strong>s. Lift the scanner assembly off of the product base.NoteDo not lose the two scanner cushions located <strong>in</strong> the scanner support frame (c<strong>all</strong>out 8; left sidelocation shown).Figure 5-38. Remove the scanner assembly (15 of 15)Scanner assembly top cover1. Remove the follow<strong>in</strong>g assemblies or comp<strong>one</strong>nts.● Scanner assembly. See Scanner assembly.● Scanner side covers. See Scanner side covers.126 Chapter 5 Removal and replacement ENWW
2. Remove three screws (c<strong>all</strong>out 1): two PCB screws and <strong>one</strong> ground<strong>in</strong>g screw.CAUTIONThe PCB is an ESD-sensitive comp<strong>one</strong>nt.Figure 5-39. Remove the scanner assembly top cover (1 of 4)3. Feed the two FFCs, the wire connector, and the ground strap through the open<strong>in</strong>g <strong>in</strong> thescanner-assembly base and remove two right-side mount<strong>in</strong>g screws (c<strong>all</strong>out 2).CAUTIONTake note of how the FFCs and wire-harnesses are routed before mov<strong>in</strong>g them.Do not bend or fold the FFCs dur<strong>in</strong>g the removal or re<strong>in</strong>st<strong>all</strong>ation process.Figure 5-40. Remove the scanner assembly top cover (2 of 4)Re<strong>in</strong>st<strong>all</strong>ation tipWhen re<strong>in</strong>st<strong>all</strong><strong>in</strong>g the FFCs, make sure that the ferrites snap <strong>in</strong>to the clips <strong>in</strong> the base.ENWW <strong>HP</strong> <strong>LaserJet</strong> <strong>3015</strong> <strong>all</strong>-<strong>in</strong>-<strong>one</strong> 127
4. Remove the two left-side mount<strong>in</strong>g screws (c<strong>all</strong>out 3).Re<strong>in</strong>st<strong>all</strong>ation tipWhen re<strong>in</strong>st<strong>all</strong><strong>in</strong>g the scanner assembly top cover make sure that it is seated on thealignment p<strong>in</strong>s (the plastic p<strong>in</strong> is beh<strong>in</strong>d the screw [c<strong>all</strong>out 3] <strong>in</strong> the follow<strong>in</strong>g figure).Figure 5-41. Remove the scanner assembly top cover (3 of 4)5. Lift up on the scanner assembly top cover to separate it from the base frame assembly.CAUTIONSeparat<strong>in</strong>g the scanner assembly top cover from the base frame assembly might requireconsiderable force. Be careful to not damage or drop either assembly when they separate.Figure 5-42. Remove the scanner assembly top cover (4 of 4)128 Chapter 5 Removal and replacement ENWW
Re<strong>in</strong>st<strong>all</strong>ation tipWhen <strong>in</strong>st<strong>all</strong><strong>in</strong>g the scanner assembly top cover, verify that the two tabs (c<strong>all</strong>out 4) along thefront-bottom edge of the assembly fit <strong>in</strong>to the correspond<strong>in</strong>g slots <strong>in</strong> the base frame (c<strong>all</strong>out5).When <strong>in</strong>st<strong>all</strong><strong>in</strong>g the scanner assembly top cover, verify that the FFCs and wire-harnesses areclear and will not be p<strong>in</strong>ched by the assembly.Figure 5-43.Re<strong>in</strong>st<strong>all</strong><strong>in</strong>g the scanner assembly top coverFigure 5-44.Align the scanner assembly top cover and baseTop-cover assembly1. Remove the follow<strong>in</strong>g assemblies.● Scanner assembly See Scanner assembly.● Scanner assembly top cover. See Scanner assembly top cover.ENWW <strong>HP</strong> <strong>LaserJet</strong> <strong>3015</strong> <strong>all</strong>-<strong>in</strong>-<strong>one</strong> 129
2. Rotate the top-cover assembly (c<strong>all</strong>out 1) away from the frame assembly (c<strong>all</strong>out 2).Figure 5-45. Remove the top-cover assembly (1 of 2)3. Pull the left-end h<strong>in</strong>ge out of the slot <strong>in</strong> the frame assembly, and slide the top cover to theleft until the right-side h<strong>in</strong>ge clears the hole <strong>in</strong> the frame assembly. Remove the top cover.Figure 5-46. Remove the top-cover assembly (2 of 2)Pickup roller1. Remove the follow<strong>in</strong>g assemblies.● Scanner assembly. See Scanner assembly.● Scanner top cover assembly. See Top-cover assembly.130 Chapter 5 Removal and replacement ENWW
2. Unclip the pickup-roller reta<strong>in</strong>er (c<strong>all</strong>out 1) and rotate it until the flat sides of the clip alignwith the mount<strong>in</strong>g slot on the frame assembly.Figure 5-47. Remove the pickup roller (1 of 2)3. Lift the right side of the pickup roller shaft out of the mount<strong>in</strong>g slot, and then pull it to theright until the left end of the shaft clears the mount<strong>in</strong>g hole on the left side of the frameassembly.Figure 5-48. Remove the pickup roller (2 of 2)White platen1. Remove the follow<strong>in</strong>g assemblies.● Scanner assembly. See Scanner assembly● Scanner assembly top cover. See Top-cover assembly● Top-cover assembly. See Top-cover assemblyENWW <strong>HP</strong> <strong>LaserJet</strong> <strong>3015</strong> <strong>all</strong>-<strong>in</strong>-<strong>one</strong> 131
2. Use a sm<strong>all</strong> flat-blade screwdriver to carefully pry the white-platen reta<strong>in</strong>er tabs (c<strong>all</strong>out 1)off of the posts on the guide assembly.Figure 5-49. Remove the white platen (1 of 2)3. Lift the guide assembly up and off of the white platen.Figure 5-50. Remove the white platen (2 of 2)Re<strong>in</strong>st<strong>all</strong>ation tipWhen replac<strong>in</strong>g the white platen, verify that the beveled edge faces the cover-pad side of theguide assembly.132 Chapter 5 Removal and replacement ENWW
<strong>HP</strong> <strong>LaserJet</strong> <strong>3020</strong> and <strong>3030</strong> <strong>all</strong>-<strong>in</strong>-<strong>one</strong>This section documents removal and replacement <strong>in</strong>structions for comp<strong>one</strong>nts that are uniqueto the <strong>HP</strong> <strong>LaserJet</strong> <strong>3020</strong> and <strong>3030</strong> product.NoteThe scanner assembly might be contam<strong>in</strong>ated if it is opened outside of a cleanroomenvironment. For this reason, the entire scanner assembly is replaceable only as a unit.Replac<strong>in</strong>g the scanner assembly as an entire assembly replaces the CIS or CCD scanmodule, the CCD scan motor, and the cable. If the ADF fails, it too is replaceable only as anentire assembly. Replac<strong>in</strong>g the ADF replaces the ADF cable and other ADF submechanisms.Figure 5-51.Parts removal order <strong>HP</strong> <strong>LaserJet</strong> <strong>3020</strong> and <strong>3030</strong> scanner assemblyADF <strong>in</strong>put tray1. Open the ADF lid and grasp the ADF <strong>in</strong>put tray. Rotate the paper tray up and pull it awayfrom the ADF.Figure 5-52.Remove the ADF <strong>in</strong>put trayENWW <strong>HP</strong> <strong>LaserJet</strong> <strong>3020</strong> and <strong>3030</strong> <strong>all</strong>-<strong>in</strong>-<strong>one</strong> 133
Flatbed lid1. Open the ADF cover. Carefully pry the ADF motor cover off (from right to left) and awayfrom the scanner assembly.Figure 5-53. Remove the flatbed lid (1 of 5)Re<strong>in</strong>st<strong>all</strong>ation tipWhen the ADF motor cover is re<strong>in</strong>st<strong>all</strong>ed, make sure it is positi<strong>one</strong>d correctly. If the motorcover is not <strong>in</strong>st<strong>all</strong>ed properly, the ADF lid will not close properly, result<strong>in</strong>g <strong>in</strong> <strong>in</strong>termittentADF errors. Verify that the plastic tab fits <strong>in</strong>to the slot and that the motor cover snaps overthe corner of the sheet metal chassis.Figure 5-54.ADF cover correctly <strong>in</strong>st<strong>all</strong>ed134 Chapter 5 Removal and replacement ENWW
2. Disconnect two wire connectors (c<strong>all</strong>out 1). Close the ADF cover.Figure 5-55. Remove the flatbed lid (2 of 5)3. Locate the h<strong>in</strong>ge-reta<strong>in</strong>er clip on the far-left flatbed h<strong>in</strong>ge (this h<strong>in</strong>ge is the <strong>one</strong> above thepar<strong>all</strong>el connector).Figure 5-56. Remove the flatbed lid (3 of 5)ENWW <strong>HP</strong> <strong>LaserJet</strong> <strong>3020</strong> and <strong>3030</strong> <strong>all</strong>-<strong>in</strong>-<strong>one</strong> 135
4. Lift up on the reta<strong>in</strong>er-clip lock<strong>in</strong>g tab, and pull the clip down and away from the flatbedlid.Figure 5-57. Remove the flatbed lid (4 of 5)5. Raise the flatbed scanner lid until the h<strong>in</strong>ges can clear the h<strong>in</strong>ge posts on the scannerbed, and then remove the flatbed lid from the scanner assembly.CAUTIONAvoid touch<strong>in</strong>g the flatbed glass or the ADF separation pad. Sk<strong>in</strong> oils and f<strong>in</strong>gerpr<strong>in</strong>ts cancontam<strong>in</strong>ate the glass or pad and cause pr<strong>in</strong>t quality problems.Figure 5-58. Remove the flatbed lid (5 of 5)L<strong>in</strong>k assemblies and scanner support frame spr<strong>in</strong>gs1. Push the pr<strong>in</strong>t-cartridge access button and raise the the scanner assembly until it is lockedopen.136 Chapter 5 Removal and replacement ENWW
2. Use a sm<strong>all</strong> flat-blade screwdriver to release the l<strong>in</strong>k tabs on each l<strong>in</strong>k assembly.WARNING!CAUTIONWhen the l<strong>in</strong>k assemblies are disengaged, the scanner assembly can easily f<strong>all</strong> off of theproduct base if it is rotated too far towards the back of the product.Do not push too hard on the l<strong>in</strong>k tabs or the tabs might break.Figure 5-59. Remove the l<strong>in</strong>k assemblies and scanner support frame spr<strong>in</strong>gs (1 of 4)3. Rotate a l<strong>in</strong>k assembly toward the front of the pr<strong>in</strong>ter until the l<strong>in</strong>k disengages from thescanner support frame.Figure 5-60. Remove the l<strong>in</strong>k assemblies and scanner support frame spr<strong>in</strong>gs (2 of 4)ENWW <strong>HP</strong> <strong>LaserJet</strong> <strong>3020</strong> and <strong>3030</strong> <strong>all</strong>-<strong>in</strong>-<strong>one</strong> 137
4. Remove the l<strong>in</strong>k assembly. Repeat this step with the rema<strong>in</strong><strong>in</strong>g l<strong>in</strong>k.Figure 5-61. Remove the l<strong>in</strong>k assemblies and scanner support frame spr<strong>in</strong>gs (3 of 4)5. Use needle nose pliers to remove the scanner support frame spr<strong>in</strong>g. Repeat this step forthe other scanner support frame spr<strong>in</strong>g.Figure 5-62. Remove the l<strong>in</strong>k assemblies and scanner support frame spr<strong>in</strong>gs (4 of 4)138 Chapter 5 Removal and replacement ENWW
Control-panel bezel1. Gently pry up the outside edge of the control-panel bezel to release it.Figure 5-63.Remove the control-panel bezelControl-panel assemblyCAUTIONThe control-panel is an ESD-sensitive comp<strong>one</strong>nt.1. Remove the control-panel bezel. See Control-panel bezel.2. Push <strong>in</strong> on the control-panel assembly latch (c<strong>all</strong>out 1), and slide the assembly to the leftto release it..Figure 5-64. Remove the control panel assembly (1 of 2)ENWW <strong>HP</strong> <strong>LaserJet</strong> <strong>3020</strong> and <strong>3030</strong> <strong>all</strong>-<strong>in</strong>-<strong>one</strong> 139
3. Slightly lift up the control panel and disconnect 1 FFC (c<strong>all</strong>out 2). Remove the controlpanelassemblyCAUTIONDo not bend or fold the FFCs dur<strong>in</strong>g the removal or re<strong>in</strong>st<strong>all</strong>ation process.Figure 5-65. Remove the control panel assembly (2 of 2)ADF separation padCAUTIONAvoid touch<strong>in</strong>g the flatbed glass or the ADF separation pad. Sk<strong>in</strong> oils and f<strong>in</strong>gerpr<strong>in</strong>ts cancontam<strong>in</strong>ate the glass or pad and cause pr<strong>in</strong>t quality or paper pickup problems.1. Open the ADF cover and lift up the ADF pickup-roller assembly.2. Use a #8 torx screwdriver to remove two torx screws (c<strong>all</strong>out 1) and remove theseparation-pad assembly.Figure 5-66.Remove the separation pad140 Chapter 5 Removal and replacement ENWW
ADF <strong>in</strong>put-tray flag1. Open the ADF cover.2. Gently flex the plastic rib that reta<strong>in</strong>s the flag h<strong>in</strong>ge until the front flag h<strong>in</strong>ge clears themount<strong>in</strong>g hole. Rotate the ADF <strong>in</strong>put-flag until the h<strong>in</strong>ge p<strong>in</strong> clears the plastic rib. Pull theflag towards you to release the back h<strong>in</strong>ge.Figure 5-67.Remove the ADF <strong>in</strong>put-tray flagRe<strong>in</strong>st<strong>all</strong>ation tipWhen re<strong>in</strong>st<strong>all</strong><strong>in</strong>g the ADF <strong>in</strong>put-tray flag, make sure that the long, straight end of the spr<strong>in</strong>g istucked under the lip on the flag and that the bent end of the spr<strong>in</strong>g threads through the hole <strong>in</strong>the plastic rib that reta<strong>in</strong>s the flag.Make sure that the ADF <strong>in</strong>put-tray flag can move freely.Figure 5-68.Correct position<strong>in</strong>g of the ADF <strong>in</strong>put-tray spr<strong>in</strong>gENWW <strong>HP</strong> <strong>LaserJet</strong> <strong>3020</strong> and <strong>3030</strong> <strong>all</strong>-<strong>in</strong>-<strong>one</strong> 141
ADF pickup rollerCAUTIONAvoid touch<strong>in</strong>g the flatbed glass or the ADF separation pad. Sk<strong>in</strong> oils and f<strong>in</strong>gerpr<strong>in</strong>ts cancontam<strong>in</strong>ate the glass or pad and cause pr<strong>in</strong>t quality or paper pickup problems.1. Open the ADF lid.2. Press the round, green button while lift<strong>in</strong>g the green lever. Rotate the green lever until itstops <strong>in</strong> the open position. The pickup roller assembly will rema<strong>in</strong> on the black surface.Figure 5-69. Remove the ADF pickup roller (1 of 2)3. Remove the pickup-roller assembly, and put the replacement assembly <strong>in</strong> exactly thesame place. The larger roller goes <strong>in</strong> back, and the gear side faces the scanner motorcover.NoteWhen <strong>in</strong>st<strong>all</strong><strong>in</strong>g the pickup roller assembly, make sure that the gear side of the roller assemblyis positi<strong>one</strong>d toward the back of the product.Figure 5-70. Remove the ADF pickup roller (2 of 2)142 Chapter 5 Removal and replacement ENWW
ADF scanner glassCAUTIONAvoid touch<strong>in</strong>g the flatbed glass or the ADF separation pad. Sk<strong>in</strong> oils and f<strong>in</strong>gerpr<strong>in</strong>ts cancontam<strong>in</strong>ate the glass or pad and cause pr<strong>in</strong>t quality or paper pickup problems.1. Use a #10 torx screwdriver to remove <strong>one</strong> torx screw.Figure 5-71. Remove the ADF scanner glass (1 of 3)2. Carefully remove the plastic ADF scanner-glass frame.Figure 5-72. Remove the ADF scanner glass (2 of 3)ENWW <strong>HP</strong> <strong>LaserJet</strong> <strong>3020</strong> and <strong>3030</strong> <strong>all</strong>-<strong>in</strong>-<strong>one</strong> 143
3. Slide the black glass-lock<strong>in</strong>g lever toward the back of the product to release the glass, andthen carefully remove the glass.CAUTIONAvoid touch<strong>in</strong>g the flatbed glass or the ADF separation pad. Sk<strong>in</strong> oils and f<strong>in</strong>gerpr<strong>in</strong>ts cancontam<strong>in</strong>ate the glass or pad and cause pr<strong>in</strong>t quality or paper pickup problems.Figure 5-73. Remove the ADF scanner glass (3 of 3)Re<strong>in</strong>st<strong>all</strong>ation tipReplace the glass first, and then <strong>in</strong>st<strong>all</strong> the frame. Press down on the frame and glass until thelock mechanism snaps back <strong>in</strong>to the locked position as shown <strong>in</strong> Figure 5-74. Inst<strong>all</strong> the ADFscanner glass.Figure 5-74.Inst<strong>all</strong> the ADF scanner glass144 Chapter 5 Removal and replacement ENWW
Scanner assemblyCAUTIONNoteAvoid touch<strong>in</strong>g the flatbed glass or the ADF separation pad. Sk<strong>in</strong> oils and f<strong>in</strong>gerpr<strong>in</strong>ts cancontam<strong>in</strong>ate the glass or pad and cause pr<strong>in</strong>t quality or paper pickup problems.It is not necessary to remove the flatbed lid before remov<strong>in</strong>g the scanner assembly. However,remov<strong>in</strong>g the flatbed lid will make the scanner assembly lighter and easier to handle when it isremoved. To remove the flatbed lid, see Flatbed lid.1. Remove the ADF <strong>in</strong>put tray. See ADF <strong>in</strong>put tray.2. Remove <strong>one</strong> screw (c<strong>all</strong>out 1).Figure 5-75. Remove the scanner assembly (1 of 13)3. Release the upper-back (c<strong>all</strong>out 2).Figure 5-76. Remove the scanner assembly (2 of 13)ENWW <strong>HP</strong> <strong>LaserJet</strong> <strong>3020</strong> and <strong>3030</strong> <strong>all</strong>-<strong>in</strong>-<strong>one</strong> 145
4. Release the bottom tab (c<strong>all</strong>out 3).Figure 5-77. Remove the scanner assembly (3 of 13)5. Rotate the back side of the cover away from the product, and then slide the cover towardthe front of the product to remove it.CAUTIONMake sure that the par<strong>all</strong>el connector bales are <strong>in</strong> the closed position. If they are <strong>in</strong> the openposition, they might spr<strong>in</strong>g off when the cover is removed and be lost.Figure 5-78. Remove the scanner assembly (4 of 13)146 Chapter 5 Removal and replacement ENWW
6. Disconnect two wire-harnesses and two FFCs on the formatter (c<strong>all</strong>out 4).CAUTIONDo not bend or fold the FFCs dur<strong>in</strong>g the removal or re<strong>in</strong>st<strong>all</strong>ation process.Figure 5-79. Remove the scanner assembly (5 of 13)7. Push the pr<strong>in</strong>t-cartridge door button to release the scanner assembly, and then raise theassembly until it locks open.Figure 5-80. Remove the scanner assembly (6 of 13)ENWW <strong>HP</strong> <strong>LaserJet</strong> <strong>3020</strong> and <strong>3030</strong> <strong>all</strong>-<strong>in</strong>-<strong>one</strong> 147
8. Grasp the tab on the gear-drive arm bracket and carefully flex it away from the scannerassembly to release the bracket.Figure 5-81. Remove the scanner assembly (7 of 13)9. Pull the bracket toward the right side of the product until its mount<strong>in</strong>g tabs clear the holes<strong>in</strong> the scanner assembly.Figure 5-82. Remove the scanner assembly (8 of 13)148 Chapter 5 Removal and replacement ENWW
10. Use a sm<strong>all</strong> flat-blade screwdriver to release the h<strong>in</strong>ge tabs on each front h<strong>in</strong>ge.WARNING!CAUTIONWhen the front h<strong>in</strong>ges are disengaged, the scanner assembly can easily f<strong>all</strong> off of the productbase if it is rotated too far toward the back of the product.Do not push too hard on the l<strong>in</strong>k tabs or the tabs might break.Figure 5-83. Remove the scanner assembly (9 of 13)ENWW <strong>HP</strong> <strong>LaserJet</strong> <strong>3020</strong> and <strong>3030</strong> <strong>all</strong>-<strong>in</strong>-<strong>one</strong> 149
11. Use <strong>one</strong> of the follow<strong>in</strong>g three separate methods to support the scanner assembly so thatit does not f<strong>all</strong> off of the product base.● A Use the <strong>HP</strong> scanner-support tool (part number: 5185-7441).NoteRemove the left-side l<strong>in</strong>k before us<strong>in</strong>g the support tool.●●B Rest the scanner assembly aga<strong>in</strong>st a w<strong>all</strong>.C Rest the scanner assembly aga<strong>in</strong>st your chestFigure 5-84. Remove the scanner assembly (10 of 13)150 Chapter 5 Removal and replacement ENWW
12. Use needle nose pliers to squeeze the two plastic wire-harness reta<strong>in</strong>ers and push themup <strong>in</strong>to the scanner support frame.WARNING!Do not clip wire reta<strong>in</strong>ers. The wire-harnesses might be damaged if the reta<strong>in</strong>ers are clipped<strong>in</strong>stead of removed.Figure 5-85. Remove the scanner assembly (11 of 13)13. Remove <strong>one</strong> screw (c<strong>all</strong>out 5). Carefully remove the ground<strong>in</strong>g shield (c<strong>all</strong>out 6) from thewire loom. Feed the two FFCs and the wire-harness through the hole <strong>in</strong> the chassis, andremove them from the wire loom.Re<strong>in</strong>st<strong>all</strong>ation tipTake note of how the FFCs and wire-harnesses are routed through and attached to thescanner support frame.Figure 5-86. Remove the scanner assembly (12 of 13)ENWW <strong>HP</strong> <strong>LaserJet</strong> <strong>3020</strong> and <strong>3030</strong> <strong>all</strong>-<strong>in</strong>-<strong>one</strong> 151
14. Rotate the scanner assembly toward the rear of the product until the rear h<strong>in</strong>ges clear thechassis h<strong>in</strong>ge p<strong>in</strong>s. Lift the scanner assembly off of the product base.CAUTIONMake sure that the ADF cover and flatbed lid are supported so they do not sw<strong>in</strong>g open whenthe scanner assembly is removed.Note Do not lose the two scanner cushions located <strong>in</strong> the scanner support frame (c<strong>all</strong>out 7).Figure 5-87. Remove the scanner assembly (13 of 13)152 Chapter 5 Removal and replacement ENWW
Pr<strong>in</strong>ter (product base)This section documents removal and replacement <strong>in</strong>structions for comp<strong>one</strong>nts that arecommon to the <strong>HP</strong> <strong>LaserJet</strong> <strong>3015</strong>, <strong>3020</strong>, and <strong>3030</strong> products.NoteFor clarity, the pr<strong>in</strong>ter is shown without the scanner assembly <strong>in</strong> place. Remov<strong>in</strong>g the scannerassembly is not necessary to perform some of the procedures <strong>in</strong> this section.Figure 5-88.Parts removal order for the pr<strong>in</strong>ter (product base, <strong>all</strong> models)ENWW Pr<strong>in</strong>ter (product base) 153
Pr<strong>in</strong>ter separation pad1. At the back of the product, remove two screws (c<strong>all</strong>out 1).Figure 5-89. Remove the pr<strong>in</strong>ter separation pad (1 of 2)2. Remove the pr<strong>in</strong>ter separation pad and frame.Figure 5-90. Remove the pr<strong>in</strong>ter separation pad (2 of 2)Pr<strong>in</strong>t cartridgeCAUTIONTo prevent damage, do not expose the pr<strong>in</strong>t cartridge to direct or bright light. Cover it with apiece of paper.154 Chapter 5 Removal and replacement ENWW
1. Push the pr<strong>in</strong>t-cartridge-door button to release the pr<strong>in</strong>t-cartridge door.Figure 5-91. Remove the pr<strong>in</strong>t cartridge (1 of 2)2. Pull the pr<strong>in</strong>t cartridge up and out of the product.Figure 5-92. Remove the pr<strong>in</strong>t cartridge (2 of 2)ENWW Pr<strong>in</strong>ter (product base) 155
Pr<strong>in</strong>ter pickup roller1. Remove the pr<strong>in</strong>t cartridge and locate the pr<strong>in</strong>ter pickup roller. See Pr<strong>in</strong>t cartridge.Figure 5-93. Remove the pr<strong>in</strong>ter pickup roller (1 of 5)2. Gently release the sm<strong>all</strong>, white tabs on each side of the pickup roller by push<strong>in</strong>g themaway from the roller, and then rotate the roller away from the mount<strong>in</strong>g frame.CAUTIONDo not touch the black-sponge transfer roller <strong>in</strong>side the product. Touch<strong>in</strong>g the transfer rollercan damage the product.Use gentle pressure to release the sm<strong>all</strong> white tabs to avoid break<strong>in</strong>g them.Figure 5-94. Remove the pr<strong>in</strong>ter pickup roller (2 of 5)156 Chapter 5 Removal and replacement ENWW
3. Gently pull the roller up and out of the product.Figure 5-95. Remove the pr<strong>in</strong>ter pickup roller (3 of 5)4. Circular and rectangular pegs on each side of the pickup roller fit <strong>in</strong>to correspond<strong>in</strong>g slotson the pickup-roller mount<strong>in</strong>g frame to prevent the roller from be<strong>in</strong>g <strong>in</strong>correctly <strong>in</strong>st<strong>all</strong>ed.Position the replacement pickup roller <strong>in</strong> the slots on the pickup-roller frame.Figure 5-96. Remove the pr<strong>in</strong>ter pickup roller (4 of 5)ENWW Pr<strong>in</strong>ter (product base) 157
5. Rotate the top of the pickup roller <strong>in</strong>to position until the white tabs on each side of theroller snap <strong>in</strong>to place.Figure 5-97. Remove the pr<strong>in</strong>ter pickup roller (5 of 5)Media <strong>in</strong>put tray1. Open the media <strong>in</strong>put tray lid.Figure 5-98. Remove the media <strong>in</strong>put tray (1 of 3)158 Chapter 5 Removal and replacement ENWW
2. Slide the adjustable media guides (c<strong>all</strong>out 1) to the center of the tray.Figure 5-99. Remove the media <strong>in</strong>put tray (2 of 3)3. Depress the pickup-tray lock<strong>in</strong>g tabs (c<strong>all</strong>out 2) to release the media <strong>in</strong>put tray, and thenpull it out and away from the product.Figure 5-100. Remove the media <strong>in</strong>put tray (3 of 3)Transfer rollerCAUTIONDo not touch the black-sponge portion of the transfer roller. Sk<strong>in</strong> oils deposited on the transferroller might cause pr<strong>in</strong>t-quality problems.Be very careful not to break the paper guide that is removed dur<strong>in</strong>g replacement of thetransfer roller. Because the paper guide is not a FRU, the entire pr<strong>in</strong>ter will have to bereplaced.1. Open the pr<strong>in</strong>t-cartridge door and remove the pr<strong>in</strong>t cartridge.ENWW Pr<strong>in</strong>ter (product base) 159
2. Release the two lock<strong>in</strong>g tabs on the paper guide and rotate the guide up.Figure 5-101. Remove the transfer roller (1 of 3)3. The clamps on the paper guide fit over the bear<strong>in</strong>gs on each end of the transfer roller. Donot touch the black-sponge portion of the transfer roller. Grasp the right end of the paperguide and pull the clamp off the bear<strong>in</strong>g on the right side of the transfer roller. Then slidethe clamp slightly to the right, and the left clamp will slide off the left bear<strong>in</strong>g.Figure 5-102. Remove the transfer roller (2 of 3)160 Chapter 5 Removal and replacement ENWW
4. Squeeze the two sm<strong>all</strong> tabs on the transfer roller.Figure 5-103. Remove the transfer roller (3 of 3)Pr<strong>in</strong>ter side coversNoteThe procedure for remov<strong>in</strong>g the right-side and left-side covers is identical, with the exceptionof the location of the screw that fastens the cover to the product. The right-side cover is shown<strong>in</strong> the follow<strong>in</strong>g procedure.1. Remove <strong>one</strong> screw (c<strong>all</strong>out 1; the right-side cover uses a black screw). C<strong>all</strong>out 2 is on theleft-side cover.Figure 5-104. Remove the pr<strong>in</strong>ter side covers (1 of 3)ENWW Pr<strong>in</strong>ter (product base) 161
2. Release the lock<strong>in</strong>g tabs on the upper-back (c<strong>all</strong>out 2).Figure 5-105. Remove the pr<strong>in</strong>ter side covers (2 of 3)3. Release the bottom tab (c<strong>all</strong>out 3).CAUTIONWhen remov<strong>in</strong>g the left-side cover hang the product off of the table to ga<strong>in</strong> access to thebottom tab. This prevents the I/O shield from be<strong>in</strong>g damaged if the right-side cover is off andthe product is tilted too far up.Figure 5-106. Remove the pr<strong>in</strong>ter side covers (2 of 3)162 Chapter 5 Removal and replacement ENWW
4. Slightly rotate the back-side of the right cover away from the product, and then slide ittoward the front of the product to release it.CAUTIONMake sure that the par<strong>all</strong>el connector bails are <strong>in</strong> the closed position. If they are <strong>in</strong> the openposition, they might spr<strong>in</strong>g off when the cover is removed and be lost.Figure 5-107. Remove the pr<strong>in</strong>ter side covers (3 of 3)Pr<strong>in</strong>t-cartridge door1. Remove the scanner assembly. For the <strong>HP</strong> <strong>LaserJet</strong> <strong>3015</strong>, see Scanner assembly. Forthe <strong>LaserJet</strong> <strong>3020</strong> and <strong>3030</strong>, see Scanner assembly.2. Fully open the pr<strong>in</strong>t-cartridge door and gently pull downward on both pr<strong>in</strong>t-cartridge sw<strong>in</strong>garms (c<strong>all</strong>out 1) to release them (the left arm is shown disengaged).CAUTIONBe careful when releas<strong>in</strong>g the sw<strong>in</strong>g arms. They can easily break.Figure 5-108. Remove the pr<strong>in</strong>t-cartridge door (1 of 2)ENWW Pr<strong>in</strong>ter (product base) 163
3. Rotate the door toward the back of the pr<strong>in</strong>ter and then lift it up and off of the pr<strong>in</strong>ter.Figure 5-109. Remove the pr<strong>in</strong>t-cartridge door (2 of 2)Rear cover and fuser cover1. Remove the right-side and left-side covers. See Pr<strong>in</strong>ter side covers2. Remove <strong>one</strong> screw (c<strong>all</strong>out 1).Figure 5-110. Remove the rear cover and fuser cover (1 of 3)164 Chapter 5 Removal and replacement ENWW
3. Release the two rear-cover lock<strong>in</strong>g tabs (c<strong>all</strong>out 2). Rotate the bottom of the rear cover upand away from the pr<strong>in</strong>ter, and remove it.Figure 5-111. Remove the rear cover and fuser cover (2 of 3)4. Rotate the bottom of the fuser cover away from the pr<strong>in</strong>ter, and remove the fuser cover.Figure 5-112. Remove the rear cover and fuser cover (3 of 3)Front cover1. Remove the right-side and left-side covers. See Pr<strong>in</strong>ter side covers.ENWW Pr<strong>in</strong>ter (product base) 165
2. Release the lower right-side front-cover lock<strong>in</strong>g tab and slightly pry the lower-right cornerof the front cover away from the pr<strong>in</strong>ter.Figure 5-113. Remove the front cover (1 of 3)3. Release the lower left-side front-cover lock<strong>in</strong>g tab ( located near the corner of the powersupply) and slightly pry the lower-left corner of the front cover away from the pr<strong>in</strong>ter.Figure 5-114. Remove the front cover (2 of 3)166 Chapter 5 Removal and replacement ENWW
4. Pry up and pull out on the front cover to release it from the pr<strong>in</strong>ter. Remove the frontcover.Figure 5-115. Remove the front cover (3 of 3)Re<strong>in</strong>st<strong>all</strong>ation tipNote the location of the front-cover tabs (c<strong>all</strong>out 1). Make sure that <strong>all</strong> of the front cover tabsare fully seated when the cover is <strong>in</strong>st<strong>all</strong>ed.Figure 5-116.Front-cover lock<strong>in</strong>g tabsInst<strong>all</strong><strong>in</strong>g the scanner cushions1. Open the pr<strong>in</strong>t-cartridge door.ENWW Pr<strong>in</strong>ter (product base) 167
2. Place a scanner cushion <strong>in</strong> the wells on the scanner support frame (c<strong>all</strong>out 1). Use theeraser end of a pencil or use an <strong>in</strong>k pen with the cap on to seat each cushion <strong>in</strong> its well.Figure 5-117.Inst<strong>all</strong><strong>in</strong>g the scanner cushionsSpeaker assembly1. Remove the right-side pr<strong>in</strong>ter cover. See Pr<strong>in</strong>ter side covers2. Disconnect <strong>one</strong> wire-harness connector (c<strong>all</strong>out 1), unclip <strong>one</strong> wire reta<strong>in</strong>er (c<strong>all</strong>out 2), andthen remove 1 screw (c<strong>all</strong>out 3).Figure 5-118. Remove the speaker assembly (1 of 2)168 Chapter 5 Removal and replacement ENWW
3. Carefully pry the sheet-metal brace away from the pr<strong>in</strong>ter chassis. Slide the speaker downand slightly to the right to release it from the reta<strong>in</strong><strong>in</strong>g clips on the pr<strong>in</strong>ter chassis.Figure 5-119. Remove the speaker assembly (2 of 2)Re<strong>in</strong>st<strong>all</strong>ation tipWhen <strong>in</strong>st<strong>all</strong><strong>in</strong>g a replacement speaker, be careful to not tear the speaker c<strong>one</strong> on anyexposed sharp sheet-metal edges.Power supply1. Remove the rear cover and fuser cover. See Rear cover and fuser cover.ENWW Pr<strong>in</strong>ter (product base) 169
2. Disconnect <strong>one</strong> spade connector (c<strong>all</strong>out 1) and remove three screws (c<strong>all</strong>out 2).Re<strong>in</strong>st<strong>all</strong>ation tipThe center screw <strong>in</strong> c<strong>all</strong>out 2 is a ground screw and is a different type than the others.When re<strong>in</strong>st<strong>all</strong><strong>in</strong>g the power supply, make sure that this screw is used <strong>in</strong> the center hole.Figure 5-120. Remove the power supply (1 of 3)3. Disconnect <strong>one</strong> FFC (c<strong>all</strong>out 3) and five wire-harness connectors (c<strong>all</strong>out 4) and removethem from the wire loom.CAUTIONDo not bend or fold the FFCs dur<strong>in</strong>g the removal or re<strong>in</strong>st<strong>all</strong>ation process.Figure 5-121. Remove the power supply (2 of 3)170 Chapter 5 Removal and replacement ENWW
4. Remove four screws (c<strong>all</strong>out 5) and remove the wire-harness from the wire loom (c<strong>all</strong>out6) and unclip the wire loom from the chassis (remove the wire-harness from this wireloom). Remove the power supplyFigure 5-122. Remove the power supply (3 of 3)Re<strong>in</strong>st<strong>all</strong>ation tipWhen re<strong>in</strong>st<strong>all</strong><strong>in</strong>g the power supply, make sure that the wire-harnesses are routed correctly.Figure 5-123.Correct rout<strong>in</strong>g of the power-supply wire-harnessesFormatter and l<strong>in</strong>e <strong>in</strong>terface unit (LIU)CAUTIONNoteThe formatter and LIU are ESD-sensitive devices.The <strong>HP</strong> <strong>LaserJet</strong> <strong>3020</strong> does not have a l<strong>in</strong>e <strong>in</strong>terface unit (LIU) because it does not have faxcapabilities.ENWW Pr<strong>in</strong>ter (product base) 171
1. Remove the right cover. See Pr<strong>in</strong>ter side covers.2. Remove <strong>one</strong> screw (c<strong>all</strong>out 1) and the I/O shield (c<strong>all</strong>out 2).172 Chapter 5 Removal and replacement ENWW
3. Disconnect <strong>all</strong> of the connectors (c<strong>all</strong>out 3) on the formatter.Figure 5-124.<strong>HP</strong> <strong>LaserJet</strong> <strong>3015</strong> formatter and LIUFigure 5-125.<strong>HP</strong> <strong>LaserJet</strong> <strong>3020</strong> formatter without LIUFigure 5-126. <strong>HP</strong> <strong>LaserJet</strong> <strong>3030</strong> formatter and LIUENWW Pr<strong>in</strong>ter (product base) 173
4. Remove 4 screws from the formatter PCA (c<strong>all</strong>out 2). For the LJ <strong>3015</strong> and <strong>3030</strong>, removethree screws (c<strong>all</strong>out 3) from the LIU. Remove the formatter and any LIU PCAs.NoteIf the LIU on the LJ <strong>3015</strong> or <strong>3030</strong> product is be<strong>in</strong>g replaced, separate the formatter from theLIU by gently pull<strong>in</strong>g them apart.Re<strong>in</strong>st<strong>all</strong>ation tipWhen re<strong>in</strong>st<strong>all</strong><strong>in</strong>g the formatter, make sure that the upper mount<strong>in</strong>g leg on the I/O plate(the cover that surrounds the par<strong>all</strong>el and USB port) is fastened to the formatter when thetop-right formatter screw <strong>in</strong> c<strong>all</strong>out 2 is <strong>in</strong>st<strong>all</strong>edFigure 5-127.Remove the formatter (1 of 2) (and LIU <strong>in</strong>st<strong>all</strong>ed)5. Gently separate the formatter from the sheet-metal shield. Mount the replacementformatter to this shield.Figure 5-128. Remove the formatter (2 of 2)174 Chapter 5 Removal and replacement ENWW
Scanner support frame1. Remove the follow<strong>in</strong>g assemblies● Scanner assembly. For the <strong>HP</strong> <strong>LaserJet</strong> <strong>3015</strong>, see Scanner assembly. For the<strong>LaserJet</strong> <strong>3020</strong> and <strong>3030</strong>, see Scanner assembly.● Left cover. See Pr<strong>in</strong>ter side covers.● Rear cover and fuser cover. See Rear cover and fuser cover.● Pr<strong>in</strong>t cartridge door. See Pr<strong>in</strong>t-cartridge door.● Front cover. See Front cover.2. Remove six screws (c<strong>all</strong>out 1).CAUTIONNoteBe careful not to drop any screws <strong>in</strong>to the pr<strong>in</strong>ter.If the scanner support frame is turned over after it is removed, the two scanner cushions(c<strong>all</strong>out 2) might f<strong>all</strong> out and be misplaced.Figure 5-129. Remove the scanner support frame (1 of 3)ENWW Pr<strong>in</strong>ter (product base) 175
3. Rotate the gear-drive bracket until the reta<strong>in</strong>er on the gear-drive arm aligns with theopen<strong>in</strong>g <strong>in</strong> the bracket, and remove the bracket.Figure 5-130. Remove the scanner support frame (2 of 3)4. Lift the scanner support frame up and off of the pr<strong>in</strong>ter.Figure 5-131. Remove the scanner support frame (3 of 3)176 Chapter 5 Removal and replacement ENWW
NoteIf the scanner support frame is be<strong>in</strong>g removed to ga<strong>in</strong> access to the fuser, remove two screws(c<strong>all</strong>out 3) and the chassis re<strong>in</strong>forcement plate (c<strong>all</strong>out 4)Figure 5-132.Remove the chassis re<strong>in</strong>forcement plateEng<strong>in</strong>e controller unit1. Remove the follow<strong>in</strong>g assemblies.● Scanner assembly. For the <strong>HP</strong> <strong>LaserJet</strong> <strong>3015</strong>, see Scanner assembly. For the<strong>LaserJet</strong> <strong>3020</strong> and <strong>3030</strong>, see Scanner assembly.● Left cover. See Pr<strong>in</strong>ter side covers.● Rear cover and fuser cover. See Rear cover and fuser cover.● Pr<strong>in</strong>t cartridge door. See Pr<strong>in</strong>t-cartridge door.● Front cover. See Front cover.● Scanner support frame. See Scanner support frame.ENWW Pr<strong>in</strong>ter (product base) 177
2. Remove four screws (c<strong>all</strong>out 1).Figure 5-133. Remove the ECU (1 of 6)3. Use a long flat-blade screwdriver to disengage the eng<strong>in</strong>e control unit (ECU) shieldreta<strong>in</strong>er hooks (left hook shown; c<strong>all</strong>out 2) <strong>in</strong>side the pr<strong>in</strong>ter. Push the hooks <strong>in</strong>to thepr<strong>in</strong>ter to disengage them.Figure 5-134. Remove the ECU (2 of 6)178 Chapter 5 Removal and replacement ENWW
4. Disconnect <strong>one</strong> FFC (c<strong>all</strong>out 3) from the formatter.Figure 5-135. Remove the ECU (3 of 6)5. Disconnect <strong>one</strong> FFC (c<strong>all</strong>out 4) from the power supply.CAUTIONDo not bend or fold the FFCs dur<strong>in</strong>g the removal or re<strong>in</strong>st<strong>all</strong>ation process.Figure 5-136. Remove the ECU (4 of 6)ENWW Pr<strong>in</strong>ter (product base) 179
6. Disconnect <strong>one</strong> FFC (c<strong>all</strong>out 5) from the ECU and the wire-harness connector to the ma<strong>in</strong>motor (c<strong>all</strong>out 6). Remove <strong>one</strong> screw (c<strong>all</strong>out 7). Release the wire-harness (c<strong>all</strong>out 8) fromthe reta<strong>in</strong>er slot on the ECU.H<strong>in</strong>tUnweave this wire-harness from additional wire looms to have enough slack to disengage itfrom the slot on the ECU.Figure 5-137. Remove the ECU (5 of 6)7. Carefully remove the ECU from the pr<strong>in</strong>ter. As it is removed, unweave the wire-harnessesand FFCs from the wire looms, and disconnect <strong>one</strong> wire-harness connector (c<strong>all</strong>out 9) fromthe laser/scanner. Remove the ECU.Figure 5-138. Remove the ECU (6 of 6)180 Chapter 5 Removal and replacement ENWW
Re<strong>in</strong>st<strong>all</strong>ation tipMake sure that the laser/scanner shutter arm fits <strong>in</strong>to the black-plastic guide (c<strong>all</strong>out 10) on theECU shield when the shield is <strong>in</strong>st<strong>all</strong>ed.Figure 5-139.Laser/scanner assembly shutter armLaser/scanner assembly1. Remove the follow<strong>in</strong>g assemblies.● Scanner assembly. For the <strong>HP</strong> <strong>LaserJet</strong> <strong>3015</strong>, see Scanner assembly. For the<strong>LaserJet</strong> <strong>3020</strong> and <strong>3030</strong>, see Scanner assembly.● Left cover. See Pr<strong>in</strong>ter side covers.● Rear cover and fuser cover. See Rear cover and fuser cover.● Pr<strong>in</strong>t cartridge door. See Pr<strong>in</strong>t-cartridge door.● Front cover. See Front cover.● Scanner support frame. See Scanner support frame.● ECU. See Eng<strong>in</strong>e controller unit.ENWW Pr<strong>in</strong>ter (product base) 181
2. Remove four screws (c<strong>all</strong>out 1). Remove the laser/scanner assembly.Figure 5-140.Remove the laser/scanner assemblyMa<strong>in</strong> motor1. Remove the follow<strong>in</strong>g assemblies.● Scanner assembly. For the <strong>HP</strong> <strong>LaserJet</strong> <strong>3015</strong>, see Scanner assembly. For the<strong>LaserJet</strong> <strong>3020</strong> and <strong>3030</strong>, see Scanner assembly.● Formatter. See Formatter and l<strong>in</strong>e <strong>in</strong>terface unit (LIU)● Left cover. See Pr<strong>in</strong>ter side covers.● Rear cover and fuser cover. See Rear cover and fuser cover.● Pr<strong>in</strong>t cartridge door. See Pr<strong>in</strong>t-cartridge door.● Front cover. See Front cover.● Scanner support frame. See Scanner support frame.● ECU. See Eng<strong>in</strong>e controller unit.● Laser/scanner assembly. See Laser/scanner assembly.182 Chapter 5 Removal and replacement ENWW
2. Disconnect the motor wire-harness connector (c<strong>all</strong>out 1) and remove <strong>one</strong> screw (c<strong>all</strong>out2).Figure 5-141. Remove the ma<strong>in</strong> motor (1 of 2)3. Remove <strong>one</strong> screw (c<strong>all</strong>out 3), and remove the ma<strong>in</strong> motor.Figure 5-142. Remove the ma<strong>in</strong> motor (2 of 2)ENWW Pr<strong>in</strong>ter (product base) 183
Fuser1. Remove the follow<strong>in</strong>g assemblies.● Scanner assembly. For the <strong>HP</strong> <strong>LaserJet</strong> <strong>3015</strong>, see Scanner assembly. For the<strong>LaserJet</strong> <strong>3020</strong> and <strong>3030</strong>, see Scanner assembly.● Left cover. See Pr<strong>in</strong>ter side covers.● Rear cover and fuser cover. See Rear cover and fuser cover.● Pr<strong>in</strong>t cartridge door. See Pr<strong>in</strong>t-cartridge door.● Front cover. See Front cover.● Scanner support frame and chassis re<strong>in</strong>forcement plate. See Scanner support frame.2. Disconnect cables from near the top of the eng<strong>in</strong>e power assembly and disconnect thelarge ground<strong>in</strong>g wire from the back of the pr<strong>in</strong>ter.3. Disengage the wire-harnesses from the wire reta<strong>in</strong>ers to release the fuser assembly.4. Remove three screws (c<strong>all</strong>out 1; this figure shows the delivery-sensor PCB removed,which is not necessary).Figure 5-143. Remove the fuser assembly (1 of 2)184 Chapter 5 Removal and replacement ENWW
5. Lift the fuser assembly at the right and remove the fuser assembly.Figure 5-144. Remove the fuser assembly (2 of 2)CAUTIONNoteA plastic tab on the left side of the fuser assembly (see Figure 5-145. Fragile tab on fuserassembly) fits <strong>in</strong>to the sheet metal. When <strong>in</strong>st<strong>all</strong><strong>in</strong>g the fuser assembly, avoid break<strong>in</strong>g thistab.When replac<strong>in</strong>g the fuser assembly, be sure to transfer the delivery-sensor PCB from the oldfuser to the new <strong>one</strong>.Figure 5-145.Fragile tab on fuser assemblyENWW Pr<strong>in</strong>ter (product base) 185
Paper-pickup assembly1. Remove the follow<strong>in</strong>g assemblies.● Scanner assembly. For the <strong>HP</strong> <strong>LaserJet</strong> <strong>3015</strong>, see Scanner assembly. For the<strong>LaserJet</strong> <strong>3020</strong> and <strong>3030</strong>, see Scanner assembly.● Left cover. See Pr<strong>in</strong>ter side covers.● Rear cover and fuser cover. See Rear cover and fuser cover.● Pr<strong>in</strong>t cartridge door. See Pr<strong>in</strong>t-cartridge door.● Front cover. See Front cover.● Transfer roller. See Transfer roller.● Fuser. See Fuser.2. Unplug and remove any additional wire-harnesses as necessary to release the paperpickupassembly. Unplug and remove the wire from the solenoid to the formatter.3. Remove six screws (c<strong>all</strong>out 1) and remove the assembly.Figure 5-146.Remove the paper-pickup assembly186 Chapter 5 Removal and replacement ENWW
6 Troubleshoot<strong>in</strong>gThis chapter provides <strong>in</strong>formation about the follow<strong>in</strong>g topics.Basic troubleshoot<strong>in</strong>g ............................................................................................................188Control-panel messages .......................................................................................................193Alert and warn<strong>in</strong>g messages ..........................................................................................193Critical error messages ...................................................................................................201Event-log codes...............................................................................................................204Solv<strong>in</strong>g image-quality problems ............................................................................................206Check<strong>in</strong>g the pr<strong>in</strong>t cartridge ............................................................................................206Solv<strong>in</strong>g pr<strong>in</strong>t image-quality problems .............................................................................206Solv<strong>in</strong>g scann<strong>in</strong>g (copy<strong>in</strong>g) image-quality problems ............................................................216Repetitive image defect ruler ................................................................................................222Solv<strong>in</strong>g paper-feed problems ................................................................................................223Jams occur <strong>in</strong> the pr<strong>in</strong>ter.................................................................................................223Solv<strong>in</strong>g pr<strong>in</strong>t paper-feed problems .................................................................................225Jams occur <strong>in</strong> the automatic document feeder (ADF).....................................................227Solv<strong>in</strong>g scanner (copier) paper-feed problems ..............................................................229Solv<strong>in</strong>g problems with digital subscriber l<strong>in</strong>e (DSL) connections..........................................231Connect<strong>in</strong>g additional devices.........................................................................................231Functional checks .................................................................................................................235Control-panel test............................................................................................................235Half self-test functional check .........................................................................................235Drum rotation functional check ......................................................................................237High-voltage contacts check ..........................................................................................238Updat<strong>in</strong>g the firmware code...................................................................................................240Troubleshoot<strong>in</strong>g tools ............................................................................................................241Pr<strong>in</strong>t<strong>in</strong>g a configuration report, demonstration page, or menu structure ........................241Pr<strong>in</strong>t<strong>in</strong>g <strong>all</strong> fax reports at once (<strong>HP</strong> <strong>LaserJet</strong> <strong>3015</strong> and <strong>3030</strong> only) ...............................241T.30 protocol trace (<strong>HP</strong> <strong>LaserJet</strong> <strong>3015</strong> and <strong>3030</strong> only) .................................................241<strong>Service</strong>-mode functions .........................................................................................................262Secondary service menu ................................................................................................262Developer’s menu ...........................................................................................................263Adjust<strong>in</strong>g the country/region code parameters................................................................264Soft reset.........................................................................................................................265NVRAM <strong>in</strong>it .....................................................................................................................265System sett<strong>in</strong>gs for localized products............................................................................266Pr<strong>in</strong>ter job language (PJL) software commands ............................................................268Ma<strong>in</strong> wir<strong>in</strong>g ............................................................................................................................269Comp<strong>one</strong>nt locations, <strong>HP</strong> <strong>LaserJet</strong> <strong>3015</strong> <strong>all</strong>-<strong>in</strong>-<strong>one</strong> .............................................................272Comp<strong>one</strong>nt locations, <strong>HP</strong> <strong>LaserJet</strong> <strong>3020</strong> and <strong>3030</strong> <strong>all</strong>-<strong>in</strong>-<strong>one</strong>..............................................276Comp<strong>one</strong>nt locations, <strong>HP</strong> <strong>LaserJet</strong> <strong>3015</strong>, <strong>3020</strong> and <strong>3030</strong> pr<strong>in</strong>ter (product base)................277ENWW 187
Basic troubleshoot<strong>in</strong>gNoteThe <strong>HP</strong> <strong>LaserJet</strong> <strong>3015</strong> and <strong>3030</strong> <strong>all</strong>-<strong>in</strong>-<strong>one</strong> products have fax<strong>in</strong>g capabilities. The <strong>HP</strong><strong>LaserJet</strong> <strong>3020</strong> <strong>all</strong>-<strong>in</strong>-<strong>one</strong> product does not operate as a fax<strong>in</strong>g device.Is Power-on successful?When the product is connected to a grounded power source, the words Hewlett Packard appear with mov<strong>in</strong>gcursors to <strong>in</strong>dicate that the firmware code is load<strong>in</strong>g, and the pr<strong>in</strong>ter motor rotates for approximately 5 seconds.NoteCauseThe flash<strong>in</strong>g wavy l<strong>in</strong>es that appear on the control-panel display dur<strong>in</strong>g this period are normal.SolutionNo power is available because of a failed power source,cable, switch. (No LEDs are lit and the display is blank.)1. Verify that the product is plugged <strong>in</strong> to a functional powersource.2. Verify that the power cable is functional and that thepower switch is on.3. Verify that FU101 on the power supply is not open (alsocheck FU102 if present). See Ma<strong>in</strong> wir<strong>in</strong>g.4. If <strong>all</strong> of these conditions are correct, replace the powersupply. See Power supply.Pr<strong>in</strong>ter motor does not rotate. 1. Verify that the pr<strong>in</strong>t cartridge is present.2. Verify that the product doors are closed.3. Verify that media is loaded <strong>in</strong> the paper <strong>in</strong>put tray. SeeLoad<strong>in</strong>g media.4. Verify that the pr<strong>in</strong>ter-path-paper sensors are functional.5. Verify that the wire-harness from the ECU is seated <strong>in</strong>tothe motor connector.6. Verify that the motor is correctly mounted to the productchassis.7. If <strong>all</strong> of these conditions are correct, replace the ECU.See Eng<strong>in</strong>e controller unit.8. If, after replac<strong>in</strong>g the ECU, the pr<strong>in</strong>ter motor still does notrotate, replace the motor. See Ma<strong>in</strong> motor.Does the product achieve the ready state?The motor rotates, but the lights are not on.CauseThe formatter is damaged or has a loose connection.SolutionVerify that the formatter cables are properly connected. If <strong>all</strong>cables are undamaged and seated correctly but the problempersists, replace the formatter. See Formatter and l<strong>in</strong>e<strong>in</strong>terface unit (LIU).188 Chapter 6 Troubleshoot<strong>in</strong>g ENWW
Is the product ready?The control panel should function without error messages.CauseSolutionAn error message appears on the control-panel display.Control panel is not functional.Consult the list of common messages which appears later <strong>in</strong>this chapter, to correct the error. See Control-panel messages.Verify that the control panel cable is seated <strong>in</strong>to both thecontrol panel and the scanner formatter. Also check theconnections between the scanner motor controller board andthe formatter. If <strong>all</strong> cables are undamaged and seatedcorrectly but the problem persists, replace the control panel.<strong>HP</strong> <strong>LaserJet</strong> <strong>3015</strong>, see Control-panel assembly. <strong>HP</strong><strong>LaserJet</strong> <strong>3020</strong> and <strong>3030</strong>, see Control-panel assembly.Control-panel display is blank, but the LEDs are lit. 1. Pr<strong>in</strong>t a page from a software program. If the page pr<strong>in</strong>ts,verify that the control-panel cables are correctly seated.2. If the problem persists, replace the control panel. <strong>HP</strong><strong>LaserJet</strong> <strong>3015</strong>, see Control-panel assembly. <strong>HP</strong><strong>LaserJet</strong> <strong>3020</strong> and <strong>3030</strong>, see Control-panel assembly.3. If the problem persists, replace the formatter. SeeFormatter and l<strong>in</strong>e <strong>in</strong>terface unit (LIU).Control-panel display and LEDs function, but buttons do notwork.Replace the control panel. <strong>HP</strong> <strong>LaserJet</strong> <strong>3015</strong>, see Controlpanelassembly. <strong>HP</strong> <strong>LaserJet</strong> <strong>3020</strong> and <strong>3030</strong>, see Controlpanelassembly.Does the demo page pr<strong>in</strong>t?Pr<strong>in</strong>t a demo page by open<strong>in</strong>g the reports menu and select Demo Page.CauseSolutionThe media does not move smoothly through the paper path.The documents pr<strong>in</strong>t with poor pr<strong>in</strong>t quality.Make sure that the media meets specifications detailed <strong>in</strong> the<strong>HP</strong> <strong>LaserJet</strong> Pr<strong>in</strong>ter Family Pr<strong>in</strong>t Media Guide.If the media is consistently jamm<strong>in</strong>g and the paper path isclear, replace either the paper-pickup assembly or the fuser,depend<strong>in</strong>g on where the jam occurs. See Paper-pickupassembly or Fuser.See Solv<strong>in</strong>g image-quality problems.ENWW Basic troubleshoot<strong>in</strong>g 189
Is the copy function operational?Place the configuration report <strong>in</strong>to the ADF and make a copy. The report should feed smoothly through the ADFand copies should pr<strong>in</strong>t without pr<strong>in</strong>t-quality problems. Make a copy from the flatbed as well (<strong>HP</strong> <strong>LaserJet</strong> <strong>3020</strong> and<strong>3030</strong> only).CauseSolutionPoor copy quality from the flatbed (<strong>HP</strong> <strong>LaserJet</strong> <strong>3020</strong> and<strong>3030</strong>).1. If the pr<strong>in</strong>t quality from the <strong>in</strong>ternal tests and the copy fromthe ADF are acceptable, clean the flatbed glass. SeeClean<strong>in</strong>g the product.2. Adjust the LIGHTER/DARKER sett<strong>in</strong>g on the control panel.3. If, after perform<strong>in</strong>g the ma<strong>in</strong>tenance, the problempersists, replace the ADF assembly (the ADF is part ofthe flatbed lid). See Flatbed lid.Poor copy quality from the ADF (<strong>HP</strong> <strong>LaserJet</strong> <strong>3015</strong>). 1. Clean the ADF scanner glass. See Clean<strong>in</strong>g the product.2. Adjust the LIGHTER/DARKER sett<strong>in</strong>g on the control panel.3. If the problem persists, replace the scanner assembly.See Scanner assembly.Media does not move smoothly through the ADF path.Clean the ADF pickup roller and ADF separation pad (seeClean<strong>in</strong>g the pr<strong>in</strong>t-cartridge area. If the problem persists,replace the ADF pickup roller and ADF separation pad (seeUser replaceable parts. If the problem persists, for the <strong>HP</strong><strong>LaserJet</strong> <strong>3015</strong> replace the scanner assembly (see, Scannerassembly. . If the problem persists, for the <strong>HP</strong> <strong>LaserJet</strong> <strong>3020</strong>,and <strong>3030</strong> replace the ADF assembly (the flatbed lid conta<strong>in</strong>sthe ADF assembly; see, Flatbed lid).Does the product send a fax? (<strong>HP</strong> <strong>LaserJet</strong> <strong>3015</strong> and <strong>3030</strong> only)Connect the ph<strong>one</strong> l<strong>in</strong>e and verify the dial t<strong>one</strong> (us<strong>in</strong>g a hand set, if necessary). Attempt to send a fax.CauseSolutionThe fax cord is plugged <strong>in</strong>to the additional device connectoron the back of the product.The teleph<strong>one</strong> l<strong>in</strong>e is not operational or the product is notplugged <strong>in</strong>to the teleph<strong>one</strong> l<strong>in</strong>e.The ph<strong>one</strong> cord is faulty or is plugged <strong>in</strong>to the wrongconnector.The product’s fax sett<strong>in</strong>gs are set <strong>in</strong>correctly.The LIU is not operational.If the customer is us<strong>in</strong>g a digital subscriber l<strong>in</strong>e (DSL)connection, the setup might be <strong>in</strong>correct.Verify that the fax cord is plugged <strong>in</strong>to the fax <strong>in</strong>terface port( the bottom ph<strong>one</strong> cord connector) on the back of theproduct. See Overview of products.Make sure that the product is plugged <strong>in</strong>to a teleph<strong>one</strong> l<strong>in</strong>ethat works (press fax/send and listen for a dial t<strong>one</strong>).Try plugg<strong>in</strong>g the ph<strong>one</strong> cord <strong>in</strong>to the other connector. Try anew cord.Review and reset the product’s fax sett<strong>in</strong>gs. See Controlpanelmenu structure.Replace the LIU. If the problem persists, replace theformatter. See Formatter and l<strong>in</strong>e <strong>in</strong>terface unit (LIU).See Solv<strong>in</strong>g problems with digital subscriber l<strong>in</strong>e (DSL)connections for <strong>in</strong>formation about sett<strong>in</strong>g up DSLconnections.190 Chapter 6 Troubleshoot<strong>in</strong>g ENWW
Does the product receive a fax? (<strong>HP</strong> <strong>LaserJet</strong> <strong>3015</strong>/<strong>3030</strong> only)Use another fax mach<strong>in</strong>e to send a fax to the product.CauseSolutionThe fax cord is plugged <strong>in</strong>to the additional device connectoron the back of the product.Too many teleph<strong>one</strong> products are plugged <strong>in</strong>, or teleph<strong>one</strong>products are not connected <strong>in</strong> the correct order.The product’s fax sett<strong>in</strong>gs are set <strong>in</strong>correctly.The l<strong>in</strong>e <strong>in</strong>terface unit (LIU) is not operational.If the customer is us<strong>in</strong>g a digital subscriber l<strong>in</strong>e (DSL)connection, the setup might be <strong>in</strong>correct.Verify that the fax cord is plugged <strong>in</strong>to the fax <strong>in</strong>terface port( the bottom ph<strong>one</strong> cord connector) on the back of theproduct.Make sure that the product is the only product on theteleph<strong>one</strong> l<strong>in</strong>e and try aga<strong>in</strong> to receive the fax (press fax/sendand listen for a dial t<strong>one</strong>).Review and reset the product’s fax sett<strong>in</strong>gs. See Controlpanelmenu structure.Replace the LIU. If the problem persists, replace theformatter. See Formatter and l<strong>in</strong>e <strong>in</strong>terface unit (LIU).See Solv<strong>in</strong>g problems with digital subscriber l<strong>in</strong>e (DSL)connections for <strong>in</strong>formation about sett<strong>in</strong>g up DSLconnections.Is the software <strong>in</strong>st<strong>all</strong>ed correctly?CauseSoftware is not <strong>in</strong>st<strong>all</strong>ed or an error occurred dur<strong>in</strong>g software<strong>in</strong>st<strong>all</strong>ation.SolutionUn<strong>in</strong>st<strong>all</strong> and then reload the product software. Make surethat the correct <strong>in</strong>st<strong>all</strong>ation procedure and the correct portsett<strong>in</strong>g is used.Does the product pr<strong>in</strong>t from the computer?Connect the par<strong>all</strong>el cable or USB cable between the product and the computer. Use a word-process<strong>in</strong>g program tosend a pr<strong>in</strong>t job to the product.CauseSolutionThe cable is not connected correctly.An <strong>in</strong>correct driver is selected.Other products are connected to the par<strong>all</strong>el port or USB port.An LPT port driver problem exists <strong>in</strong> Microsoft W<strong>in</strong>dows.A problem exists <strong>in</strong> the device manager.The formatter has failed.Reconnect the cable.Select the correct driver.Disconnect the other products and try aga<strong>in</strong> to pr<strong>in</strong>t.Reset the computer’s port sett<strong>in</strong>gs. Verify that the port is setfor bidirectional communication.Check the computer system sett<strong>in</strong>gs and fix any deviceproblems.Replace the formatter. See Formatter and l<strong>in</strong>e <strong>in</strong>terface unit(LIU).ENWW Basic troubleshoot<strong>in</strong>g 191
Does the product scan to the computer?Initiate a scan from either the computer’s basic desktop software or from the product.CauseSolutionOther products are connected to the par<strong>all</strong>el port or USB port.The computer’s par<strong>all</strong>el-port hardware is not bidirectional.The BIOS sett<strong>in</strong>gs for the par<strong>all</strong>el port are set <strong>in</strong>correctly.Poll<strong>in</strong>g is turned off <strong>in</strong> <strong>HP</strong> Toolbox, or <strong>HP</strong> Toolbox is notrunn<strong>in</strong>g.Disconnect the other products and try aga<strong>in</strong> to scan.Check the computer documentation to see if the portconfiguration can be changed. Make sure the correct port isselected.Reset the computer’s port sett<strong>in</strong>gs. If the problem persists,reset the BIOS sett<strong>in</strong>gs <strong>in</strong> CMOS.Start <strong>HP</strong> Toolbox and turn on poll<strong>in</strong>g.192 Chapter 6 Troubleshoot<strong>in</strong>g ENWW
Control-panel messagesThe majority of the control-panel messages are <strong>in</strong>tended to guide the user through normaloperation. The control-panel messages <strong>in</strong>dicate the status of the current operation, and<strong>in</strong>clude a page count on the second l<strong>in</strong>e of the display, if appropriate. When the product isreceiv<strong>in</strong>g fax data, pr<strong>in</strong>t data, or scann<strong>in</strong>g commands, control-panel messages <strong>in</strong>dicate thisstatus. In addition, alert messages, warn<strong>in</strong>g messages, and critical error messages <strong>in</strong>dicatesituations that might require some action.Note<strong>HP</strong> <strong>LaserJet</strong> <strong>3015</strong> and <strong>3030</strong> only: This product has been tested with the supplied two-wireteleph<strong>one</strong> cord to meet RJ11 specifications. If you are experienc<strong>in</strong>g fax<strong>in</strong>g problems, makesure that the supplied ph<strong>one</strong> cord or an equivalent cord is <strong>in</strong>st<strong>all</strong>ed.Alert and warn<strong>in</strong>g messagesAlert and warn<strong>in</strong>g messages appear temporarily and might require the user to acknowledgethe message by press<strong>in</strong>g MENU/ENTER to resume or by press<strong>in</strong>g CANCEL to cancel the job. Withcerta<strong>in</strong> warn<strong>in</strong>gs, the job might not complete or the pr<strong>in</strong>t quality might be affected. If the alertor warn<strong>in</strong>g message is related to pr<strong>in</strong>t<strong>in</strong>g and the auto-cont<strong>in</strong>ue feature is on, the product willattempt to resume the pr<strong>in</strong>t<strong>in</strong>g job after the warn<strong>in</strong>g has appeared for 10 seconds withoutacknowledgement.NoteNoteSome control-panel error messages might not apply to the product be<strong>in</strong>g serviced, andtherefore they will not appear on the control-panel display. For example, fax error messageswill not appear on the control-panel display for the <strong>HP</strong> <strong>LaserJet</strong> <strong>3020</strong> <strong>all</strong>-<strong>in</strong>-<strong>one</strong> product.Event-log codes are not listed here. For a list of event-log codes, see Event-log codes.Table 6-1. Alert and warn<strong>in</strong>g messagesControl panel messageEvent logerrormessageDescriptionRecommended action###: [Group Name] Phbook/SpeedDial(<strong>HP</strong> <strong>LaserJet</strong> <strong>3015</strong> and <strong>3030</strong> only)N<strong>one</strong>The product is wait<strong>in</strong>g for theprogrammed <strong>one</strong>-touch button tobe pressed or add a speed-dialcode to a group-dial code.Beg<strong>in</strong> add<strong>in</strong>g fax numbers to thegroup-dial code. See “To managegroup-dial entries” <strong>in</strong> the fax guideon the product CD.Canceled copy. Clear document N<strong>one</strong> The CANCEL button was pressed tocancel the current job while pageswere feed<strong>in</strong>g from the documentfeeder. The cancel process will notautomatic<strong>all</strong>y clear the documentfeeder.Canceled scan. Clear document N<strong>one</strong> The CANCEL button was pressed tocancel the current job while pageswere feed<strong>in</strong>g from the documentfeeder. The cancel process will notautomatic<strong>all</strong>y clear the documentfeeder.Open the ADF cover or raise theflatbed lid (<strong>HP</strong> <strong>LaserJet</strong> <strong>3020</strong> and<strong>3030</strong> only), remove the jammeditem, and close the door or lid.Then, clear the items <strong>in</strong> thedocument feeder tray and startover.Open the ADF cover or raise theflatbed lid (<strong>HP</strong> <strong>LaserJet</strong> <strong>3020</strong> and<strong>3030</strong> only), remove the jammeditem, and close the door or lid.Then, clear the items <strong>in</strong> thedocument feeder tray and startover.ENWW Control-panel messages 193
Table 6-1. Alert and warn<strong>in</strong>g messages (cont<strong>in</strong>ued)Control panel messageEvent logerrormessageDescriptionCanceled send. Clear document N<strong>one</strong> The CANCEL button was pressed tocancel the current job while pageswere feed<strong>in</strong>g from the documentfeeder tray. The cancel process willnot automatic<strong>all</strong>y clear thedocument feeder.Recommended actionOpen the ADF cover or raise theflatbed lid (<strong>HP</strong> <strong>LaserJet</strong> <strong>3020</strong> and<strong>3030</strong> only), remove the jammeditem, and close the door or lid.Then, clear the items <strong>in</strong> thedocument feeder tray and startover.Clean<strong>in</strong>g Mode.Wait 1-3 m<strong>in</strong>.N<strong>one</strong>The product is runn<strong>in</strong>g an <strong>in</strong>ternalclean<strong>in</strong>g cycle.Wait for the product to f<strong>in</strong>ish theclean<strong>in</strong>g cycle. The message willclear when the cycle is f<strong>in</strong>ished.Comm. error(<strong>HP</strong> <strong>LaserJet</strong> <strong>3015</strong> and <strong>3030</strong> only)N<strong>one</strong>Fax communication error occurredbetween the product and thesender or receiver. For descriptionsof communication errors, see Table6-4. Fax receive codes, and Table6-5. Fax send codes.Allow the product to retry send<strong>in</strong>gthe fax. Unplug the productteleph<strong>one</strong> cord from the w<strong>all</strong>, plug<strong>in</strong> a teleph<strong>one</strong>, and try mak<strong>in</strong>g ac<strong>all</strong>. Plug the product ph<strong>one</strong> cord<strong>in</strong>to a jack for another ph<strong>one</strong> l<strong>in</strong>e.Reseat or replace the cord. Try adifferent ph<strong>one</strong> cord.If the error persists, replace theLIU. See Formatter and l<strong>in</strong>e<strong>in</strong>terface unit (LIU).Device error. [enter] to cont. N<strong>one</strong> An <strong>in</strong>ternal error occurred <strong>in</strong> theproduct.Press MENU/ENTER to resume the job.Device is busy.Try aga<strong>in</strong> laterN<strong>one</strong> The product is currently <strong>in</strong> use. Wait for the product to f<strong>in</strong>ish thecurrent job.Doc feeder jamClear, ReloadN<strong>one</strong>A piece of media is jammed <strong>in</strong> thedocument feeder tray.Open the ADF cover or raise theflatbed lid (LJ <strong>3020</strong>/<strong>3030</strong> only),remove the jammed item (see,Solv<strong>in</strong>g paper-feed problems), andclose the door or lid. Then, clear theitems <strong>in</strong> the document feeder trayand start over.If the error persists, replace theADF separation pad and ADFpickup roller. See, User replaceableparts.Document feeder mispick. Reload N<strong>one</strong> Media <strong>in</strong> the document feeder traywas not picked up.Remove the media from thedocument feeder tray and thenreload it.If the error persists, replace theADF pickup roller and ADFseparation pad. See, Userreplaceable parts.194 Chapter 6 Troubleshoot<strong>in</strong>g ENWW
Table 6-1. Alert and warn<strong>in</strong>g messages (cont<strong>in</strong>ued)Control panel messageEvent logerrormessageDescriptionRecommended actionDoor open or nopr<strong>in</strong>t cartridgeN<strong>one</strong>The pr<strong>in</strong>t cartridge door is open orthe pr<strong>in</strong>t cartridge is not <strong>in</strong>st<strong>all</strong>edproperly.1. Check that the pr<strong>in</strong>t cartridgedoor is completely closed.2. Forcefully open and close thepr<strong>in</strong>t-cartridge door to makesure that the pr<strong>in</strong>t cartridge isseated.3. Check that the pr<strong>in</strong>t cartridge iscorrectly <strong>in</strong>st<strong>all</strong>ed.Eng<strong>in</strong>e comm. error N<strong>one</strong> The product experienced an<strong>in</strong>ternal communication error.Warn<strong>in</strong>g message only. Job outputmight be affected.Fax is busyCanceled send(<strong>HP</strong> <strong>LaserJet</strong> <strong>3015</strong> and <strong>3030</strong> only)N<strong>one</strong>The receiv<strong>in</strong>g fax l<strong>in</strong>e was busy.The product has canceled send<strong>in</strong>gthe fax.C<strong>all</strong> the recipient to ensure thattheir fax mach<strong>in</strong>e is turned on andready.Check that you are dial<strong>in</strong>g thecorrect fax number.Check that the Redial if busyoption is enabled. See, Controlpanelmenu structure.Check for a dial t<strong>one</strong> on the ph<strong>one</strong>l<strong>in</strong>e by press<strong>in</strong>g FAX/SEND.Make sure that the ph<strong>one</strong> l<strong>in</strong>e iswork<strong>in</strong>g by disconnect<strong>in</strong>g theproduct, plugg<strong>in</strong>g <strong>in</strong> a teleph<strong>one</strong> tothe ph<strong>one</strong> l<strong>in</strong>e, and mak<strong>in</strong>g a voicec<strong>all</strong>.Plug the product ph<strong>one</strong> cord <strong>in</strong>to ajack for another ph<strong>one</strong> l<strong>in</strong>e, and trysend<strong>in</strong>g the fax aga<strong>in</strong>.Try a different ph<strong>one</strong> cord.Update the firmware. See Updat<strong>in</strong>gthe firmware code.If the error persists, replace theLIU. See, Formatter and l<strong>in</strong>e<strong>in</strong>terface unit (LIU).ENWW Control-panel messages 195
Table 6-1. Alert and warn<strong>in</strong>g messages (cont<strong>in</strong>ued)Control panel messageEvent logerrormessageDescriptionRecommended actionFax is busyRedial pend<strong>in</strong>g(<strong>HP</strong> <strong>LaserJet</strong> <strong>3015</strong> and <strong>3030</strong> only)N<strong>one</strong>The fax l<strong>in</strong>e to which you weresend<strong>in</strong>g a fax was busy. Theproduct automatic<strong>all</strong>y redials thebusy number. (See “Chang<strong>in</strong>g theredial sett<strong>in</strong>g” <strong>in</strong> the fax guide on theproduct CD.)Allow the product to retry send<strong>in</strong>gthe fax.C<strong>all</strong> the recipient to ensure that thefax mach<strong>in</strong>e is turned on and ready.Check that you are dial<strong>in</strong>g thecorrect fax number.Check for a dial t<strong>one</strong> on the ph<strong>one</strong>l<strong>in</strong>e by press<strong>in</strong>g FAX/SEND.Make sure that the ph<strong>one</strong> l<strong>in</strong>e iswork<strong>in</strong>g by disconnect<strong>in</strong>g theproduct, plugg<strong>in</strong>g <strong>in</strong> a teleph<strong>one</strong> tothe ph<strong>one</strong> l<strong>in</strong>e, and mak<strong>in</strong>g a voicec<strong>all</strong>.Plug the product ph<strong>one</strong> cord <strong>in</strong>to ajack for another ph<strong>one</strong> l<strong>in</strong>e, and trysend<strong>in</strong>g the fax aga<strong>in</strong>.Try a different ph<strong>one</strong> cord.Update the firmware. See Updat<strong>in</strong>gthe firmware code.If the error persists, replace theLIU. See, Formatter and l<strong>in</strong>e<strong>in</strong>terface unit (LIU).Fax memory fullCancel<strong>in</strong>g recv.(<strong>HP</strong> <strong>LaserJet</strong> <strong>3015</strong> and <strong>3030</strong> only)N<strong>one</strong>Dur<strong>in</strong>g the fax transmission, theproduct ran out of memory. Only thepages that fit <strong>in</strong>to memory will bepr<strong>in</strong>ted.Pr<strong>in</strong>t <strong>all</strong> of the faxes and have thesender resend the fax. Cancel <strong>all</strong>fax jobs or clear the faxes frommemory (see “Delet<strong>in</strong>g faxes frommemory” <strong>in</strong> the fax guide on theproduct CD).Fax memory fullCancel<strong>in</strong>g send(<strong>HP</strong> <strong>LaserJet</strong> <strong>3015</strong> and <strong>3030</strong> only)N<strong>one</strong>Dur<strong>in</strong>g the fax job, the memoryfilled. All pages of the fax have to be<strong>in</strong> memory for a fax job to workcorrectly. Only the pages that fit <strong>in</strong>tomemory were sent.Pr<strong>in</strong>t <strong>all</strong> received faxes or wait until<strong>all</strong> pend<strong>in</strong>g faxes are sent.Cancel <strong>all</strong> fax jobs or clear the faxesfrom memory (see “Delet<strong>in</strong>g faxesfrom memory” <strong>in</strong> the fax guide onthe product CD).196 Chapter 6 Troubleshoot<strong>in</strong>g ENWW
Table 6-1. Alert and warn<strong>in</strong>g messages (cont<strong>in</strong>ued)Control panel messageEvent logerrormessageDescriptionRecommended actionFax recv. error(<strong>HP</strong> <strong>LaserJet</strong> <strong>3015</strong> and <strong>3030</strong> only)N<strong>one</strong>An error occurred while try<strong>in</strong>g toreceive a fax.Ask the sender to resend the fax.Try fax<strong>in</strong>g back to the sender oranother fax mach<strong>in</strong>e.Check for a dial t<strong>one</strong> on the ph<strong>one</strong>l<strong>in</strong>e by press<strong>in</strong>g FAX/SEND.Check that the teleph<strong>one</strong> cord issecurely connected by unplugg<strong>in</strong>gand replugg<strong>in</strong>g the cord.Make sure that the ph<strong>one</strong> iswork<strong>in</strong>g by disconnect<strong>in</strong>g theproduct, plugg<strong>in</strong>g <strong>in</strong> a teleph<strong>one</strong> tothe ph<strong>one</strong> l<strong>in</strong>e, and mak<strong>in</strong>g a voicec<strong>all</strong>.Turn off error-correction mode(ECM), and turn off V.34. Ask thesender to resend the fax.Turn off error-correction mode(ECM) and turn off V.34. Ask thesender to resend the fax.Connect the product to a differentph<strong>one</strong> l<strong>in</strong>e.If the error persists, replace theLIU. See, Formatter and l<strong>in</strong>e<strong>in</strong>terface unit (LIU).Fax Send error(<strong>HP</strong> <strong>LaserJet</strong> <strong>3015</strong> and <strong>3030</strong> only)N<strong>one</strong>An error occurred while try<strong>in</strong>g tosend a fax.Try resend<strong>in</strong>g the fax.Check for a dial t<strong>one</strong> on the ph<strong>one</strong>l<strong>in</strong>e by press<strong>in</strong>g FAX/SEND.Try fax<strong>in</strong>g to another fax number.Check that the teleph<strong>one</strong> cord issecurely connected by unplugg<strong>in</strong>gand replugg<strong>in</strong>g the cord.Make sure that the ph<strong>one</strong> iswork<strong>in</strong>g by disconnect<strong>in</strong>g theproduct, plugg<strong>in</strong>g <strong>in</strong> a teleph<strong>one</strong> tothe ph<strong>one</strong> l<strong>in</strong>e, and mak<strong>in</strong>g a voicec<strong>all</strong>.Connect the product to a differentph<strong>one</strong> l<strong>in</strong>e.If the error persists, replace theLIU. See, Formatter and l<strong>in</strong>e<strong>in</strong>terface unit (LIU).Fit to Page onflatbed onlyN<strong>one</strong>The copy reduce/enlarge featureonly applies to flatbed copies.Use the flatbed or select anotherreduction/enlargement sett<strong>in</strong>g.(<strong>HP</strong> <strong>LaserJet</strong> <strong>3020</strong> and <strong>3030</strong> only)ENWW Control-panel messages 197
Table 6-1. Alert and warn<strong>in</strong>g messages (cont<strong>in</strong>ued)Control panel messageEvent logerrormessageDescriptionRecommended actionGroup dial not <strong>all</strong>owed <strong>in</strong> group(<strong>HP</strong> <strong>LaserJet</strong> <strong>3015</strong> and <strong>3030</strong> only)N<strong>one</strong>The speed-dial code that you typedis programmed for a group. Add<strong>in</strong>ga group-dial to another group-dial isnot <strong>all</strong>owed.Add <strong>one</strong>-touch buttons(programmed as an <strong>in</strong>dividualspeed dial) or speed-dial codes to agroup-dial.Invalid date(<strong>HP</strong> <strong>LaserJet</strong> <strong>3015</strong> and <strong>3030</strong> only)N<strong>one</strong>An <strong>in</strong>valid date was entered, suchas June 35.Re-enter the date.Invalid entry N<strong>one</strong> Invalid data or response. Correct the entry.Mem. low 1 copyPress [cancel]N<strong>one</strong>The product completed mak<strong>in</strong>g <strong>one</strong>copy. The rema<strong>in</strong><strong>in</strong>g copies havebeen canceled because of lowproduct memory.Press CANCEL to clear the error.Break the job <strong>in</strong>to sm<strong>all</strong>er jobs thatconta<strong>in</strong> fewer pages.Memory is lowTry aga<strong>in</strong> laterN<strong>one</strong>The product does not have enoughmemory to start a new job.Wait until the current job is f<strong>in</strong>ishedbefore start<strong>in</strong>g a new job.Remove a surge protector if <strong>one</strong> isbe<strong>in</strong>g used. Plug the pr<strong>in</strong>ter directly<strong>in</strong>to the w<strong>all</strong> socket. Use the powerswitch to turn the product on.Memory is low.Press [enter]N<strong>one</strong>The product memory has beenalmost completely filled.Allow the product to f<strong>in</strong>ish the job,or press MENU/ENTER to cancel thejob.Memory lowOnly 1 copy madeN<strong>one</strong>Break the job <strong>in</strong>to sm<strong>all</strong>er jobs thatconta<strong>in</strong> fewer pages.Cont<strong>in</strong>ue complet<strong>in</strong>g the collatedcopy job.No Dial T<strong>one</strong>(<strong>HP</strong> <strong>LaserJet</strong> <strong>3015</strong> and <strong>3030</strong> only)N<strong>one</strong>The product could not detect a dialt<strong>one</strong>.Check for a dial t<strong>one</strong> on the ph<strong>one</strong>l<strong>in</strong>e by press<strong>in</strong>g FAX/SEND.Unplug the teleph<strong>one</strong> cord fromboth the product and the w<strong>all</strong> andreplug the cord.Unplug the product teleph<strong>one</strong> cordfrom the w<strong>all</strong>, plug <strong>in</strong> a teleph<strong>one</strong>,and try mak<strong>in</strong>g a c<strong>all</strong>.Plug the product ph<strong>one</strong> cord <strong>in</strong>to ajack for another ph<strong>one</strong> l<strong>in</strong>e. See“Chang<strong>in</strong>g the detect-dial-t<strong>one</strong>sett<strong>in</strong>g” <strong>in</strong> the fax guide on theproduct CD.Update the firmware. See Updat<strong>in</strong>gthe firmware code.If the error persists, replace theLIU. If, after replac<strong>in</strong>g the LIU, theerror persists, replace the formatter.See, Formatter and l<strong>in</strong>e <strong>in</strong>terfaceunit (LIU).No document sent(<strong>HP</strong> <strong>LaserJet</strong> <strong>3015</strong> and <strong>3030</strong> only)N<strong>one</strong>The product did not scan any pagesor receive a file from the computerto transmit as a fax.Rescan the pages or resend the filefrom the computer to transmit as afax.198 Chapter 6 Troubleshoot<strong>in</strong>g ENWW
Table 6-1. Alert and warn<strong>in</strong>g messages (cont<strong>in</strong>ued)Control panel messageEvent logerrormessageDescriptionRecommended actionNo fax answer.Canceled send(<strong>HP</strong> <strong>LaserJet</strong> <strong>3015</strong> and <strong>3030</strong> only)N<strong>one</strong>Attempts to redial a fax numberfailed, or the “Redial-no answer”option was turned off.C<strong>all</strong> the recipient to ensure thattheir fax mach<strong>in</strong>e is on and ready.Check that you are dial<strong>in</strong>g thecorrect fax number.Check that the redial option isenabled. See Control-panel menustructure.Unplug the teleph<strong>one</strong> cord fromboth the product and the w<strong>all</strong> andreplug the cord.Unplug the product teleph<strong>one</strong> cordfrom the w<strong>all</strong>, plug <strong>in</strong> a teleph<strong>one</strong>,and try mak<strong>in</strong>g a c<strong>all</strong>.Plug the product ph<strong>one</strong> cord <strong>in</strong>to ajack for another ph<strong>one</strong> l<strong>in</strong>e.Update the firmware. See Updat<strong>in</strong>gthe firmware code.If the error persists, replace theformatter. See, Formatter and l<strong>in</strong>e<strong>in</strong>terface unit (LIU).No fax answer.Redial pend<strong>in</strong>g(<strong>HP</strong> <strong>LaserJet</strong> <strong>3015</strong> and <strong>3030</strong> only)N<strong>one</strong>The receiv<strong>in</strong>g fax l<strong>in</strong>e did notanswer. The product attempts toredial after a few m<strong>in</strong>utes.Allow the product to retry send<strong>in</strong>gthe fax.C<strong>all</strong> the recipient to ensure thattheir fax mach<strong>in</strong>e is on and ready.Check that you are dial<strong>in</strong>g thecorrect fax number.After the device stops try<strong>in</strong>g toredial, do the follow<strong>in</strong>g.Unplug the product teleph<strong>one</strong> cordfrom the w<strong>all</strong>, plug <strong>in</strong> a teleph<strong>one</strong>,and try mak<strong>in</strong>g a c<strong>all</strong>.Plug the product ph<strong>one</strong> cord <strong>in</strong>to ajack for another ph<strong>one</strong> l<strong>in</strong>e.Try a different ph<strong>one</strong> cord.Update the firmware. See Updat<strong>in</strong>gthe firmware code.If the error persists, replace theLIU. See, Formatter and l<strong>in</strong>e<strong>in</strong>terface unit (LIU).ENWW Control-panel messages 199
Table 6-1. Alert and warn<strong>in</strong>g messages (cont<strong>in</strong>ued)Control panel messageEvent logerrormessageDescriptionRecommended actionNo fax detected(<strong>HP</strong> <strong>LaserJet</strong> <strong>3015</strong> and <strong>3030</strong> only)N<strong>one</strong>The product answered the <strong>in</strong>com<strong>in</strong>gc<strong>all</strong> but did not detect that a faxmach<strong>in</strong>e was c<strong>all</strong><strong>in</strong>g.Allow the product to retry receiv<strong>in</strong>gthe fax.Try a different ph<strong>one</strong> cord.Plug the product ph<strong>one</strong> cord <strong>in</strong>to ajack for another ph<strong>one</strong> l<strong>in</strong>e.Update the firmware. See Updat<strong>in</strong>gthe firmware code.If the error persists, replace theformatter. See, Formatter and l<strong>in</strong>e<strong>in</strong>terface unit (LIU).No fax pagesto repr<strong>in</strong>t(<strong>HP</strong> <strong>LaserJet</strong> <strong>3015</strong> and <strong>3030</strong> only)N<strong>one</strong>The product attempted to execute“Repr<strong>in</strong>t last" fax when noth<strong>in</strong>g was<strong>in</strong> memory.Receive a fax before attempt<strong>in</strong>g touse this option.Out of range N<strong>one</strong> An <strong>in</strong>valid number was typed. Retype the number.Page too complex[enter] to cont.n<strong>one</strong>The product could not pr<strong>in</strong>t thecurrent page because of itscomplexity.Press MENU/ENTER to clear themessage.Allow the product to f<strong>in</strong>ish the job,or press CANCEL to cancel the job.Ph<strong>one</strong> Book ###is empty(<strong>HP</strong> <strong>LaserJet</strong> <strong>3015</strong> and <strong>3030</strong> only)N<strong>one</strong>The <strong>one</strong>-touch button or speed-dialcode has not been programmedand therefore cannot be added to agroup.Press MENU/ENTER to program the<strong>one</strong>-touch or speed-dial. If you wantto program a group-dial, pressCANCEL and use the control panelmenu to create a new group. PressCANCEL if you do not want to programthe <strong>one</strong>-touch or speed-dial.Pr<strong>in</strong>ter jamClear paper pathPr<strong>in</strong>ter tray isempty. Add paperN<strong>one</strong> The product has detected a jam. Clear the jam (see, Solv<strong>in</strong>g paperfeedproblems). The job shouldcont<strong>in</strong>ue to pr<strong>in</strong>t. If it does not, tryrepr<strong>in</strong>t<strong>in</strong>g the job.If media jams frequently, seeMa<strong>in</strong>tenance.N<strong>one</strong> The media <strong>in</strong>put tray is empty. Load media. If media is alreadyloaded, remove it.Check for and remove any jam(see, Solv<strong>in</strong>g paper-feedproblems), and then reload thestack of media <strong>in</strong> the media <strong>in</strong>puttray.Scanner reservedfor PC scanN<strong>one</strong>A computer is us<strong>in</strong>g the product tocreate a scan.Wait until the computer scan hasf<strong>in</strong>ished, or cancel the scan fromthe computer software, or pressCANCEL.200 Chapter 6 Troubleshoot<strong>in</strong>g ENWW
Table 6-1. Alert and warn<strong>in</strong>g messages (cont<strong>in</strong>ued)Control panel messageEvent logerrormessageDescriptionRecommended actionScann<strong>in</strong>g errorCannot connectN<strong>one</strong>The product cannot transmit scan<strong>in</strong>formation to a computer.Make sure that the connectioncable is not loose or damaged.Replace the cable if necessary, andtry the scan aga<strong>in</strong>.Sett<strong>in</strong>gs cleared N<strong>one</strong> The product has cleared jobsett<strong>in</strong>gs.Re-enter any appropriate jobsett<strong>in</strong>gs.Critical error messagesCritical error messages can <strong>in</strong>dicate some k<strong>in</strong>d of failure. Cycl<strong>in</strong>g the power might fix theproblem. If a critical error persists, the product might require service.Table 6-2. Critical error messagesControl panel messageEvent logerrormessageDescriptionRecommended action50 Fuser Error N<strong>one</strong> The product has experienced an<strong>in</strong>ternal hardware error.Turn off the power switch, wait atleast 20 m<strong>in</strong>utes, and then turn onthe power switch and wait for theproduct to <strong>in</strong>itialize.NoteThe device power must rema<strong>in</strong> offfor at least 20 m<strong>in</strong>utes for the fuserto cool down and properly reset.If a surge protector is be<strong>in</strong>g used,remove it. Plug the pr<strong>in</strong>ter directly<strong>in</strong>to the w<strong>all</strong> socket. Use the powerswitch to turn the product on.Check the cabl<strong>in</strong>g connections tothe heat<strong>in</strong>g element.If, the error persists, replace thefuser. See, Fuser.ENWW Control-panel messages 201
Table 6-2. Critical error messages (cont<strong>in</strong>ued)Control panel messageEvent logerrormessageDescription51 Laser Error N<strong>one</strong> The product has experienced an<strong>in</strong>ternal hardware error.52 Scanner Error N<strong>one</strong> The product has experienced an<strong>in</strong>ternal hardware error.Recommended actionTurn off the power by us<strong>in</strong>g thepower switch, wait at least 30seconds, and then turn on thepower and wait for the product to<strong>in</strong>itialize.Check the cabl<strong>in</strong>g connections tothe laser scanner assembly.Try connect<strong>in</strong>g the product to adifferent power source or surgeprotector.If the error persists, replace thelaser/scanner assembly. <strong>HP</strong><strong>LaserJet</strong> <strong>3015</strong>: see, Scannerassembly. <strong>HP</strong> <strong>LaserJet</strong> <strong>3020</strong> and<strong>3030</strong>: see, Scanner assembly.Turn off the power by us<strong>in</strong>g thepower switch, wait at least 30seconds, and then turn on thepower and wait for the product to<strong>in</strong>itialize.Make sure that the flat, flexiblecables (FFCs) are properlyconnected on the formatter and onthe laser/scanner.Check the FFC connection betweenthe formatter and the scanner.NoteDo not bend or fold the FFCs dur<strong>in</strong>gthe removal or re<strong>in</strong>st<strong>all</strong>ationprocess.Try connect<strong>in</strong>g the product to adifferent power source or surgeprotector.If the error persists, replace thelaser scanner assembly. SeeLaser/scanner assembly.79 ErrorTurn off then onN<strong>one</strong>The product has experienced an<strong>in</strong>ternal firmware error.Turn off the power by us<strong>in</strong>g thepower switch, wait at least 30seconds, and then turn on thepower and wait for the product to<strong>in</strong>itialize.<strong>HP</strong> <strong>LaserJet</strong> <strong>3020</strong> and <strong>3030</strong> only:update the firmware.If the error persists, replace theformatter. See Formatter and l<strong>in</strong>e<strong>in</strong>terface unit (LIU).202 Chapter 6 Troubleshoot<strong>in</strong>g ENWW
Table 6-2. Critical error messages (cont<strong>in</strong>ued)Control panel messageEvent logerrormessageDescriptionRecommended actionADF door is open(<strong>HP</strong> <strong>LaserJet</strong> <strong>3020</strong> and <strong>3030</strong> only)N<strong>one</strong>The ADF lid is open or a sensor ismalfunction<strong>in</strong>g.Make sure the ADF lid is closed.If the ADF motor cover wasremoved dur<strong>in</strong>g product servic<strong>in</strong>g,make sure that the cover is <strong>in</strong>st<strong>all</strong>edcorrectly and that the ADF lid canclose properly. See Figure 5-54.ADF cover correctly <strong>in</strong>st<strong>all</strong>ed.Make sure that the ADF lid iscompletely seated. If necessary,remove the ADF and re<strong>in</strong>st<strong>all</strong> it.Turn off the power by us<strong>in</strong>g thepower switch, wait at least 30seconds, and then turn on thepower and wait for the product to<strong>in</strong>itialize.Try another power source.If the sensor is not function<strong>in</strong>g,replace the ADF( the ADF is part ofthe flatbed lid). See Flatbed lid.CIS Scanner Error (<strong>HP</strong> <strong>LaserJet</strong><strong>3015</strong>)N<strong>one</strong>The scanner assembly experiencedan <strong>in</strong>ternal error.Turn off the power by us<strong>in</strong>g thepower switch, wait at least 30seconds, and then turn on thepower and wait for the product to<strong>in</strong>itialize.Try another power source.If the error persists, replace thescanner assembly. See, Scannerassembly.ENWW Control-panel messages 203
Table 6-2. Critical error messages (cont<strong>in</strong>ued)Control panel messageEvent logerrormessageDescriptionRecommended actionScanner Bulb Failure (<strong>HP</strong> <strong>LaserJet</strong><strong>3020</strong> and <strong>3030</strong> only)N<strong>one</strong>The scanner assembly experiencedan error <strong>in</strong> scanner bulbfunctionality.Turn off the power by us<strong>in</strong>g thepower switch, wait at least 30seconds, and then turn on thepower and wait for the product to<strong>in</strong>itialize.Try another power source.If the error persists, lift the flatbed tosee if the scanner bulb isillum<strong>in</strong>at<strong>in</strong>g. If it is not illum<strong>in</strong>at<strong>in</strong>g,replace the scanner assembly. See,Scanner assembly.If the bulb is illum<strong>in</strong>at<strong>in</strong>g, the scanmodule may be too far to the right tof<strong>in</strong>d the calibration strip dur<strong>in</strong>gstartup. Follow this procedure tomove the scan module so it beg<strong>in</strong>sthe startup cycle farther to the left:1. Cycle the power and watch themovement of the scan module.The scan module will move tothe left and the bulb willillum<strong>in</strong>ate. When it does, cyclethe power.2. Repeat the first step until thescan module is about 3centimeters (about 1 <strong>in</strong>ch) fromthe right edge of the scanglass.3. Turn on power by us<strong>in</strong>g thepower switch.If the error persists, replace thescanner assembly. See, Scannerassembly.Event-log codesThese codes appear <strong>in</strong> the event-log section of the configuration report. Use this table toassociate an event-log code with a description of the event.Table 6-3. Event-log codesEvent code Event sub-code Event10 the l<strong>in</strong>e <strong>in</strong> the file at which theevent occurredasserts20 10 receive-fax directory is miss<strong>in</strong>g20 20 send-fax directory is miss<strong>in</strong>g20 30 send-ID file is corrupted204 Chapter 6 Troubleshoot<strong>in</strong>g ENWW
Table 6-3. Event-log codes (cont<strong>in</strong>ued)Event code Event sub-code Event20 40 receive-ID file is corrupted20 50 fax log is corrupted20 60 flash <strong>in</strong>it as a result of a firmwareupgrade20 6060 write to flash failed79 2 access error79 3 address error79 4 illegal <strong>in</strong>struction79 8 privilege violation79 9 trace fault79 10 unimplemented l<strong>in</strong>e-a opcode79 11 unimplemented l<strong>in</strong>e-f opcode79 14 format error79 15 un<strong>in</strong>itialized <strong>in</strong>terrupt79 120 ASIC fault79 5 or 6 or 7 reserved30016 0 <strong>in</strong>sufficient memory30017 0 pr<strong>in</strong>t page punt30035 0 NVRAM error30036 0 NVRAM service error30108 0 MIO connection break30109 0 data communication error30110 0 MIO buffer overflow30111 0 par<strong>all</strong>el buffer overflow35028 0 bad MIO35031 0 <strong>in</strong>valid personality50003 0 bad fuser50004 0 bad beam detect50005 0 bad scanner motor50007 0 eng<strong>in</strong>e communication error50012 0 bad malfunction50013 0 laser malfunctionENWW Control-panel messages 205
Solv<strong>in</strong>g image-quality problemsIf the problem occurs when pr<strong>in</strong>t<strong>in</strong>g, see Solv<strong>in</strong>g pr<strong>in</strong>t image-quality problems.If the problem occurs when copy<strong>in</strong>g or scann<strong>in</strong>g, see Solv<strong>in</strong>g scann<strong>in</strong>g (copy<strong>in</strong>g) image-qualityproblems.Also, see Solv<strong>in</strong>g paper-feed problems and Jams occur <strong>in</strong> the automatic document feeder(ADF).NoteSome image-quality problems can be isolated by perform<strong>in</strong>g pr<strong>in</strong>ter functional tests. SeeFunctional checks. Image quality problems can also be caused by us<strong>in</strong>g cables that are notIEEE-1284 compliant.Check<strong>in</strong>g the pr<strong>in</strong>t cartridgeImage-formation defects are frequently the result of problems <strong>in</strong> the pr<strong>in</strong>t cartridge. If thesource of the defect is not immediately evident, always replace the pr<strong>in</strong>t cartridge beforetroubleshoot<strong>in</strong>g image defects.Use the follow<strong>in</strong>g checklist to make sure that the pr<strong>in</strong>t cartridge is still operable.□ Make sure that the pr<strong>in</strong>t cartridge is seated properly.□ Check the pr<strong>in</strong>t cartridge to see if it has been disassembled or refilled.□ Inspect the pr<strong>in</strong>t cartridge to see if t<strong>one</strong>r is leak<strong>in</strong>g through worn seals.□□Check the surface of the photosensitive drum <strong>in</strong> the cartridge to see if it has beendamaged or scratched. Touch<strong>in</strong>g the drum contam<strong>in</strong>ates the photosensitive surface andcan cause spott<strong>in</strong>g and image defects.Blurred areas on pr<strong>in</strong>ted pages <strong>in</strong>dicate that the photosensitive drum <strong>in</strong> the cartridge hasbeen overexposed to light. Because overexposure to light causes permanent damage tothe photosensitive drum, the cartridge should be replaced.To redistribute the t<strong>one</strong>r <strong>in</strong> the pr<strong>in</strong>t cartridgeBefore <strong>in</strong>st<strong>all</strong><strong>in</strong>g a new pr<strong>in</strong>t cartridge or when the t<strong>one</strong>r beg<strong>in</strong>s to run low, redistribute thet<strong>one</strong>r by rotat<strong>in</strong>g the cartridge back and forth five or six times.Solv<strong>in</strong>g pr<strong>in</strong>t image-quality problemsUse the follow<strong>in</strong>g tables to help solve problems with pr<strong>in</strong>ted pages.NoteSome image-quality problems can be isolated by perform<strong>in</strong>g pr<strong>in</strong>ter functional tests. SeeFunctional checks. Image-quality problems can also be caused by us<strong>in</strong>g cables that are notIEEE-1284 compliant.206 Chapter 6 Troubleshoot<strong>in</strong>g ENWW
Pages do not pr<strong>in</strong>t.CauseThe product is not plugged <strong>in</strong>, or the power switchis not on.The computer cable is loose.The tape was not removed from the pr<strong>in</strong>tcartridge.The pr<strong>in</strong>t cartridge is out of t<strong>one</strong>r.The media does not meet <strong>HP</strong> specifications (forexample, it is too moist or too rough).SolutionMake sure that the product is plugged <strong>in</strong>to awork<strong>in</strong>g w<strong>all</strong> outlet or power strip and that thepower switch is turned on.Check that the par<strong>all</strong>el cable or USB cablebetween the product and the computer is securelyconnected.Remove the pr<strong>in</strong>t cartridge, remove the tape, andre<strong>in</strong>st<strong>all</strong> the pr<strong>in</strong>t cartridge.Replace the pr<strong>in</strong>t cartridge.Make sure that the media meets specificationsdetailed <strong>in</strong> the <strong>HP</strong> <strong>LaserJet</strong> Pr<strong>in</strong>ter Family Pr<strong>in</strong>tMedia Guide.Parts of the page around the edges are not pr<strong>in</strong>t<strong>in</strong>g.CauseThe product cannot pr<strong>in</strong>t to the edge of the paper.The pr<strong>in</strong>ter has m<strong>in</strong>imum marg<strong>in</strong>s on each edgeof 6 mm (0.25 <strong>in</strong>ch).The reduction sett<strong>in</strong>g is set <strong>in</strong>correctly.SolutionTo fit the image <strong>in</strong>to this pr<strong>in</strong>table area, slightlyreduce the size of the image.Check the reduction sett<strong>in</strong>g <strong>in</strong> the “Pr<strong>in</strong>t” or“Setup” w<strong>in</strong>dow from with<strong>in</strong> the program that youare us<strong>in</strong>g.ENWW Solv<strong>in</strong>g image-quality problems 207
T<strong>one</strong>r specks appear on the pr<strong>in</strong>ted page..CauseThe media does not meet <strong>HP</strong> specifications (forexample, it is too moist or too rough).The pr<strong>in</strong>t path needs to be cleaned.SolutionMake sure that the media meets specificationsdetailed <strong>in</strong> the <strong>HP</strong> <strong>LaserJet</strong> Pr<strong>in</strong>ter Family Pr<strong>in</strong>tMedia Guide.Clean the pr<strong>in</strong>t path. See, Clean<strong>in</strong>g the productand Clean<strong>in</strong>g the pr<strong>in</strong>t-cartridge area.Characters are only parti<strong>all</strong>y pr<strong>in</strong>ted (also referred to as dropouts).CauseA s<strong>in</strong>gle sheet of paper is defective.The pr<strong>in</strong>t density needs to be adjusted.The moisture content of the paper is <strong>in</strong>consistent,or the paper has moist or wet spots on thesurface.The paper was damaged by <strong>in</strong>consistentmanufactur<strong>in</strong>g processes.Draft mode or EconoMode is selected <strong>in</strong> thedriver.The pr<strong>in</strong>t cartridge is defective.SolutionTry repr<strong>in</strong>t<strong>in</strong>g the job.Adjust the pr<strong>in</strong>t density from the <strong>HP</strong> Toolbox.Make sure that the media meets specificationsdetailed <strong>in</strong> the <strong>HP</strong> <strong>LaserJet</strong> Pr<strong>in</strong>ter Family Pr<strong>in</strong>tMedia Guide.Make sure that the media meets specificationsdetailed <strong>in</strong> the <strong>HP</strong> <strong>LaserJet</strong> Pr<strong>in</strong>ter Family Pr<strong>in</strong>tMedia Guide.Try the normal or best sett<strong>in</strong>g.Replace the pr<strong>in</strong>t cartridge.208 Chapter 6 Troubleshoot<strong>in</strong>g ENWW
Vertical l<strong>in</strong>es appear on the pr<strong>in</strong>ted page.CauseThe priority <strong>in</strong>put tray is not <strong>in</strong> place.The photosensitive drum <strong>in</strong>side the pr<strong>in</strong>t cartridgeis scratched.The fuser is damaged or has an obstruction.SolutionAdjust the priority <strong>in</strong>put tray.Replace the pr<strong>in</strong>t cartridge.Replace the fuser. See, Fuser.The pr<strong>in</strong>ted page has a gray background.CauseThe priority <strong>in</strong>put tray is not <strong>in</strong> place.The pr<strong>in</strong>t density sett<strong>in</strong>g is too high.The media basis-weight is too high.The humidity level is too low.The pr<strong>in</strong>t cartridge needs to be replaced.SolutionAdjust the priority <strong>in</strong>put tray.Decrease the amount of background shad<strong>in</strong>g byus<strong>in</strong>g the <strong>HP</strong> Toolbox.Change the media to a lower basis-weight.Very low humidity can <strong>in</strong>crease the amount ofbackground shad<strong>in</strong>g. Move the product to adifferent location, or decrease the backgroundshad<strong>in</strong>g by us<strong>in</strong>g the <strong>HP</strong> Toolbox. If this happensdur<strong>in</strong>g copy<strong>in</strong>g, set the light/dark sett<strong>in</strong>g to a lightvalue.Replace the pr<strong>in</strong>t cartridge.ENWW Solv<strong>in</strong>g image-quality problems 209
T<strong>one</strong>r smears appear on the pr<strong>in</strong>ted page.CauseIf the t<strong>one</strong>r smears appear on the lead<strong>in</strong>g edge ofthe media, the media guides are dirty.The media does not meet <strong>HP</strong> specifications (forexample, it is too moist or too rough).The pr<strong>in</strong>t cartridge needs to be replaced.The fuser temperature is too low. The fusertemperature varies accord<strong>in</strong>g to the type of mediabe<strong>in</strong>g used.SolutionWipe the media guides with a dry, l<strong>in</strong>t-free cloth.Make sure that the media meets specificationsdetailed <strong>in</strong> the <strong>HP</strong> <strong>LaserJet</strong> Pr<strong>in</strong>ter Family Pr<strong>in</strong>tMedia Guide.Replace the pr<strong>in</strong>t cartridge.In the Paper tab of the driver, under Type is:,select the appropriate media type from the dropdownlist.If the error persists, replace the ECU. See Eng<strong>in</strong>econtroller unit.210 Chapter 6 Troubleshoot<strong>in</strong>g ENWW
The t<strong>one</strong>r is loose, and it does not stay attached to the pr<strong>in</strong>ted page.CauseThe <strong>in</strong>side of the pr<strong>in</strong>ter is dirty.The media does not meet <strong>HP</strong> specifications (forexample, it is too moist or too rough).SolutionClean the pr<strong>in</strong>t path. See, Clean<strong>in</strong>g the productand Clean<strong>in</strong>g the pr<strong>in</strong>t-cartridge area.Make sure that the media meets specificationsdetailed <strong>in</strong> the <strong>HP</strong> <strong>LaserJet</strong> Pr<strong>in</strong>ter Family Pr<strong>in</strong>tMedia Guide.The driver is not set for the correct media. 1. On the Paper tab of the pr<strong>in</strong>ter driver, underType is:, select the correct media type fromthe drop-down list.2. Select the correct media by us<strong>in</strong>g the <strong>HP</strong>Toolbox.The power strip is not work<strong>in</strong>g correctly.The fuser temperature is too low. The fusertemperature varies accord<strong>in</strong>g to the media typebe<strong>in</strong>g used.The fuser film is torn or has holes.The fuser film is damaged.The pr<strong>in</strong>t cartridge needs to be replaced.Plug the product directly <strong>in</strong>to an work<strong>in</strong>g ac outlet.In the Paper tab of the pr<strong>in</strong>ter driver, under Typeis:, select the correct media type from the dropdownlist.If the error persists, replace the ECU. See, Eng<strong>in</strong>econtroller unit.Replace the fuser. See, Fuser.Check the fuser film for tears or holes. Replace thefuser if necessary. See, Fuser.Replace the pr<strong>in</strong>t cartridge.ENWW Solv<strong>in</strong>g image-quality problems 211
Repetitive vertical defects appear on the pr<strong>in</strong>ted page.CauseIf the repetitive mark occurs at equal distancebetween marks, either the pr<strong>in</strong>t cartridge or apr<strong>in</strong>ter roller is damaged.The <strong>in</strong>ternal parts have t<strong>one</strong>r on them.SolutionUse the defect ruler to identify the spac<strong>in</strong>g. Checkthe appropriate comp<strong>one</strong>nt and replace ifnecessary. See Repetitive image defect ruler.If the defects occur on the back of the page, theproblem will probably correct itself after a fewmore pr<strong>in</strong>ted pages. Otherwise, clean the pr<strong>in</strong>ter.See, Clean<strong>in</strong>g the product and Clean<strong>in</strong>g the pr<strong>in</strong>tcartridgearea.The driver is not set for the correct media. 1. In the Paper tab of the pr<strong>in</strong>ter driver, underType is:, select the correct media type fromthe drop-down list. (This affects the currentpr<strong>in</strong>t job only.)2. Select the correct media from the <strong>HP</strong>Toolbox.Characters are poorly formed and are produc<strong>in</strong>g hollow images.CauseThe media is too slick.SolutionTry a different media. Make sure that the mediameets specifications detailed <strong>in</strong> the <strong>HP</strong> <strong>LaserJet</strong>Pr<strong>in</strong>ter Family Pr<strong>in</strong>t Media Guide.The driver is not set for the correct media. 1. In the Paper tab of the pr<strong>in</strong>ter driver, underType is:, select the correct media type fromthe drop-down list. (This affects the currentpr<strong>in</strong>t job only.)2. Select the correct media through <strong>HP</strong> Toolbox.212 Chapter 6 Troubleshoot<strong>in</strong>g ENWW
Pages are skewed (crooked).CauseThe media is loaded <strong>in</strong>correctly.The media guides are broken or miss<strong>in</strong>g.The <strong>in</strong>put tray is too full.The type and quality of media does not meet <strong>HP</strong>specifications.SolutionReload the media, and make sure that the mediaguides are not too tight or too loose aga<strong>in</strong>st themedia stack. See, Load<strong>in</strong>g media.Replace the media <strong>in</strong>put tray or the paper-pickupassembly. See, Media <strong>in</strong>put tray or Paper-pickupassembly.Remove some of the sheets. The <strong>HP</strong> <strong>LaserJet</strong><strong>3015</strong> ADF <strong>in</strong>put tray can hold up to 30 sheets of75-g/m 2 (20-lb) bond-weight paper (less forheavier paper).Remove some of the sheets. The <strong>HP</strong> <strong>LaserJet</strong><strong>3020</strong> and <strong>3030</strong> ADF <strong>in</strong>put tray can hold up to 50sheets of 75-g/m 2 (20-lb) bond-weight paper (lessfor heavier paper).Remove some of the sheets. The <strong>HP</strong> <strong>LaserJet</strong><strong>3015</strong>, <strong>3020</strong>, and <strong>3030</strong> ma<strong>in</strong> <strong>in</strong>put tray can hold upto 150 sheets of 75-g/m 2 (20-lb) bond-weightpaper (less for heavier paper).Make sure that the media meets specificationsdetailed <strong>in</strong> the <strong>HP</strong> <strong>LaserJet</strong> Pr<strong>in</strong>ter Family Pr<strong>in</strong>tMedia Guide.ENWW Solv<strong>in</strong>g image-quality problems 213
The pr<strong>in</strong>ted page has curls or waves.CausePaper curl is <strong>in</strong>herent to the laser pr<strong>in</strong>t<strong>in</strong>gprocess; it occurs when paper is subjected toheat.SolutionCurled paper tends to relax as it cools. Place thepaper on a flat surface while it is cool<strong>in</strong>g.The environment is too warm or too humid. 1. Both high temperatures and high humiditylevels cause media to curl. Move the productto a different environment.2. Use a different media. Make sure that themedia meets specifications detailed <strong>in</strong> the <strong>HP</strong><strong>LaserJet</strong> Pr<strong>in</strong>ter Family Pr<strong>in</strong>t Media Guide.The media was <strong>in</strong> the <strong>in</strong>put tray for too long.The fuser temperature is too high. The fusertemperature varies accord<strong>in</strong>g to the type of mediabe<strong>in</strong>g used.Turn the stack of media over and put it back <strong>in</strong> thetray. Rotate the media 180° and put it back <strong>in</strong> thetray.Select a lighter-weight media type from the pr<strong>in</strong>terdriver or the <strong>HP</strong> Toolbox.Large amounts of t<strong>one</strong>r are scattered around the characters.CauseSolutionThe media resistivity is too high. 1. Use a different media. Make sure that themedia meets specifications detailed <strong>in</strong> the <strong>HP</strong><strong>LaserJet</strong> Pr<strong>in</strong>ter Family Pr<strong>in</strong>t Media Guide.2. Turn the stack of media over and put it back <strong>in</strong>the tray.3. Use media that is designed for laser pr<strong>in</strong>ters.214 Chapter 6 Troubleshoot<strong>in</strong>g ENWW
Vertical white stripes appear.CauseThe media does not meet <strong>HP</strong> specifications (forexample, it is too moist or too rough).The t<strong>one</strong>r is low.SolutionMake sure that the media meets specificationsdetailed <strong>in</strong> the <strong>HP</strong> <strong>LaserJet</strong> Pr<strong>in</strong>ter Family Pr<strong>in</strong>tMedia Guide.Gently shake the pr<strong>in</strong>t cartridge back and forth toredistribute the t<strong>one</strong>r.ENWW Solv<strong>in</strong>g image-quality problems 215
Solv<strong>in</strong>g scann<strong>in</strong>g (copy<strong>in</strong>g) image-quality problemsUse the follow<strong>in</strong>g tables to help solve problems with scanned or copied pages.NoteSome image-quality problems can be isolated by perform<strong>in</strong>g pr<strong>in</strong>ter functional tests. SeeFunctional checks. Image quality problems can also be caused by us<strong>in</strong>g cables that are notIEEE-1284 compliant.Pages do not pr<strong>in</strong>t.CauseThe product is not plugged <strong>in</strong>, or the power switchis not on.The computer cable is loose.The tape was not removed from the pr<strong>in</strong>tcartridge.The pr<strong>in</strong>t cartridge is out of t<strong>one</strong>r.The media does not meet <strong>HP</strong> specifications (forexample, it is too moist or too rough).The orig<strong>in</strong>al was loaded upside-down.SolutionMake sure that the product is plugged <strong>in</strong>to awork<strong>in</strong>g w<strong>all</strong> outlet or power strip and that thepower switch is turned on.Check that the cable between the product and thecomputer is securely connected.Remove the pr<strong>in</strong>t cartridge, remove the tape, andre<strong>in</strong>st<strong>all</strong> the pr<strong>in</strong>t cartridge.Replace the pr<strong>in</strong>t cartridge.Make sure that the media meets specificationsdetailed <strong>in</strong> the <strong>HP</strong> <strong>LaserJet</strong> Pr<strong>in</strong>ter Family Pr<strong>in</strong>tMedia Guide.Load the orig<strong>in</strong>al with the side to be scannedfac<strong>in</strong>g down <strong>in</strong> the ADF for the <strong>HP</strong> <strong>LaserJet</strong> <strong>3015</strong>,or up <strong>in</strong> the ADF for the <strong>LaserJet</strong> <strong>3020</strong> and <strong>3030</strong>.Load the orig<strong>in</strong>al with the side to be scannedfac<strong>in</strong>g down on the flatbed (<strong>HP</strong> <strong>LaserJet</strong> <strong>3020</strong> and<strong>3030</strong>).216 Chapter 6 Troubleshoot<strong>in</strong>g ENWW
Pages are skewed (crooked).CauseThe media is loaded <strong>in</strong>correctly.The media guides are broken or miss<strong>in</strong>g.The ADF <strong>in</strong>put tray is too full.The type and quality of media does not meet <strong>HP</strong>specifications.SolutionReload the media, and make sure that the mediaguides are not too tight or too loose aga<strong>in</strong>st themedia stack. See Load<strong>in</strong>g media.Replace the media <strong>in</strong>put tray or the paper-pickupunit. See Media <strong>in</strong>put tray or Paper-pickupassembly.Remove some of the sheets. The <strong>HP</strong> <strong>LaserJet</strong><strong>3015</strong> ADF <strong>in</strong>put tray can hold up to 30 sheets of75-g/m 2 (20-lb) bond-weight paper.Remove some of the sheets. The <strong>HP</strong> <strong>LaserJet</strong><strong>3020</strong> and <strong>3030</strong> ADF <strong>in</strong>put tray can hold up to 50sheets of 75-g/m 2 (20-lb) bond-weight paper.Remove some of the sheets. The <strong>HP</strong> <strong>LaserJet</strong><strong>3015</strong>, <strong>3020</strong>, and <strong>3030</strong> ma<strong>in</strong> <strong>in</strong>put tray can hold upto 150 sheets of 75-g/m 2 (20-lb) bond-weightpaper.Make sure that the media meets specificationsdetailed <strong>in</strong> the <strong>HP</strong> <strong>LaserJet</strong> Pr<strong>in</strong>ter Family Pr<strong>in</strong>tMedia Guide.Parts of the page around the edges are not pr<strong>in</strong>t<strong>in</strong>g.CauseThe product cannot pr<strong>in</strong>t to the edge of the paper.The pr<strong>in</strong>ter has m<strong>in</strong>imum marg<strong>in</strong>s on each edgeof 6 mm (0.25 <strong>in</strong>ch).If copy<strong>in</strong>g, the reduction sett<strong>in</strong>g is <strong>in</strong>correct.The paper size sett<strong>in</strong>g is <strong>in</strong>correct.SolutionTo fit the image <strong>in</strong>to this pr<strong>in</strong>table area, slightlyreduce the size of the image.Copied images will be clipped if the image on theorig<strong>in</strong>al is too close to the edge of the orig<strong>in</strong>al.Set the correct page size on the control-panelmenu.ENWW Solv<strong>in</strong>g scann<strong>in</strong>g (copy<strong>in</strong>g) image-quality problems 217
Vertical white stripes appear.CauseThe media does not meet <strong>HP</strong> specifications (forexample, it is too moist or too rough).The t<strong>one</strong>r is low.SolutionMake sure that the media meets specificationsdetailed <strong>in</strong> the <strong>HP</strong> <strong>LaserJet</strong> Pr<strong>in</strong>ter Family Pr<strong>in</strong>tMedia Guide.Gently shake the pr<strong>in</strong>t cartridge back and forth toredistribute the t<strong>one</strong>r.If copy<strong>in</strong>g with the ADF, the ADF glass is dirty. 1. Clean the ADF glass. See Clean<strong>in</strong>g theproduct.2. If the problem persists, replace the pr<strong>in</strong>tcartridge.3. If the problem persists, replace the fuserassembly. See, Fuser.Copies or scanned images are too light or too dark.CauseSolutionThe contrast is not set correctly. 1. Adjust the contrast and resolution sett<strong>in</strong>gs onthe control-panel menu (see, Control-panelmenu structure) or from the <strong>HP</strong> Toolbox.2. Check that the contrast and resolutionsett<strong>in</strong>gs are correct. See the user guide formore <strong>in</strong>formation.The orig<strong>in</strong>al image is very light or very dark.The scanned image is too light or too darkbecause the orig<strong>in</strong>al was on colored paper.Adjust the resolution and contrast sett<strong>in</strong>g(s) on thecontrol-panel menu (see, Control-panel menustructure) or from the <strong>HP</strong> Toolbox.If the orig<strong>in</strong>al was on a colored paper, <strong>in</strong>clud<strong>in</strong>gbrown recycled paper, the text might not be clear.Adjust the resolution, contrast, and brightnesssett<strong>in</strong>gs from <strong>HP</strong> Toolbox.218 Chapter 6 Troubleshoot<strong>in</strong>g ENWW
The pr<strong>in</strong>ted page has a gray background.CauseThe priority <strong>in</strong>put tray is not <strong>in</strong> place.The pr<strong>in</strong>t density sett<strong>in</strong>g is too high.The lighter/darker sett<strong>in</strong>g is <strong>in</strong>correct. Some"white" media might produce a greyishbackground at the default lighter/darker sett<strong>in</strong>gs.The media basis-weight is too high.The humidity level is too low.The pr<strong>in</strong>t cartridge needs to be replaced.SolutionAdjust the priority <strong>in</strong>put tray.Decrease the amount of background shad<strong>in</strong>g byus<strong>in</strong>g the <strong>HP</strong> Toolbox.Adjust the lighter/darker sett<strong>in</strong>g to a lighter level.Change the media to a lower basis-weight.Very low humidity can <strong>in</strong>crease the amount ofbackground shad<strong>in</strong>g. Move the product to adifferent location, or decrease the backgroundshad<strong>in</strong>g by us<strong>in</strong>g the <strong>HP</strong> Toolbox.Replace the pr<strong>in</strong>t cartridge.Vertic<strong>all</strong>y-aligned black streaks or smears appear on successive pages.CauseThe ADF glass is dirty. See, Clean<strong>in</strong>g the product.The pr<strong>in</strong>ter needs to be cleaned.A comp<strong>one</strong>nt is damaged. (For example, thephotosensitive drum <strong>in</strong>side the pr<strong>in</strong>t cartridge isscratched.)SolutionTry copy<strong>in</strong>g from the flatbed scanner (<strong>HP</strong><strong>LaserJet</strong> <strong>3020</strong> and <strong>3030</strong> only). If the problemoccurs only with the ADF, clean the ADF glass.See, Clean<strong>in</strong>g the product.If the problem occurs when copy<strong>in</strong>g from theflatbed scanner and the ADF, clean the pr<strong>in</strong>ter.See, Clean<strong>in</strong>g the product.1. Replace the pr<strong>in</strong>t cartridge if it is damagedand if ma<strong>in</strong>tenance procedures do notimprove pr<strong>in</strong>t quality.2. Replace the scanner assembly. <strong>HP</strong> <strong>LaserJet</strong><strong>3015</strong>: see, Scanner assembly. <strong>HP</strong> <strong>LaserJet</strong><strong>3020</strong> and <strong>3030</strong>: Scanner assembly.ENWW Solv<strong>in</strong>g scann<strong>in</strong>g (copy<strong>in</strong>g) image-quality problems 219
Scanned images have black dots or streaks.CauseThe scanner glass is dirty.The t<strong>one</strong>r drum <strong>in</strong> the pr<strong>in</strong>t cartridge is damaged.A problem exists with the scanner assembly.SolutionClean the ADF path and flatbed glass. See,Clean<strong>in</strong>g the product.Replace the pr<strong>in</strong>t cartridge.Replace the scanner assembly. <strong>HP</strong> <strong>LaserJet</strong><strong>3015</strong>: see, Scanner assembly. <strong>HP</strong> <strong>LaserJet</strong> <strong>3020</strong>and <strong>3030</strong>: Scanner assembly.Scanned text is not clear.CauseThe contrast, resolution, or brightness needs to beadjusted before scann<strong>in</strong>g.The orig<strong>in</strong>al is on colored paper.There is a problem with the scanner assembly.Solution1. Adjust the contrast and resolution sett<strong>in</strong>gsfrom the <strong>HP</strong> Toolbox.2. Check that the contrast and resolutionsett<strong>in</strong>gs are correct. See the user guidesection for more <strong>in</strong>formation.If the orig<strong>in</strong>al is on colored paper, <strong>in</strong>clud<strong>in</strong>g brownrecycled paper, the text might not be clear. Tryadjust<strong>in</strong>g the resolution, contrast, and brightnesssett<strong>in</strong>gs from the <strong>HP</strong> Toolbox.Replace the scanner assembly. <strong>HP</strong> <strong>LaserJet</strong><strong>3015</strong>: see, Scanner assembly. <strong>HP</strong> <strong>LaserJet</strong> <strong>3020</strong>and <strong>3030</strong>: Scanner assembly.220 Chapter 6 Troubleshoot<strong>in</strong>g ENWW
Images are scann<strong>in</strong>g at a reduced size.CauseThe <strong>HP</strong> software sett<strong>in</strong>gs are set to reduce thescanned image.Solution1. Adjust the sett<strong>in</strong>gs from the <strong>HP</strong> Toolbox.2. Adjust the sett<strong>in</strong>gs <strong>in</strong> the <strong>HP</strong> <strong>LaserJet</strong> Scansoftware.Large amounts of t<strong>one</strong>r are scattered around the characters.CauseSolutionThe media resistivity is too high. 1. Use a different media type. Make sure that themedia meets specifications detailed <strong>in</strong> the <strong>HP</strong><strong>LaserJet</strong> Pr<strong>in</strong>ter Family Pr<strong>in</strong>t Media Guide.2. Turn the stack of media over and put it back <strong>in</strong>the tray.3. Use media that is designed for laser pr<strong>in</strong>ters.ENWW Solv<strong>in</strong>g scann<strong>in</strong>g (copy<strong>in</strong>g) image-quality problems 221
Repetitive image defect rulerUse the repetitive image-defect ruler to help solve image quality problems. Place the top l<strong>in</strong>eon the ruler next to the first occurrence of the defect on the page. F<strong>in</strong>d the mark that po<strong>in</strong>ts tothe next <strong>in</strong>stance of the defect to identify the comp<strong>one</strong>nt that is caus<strong>in</strong>g the defect.First occurrence of pr<strong>in</strong>t defect (0.00 <strong>in</strong>ches)Pr<strong>in</strong>t cartridge 30.8 mm (1.21 <strong>in</strong>ches)Pr<strong>in</strong>t cartridge 37.7 mm (1.48 <strong>in</strong>ches)Fuser (Fix<strong>in</strong>g assembly) 41.0 mm (1.61 <strong>in</strong>ches)Transfer roller 46.3 mm (1.82 <strong>in</strong>ches)Paper pick-up assembly 55.2 mm (2.17 <strong>in</strong>ches)Fuser (Fix<strong>in</strong>g assembly) 56.5 mm (2.22 <strong>in</strong>ches)Pr<strong>in</strong>t cartridge 76.3 mm (3.00 <strong>in</strong>ches)Figure 6-1.NoteRepetitive image defect rulerThe repetitive image defect ruler is for reference only and may not display or pr<strong>in</strong>t to exactscale. Use a measur<strong>in</strong>g device to determ<strong>in</strong>e the spac<strong>in</strong>g between repeat<strong>in</strong>g image defects.222 Chapter 6 Troubleshoot<strong>in</strong>g ENWW
Solv<strong>in</strong>g paper-feed problemsUse the <strong>in</strong>formation <strong>in</strong> this section to solve problems that are related to mov<strong>in</strong>g paper ordocuments through the product.CAUTIONAlways try to remove a jam <strong>in</strong> the direction that the media feeds through the pr<strong>in</strong>ter.If the problem occurs when copy<strong>in</strong>g or scann<strong>in</strong>g, see Solv<strong>in</strong>g scann<strong>in</strong>g (copy<strong>in</strong>g) image-qualityproblems.Jams occur <strong>in</strong> the pr<strong>in</strong>terOccasion<strong>all</strong>y, media becomes jammed dur<strong>in</strong>g a pr<strong>in</strong>t job. Try the follow<strong>in</strong>g remedies beforeyou attempt to clear the jam:● Make sure that the media meets specifications.● Make sure that the media is not wr<strong>in</strong>kled, folded, or damaged.● Make sure that the product is clean. See Clean<strong>in</strong>g the product.●Make sure that the <strong>in</strong>put trays are loaded properly and are not too full. See, Load<strong>in</strong>gmedia.To clear a jamCAUTIONJams might result <strong>in</strong> loose t<strong>one</strong>r on the page. If t<strong>one</strong>r f<strong>all</strong>s on cloth<strong>in</strong>g, wash it <strong>in</strong> cold water.Hot water will permanently set the t<strong>one</strong>r <strong>in</strong>to the fabric. If t<strong>one</strong>r is on your hands, wash them <strong>in</strong>cold water.Never use a sharp object, such as a pencil or scissors, to remove jammed media.1. Open the pr<strong>in</strong>t-cartridge door .Figure 6-2. Clear a jam <strong>in</strong> the product base (1 of 3)ENWW Solv<strong>in</strong>g paper-feed problems 223
2. Grasp the handle on the pr<strong>in</strong>t cartridge, remove the pr<strong>in</strong>t cartridge, and set it aside.Figure 6-3. Clear a jam <strong>in</strong> the product base (2 of 3)CAUTIONTo prevent damage to the pr<strong>in</strong>t cartridge, do not expose it to light any longer than necessary.Place the pr<strong>in</strong>t cartridge <strong>in</strong> a paper bag or other opaque conta<strong>in</strong>er until you can place it back <strong>in</strong>the device.3. With both hands, grasp the side of the media that is most visible (this <strong>in</strong>cludes themiddle), and carefully pull it free from the product.NoteAlways try to remove a jam towards the way it would move through the paper path.Figure 6-4. Clear a jam <strong>in</strong> the product base (3 of 3)4. After the jammed media is removed, replace the pr<strong>in</strong>t cartridge, and close the pr<strong>in</strong>tcartridgedoor.5. After clear<strong>in</strong>g a jam, turn off the product, and then turn it on aga<strong>in</strong>.To clear other media jamsCAUTIONNever use a sharp object, such as a pencil or scissors, to remove jammed media.224 Chapter 6 Troubleshoot<strong>in</strong>g ENWW
If the media has jammed where it exits the product, grasp the lead<strong>in</strong>g edge of the media andpull the media out through the output b<strong>in</strong>.Figure 6-5. Clear<strong>in</strong>g output b<strong>in</strong> jams (<strong>HP</strong> LJ <strong>3015</strong>)Figure 6-6. Clear<strong>in</strong>g ADF output b<strong>in</strong> jams (<strong>HP</strong> <strong>LaserJet</strong> <strong>3015</strong>)Figure 6-7. Clear<strong>in</strong>g output b<strong>in</strong> jams (<strong>HP</strong> <strong>LaserJet</strong> <strong>3020</strong> and <strong>3030</strong>)If the media has jammed <strong>in</strong> the automatic document feeder (ADF), see Jams occur <strong>in</strong> theautomatic document feeder (ADF).NoteIf you turned the product off before clear<strong>in</strong>g the jam, turn it on aga<strong>in</strong>, and then resend thepr<strong>in</strong>t<strong>in</strong>g or copy<strong>in</strong>g job.Solv<strong>in</strong>g pr<strong>in</strong>t paper-feed problemsUse the follow<strong>in</strong>g tables to solve paper-feed problems when pr<strong>in</strong>t<strong>in</strong>g.ENWW Solv<strong>in</strong>g paper-feed problems 225
Pages are com<strong>in</strong>g out curled or wr<strong>in</strong>kled.CausePaper curl is <strong>in</strong>herent to the laser pr<strong>in</strong>t<strong>in</strong>gprocesses, and occurs when paper is subjected toheat. Paper curl tends to relax as the paper coolswhile rest<strong>in</strong>g on a flat surface.Paper is curled or wr<strong>in</strong>kled when pr<strong>in</strong>t<strong>in</strong>g.Paper is curled when fax<strong>in</strong>g or copy<strong>in</strong>g.Paper is not stored properly.The media is too long for the pr<strong>in</strong>ter output b<strong>in</strong>.SolutionMake sure that the media meets specificationsdetailed <strong>in</strong> the <strong>HP</strong> <strong>LaserJet</strong> Pr<strong>in</strong>ter Family Pr<strong>in</strong>tMedia Guide. Remove the media, turn it over, andreload it.In the pr<strong>in</strong>ter driver, on the Paper or Paper/Quality tab, select a lighter-weight media type,such as Light
The pr<strong>in</strong>ter feeds multiple sheets or jams frequently from the ma<strong>in</strong> <strong>in</strong>put tray or priority <strong>in</strong>puttray.CauseSolutionPaper guides are not adjusted properly.Paper was not removed from the ma<strong>in</strong> <strong>in</strong>put traybefore refill<strong>in</strong>g the tray.The ma<strong>in</strong> <strong>in</strong>put tray or priority <strong>in</strong>put tray isoverfilled.The paper was poorly cut by the manufacturer andis stick<strong>in</strong>g together.The paper does not meet <strong>HP</strong> specifications forpr<strong>in</strong>t media.The output capacity was exceeded <strong>in</strong> the paperoutput b<strong>in</strong>.The pickup roller is dirty or damaged.The separation pad is dirty or damaged.A sensor is not operat<strong>in</strong>g properly.Slide the guides aga<strong>in</strong>st the sides of the stack <strong>in</strong>the media <strong>in</strong>put tray or the priority <strong>in</strong>put tray tocenter the paper. Make sure the guides are notadjusted too tightly.Always remove paper from the ma<strong>in</strong> <strong>in</strong>put traybefore refill<strong>in</strong>g it.Remove some of the sheets. The <strong>HP</strong> <strong>LaserJet</strong><strong>3015</strong> ADF <strong>in</strong>put tray can hold up to 30 sheets of60-g/m 2 (16-lb) bond-weight paper.Remove some of the sheets. The <strong>HP</strong> <strong>LaserJet</strong><strong>3020</strong> and <strong>3030</strong> ADF <strong>in</strong>put tray can hold up to 50sheets of 60-g/m 2 (16-lb) bond-weight paper.Remove some of the sheets. The <strong>HP</strong> <strong>LaserJet</strong><strong>3015</strong>, <strong>3020</strong>, and <strong>3030</strong> ma<strong>in</strong> <strong>in</strong>put tray can hold upto 150 sheets of 60-g/m 2 (16-lb) bond-weightpaper.“Break” the ream of paper by curv<strong>in</strong>g it <strong>in</strong>to anupside-down u-shape; this can effectivelydecrease multifeeds. Also try turn<strong>in</strong>g the paperaround to feed the opposite end first, or use adifferent type of paper.Make sure that the media meets specificationsdetailed <strong>in</strong> the <strong>HP</strong> <strong>LaserJet</strong> Pr<strong>in</strong>ter Family Pr<strong>in</strong>tMedia Guide.Do not <strong>all</strong>ow more than 125 sheets of 75 g/m 2(20-lb) bond-weight paper (less for heavier paper)to fill the paper output b<strong>in</strong>.Clean the pickup roller.Replace the pickup roller. See, User replaceableparts.Clean the separation pad.Replace the separation pad. See, Userreplaceable parts.Check the sensors to make sure that n<strong>one</strong> isjammed. If a sensor cannot be corrected, replacethe sensor.Jams occur <strong>in</strong> the automatic document feeder (ADF)Occasion<strong>all</strong>y, media becomes jammed dur<strong>in</strong>g a copy, scan, or fax job.You are notified of a media jam by a software error message and the Doc feeder jam Clear,Reload message that appears on the device control-panel display.ENWW Solv<strong>in</strong>g paper-feed problems 227
To clear a media jam from the automatic document feeder (ADF)1. Remove the ADF <strong>in</strong>put tray and open the ADF lid.Figure 6-8. ADF lid open (<strong>HP</strong> <strong>LaserJet</strong> <strong>3015</strong>)Figure 6-9. ADF lid open (<strong>HP</strong> <strong>LaserJet</strong> <strong>3020</strong> and <strong>3030</strong>)228 Chapter 6 Troubleshoot<strong>in</strong>g ENWW
2. Carefully remove jammed media (for the <strong>HP</strong> <strong>LaserJet</strong> <strong>3020</strong> and <strong>3030</strong>: lift<strong>in</strong>g the greenlever, rotate the pickup roller assembly until it stays open). Gently try to remove the pagewithout tear<strong>in</strong>g it.Figure 6-10. Clear an ADF jam (<strong>HP</strong> <strong>LaserJet</strong> <strong>3015</strong>)Figure 6-11. Clear an ADF jam (<strong>HP</strong> <strong>LaserJet</strong> <strong>3020</strong> and <strong>3030</strong>; 1 of 2)NoteWhen remov<strong>in</strong>g media jammed <strong>in</strong> the ADF, It might be helpful to remove the ADF guide/cleanout comb.Figure 6-12. Clear an ADF jam (<strong>HP</strong> <strong>LaserJet</strong> <strong>3020</strong> and <strong>3030</strong>; 2 of 2)3. Close the ADF lid and replace the ADF <strong>in</strong>put tray.Solv<strong>in</strong>g scanner (copier) paper-feed problemsUse the follow<strong>in</strong>g tables to help solve paper-feed problems when scann<strong>in</strong>g or copy<strong>in</strong>g.Long pages stop feed<strong>in</strong>g through the ADF.CauseSolutionThe document is too long. The maximum document length is 381 mm (15<strong>in</strong>ches). If the document is too long, copysegments of it and scan each copy.The paper delivery sensor is damaged.Check the paper delivery sensor to make sure it isnot jammed. If the sensor cannot be corrected,replace it.ENWW Solv<strong>in</strong>g paper-feed problems 229
Scanned items are crooked.CauseThe media <strong>in</strong>put tray guides are not set correctly,are broken, or are miss<strong>in</strong>g.SolutionBe sure to center the paper with the media <strong>in</strong>puttray guides. Verify that the guides are not adjustedtoo tightly or too loosely aga<strong>in</strong>st the paper. Checkfor broken or miss<strong>in</strong>g guides and replace asnecessary.Pages refeed <strong>in</strong>to the ADF.CauseThe media is damaged. Make sure that the mediais flat (not folded) and that it meets weightspecifications.SolutionMake sure that the media is not folded or torn, andthat it meets specifications detailed <strong>in</strong> the <strong>HP</strong><strong>LaserJet</strong> Pr<strong>in</strong>ter Family Pr<strong>in</strong>t Media Guide.The ADF feeds multiple sheets or jams frequently from the media <strong>in</strong>put tray.CauseSolutionThe media <strong>in</strong>put tray guides are not adjustedproperly.The media <strong>in</strong>put tray is overfilled.The item was too thick, too slick, or otherwise didnot meet specifications.The ADF pickup roller is dirty or worn.The ADF document feed guide is not <strong>in</strong>st<strong>all</strong>edproperly.The ADF pickup roller is damaged or worn.The ADF separation pad is dirty, damaged, orworn.The sensor is not operat<strong>in</strong>g properly.A problem exists <strong>in</strong> the ADF path.Remove the document from the media <strong>in</strong>put tray.Straighten the item, then re<strong>in</strong>sert it. Slide theguides aga<strong>in</strong>st the sides of the item to center it.Make sure that the guides are not adjusted tootightly.Remove some of the sheets. The media <strong>in</strong>put traycan hold up to 30 (<strong>HP</strong> <strong>LaserJet</strong> <strong>3015</strong>) or 50 (<strong>HP</strong><strong>LaserJet</strong> <strong>3020</strong> and <strong>3030</strong>) pages, depend<strong>in</strong>g on thethickness of the pages.Make sure that the media meets specificationsdetailed <strong>in</strong> the <strong>HP</strong> <strong>LaserJet</strong> Pr<strong>in</strong>ter Family Pr<strong>in</strong>tMedia Guide Use the flatbed ( <strong>HP</strong> <strong>LaserJet</strong> <strong>3020</strong>and <strong>3030</strong>) to make the scan or copy.Clean or replace the ADF pickup roller. See,Ensure that both sides of the ADF document feedguide are snapped <strong>in</strong> properly.<strong>HP</strong> <strong>LaserJet</strong> <strong>3015</strong>: replace the scannerassembly. See, Scanner assembly. <strong>HP</strong> <strong>LaserJet</strong><strong>3020</strong> and <strong>3030</strong>: replace the ADF pickup rollerSee, User replaceable parts.Replace the ADF separation pad. See, Userreplaceable parts.Check the sensor to make sure it is not jammed. Ifa sensor cannot be corrected, replace the ADFassembly.Check the path for obstructions. Readjust asnecessary or replace the ADF assembly (the ADFassembly is part of the flatbed lid for the <strong>HP</strong><strong>LaserJet</strong> <strong>3020</strong> and <strong>3030</strong>). See, Scanner assemblyor Flatbed lid.230 Chapter 6 Troubleshoot<strong>in</strong>g ENWW
Solv<strong>in</strong>g problems with digital subscriber l<strong>in</strong>e (DSL) connectionsNoteThe <strong>HP</strong> <strong>LaserJet</strong> <strong>3015</strong> and <strong>3030</strong> <strong>all</strong>-<strong>in</strong>-<strong>one</strong> products have fax<strong>in</strong>g capability. The <strong>HP</strong> <strong>LaserJet</strong><strong>3020</strong> <strong>all</strong>-<strong>in</strong>-<strong>one</strong> product does not operate as a fax<strong>in</strong>g device.A digital subscriber l<strong>in</strong>e (DSL) uses digital technology over standard copper ph<strong>one</strong> wires. DSLservices rely on an AM radio wave that has a range of 600 kHz to 2.2 GHz. The <strong>HP</strong> <strong>LaserJet</strong><strong>3015</strong> and <strong>3030</strong> <strong>all</strong>-<strong>in</strong>-<strong>one</strong> is a Group 3 fax device, which operates at about 200 kHz (below theDSL capability) and is not directly compatible with digital signals. However, if specified dur<strong>in</strong>gthe DSL l<strong>in</strong>e setup, the signal on a DSL l<strong>in</strong>e can be separated so that some of the bandwidthis used to transmit an analog signal (for voice and fax) while the rema<strong>in</strong><strong>in</strong>g bandwidth is usedto transmit digital data. Split the signal to use both the teleph<strong>one</strong> or fax and the computer onthe same l<strong>in</strong>e and at the same time.NoteNot <strong>all</strong> pr<strong>in</strong>ters and faxes are compatible with DSL services. <strong>HP</strong> does not guarantee that the<strong>HP</strong> <strong>LaserJet</strong> <strong>all</strong>-<strong>in</strong>-<strong>one</strong> product will be compatible with <strong>all</strong> DSL service l<strong>in</strong>es or providers.The DSL modem requires a high-pass filter. Sometimes when DSL service is <strong>in</strong>st<strong>all</strong>ed, theservice provider supplies a splitter, which <strong>in</strong>cludes a low-pass filter, for the normal houseph<strong>one</strong> wir<strong>in</strong>g. If not, the user should contact the DSL provider, and request a filter or splitter toenable a fax modem to operate on the l<strong>in</strong>e.Note<strong>HP</strong> recommends discuss<strong>in</strong>g DSL l<strong>in</strong>e setup options with the DSL service provider. Consult theDSL provider for technical <strong>in</strong>st<strong>all</strong>ation requirements.Connect<strong>in</strong>g additional devicesDepend<strong>in</strong>g on how the ph<strong>one</strong> l<strong>in</strong>es are set up, additional devices can be connected to theph<strong>one</strong> l<strong>in</strong>e along with the <strong>HP</strong> <strong>LaserJet</strong> <strong>3015</strong> and <strong>3030</strong> <strong>all</strong>-<strong>in</strong>-<strong>one</strong>. In general, no more thanthree or four devices should be connected to a s<strong>in</strong>gle ph<strong>one</strong> l<strong>in</strong>e. If too many devices areconnected to a s<strong>in</strong>gle ph<strong>one</strong> l<strong>in</strong>e, <strong>one</strong> or more of the devices might not detect an <strong>in</strong>com<strong>in</strong>gc<strong>all</strong>. If this occurs, disconnect <strong>one</strong> or more of the devices.NoteThis product cannot replace a computer modem. It cannot act as a modem for send<strong>in</strong>g andreceiv<strong>in</strong>g e-mail, for connect<strong>in</strong>g to the Internet, or for communicat<strong>in</strong>g with other computers.Dedicated fax l<strong>in</strong>eIf the product is connected to a ph<strong>one</strong> l<strong>in</strong>e that is used only for fax c<strong>all</strong>s, the follow<strong>in</strong>g devicescan be connected:● C<strong>all</strong>er ID box●Modem—An <strong>in</strong>ternal or external computer modem can be connected to the fax l<strong>in</strong>e if thefax l<strong>in</strong>e is to be used for e-mail or access to the Internet. However, faxes might not besent or received while the l<strong>in</strong>e is be<strong>in</strong>g used for these purposes.● Extra ph<strong>one</strong>—An extra ph<strong>one</strong> l<strong>in</strong>e can be connected to the fax l<strong>in</strong>e if the fax is to used formak<strong>in</strong>g outgo<strong>in</strong>g c<strong>all</strong>s.Do not connect an answer<strong>in</strong>g mach<strong>in</strong>e or computer voicemail system to the fax l<strong>in</strong>e. If thecustomer uses computer voicemail, connect the external or <strong>in</strong>ternal modem to the dedicatedph<strong>one</strong> l<strong>in</strong>e. Then, use the dedicated voice l<strong>in</strong>e to connect to the Internet and receivevoicemail.ENWW Solv<strong>in</strong>g problems with digital subscriber l<strong>in</strong>e (DSL) connections 231
Shared ph<strong>one</strong> l<strong>in</strong>eIf the product is connected to a ph<strong>one</strong> l<strong>in</strong>e that is shared between fax c<strong>all</strong>s and voice c<strong>all</strong>s, orif the ph<strong>one</strong> l<strong>in</strong>e has two ph<strong>one</strong> numbers assigned and uses a r<strong>in</strong>g-pattern service, thefollow<strong>in</strong>g devices can be connected:● C<strong>all</strong>er ID box●●●Modem—An <strong>in</strong>ternal or external computer modem can be connected to the fax l<strong>in</strong>e if thefax l<strong>in</strong>e is to be used for e-mail or access to the Internet. However, faxes might not besent or received while the l<strong>in</strong>e is be<strong>in</strong>g used for these purposes.Ph<strong>one</strong>—Connect a ph<strong>one</strong> to the shared ph<strong>one</strong> l<strong>in</strong>e to make or answer voice c<strong>all</strong>s on theshared l<strong>in</strong>e.Answer<strong>in</strong>g mach<strong>in</strong>e or computer voicemail system—Connect these devices to the sameph<strong>one</strong> jack that the product uses <strong>in</strong> order to make sure that the different devices do not<strong>in</strong>terfere with <strong>one</strong> another.NoteIt is possible to connect devices to another ph<strong>one</strong> jack for the same ph<strong>one</strong> l<strong>in</strong>e (for example,<strong>in</strong> another room). However, the devices might <strong>in</strong>terfere with fax<strong>in</strong>g and with each other.To connect additional devices to the <strong>HP</strong> <strong>LaserJet</strong> <strong>3015</strong> <strong>all</strong>-<strong>in</strong>-<strong>one</strong> and the<strong>HP</strong> <strong>LaserJet</strong> <strong>3030</strong> <strong>all</strong>-<strong>in</strong>-<strong>one</strong>Connect additional devices <strong>in</strong> the order that is described <strong>in</strong> the follow<strong>in</strong>g steps. The outputport for each device is connected to the <strong>in</strong>put port of the next, form<strong>in</strong>g a "cha<strong>in</strong>". If you do notwant to connect a specified device, skip the step that expla<strong>in</strong>s it and cont<strong>in</strong>ue to the nextdevice.NoteDo not connect more than three devices to the teleph<strong>one</strong> l<strong>in</strong>e.1. Unplug the power cords for <strong>all</strong> the devices that you want to connect.2. The device should already be connected to a teleph<strong>one</strong> jack.3. Locate the fax ports on the back of the device.4. Remove the plastic <strong>in</strong>sert from the "teleph<strong>one</strong>" port (the port that is marked with ateleph<strong>one</strong> icon).232 Chapter 6 Troubleshoot<strong>in</strong>g ENWW
5. To connect an <strong>in</strong>ternal or external modem on a computer, plug <strong>one</strong> end of a teleph<strong>one</strong>cord <strong>in</strong>to the device “teleph<strong>one</strong>” port (the port that is marked with a teleph<strong>one</strong> icon). Plugthe other end of the cord <strong>in</strong>to the modem “l<strong>in</strong>e” port.NoteSome modems have a second “l<strong>in</strong>e” port to connect to a dedicated voice l<strong>in</strong>e. If you have two“l<strong>in</strong>e” ports, see your modem documentation to make sure that you connect to the correct“l<strong>in</strong>e” port.6. To connect a c<strong>all</strong>er-ID box, plug a teleph<strong>one</strong> cord <strong>in</strong>to the previous device’s “teleph<strong>one</strong>”port. Plug the other end of the teleph<strong>one</strong> cord <strong>in</strong>to the c<strong>all</strong>er-ID box “l<strong>in</strong>e” port.7. To connect an answer<strong>in</strong>g mach<strong>in</strong>e, plug a teleph<strong>one</strong> cord <strong>in</strong>to the previous device’s“teleph<strong>one</strong>” port. Plug the other end of the teleph<strong>one</strong> cord <strong>in</strong>to the answer<strong>in</strong>g mach<strong>in</strong>e“l<strong>in</strong>e” port.ENWW Solv<strong>in</strong>g problems with digital subscriber l<strong>in</strong>e (DSL) connections 233
8. To connect a teleph<strong>one</strong>, plug a teleph<strong>one</strong> cord <strong>in</strong>to the previous device’s “teleph<strong>one</strong>” port.Plug the other end of the teleph<strong>one</strong> cord <strong>in</strong>to the teleph<strong>one</strong> “l<strong>in</strong>e” port.9. After you have f<strong>in</strong>ished connect<strong>in</strong>g additional devices, plug <strong>all</strong> of the devices <strong>in</strong>to theirpower sources.234 Chapter 6 Troubleshoot<strong>in</strong>g ENWW
Functional checksUse the follow<strong>in</strong>g procedures to help diagnose and solve problems that occur <strong>in</strong> the pr<strong>in</strong>teng<strong>in</strong>e.Control-panel testNotePerform this procedure as quickly as possible <strong>in</strong> order to complete the control-panel checkbefore the formatter beg<strong>in</strong>s communicat<strong>in</strong>g with the control panel. The control-panel testcont<strong>in</strong>ues until <strong>all</strong> of the buttons have been tested or until the formatter attempts tocommunicate with the control panel (after approximately 40 seconds). The control-panel testwill be <strong>in</strong>terrupted if it is not completed before communication occurs.1. Turn the product power on by us<strong>in</strong>g the power switch.2. Immediately press the > and CANCEL buttons simultaneously.3. Press and hold down the > and CANCEL buttons until the message Passed MEM Testappears on the control-panel display.4. Release the > and CANCEL buttons.5. Press the MENU/ENTER button to test the control-panel display LEDs. Cont<strong>in</strong>ue to press MENU/ENTER until the message Scroll Check--Press Enter To Pass appears on the controlpaneldisplay.6. Press MENU/ENTER aga<strong>in</strong>.7. The name of a control-panel button will appear on the control-panel display. Press thecorrespond<strong>in</strong>g button on the control panel. Repeat this step until <strong>all</strong> of the control-panelbuttons have been tested.NoteThe control-panel test cont<strong>in</strong>ues until <strong>all</strong> of the buttons have been tested or there is no activityat the control panel for about 20 seconds. After test<strong>in</strong>g <strong>all</strong> of the control-panel buttons (orwhen there is no activity at the control panel for about 20 seconds), the product exits the testand cont<strong>in</strong>ues the startup processes.Half self-test functional checkThe purpose of the half self-test check is to determ<strong>in</strong>e which image-formation process ismalfunction<strong>in</strong>g. The image-formation process can be subdivided <strong>in</strong>to the follow<strong>in</strong>g stages:● condition<strong>in</strong>g stage (charges the drum)● writ<strong>in</strong>g stage (writes a latent image to the drum with the laser)● development stage (forms a t<strong>one</strong>r image on the drum)● transfer stage (transfers the image to paper)● separation stage (separates the media from the drum)● fus<strong>in</strong>g stage (applies heat and pressure to make the image on paper permanent)● clean<strong>in</strong>g stage (removes excess t<strong>one</strong>r from the drum)To perform a half self-test check1. Pr<strong>in</strong>t a self-test page. (See Troubleshoot<strong>in</strong>g tools.)ENWW Functional checks 235
2. Open the pr<strong>in</strong>t cartridge door after the paper advances halfway through the pr<strong>in</strong>ter (about 5seconds after the motor beg<strong>in</strong>s rotation). The lead<strong>in</strong>g edge of the paper should haveadvanced past the pr<strong>in</strong>t cartridge.3. Remove the pr<strong>in</strong>t cartridge.4. Open the pr<strong>in</strong>t cartridge drum shield to view the drum surface. If a dark and dist<strong>in</strong>ct t<strong>one</strong>rimage is present on the drum surface, assume that the first three functions of the imageformationprocess are function<strong>in</strong>g (through the development stage). Troubleshoot thefailure as a transfer or fus<strong>in</strong>g problem.To perform other checksIf, dur<strong>in</strong>g the half self-test check, no image is present on the photosensitive drum, performthese checks:1. Make sure that you removed the entire length of the seal<strong>in</strong>g tape from the pr<strong>in</strong>t cartridgebefore you <strong>in</strong>st<strong>all</strong>ed the cartridge.2. Perform a drum-rotation functional check. (See Drum rotation functional check .)3. Perform a high-voltage power-supply check. (See High-voltage contacts check.)236 Chapter 6 Troubleshoot<strong>in</strong>g ENWW
If a transfer problem, replace the transfer roller. If a fuser problem, first make sure to check thetwo wire-harness connectors (J102 and J204; c<strong>all</strong>out 1) on the power supply.Figure 6-13.Check the fuser connectors on the fuserFigure 6-14.Check the fuser connectors on the power supplyDrum rotation functional checkThe photosensitive drum, located <strong>in</strong> the pr<strong>in</strong>t cartridge, must rotate <strong>in</strong> order for the pr<strong>in</strong>tprocess to work. The photosensitive drum receives its drive from the ma<strong>in</strong> drive assembly.NoteThis test is especi<strong>all</strong>y important if refilled pr<strong>in</strong>t cartridges have been used.1. Open the pr<strong>in</strong>t-cartridge door.ENWW Functional checks 237
2. Remove the pr<strong>in</strong>t cartridge.3. Mark the drive gear on the cartridge with a felt-tipped marker. Note the position of themark.4. Inst<strong>all</strong> the pr<strong>in</strong>t cartridge and close the pr<strong>in</strong>t-cartridge door. The startup sequence shouldrotate the drum enough to move the mark.5. Open the pr<strong>in</strong>t-cartridge door and <strong>in</strong>spect the gear that was marked <strong>in</strong> step 3. Verify thatthe mark moved.If the mark did not move, <strong>in</strong>spect the ma<strong>in</strong> drive assembly to make sure that it is mesh<strong>in</strong>g withthe pr<strong>in</strong>t-cartridge gears. If the drive gears appear functional and the drum does not move,replace the pr<strong>in</strong>t cartridge.High-voltage contacts checkThe high-voltage contacts <strong>in</strong> the product must have a good connection with the contacts onthe pr<strong>in</strong>t cartridge to provide the necessary voltages for the image-formation processes.To check the pr<strong>in</strong>t-cartridge contactsRemove the pr<strong>in</strong>t cartridge and visu<strong>all</strong>y <strong>in</strong>spect the three connection po<strong>in</strong>ts (c<strong>all</strong>out 1) on theend of the pr<strong>in</strong>t cartridge. If they are dirty or corroded, clean the connection. If they aredamaged, replace the pr<strong>in</strong>t cartridge.NoteUse only isopropyl alcohol to clean the connections.Figure 6-15.Pr<strong>in</strong>t-cartridge high-voltage contacts238 Chapter 6 Troubleshoot<strong>in</strong>g ENWW
To check the high-voltage connector p<strong>in</strong>sThe assembly has three spr<strong>in</strong>g-loaded p<strong>in</strong>s (c<strong>all</strong>out 1) to contact the pr<strong>in</strong>t cartridge. Verify thatthe p<strong>in</strong>s are not dirty or corroded and that the spr<strong>in</strong>g-load<strong>in</strong>g action is functional. If the p<strong>in</strong>s aredirty or obstructed, clean them us<strong>in</strong>g a dry cloth. If they are damaged, replace the product.Figure 6-16.High-voltage contactsENWW Functional checks 239
Updat<strong>in</strong>g the firmware codeNoteIf after attempt<strong>in</strong>g to update the firmware code the device does not return to the Ready state,preform the follow<strong>in</strong>g procedures.Try the firmware update aga<strong>in</strong>.Perform the NVRAM <strong>in</strong>it procedure. See NVRAM <strong>in</strong>it.If the device still does not reach the Ready state, replace the formatter. See Formatter andl<strong>in</strong>e <strong>in</strong>terface unit (LIU).The device uses a flash-memory-based formatter that enables the firmware code to beupdated when updated firmware is available. Flash memory also provides a method forproduct recovery if the <strong>in</strong>st<strong>all</strong>ed firmware becomes corrupted or fails.Pr<strong>in</strong>t a configuration page to f<strong>in</strong>d out what version of firmware code is <strong>in</strong>st<strong>all</strong>ed on the device.If updated firmware is available, download the appropriate update (www.hp.com/support/lj<strong>3015</strong>; www.hp.com/support/lj<strong>3020</strong>; www.hp.com/support/lj<strong>3030</strong>) and follow the <strong>in</strong>structions <strong>in</strong>the ReadMe file.240 Chapter 6 Troubleshoot<strong>in</strong>g ENWW
Troubleshoot<strong>in</strong>g toolsUse the control panel to pr<strong>in</strong>t configuration reports and demonstration pages. Theconfiguration report shows the sett<strong>in</strong>gs that have been selected from the control panel.Pr<strong>in</strong>t<strong>in</strong>g a configuration report is also considered a "self test" for the pr<strong>in</strong>ter, although any ofthe reports can serve this purpose. A pr<strong>in</strong>tout of the control-panel menu structure is a usefulreference if you alter sett<strong>in</strong>gs <strong>in</strong> the menu.Pr<strong>in</strong>t<strong>in</strong>g a configuration report, demonstration page, or menustructure1. Press MENU/ENTER.2. Use the < or > button to select Reports and then press MENU/ENTER.3. Use the < or > button to select either Config report , Demo Page , or Menu Structureand then press MENU/ENTER. The product exits the Menu sett<strong>in</strong>gs and pr<strong>in</strong>ts the report.Pr<strong>in</strong>t<strong>in</strong>g <strong>all</strong> fax reports at once (<strong>HP</strong> <strong>LaserJet</strong> <strong>3015</strong> and <strong>3030</strong>only)To pr<strong>in</strong>t <strong>all</strong> fax reports at once:1. Press MENU/ENTER.2. Use the < or > button to select Reports and then press MENU/ENTER.3. Use the < or > button to select All fax reports and then press MENU/ENTER. The productexits the Menu sett<strong>in</strong>gs and pr<strong>in</strong>ts the reports.When you pr<strong>in</strong>t <strong>all</strong> reports at once, the follow<strong>in</strong>g reports are pr<strong>in</strong>ted:● Fax activity log—recent faxes sent and received, and their status● Bill<strong>in</strong>g log (if enabled)—sorted by bill<strong>in</strong>g code● Block fax list (if enabled)—fax numbers you have blocked● Configuration report—current control-panel sett<strong>in</strong>gs, <strong>in</strong>clud<strong>in</strong>g the follow<strong>in</strong>g sections:● System <strong>in</strong>formation● Reports● Fax sett<strong>in</strong>gs● User defaults● <strong>Service</strong>● Page counts● Speed-dial report—<strong>one</strong>-touch, speed-dial, and group-dial report● Usage pageT.30 protocol trace (<strong>HP</strong> <strong>LaserJet</strong> <strong>3015</strong> and <strong>3030</strong> only)Use a T.30 protocol trace report to troubleshoot fax transmission and receive issues.ENWW Troubleshoot<strong>in</strong>g tools 241
To pr<strong>in</strong>t a T.30 protocol trace report1. Press MENU/ENTER.2. Use the < or > button to select <strong>Service</strong> and then press MENU/ENTER.3. Use the < or > button to select Pr<strong>in</strong>t T.30 trace and then press MENU/ENTER.4. Use the < or > button to select NOW, and then press MENU/ENTER. The product exits theMenu sett<strong>in</strong>gs and pr<strong>in</strong>ts the reports.Send a fax from the product or receive a fax to the product from another fax mach<strong>in</strong>e. Pr<strong>in</strong>t aT.30 trace report after the fax pr<strong>in</strong>ts.Explanations of some of the report column head<strong>in</strong>g follow:● Date and Time identify when the fax beg<strong>in</strong>s. Match this <strong>in</strong>formation with the fax log oferrors.● Type is the type of fax activity: send or receive.● Identification is the ph<strong>one</strong> number to which a fax is sent.● Result expla<strong>in</strong>s the status of the fax:● “OK” means that the fax was successful.● “Pend<strong>in</strong>g” faxes are <strong>in</strong> memory or are pr<strong>in</strong>t<strong>in</strong>g.● For error codes and their mean<strong>in</strong>gs, see Table 6-4. Fax receive codes and Table 6-5.Fax send codes.Fax error-correction mode (ECM) (<strong>HP</strong> <strong>LaserJet</strong> <strong>3015</strong> and <strong>3030</strong> only)Norm<strong>all</strong>y, the product monitors the signals on the teleph<strong>one</strong> l<strong>in</strong>e while it is send<strong>in</strong>g or receiv<strong>in</strong>g afax. If the product detects an error dur<strong>in</strong>g the transmission and the error-correction mode is On,the product can request that the portion of the fax be resent. The factory-set default for errorcorrectionmode is On.To change the error-correction sett<strong>in</strong>g1. Press MENU/ENTER.2. Use the < or > button to select Fax setup, and then press MENU/ENTER.3. Use the < or > button to select All faxes, and then press MENU/ENTER.4. Use the < or > button to select Error correction, and then press MENU/ENTER.5. Use the < or > button to select On or Off, and then press MENU/ENTER to save theselection.V.34 fax standardV.34 is the <strong>in</strong>dustry-wide fax standard for full-duplex modems that transmit at speeds up to28,000 bps. When V.34 is turned on, the product automatic<strong>all</strong>y adjusts the transmission speedbased on the clarity of the image. Turn<strong>in</strong>g V.34 off can resolve some fax transmission issues.To change the V.34 sett<strong>in</strong>g1. Press MENU/ENTER.2. Use the < or > button to select Fax setup, and then press MENU/ENTER.3. Use the < or > button to select All faxes, and then press MENU/ENTER.4. Use the < or > button to select V.34, and then press MENU/ENTER.242 Chapter 6 Troubleshoot<strong>in</strong>g ENWW
5. Use the < or > button to select On or Off, and then press MENU/ENTER to save theselection.Fax receive and fax send codesThe follow<strong>in</strong>g tables list the fax receive and fax send codes that appear <strong>in</strong> the fax c<strong>all</strong> report.Table 6-4. Fax receive codesCode Description Recommended action200 The fax session has been completedwithout errors.221 The user has pressed CANCEL, whichcaused the fax session to beprematurely halted.222 The product has answered a c<strong>all</strong> buthas been unable to detect thepresence of a fax mach<strong>in</strong>e. Typic<strong>all</strong>y,this is caused by the productanswer<strong>in</strong>g a voice c<strong>all</strong>.The remote user canceled the faxtransmission by press<strong>in</strong>g CANCELimmediately before, or just as, theproduct answered the c<strong>all</strong>.The remote mach<strong>in</strong>e automatic<strong>all</strong>yended the c<strong>all</strong> immediately before, orjust as, the product answered thec<strong>all</strong>.The remote (c<strong>all</strong><strong>in</strong>g) fax mach<strong>in</strong>eidentified a feature <strong>in</strong>compatibilitybetween the two mach<strong>in</strong>es anddisconnected immediately beforetransmitt<strong>in</strong>g any additional fax t<strong>one</strong>sor T.30 frames. (This is a very rareand non-standard behavior.)N<strong>one</strong> required.Allow the product to receive the fax.1. Confirm that the remote c<strong>all</strong>er is a faxmach<strong>in</strong>e and not a voice c<strong>all</strong>. (Typic<strong>all</strong>ythe remote user must <strong>in</strong>form the c<strong>all</strong>erthat the fax session failed.)2. If the remote mach<strong>in</strong>e ends the c<strong>all</strong> justas the product starts receiv<strong>in</strong>g, reducethe r<strong>in</strong>g count after which the productanswers. Or, suggest that the remoteuser manu<strong>all</strong>y dial to the product andthen manu<strong>all</strong>y start the fax session bypress<strong>in</strong>g START after fax t<strong>one</strong>s have beenheard from the product.3. Confirm that the remote user is not<strong>in</strong>advertently attempt<strong>in</strong>g a polltransmission from the product <strong>in</strong>stead oftransmitt<strong>in</strong>g to the product.4. Reconfigure the local fax mach<strong>in</strong>e to usedifferent configuration sett<strong>in</strong>gs, changeECM to the opposite of the currentsett<strong>in</strong>g, and/or select a slower receptionspeed.223 (ECMerror)The product has been unable toreceive an entire page even aftermultiple attempts to receive the partsof the page that conta<strong>in</strong> errors. Thisis usu<strong>all</strong>y caused by extremely poorl<strong>in</strong>e conditions.Attempt to receive the fax aga<strong>in</strong> afterteleph<strong>one</strong>-l<strong>in</strong>e conditions have improved.-Or--Or--Or--Or-Set the ECM to Off. Errors might still occur,which might result <strong>in</strong> degraded image qualityon the received page. However, the ability toreceive the entire document will be improved.ENWW Troubleshoot<strong>in</strong>g tools 243
Table 6-4. Fax receive codes (cont<strong>in</strong>ued)Code Description Recommended action224 The product has received <strong>one</strong> ormore pages that conta<strong>in</strong> excessiveerrors. This is usu<strong>all</strong>y caused byextremely poor l<strong>in</strong>e conditions.Because the ECM is not used dur<strong>in</strong>gthis session, errors are not corrected.Some non-<strong>HP</strong> mach<strong>in</strong>es might try toresend the failed pages, but it isimpossible to determ<strong>in</strong>e from theresent pages if the problems with thepreviously received pages have beencorrected.225 The remote mach<strong>in</strong>e has attemptedto <strong>in</strong>itiate a remote diagnosticsession with this mach<strong>in</strong>e, eventhough remote diagnostic access isloc<strong>all</strong>y disabled.226 The remote mach<strong>in</strong>e has attemptedto <strong>in</strong>itiate a remote diagnosticsession with this mach<strong>in</strong>e, but theremote diagnostic versions that thetwo mach<strong>in</strong>es support are<strong>in</strong>compatible.227 The remote mach<strong>in</strong>e has attemptedto <strong>in</strong>itiate a fax session at a speedand modulation that the product doesnot support.228 The remote mach<strong>in</strong>e has attemptedto <strong>in</strong>itiate a poll transmission from theproduct even though the product isnot configured for poll transmission.229 The remote mach<strong>in</strong>e has attemptedto <strong>in</strong>itiate a secure poll transmissionfrom the product but has not provideda valid password.230 The remote mach<strong>in</strong>e has attemptedto <strong>in</strong>itiate an operation that requireserror correction but has not selectederror correction for the session.231 The remote mach<strong>in</strong>e has attemptedto <strong>in</strong>itiate a transmission to theproduct even though the ability toreceive is disabled at the product.Attempt to receive the fax aga<strong>in</strong> afterteleph<strong>one</strong>-l<strong>in</strong>e conditions have improved.Enable the remote diagnostics capability onthe product.N<strong>one</strong>. Remote diagnostics cannot occurbetween mach<strong>in</strong>es that have <strong>in</strong>compatibleremote diagnostic versions.Reconfigure the product to receive at aslower speed.1. Confirm that the remote user <strong>in</strong>tends touse poll<strong>in</strong>g. The remote user might have<strong>in</strong>advertently attempted to poll. If this isthe case, reattempt a normaltransmission from the remote mach<strong>in</strong>e.2. If the remote user <strong>in</strong>tended to usepoll<strong>in</strong>g, confirm that the product wascorrectly configured for poll transmission.Confirm that the remote user is the person forwhom the polled document is <strong>in</strong>tended. If so,make sure that the remote user has thecorrect password and that the product isconfigured with the same password.Enable the ECM on both the product and theremote mach<strong>in</strong>e.Ensure that the product is capable ofreceiv<strong>in</strong>g a document. Check that paper iscorrectly loaded, paper is not jammed with<strong>in</strong>the mach<strong>in</strong>e, and any other systemabnormalities have been cleared.244 Chapter 6 Troubleshoot<strong>in</strong>g ENWW
Table 6-4. Fax receive codes (cont<strong>in</strong>ued)Code Description Recommended action232 233 234235 (ECMerror) 236(ECM error)237238 239 (ECMerror) 240(ECM error)241 (ECMerror)A communication failure hasoccurred between the two mach<strong>in</strong>es.The user at the remote mach<strong>in</strong>emight have pressed CANCEL.The power at the remote mach<strong>in</strong>ehas been <strong>in</strong>terrupted or deliberatelyturned off, caus<strong>in</strong>g the fax session tobe <strong>in</strong>terrupted.The remote fax mach<strong>in</strong>e sent anunexpected communication.1. Attempt to receive the fax aga<strong>in</strong> afterteleph<strong>one</strong>-l<strong>in</strong>e conditions haveimproved.2. If the error persists, and error correctionis <strong>in</strong> use for the fax session, disable theECM.N<strong>one</strong>. This is a defect <strong>in</strong> the remote send<strong>in</strong>gmach<strong>in</strong>e.242 The remote fax mach<strong>in</strong>e isattempt<strong>in</strong>g to receive <strong>in</strong>stead ofsend. Both mach<strong>in</strong>es have attemptedto start receiv<strong>in</strong>g at the same time.It is possible to accident<strong>all</strong>y <strong>in</strong>itiate afax reception after dial<strong>in</strong>g on manymach<strong>in</strong>es, if there is no paper <strong>in</strong> themach<strong>in</strong>e, or if the paper is notcorrectly loaded and cannot besensed by the appropriate documentsensor.243 244 The user of the remote mach<strong>in</strong>e haspressed the Stop button on thatmach<strong>in</strong>e, which caused the sessionto be prematurely term<strong>in</strong>ated.-Or--Or--Or-The remote fax mach<strong>in</strong>e identified afeature <strong>in</strong>compatibility between thetwo mach<strong>in</strong>es and has term<strong>in</strong>atedthe session. For example, theproduct tried to <strong>in</strong>itiate poll<strong>in</strong>g, but theremote mach<strong>in</strong>e did not support thismode of operation.Ensure that a document is ready and iscorrectly loaded <strong>in</strong> the transmitt<strong>in</strong>g faxmach<strong>in</strong>e and that the remote mach<strong>in</strong>e isattempt<strong>in</strong>g to transmit and not to receive.1. Confirm that the remote user is not<strong>in</strong>advertently attempt<strong>in</strong>g a polltransmission from the product, <strong>in</strong>stead oftransmitt<strong>in</strong>g to the product. This mode ofoperation must be speci<strong>all</strong>y configuredon the product. If poll transmission fromthe product is the appropriate mode ofoperation, confirm that the product hasbeen configured for this operation.2. Reconfigure the local fax mach<strong>in</strong>e to usedifferent configuration sett<strong>in</strong>gs, changethe ECM sett<strong>in</strong>g to the opposite of thecurrent sett<strong>in</strong>g, or select a slowerreception speed.ENWW Troubleshoot<strong>in</strong>g tools 245
Table 6-4. Fax receive codes (cont<strong>in</strong>ued)Code Description Recommended action245 246 (ECMerror)The user of the remote mach<strong>in</strong>e haspressed the Stop button on thatmach<strong>in</strong>e, which caused the sessionto be prematurely term<strong>in</strong>ated.The product has been “hold<strong>in</strong>g off”the remote mach<strong>in</strong>e dur<strong>in</strong>g receptionof a large or complex documentbecause the remote mach<strong>in</strong>e lacksavailable memory. This hold-off timehas exceeded the timeout (typic<strong>all</strong>y60 seconds) that the remote mach<strong>in</strong>euses, and the remote mach<strong>in</strong>e hasterm<strong>in</strong>ated the session.1. If the document was large, ask theremote user to retransmit the documentas two or more sm<strong>all</strong>er documents.2. Disable ECM and attempt to receive thefax aga<strong>in</strong>.247 - 251 The remote mach<strong>in</strong>e is apparentlystuck <strong>in</strong> the “on” mode.252 Teleph<strong>one</strong>-l<strong>in</strong>e conditions were toopoor to receive a fax.253 The remote mach<strong>in</strong>e has attemptedto <strong>in</strong>itiate a page transmission us<strong>in</strong>ga page width that is not supported bythe product.281 The product has not received anydata at the start of a page dur<strong>in</strong>gnon-ECM reception although themodem has not detected a remotedisconnect. The remote mach<strong>in</strong>e isprobably transmitt<strong>in</strong>g fill bytes<strong>in</strong>stead of data, and is either brokenor jammed.282 The product has not received anydata at the start of a page dur<strong>in</strong>gECM reception although the modemhas not detected a remotedisconnect. The remote mach<strong>in</strong>e isprobably transmitt<strong>in</strong>g sync frames<strong>in</strong>stead of data, and is either brokenor jammed.283 The product has detected that themodem carrier has stopped. Eitherthe l<strong>in</strong>e has been disconnected or theremote mach<strong>in</strong>e has aborted thetransmission.N<strong>one</strong>.1. Attempt to receive the fax aga<strong>in</strong> afterteleph<strong>one</strong>-l<strong>in</strong>e conditions haveimproved.2. Configure the mach<strong>in</strong>e to start receiv<strong>in</strong>gat a lower speed.3. If the product successfully receivedseveral pages of a larger document, askthe remote user to transmit thedocument <strong>in</strong> several sm<strong>all</strong>er parts.Ask the remote user to reconfigure the remotemach<strong>in</strong>e to transmit us<strong>in</strong>g a “normal” (letter/A4) page width.Ask the remote user to check his or hermach<strong>in</strong>e, and then ask the remote user tosend the fax aga<strong>in</strong>.Ask the remote user to check his or hermach<strong>in</strong>e, and then ask the remote user tosend the fax aga<strong>in</strong>.Ask the remote user to check his or hermach<strong>in</strong>e, and then ask the remote user tosend the fax aga<strong>in</strong>.246 Chapter 6 Troubleshoot<strong>in</strong>g ENWW
Table 6-4. Fax receive codes (cont<strong>in</strong>ued)Code Description Recommended action284 The product has not received anydata dur<strong>in</strong>g non-ECM page receptionand a timeout failure has occurred.The remote mach<strong>in</strong>e is probablytransmitt<strong>in</strong>g fill bytes <strong>in</strong>stead of data,and is either broken or jammed.285 The product has stopped receiv<strong>in</strong>gany data dur<strong>in</strong>g an ECM pagereception although the modem hasnot detected a remote disconnect.The remote mach<strong>in</strong>e is probablytransmitt<strong>in</strong>g sync frames <strong>in</strong>stead ofdata, and is either broken orjammed.286 The remote mach<strong>in</strong>e has transmitted<strong>in</strong>valid data. The product hasreceived frames with errors dur<strong>in</strong>g anECM reception and requestedretransmission of the failed frames.The data that is resent does notcorrespond to the data that wasrequested. This is an implementati<strong>one</strong>rror from the remote mach<strong>in</strong>e.290 Between pages, the remote mach<strong>in</strong>ehas attempted to renegotiate thesession mode from ECM to non-ECM. This operation is notsupported, and the session has beenaband<strong>one</strong>d.291 This is not a communication error,and it is not expected that this errorwill occur under non-developmentscenarios. Reception has failedbecause the local unit is unable toopen to receive data. This errormight be associated with lowmemory, although low memoryshould not produce the error unlessother conditions are contribut<strong>in</strong>g tothe problem.292 The remote mach<strong>in</strong>e has attemptedto renegotiate the encod<strong>in</strong>g modefrom non-JPEG to JPEG. Thisoperation is not supported, and thesession has been aband<strong>one</strong>d.Ask the remote user to check his or hermach<strong>in</strong>e, and then ask the remote user tosend the fax aga<strong>in</strong>.Ask the remote user to check his or hermach<strong>in</strong>e, and then ask the remote user tosend the fax aga<strong>in</strong>.Disable ECM, and ask the remote user tosend the fax aga<strong>in</strong>.Ask the remote user to send the fax aga<strong>in</strong>,and to split the document <strong>in</strong>to two portions:the ECM and non-ECM portions. Somemach<strong>in</strong>es will attempt to use non-ECM forphoto mode, so this might be associated witha between-page encod<strong>in</strong>g change to supportphoto mode.If the error persists, turn the product off andthen on aga<strong>in</strong>.Ask the remote user to send the fax aga<strong>in</strong>,and to split the document <strong>in</strong>to two portions:the JPEG and non-JPEG portions. Somemach<strong>in</strong>es will attempt to use JPEG for photomode, so this might be associated with abetween-page encod<strong>in</strong>g change to supportphoto mode.ENWW Troubleshoot<strong>in</strong>g tools 247
Table 6-5. Fax send codesCode Description Recommended action300 The fax session has been completedwithout errors.311 The user has pressed the STOPbutton, which caused the session tobe prematurely halted before <strong>all</strong>pages have been transmitted.312 A remote fax device has failed toanswer the c<strong>all</strong>. Specific<strong>all</strong>y, fax t<strong>one</strong>sor the fax handshake from a remotemach<strong>in</strong>e has not been detected.Typic<strong>all</strong>y this is caused by the userc<strong>all</strong><strong>in</strong>g the wrong number, or whenthe correct number has been c<strong>all</strong>edbut the mach<strong>in</strong>e has been configurednot to answer, or when the remotemach<strong>in</strong>e has been temporarilydisabled because of a condition suchas a lack of paper or a jam.313 A busy signal has been detected eachtime that the product has attempted toc<strong>all</strong> the remote mach<strong>in</strong>e.314 The product has attempted to <strong>in</strong>itiatea remote diagnostic session but hasdetected that remote diagnostics aredisabled at the remote mach<strong>in</strong>e.315 The product has attempted to <strong>in</strong>itiatea remote diagnostic session but hasdetected that the remote diagnosticversion supported by the remotemach<strong>in</strong>e is <strong>in</strong>compatible.316 The product is set up to <strong>in</strong>itiatedocument transmission, but it hasdetected that the remote mach<strong>in</strong>e isnot able to receive a document. Thiserror should be rare because aremote mach<strong>in</strong>e norm<strong>all</strong>y will notanswer if it cannot receive adocument. An exception is if theremote mach<strong>in</strong>e is configured for polltransmission but is unable to receive.317 The remote mach<strong>in</strong>e cannot supporta fax reception at any speed ormodulation that the product supports.318 The remote mach<strong>in</strong>e cannot supporta fax reception at the page width thatthe product selected.N<strong>one</strong> required.N<strong>one</strong> required.Confirm that the remote fax mach<strong>in</strong>e is readyto receive a document, and attempt to sendthe fax aga<strong>in</strong>.Attempt to send the fax aga<strong>in</strong> when the l<strong>in</strong>e isno longer busy.Ask the remote user to enable remotediagnostics on the remote mach<strong>in</strong>e.No solution. Remote diagnostics cannotoccur between mach<strong>in</strong>es that have<strong>in</strong>compatible remote diagnostic versions.Configure the remote mach<strong>in</strong>e for reception.Typic<strong>all</strong>y the remote user configures theremote mach<strong>in</strong>e, which can <strong>in</strong>clude load<strong>in</strong>gpaper, clear<strong>in</strong>g jams, and clear<strong>in</strong>g othersystem abnormalities.N<strong>one</strong>.N<strong>one</strong>.248 Chapter 6 Troubleshoot<strong>in</strong>g ENWW
Table 6-5. Fax send codes (cont<strong>in</strong>ued)Code Description Recommended action319 The product has attempted to <strong>in</strong>itiatea b<strong>in</strong>ary file transfer (BFT) but hasdetected that the remote mach<strong>in</strong>edoes not support this mode ofoperation.320 The product is set up to <strong>in</strong>itiate pollreception with a remote mach<strong>in</strong>e, butit has detected that the remotemach<strong>in</strong>e is not configured to do this.Poll transmission from a remotemach<strong>in</strong>e is typic<strong>all</strong>y configured on asession-by-session basis.321 A communication error with thereceiv<strong>in</strong>g fax mach<strong>in</strong>e was caused bypoor teleph<strong>one</strong>-l<strong>in</strong>e conditions.322 - 324 Teleph<strong>one</strong>-l<strong>in</strong>e conditions are toopoor to send a fax.1. Ask the remote user to enable the BFTcapability on the remote mach<strong>in</strong>e if it issupported.2. Retransmit the document as a normalfax, rather than attempt<strong>in</strong>g a BFTtransfer.Confirm that the local user wants to attempt apoll reception. If not, reconfigure the productfor a normal fax transmission.Configure the remote mach<strong>in</strong>e for polltransmission. The remote user must first loada document to transmit and then configure themach<strong>in</strong>e for poll<strong>in</strong>g.Attempt to send the fax aga<strong>in</strong> whenteleph<strong>one</strong>-l<strong>in</strong>e conditions have improved.1. Attempt to send the fax aga<strong>in</strong> whenteleph<strong>one</strong>-l<strong>in</strong>e conditions haveimproved.2. If the session fails after transmitt<strong>in</strong>gseveral pages of a large document,retransmit the document as severalsm<strong>all</strong>er documents.325 - 328(ECM error)Teleph<strong>one</strong>-l<strong>in</strong>e conditions are poor.Attempt to send the fax aga<strong>in</strong> whenteleph<strong>one</strong>-l<strong>in</strong>e conditions have improved.Disable ECM. Errors might still occur, andmight result <strong>in</strong> a degraded image quality onthe received page. However, the ability totransmit the entire document will beimproved.329 - 331 The remote mach<strong>in</strong>e has reportedthat <strong>one</strong> or more pages have beenreceived (while ECM was off) withexcessive errors. This error does notresult <strong>in</strong> the session be<strong>in</strong>g term<strong>in</strong>atedimmediately. Subsequent pagetransmission can still occur, and laterpages might be received withouterror.332 - 343 A defect exists <strong>in</strong> the remote faxmach<strong>in</strong>e.Attempt to send the fax aga<strong>in</strong> whenteleph<strong>one</strong>-l<strong>in</strong>e conditions have improved.-Or--Or--Or-Select a lower speed for the <strong>in</strong>itialtransmission speed.Send to or receive from another fax mach<strong>in</strong>e.ENWW Troubleshoot<strong>in</strong>g tools 249
Table 6-5. Fax send codes (cont<strong>in</strong>ued)Code Description Recommended action344 - 348349-353 (ECMerror) 354-355356 - 361362-366 (ECMerror)367 - 372373-377 (ECMerror) 378-379The remote mach<strong>in</strong>e has failed torespond to a fax command from theproduct because the connection is<strong>in</strong>terrupted.The remote user has pressed theStop button while the remote mach<strong>in</strong>ewas receiv<strong>in</strong>g.Under rare conditions, <strong>in</strong>compatibilitybetween the two mach<strong>in</strong>es can causethe remote mach<strong>in</strong>e to simplyabandon the c<strong>all</strong>.The remote user has pressed theStop button, which caused thesession to be aborted.The remote mach<strong>in</strong>e hasencountered a system problem (suchas no paper or a jam), which has<strong>in</strong>hibited it from receiv<strong>in</strong>g any morepages, and which has caused it toterm<strong>in</strong>ate the session prematurely.-Or--Or--Or--Or-The remote mach<strong>in</strong>e hasencountered a feature <strong>in</strong>compatibility,which caused it to term<strong>in</strong>ate thesession.The remote mach<strong>in</strong>e is apparentlystuck <strong>in</strong> the “on” mode.1. Attempt to send the fax aga<strong>in</strong> whenteleph<strong>one</strong>-l<strong>in</strong>e conditions haveimproved.2. If the fax session was us<strong>in</strong>g errorcorrection, disable ECM.1. Configure the remote mach<strong>in</strong>e fordocument reception by clear<strong>in</strong>g anypaper jams, load<strong>in</strong>g sufficient paper, andclear<strong>in</strong>g any other system errors.2. Configure the local fax mach<strong>in</strong>e to usedifferent configurations, toggle the ECMstate, or select a slower reception speed.N<strong>one</strong>.380 The remote mach<strong>in</strong>e has failed toissue a valid response to a CTCframe. This occurs dur<strong>in</strong>g ECMtransmission after multipleretransmissions of err<strong>one</strong>ous data.381 The remote mach<strong>in</strong>e has failed torespond to a fax command from theproduct because the connection is<strong>in</strong>terrupted.-Or-The remote user has pressed theStop button while the remote mach<strong>in</strong>ewas receiv<strong>in</strong>g.N<strong>one</strong>; a defect exists <strong>in</strong> the remote mach<strong>in</strong>e.1. Attempt to send the fax aga<strong>in</strong> whenteleph<strong>one</strong>-l<strong>in</strong>e conditions haveimproved.2. Disable ECM.250 Chapter 6 Troubleshoot<strong>in</strong>g ENWW
Table 6-5. Fax send codes (cont<strong>in</strong>ued)Code Description Recommended action382 The remote fax mach<strong>in</strong>e has been“hold<strong>in</strong>g off” the local fax mach<strong>in</strong>efrom cont<strong>in</strong>u<strong>in</strong>g the ongo<strong>in</strong>gtransmission because of a temporarylow-memory condition at the remotemach<strong>in</strong>e. If this “hold-off” periodexceeds a mach<strong>in</strong>e's specific timeoutvalue, the session is term<strong>in</strong>ated.383 The remote mach<strong>in</strong>e has failed torespond to a fax command from theproduct because the connection was<strong>in</strong>terrupted.The remote user has pressed theStop button while the remote mach<strong>in</strong>ewas receiv<strong>in</strong>g.384 The product has attempted a blackJPEG transmission to a mach<strong>in</strong>e thatdoes not support this mode.386 The product has failed to completephase 3 of the <strong>in</strong>itial V.34 handshakeafter orig<strong>in</strong>at<strong>in</strong>g a fax session. This isusu<strong>all</strong>y caused by poor l<strong>in</strong>econditions, although it might be acompatibility issue with certa<strong>in</strong>mach<strong>in</strong>es or l<strong>in</strong>e conditions.387 The product has failed to successfullynegotiate the <strong>in</strong>itial V.8 handshakewith the remote mach<strong>in</strong>e afterorig<strong>in</strong>at<strong>in</strong>g a fax session. Typic<strong>all</strong>y,this occurs when the remote mach<strong>in</strong>eis not fax-capable or has disabledreception. It might also be acompatibility issue with certa<strong>in</strong>mach<strong>in</strong>es or l<strong>in</strong>e conditions.388 The product has orig<strong>in</strong>ated a faxsession and detected a remote faxmach<strong>in</strong>e but has been unable todetect any T30 frames. If the mach<strong>in</strong>eis <strong>in</strong> V.17 mode, the connectionprobably has been <strong>in</strong>terrupted. InV.34 mode, this error might alsooccur because of compatibilityproblems with certa<strong>in</strong> mach<strong>in</strong>es orl<strong>in</strong>e conditions.389 The product has orig<strong>in</strong>ated a faxsession and has reattempted V.8negotiations multiple times withoutsuccess.Resend the document as two or moreseparate fax transmissions. Wait severalm<strong>in</strong>utes between the end of <strong>one</strong> transmissionand the start of the next transmission.Disable ECM.Attempt to send the fax aga<strong>in</strong> whenteleph<strong>one</strong>-l<strong>in</strong>e conditions have improved-Or--Or--Or-Disable ECM.Use a different mode, and attempt to send thefax aga<strong>in</strong>.1. Attempt to send the fax aga<strong>in</strong> whenteleph<strong>one</strong>-l<strong>in</strong>e conditions haveimproved.2. Disable V.34 on the product and attemptthe transmission with the V.17 mode.1. Attempt to send the fax aga<strong>in</strong> whenteleph<strong>one</strong>-l<strong>in</strong>e conditions haveimproved.2. Disable V.34 on the product and attemptthe transmission us<strong>in</strong>g the V.17 mode.1. Attempt to send the fax aga<strong>in</strong> whenteleph<strong>one</strong>-l<strong>in</strong>e conditions haveimproved.2. Disable V.34 on the product and attemptthe transmission with the V.17 mode.1. Attempt to send the fax aga<strong>in</strong> whenteleph<strong>one</strong>-l<strong>in</strong>e conditions haveimproved.2. Disable V.34 on the product and attemptthe transmission with the V.17 mode.ENWW Troubleshoot<strong>in</strong>g tools 251
Table 6-5. Fax send codes (cont<strong>in</strong>ued)Code Description Recommended action390 The product has orig<strong>in</strong>ated a faxsession while us<strong>in</strong>g error correction(either V.34 or V.17). Transmission ofan image has been aband<strong>one</strong>d after atimeout when no data has becomeready for transmission. This is mostlikely caused by a low-memorycondition, although it could be causedby other <strong>in</strong>ternal problems that causedata generation for transmission tost<strong>all</strong>.391 The product has orig<strong>in</strong>ated a faxsession without error correction (notV.34). Transmission of an image hasbeen aband<strong>one</strong>d after a timeout whenno data has become ready fortransmission. This is most likelycaused by a low-memory condition,although it could be caused by other<strong>in</strong>ternal problems that st<strong>all</strong> the datageneration for transmission.392 The product has answered a faxsession and completed the <strong>in</strong>itial V.34handshake but has been unable todetect any T.30 frames. This failure iscaused by either compatibilityproblems with certa<strong>in</strong> mach<strong>in</strong>es orl<strong>in</strong>e conditions.393 The product has failed to completephase 3 of the <strong>in</strong>itial V.34 handshakeafter answer<strong>in</strong>g a fax session. This isusu<strong>all</strong>y caused by poor l<strong>in</strong>econditions, although it might be acompatibility issue with certa<strong>in</strong>mach<strong>in</strong>es or l<strong>in</strong>e conditions.394 The product has failed to successfullynegotiate the <strong>in</strong>itial V.8 handshakewith the remote mach<strong>in</strong>e afteranswer<strong>in</strong>g a fax session. Typic<strong>all</strong>y,this occurs when the c<strong>all</strong><strong>in</strong>g mach<strong>in</strong>eis not fax-capable. It might also be acompatibility issue with certa<strong>in</strong>mach<strong>in</strong>es or l<strong>in</strong>e conditions.395 An unexpected T.30 frame has beenreceived between pages dur<strong>in</strong>g amultipage V.34 reception. This isalmost certa<strong>in</strong>ly a compatibilityproblem with the remote mach<strong>in</strong>e,and might be caused by an error withthe implementation of the remotemach<strong>in</strong>e.Attempt to send the fax aga<strong>in</strong> after mak<strong>in</strong>gsure that documents stored <strong>in</strong> memory arepr<strong>in</strong>ted, and that the unit has paper ready forpr<strong>in</strong>t<strong>in</strong>g. If the problem persists, re<strong>in</strong>itializepermanent storage.Attempt to send the fax aga<strong>in</strong> after mak<strong>in</strong>gsure that documents that are stored <strong>in</strong>memory are pr<strong>in</strong>ted, and that the unit haspaper ready for pr<strong>in</strong>t<strong>in</strong>g. If the problempersists, re<strong>in</strong>itialize permanent storage.1. Ask the remote user to send the faxaga<strong>in</strong> when teleph<strong>one</strong>-l<strong>in</strong>e conditionshave improved.2. Disable V.34 on the product and attemptthe transmission with the V.17 mode.1. Ask the remote user to send the faxaga<strong>in</strong> when teleph<strong>one</strong>-l<strong>in</strong>e conditionshave improved.2. Disable V.34 on the product and attemptthe transmission with the V.17 mode.1. Ask the remote user to send the faxaga<strong>in</strong> when teleph<strong>one</strong>-l<strong>in</strong>e conditionshave improved.2. Disable V.34 on the product and attemptthe transmission with the V.17 mode.1. Ask the remote user to send the faxaga<strong>in</strong> when teleph<strong>one</strong>-l<strong>in</strong>e conditionshave improved.2. Disable V.34 on the product and attemptthe transmission with the V.17 mode.252 Chapter 6 Troubleshoot<strong>in</strong>g ENWW
Table 6-5. Fax send codes (cont<strong>in</strong>ued)Code Description Recommended action396-409 An error occurred dur<strong>in</strong>g a V.34transmission when the product wasunable to correctly complete thehandshake with the remote mach<strong>in</strong>eand was consequently unable totransmit a T.30 frame. This occurswhen the l<strong>in</strong>e was disconnected or ifl<strong>in</strong>e conditions degrade dur<strong>in</strong>g thesession.410-419 An error occurred dur<strong>in</strong>g a V.34reception when the product wasunable to correctly complete thehandshake with the remote mach<strong>in</strong>eand was consequently unable totransmit a T.30 frame. This occurswhen the l<strong>in</strong>e is disconnected or if l<strong>in</strong>econditions degrade dur<strong>in</strong>g thesession.420 V.34 negotiations have failed from theorig<strong>in</strong>at<strong>in</strong>g mach<strong>in</strong>e dur<strong>in</strong>g phase 4.Phase 4 occurs after V.8 and beforethe first T.30 frames are exchanged.These compatibility problems havebeen observed when send<strong>in</strong>g to non-<strong>HP</strong> units.421 V.34 negotiations have failed from theorig<strong>in</strong>at<strong>in</strong>g mach<strong>in</strong>e dur<strong>in</strong>g phase 3.Phase 3 occurs after V.8, beforephase 4, and before the first T.30frames are exchanged. Thesecompatibility problems have beenobserved when send<strong>in</strong>g to non-<strong>HP</strong>units.422 V.34 negotiations have failed from theanswer<strong>in</strong>g mach<strong>in</strong>e dur<strong>in</strong>g phase 4.Phase 4 occurs after V.8 and beforethe first T.30 frames are exchanged.423 V.34 negotiations have failed from theanswer<strong>in</strong>g mach<strong>in</strong>e dur<strong>in</strong>g phase 3.Phase 3 occurs after V.8, beforephase 4, and before the first T.30frames are exchanged.430 The transmitt<strong>in</strong>g mach<strong>in</strong>e is unable tosend cont<strong>in</strong>uous "<strong>one</strong>s" at the end ofthe control channel before start<strong>in</strong>g theprimary channel. This is a V.34 error.This error might be associated withl<strong>in</strong>e conditions, although it is morelikely to be caused by <strong>in</strong>ternal modemproblems.Attempt to receive the fax aga<strong>in</strong> whenteleph<strong>one</strong>-l<strong>in</strong>e conditions have improved.Attempt to receive the fax aga<strong>in</strong> whenteleph<strong>one</strong>-l<strong>in</strong>e conditions have improved.Attempt to receive the fax aga<strong>in</strong> whenteleph<strong>one</strong>-l<strong>in</strong>e conditions have improved.Attempt to receive the fax aga<strong>in</strong> whenteleph<strong>one</strong>-l<strong>in</strong>e conditions have improved.Ask the remote user to send the fax aga<strong>in</strong>when teleph<strong>one</strong>-l<strong>in</strong>e conditions haveimproved.Ask the remote user to send the fax aga<strong>in</strong>when teleph<strong>one</strong>-l<strong>in</strong>e conditions haveimproved.Ask the remote user to send the fax aga<strong>in</strong>when teleph<strong>one</strong>-l<strong>in</strong>e conditions haveimproved.ENWW Troubleshoot<strong>in</strong>g tools 253
Table 6-5. Fax send codes (cont<strong>in</strong>ued)Code Description Recommended action431 The transmitt<strong>in</strong>g mach<strong>in</strong>e has notreceived a response after abort<strong>in</strong>g atransmission. Depend<strong>in</strong>g upon whenthe session is aborted, some remotemach<strong>in</strong>es might not respond. Theproduct always attempts to abort thesession <strong>in</strong> such a way that the remotemach<strong>in</strong>e can respond to the f<strong>in</strong>alPPS_EOP.440-444 An error occurred dur<strong>in</strong>g a V.34transmission after <strong>one</strong> or more partialpages (image data) were transmittedthrough the primary channel. Thetransmitt<strong>in</strong>g mach<strong>in</strong>e was unable torestart the control channel <strong>in</strong> order toresume the T.30 handshake. Thistypic<strong>all</strong>y occurs when the receiv<strong>in</strong>gmach<strong>in</strong>e prematurely disconnectswhile receiv<strong>in</strong>g a partial page,although the problem can be causedby compatibility issues.No action required. The session was aborted.Attempt to receive the fax aga<strong>in</strong> whenteleph<strong>one</strong>-l<strong>in</strong>e conditions have improved.Translat<strong>in</strong>g the fax trace report (<strong>HP</strong> <strong>LaserJet</strong> <strong>3015</strong> and <strong>3030</strong> only)Pr<strong>in</strong>t a fax log report. The fax log report conta<strong>in</strong>s <strong>in</strong>formation about the product’s <strong>in</strong>terpretationof the problem.Read the time sequences, look<strong>in</strong>g for abnormal activity on the fax trace report. See Table 6-6.Fax phase sequence (<strong>HP</strong> <strong>LaserJet</strong> <strong>3015</strong> and <strong>3030</strong> only), and Table 6-7. Appropriateresponses (<strong>HP</strong> <strong>LaserJet</strong> <strong>3015</strong> and <strong>3030</strong> only), to separate normal from abnormal activity. Faxabbreviations appear <strong>in</strong> Table 6-8. Fax abbreviations (<strong>HP</strong> <strong>LaserJet</strong> <strong>3015</strong> and <strong>3030</strong> only).Identify the phase <strong>in</strong> which the error occurred.Note??? represents an unidentified command.Examples of a successfully sent fax and a successfully received fax appear after the tables.Table 6-6. Fax phase sequence (<strong>HP</strong> <strong>LaserJet</strong> <strong>3015</strong> and <strong>3030</strong> only)Sequence C<strong>all</strong><strong>in</strong>g station C<strong>all</strong>ed stationPhase A—C<strong>all</strong> setup sequence1 R<strong>in</strong>g signal2 CNG t<strong>one</strong> beep, 500 Hz for 1second3 Transmit CED, 2100 Hz for 3seconds4 Transmit NSF5 Transmit CSI6 Transmit DIS254 Chapter 6 Troubleshoot<strong>in</strong>g ENWW
Table 6-6. Fax phase sequence (<strong>HP</strong> <strong>LaserJet</strong> <strong>3015</strong> and <strong>3030</strong> only) (cont<strong>in</strong>ued)Sequence C<strong>all</strong><strong>in</strong>g station C<strong>all</strong>ed station7 DIS detectedPhase B—Pre-message procedure (negotiate compatible format/protocol) (<strong>HP</strong> <strong>LaserJet</strong> <strong>3015</strong>and <strong>3030</strong> only)8 Transmit TSI9 Transmit DCS, select mode10 DCS detected11 Transmit TCF/tra<strong>in</strong><strong>in</strong>g12 Transmit FSK13 Tra<strong>in</strong><strong>in</strong>g (synchronize signals),check for errors14 Transmit CFR15 Detect CFRPhase C—Message transmission (page/scan transmission) (<strong>HP</strong> <strong>LaserJet</strong> <strong>3015</strong> and <strong>3030</strong> only)16 Transmit message (FSK,followed by date)17 Receive message (SCAN),check for errors18 Transmit FSK19 At end of message, send <strong>one</strong> ofthe follow<strong>in</strong>g:●●●●●●●●●EOMEOPMPSPRI-QPPS-NULLPPS-MPSPPS-EOMPPS-EOPPPS-PRI-QPhase D—Post-message transmission (next page/end of transmission) (<strong>HP</strong> <strong>LaserJet</strong> <strong>3015</strong> and<strong>3030</strong> only)20 Detect EOM, EOP, MPS, PRI-Q,PPS-NULL, PPS-MPS, PPS-EOM, PPS-EOP, or PPS-PRI-Q21 Transmit MCF response toconfirmation signals of postmessageresponsesPhase E—C<strong>all</strong> release (hang up sequence) (<strong>HP</strong> <strong>LaserJet</strong> <strong>3015</strong> and <strong>3030</strong> only)ENWW Troubleshoot<strong>in</strong>g tools 255
Table 6-6. Fax phase sequence (<strong>HP</strong> <strong>LaserJet</strong> <strong>3015</strong> and <strong>3030</strong> only) (cont<strong>in</strong>ued)Sequence C<strong>all</strong><strong>in</strong>g station C<strong>all</strong>ed station21 Transmit DCN22 Station hangs upTable 6-7. Appropriate responses (<strong>HP</strong> <strong>LaserJet</strong> <strong>3015</strong> and <strong>3030</strong> only)Commands Comments Appropriate responses(NSF) (CSI) DIS(NSC) (CIG) DTCIdentify<strong>in</strong>g capabilities: from amanual receiver or an autoanswerunitMode-sett<strong>in</strong>g command: fromc<strong>all</strong><strong>in</strong>g unit(NSC) (CIG) DTC (TSI) DCS(NSF) (CSI) DIS (CRP) (TSI)(NSS) (PWD) (SEP) (CIG) DTC(PWD) (SUB) (TSI) DCS(TSI) DCS (NSF) (CSI) DIS(PWD) (SEP) (CIG) DTC Poll operation (CRP) (TSI) (NSS)(TSI) DCS (TSI) (NSS)(PWD (SUB) (TSI) DCSCTC(EOR-NULL)Any <strong>one</strong> of the follow<strong>in</strong>g:● (EOR-EOP)● (EOR-EOM)● (EOR-PRI-MPS)● (EOR-PRI-EOP)● (EOR-PRI-EOM)Any <strong>one</strong> of the follow<strong>in</strong>g:● MPS● EOP● EOM● (PRI-MPS)● (PRI-EOP)● (PRI-EOM)(PPS-NULL)Mode-sett<strong>in</strong>g command: frommanual transmitter or automaticreceiverCommand is always followed byphas<strong>in</strong>g/tra<strong>in</strong><strong>in</strong>gMode-sett<strong>in</strong>g command: fromthe transmitter to the receiverIndicates the next blocktransmission from thetransmitter to the receiverThe receiverPost-message commandsPost-message command for apartial page from the transmitterto the receiverCFR FTT (NSC) (CIG) DTC(NSC) (CIG) DTC(CTR) (CRP)(ERR) (RNR) (CRP)(ERR)(RNR)PIN(CRP)MCFRTPRTNPIPPIN(CRP)(PPR)MCF(RNR)(CRP)256 Chapter 6 Troubleshoot<strong>in</strong>g ENWW
Table 6-7. Appropriate responses (<strong>HP</strong> <strong>LaserJet</strong> <strong>3015</strong> and <strong>3030</strong> only) (cont<strong>in</strong>ued)Commands Comments Appropriate responsesAny <strong>one</strong> of the follow<strong>in</strong>g:● (PPS-MPS)● (PPS-EOP)● (PPS-EOM)● (PPS-PRI-MPS)● (PPS-PRI-EOP)● (PPS-PRI-EOM)(RR)Post-message commands for acomplete page from thetransmitter to the receiverAsk for the status of thereceiver: from the transmitter tothe receiver(PPR)MCF(RNR)PIPPIN(CRP)(RNR)(ERR)MCFPIPPIN(CRP)DCN Phase E command N<strong>one</strong>Table 6-8. Fax abbreviations (<strong>HP</strong> <strong>LaserJet</strong> <strong>3015</strong> and <strong>3030</strong> only)Abbreviation Function Signal format (“X”= any #)CED C<strong>all</strong>ed station identification 2100 HzCFR Confirmation to receive X010 0001 1850 or 1650 Hz for 3secondsCIG C<strong>all</strong><strong>in</strong>g subscriber identification 1000 0010CNG C<strong>all</strong><strong>in</strong>g t<strong>one</strong> 1100 Hz for 500 msCRP Command repeat X101 1000CSI C<strong>all</strong>ed subscriber identification 0000 0010CTC Cont<strong>in</strong>ue to correct X100 1000CTR Response to cont<strong>in</strong>ue to correct X010 0011DBM-dBM signal strength detectedfrom send<strong>in</strong>g station (number isdeviation from average value)Range <strong>in</strong> -7.5 to -43 (-43 is aweak signal; see the explanationthat follows Figure 6-18.Example of a T.30 trace of asuccessfully received fax)DCN Disconnect X101 1111DCS Digital command signal X100 0001DIS Digital identification signal 0000 0001DTC Digital transmit command 1000 0001EOM End of message X111 0001 1100 HzENWW Troubleshoot<strong>in</strong>g tools 257
Table 6-8. Fax abbreviations (<strong>HP</strong> <strong>LaserJet</strong> <strong>3015</strong> and <strong>3030</strong> only) (cont<strong>in</strong>ued)Abbreviation Function Signal format (“X”= any #)EOP End of procedure X111 0100EOR End of retransmission X111 0011EQMERREye quality monitor—a measureof the modem signal quality,lower numbers <strong>in</strong>dicate bettersignalsResponse for end ofretransmission0-99X011 1000ECD Facsimile coded date 0110 0000FCFFCSFacsimileFrame check sequenceFDM File diagnostics message X011 1111FIFFSKFTTFacsimile <strong>in</strong>formation fieldFrequency shift key: Low-speedcommand identifier separat<strong>in</strong>gcommands/scans; precedescommand modeFailure to tra<strong>in</strong>: The 1.5 secondsof the Tra<strong>in</strong><strong>in</strong>g Check Frame(TCF) <strong>in</strong>dicates l<strong>in</strong>e conditionsare not good enough for thismodulationX010 0010GC Group command 2100 Hz for 1.5 to 100 secondsGI Group identification 1850 HzHDLCHigh-level data l<strong>in</strong>k controlLCS L<strong>in</strong>e condition<strong>in</strong>g signals 1100 HzMCF Message confirmation X011 00011850 HzMSGMessage received high speeddataMPS Multipage signal X111 0010NSF Nonstandard facilities command 1000 0100NSF Nonstandard facilities 0000 0100NSS Nonstandard setup X100 0100PID Procedure <strong>in</strong>terrupt disconnect X011 0110PIN Procedural <strong>in</strong>terrupt negative X011 0100PIP Procedural <strong>in</strong>terrupt positive X011 0101PIS Procedural <strong>in</strong>terrupt signal 462 Hz for 3 seconds258 Chapter 6 Troubleshoot<strong>in</strong>g ENWW
Table 6-8. Fax abbreviations (<strong>HP</strong> <strong>LaserJet</strong> <strong>3015</strong> and <strong>3030</strong> only) (cont<strong>in</strong>ued)Abbreviation Function Signal format (“X”= any #)PPS Partial-page signal X111 1101PPS-EOMPPS-EOPPPS-MPSPartial-page signal—end ofmessagePartial-page signal—end ofprocedurePartial-page signal—multipagesignalX111 1101X111 1101X111 1101PPS-NULL Partial-page signal—null X111 1101PPR Partial-page request X011 1101PRI-EOMPRI-EOPPRI-MPSProcedure <strong>in</strong>terrupt—end ofmessageProcedure <strong>in</strong>terrupt—end ofprocedureProcedure <strong>in</strong>terrupt—multipagesignalX111 1001X111 1100X111 1010RCP Return to control for partial page 0110 0001RNR Receive not ready X011 0111RR Receive ready X111 0110RTC Return to control mode Six EOLsRTN Retra<strong>in</strong> negative X011 0010RTP Retra<strong>in</strong> positive X011 0011TCF Tra<strong>in</strong><strong>in</strong>g check field Zeroes for 1 5 5TSITransmitt<strong>in</strong>g subscriberidentificationX100 0010PWD Password (for poll<strong>in</strong>g) 1000 0011PWD Password (for transmission) X100 0101SCANData-packets or scan-l<strong>in</strong>e countSEP Selective poll<strong>in</strong>g 1000 0101SUB Sub-address X100 0011V.xx Protocol version used (Group 3only)V.27 = 4800/2400V.29 = 9600/7200V.33 = 14400/12000V.17 = 14400/12000/9600/7200XIDExchange identificationprocedure??? Unidentified commandsequenceENWW Troubleshoot<strong>in</strong>g tools 259
Figure 6-17.Example of a T.30 trace of a successfully sent fax260 Chapter 6 Troubleshoot<strong>in</strong>g ENWW
NotePhase A, c<strong>all</strong> establishment, does not show up on a trace report. Phase C is the phase <strong>in</strong>which faxed pages are transferred.Figure 6-18.Example of a T.30 trace of a successfully received faxENWW Troubleshoot<strong>in</strong>g tools 261
<strong>Service</strong>-mode functionsUse the follow<strong>in</strong>g <strong>in</strong>formation to perform system-wide reset procedures and to adjust certa<strong>in</strong>global sett<strong>in</strong>gs such as the country/region. Users do not have access to this <strong>in</strong>formation.Secondary service menuUse the secondary service menu to perform various tests and pr<strong>in</strong>t service reports. Thefollow<strong>in</strong>g is a hierarchical diagram of the secondary service menu.Ma<strong>in</strong> menu Submenu Submenu2ndary <strong>Service</strong> <strong>Service</strong> Reports Cont<strong>in</strong>uous Self-TestDS FaxDS No FaxExtended KeymapTranslationsLocation codesData StoreError ReportScan CalibrationScanl<strong>in</strong>e dataLocationClock Dither<strong>in</strong>gRed-correctedBlue-correctedGreen-correctedRed-uncorrectedBlue-uncorrectedGreen-uncorrectedUSA1=Yes 2=NoOnOffPark ScannerTo ga<strong>in</strong> access to the secondary service menu1. Make sure that the control-panel display reads Ready.2. Press MENU/ENTER.3. Press 2 on the keypad.Note You can ga<strong>in</strong> access to the secondary service menu from any other menu by press<strong>in</strong>g 2.4. Use the < or > button to navigate the secondary service menu.262 Chapter 6 Troubleshoot<strong>in</strong>g ENWW
5. To exit the secondary service menu and remove it from the menu tree, press CANCEL toreturn to the Ready display, and then press CANCEL aga<strong>in</strong>.To pr<strong>in</strong>t a list of <strong>all</strong> the Fax data-store parameters1. From the secondary service menu, use the < or > button to select <strong>Service</strong> reports, andpress MENU/ENTER.2. Use the < or > button to select DS-Fax, and press MENU/ENTER.Developer’s menuUse the developer’s menu to adjust fax data-store parameters and to run various tests. Thefollow<strong>in</strong>g is a hierarchical diagram of the developer’s menu.Ma<strong>in</strong> menu Submenu SubmenuDeveloper’s menuDisplay testRead RegisterWrite RegisterR/W parameterMonitor testLIU testOnhook monitorOffhook monitorEavesdrop TestSignal Pwr Mon.LIU <strong>in</strong>putsLIU IDLoopback testData StoreTransmit testOFFHOOKONHOOKDIAL NUMBERNoteSeveral other options are availableunder this menu.To ga<strong>in</strong> access to the developer’s menu:1. Make sure that the control-panel display reads Ready.2. Press MENU/ENTER.3. Press the * and # buttons simultaneously.Note You can ga<strong>in</strong> access to the developer’s menu from any other menu by press<strong>in</strong>g the * and #buttons simultaneously.ENWW <strong>Service</strong>-mode functions 263
4. Use the < or > button to navigate the developer’s menu.5. To exit the developer’s menu and remove it from the menu tree, press CANCEL to return tothe Ready display, and then press CANCEL aga<strong>in</strong>.To adjust fax data-store parametersWhen you adjust fax data-store parameters, the product does not alert you to <strong>in</strong>correct <strong>in</strong>putvalues. Chang<strong>in</strong>g fax data-store parameters can render the product illegal or <strong>in</strong>operable.NoteBefore adjust<strong>in</strong>g the fax data-store parameters, you can pr<strong>in</strong>t a list of <strong>all</strong> the parameters fromthe secondary service menu. See To pr<strong>in</strong>t a list of <strong>all</strong> the Fax data-store parameters.1. On the developer’s menu, use the < or > button to navigate to R/W PARAMETER, andthen press MENU/ENTER.2. Use the < or > button to locate the parameter that you want to change. The current sett<strong>in</strong>gappears on the control-panel display.3. Type the new value for the fax data-store parameter, and then press MENU/ENTER.To scroll quickly to a particular data-store parameterWhen R/W PARAMETER appears on the control-panel display, jump directly to anyparameter ID that does not conta<strong>in</strong> a 2 by typ<strong>in</strong>g the ID on the keypad. (Press<strong>in</strong>g 2 br<strong>in</strong>gs upthe secondary service menu.) To change a parameter that has a 2 <strong>in</strong> its ID, type the ID of theclosest parameter that does not have a 2 and then use the < or > button to locate theparameter that you want to change. For example, to move quickly to parameter 152, enter 151 >.Adjust<strong>in</strong>g the country/region code parametersThree situations can occur that necessitate chang<strong>in</strong>g the country/region or language sett<strong>in</strong>gsfor the product:1. The customer has moved to a different country/region from where the product waspurchased.2. The <strong>in</strong>formation has been erased because of an NVRAM <strong>in</strong>itialization, or the parametersare set to "undef<strong>in</strong>ed."3. The formatter was replaced.Use the <strong>in</strong>formation <strong>in</strong> the follow<strong>in</strong>g sections to adjust the country/region and languagesett<strong>in</strong>gs.To change the country/region from <strong>one</strong> location to another1. Press MENU/ENTER, and then press 2 to ga<strong>in</strong> access to the Secondary <strong>Service</strong> menu.2. Press < or > to select Location, and then press MENU/ENTER.3. Press < or > until the correct location appears.4. When the correct location appears, press MENU/ENTER. Press 1 to confirm the new location.The product automatic<strong>all</strong>y turns itself off and then on after the sett<strong>in</strong>g is confirmed.264 Chapter 6 Troubleshoot<strong>in</strong>g ENWW
To set the language and location if n<strong>one</strong> is setIf the language and location have been erased because NVRAM has been <strong>in</strong>itialized or theformatter is replaced, the product automatic<strong>all</strong>y prompts for the language and the locationwhen it is turned on.Note<strong>HP</strong> <strong>LaserJet</strong> <strong>3015</strong> and <strong>3030</strong> only: The customer cannot send or receive faxes until thesesett<strong>in</strong>gs have been established.1. Press < or > until the correct language appears.2. When the correct language appears, press MENU/ENTER, and then press 1 to confirm theselection. If the location also needs to be set, the product automatic<strong>all</strong>y prompts for thelocation.3. Press < or > until the correct country/region appears.Note<strong>HP</strong> <strong>LaserJet</strong> <strong>3015</strong> and <strong>3030</strong>: The list of countries/regions that appears on the control-paneldisplay depends on the LIU that is <strong>in</strong>st<strong>all</strong>ed <strong>in</strong> the product.<strong>HP</strong> <strong>LaserJet</strong> <strong>3020</strong>: This product does not have fax capabilities and so it does not have a LIU<strong>in</strong>st<strong>all</strong>ed. The list of supported countries/regions that appears on the control-panel display are<strong>in</strong> a localized format.4. When the correct country/region appears, press MENU/ENTER, and then press 1 to confirmthe selection.5. After both the language and the location sett<strong>in</strong>gs are established, the productautomatic<strong>all</strong>y turns itself off and then on.Soft resetBefore perform<strong>in</strong>g an NVRAM <strong>in</strong>it, attempt a soft reset, which does not reset configurationsett<strong>in</strong>gs or cause loss of data.To perform a soft reset1. Press MENU/ENTER.2. Simultaneously press then release the * button and the # button to enter the Developer'smenu.3. Press the < or > button until the message REINIT FFS appears on the second l<strong>in</strong>e of thecontrol-panel display.4. Press MENU/ENTER.5. The process takes approximately 2.5 m<strong>in</strong>utes. Dur<strong>in</strong>g that time, the control-panel displaywill change several times before return<strong>in</strong>g to Ready.6. When the Ready message appears on the control-panel display, press CANCEL to exit theDeveloper's menu.NVRAM <strong>in</strong>itNVRAM <strong>in</strong>it returns <strong>all</strong> stored parameters <strong>in</strong> NVRAM to factory default values or to a defaultROM value, depend<strong>in</strong>g on the variable, and performs a system reset.Perform<strong>in</strong>g NVRAM <strong>in</strong>it can cause the product to violate local teleph<strong>one</strong> regulations. Reset thelanguage and country/region after perform<strong>in</strong>g NVRAM <strong>in</strong>it.ENWW <strong>Service</strong>-mode functions 265
NVRAM <strong>in</strong>it resets the follow<strong>in</strong>g sett<strong>in</strong>gs and <strong>in</strong>formation:● All menu sett<strong>in</strong>gs are reset to factory default values, <strong>in</strong>clud<strong>in</strong>g fax header and companyname.● Factory sett<strong>in</strong>gs such as formatter number, page counts, and factory paper sett<strong>in</strong>gs arereset.● All faxes <strong>in</strong> memory are erased.● All speed-dials, group-dials, and ph<strong>one</strong> book entries are erased.● All localization sett<strong>in</strong>gs, <strong>in</strong>clud<strong>in</strong>g language and country/region, are reset.To perform NVRAM <strong>in</strong>it1. Turn off the product.2. Press and hold down the * and MENU/ENTER buttons.3. Cont<strong>in</strong>ue to hold down the buttons while you turn on the product. Hold the buttons throughthe entire power-on sequence.4. When Permanent Storage Init. appears on the control-panel display, release thebuttons.5. When the message Language appears on the control-panel display, set the correctlanguage and country/region.6. Allow the product to return to Ready before us<strong>in</strong>g the product.System sett<strong>in</strong>gs for localized productsNoteThe <strong>HP</strong> <strong>LaserJet</strong> <strong>3020</strong> does not have a LIU because it does not have fax capabilities. The listof available country/regions <strong>in</strong>cludes <strong>all</strong> of the country/regions listed <strong>in</strong> Table 6-9. Systemsett<strong>in</strong>gs and Chile (default media size letter, default date format ddmmyy, and default timeformat am/pm), North Africa (default media size A4, default date format ddmmyy, and defaulttime format 24 hour), Jordan (default media size A4, default date format ddmmyy, and defaulttime format am/pm), and Lebanon (default media size A4, default date format ddmmyy, anddefault time format am/pm).Two LIUs are available for the product. The list of available countries/regions that appears <strong>in</strong>the Secondary service menu (<strong>in</strong> the Location submenu) varies accord<strong>in</strong>g to the LIU that is<strong>in</strong>st<strong>all</strong>ed <strong>in</strong> the product. The default system sett<strong>in</strong>gs vary for each country/region. The follow<strong>in</strong>gtable lists the default system sett<strong>in</strong>gs for each country/region. Be sure to reset any userdef<strong>in</strong>edsett<strong>in</strong>gs that differ from these sett<strong>in</strong>gs.Table 6-9. System sett<strong>in</strong>gsCountry/region LIU <strong>in</strong>st<strong>all</strong>ed Default mediasize 1 Date format Time formatArgent<strong>in</strong>a USA Letter ddmmyy am/pmAustralia USA A4 ddmmyy am/pmAustria Europe A4 ddmmyy 24 hourBelgium Europe A4 ddmmyy 24 hourBrazil USA A4 ddmmyy 24 hour266 Chapter 6 Troubleshoot<strong>in</strong>g ENWW
Table 6-9. System sett<strong>in</strong>gs (cont<strong>in</strong>ued)Country/region LIU <strong>in</strong>st<strong>all</strong>ed Default mediasize 1 Date format Time formatBulgaria Europe A4 ddmmyy 24 hourCanada USA Letter ddmmyy am/pmCh<strong>in</strong>a USA A4 yymmdd 24 hourCroatia Europe A4 ddmmyy 24 hourCzech Republic Europe A4 ddmmyy 24 hourDenmark Europe A4 ddmmyy 24 hourF<strong>in</strong>land Europe A4 ddmmyy 24 hourFrance Europe A4 ddmmyy 24 hourGermany Europe A4 ddmmyy 24 hourGreece Europe A4 ddmmyy am/pmHong Kong SAR USA A4 yymmdd am/pmHungary Europe A4 yymmdd 24 hourIndia USA A4 ddmmyy 24 hourInd<strong>one</strong>sia USA A4 ddmmyy 24 hourIreland Europe A4 ddmmyy 24 hourIsrael Europe A4 ddmmyy 24 hourItaly Europe A4 ddmmyy 24 hourKorea USA A4 yymmdd am/pmLuxemburg Europe A4 ddmmyy 24 hourMalaysia USA A4 ddmmyy 24 hourMexico USA Letter ddmmyy am/pmNetherlands Europe A4 ddmmyy 24 hourNew Zealand USA A4 ddmmyy am/pmNorway Europe A4 ddmmyy 24 hourPakistan USA A4 ddmmyy am/pmPeru USA Letter ddmmyy am/pmPhilipp<strong>in</strong>es USA Letter mmddyy am/pmPoland Europe A4 yymmdd 24 hourPortugal Europe A4 ddmmyy 24 hourRomania Europe A4 ddmmyy 24 hourRussia Europe A4 ddmmyy 24 hourS<strong>in</strong>gapore USA A4 ddmmyy am/pmENWW <strong>Service</strong>-mode functions 267
Table 6-9. System sett<strong>in</strong>gs (cont<strong>in</strong>ued)Country/region LIU <strong>in</strong>st<strong>all</strong>ed Default mediasize 1 Date format Time formatSlovak Republic Europe A4 ddmmyy 24 hourSouth Africa Europe A4 yymmdd am/pmSpa<strong>in</strong> Europe A4 ddmmyy 24 hourSri Lanka USA A4 ddmmyy 24 hourSweden Europe A4 yymmdd 24 hourSwitzerland Europe A4 ddmmyy 24 hourTaiwan USA A4 yymmdd am/pmThailand USA A4 ddmmyy 24 hourTurkey Europe A4 ddmmyy 24 hourUnited K<strong>in</strong>gdom Europe A4 ddmmyy 24 hourUnited States USA Letter mmddyy am/pmVietnam USA A4 ddmmyy am/pm1The default media-size sett<strong>in</strong>g that is listed is the same for the pr<strong>in</strong>ter <strong>in</strong>put trays and the faxglass-size sett<strong>in</strong>g.Pr<strong>in</strong>ter job language (PJL) software commandsMany PJL scripts are available for restor<strong>in</strong>g parameters such as paper size and page countsafter the formatter has been replaced. For comprehensive <strong>in</strong>structions, see the Pr<strong>in</strong>ter JobLanguage Technical <strong>Manual</strong> and the Pr<strong>in</strong>ter Job Language Technical <strong>Manual</strong> Addendum.268 Chapter 6 Troubleshoot<strong>in</strong>g ENWW
Ma<strong>in</strong> wir<strong>in</strong>gFigure 6-19.Ma<strong>in</strong> wir<strong>in</strong>g, <strong>HP</strong> <strong>LaserJet</strong> <strong>3015</strong> scanner assemblyENWW Ma<strong>in</strong> wir<strong>in</strong>g 269
Figure 6-20.Ma<strong>in</strong> wir<strong>in</strong>g, <strong>HP</strong> <strong>LaserJet</strong> <strong>3020</strong> and <strong>3030</strong> scanner assembly270 Chapter 6 Troubleshoot<strong>in</strong>g ENWW
Figure 6-21.Ma<strong>in</strong> wir<strong>in</strong>g, <strong>HP</strong> <strong>LaserJet</strong> <strong>3015</strong>, <strong>3020</strong>,and <strong>3030</strong> product baseENWW Ma<strong>in</strong> wir<strong>in</strong>g 271
Comp<strong>one</strong>nt locations, <strong>HP</strong> <strong>LaserJet</strong> <strong>3015</strong> <strong>all</strong>-<strong>in</strong>-<strong>one</strong>Figure 6-22.Major comp<strong>one</strong>nts1 Guide assembly2 Frame assembly272 Chapter 6 Troubleshoot<strong>in</strong>g ENWW
Figure 6-23.Ma<strong>in</strong> parts1 Pickup roller2 Separation pad assemblyENWW Comp<strong>one</strong>nt locations, <strong>HP</strong> <strong>LaserJet</strong> <strong>3015</strong> <strong>all</strong>-<strong>in</strong>-<strong>one</strong> 273
Figure 6-24.Sensors and motors1 Document sensor2 Document-top sensor3 Scanner-assembly motor4 Contact image sensor274 Chapter 6 Troubleshoot<strong>in</strong>g ENWW
Figure 6-25.PCBs1 Document-sensor PCB2 Ground<strong>in</strong>g-connector PCB3 CIS filter PCB4 Document-top sensor PCBENWW Comp<strong>one</strong>nt locations, <strong>HP</strong> <strong>LaserJet</strong> <strong>3015</strong> <strong>all</strong>-<strong>in</strong>-<strong>one</strong> 275
Comp<strong>one</strong>nt locations, <strong>HP</strong> <strong>LaserJet</strong> <strong>3020</strong> and <strong>3030</strong> <strong>all</strong>-<strong>in</strong>-<strong>one</strong>Figure 6-26.<strong>HP</strong> <strong>LaserJet</strong> <strong>3020</strong> and <strong>3030</strong> comp<strong>one</strong>nts1 ADF motor cover (under the ADF lid)2 ADF <strong>in</strong>put tray3 Flatbed scanner lid and ADF output b<strong>in</strong>4 ADF solar lock (h<strong>in</strong>ge lock<strong>in</strong>g clip)5 Flatbed (with glass)6 CCD scanner assembly7 Scanner bed8 Control-panel assembly9 ADF assembly (<strong>in</strong>cludes the ADF lid, ADF pickup roller, and ADF separation pad assembly)276 Chapter 6 Troubleshoot<strong>in</strong>g ENWW
Comp<strong>one</strong>nt locations, <strong>HP</strong> <strong>LaserJet</strong> <strong>3015</strong>, <strong>3020</strong> and <strong>3030</strong> pr<strong>in</strong>ter(product base)Figure 6-27.Major comp<strong>one</strong>nts1 Fuser assembly2 Paper-pickup assemblyENWW Comp<strong>one</strong>nt locations, <strong>HP</strong> <strong>LaserJet</strong> <strong>3015</strong>, <strong>3020</strong> and <strong>3030</strong> pr<strong>in</strong>ter (product base) 277
➅➂➃➄➆➁➀Figure 6-28.Solenoid, sensors, switches, and motor1 Pr<strong>in</strong>t-cartridge-door switch2 Power switch/power supply3 Paper-width sensor4 Paper-delivery sensor5 Top-of-page sensor6 Solenoid7 Motor278 Chapter 6 Troubleshoot<strong>in</strong>g ENWW
Figure 6-29.PCBs1 Eng<strong>in</strong>e controller unit (ECU)2 FormatterNoteFor the <strong>HP</strong> <strong>LaserJet</strong> <strong>3015</strong> and <strong>3030</strong>, the l<strong>in</strong>e <strong>in</strong>terface unit (LIU) is attached to the formatter. The <strong>HP</strong><strong>LaserJet</strong> <strong>3020</strong> does not have fax capabilities, and does not use an LIU.ENWW Comp<strong>one</strong>nt locations, <strong>HP</strong> <strong>LaserJet</strong> <strong>3015</strong>, <strong>3020</strong> and <strong>3030</strong> pr<strong>in</strong>ter (product base) 279
280 Chapter 6 Troubleshoot<strong>in</strong>g ENWW
7Partsand diagramsThis chapter conta<strong>in</strong>s the follow<strong>in</strong>g sections.Order<strong>in</strong>g parts and supplies ..................................................................................................282Parts that wear ................................................................................................................282Parts ............................................................................................................................... 282World-wide customer support .........................................................................................282Accessories ...........................................................................................................................284Common hardware .........................................................................................................284How to use the parts lists and diagrams ........................................................................285<strong>HP</strong> <strong>LaserJet</strong> <strong>3015</strong> scanner assembly ...................................................................................286<strong>HP</strong> <strong>LaserJet</strong> <strong>3020</strong>/<strong>3030</strong> scanner assembly ..........................................................................296<strong>HP</strong> <strong>LaserJet</strong> <strong>3015</strong>/<strong>3020</strong>/<strong>3030</strong> pr<strong>in</strong>ter base............................................................................304ENWW 281
Order<strong>in</strong>g parts and suppliesParts that wearThe parts on the product that wear are listed <strong>in</strong> Life expectancies of parts that wear <strong>in</strong> Table3-1. Life expectancies of parts that wear. Parts are available directly from Hewlett-Packard atthe follow<strong>in</strong>g URL: http://partsdirect.hp.com.PartsOrder replacement parts from the follow<strong>in</strong>g website: https//partsdirect.hp.com/epdo/defualt/ma<strong>in</strong>menu.aspWorld-wide customer supportOrder documentation and software from the websites listed <strong>in</strong> Table 7-1. Technical supportwebsites and related documentation:Table 7-1. Technical support websites and related documentation<strong>HP</strong> Connect Onl<strong>in</strong>e(for <strong>HP</strong> partners)<strong>HP</strong> Customer Care C<strong>all</strong> CentersInformation for contact<strong>in</strong>g <strong>HP</strong> c<strong>all</strong> centers <strong>in</strong> specificcountries/regions.<strong>HP</strong> Onl<strong>in</strong>e Technical SupportSoftware drivers, support documentation, andanswers to frequently asked questions<strong>HP</strong> Technical Tra<strong>in</strong><strong>in</strong>g (North America)Classes and schedulesPartsParts <strong>in</strong>formationhttp://www.connect-onl<strong>in</strong>e.hp.comhttp://www.hp.com/support/c<strong>all</strong>centershttp://www.hp.com/supporthttp://www.compaq.com/tra<strong>in</strong><strong>in</strong>gNote: Select your country/region <strong>in</strong> the "select acountry or region" field at the top, right corner ofthe page.http://partsurfer.hp.com282 Chapter 7 Parts and diagrams ENWW
Table 7-1. Technical support websites and related documentation (cont<strong>in</strong>ued)Fax guide ● Q2660-90920English, Spanish (Castilian), andPortuguese (Brazilian)● Q2660-90921English, French (European), German, andDutch● Q2660-90924English, Russian, Turkish, and Arabic● Q2660-90925English, Korean, Simplified Ch<strong>in</strong>ese, andThai● Q2660-90926English, Traditional Ch<strong>in</strong>ese, Ind<strong>one</strong>sian(Bahasa), and Vietnamese● Q2660-90928English, Italian, Spanish (Castilian), andPortuguese (Brazilian)● Q2660-90929English, F<strong>in</strong>nish, and Swedish● Q2660-90930English, Danish, and Norwegian● Q2660-90931English, Hungarian, and Polish● Q2660-90932English, Hebrew, and Greek● Q2660-90933English and French (European)● Q2660-90934English, Czech, and SlovakENWW Order<strong>in</strong>g parts and supplies 283
AccessoriesThe follow<strong>in</strong>g accessories are available for the <strong>HP</strong> <strong>LaserJet</strong> <strong>3015</strong>, <strong>3020</strong>, and <strong>3030</strong> products.Table 7-2. AccessoriesProduct name Description Part numberPr<strong>in</strong>t cartridge 2,000-page cartridge Q2612AT<strong>one</strong>r cloth Ideal for wip<strong>in</strong>g up t<strong>one</strong>r spills 5090-3379Scanner h<strong>in</strong>ge toolFax teleph<strong>one</strong> cordPar<strong>all</strong>el cablePar<strong>all</strong>el cableUse this tool to keep the scannerassembly from f<strong>all</strong><strong>in</strong>g off of thepr<strong>in</strong>ter when the entire assemblyis be<strong>in</strong>g removed.2-wire 3-meter (9.8-feet) faxteleph<strong>one</strong> cord2-meter (6.6-feet) IEEE-1284par<strong>all</strong>el cable3-meter (9.8-feet) IEEE-1284par<strong>all</strong>el cable5185-74418121-0811C2950AC2951AUSB cable 2-meter (6.6-feet) USB cable 8121-0539USB cable 0.6-meter (2-feet) USB cable 8121-0549Power cord 1.8-meter (6 feet) U.S./Canada 8120-8382Power cord 1.8-meter (6 feet) Europe 8121-0516Power cord 1.8-meter (6 feet) UK 8121-0517Power cord 1.8-meter (6 feet) Danish 8121-0518Power cord 1.8-meter (6 feet) Switzerland 8121-0519Power cord 1.8-meter (6 feet) South America 8121-0520Power cord 1.8-meter (6 feet) Israel 8121-0521Common hardwareThe product has three common fasteners. See Table 7-3. Common fasteners for a descriptionof these screw types.Table 7-3. Common fastenersExampleDescriptionScrew, mach<strong>in</strong>e, truss head284 Chapter 7 Parts and diagrams ENWW
Table 7-3. Common fasteners (cont<strong>in</strong>ued)ExampleDescriptionScrew, starScrew, self-tapp<strong>in</strong>gScrew, torxHow to use the parts lists and diagramsThe figures <strong>in</strong> this chapter illustrate the major subassemblies <strong>in</strong> the product and theircomp<strong>one</strong>nt parts. A table (material list) follows each exploded assembly diagram. Each tablelists the reference designator, the associated part number for the item, and a description of thepart.Parts that have no reference designator or part number are not field-replaceable units (FRUs)and cannot be ordered.While look<strong>in</strong>g for a part number, pay careful attention to the voltage listed <strong>in</strong> the descriptioncolumn to make sure that the part number selected is for the correct product model.ENWW Accessories 285
<strong>HP</strong> <strong>LaserJet</strong> <strong>3015</strong> scanner assemblyFigure 7-1. <strong>HP</strong> <strong>LaserJet</strong> <strong>3015</strong>286 Chapter 7 Parts and diagrams ENWW
Ref Description Part number Qty1 <strong>HP</strong> <strong>LaserJet</strong> <strong>3015</strong> scanner assembly NA2 Scanner control panel assembly RK2-0232-000CN3 Scanner tray, delivery (wire) RC1-2560-000CN 1NotshownLJ<strong>3015</strong> formatter LIU1 Q2668-60001 1LIU1To order the l<strong>in</strong>e <strong>in</strong>terface unit (LIU) or pr<strong>in</strong>t cartridge, see <strong>HP</strong> <strong>LaserJet</strong> <strong>3015</strong>/<strong>3020</strong>/<strong>3030</strong>pr<strong>in</strong>ter base,ENWW <strong>HP</strong> <strong>LaserJet</strong> <strong>3015</strong> scanner assembly 287
Figure 7-2. ADF <strong>in</strong>put and delivery assemblies (<strong>HP</strong> <strong>LaserJet</strong> <strong>3015</strong>)288 Chapter 7 Parts and diagrams ENWW
Ref Description Part number Qty1 Scanner pickup tray assembly RM1-0893-000CN 12 Scanner tray, delivery (wire) RC1-2560-000CN 1ENWW <strong>HP</strong> <strong>LaserJet</strong> <strong>3015</strong> scanner assembly 289
Figure 7-3. Internal comp<strong>one</strong>nts (<strong>HP</strong> <strong>LaserJet</strong> <strong>3015</strong>)290 Chapter 7 Parts and diagrams ENWW
Ref Description Part number Qty1 Scanner cover, right RC1-2559-000CN 12 Scanner flexible flat cable (FFC) RK2-0236-000CN 13 Scanner cover top assembly RC1-2564-000CN 1NA <strong>3015</strong> English bezel Q2669-40002 1NA Scanner control-panel overlay; French Q2669-00001 1NA Scanner control-panel overlay; German Q2669-00002 1NA Scanner control-panel overlay; Italian Q2669-00003 1NA Scanner control-panel overlay; Spanish Q2669-00004 1NA Scanner control-panel overlay; Danish Q2669-00005 1NA Scanner control-panel overlay; Dutch Q2669-00006 1NA Scanner control-panel overlay; F<strong>in</strong>nish Q2669-00007 1NA Scanner control-panel overlay; Portuguese Q2669-00008 1NA Scanner control-panel overlay; Swedish Q2669-00009 1NA Scanner control-panel overlay; Czech Q2669-00010 1NA Scanner control-panel overlay; Hungarian Q2669-00011 1NA Scanner control-panel overlay; Polish Q2669-00012 1NA Scanner control-panel overlay; Russian Q2669-00013 1NA Scanner control-panel overlay; Slovak Q2669-00014 1NA Scanner control-panel overlay; Turkish Q2669-00015 1NA Scanner control-panel overlay; Arabic Q2669-00016 1NA Scanner control-panel overlay; Norwegian Q2669-00023 14 Scanner control-panel assembly RK2-0232-000CN5 Scanner l<strong>in</strong>k assembly, right (<strong>HP</strong> <strong>LaserJet</strong><strong>3015</strong>)RM1-0897-000CN 16 Scanner spr<strong>in</strong>g, compression RU5-2198-000CN 27 Scanner l<strong>in</strong>k assembly, left (<strong>HP</strong> <strong>LaserJet</strong> <strong>3015</strong>) RM1-0896-000CN 18 Scanner cover, left RC1-2358-000CN 19 Scanner base frame assembly (scannersupport frame)RL1-0375-000CN 110 Scanner sheet, ground<strong>in</strong>g RL1-0376-000CN 1S1 Screw, tap M4X10 XB4-5401-009CN 6S2 Screw, tap BH3X6 XA9-1503-000CN 1ENWW <strong>HP</strong> <strong>LaserJet</strong> <strong>3015</strong> scanner assembly 291
Figure 7-4. Frame assembly (<strong>HP</strong> <strong>LaserJet</strong> <strong>3015</strong>)292 Chapter 7 Parts and diagrams ENWW
Ref Description Part number Qty1 LJ<strong>3015</strong> scanner frame assembly RM1-0883-000CN 12 LJ<strong>3015</strong> scanner pickup assembly RM1-0885-000CN 1S1 Screw, tap M4X10 XB4-5401-009CN 3S3 Screw, mach<strong>in</strong>e M3X6 XB1-2300-605CN 1S4 Screw, w/washer M3X6 XB2-7300-605CN 1ENWW <strong>HP</strong> <strong>LaserJet</strong> <strong>3015</strong> scanner assembly 293
Figure 7-5. Guide assembly (<strong>HP</strong> <strong>LaserJet</strong> <strong>3015</strong>)294 Chapter 7 Parts and diagrams ENWW
Ref Description Part number Qty1 Scanner guide assembly RM1-0889-000CN 12 Scanner separation-pad assembly RM1-0890-000CN 12A Scanner separation pad set RM1-0891-000CN 13 Scanner media lever (lever, pressure convert) RC1-2543-000CN 1NotshownScanner media lever torsion spr<strong>in</strong>g (lever,pressure convert)RC1-2544-000CN 14 Scanner white platen RF5-3235-000CN 1NotshownCompression spr<strong>in</strong>g (white platen) RU5-2196-000CN 3S1 Screw, tap M4X10 XB4-5401-009CN 2S4 Screw, w/washer M3X6 XB2-7300-605CN 1S5 Screw, rs M3X6 XA9-1495-000CN 1NoteThe separation pad set and the separation pad assembly are two different assemblies.The separation pad set consists of the pad, clear plastic sheet, and the pad cover. Theseparation pad set is a user replaceable assembly.The separation-pad assembly consists of the separation lever, tension spr<strong>in</strong>g, feed arm, andthe comp<strong>one</strong>nts of the separation pad set. The separation-pad assembly is not a userreplaceable assembly.Only tra<strong>in</strong>ed service personnel should attempt to replace the separation-pad assembly.ENWW <strong>HP</strong> <strong>LaserJet</strong> <strong>3015</strong> scanner assembly 295
<strong>HP</strong> <strong>LaserJet</strong> <strong>3020</strong>/<strong>3030</strong> scanner assemblyFigure 7-6.<strong>HP</strong> <strong>LaserJet</strong> <strong>3020</strong>/<strong>3030</strong> scanner assembly296 Chapter 7 Parts and diagrams ENWW
Ref Description Part number Qty1 <strong>HP</strong> <strong>LaserJet</strong> <strong>3020</strong>/<strong>3030</strong> scanner assembly NA2 Automatic document feeder and flatbed lid(ADF; part of the flatbed lid)Q2665-60102-000CN 13 Flatbed scanner assembly Q26665-60112-000CN 14 LJ<strong>3020</strong> copy control panel Q2665-601014 LJ<strong>3030</strong> fax control panel Q2666-60101NotshownLJ<strong>3020</strong> formatter C2688-60002 1NotshownLJ<strong>3030</strong> formatter LIU2 Q2664-60001 1LIU2To order the l<strong>in</strong>e <strong>in</strong>terface unit (LIU) or t<strong>one</strong>r cartridge, see <strong>HP</strong> <strong>LaserJet</strong> <strong>3015</strong>/<strong>3020</strong>/<strong>3030</strong>pr<strong>in</strong>ter base.ENWW <strong>HP</strong> <strong>LaserJet</strong> <strong>3020</strong>/<strong>3030</strong> scanner assembly 297
Figure 7-7. L<strong>in</strong>k assembly (<strong>HP</strong> <strong>LaserJet</strong> <strong>3020</strong>/<strong>3030</strong>)298 Chapter 7 Parts and diagrams ENWW
Ref Description Part number Qty1 LJ<strong>3020</strong>/<strong>3030</strong> scanner l<strong>in</strong>k assembly right RM1-0899-000CN 12 LJ<strong>3020</strong>/<strong>3030</strong> scanner spr<strong>in</strong>g, compression RU5-2199-000CN 23 LJ<strong>3020</strong>/<strong>3030</strong> scanner l<strong>in</strong>k assembly left RM1-0898-000CN 1ENWW <strong>HP</strong> <strong>LaserJet</strong> <strong>3020</strong>/<strong>3030</strong> scanner assembly 299
Figure 7-8. Major assemblies (<strong>HP</strong> <strong>LaserJet</strong> <strong>3020</strong>/<strong>3030</strong>)300 Chapter 7 Parts and diagrams ENWW
Ref Description Part number Qty1 ADF assembly and flatbed lid Q2665-60102 12 Flatbed scanner assembly (does not <strong>in</strong>clude theflatbed lid)Q2665-60112 1NotshownSeparation pad C7309-60009 13 ADF <strong>in</strong>put tray Q2665-60109 1NotshownNotshownNotshownNotshownADF pickup-roller assembly C7309-60016 1ADF cleanout/comb C7309-40153 1ADF <strong>in</strong>put-tray flag C7309-40013 1ADF <strong>in</strong>put-tray spr<strong>in</strong>g C7309-80013 14 LJ<strong>3020</strong>/<strong>3030</strong> ADF lid Q26665-60102 15 LJ<strong>3020</strong>/<strong>3030</strong> ADF solar lock (clip) Q1636-40036 16 LJ<strong>3020</strong>/<strong>3020</strong> ADF glass C7296-00014 17 ADF glass frame Q1636-40037 18 LJ<strong>3020</strong> copy control panel Q2665-60101 19 <strong>3020</strong> bezel; English Q2665-40010 19 <strong>3020</strong> bezel; French Q2665-40018 19 <strong>3020</strong> bezel; German Q2665-40019 19 <strong>3020</strong> bezel; Italian Q2665-40020 19 <strong>3020</strong> bezel; Spanish Q2665-40021 19 <strong>3020</strong> bezel; Danish Q2665-40022 19 <strong>3020</strong> bezel; Dutch Q2665-40023 19 <strong>3020</strong> bezel; F<strong>in</strong>nish Q2665-40024 19 <strong>3020</strong> bezel; Portuguese Q2665-40025 19 <strong>3020</strong> bezel; Swedish Q2665-40026 19 <strong>3020</strong> bezel; Czech Q2665-40027 19 <strong>3020</strong> bezel; Hungarian Q2665-40028 19 <strong>3020</strong> bezel; Polish Q2665-40029 19 <strong>3020</strong> bezel; Russian Q2665-40030 19 <strong>3020</strong> bezel; Slovak Q2665-40031 19 <strong>3020</strong> bezel; Turkish Q2665-40032 1ENWW <strong>HP</strong> <strong>LaserJet</strong> <strong>3020</strong>/<strong>3030</strong> scanner assembly 301
Ref Description Part number Qty9 <strong>3020</strong> bezel; Arabic Q2665-40033 19 <strong>3020</strong> bezel; Greek Q2665-40034 19 <strong>3020</strong> bezel; Hebrew Q2665-40035 19 <strong>3020</strong> bezel; Korean Q2665-40036 19 <strong>3020</strong> bezel; Simplified Ch<strong>in</strong>ese Q2665-40037 19 <strong>3020</strong> bezel; Traditional Ch<strong>in</strong>ese Q2665-40038 19 <strong>3020</strong> bezel; Thai Q2665-40039 19 <strong>3020</strong> bezel; Norwegian Q2665-40040 19 <strong>3020</strong> bezel; Swiss German Q2665-40042 19 <strong>3020</strong> bezel; Vietnamese Q2665-40043 18 LJ<strong>3030</strong> fax control panel Q2666-60101 19 <strong>3030</strong> bezel; English Q2666-40002 19 <strong>3030</strong> bezel; French Q2666-40003 19 <strong>3030</strong> bezel; German Q2666-40004 19 <strong>3030</strong> bezel; Italian Q2666-40005 19 <strong>3030</strong> bezel; Spanish Q2666-40006 19 <strong>3030</strong> bezel; Danish Q2666-40007 19 <strong>3030</strong> bezel; Dutch Q2666-40008 19 <strong>3030</strong> bezel; F<strong>in</strong>nish Q2666-40009 19 <strong>3030</strong> bezel; Portuguese Q2666-40010 19 <strong>3030</strong> bezel; Swedish Q2666-40011 19 <strong>3030</strong> bezel; Czech Q2666-40012 19 <strong>3030</strong> bezel; Hungarian Q2666-40013 19 <strong>3030</strong> bezel; Polish Q2666-40014 19 <strong>3030</strong> bezel; Russian Q2666-40015 19 <strong>3030</strong> bezel; Slovak Q2666-40016 19 <strong>3030</strong> bezel; Turkish Q2666-40017 19 <strong>3030</strong> bezel; Arabic Q2666-40018 19 <strong>3030</strong> bezel; Greek Q2666-40019 19 <strong>3030</strong> bezel; Hebrew Q2666-40020 19 <strong>3030</strong> bezel; Korean Q2666-40021 19 <strong>3030</strong> bezel; Simplified Ch<strong>in</strong>ese Q2666-40022 19 <strong>3030</strong> bezel; Traditional Ch<strong>in</strong>ese Q2666-40023 1302 Chapter 7 Parts and diagrams ENWW
Ref Description Part number Qty9 <strong>3030</strong> bezel; Norwegian Q2666-40025 19 <strong>3030</strong> bezel; Swiss German Q2666-40027 1ENWW <strong>HP</strong> <strong>LaserJet</strong> <strong>3020</strong>/<strong>3030</strong> scanner assembly 303
<strong>HP</strong> <strong>LaserJet</strong> <strong>3015</strong>/<strong>3020</strong>/<strong>3030</strong> pr<strong>in</strong>ter baseFigure 7-9.<strong>HP</strong> <strong>LaserJet</strong> <strong>3015</strong>/<strong>3020</strong>/<strong>3030</strong> pr<strong>in</strong>ter base304 Chapter 7 Parts and diagrams ENWW
Ref Description Part number Qty1 <strong>3015</strong>/20/30 pr<strong>in</strong>t eng<strong>in</strong>e pr<strong>in</strong>ter , replacement 110V1 <strong>3015</strong>/20/30 pr<strong>in</strong>t eng<strong>in</strong>e pr<strong>in</strong>ter , replacement 220VQ2665-67001Q2665-670022 Delivery tray assembly RM1-0859-000CN3 Pickup tray assembly RM1-0858-000CNNotshownNotshownNotshownUS/WW LIU (L<strong>in</strong>e <strong>in</strong>terface unit) Q2663-60001EMEA LIU (L<strong>in</strong>e <strong>in</strong>terface unit) Q2687-60002Pr<strong>in</strong>t cartridge Q2460-67913NA <strong>HP</strong> jewel 7121-8043pr<strong>in</strong>terThe <strong>HP</strong> <strong>LaserJet</strong> <strong>3015</strong>/<strong>3020</strong>/<strong>3030</strong> pr<strong>in</strong>ter base (reference items 1 or 2) does not comewith <strong>all</strong> of the covers and pr<strong>in</strong>ted circuit assemblies that are required to make it a function<strong>in</strong>gunit. Comp<strong>one</strong>nts from the unit that is be<strong>in</strong>g serviced must be <strong>in</strong>st<strong>all</strong>ed onto the replacementpr<strong>in</strong>ter base.ENWW <strong>HP</strong> <strong>LaserJet</strong> <strong>3015</strong>/<strong>3020</strong>/<strong>3030</strong> pr<strong>in</strong>ter base 305
Figure 7-10.Pickup and delivery tray assemblies (LJ <strong>3015</strong>/<strong>3020</strong>/<strong>3030</strong> pr<strong>in</strong>ter base)306 Chapter 7 Parts and diagrams ENWW
Ref Description Part number Qty1 Delivery-tray assembly (product output b<strong>in</strong>) RM1-0859-000CN 12 Pickup-tray assembly (media <strong>in</strong>put tray) RM1-0858-000CN 1ENWW <strong>HP</strong> <strong>LaserJet</strong> <strong>3015</strong>/<strong>3020</strong>/<strong>3030</strong> pr<strong>in</strong>ter base 307
Figure 7-11.External covers (LJ <strong>3015</strong>/<strong>3020</strong>/<strong>3030</strong> pr<strong>in</strong>ter base)308 Chapter 7 Parts and diagrams ENWW
Ref Description Part number Qty1 Door, pr<strong>in</strong>t cartridge RC1-2473-000CN 12 Cover, right RC1-2472-000CN 13 Cover, front RL1-0358-000CN 14 Cover, left RC1-2471-000CN 15 Cover, rear RC1-2474 16 Cover, top (scanner support frame), pr<strong>in</strong>ter RL1-0359-000CN 17 Scanner cushion RC1-2476-000CN 2ENWW <strong>HP</strong> <strong>LaserJet</strong> <strong>3015</strong>/<strong>3020</strong>/<strong>3030</strong> pr<strong>in</strong>ter base 309
Figure 7-12.Internal comp<strong>one</strong>nts 1 of 1 (LJ <strong>3015</strong>/<strong>3020</strong>/<strong>3030</strong> pr<strong>in</strong>ter base)310 Chapter 7 Parts and diagrams ENWW
Ref Description Part number Qty1 Transfer-roller assembly RM1-0658-000CN 12 Motor, stepp<strong>in</strong>g RK2-0107-000CN 13 Power-supply assembly, 110-127 V RM1-0903-000CN 13 Power-supply assembly, 220-240 V RM1-0904-000CN 14 Separation-pad assembly, pr<strong>in</strong>ter RM1-0648-000CN 15 Panel, rear RC1-1985-000CN 1S1 Screw, tap M4X10 XB4-5401-009CN 1S4 Screw, w/washer M3X6 XB2-7300-605CN 2S5 Screw, rs M3X6 XA9-1495-000CN 5S6 Screw, rs M3X8 XA9-1420-000CN 1ENWW <strong>HP</strong> <strong>LaserJet</strong> <strong>3015</strong>/<strong>3020</strong>/<strong>3030</strong> pr<strong>in</strong>ter base 311
Figure 7-13.Internal comp<strong>one</strong>nts 2 of 2 (LJ <strong>3015</strong>/<strong>3020</strong>/<strong>3030</strong> pr<strong>in</strong>ter base)312 Chapter 7 Parts and diagrams ENWW
Ref Description Part number Qty1 Laser/scanner assembly RM1-0171-000CN 12 Eng<strong>in</strong>e-controller-PCB assembly RM1-0907-000CN 1S5 Screw, rs M3X6 XA9-1495-000CN 3S6 Screw, rs M3X8 XA9-1420-000CN 2S7 Screw, rs M2X10 XA9-1501-000CN 1ENWW <strong>HP</strong> <strong>LaserJet</strong> <strong>3015</strong>/<strong>3020</strong>/<strong>3030</strong> pr<strong>in</strong>ter base 313
Figure 7-14.Internal comp<strong>one</strong>nts 3 of 3 (LJ <strong>3015</strong>/<strong>3020</strong>/<strong>3030</strong> pr<strong>in</strong>ter base)314 Chapter 7 Parts and diagrams ENWW
Ref Description Part number Qty1 Bush<strong>in</strong>g RC1-1953-000CN 12 L<strong>in</strong>k, coupl<strong>in</strong>g lower RC1-2485-000CN 13 L<strong>in</strong>k, coupl<strong>in</strong>g top RC1-2494-000CN 14 Speaker assembly RM1-0915-000CN 1S5 Screw, rs M3X6 XA9-1495-000CN 2S6 Screw, rs M3X8 XA9-1420-000CN 1ENWW <strong>HP</strong> <strong>LaserJet</strong> <strong>3015</strong>/<strong>3020</strong>/<strong>3030</strong> pr<strong>in</strong>ter base 315
Figure 7-15.Paper-pickup assembly (LJ <strong>3015</strong>/<strong>3020</strong>/<strong>3030</strong> pr<strong>in</strong>ter base)316 Chapter 7 Parts and diagrams ENWW
Ref Description Part number Qty1 Paper-pickup assembly RM1-0864-000CN 12 Roller, pickup RL1-0266-000CN 1S1 Screw, tap M4X10 XB4-5401-009CN 1S2 Screw, tap BH3X8 XA9-1503-000CN 1ENWW <strong>HP</strong> <strong>LaserJet</strong> <strong>3015</strong>/<strong>3020</strong>/<strong>3030</strong> pr<strong>in</strong>ter base 317
Figure 7-16.Fuser (fix<strong>in</strong>g assy) assembly (LJ <strong>3015</strong>/<strong>3020</strong>/<strong>3030</strong> pr<strong>in</strong>ter base)318 Chapter 7 Parts and diagrams ENWW
Ref Description Part number Qty1 Fuser (fix<strong>in</strong>g assy) assembly 110-127 V RM1-0862-000CN 11 Fuser (fix<strong>in</strong>g assy) assembly 220-240 V RM1-0863-000CN 1S8 Screw, w/washer M3X6 XB2-8300-909CN 1ENWW <strong>HP</strong> <strong>LaserJet</strong> <strong>3015</strong>/<strong>3020</strong>/<strong>3030</strong> pr<strong>in</strong>ter base 319
Alphabetical parts listTable 7-4. Alphabetical parts listDescription Part number Table and page<strong>3015</strong> English bezel Q2669-40002 Table 7-3 on page 291<strong>3015</strong>/20/30 pr<strong>in</strong>t eng<strong>in</strong>e pr<strong>in</strong>ter , replacement 110 V Q2665-67001 Table 7-3 on page 305<strong>3015</strong>/20/30 pr<strong>in</strong>t eng<strong>in</strong>e pr<strong>in</strong>ter , replacement 220 V Q2665-67002 Table 7-3 on page 305<strong>3020</strong> bezel; Arabic Q2665-40033 Table 7-3 on page 302<strong>3020</strong> bezel; Czech Q2665-40027 Table 7-3 on page 301<strong>3020</strong> bezel; Danish Q2665-40022 Table 7-3 on page 301<strong>3020</strong> bezel; Dutch Q2665-40023 Table 7-3 on page 301<strong>3020</strong> bezel; English Q2665-40010 Table 7-3 on page 301<strong>3020</strong> bezel; F<strong>in</strong>nish Q2665-40024 Table 7-3 on page 301<strong>3020</strong> bezel; French Q2665-40018 Table 7-3 on page 301<strong>3020</strong> bezel; German Q2665-40019 Table 7-3 on page 301<strong>3020</strong> bezel; Greek Q2665-40034 Table 7-3 on page 302<strong>3020</strong> bezel; Hebrew Q2665-40035 Table 7-3 on page 302<strong>3020</strong> bezel; Hungarian Q2665-40028 Table 7-3 on page 301<strong>3020</strong> bezel; Italian Q2665-40020 Table 7-3 on page 301<strong>3020</strong> bezel; Korean Q2665-40036 Table 7-3 on page 302<strong>3020</strong> bezel; Norwegian Q2665-40040 Table 7-3 on page 302<strong>3020</strong> bezel; Polish Q2665-40029 Table 7-3 on page 301<strong>3020</strong> bezel; Portuguese Q2665-40025 Table 7-3 on page 301<strong>3020</strong> bezel; Russian Q2665-40030 Table 7-3 on page 301<strong>3020</strong> bezel; Simplified Ch<strong>in</strong>ese Q2665-40037 Table 7-3 on page 302<strong>3020</strong> bezel; Slovak Q2665-40031 Table 7-3 on page 301<strong>3020</strong> bezel; Spanish Q2665-40021 Table 7-3 on page 301<strong>3020</strong> bezel; Swedish Q2665-40026 Table 7-3 on page 301<strong>3020</strong> bezel; Swiss German Q2665-40042 Table 7-3 on page 302<strong>3020</strong> bezel; Thai Q2665-40039 Table 7-3 on page 302<strong>3020</strong> bezel; Traditional Ch<strong>in</strong>ese Q2665-40038 Table 7-3 on page 302<strong>3020</strong> bezel; Turkish Q2665-40032 Table 7-3 on page 301<strong>3020</strong> bezel; Vietnamese Q2665-40043 Table 7-3 on page 302<strong>3030</strong> bezel; Arabic Q2666-40018 Table 7-3 on page 302320 Chapter 7 Parts and diagrams ENWW
Table 7-4. Alphabetical parts list (cont<strong>in</strong>ued)Description Part number Table and page<strong>3030</strong> bezel; Czech Q2666-40012 Table 7-3 on page 302<strong>3030</strong> bezel; Danish Q2666-40007 Table 7-3 on page 302<strong>3030</strong> bezel; Dutch Q2666-40008 Table 7-3 on page 302<strong>3030</strong> bezel; English Q2666-40002 Table 7-3 on page 302<strong>3030</strong> bezel; F<strong>in</strong>nish Q2666-40009 Table 7-3 on page 302<strong>3030</strong> bezel; French Q2666-40003 Table 7-3 on page 302<strong>3030</strong> bezel; German Q2666-40004 Table 7-3 on page 302<strong>3030</strong> bezel; Greek Q2666-40019 Table 7-3 on page 302<strong>3030</strong> bezel; Hebrew Q2666-40020 Table 7-3 on page 302<strong>3030</strong> bezel; Hungarian Q2666-40013 Table 7-3 on page 302<strong>3030</strong> bezel; Italian Q2666-40005 Table 7-3 on page 302<strong>3030</strong> bezel; Korean Q2666-40021 Table 7-3 on page 302<strong>3030</strong> bezel; Norwegian Q2666-40025 Table 7-3 on page 303<strong>3030</strong> bezel; Polish Q2666-40014 Table 7-3 on page 302<strong>3030</strong> bezel; Portuguese Q2666-40010 Table 7-3 on page 302<strong>3030</strong> bezel; Russian Q2666-40015 Table 7-3 on page 302<strong>3030</strong> bezel; Simplified Ch<strong>in</strong>ese Q2666-40022 Table 7-3 on page 302<strong>3030</strong> bezel; Slovak Q2666-40016 Table 7-3 on page 302<strong>3030</strong> bezel; Spanish Q2666-40006 Table 7-3 on page 302<strong>3030</strong> bezel; Swedish Q2666-40011 Table 7-3 on page 302<strong>3030</strong> bezel; Swiss German Q2666-40027 Table 7-3 on page 303<strong>3030</strong> bezel; Traditional Ch<strong>in</strong>ese Q2666-40023 Table 7-3 on page 302<strong>3030</strong> bezel; Turkish Q2666-40017 Table 7-3 on page 302ADF assembly and flatbed lid Q2665-60102 Table 7-3 on page 301ADF cleanout/comb C7309-40153 Table 7-3 on page 301ADF glass frame Q1636-40037 Table 7-3 on page 301ADF <strong>in</strong>put tray Q2665-60109 Table 7-3 on page 301ADF <strong>in</strong>put-tray flag C7309-40013 Table 7-3 on page 301ADF <strong>in</strong>put-tray spr<strong>in</strong>g C7309-80013 Table 7-3 on page 301ADF pickup-roller assembly C7309-60016 Table 7-3 on page 301Automatic document feeder and flatbed lid (ADF; partof the flatbed lid)Q2665-60102-000CNTable 7-3 on page 297Bush<strong>in</strong>g RC1-1953-000CN Table 7-3 on page 315ENWW Alphabetical parts list 321
Table 7-4. Alphabetical parts list (cont<strong>in</strong>ued)Description Part number Table and pageCompression spr<strong>in</strong>g (white platen) RU5-2196-000CN Table 7-3 on page 295Cover, front RL1-0358-000CN Table 7-3 on page 309Cover, left RC1-2471-000CN Table 7-3 on page 309Cover, rear RC1-2474 Table 7-3 on page 309Cover, right RC1-2472-000CN Table 7-3 on page 309Cover, top (scanner support frame), pr<strong>in</strong>ter RL1-0359-000CN Table 7-3 on page 309Delivery tray assembly RM1-0859-000CN Table 7-3 on page 305Delivery-tray assembly (product output b<strong>in</strong>) RM1-0859-000CN Table 7-3 on page 307Door, pr<strong>in</strong>t cartridge RC1-2473-000CN Table 7-3 on page 309EMEA LIU (L<strong>in</strong>e <strong>in</strong>terface unit) Q2687-60002 Table 7-3 on page 305Eng<strong>in</strong>e-controller-PCB assembly RM1-0907-000CN Table 7-3 on page 313Flatbed scanner assembly (does not <strong>in</strong>clude theflatbed lid)Q2665-60112 Table 7-3 on page 301Flatbed scanner assemblyQ26665-60112-000CNTable 7-3 on page 297Fuser (fix<strong>in</strong>g assy) assembly 110-127 V RM1-0862-000CN Table 7-3 on page 319Fuser (fix<strong>in</strong>g assy) assembly 220-240 V RM1-0863-000CN Table 7-3 on page 319<strong>HP</strong> jewel 7121-8043 Table 7-3 on page 305<strong>HP</strong> <strong>LaserJet</strong> <strong>3015</strong> scanner assembly NA Table 7-3 on page 287<strong>HP</strong> <strong>LaserJet</strong> <strong>3020</strong>/<strong>3030</strong> scanner assembly NA Table 7-3 on page 297Laser/scanner assembly RM1-0171-000CN Table 7-3 on page 313L<strong>in</strong>k, coupl<strong>in</strong>g lower RC1-2485-000CN Table 7-3 on page 315L<strong>in</strong>k, coupl<strong>in</strong>g top RC1-2494-000CN Table 7-3 on page 315LJ<strong>3015</strong> formatter LIU1 Q2668-60001 Table 7-3 on page 287LJ<strong>3015</strong> scanner frame assembly RM1-0883-000CN Table 7-3 on page 293LJ<strong>3015</strong> scanner pickup assembly RM1-0885-000CN Table 7-3 on page 293LJ<strong>3020</strong> copy control panel Q2665-60101 Table 7-3 on page 297LJ<strong>3020</strong> copy control panel Q2665-60101 Table 7-3 on page 301LJ<strong>3020</strong> formatter C2688-60002 Table 7-3 on page 297LJ<strong>3020</strong>/<strong>3020</strong> ADF glass C7296-00014 Table 7-3 on page 301LJ<strong>3020</strong>/<strong>3030</strong> ADF lid Q26665-60102 Table 7-3 on page 301LJ<strong>3020</strong>/<strong>3030</strong> ADF solar lock (clip) Q1636-40036 Table 7-3 on page 301LJ<strong>3020</strong>/<strong>3030</strong> scanner l<strong>in</strong>k assembly left RM1-0898-000CN Table 7-3 on page 299322 Chapter 7 Parts and diagrams ENWW
Table 7-4. Alphabetical parts list (cont<strong>in</strong>ued)Description Part number Table and pageLJ<strong>3020</strong>/<strong>3030</strong> scanner l<strong>in</strong>k assembly right RM1-0899-000CN Table 7-3 on page 299LJ<strong>3020</strong>/<strong>3030</strong> scanner spr<strong>in</strong>g, compression RU5-2199-000CN Table 7-3 on page 299LJ<strong>3030</strong> fax control panel Q2666-60101 Table 7-3 on page 297LJ<strong>3030</strong> fax control panel Q2666-60101 Table 7-3 on page 302LJ<strong>3030</strong> formatter LIU2 Q2664-60001 Table 7-3 on page 297Motor, stepp<strong>in</strong>g RK2-0107-000CN Table 7-3 on page 311Panel, rear RC1-1985-000CN Table 7-3 on page 311Paper-pickup assembly RM1-0864-000CN Table 7-3 on page 317Pickup tray assembly RM1-0858-000CN Table 7-3 on page 305Pickup-tray assembly (media <strong>in</strong>put tray) RM1-0858-000CN Table 7-3 on page 307Power-supply assembly, 110-127 V RM1-0903-000CN Table 7-3 on page 311Power-supply assembly, 220-240 V RM1-0904-000CN Table 7-3 on page 311Pr<strong>in</strong>t cartridge Q2460-67913 Table 7-3 on page 305Roller, pickup RL1-0266-000CN Table 7-3 on page 317Scanner base frame assembly (scanner supportframe)RL1-0375-000CN Table 7-3 on page 291Scanner control panel assembly RK2-0232-000CN Table 7-3 on page 287Scanner control-panel assembly RK2-0232-000CN Table 7-3 on page 291Scanner control-panel overlay; Arabic Q2669-00016 Table 7-3 on page 291Scanner control-panel overlay; Czech Q2669-00010 Table 7-3 on page 291Scanner control-panel overlay; Danish Q2669-00005 Table 7-3 on page 291Scanner control-panel overlay; Dutch Q2669-00006 Table 7-3 on page 291Scanner control-panel overlay; F<strong>in</strong>nish Q2669-00007 Table 7-3 on page 291Scanner control-panel overlay; French Q2669-00001 Table 7-3 on page 291Scanner control-panel overlay; German Q2669-00002 Table 7-3 on page 291Scanner control-panel overlay; Hungarian Q2669-00011 Table 7-3 on page 291Scanner control-panel overlay; Italian Q2669-00003 Table 7-3 on page 291Scanner control-panel overlay; Norwegian Q2669-00023 Table 7-3 on page 291Scanner control-panel overlay; Polish Q2669-00012 Table 7-3 on page 291Scanner control-panel overlay; Portuguese Q2669-00008 Table 7-3 on page 291Scanner control-panel overlay; Russian Q2669-00013 Table 7-3 on page 291Scanner control-panel overlay; Slovak Q2669-00014 Table 7-3 on page 291Scanner control-panel overlay; Spanish Q2669-00004 Table 7-3 on page 291ENWW Alphabetical parts list 323
Table 7-4. Alphabetical parts list (cont<strong>in</strong>ued)Description Part number Table and pageScanner control-panel overlay; Swedish Q2669-00009 Table 7-3 on page 291Scanner control-panel overlay; Turkish Q2669-00015 Table 7-3 on page 291Scanner cover top assembly RC1-2564-000CN Table 7-3 on page 291Scanner cover, left RC1-2358-000CN Table 7-3 on page 291Scanner cover, right RC1-2559-000CN Table 7-3 on page 291Scanner cushion RC1-2476-000CN Table 7-3 on page 309Scanner flexible flat cable (FFC) RK2-0236-000CN Table 7-3 on page 291Scanner guide assembly RM1-0889-000CN Table 7-3 on page 295Scanner l<strong>in</strong>k assembly, left (<strong>HP</strong> <strong>LaserJet</strong> <strong>3015</strong>) RM1-0896-000CN Table 7-3 on page 291Scanner l<strong>in</strong>k assembly, right (<strong>HP</strong> <strong>LaserJet</strong> <strong>3015</strong>) RM1-0897-000CN Table 7-3 on page 291Scanner media lever (lever, pressure convert) RC1-2543-000CN Table 7-3 on page 295Scanner media lever torsion spr<strong>in</strong>g (lever, pressureconvert)RC1-2544-000CN Table 7-3 on page 295Scanner pickup tray assembly RM1-0893-000CN Table 7-3 on page 289Scanner separation pad set RM1-0891-000CN Table 7-3 on page 295Scanner separation-pad assembly RM1-0890-000CN Table 7-3 on page 295Scanner sheet, ground<strong>in</strong>g RL1-0376-000CN Table 7-3 on page 291Scanner spr<strong>in</strong>g, compression RU5-2198-000CN Table 7-3 on page 291Scanner tray, delivery (wire) RC1-2560-000CN Table 7-3 on page 289Scanner tray, delivery (wire) RC1-2560-000CN Table 7-3 on page 287Scanner white platen RF5-3235-000CN Table 7-3 on page 295Screw, mach<strong>in</strong>e M3X6 XB1-2300-605CN Table 7-3 on page 293Screw, rs M2X10 XA9-1501-000CN Table 7-3 on page 313Screw, rs M3X6 XA9-1495-000CN Table 7-3 on page 295Screw, rs M3X6 XA9-1495-000CN Table 7-3 on page 311Screw, rs M3X6 XA9-1495-000CN Table 7-3 on page 313Screw, rs M3X6 XA9-1495-000CN Table 7-3 on page 315Screw, rs M3X8 XA9-1420-000CN Table 7-3 on page 311Screw, rs M3X8 XA9-1420-000CN Table 7-3 on page 313Screw, rs M3X8 XA9-1420-000CN Table 7-3 on page 315Screw, tap BH3X6 XA9-1503-000CN Table 7-3 on page 291Screw, tap BH3X8 XA9-1503-000CN Table 7-3 on page 317Screw, tap M4X10 XB4-5401-009CN Table 7-3 on page 291324 Chapter 7 Parts and diagrams ENWW
Table 7-4. Alphabetical parts list (cont<strong>in</strong>ued)Description Part number Table and pageScrew, tap M4X10 XB4-5401-009CN Table 7-3 on page 293Screw, tap M4X10 XB4-5401-009CN Table 7-3 on page 295Screw, tap M4X10 XB4-5401-009CN Table 7-3 on page 311Screw, tap M4X10 XB4-5401-009CN Table 7-3 on page 317Screw, w/washer M3X6 XB2-7300-605CN Table 7-3 on page 293Screw, w/washer M3X6 XB2-7300-605CN Table 7-3 on page 295Screw, w/washer M3X6 XB2-7300-605CN Table 7-3 on page 311Screw, w/washer M3X6 XB2-8300-909CN Table 7-3 on page 319Separation pad C7309-60009 Table 7-3 on page 301Separation-pad assembly, pr<strong>in</strong>ter RM1-0648-000CN Table 7-3 on page 311Speaker assembly RM1-0915-000CN Table 7-3 on page 315Transfer-roller assembly RM1-0658-000CN Table 7-3 on page 311US/WW LIU (L<strong>in</strong>e <strong>in</strong>terface unit) Q2663-60001 Table 7-3 on page 305ENWW Alphabetical parts list 325
Numerical parts listTable 7-5. Numerical parts listPart number Description Table and page7121-8043 <strong>HP</strong> jewel Table 7-3 on page 305C2688-60002 LJ<strong>3020</strong> formatter Table 7-3 on page 297C7296-00014 LJ<strong>3020</strong>/<strong>3020</strong> ADF glass Table 7-3 on page 301C7309-40013 ADF <strong>in</strong>put-tray flag Table 7-3 on page 301C7309-40153 ADF cleanout/comb Table 7-3 on page 301C7309-60009 Separation pad Table 7-3 on page 301C7309-60016 ADF pickup-roller assembly Table 7-3 on page 301C7309-80013 ADF <strong>in</strong>put-tray spr<strong>in</strong>g Table 7-3 on page 301NA <strong>HP</strong> <strong>LaserJet</strong> <strong>3015</strong> scanner assembly Table 7-3 on page 287NA <strong>HP</strong> <strong>LaserJet</strong> <strong>3020</strong>/<strong>3030</strong> scanner assembly Table 7-3 on page 297Q1636-40036 LJ<strong>3020</strong>/<strong>3030</strong> ADF solar lock (clip) Table 7-3 on page 301Q1636-40037 ADF glass frame Table 7-3 on page 301Q2460-67913 Pr<strong>in</strong>t cartridge Table 7-3 on page 305Q2663-60001 US/WW LIU (L<strong>in</strong>e <strong>in</strong>terface unit) Table 7-3 on page 305Q2664-60001 LJ<strong>3030</strong> formatter LIU2 Table 7-3 on page 297Q2665-40010 <strong>3020</strong> bezel; English Table 7-3 on page 301Q2665-40018 <strong>3020</strong> bezel; French Table 7-3 on page 301Q2665-40019 <strong>3020</strong> bezel; German Table 7-3 on page 301Q2665-40020 <strong>3020</strong> bezel; Italian Table 7-3 on page 301Q2665-40021 <strong>3020</strong> bezel; Spanish Table 7-3 on page 301Q2665-40022 <strong>3020</strong> bezel; Danish Table 7-3 on page 301Q2665-40023 <strong>3020</strong> bezel; Dutch Table 7-3 on page 301Q2665-40024 <strong>3020</strong> bezel; F<strong>in</strong>nish Table 7-3 on page 301Q2665-40025 <strong>3020</strong> bezel; Portuguese Table 7-3 on page 301Q2665-40026 <strong>3020</strong> bezel; Swedish Table 7-3 on page 301Q2665-40027 <strong>3020</strong> bezel; Czech Table 7-3 on page 301Q2665-40028 <strong>3020</strong> bezel; Hungarian Table 7-3 on page 301Q2665-40029 <strong>3020</strong> bezel; Polish Table 7-3 on page 301Q2665-40030 <strong>3020</strong> bezel; Russian Table 7-3 on page 301326 Chapter 7 Parts and diagrams ENWW
Table 7-5. Numerical parts list (cont<strong>in</strong>ued)Part number Description Table and pageQ2665-40031 <strong>3020</strong> bezel; Slovak Table 7-3 on page 301Q2665-40032 <strong>3020</strong> bezel; Turkish Table 7-3 on page 301Q2665-40033 <strong>3020</strong> bezel; Arabic Table 7-3 on page 302Q2665-40034 <strong>3020</strong> bezel; Greek Table 7-3 on page 302Q2665-40035 <strong>3020</strong> bezel; Hebrew Table 7-3 on page 302Q2665-40036 <strong>3020</strong> bezel; Korean Table 7-3 on page 302Q2665-40037 <strong>3020</strong> bezel; Simplified Ch<strong>in</strong>ese Table 7-3 on page 302Q2665-40038 <strong>3020</strong> bezel; Traditional Ch<strong>in</strong>ese Table 7-3 on page 302Q2665-40039 <strong>3020</strong> bezel; Thai Table 7-3 on page 302Q2665-40040 <strong>3020</strong> bezel; Norwegian Table 7-3 on page 302Q2665-40042 <strong>3020</strong> bezel; Swiss German Table 7-3 on page 302Q2665-40043 <strong>3020</strong> bezel; Vietnamese Table 7-3 on page 302Q2665-60101 LJ<strong>3020</strong> copy control panel Table 7-3 on page 297Q2665-60101 LJ<strong>3020</strong> copy control panel Table 7-3 on page 301Q2665-60102 ADF assembly and flatbed lid Table 7-3 on page 301Q2665-60102-000CNAutomatic document feeder and flatbed lid (ADF;part of the flatbed lid)Table 7-3 on page 297Q2665-60109 ADF <strong>in</strong>put tray Table 7-3 on page 301Q2665-60112 Flatbed scanner assembly (does not <strong>in</strong>clude theflatbed lid)Table 7-3 on page 301Q2665-67001 <strong>3015</strong>/20/30 pr<strong>in</strong>t eng<strong>in</strong>e pr<strong>in</strong>ter , replacement 110 V Table 7-3 on page 305Q2665-67002 <strong>3015</strong>/20/30 pr<strong>in</strong>t eng<strong>in</strong>e pr<strong>in</strong>ter , replacement 220 V Table 7-3 on page 305Q2666-40002 <strong>3030</strong> bezel; English Table 7-3 on page 302Q2666-40003 <strong>3030</strong> bezel; French Table 7-3 on page 302Q2666-40004 <strong>3030</strong> bezel; German Table 7-3 on page 302Q2666-40005 <strong>3030</strong> bezel; Italian Table 7-3 on page 302Q2666-40006 <strong>3030</strong> bezel; Spanish Table 7-3 on page 302Q2666-40007 <strong>3030</strong> bezel; Danish Table 7-3 on page 302Q2666-40008 <strong>3030</strong> bezel; Dutch Table 7-3 on page 302Q2666-40009 <strong>3030</strong> bezel; F<strong>in</strong>nish Table 7-3 on page 302Q2666-40010 <strong>3030</strong> bezel; Portuguese Table 7-3 on page 302Q2666-40011 <strong>3030</strong> bezel; Swedish Table 7-3 on page 302Q2666-40012 <strong>3030</strong> bezel; Czech Table 7-3 on page 302ENWW Numerical parts list 327
Table 7-5. Numerical parts list (cont<strong>in</strong>ued)Part number Description Table and pageQ2666-40013 <strong>3030</strong> bezel; Hungarian Table 7-3 on page 302Q2666-40014 <strong>3030</strong> bezel; Polish Table 7-3 on page 302Q2666-40015 <strong>3030</strong> bezel; Russian Table 7-3 on page 302Q2666-40016 <strong>3030</strong> bezel; Slovak Table 7-3 on page 302Q2666-40017 <strong>3030</strong> bezel; Turkish Table 7-3 on page 302Q2666-40018 <strong>3030</strong> bezel; Arabic Table 7-3 on page 302Q2666-40019 <strong>3030</strong> bezel; Greek Table 7-3 on page 302Q2666-40020 <strong>3030</strong> bezel; Hebrew Table 7-3 on page 302Q2666-40021 <strong>3030</strong> bezel; Korean Table 7-3 on page 302Q2666-40022 <strong>3030</strong> bezel; Simplified Ch<strong>in</strong>ese Table 7-3 on page 302Q2666-40023 <strong>3030</strong> bezel; Traditional Ch<strong>in</strong>ese Table 7-3 on page 302Q2666-40025 <strong>3030</strong> bezel; Norwegian Table 7-3 on page 303Q2666-40027 <strong>3030</strong> bezel; Swiss German Table 7-3 on page 303Q2666-60101 LJ<strong>3030</strong> fax control panel Table 7-3 on page 297Q2666-60101 LJ<strong>3030</strong> fax control panel Table 7-3 on page 302Q26665-60102 LJ<strong>3020</strong>/<strong>3030</strong> ADF lid Table 7-3 on page 301Q26665-60112-000CNFlatbed scanner assembly Table 7-3 on page 297Q2668-60001 LJ<strong>3015</strong> formatter LIU1 Table 7-3 on page 287Q2669-00001 Scanner control-panel overlay; French Table 7-3 on page 291Q2669-00002 Scanner control-panel overlay; German Table 7-3 on page 291Q2669-00003 Scanner control-panel overlay; Italian Table 7-3 on page 291Q2669-00004 Scanner control-panel overlay; Spanish Table 7-3 on page 291Q2669-00005 Scanner control-panel overlay; Danish Table 7-3 on page 291Q2669-00006 Scanner control-panel overlay; Dutch Table 7-3 on page 291Q2669-00007 Scanner control-panel overlay; F<strong>in</strong>nish Table 7-3 on page 291Q2669-00008 Scanner control-panel overlay; Portuguese Table 7-3 on page 291Q2669-00009 Scanner control-panel overlay; Swedish Table 7-3 on page 291Q2669-00010 Scanner control-panel overlay; Czech Table 7-3 on page 291Q2669-00011 Scanner control-panel overlay; Hungarian Table 7-3 on page 291Q2669-00012 Scanner control-panel overlay; Polish Table 7-3 on page 291Q2669-00013 Scanner control-panel overlay; Russian Table 7-3 on page 291Q2669-00014 Scanner control-panel overlay; Slovak Table 7-3 on page 291328 Chapter 7 Parts and diagrams ENWW
Table 7-5. Numerical parts list (cont<strong>in</strong>ued)Part number Description Table and pageQ2669-00015 Scanner control-panel overlay; Turkish Table 7-3 on page 291Q2669-00016 Scanner control-panel overlay; Arabic Table 7-3 on page 291Q2669-00023 Scanner control-panel overlay; Norwegian Table 7-3 on page 291Q2669-40002 <strong>3015</strong> English bezel Table 7-3 on page 291Q2687-60002 EMEA LIU (L<strong>in</strong>e <strong>in</strong>terface unit) Table 7-3 on page 305RC1-1953-000CN Bush<strong>in</strong>g Table 7-3 on page 315RC1-1985-000CN Panel, rear Table 7-3 on page 311RC1-2358-000CN Scanner cover, left Table 7-3 on page 291RC1-2471-000CN Cover, left Table 7-3 on page 309RC1-2472-000CN Cover, right Table 7-3 on page 309RC1-2473-000CN Door, pr<strong>in</strong>t cartridge Table 7-3 on page 309RC1-2474 Cover, rear Table 7-3 on page 309RC1-2476-000CN Scanner cushion Table 7-3 on page 309RC1-2485-000CN L<strong>in</strong>k, coupl<strong>in</strong>g lower Table 7-3 on page 315RC1-2494-000CN L<strong>in</strong>k, coupl<strong>in</strong>g top Table 7-3 on page 315RC1-2543-000CN Scanner media lever (lever, pressure convert) Table 7-3 on page 295RC1-2544-000CNScanner media lever torsion spr<strong>in</strong>g (lever, pressureconvert)Table 7-3 on page 295RC1-2559-000CN Scanner cover, right Table 7-3 on page 291RC1-2560-000CN Scanner tray, delivery (wire) Table 7-3 on page 287RC1-2560-000CN Scanner tray, delivery (wire) Table 7-3 on page 289RC1-2564-000CN Scanner cover top assembly Table 7-3 on page 291RF5-3235-000CN Scanner white platen Table 7-3 on page 295RK2-0107-000CN Motor, stepp<strong>in</strong>g Table 7-3 on page 311RK2-0232-000CN Scanner control panel assembly Table 7-3 on page 287RK2-0232-000CN Scanner control-panel assembly Table 7-3 on page 291RK2-0236-000CN Scanner flexible flat cable (FFC) Table 7-3 on page 291RL1-0266-000CN Roller, pickup Table 7-3 on page 317RL1-0358-000CN Cover, front Table 7-3 on page 309RL1-0359-000CN Cover, top (scanner support frame), pr<strong>in</strong>ter Table 7-3 on page 309RL1-0375-000CNScanner base frame assembly (scanner supportframe)Table 7-3 on page 291RL1-0376-000CN Scanner sheet, ground<strong>in</strong>g Table 7-3 on page 291ENWW Numerical parts list 329
Table 7-5. Numerical parts list (cont<strong>in</strong>ued)Part number Description Table and pageRM1-0171-000CN Laser/scanner assembly Table 7-3 on page 313RM1-0648-000CN Separation-pad assembly, pr<strong>in</strong>ter Table 7-3 on page 311RM1-0658-000CN Transfer-roller assembly Table 7-3 on page 311RM1-0858-000CN Pickup tray assembly Table 7-3 on page 305RM1-0858-000CN Pickup-tray assembly (media <strong>in</strong>put tray) Table 7-3 on page 307RM1-0859-000CN Delivery tray assembly Table 7-3 on page 305RM1-0859-000CN Delivery-tray assembly (product output b<strong>in</strong>) Table 7-3 on page 307RM1-0862-000CN Fuser (fix<strong>in</strong>g assy) assembly 110-127 V Table 7-3 on page 319RM1-0863-000CN Fuser (fix<strong>in</strong>g assy) assembly 220-240 V Table 7-3 on page 319RM1-0864-000CN Paper-pickup assembly Table 7-3 on page 317RM1-0883-000CN LJ<strong>3015</strong> scanner frame assembly Table 7-3 on page 293RM1-0885-000CN LJ<strong>3015</strong> scanner pickup assembly Table 7-3 on page 293RM1-0889-000CN Scanner guide assembly Table 7-3 on page 295RM1-0890-000CN Scanner separation-pad assembly Table 7-3 on page 295RM1-0891-000CN Scanner separation pad set Table 7-3 on page 295RM1-0893-000CN Scanner pickup tray assembly Table 7-3 on page 289RM1-0896-000CN Scanner l<strong>in</strong>k assembly, left (<strong>HP</strong> <strong>LaserJet</strong> <strong>3015</strong>) Table 7-3 on page 291RM1-0897-000CN Scanner l<strong>in</strong>k assembly, right (<strong>HP</strong> <strong>LaserJet</strong> <strong>3015</strong>) Table 7-3 on page 291RM1-0898-000CN LJ<strong>3020</strong>/<strong>3030</strong> scanner l<strong>in</strong>k assembly left Table 7-3 on page 299RM1-0899-000CN LJ<strong>3020</strong>/<strong>3030</strong> scanner l<strong>in</strong>k assembly right Table 7-3 on page 299RM1-0903-000CN Power-supply assembly, 110-127 V Table 7-3 on page 311RM1-0904-000CN Power-supply assembly, 220-240 V Table 7-3 on page 311RM1-0907-000CN Eng<strong>in</strong>e-controller-PCB assembly Table 7-3 on page 313RM1-0915-000CN Speaker assembly Table 7-3 on page 315RU5-2196-000CN Compression spr<strong>in</strong>g (white platen) Table 7-3 on page 295RU5-2198-000CN Scanner spr<strong>in</strong>g, compression Table 7-3 on page 291RU5-2199-000CN LJ<strong>3020</strong>/<strong>3030</strong> scanner spr<strong>in</strong>g, compression Table 7-3 on page 299XA9-1420-000CN Screw, rs M3X8 Table 7-3 on page 311XA9-1420-000CN Screw, rs M3X8 Table 7-3 on page 313XA9-1420-000CN Screw, rs M3X8 Table 7-3 on page 315XA9-1495-000CN Screw, rs M3X6 Table 7-3 on page 295XA9-1495-000CN Screw, rs M3X6 Table 7-3 on page 311330 Chapter 7 Parts and diagrams ENWW
Table 7-5. Numerical parts list (cont<strong>in</strong>ued)Part number Description Table and pageXA9-1495-000CN Screw, rs M3X6 Table 7-3 on page 313XA9-1495-000CN Screw, rs M3X6 Table 7-3 on page 315XA9-1501-000CN Screw, rs M2X10 Table 7-3 on page 313XA9-1503-000CN Screw, tap BH3X6 Table 7-3 on page 291XA9-1503-000CN Screw, tap BH3X8 Table 7-3 on page 317XB1-2300-605CN Screw, mach<strong>in</strong>e M3X6 Table 7-3 on page 293XB2-7300-605CN Screw, w/washer M3X6 Table 7-3 on page 293XB2-7300-605CN Screw, w/washer M3X6 Table 7-3 on page 295XB2-7300-605CN Screw, w/washer M3X6 Table 7-3 on page 311XB2-8300-909CN Screw, w/washer M3X6 Table 7-3 on page 319XB4-5401-009CN Screw, tap M4X10 Table 7-3 on page 291XB4-5401-009CN Screw, tap M4X10 Table 7-3 on page 293XB4-5401-009CN Screw, tap M4X10 Table 7-3 on page 295XB4-5401-009CN Screw, tap M4X10 Table 7-3 on page 311XB4-5401-009CN Screw, tap M4X10 Table 7-3 on page 317ENWW Numerical parts list 331
332 Chapter 7 Parts and diagrams ENWW
IndexSymbols/Numerics###: error message 19350 Fuser Error message 20151 Laser Error message 20252 Scanner Error message 20279 Error message 202Aabbreviations, fax 257ac bias 83ac power distribution 80acoustic emissions 9, 11, 12add<strong>in</strong>g paper 43ADFcopy<strong>in</strong>g, troubleshoot<strong>in</strong>g 190door open error message 203duty cycle 11features 3feed<strong>in</strong>g problems, troubleshoot<strong>in</strong>g 229, 230<strong>in</strong>put tray, remov<strong>in</strong>g <strong>HP</strong> <strong>LaserJet</strong> <strong>3020</strong>/<strong>3030</strong> 133<strong>in</strong>put tray, replac<strong>in</strong>g 62<strong>in</strong>put-tray flag, remov<strong>in</strong>g <strong>HP</strong> <strong>LaserJet</strong> <strong>3020</strong>/<strong>3030</strong>141jam detection, <strong>HP</strong> <strong>LaserJet</strong> <strong>3020</strong>/<strong>3030</strong> 95jams, clear<strong>in</strong>g 227load<strong>in</strong>g 45locat<strong>in</strong>g 5media specifications 38media supported 43operations, <strong>HP</strong> <strong>LaserJet</strong> <strong>3015</strong> 87operations, <strong>HP</strong> <strong>LaserJet</strong> <strong>3020</strong>/<strong>3030</strong> 94output b<strong>in</strong>, replac<strong>in</strong>g 63part numbers, <strong>HP</strong> <strong>LaserJet</strong> <strong>3015</strong> 287part numbers, <strong>HP</strong> <strong>LaserJet</strong> <strong>3020</strong>/<strong>3030</strong> 297, 301parts, life expectancies 48pickup roller, remov<strong>in</strong>g <strong>HP</strong> <strong>LaserJet</strong> <strong>3020</strong>/<strong>3030</strong>142pickup roller, replac<strong>in</strong>g 61, 63replac<strong>in</strong>g <strong>HP</strong> <strong>LaserJet</strong> <strong>3020</strong>/<strong>3030</strong> 104scanner glass, remov<strong>in</strong>g <strong>HP</strong> <strong>LaserJet</strong> <strong>3020</strong>/<strong>3030</strong>143separation pad, remov<strong>in</strong>g <strong>HP</strong> <strong>LaserJet</strong> <strong>3020</strong>/<strong>3030</strong>140separation pad, replac<strong>in</strong>g <strong>HP</strong> <strong>LaserJet</strong> <strong>3015</strong> 62separation pad, replac<strong>in</strong>g <strong>HP</strong> <strong>LaserJet</strong> <strong>3020</strong>/<strong>3030</strong>66specifications 9, 11adhesive labelsload<strong>in</strong>g 43specifications 40alert messages 193alignment, troubleshoot<strong>in</strong>g 213, 217answer<strong>in</strong>g mach<strong>in</strong>es 231, 232appropriate responses, fax 256Australia 26automatic document feeder. See ADFBbackground, gray 209battery specifications 14beam detect (BD) signal 83bezel, control panelpart numbers, <strong>HP</strong> <strong>LaserJet</strong> <strong>3015</strong> 291part numbers, <strong>HP</strong> <strong>LaserJet</strong> <strong>3020</strong> 301part numbers, <strong>HP</strong> <strong>LaserJet</strong> <strong>3030</strong> 302remov<strong>in</strong>g <strong>HP</strong> <strong>LaserJet</strong> <strong>3015</strong> 112remov<strong>in</strong>g <strong>HP</strong> <strong>LaserJet</strong> <strong>3020</strong>/<strong>3030</strong> 139replac<strong>in</strong>g <strong>HP</strong> <strong>LaserJet</strong> <strong>3020</strong>/<strong>3030</strong> 66bidirectional communications 75, 77bill<strong>in</strong>g filters, fax 99bill<strong>in</strong>g log 241b<strong>in</strong>sADF, replac<strong>in</strong>g 63capacity 8, 10jams, clear<strong>in</strong>g 225locat<strong>in</strong>g 5paper feed<strong>in</strong>g operations 85part numbers 305, 307black dots, troubleshoot<strong>in</strong>gpr<strong>in</strong>ted pages 208, 214scanned images 220black streaks, troubleshoot<strong>in</strong>g 219block diagrams<strong>HP</strong> <strong>LaserJet</strong> <strong>3015</strong> operations 87image formation 83pr<strong>in</strong>ter functions 78block fax list 241boot process 75break<strong>in</strong>g paper reams 227buffer memory 77bush<strong>in</strong>g, part number 315buttons, control panel 33ENWW Index 333
Ccablesflexible flat, <strong>HP</strong> <strong>LaserJet</strong> <strong>3015</strong> 291<strong>in</strong>terface, order<strong>in</strong>g 284calibration, scanner 49c<strong>all</strong>er-ID boxes 231, 232Canada DOC regulations 25Canceled copy. error message 193Canceled scan error message 193Canceled send error message 194card stock specifications 41Care Pack, <strong>HP</strong> 17cartridge-doorpart number 309remov<strong>in</strong>g 163cartridgescheck<strong>in</strong>g 206, 238clean<strong>in</strong>g near 54drum rotation check 237extend<strong>in</strong>g life of 76life expectancies 48operations 83, 84part numbers 284, 305recycl<strong>in</strong>g 18refilled 18remov<strong>in</strong>g 154warranty 16central process<strong>in</strong>g unit (CPU), formatter 75characters, mispr<strong>in</strong>ted 208, 212charg<strong>in</strong>g rolleroperations 83power supply 81checklistst<strong>one</strong>r cartridge <strong>in</strong>spection 206troubleshoot<strong>in</strong>g 188checkscontrol panel 235drum rotation 237half-self-test 235high-voltage contacts 238circuitry, power system 80CIS (contact image sensor) 91CIS Scanner Error message 203classes, <strong>HP</strong> Technical Tra<strong>in</strong><strong>in</strong>g 282clean<strong>in</strong>gabout, precautions 50exterior 50glass 51high-voltage connection po<strong>in</strong>ts 238lid back<strong>in</strong>g 52media guides 210pr<strong>in</strong>t path 50pr<strong>in</strong>t-cartridge area 54separation pads 56t<strong>one</strong>r off sk<strong>in</strong> or fabric 55Clean<strong>in</strong>g Mode message 194clean<strong>in</strong>g stage, image formation process 84clipped pages, troubleshoot<strong>in</strong>g 207cloth, t<strong>one</strong>r 284CO 96, 99CODEC circuitry 96codesevent log 204fax receive 243fax send 248Coldfire processor 75colored paper, troubleshoot<strong>in</strong>g 218Comm. error message 194commands, PJL 268Common sett<strong>in</strong>gs menu 35communication operations 75, 77complex pages, pr<strong>in</strong>t<strong>in</strong>g 77comp<strong>one</strong>nt locations<strong>HP</strong> <strong>LaserJet</strong> <strong>3015</strong> 272, 277<strong>HP</strong> <strong>LaserJet</strong> <strong>3020</strong>/<strong>3030</strong> 276, 277condition<strong>in</strong>g stage, image formation process 83configuration report, pr<strong>in</strong>t<strong>in</strong>g 241consumablesorder<strong>in</strong>g 282contact image sensor (CIS) 91cont<strong>in</strong>uous self-test 262contrast, troubleshoot<strong>in</strong>g 218control panelbezel, remov<strong>in</strong>g <strong>HP</strong> <strong>LaserJet</strong> <strong>3015</strong> 112bezel, remov<strong>in</strong>g <strong>HP</strong> <strong>LaserJet</strong> <strong>3020</strong>/<strong>3030</strong> 139bezel, replac<strong>in</strong>g 66buttons 33comp<strong>one</strong>nts 31, 76languages, <strong>HP</strong> <strong>LaserJet</strong> <strong>3015</strong> 291languages, <strong>HP</strong> <strong>LaserJet</strong> <strong>3020</strong> 301languages, <strong>HP</strong> <strong>LaserJet</strong> <strong>3030</strong> 302menus 33messages 193part number, <strong>HP</strong> <strong>LaserJet</strong> <strong>3015</strong> 287remov<strong>in</strong>g <strong>HP</strong> <strong>LaserJet</strong> <strong>3015</strong> 113remov<strong>in</strong>g <strong>HP</strong> <strong>LaserJet</strong> <strong>3020</strong>/<strong>3030</strong> 139reports, pr<strong>in</strong>t<strong>in</strong>g 241test 235troubleshoot<strong>in</strong>g 189controller PCA 78copieroperations 75specifications 9, 11Copy setup menu 34copy<strong>in</strong>gacoustic emissions 9, 11contrast, troubleshoot<strong>in</strong>g 218features 4feed<strong>in</strong>g problems, troubleshoot<strong>in</strong>g 229image quality, troubleshoot<strong>in</strong>g 216load<strong>in</strong>g orig<strong>in</strong>als 44reduction and enlargement capability 9, 11speed 9, 11troubleshoot<strong>in</strong>g 190334 Index ENWW
country sett<strong>in</strong>gs 264coupl<strong>in</strong>g l<strong>in</strong>k, part numbers 315covers, <strong>HP</strong> <strong>LaserJet</strong> <strong>3015</strong> part numbers 291covers, part numbers 311covers, remov<strong>in</strong>gfront 165fuser 164pr<strong>in</strong>t-cartridge 163rear 164scanner side, <strong>HP</strong> <strong>LaserJet</strong> <strong>3015</strong> 110scanner top, <strong>HP</strong> <strong>LaserJet</strong> <strong>3015</strong> 126side 161top, <strong>HP</strong> <strong>LaserJet</strong> <strong>3015</strong> 129CPU, formatter 75critical error messages 201crooked pages, troubleshoot<strong>in</strong>g 213, 217crooked scans, troubleshoot<strong>in</strong>g 230curl, troubleshoot<strong>in</strong>g 214, 226current control, fax l<strong>in</strong>e 99cushions, scanner<strong>in</strong>st<strong>all</strong><strong>in</strong>g 167part numbers 309custom-sized media, load<strong>in</strong>g 43Customer Care Onl<strong>in</strong>e 282cut-off edges 207Ddark copies or scans, troubleshoot<strong>in</strong>g 218data communication operations 75, 77data-store parameters, fax 263Date menu 33dc bias 83DC controller PCA 78dc power distribution 80Declaration of Conformity 24, 25default sett<strong>in</strong>gs, restor<strong>in</strong>g 265delay jams 86delivery sensor, paper (PS803) 85delivery-delay jams 86delivery-stationary jams 86demonstration report, pr<strong>in</strong>t<strong>in</strong>g 241densityoperations 82troubleshoot<strong>in</strong>g 208developer menu 263develop<strong>in</strong>g roller 81develop<strong>in</strong>g stage, image formation process 83Device error message 194Device is busy error message 194dial<strong>in</strong>g, pulse 98digital subscriber l<strong>in</strong>es (DSL), troubleshoot<strong>in</strong>g 231Doc feeder jam error message 194Document feeder mispick error message 194document sensor (PS1201) 88document top sensor (PS 1202) 88documentation, order<strong>in</strong>g 282Door open or no pr<strong>in</strong>t cartridge error message 195door, cartridgepart number 309door, pr<strong>in</strong>t cartridgeremov<strong>in</strong>g 163door-open paper jams 86dots, troubleshoot<strong>in</strong>gpr<strong>in</strong>ted pages 208, 214scanned images 220draft mode 76DRAM 76driversorder<strong>in</strong>g 282supported 3dropouts, troubleshoot<strong>in</strong>g 208, 212drum<strong>in</strong>spect<strong>in</strong>g 206operations 83, 84rotation functional check 237drum clean<strong>in</strong>g stage, image formation process 84DSL l<strong>in</strong>es, troubleshoot<strong>in</strong>g 231DSP circuitry 96duty cycleADF 9, 11product 9, 11scanner 9, 11EECM (error-correction mode) 242EconoMode 76ECUassembly, part numbers 313functions 78jam detection operations 85laser/scanner operations 80paper feed<strong>in</strong>g operations 84remov<strong>in</strong>g 177edges, not pr<strong>in</strong>t<strong>in</strong>g 207electrical specifications 12electrophotographic processesoperations 83test<strong>in</strong>g 235electrostatic discharge (ESD) 103EMC statement for Australia 26EMI statement for Korea 26Eng<strong>in</strong>e comm. error message 195eng<strong>in</strong>e control unit. See ECUeng<strong>in</strong>e power assembly 80Enhanced I/O 77envelopesload<strong>in</strong>g 43specifications 40environmental specifications 8, 30error messagesalert and warn<strong>in</strong>g 193control panel 193critical 201error-correction mode (ECM) 242ENWW Index 335
ESD (electrostatic discharge) 103European Union regulatory <strong>in</strong>formation 27event log codes 204exit rollers, fuser assembly 85extended warranty 17Ffactory default sett<strong>in</strong>gs, restor<strong>in</strong>g 265fasteners, types of 284faxabbreviations 257additional devices, connect<strong>in</strong>g 231appropriate responses 256bill<strong>in</strong>g (meter<strong>in</strong>g) t<strong>one</strong> filters 99data path 97data-store parameters 263downstream current detection 98DSL l<strong>in</strong>es, troubleshoot<strong>in</strong>g 231error-correction mode (ECM) 242flash memory storage 99hook state 98hook switch control 98l<strong>in</strong>e current control 99marg<strong>in</strong>s 10, 13operations 96page storage 99phase sequence 254products supported 3receive codes 243reports, pr<strong>in</strong>t<strong>in</strong>g 241resolution 10, 13r<strong>in</strong>g detect 98safety isolation 97safety protection circuitry 97send codes 248speed 10, 13T.30 protocol trace report 242, 254troubleshoot<strong>in</strong>g 190Fax Functions menu 33Fax is busy error message 195Fax memory full error message 196Fax recv. error message 197Fax Send error message 197Fax setup menu 35FCC regulations 20features 2feed assembly drive rollers 84feed system, paperADF operations, <strong>HP</strong> <strong>LaserJet</strong> <strong>3020</strong>/<strong>3030</strong> 94ADF, <strong>HP</strong> <strong>LaserJet</strong> <strong>3015</strong> 88pr<strong>in</strong>ter 84feed<strong>in</strong>g problems, troubleshoot<strong>in</strong>gcopier/scanner 229pr<strong>in</strong>ter 225film, transparencyclean<strong>in</strong>g pr<strong>in</strong>t path with 50load<strong>in</strong>g 39, 43F<strong>in</strong>land laser safety 26Fit to Page error message 197flash memory, fax 99flatbedlid, remov<strong>in</strong>g <strong>HP</strong> <strong>LaserJet</strong> <strong>3020</strong>/<strong>3030</strong> 134load<strong>in</strong>g orig<strong>in</strong>als 46media supported 44part numbers, <strong>HP</strong> <strong>LaserJet</strong> <strong>3020</strong>/<strong>3030</strong> 297flexible flat cables, part numbers 291flowchart, troubleshoot<strong>in</strong>g 188focus<strong>in</strong>g lenses, operations 83form sensor, ADF 95formatterfax subsystem 96operations 75part number, <strong>HP</strong> <strong>LaserJet</strong> <strong>3015</strong> 287part numbers, <strong>HP</strong> <strong>LaserJet</strong> <strong>3020</strong>/<strong>3030</strong> 297remov<strong>in</strong>g 171frame assembly, <strong>HP</strong> <strong>LaserJet</strong> <strong>3015</strong> 293front coverpart number 309remov<strong>in</strong>g 165fuserassembly, part numbers 318cover, remov<strong>in</strong>g 164error messages 201exit rollers 85life expectancy 48modes 37operations 84remov<strong>in</strong>g 184fuses, overcurrent protection (F101, F102) 81fus<strong>in</strong>g stage, image formation process 84Gglass, clean<strong>in</strong>g 51gray background, troubleshoot<strong>in</strong>g 209ground<strong>in</strong>g sheet 291Group dial not <strong>all</strong>owed <strong>in</strong> group error message 198group-dial report 241guide assembly, <strong>HP</strong> <strong>LaserJet</strong> <strong>3015</strong> 295guidesclean<strong>in</strong>g 210troubleshoot<strong>in</strong>g 229Hhalf-self-test functional check 235hardware ma<strong>in</strong>tenance agreements 17headers, fax 33heat output 12heavy media 41high-voltage contacts check 238high-voltage power supply, operations 81hook state 98hook switch control 98<strong>HP</strong> Care Pack 17<strong>HP</strong> Customer Care Onl<strong>in</strong>e 282336 Index ENWW
<strong>HP</strong> <strong>LaserJet</strong> <strong>3015</strong>comp<strong>one</strong>nt locations 272, 277comp<strong>one</strong>nts 5operations 87part numbers 287remov<strong>in</strong>g and replac<strong>in</strong>g parts 107<strong>HP</strong> <strong>LaserJet</strong> <strong>3020</strong>/<strong>3030</strong>ADF, replac<strong>in</strong>g 104comp<strong>one</strong>nt locations 276, 277operations 93part numbers 296remov<strong>in</strong>g and replac<strong>in</strong>g parts 133scanner assembly, replac<strong>in</strong>g 104<strong>HP</strong> Technical Tra<strong>in</strong><strong>in</strong>g 282humidityspecifications 8troubleshoot<strong>in</strong>g 209, 214, 219II/O, Enhanced 77IC CS-03 requirements 23identification label 7image densitytroubleshoot<strong>in</strong>g 208voltage operations 82image formation processoperations 83test<strong>in</strong>g 235image quality, troubleshoot<strong>in</strong>gabout 206copies and scans 216repetitive defects 222types of problems 206<strong>in</strong>put trays. See trays<strong>in</strong>st<strong>all</strong><strong>in</strong>g scanner cushions 167<strong>in</strong>ternal comp<strong>one</strong>nts, part numbers 311INTR (Initial Rotation Period) 73Invalid date error message 198Invalid entry error message 198JjamsADF 227, 230clear<strong>in</strong>g 223detection operations, <strong>HP</strong> <strong>LaserJet</strong> <strong>3020</strong>/<strong>3030</strong> 95detection operations, pr<strong>in</strong>ter 85error messages 200multifeeds 227output b<strong>in</strong> 225prevent<strong>in</strong>g 43Kkeys, control panel 33Korean EMI statement 26Llabelsload<strong>in</strong>g 43specifications 40languagescontrol panel part numbers, <strong>HP</strong> <strong>LaserJet</strong> <strong>3015</strong> 291control panel part numbers, <strong>HP</strong> <strong>LaserJet</strong> <strong>3020</strong> 301control panel part numbers, <strong>HP</strong> <strong>LaserJet</strong> <strong>3030</strong> 302sett<strong>in</strong>gs 264languages, pr<strong>in</strong>ter 77laser safety statement 25laser/scanner assemblyerror messages 202operations 80part numbers 313protective cover 103remov<strong>in</strong>g 181latent electrostatic image 83lead<strong>in</strong>g edgedetection operations 84, 86LEDs, pr<strong>in</strong>ter control paneloff, troubleshoot<strong>in</strong>g 188startup messages 75LEDs, scann<strong>in</strong>g system 91left cover, <strong>HP</strong> <strong>LaserJet</strong> <strong>3015</strong> 291left-side coverpart number 309remov<strong>in</strong>g 161lenses, operations 83life expectanciesextend<strong>in</strong>g pr<strong>in</strong>t cartridge 76parts 48lift plate 84light copies or scans, troubleshoot<strong>in</strong>g 218lights, pr<strong>in</strong>ter control panelerror messages 193off, troubleshoot<strong>in</strong>g 188startup messages 75lights, scann<strong>in</strong>g system 91l<strong>in</strong>e current control, fax 99l<strong>in</strong>e <strong>in</strong>terface unit. See LIUl<strong>in</strong>es, faxadditional devices, connect<strong>in</strong>g 231digital subscriber (DSL) 231l<strong>in</strong>es, troubleshoot<strong>in</strong>gcopies or scans 219pr<strong>in</strong>ted pages 209white, vertical 215, 218l<strong>in</strong>k assemblies, part numbers<strong>HP</strong> <strong>LaserJet</strong> <strong>3015</strong> 291<strong>HP</strong> <strong>LaserJet</strong> <strong>3020</strong>/<strong>3030</strong> 299l<strong>in</strong>k assemblies, remov<strong>in</strong>g<strong>HP</strong> <strong>LaserJet</strong> <strong>3015</strong> 107<strong>HP</strong> <strong>LaserJet</strong> <strong>3020</strong>/<strong>3030</strong> 136l<strong>in</strong>k, coupl<strong>in</strong>g 315ENWW Index 337
LIUdata path 97hook switch control 98operations 75part numbers 305regional versions 96remov<strong>in</strong>g 171r<strong>in</strong>g detect 98safety isolation circuitry 97safety protection 97load<strong>in</strong>g<strong>in</strong>put trays 43orig<strong>in</strong>als to copy or scan 44long pages, copy<strong>in</strong>g or scann<strong>in</strong>g 229long-document jams, ADF 95loose t<strong>one</strong>r, troubleshoot<strong>in</strong>g 211LSTR (Last Rotation Period) 73Mmach<strong>in</strong>e screws 284Mac<strong>in</strong>tosh operat<strong>in</strong>g systems supported 3ma<strong>in</strong> <strong>in</strong>put traycapacity 8, 10feed<strong>in</strong>g operations 84feed<strong>in</strong>g problems, troubleshoot<strong>in</strong>g 227load<strong>in</strong>g 43media supported 37part number 305, 307remov<strong>in</strong>g 158replac<strong>in</strong>g 60ma<strong>in</strong> motor, remov<strong>in</strong>g 182ma<strong>in</strong> wir<strong>in</strong>g diagrams 269ma<strong>in</strong>tenance agreements 17manuals, order<strong>in</strong>g 282marg<strong>in</strong>sfax<strong>in</strong>g 10, 13pr<strong>in</strong>ter, m<strong>in</strong>imum 207scanner 9, 11mediaADF feed<strong>in</strong>g operations, <strong>HP</strong> <strong>LaserJet</strong> <strong>3015</strong> 88ADF feed<strong>in</strong>g operations, <strong>HP</strong> <strong>LaserJet</strong> <strong>3020</strong>/<strong>3030</strong>94curl, troubleshoot<strong>in</strong>g 214, 226envelopes 40feed system operations 84fuser modes 37labels 40load<strong>in</strong>g 43size, maximum 9, 10size, m<strong>in</strong>imum 8, 10specifications 37, 39, 41troubleshoot<strong>in</strong>g 39weight 9, 11media guidesclean<strong>in</strong>g 210troubleshoot<strong>in</strong>g 229media jams. See jamsmedia lever, <strong>HP</strong> <strong>LaserJet</strong> <strong>3015</strong>part numbers 295remov<strong>in</strong>g 115memorybase 9, 11buffer 77flash, fax 99<strong>in</strong>cluded 2NVRAM <strong>in</strong>it 265RAM 76Memory Enhancement technology (MEt) 77Memory is low error message 198menu structure report, pr<strong>in</strong>t<strong>in</strong>g 241menu structure, control panel 33menusdeveloper 263secondary service 262messagesalert and warn<strong>in</strong>g 193control panel 193critical 201startup 75mirror operations 83misalignment, troubleshoot<strong>in</strong>g 213, 217model number, locat<strong>in</strong>g 7modemsconnect<strong>in</strong>g to <strong>HP</strong> <strong>LaserJet</strong> <strong>3015</strong> <strong>all</strong>-<strong>in</strong>-<strong>one</strong> 233connect<strong>in</strong>g to <strong>HP</strong> <strong>LaserJet</strong> <strong>3030</strong> <strong>all</strong>-<strong>in</strong>-<strong>one</strong> 233features 2, 231speed 10, 13motors<strong>HP</strong> <strong>LaserJet</strong> <strong>3015</strong> comp<strong>one</strong>nt locations 274operations 79remov<strong>in</strong>g 182stepp<strong>in</strong>g, part number 311multifeedsADF 230pr<strong>in</strong>ter <strong>in</strong>put trays 227NNo Dial T<strong>one</strong> error message 198No document sent error message 198No fax answer error message 199No fax detected error message 200No fax pages to repr<strong>in</strong>t error message 200noise specifications 12NVRAM<strong>in</strong>cluded 76<strong>in</strong>it 265Ooff-hook 98on-hook 98on/off switch, locat<strong>in</strong>g 5<strong>one</strong>-touch report 241Onl<strong>in</strong>e Customer Care, <strong>HP</strong> 282operat<strong>in</strong>g environment, specifications 8, 30338 Index ENWW
operat<strong>in</strong>g systems supported 3operationsADF, <strong>HP</strong> <strong>LaserJet</strong> <strong>3015</strong> 87ADF, <strong>HP</strong> <strong>LaserJet</strong> <strong>3020</strong>/<strong>3030</strong> 94boot process 75comp<strong>one</strong>nts 70ECU 78fax 96formatter 75<strong>HP</strong> <strong>LaserJet</strong> <strong>3015</strong> 87<strong>HP</strong> <strong>LaserJet</strong> <strong>3020</strong>/<strong>3030</strong> 93image formation 83jam detection 85LIU 75motor 79optical system, <strong>HP</strong> <strong>LaserJet</strong> <strong>3015</strong> 91optical system, <strong>HP</strong> <strong>LaserJet</strong> <strong>3020</strong>/<strong>3030</strong> 93paper-feed system, pr<strong>in</strong>ter 84power system 80pr<strong>in</strong>t cartridges 84sequences 71troubleshoot<strong>in</strong>g image formation 235optical system operations<strong>HP</strong> <strong>LaserJet</strong> <strong>3015</strong> 91<strong>HP</strong> <strong>LaserJet</strong> <strong>3020</strong>/<strong>3030</strong> 93optimiz<strong>in</strong>g feature 38order ofoperations 71remov<strong>in</strong>g and replac<strong>in</strong>g parts 104troubleshoot<strong>in</strong>g steps 188order<strong>in</strong>g parts and supplies 282orig<strong>in</strong>als to copy or scanADF, media supported 43load<strong>in</strong>g 44Out of range error message 200output b<strong>in</strong>s. See b<strong>in</strong>sovercurrent/overvoltage protection 81overhead transparenciesclean<strong>in</strong>g pr<strong>in</strong>t path with 50load<strong>in</strong>g 39, 43overlay, control panel. See bezel, control panelPPage Protect 77Page too complex error message 200pages per m<strong>in</strong>uteADF 3pr<strong>in</strong>t<strong>in</strong>g 2, 8panels, remov<strong>in</strong>g. See covers, remov<strong>in</strong>gpaperADF feed<strong>in</strong>g operations, <strong>HP</strong> <strong>LaserJet</strong> <strong>3015</strong> 88ADF feed<strong>in</strong>g operations, <strong>HP</strong> <strong>LaserJet</strong> <strong>3020</strong>/<strong>3030</strong>94break<strong>in</strong>g reams 227curl, troubleshoot<strong>in</strong>g 214, 226feed system operations 84fuser modes 37load<strong>in</strong>g 43size, maximum 9, 10size, m<strong>in</strong>imum 8, 10specifications 37, 39stor<strong>in</strong>g 226troubleshoot<strong>in</strong>g 39weight 9, 11paper delivery sensor (PS803) 85paper feed problems, troubleshoot<strong>in</strong>gcopier/scanner 229pr<strong>in</strong>ter 225paper guidesclean<strong>in</strong>g 210troubleshoot<strong>in</strong>g 229paper jamsADF 227, 230clear<strong>in</strong>g 223detection operations 85detection operations, <strong>HP</strong> <strong>LaserJet</strong> <strong>3020</strong>/<strong>3030</strong> 95error messages 200multifeeds 227output b<strong>in</strong> 225prevent<strong>in</strong>g 43paper lift plate 84paper pathADF feed<strong>in</strong>g operations, <strong>HP</strong> <strong>LaserJet</strong> <strong>3020</strong>/<strong>3030</strong>95clean<strong>in</strong>g 50paper top sensor (PS801) 84, 85paper-out sensor (PS201) 84, 85paper-pickup assembly, part numbers 316paper-pickup assembly, remov<strong>in</strong>g 186paper-present sensor, ADF 95par<strong>all</strong>el cable, order<strong>in</strong>g 284par<strong>all</strong>el port 10, 11par<strong>all</strong>el ports 192parameters, fax data-store 263part numbersabout 285ADF, <strong>HP</strong> <strong>LaserJet</strong> <strong>3015</strong> 287ADF, <strong>HP</strong> <strong>LaserJet</strong> <strong>3020</strong>/<strong>3030</strong> 297, 301b<strong>in</strong>s 305, 307bush<strong>in</strong>g 315control panel bezels, <strong>HP</strong> <strong>LaserJet</strong> <strong>3020</strong> 301control panel bezels, <strong>HP</strong> <strong>LaserJet</strong> <strong>3030</strong> 302control panel overlays, <strong>HP</strong> <strong>LaserJet</strong> <strong>3015</strong> 291control panel, <strong>HP</strong> <strong>LaserJet</strong> <strong>3015</strong> 287covers 309, 311covers, <strong>HP</strong> <strong>LaserJet</strong> <strong>3015</strong> 291cushion, scanner 309eng<strong>in</strong>e-controller-PCB assembly 313flatbed, <strong>HP</strong> <strong>LaserJet</strong> <strong>3020</strong>/<strong>3030</strong> 297flexible flat cable, <strong>HP</strong> <strong>LaserJet</strong> <strong>3015</strong> 291formatter, <strong>HP</strong> <strong>LaserJet</strong> <strong>3015</strong> 287formatter, <strong>HP</strong> <strong>LaserJet</strong> <strong>3020</strong>/<strong>3030</strong> 297frame assembly, <strong>HP</strong> <strong>LaserJet</strong> <strong>3015</strong> 293fuser (fix<strong>in</strong>g assy) assembly 318ENWW Index 339
ground<strong>in</strong>g sheet, <strong>HP</strong> <strong>LaserJet</strong> <strong>3015</strong> 291guide assembly, <strong>HP</strong> <strong>LaserJet</strong> <strong>3015</strong> 295<strong>HP</strong> <strong>LaserJet</strong> <strong>3015</strong> 287<strong>HP</strong> <strong>LaserJet</strong> <strong>3020</strong>/<strong>3030</strong> 296<strong>in</strong>ternal comp<strong>one</strong>nts 311laser/scanner assembly 313l<strong>in</strong>k assemblies, <strong>HP</strong> <strong>LaserJet</strong> <strong>3015</strong> 291l<strong>in</strong>k assemblies, <strong>HP</strong> <strong>LaserJet</strong> <strong>3020</strong>/<strong>3030</strong> 299l<strong>in</strong>k, coupl<strong>in</strong>g 315LIU 305media levers, <strong>HP</strong> <strong>LaserJet</strong> <strong>3015</strong> 295paper-pickup assembly 316pickup roller, <strong>HP</strong> <strong>LaserJet</strong> <strong>3015</strong> 293platen, <strong>HP</strong> <strong>LaserJet</strong> <strong>3015</strong> 295power supplies 311pr<strong>in</strong>t cartridges 305pr<strong>in</strong>ter base 305scanner support frame 309scanner support frame, <strong>HP</strong> <strong>LaserJet</strong> <strong>3015</strong> 291separation pads, <strong>HP</strong> <strong>LaserJet</strong> <strong>3020</strong>/<strong>3030</strong> 295, 301separation-pad assembly 311speaker assembly 315spr<strong>in</strong>g, <strong>HP</strong> <strong>LaserJet</strong> <strong>3015</strong> 291spr<strong>in</strong>g, <strong>HP</strong> <strong>LaserJet</strong> <strong>3020</strong>/<strong>3030</strong> 299transfer-roller assembly 311trays 305, 307partial characters, troubleshoot<strong>in</strong>g 208, 212partsabout remov<strong>in</strong>g and replac<strong>in</strong>g 103<strong>HP</strong> <strong>LaserJet</strong> <strong>3015</strong> comp<strong>one</strong>nt locations 272, 277<strong>HP</strong> <strong>LaserJet</strong> <strong>3020</strong>/<strong>3030</strong> comp<strong>one</strong>nt locations 276,277life expectancies 48order of removal 104order<strong>in</strong>g 282pr<strong>in</strong>ter, remov<strong>in</strong>g 153remov<strong>in</strong>g <strong>HP</strong> <strong>LaserJet</strong> <strong>3015</strong> 107remov<strong>in</strong>g <strong>HP</strong> <strong>LaserJet</strong> <strong>3020</strong>/<strong>3030</strong> 133pathADF feed<strong>in</strong>g operations, <strong>HP</strong> <strong>LaserJet</strong> <strong>3020</strong>/<strong>3030</strong>95feed<strong>in</strong>g operations 84pr<strong>in</strong>t, clean<strong>in</strong>g 50PCL (Pr<strong>in</strong>ter Command Language) 77phase sequence, fax 254Ph<strong>one</strong> Book is empty error message 200ph<strong>one</strong> l<strong>in</strong>esadditional devices, connect<strong>in</strong>g 231DSL, troubleshoot<strong>in</strong>g 231ph<strong>one</strong>book report 241ph<strong>one</strong>s, connect<strong>in</strong>g extra 231, 232photosensitive drum<strong>in</strong>spect<strong>in</strong>g 206operations 83, 84rotation functional checks 237pickup delay jams 86pickup rollerADF feed<strong>in</strong>g operations, <strong>HP</strong> <strong>LaserJet</strong> <strong>3015</strong> 88ADF, remov<strong>in</strong>g <strong>HP</strong> <strong>LaserJet</strong> <strong>3020</strong>/<strong>3030</strong> 142ADF, replac<strong>in</strong>g 61, 63clean<strong>in</strong>g 55<strong>HP</strong> <strong>LaserJet</strong> <strong>3015</strong> comp<strong>one</strong>nt locations 273life expectancy 48operations 84part numbers, <strong>HP</strong> <strong>LaserJet</strong> <strong>3015</strong> 293pr<strong>in</strong>ter, part number 316pr<strong>in</strong>ter, replac<strong>in</strong>g 57remov<strong>in</strong>g <strong>HP</strong> <strong>LaserJet</strong> <strong>3015</strong> 130pickup solenoid (SL001) 84, 86pickup stationary jam 86PJL (Pr<strong>in</strong>ter Job Language) 77, 268platenclean<strong>in</strong>g 51remov<strong>in</strong>g 131portsformatter operations 75<strong>in</strong>cluded 2, 11locat<strong>in</strong>g 5specifications 9troubleshoot<strong>in</strong>g 192powerspecifications 12troubleshoot<strong>in</strong>g 188power cable, order<strong>in</strong>g 284power suppliesfax l<strong>in</strong>e current control 99operations 80part numbers 311remov<strong>in</strong>g 169test<strong>in</strong>g high-voltage 238unplugg<strong>in</strong>g 103power switch, locat<strong>in</strong>g 5PowerSave mode 12pressure convert levers, <strong>HP</strong> <strong>LaserJet</strong> <strong>3015</strong> 295pressure roller, operations 84primary charg<strong>in</strong>g rolleroperations 83power supply 81pr<strong>in</strong>t cartridgescheck<strong>in</strong>g 206, 238clean<strong>in</strong>g near 54drum rotation check 237extend<strong>in</strong>g life of 76life expectancies 48operations 83, 84part numbers 284, 305recycl<strong>in</strong>g 18refilled 18remov<strong>in</strong>g 154warranty 16pr<strong>in</strong>t densitytroubleshoot<strong>in</strong>g 208voltage operations 82340 Index ENWW
pr<strong>in</strong>t pathclean<strong>in</strong>g 50feed<strong>in</strong>g operations 84PRINT period 73pr<strong>in</strong>t quality, troubleshoot<strong>in</strong>gabout 206repetitive defects 222types of problems 206pr<strong>in</strong>t-cartridge doorpart number 309remov<strong>in</strong>g 163pr<strong>in</strong>ter base, part numbers 305Pr<strong>in</strong>ter Command Language (PCL) 77pr<strong>in</strong>ter driversorder<strong>in</strong>g 282supported 3Pr<strong>in</strong>ter jam error message 200Pr<strong>in</strong>ter Job Language (PJL) 77, 268pr<strong>in</strong>ter pickup rollerclean<strong>in</strong>g 55life expectancy 48operations 84part number 316replac<strong>in</strong>g 57pr<strong>in</strong>ter separation padlife expectancy 48operations 84replac<strong>in</strong>g 59pr<strong>in</strong>ter specifications 8, 10Pr<strong>in</strong>ter tray is empty error message 200pr<strong>in</strong>t<strong>in</strong>gfeed problems 225load<strong>in</strong>g media 43speed 8, 10troubleshoot<strong>in</strong>g 191, 207priority <strong>in</strong>put traycapacity 8, 10feed<strong>in</strong>g operations 84feed<strong>in</strong>g problems, troubleshoot<strong>in</strong>g 227load<strong>in</strong>g 43processor, formatter 75protocol trace report, fax 242, 254PSTN 96pulse dial<strong>in</strong>g 98Qquality, troubleshoot<strong>in</strong>gabout 206copies and scans 216repetitive defects 222types of problems 206RRAM 76reams, break<strong>in</strong>g 227rear coverpart number 309, 311remov<strong>in</strong>g 164receive codes, fax 243recycl<strong>in</strong>g pr<strong>in</strong>t cartridges 18redistribut<strong>in</strong>g t<strong>one</strong>r 206reduction sett<strong>in</strong>gs 207, 221refilled pr<strong>in</strong>t cartridges 18region sett<strong>in</strong>gs 264regulatory statements. See statementsremov<strong>in</strong>gADF <strong>in</strong>put tray, <strong>HP</strong> <strong>LaserJet</strong> <strong>3020</strong>/<strong>3030</strong> 133ADF <strong>in</strong>put-tray flag, <strong>HP</strong> <strong>LaserJet</strong> <strong>3020</strong>/<strong>3030</strong> 141ADF pickup roller, <strong>HP</strong> <strong>LaserJet</strong> <strong>3020</strong>/<strong>3030</strong> 142ADF scanner glass, <strong>HP</strong> <strong>LaserJet</strong> <strong>3020</strong>/<strong>3030</strong> 143ADF separation pad, <strong>HP</strong> <strong>LaserJet</strong> <strong>3020</strong>/<strong>3030</strong> 140control panel bezel, <strong>HP</strong> <strong>LaserJet</strong> <strong>3015</strong> 112control panel bezel, <strong>HP</strong> <strong>LaserJet</strong> <strong>3020</strong>/<strong>3030</strong> 139control panel, <strong>HP</strong> <strong>LaserJet</strong> <strong>3015</strong> 113control panel, <strong>HP</strong> <strong>LaserJet</strong> <strong>3020</strong>/<strong>3030</strong> 139ECU 177flatbed lid, <strong>HP</strong> <strong>LaserJet</strong> <strong>3020</strong>/<strong>3030</strong> 134formatter 171front cover 165fuser 184fuser cover 164<strong>HP</strong> <strong>LaserJet</strong> <strong>3015</strong> parts 107<strong>HP</strong> <strong>LaserJet</strong> <strong>3020</strong>/<strong>3030</strong> parts 133laser/scanner assembly 181l<strong>in</strong>k assemblies, <strong>HP</strong> <strong>LaserJet</strong> <strong>3015</strong> 107l<strong>in</strong>k assemblies, <strong>HP</strong> <strong>LaserJet</strong> <strong>3020</strong>/<strong>3030</strong> 136LIU 171ma<strong>in</strong> motor 182media <strong>in</strong>put tray 158media lever and torsion spr<strong>in</strong>g, <strong>HP</strong> <strong>LaserJet</strong> <strong>3015</strong>115order of 104paper-pickup assembly 186parts 103pickup roller, <strong>HP</strong> <strong>LaserJet</strong> <strong>3015</strong> 130power supply 169pr<strong>in</strong>t cartridge 154pr<strong>in</strong>t-cartridge door 163pr<strong>in</strong>ter parts 153rear cover 164scanner assembly, <strong>HP</strong> <strong>LaserJet</strong> <strong>3015</strong> 118scanner assembly, <strong>HP</strong> <strong>LaserJet</strong> <strong>3020</strong>/<strong>3030</strong> 145scanner side covers, <strong>HP</strong> <strong>LaserJet</strong> <strong>3015</strong> 110scanner support frame 175scanner support frame spr<strong>in</strong>gs, <strong>HP</strong> <strong>LaserJet</strong> <strong>3015</strong>107scanner support frame spr<strong>in</strong>gs, <strong>HP</strong> <strong>LaserJet</strong><strong>3020</strong>/<strong>3030</strong> 136scanner top cover, <strong>HP</strong> <strong>LaserJet</strong> <strong>3015</strong> 126separation pad assembly, <strong>HP</strong> <strong>LaserJet</strong> <strong>3015</strong> 116separation-pad set, <strong>HP</strong> <strong>LaserJet</strong> <strong>3015</strong> 111side covers 161ENWW Index 341
speaker assembly 168top cover, <strong>HP</strong> <strong>LaserJet</strong> <strong>3015</strong> 129transfer roller 159white platen 131repetitive defects, troubleshoot<strong>in</strong>g 212, 222replacement <strong>in</strong>tervals 48replac<strong>in</strong>gADF <strong>in</strong>put tray 62ADF <strong>in</strong>put-tray flag, <strong>HP</strong> <strong>LaserJet</strong> <strong>3020</strong>/<strong>3030</strong> 141ADF output b<strong>in</strong> 63ADF pickup roller 61, 63ADF pickup roller, <strong>HP</strong> <strong>LaserJet</strong> <strong>3020</strong>/<strong>3030</strong> 142ADF scanner glass, <strong>HP</strong> <strong>LaserJet</strong> <strong>3020</strong>/<strong>3030</strong> 143ADF separation pad, <strong>HP</strong> <strong>LaserJet</strong> <strong>3020</strong>/<strong>3030</strong> 140ADF separation pads 62ADF separation pads <strong>HP</strong> <strong>LaserJet</strong> <strong>3020</strong>/<strong>3030</strong> 66ADF, <strong>HP</strong> <strong>LaserJet</strong> <strong>3020</strong>/<strong>3030</strong> 104control panel bezel, <strong>HP</strong> <strong>LaserJet</strong> <strong>3015</strong> 112control panel, <strong>HP</strong> <strong>LaserJet</strong> <strong>3015</strong> 113control panel, <strong>HP</strong> <strong>LaserJet</strong> <strong>3020</strong>/<strong>3030</strong> 139control-panel bezel 66ECU 177flatbed lid, <strong>HP</strong> <strong>LaserJet</strong> <strong>3020</strong>/<strong>3030</strong> 134formatter 171front cover 165fuser 184fuser cover 164<strong>HP</strong> <strong>LaserJet</strong> <strong>3015</strong> parts 107<strong>HP</strong> <strong>LaserJet</strong> <strong>3020</strong>/<strong>3030</strong> parts 133laser/scanner assembly 181l<strong>in</strong>k assemblies, <strong>HP</strong> <strong>LaserJet</strong> <strong>3015</strong> 107l<strong>in</strong>k assemblies, <strong>HP</strong> <strong>LaserJet</strong> <strong>3020</strong>/<strong>3030</strong> 136LIU 171ma<strong>in</strong> <strong>in</strong>put tray 60ma<strong>in</strong> motor 182media <strong>in</strong>put tray 158media lever and torsion spr<strong>in</strong>g, <strong>HP</strong> <strong>LaserJet</strong> <strong>3015</strong>115order of 104paper-pickup assembly 186parts 103pickup roller, <strong>HP</strong> <strong>LaserJet</strong> <strong>3015</strong> 130power supply 169pr<strong>in</strong>t cartridge 154pr<strong>in</strong>t-cartridge door 163pr<strong>in</strong>ter parts 153pr<strong>in</strong>ter pickup roller 57pr<strong>in</strong>ter separation pads 59rear cover 164scanner assembly, <strong>HP</strong> <strong>LaserJet</strong> <strong>3015</strong> 118scanner assembly, <strong>HP</strong> <strong>LaserJet</strong> <strong>3020</strong>/<strong>3030</strong> 104,145scanner cushions 167scanner side covers, <strong>HP</strong> <strong>LaserJet</strong> <strong>3015</strong> 110scanner support frame 175scanner support frame spr<strong>in</strong>gs, <strong>HP</strong> <strong>LaserJet</strong> <strong>3015</strong>107scanner support frame spr<strong>in</strong>gs, <strong>HP</strong> <strong>LaserJet</strong><strong>3020</strong>/<strong>3030</strong> 136scanner top cover, <strong>HP</strong> <strong>LaserJet</strong> <strong>3015</strong> 126separation pad assembly, <strong>HP</strong> <strong>LaserJet</strong> <strong>3015</strong> 116separation-pad set, <strong>HP</strong> <strong>LaserJet</strong> <strong>3015</strong> 111side covers 161speaker assembly 168top cover, <strong>HP</strong> <strong>LaserJet</strong> <strong>3015</strong> 129transfer roller 159white platen 131reportscont<strong>in</strong>uous self-test 262control panel menu structure 33fax 241fax data-store parameters 263fax receive codes 243fax send codes 248menu 34pr<strong>in</strong>t<strong>in</strong>g 241secondary service 262T.30 protocol trace 242, 254reset, soft 265residual paper jams 86resiz<strong>in</strong>g scanned images 221resolutionfax<strong>in</strong>g 10, 13pr<strong>in</strong>t<strong>in</strong>g 9, 11scann<strong>in</strong>g 9, 11restor<strong>in</strong>g default sett<strong>in</strong>gs 265right cover, <strong>HP</strong> <strong>LaserJet</strong> <strong>3015</strong> 291right-side coverpart number 309remov<strong>in</strong>g 161RING 96, 97, 99r<strong>in</strong>g detect 98rollersADF feed<strong>in</strong>g operations, <strong>HP</strong> <strong>LaserJet</strong> <strong>3015</strong> 88ADF pickup, remov<strong>in</strong>g <strong>HP</strong> <strong>LaserJet</strong> <strong>3020</strong>/<strong>3030</strong> 142ADF pickup, replac<strong>in</strong>g 61, 63clean<strong>in</strong>g around 50clean<strong>in</strong>g pickup 55<strong>HP</strong> <strong>LaserJet</strong> <strong>3015</strong> comp<strong>one</strong>nt locations 273life expectancies 48paper feed<strong>in</strong>g operations 84part numbers, <strong>HP</strong> <strong>LaserJet</strong> <strong>3015</strong> 293pickup, remov<strong>in</strong>g <strong>HP</strong> <strong>LaserJet</strong> <strong>3015</strong> 130pr<strong>in</strong>ter pickup, part number 316pr<strong>in</strong>ter pickup, replac<strong>in</strong>g 57pr<strong>in</strong>ter pr<strong>in</strong>ter pickup, replac<strong>in</strong>g 156transfer, part number 311transfer, remov<strong>in</strong>g 159rotation, drum 237ruler, repetitive defect 222342 Index ENWW
Sscannerassembly, replac<strong>in</strong>g <strong>HP</strong> <strong>LaserJet</strong> <strong>3020</strong>/<strong>3030</strong> 104Bulb Failure error message 204calibration 49CIS error message 203clean<strong>in</strong>g 51cushions, <strong>in</strong>st<strong>all</strong><strong>in</strong>g 167cushions, part numbers 309features 3feed<strong>in</strong>g problems, troubleshoot<strong>in</strong>g 229flatbed lid, remov<strong>in</strong>g <strong>HP</strong> <strong>LaserJet</strong> <strong>3020</strong>/<strong>3030</strong> 134<strong>HP</strong> <strong>LaserJet</strong> <strong>3015</strong> operations 87<strong>HP</strong> <strong>LaserJet</strong> <strong>3015</strong> part numbers 287operations 75operations, <strong>HP</strong> <strong>LaserJet</strong> <strong>3015</strong> 91operations, <strong>HP</strong> <strong>LaserJet</strong> <strong>3020</strong>/<strong>3030</strong> 93part numbers, <strong>HP</strong> <strong>LaserJet</strong> <strong>3020</strong>/<strong>3030</strong> 296remov<strong>in</strong>g <strong>HP</strong> <strong>LaserJet</strong> <strong>3015</strong> 118remov<strong>in</strong>g, <strong>HP</strong> <strong>LaserJet</strong> <strong>3020</strong>/<strong>3030</strong> 145side covers, remov<strong>in</strong>g <strong>HP</strong> <strong>LaserJet</strong> <strong>3015</strong> 110specifications 9, 11support frame part number, <strong>HP</strong> <strong>LaserJet</strong> <strong>3015</strong> 291support frame spr<strong>in</strong>gs, remov<strong>in</strong>g <strong>HP</strong> <strong>LaserJet</strong> <strong>3015</strong>107support frame spr<strong>in</strong>gs, remov<strong>in</strong>g <strong>HP</strong> <strong>LaserJet</strong><strong>3020</strong>/<strong>3030</strong> 136support frame, part number 309support frame, remov<strong>in</strong>g 175top cover, remov<strong>in</strong>g 126scanner capacities and rat<strong>in</strong>gs 9, 11Scanner reserved for PC scan error message 200scann<strong>in</strong>gcontrast, troubleshoot<strong>in</strong>g 218image quality, troubleshoot<strong>in</strong>g 216load<strong>in</strong>g orig<strong>in</strong>als 44marg<strong>in</strong>s 9, 11resolution 9, 11text, troubleshoot<strong>in</strong>g 220troubleshoot<strong>in</strong>g 192Scann<strong>in</strong>g error message 201scann<strong>in</strong>g exposure stage, image formation process83scatter, t<strong>one</strong>r 214schedules, <strong>HP</strong> Technical Tra<strong>in</strong><strong>in</strong>g 282screwdrivers, required 103screwsself-tapp<strong>in</strong>g 103types of 284secondary service menu 262self test, cont<strong>in</strong>uous 262self-tapp<strong>in</strong>g screws 103, 284send codes, fax 248sensorsADF feed<strong>in</strong>g operations, <strong>HP</strong> <strong>LaserJet</strong> <strong>3015</strong> 88ADF, <strong>HP</strong> <strong>LaserJet</strong> <strong>3020</strong>/<strong>3030</strong> 95<strong>HP</strong> <strong>LaserJet</strong> <strong>3015</strong> comp<strong>one</strong>nt locations 274optical system, <strong>HP</strong> <strong>LaserJet</strong> <strong>3015</strong> 91pr<strong>in</strong>ter paper-feed system 84separation padsADF feed<strong>in</strong>g operations, <strong>HP</strong> <strong>LaserJet</strong> <strong>3015</strong> 88ADF, remov<strong>in</strong>g <strong>HP</strong> <strong>LaserJet</strong> <strong>3020</strong>/<strong>3030</strong> 140ADF, replac<strong>in</strong>g <strong>HP</strong> <strong>LaserJet</strong> <strong>3015</strong> 62ADF, replac<strong>in</strong>g <strong>HP</strong> <strong>LaserJet</strong> <strong>3020</strong>/<strong>3030</strong> 66assembly, remov<strong>in</strong>g <strong>HP</strong> <strong>LaserJet</strong> <strong>3015</strong> 116clean<strong>in</strong>g 56<strong>HP</strong> <strong>LaserJet</strong> <strong>3015</strong> comp<strong>one</strong>nt locations 273life expectancies 48operations 84part numbers, <strong>HP</strong> <strong>LaserJet</strong> <strong>3015</strong> 295part numbers, <strong>HP</strong> <strong>LaserJet</strong> <strong>3020</strong>/<strong>3030</strong> 301pr<strong>in</strong>ter, part numbers 311pr<strong>in</strong>ter, replac<strong>in</strong>g 59, 154remov<strong>in</strong>g <strong>HP</strong> <strong>LaserJet</strong> <strong>3015</strong> 111separation stage, image formation process 83sequenceoperations 71troubleshoot<strong>in</strong>g steps 188serial number, locat<strong>in</strong>g 7<strong>Service</strong> menusecondary 262sett<strong>in</strong>gs 36servic<strong>in</strong>g product 103sett<strong>in</strong>gscountry/region 264fax data-store parameters 263NVRAM <strong>in</strong>it 265Sett<strong>in</strong>gs cleared error message 201sheet, ground<strong>in</strong>g 291SHUNT function 99side coverspart numbers 309remov<strong>in</strong>g pr<strong>in</strong>ter 161remov<strong>in</strong>g scanner, <strong>HP</strong> <strong>LaserJet</strong> <strong>3015</strong> 110signals, VIDEO 73sizemarg<strong>in</strong>s, m<strong>in</strong>imum 207product specifications 8scanned images 221space requirements 30skewcopies or scans, troubleshoot<strong>in</strong>g 230pr<strong>in</strong>ted pages, troubleshoot<strong>in</strong>g 213, 217specifications 12smears, t<strong>one</strong>r 210soft reset 265software<strong>in</strong>st<strong>all</strong>ation, troubleshoot<strong>in</strong>g 191order<strong>in</strong>g 282supported 3ENWW Index 343
solenoid (SL001) 84, 86space requirements 30speaker assemblypart number 315remov<strong>in</strong>g 168specificationsADF 9, 11battery 14card stock and heavy media 41copier 9, 11envelopes 40features 2labels 40media 37physical 8pr<strong>in</strong>ter 8, 10scanner 9, 11skew 12space requirements 30specks, t<strong>one</strong>r 208, 214speedADF 3copy 9, 11data transfer 77fax 10, 13modem 10, 13pr<strong>in</strong>t 8, 10pr<strong>in</strong>t<strong>in</strong>g 2processor 75speed dial report 241spotspr<strong>in</strong>ted pages 208, 214scanned images 220spr<strong>in</strong>g, compression<strong>HP</strong> <strong>LaserJet</strong> <strong>3015</strong> 291<strong>HP</strong> <strong>LaserJet</strong> <strong>3020</strong>/<strong>3030</strong> 299stagesimage formation 83, 235operation sequence 71st<strong>all</strong> jams, ADF 95standby power specifications 12star screws 284startup messages 75statementsAustralian EMC 26Declaration of Conformity 24, 25FCC Part 68 requirements 20F<strong>in</strong>land laser 26IC CS-03 requirements 23Korean EMI 26laser safety 25teleph<strong>one</strong> consumer protection act 22static elim<strong>in</strong>ator, operations 83static, precautions 103stationary jams 86STBY (Standby) period 73stepp<strong>in</strong>g motor, part number 311storage environment, specifications 8stored fax pages 99stor<strong>in</strong>g paper 226streaks, vertical black 219stripes, vertical white 215, 218supplieslife expectancies 48order<strong>in</strong>g 282support frame, scannerpart number, <strong>HP</strong> <strong>LaserJet</strong> <strong>3015</strong> 291remov<strong>in</strong>g 175spr<strong>in</strong>gs 107support, technical 282TT.30 protocol trace report, fax 242, 254technical support 282Technical Tra<strong>in</strong><strong>in</strong>g 282teleph<strong>one</strong> consumer protection act 22teleph<strong>one</strong> l<strong>in</strong>esadditional devices, connect<strong>in</strong>g 231DSL, troubleshoot<strong>in</strong>g 231teleph<strong>one</strong>s, connect<strong>in</strong>g extra 231, 232temperaturespecifications 8stor<strong>in</strong>g paper 226troubleshoot<strong>in</strong>g 214testscontrol panel 235drum rotation 237half-self functional check 235high-voltage contacts 238text, troubleshoot<strong>in</strong>gmispr<strong>in</strong>ted 208, 212scanned 220Time/Date Header menu 33tim<strong>in</strong>g diagrams 74TIP 96, 97, 99t<strong>one</strong>rclean<strong>in</strong>g from sk<strong>in</strong> or fabric 55cloth, order<strong>in</strong>g 284image formation operations 83loose, troubleshoot<strong>in</strong>g 211redistribut<strong>in</strong>g 206scattered, troubleshoot<strong>in</strong>g 214smears, troubleshoot<strong>in</strong>g 210specks, troubleshoot<strong>in</strong>g 208waste clean<strong>in</strong>g operations 84t<strong>one</strong>r cartridges. See pr<strong>in</strong>t cartridgestools, required 103top coverpart number, <strong>HP</strong> <strong>LaserJet</strong> <strong>3015</strong> 291pr<strong>in</strong>ter, part number 309remov<strong>in</strong>g 126, 129torsion spr<strong>in</strong>g, remov<strong>in</strong>g <strong>HP</strong> <strong>LaserJet</strong> <strong>3015</strong> 115torx screws 284trace report, fax 242, 254344 Index ENWW
trail<strong>in</strong>g edge detection, ADF 95trail<strong>in</strong>g edge, detection 86Tra<strong>in</strong><strong>in</strong>g, <strong>HP</strong> Technical 282transfer rollerassembly, part number 311clean<strong>in</strong>g around 50operations 83power supply 81remov<strong>in</strong>g 159transfer stage, image formation process 83transparenciesclean<strong>in</strong>g pr<strong>in</strong>t path with 50load<strong>in</strong>g 43specifications 39traysADF <strong>in</strong>put, remov<strong>in</strong>g <strong>HP</strong> <strong>LaserJet</strong> <strong>3020</strong>/<strong>3030</strong> 133ADF <strong>in</strong>put, replac<strong>in</strong>g 62empty, error messages 200feed<strong>in</strong>g problems 227<strong>in</strong>cluded 2load<strong>in</strong>g 43locat<strong>in</strong>g 5media supported 37paper feed system 84part numbers 305, 307remov<strong>in</strong>g 158replac<strong>in</strong>g ma<strong>in</strong> <strong>in</strong>put 60troubleshoot<strong>in</strong>gADF copy<strong>in</strong>g 190ADF feed<strong>in</strong>g problems 229ADF jams 227basic steps 188characters, parti<strong>all</strong>y pr<strong>in</strong>ted 208, 212contrast, copies or scans 218control panel 189, 235copier feed<strong>in</strong>g problems 229copy quality 216copy<strong>in</strong>g 190country/region sett<strong>in</strong>gs 264critical error messages 201curled pages 214, 226dots or streaks <strong>in</strong> scans 220drum rotation 237DSL l<strong>in</strong>es 231error messages, control panel 193event log codes 204fax error-correction mode (ECM) 242fax receive codes 243fax reports 241fax send codes 248fax T.30 protocol trace report 242, 254fax<strong>in</strong>g 190feed<strong>in</strong>g problems 225gray background 209half self-test functional check 235high-voltage contacts 238image formation 235image quality 206jams 223lights, pr<strong>in</strong>ter control panel 188loose t<strong>one</strong>r 211media problems 39multifeeds 227NVRAM <strong>in</strong>it 265power 188pr<strong>in</strong>t<strong>in</strong>g 191, 207repetitive defects 212, 222scanned text 220scanner feed<strong>in</strong>g problems 229scann<strong>in</strong>g 192scann<strong>in</strong>g quality 216secondary service menu 262skewed pr<strong>in</strong>ted pages 213soft reset 265software <strong>in</strong>st<strong>all</strong>ation 191t<strong>one</strong>r scatter 214t<strong>one</strong>r smears 210t<strong>one</strong>r specks 208tools 241vertical black streaks 219vertical l<strong>in</strong>es 209white vertical stripes 215, 218truss head screws 284two-way communications 75, 77Uunplugg<strong>in</strong>g power cord 103USBcable, order<strong>in</strong>g 284port 11specifications 10VV.34enabl<strong>in</strong>g or disabl<strong>in</strong>g 242V.34 fax standard 242vertical black streaks, troubleshoot<strong>in</strong>g 219vertical defects, troubleshoot<strong>in</strong>g 212vertical l<strong>in</strong>es, troubleshoot<strong>in</strong>g 209vertical white stripes, troubleshoot<strong>in</strong>g 215, 218VIDEO signals 73voltageDC power supply 80fax l<strong>in</strong>e current control 99high-voltage power supply 82overvoltage protection 81WWAIT period 71, 73warn<strong>in</strong>g messages 193ENWW Index 345
warrantyextended 17pr<strong>in</strong>t cartridges 16product 15refilled cartridges, impact on 18waste t<strong>one</strong>r receptacle 84wave, troubleshoot<strong>in</strong>g 214, 226websites 282weightADF media 9, 11battery 14media 9, 11product 8white platenclean<strong>in</strong>g 51part number, <strong>HP</strong> <strong>LaserJet</strong> <strong>3015</strong> 295part numbers, <strong>HP</strong> <strong>LaserJet</strong> <strong>3015</strong> 295remov<strong>in</strong>g 131white stripes, troubleshoot<strong>in</strong>g 215, 218W<strong>in</strong>dows operat<strong>in</strong>g systems supported 3wir<strong>in</strong>g diagrams 269wrapp<strong>in</strong>g jams 86wr<strong>in</strong>kled pages, troubleshoot<strong>in</strong>g 226writ<strong>in</strong>g stage, image formation process 83346 Index ENWW