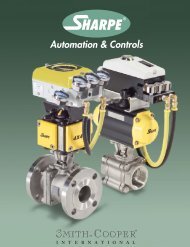
Installation, Operation, and Maintenance Manual ... - Sharpe® Valves
Installation, Operation, and Maintenance Manual ... - Sharpe® Valves
Installation, Operation, and Maintenance Manual ... - Sharpe® Valves

You also want an ePaper? Increase the reach of your titles
YUMPU automatically turns print PDFs into web optimized ePapers that Google loves.
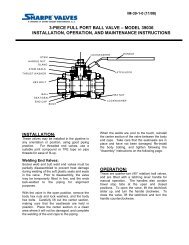
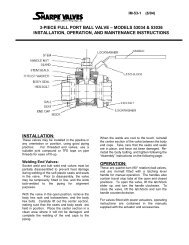
IM-50-1-AAugust 14, 2007Page 2 of 4INSTALLATION:1. Before installing the valves, the pipes must be flushed clean of dirt, burrs <strong>and</strong> weldingresidues, or you will damage the seats <strong>and</strong> ball surface.2. These valves may be installed in any position using good pipe fitting practices. Flangesconform to ASME St<strong>and</strong>ard B16.5, Class 150, 300, or 600.3. Periodically check <strong>and</strong> tighten body joint <strong>and</strong> flange bolting. (See TABLE 1 for torquerequirements.)MANUAL OPERATION:1. The valve is opened <strong>and</strong> closed by turning the h<strong>and</strong>le ¼ turn (90°). Turning the h<strong>and</strong>leclockwise closes the valve (h<strong>and</strong>le perpendicular to pipeline). Turning the h<strong>and</strong>lecounterclockwise opens the valve (h<strong>and</strong>le parallel to pipeline).AUTOMATED OPERATION:1. <strong>Valves</strong> with Actuators should be checked for alignment of the actuator to the valve.Angular or parallel misalignment may result in high operational torque, <strong>and</strong> potentialdamage to the stem seals or stem.STEM SEAL ADJUSTMENT:1. Stem seal leakage may be corrected without disassembly. If leakage is evident in stempacking area, tighten the adjusting nut 1/4 turn. If leakage persists, repeat above.Replacement of stem seals is indicated if the leak is still apparent after 1/2 turn.DISASSEMBLY:-CAUTION-If the Valve has been used to control hazardous media, it must be decontaminated beforedisassembly.---WARNING---Do not attempt to repair or partially disassemble a valve while it is in line <strong>and</strong> under pressure.Isolate the line, de-pressurize, <strong>and</strong> remove valve prior to performing maintenance.1. Remove flange bolts <strong>and</strong> nuts <strong>and</strong> lift valve from line. Care should be taken to avoidscratching or damaging flange facings.2. Remove h<strong>and</strong>le <strong>and</strong> travel stop plate.