
You also want an ePaper? Increase the reach of your titles
YUMPU automatically turns print PDFs into web optimized ePapers that Google loves.
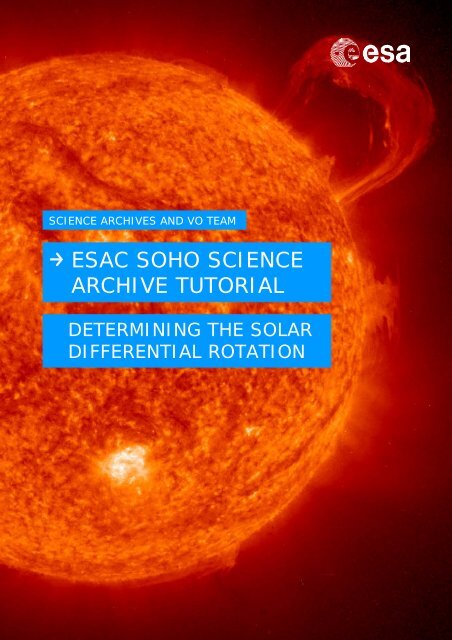
SCIENCE ARCHIVES AND VO TEAM<strong>ESAC</strong> <strong>SOHO</strong> SCIENCEARCHIVE TUTORIALDETERMINING THE SOLARDIFFERENTIAL ROTATION
<strong>Tutorial</strong> created by Luis Sánchez, <strong>ESAC</strong> <strong>SOHO</strong> <strong>Archive</strong> scientist,adapted from the ‘Tracking Sunspots’ <strong>SOHO</strong> classroom exercise:http://soho.esac.esa.ubt/classroom/docs/Spotexerweb.pdfand modified for use with the <strong>SOHO</strong> <strong>Science</strong> <strong>Archive</strong> and Aladinby Deborah Baines and Pedro Osuna.This tutorial can be found online at:http://www.sciops.esa.int/SD/ESAVO/docs/SSA_SolarDiffRotation_<strong>Tutorial</strong>.pdfAcknowledgements would like to be given to the whole <strong>Science</strong><strong>Archive</strong>s Team for the implementation of the <strong>SOHO</strong> archive.http://archives.esac.esa.intWe would also like to thank the developers of the Aladininteractive sky atlas tool at CDS, Strasbourg.CONTACTPedro.Osuna@esa.intDeborah.Baines@esa.int<strong>ESAC</strong> <strong>Science</strong> <strong>Archive</strong>s and Virtual Observatory Team1
Table of contents1 BACKGROUND ................................................................. 31.1 SUNSPOTS .......................................................................................................... 41.2 <strong>SOHO</strong> AND MDI .................................................................................................... 41.3 HISTORICAL DETERMINATION OF DIFFERENTIAL SOLAR ROTATION ............................ 51.4 <strong>SOHO</strong> SCIENCE ARCHIVE ....................................................................................... 62 DETERMINING THE SOLAR DIFFERENTIAL ROTATION ..... 82.1 VERSION FOR YOUNGER STUDENTS ...................................................................... 233 TROUBLESHOOTING TIPS .............................................. 282
3THE SUN,<strong>SOHO</strong> SPACECRAFTANDINSTRUMENTS
1 BACKGROUND1.1 SUNSPOTS• Sunspots are dark, cooler areas on the Sun’s surface that indicate areas ofstrong magnetic activity.• They appear dark only because they are not as hot or bright as the areasurrounding them (4,000 degrees Celsius versus 6,000 degrees Celsius).• Sunspots extend down into the Sun as well as above where loops of magneticfield lines carry charged particles.• They can last from just hours to several months.• Sunspots, which usually appear in groups, can grow to many times the size ofEarth.1.2 <strong>SOHO</strong> AND MDI• <strong>SOHO</strong>, the Solar & Heliospheric Observatory, is a project of internationalcollaboration between the European Space Agency and NASA to study the Sunfrom its deep core to the outer corona and the solar wind.• <strong>SOHO</strong> was designed to answer the following three fundamental scientificquestions about the Sun:4
oooWhat is the structure and dynamics of the solar interior?Why does the solar corona exist and how is it heated to the extremelyhigh temperature of about 1 000 000°C?Where is the solar wind produced and how is it accelerated?• <strong>SOHO</strong> maintains an orbit around the Sun at 1.5 million km (1 million miles)from the Earth. It orbits around the Lagrangian point (L1), and is alwayspointing towards the Sun:http://soho.esac.esa.int/gallery/Movies/orbit/orbit.mov• <strong>SOHO</strong> consists of 12 complementary instruments, developed by 15 countries.• The Michelson Doppler Imager (MDI) is one of the instruments on board <strong>SOHO</strong>.o It measures velocity and magnetic fields in the solar photosphere to learnabout the convection zone which forms the outer layer of the interior ofthe sun and about the magnetic fields which control the structure of thesolar corona.o MDI measures line-of-sight motion (Dopplergrams), magnetic field(magnetograms), and brightness images in full disk at several resolutions(4 arc-second to very low resolution) and a fixed selected region inhigher resolution (1.2 arc-second).• See below for information on <strong>SOHO</strong> and its instruments:http://soho.esac.esa.int/about/docs/<strong>SOHO</strong>_Fact_Sheet.pdfhttp://soho.esac.esa.int/about/about.htmlhttp://sci.esa.int/science-e/www/object/index.cfm?fobjectid=333791.3 HISTORICAL DETERMINATION OF DIFFERENTIALSOLAR ROTATION5• The first telescope was made in Europe in 1608. Galileo, who first performedscientific observations in the early 1613, concluded that the Sun did indeedhave spots. If, as others suggested, these spots are planets passing in front of
the Sun, they’d be the same in the centre as near the edges. He noted changesin size and shape. Other scientists came to similar conclusions.• The first historical determination of differential solar rotation was in 1630 byScheiner, and then again in 1843 by Schwabe. This is an example of howscientific advances can sometimes be lost to tradition, and are re-discoveredmuch later.1.4 <strong>SOHO</strong> SCIENCE ARCHIVE• The <strong>SOHO</strong> <strong>Science</strong> <strong>Archive</strong> is hosted at the European Space Astronomy Centre(<strong>ESAC</strong>), ESA, Madrid, and also at NASA, and contains all the data from the<strong>SOHO</strong> spacecraft.• The <strong>SOHO</strong> <strong>Science</strong> <strong>Archive</strong> is designed, developed, maintained and operated bythe <strong>Science</strong> <strong>Archive</strong>s Team at <strong>ESAC</strong>.• The archive can be accessed by using the <strong>SOHO</strong> <strong>Science</strong> <strong>Archive</strong> tool at <strong>ESAC</strong>:http://soho.esac.esa.int/data/archive/index_ssa.htmlor through a traditional web interface:http://soho.esac.esa.int/data/archive/index_gsfc.html (note that this versionwill not be used in the following tutorial).• Using the SSA it is possible to easily search for data, as well as make timeanimations from images of the Sun.• See also: http://archives.esac.esa.int .6
THE TUTORIALTHE AIMThe aim of this tutorial is to explore<strong>SOHO</strong> images of the sun (downloadedfrom the <strong>SOHO</strong> <strong>Science</strong> <strong>Archive</strong>), watchthe evolution of sunspots, and finally todetermine the differential rotation of theSun at different latitudes.7
2 DETERMINING THE SOLAR DIFFERENTIALROTATIONThis tutorial can be found online at:http://www.sciops.esa.int/SD/ESAVO/docs/SSA_SolarDiffRotation_<strong>Tutorial</strong>.pdfTOOLS USED:The <strong>SOHO</strong> <strong>Science</strong> <strong>Archive</strong>: the <strong>SOHO</strong> <strong>Science</strong> <strong>Archive</strong> (SSA) contains all the datafrom the <strong>SOHO</strong> spacecraft. Using the SSA it is possible to easily search for data, aswell as make time animations from images of the Sun.Aladin: Aladin is a Virtual Observatory interactive sky atlas tool for interactive imageand catalogue visualisation.1. Open the <strong>SOHO</strong> <strong>Science</strong> <strong>Archive</strong>:http://ssa.esac.esa.int/ssa/ssa.jnlpAnd open Aladin:http://aladin.u-strasbg.fr/java/nph-aladin.pl?frame=downloading(either download the version for your computer operating system, or open the WebStart: http://aladin.u-strasbg.fr/java/nph-aladin.pl?frame=get&id=aladin.jnlp )2. Using the <strong>SOHO</strong> <strong>Science</strong> <strong>Archive</strong> (SSA), we are able to download images of the Suntaken by the <strong>SOHO</strong> satellite, and to build movies, with just a few clicks of thebutton!3. Firstly, we are going to take a look the sunspots by building a movie. In the mainmenu of the <strong>SOHO</strong> <strong>Science</strong> <strong>Archive</strong>, select Windows -> Time Animator:4. The Time Animator window now opens. In the Instrument/Filter box select MDIContinuum, change the Resolution to 1024 and change the ‘Max Number of EvenlySpaced Images’ to 300:8
5. In the Date Range fields choose from 01/01/2005 to 01/02/2005:6. Click the 'Search' button7. Once the search is finished, the results are shown below the Time Animator Filtersin the Time Animator Result panel:8. Click on the 'Play Movie'.9. The Soho Time Animator window opens and immediately starts playing the movie,which is actually just a time sequence of MDI Continuum images taken between thedate ranges, 1 st January 2005 and 1 st February 2005.10. This movie can be paused, reset, and played using the icons and bar at the bottomof the window (and also by using the View and Options menus).11. Do you notice how sunspots appear, evolve and then disappear?12. Optional: Try building movies for other instruments by selecting 'All' in theInstrument/Filter field and click select (be patient as this may take some time toload).The instruments available are:o EIT (Extreme Ultraviolet Imaging Telescope): high resolution images of thesolar corona in 4 filters in the ultraviolet (17.1nm, 19.5nm, 28.4nm and30.4nm, which correspond to temperatures of 80,000 K to >2 million K).o LASCO (Large Angle and Spectrometric Coronagraph): visible images of thesolar corona which mask out the sun in the centre of the image. The LASCOC2 field of view is from 2 to 6 solar radii, and LASCO C3 from 3.7 to 32 solarradii.o MDI (Michelson Doppler Imager): visible images (called MDI Continuum) andmagnetic field images (called MDI Magnetogram 96m) of the solarphotosphere.o Proba2/SWAP: Proba2 is actually another ESA satellite. The Proba (ProjectOnBoard Autonomy) satellites are small satellites being used to test newspacecraft technologies. Proba2 is the second of these types of satellites andcontains an extreme ultraviolet imaging telescope called SWAP (Sun Watcherusing ASP detectors and image processing). The SWAP images are highresolution extreme ultraviolet images (at a slightly better resolution that the<strong>SOHO</strong> EIT images) of the solar corona, at 17.5 nm.9
13. CALCULATING THE SOLAR DIFFERENTIAL ROTATION: To calculate the solardifferential rotation we are going to measure a sunspot when it becomes visible inthe sun and then when it has travelled across the sun after a number of days. We'regoing to do this for two sunspots:one close to the solar equator, visible between:09/01/2005 06:24 and 17/01/2005 16:00the other further away from the solar equator, and visible between:27/12/2009 06:24 and 02/01/2010 18:4214. To do this we will be loading some <strong>SOHO</strong> images into Aladin. So, go back to the<strong>SOHO</strong> <strong>Science</strong> <strong>Archive</strong> window and select the Search tab.15. This window is divided into three panels: the Results Display, the Main Query Paneland the Instruments Panel. Keep the Results Panel as it is, with 'Observations'selected, Sort Criteria as 'Begin Date' and 'Ascending':16. In the Main Query Panel open the Begin Date Range and select 09/01/2005. In theInstrument section, scroll down and choose MDI:17. Then click the 'Query' button in the bottom right corner.18. A new window opens showing the results. We are going to download the first MDIContinuum image in the list. Click the green arrow on the right for this observationand open up the overview details:10
19. On the top left of this observation, click on the magnifying glass icon (showobservation details).20. A second panel opens to the right which gives a table of observation details and athumbnail image of the observation at the bottom:If you left click on the image it will pop out into a resizable postcard window.21. Before we can send the image to Aladin we first need to register or login to the<strong>SOHO</strong> <strong>Science</strong> <strong>Archive</strong>. Go to 'Actions' in the main menu and either select 'Login', ifyou already have a username and password, otherwise select 'Register/Edit UserDetails'.22. The Registration window opens in the <strong>SOHO</strong> <strong>Science</strong> <strong>Archive</strong>. Fill in your details(boxes highlighted in red are compulsory), and click Register.23. A second window will appear to say you have successfully registered.11
24. Click the 'OK' button and go back to the Observation details on the right-handpanel.25. Right click on the thumbnail image of the sun and select 'Send To -> Aladin':26. Go to the Aladin tool and the image of the Sun should be loaded.Did this work? If yes, go straight to step 27. If no, try the troubleshooting tips insection 2.2, at the end of the tutorial.27. What two things do you notice about the image displayed in Aladin?28. The image is very dark isn't it? To change this, click on the pixel icon, located onthe panel to the right of the main Aladin display of the Sun.29. A new window opens called Pixel mapping. Click on the 'Reverse' button (towardsthe centre).30. Your image of the sun is reversed, so the sun now appears a light gray. To make itlook more like the sun, select the 'Color map' option and change from 'gray' to 'BB':31. Your sun should now look a nice yellow colour with a black background.32. What else do you notice about the image (compare it to the thumbnail image in the<strong>SOHO</strong> <strong>Science</strong> <strong>Archive</strong>)?12
33. Do you notice the position of the sun spot in both images?34. The image in Aladin has been rotated 180 degrees!35. Select from the main menu 'Image -> Symmetry' and click Top/Bottom once andRight/Left once. Your image of the sun should now be the same as in the <strong>SOHO</strong><strong>Science</strong> <strong>Archive</strong>:36. Go back to the <strong>SOHO</strong> <strong>Science</strong> <strong>Archive</strong> and send the MDI continuum image taken on17/01/2005 at 16:00 to Aladin, by doing the following: Select the Search windowby clicking the 'Search' tab in the main SSA window.37. Change the Date Range to Begin on 17/01/2005 and end on 18/01/2005.38. Make sure have selected just the MDI Instrument and then click the 'Query' button.39. Another window opens with the results. Go to the second page, or change the PageSize to '25'.40. Click on the magnifying glass icon (show observation details) for the last MDIContinuum observation (taken at 15:59:32 on 17/01/2005).13
41. The observation details for this observation, and the thumbnail image is shown inthe right-hand panel.42. Again, right click on the thumbnail image and select 'Send To -> Aladin'.43. Go back to Aladin and your second image should be loaded. This will appear as asecond ‘plane’ in the panel on the right. To change from one image to the other, tickthe box to the left of the plane:44. Change again the display by selecting the pixel icon in Aladin.45. A new window opens called Pixel mapping. Click on the 'Reverse' button, towardsthe centre of the Pixel mapping window and change the 'Color map' from 'gray' to'BB'.46. Select from the main menu 'Image -> Symmetry' and click Top/Bottom once andRight/Left once. Your image of the sun should now be the same as in the <strong>SOHO</strong><strong>Science</strong> <strong>Archive</strong>.47. To calculate the differential rotation, firstly let’s determine the position of thesunspot for the first and last image of the series. Take a look at the movie youmade with the SSA and make a note what is the same sunspot in each image (seebelow, marked with red circles):48. In Aladin, locate the 'Frame' box (located in the top right corner) and change itfrom 'ICRS' to 'XY Fits':14
49. Now if you move your mouse across the image of the sun, you'll see thecoordinates changing in the Location field, at the top of the window:50. These are the x and y pixel coordinates of the image.51. Make a note of the x and y pixel coordinates for the centre of the sunspot in thefirst and last images:09/01/2005 06:24 Sunspot (x, y) =17/01/2005 16:00 Sunspot (x, y) =52. It may help to zoom into the image. To do this select the 'zoom' icon and click onthe sunspot:53. Or change the zoom in the zoom scroll bar (to the right of the main Aladin window,below the planes) and then pan to the sunspot by clicking on the 'pan' icon, andscrolling with your mouse on the image:54. Or zoom in with the central wheel of your mouse.55. Next, find the centre coordinates for the Sun (in pixels) and the Radius of the Sun(in pixels). These can all be found within the information in the image. Click on theproperties icon in Aladin (located just below the pixel icon):56. A properties window now opens. Select the 'Get original header' button.57. Another window opens called FITS header. FITS is the type of format the images are15
saved in, these formats also contain header information, which is all theobservational information on the image.58. The value giving the x centre coordinate for the Sun is called CENTER_X. The valuefor the Y centre coordinate is called CENTER_Y and the value for the radius of theSun is called R_SUN. All of these values are given in pixels.59. Make a note of these and add them to the Sunspot values you found earlier:09/01/2005 06:24 Sunspot (x, y) =Centre (CENTER_X, CENTER_Y) =Radius (R_SUN) =17/01/2005 16:00 Sunspot (x, y) =Centre (CENTER_X, CENTER_Y) =Radius (R_SUN) =60. We are going to use trigonometry to calculate the longitude and latitude of thesunspots.61. Calculate the latitude and longitude for the sunspots in each image, using thefollowing formula:16
Rearrange the formula to find the latitude:And the longitude:− ⎛Latitude = sin 1 ⎜⎝− ⎛Longitude = sin 1 ⎜⎝( y − CENTER _ Y ) ⎞ ⎟R _ Sun( x − CENTER _ X ) ⎞ ⎟R _ Sun⎠⎠Note: The formulae are approximated and more or less valid for small latitudes.However, we are actually calculating the longitude and latitude of points on asphere (see images below). It would therefore be better to use sphericaltrigonometry, which, to calculate the longitude, approximates to: multiply x withthe cosine of the latitude to find a new X, and then compute the longitude applyingthe formula above, substituting x for X.17
62. Record your values with the other values:09/01/2005 06:24 Sunspot (x, y) =Centre (CENTER_X, CENTER_Y) =Radius (R_SUN) =Latitude =Longitude =17/01/2005 16:00 Sunspot (x, y) =Centre (CENTER_X, CENTER_Y) =Radius (R_SUN) =Latitude =Longitude =63. Now calculate the difference in the longitude, remember that 0 degrees is in thecentre of the image, negative to the left and positive to the right. How manydegrees in longitude did the sunspot travel between the first and last images?ANSWER ~112.2 degrees.64. Calculate the difference in time between the first image and the last image (indays).ANSWER ~8.4 days.65. Calculate the Rotation in degrees per day, where Rotation = Difference in longitude/Difference in days.ANSWER ~13.36 degrees/day.66. And finally, calculate how long it seems to take the Sun to make a full rotation of360 degrees: Solar Rotation = 360 degrees/ Rotation.ANSWER ~27.0 days for one rotation.18
67. Now we are going to repeat the same steps for another sunspot, this time at ahigher latitude, and between the dates: 27/12/2009 06:24 and 02/01/201018:42.68. Firstly, we'll take a look at the sunspots by building another movie. In the mainmenu of the <strong>SOHO</strong> <strong>Science</strong> <strong>Archive</strong>, select Windows -> Time Animator.69. The Time Animator window now opens. In the Instrument/Filter box select MDIContinuum, change the Resolution to 1024 and change the Max Number of EvenlySpaced Images to 300:70. In the Date Range fields choose from 27/12/2009 to 02/01/2010.71. Click the 'Search' button72. Once the movie has been built click on the 'Play Movie'. Choose one of the sunspotsand then download the images by doing the following:73. Go back to the <strong>SOHO</strong> <strong>Science</strong> <strong>Archive</strong> window and select the Search tab.74. In the Main Query Panel open the Begin Date Range and select 27/12/2009 and inthe End Date Range select 03/01/2010. In the Instrument section, scroll down andchoose MDI.75. Then click the 'Query' button in the bottom right corner.76. We are going to download the first MDI Continuum image in the list and the lastMDI Continuum image taken on the 02/01/2010:77. On the left of each observation click on the magnifying glass icon (show observationdetails):78. Right click on each thumbnail image and send both of them to Aladin.79. In Aladin, change the display of each image by selecting the pixel icon:80. Click on the 'Reverse' button, towards the centre of the Pixel mapping window andchange the 'Color map' from 'gray' to 'BB'.19
81. Select from the main menu 'Image -> Symmetry' and click Top/Bottom once andRight/Left once. Your image of the sun should now be the same as in the <strong>SOHO</strong><strong>Science</strong> <strong>Archive</strong>: To calculate the differential rotation, first determine the position ofthe sunspot for the first and last image of this particular series. Take a look at themovie you made with the SSA and make a note of where the same sunspot appearsin each image (see below, marked with red circles):82. Make a note of the x and y pixel coordinates for the centre of the sunspot in thefirst and last images:27/12/2009 06:24 Sunspot (x, y) =02/01/2010 18:42 Sunspot (x, y) =83. Again, find the centre coordinates for the Sun (in pixels) and the Radius of the Sun(in pixels) by clicking on the properties icon.84. A properties window now opens. Select the 'Get original header' button.85. Another window opens called FITS header. The value giving the x centre coordinatefor the Sun is called CENTER_X. The value for the Y centre coordinate is calledCENTER_Y and the value for the radius of the Sun is called R_SUN. All of thesevalues are given in pixels.86. Make a note of these and add them to the Sunspot values you found earlier:27/12/2009 06:24 Sunspot (x, y) =Centre (CENTER_X, CENTER_Y) =Radius (R_SUN) =02/01/2010 18:42 Sunspot (x, y) =Centre (CENTER_X, CENTER_Y) =Radius (R_SUN) =20
87. Calculate the latitude and longitude for the sunspots in each image, using thefollowing trigonometric formula:Latitude =−⎛⎜⎝( y − CENTER _ Y )R _ Sun⎞⎟⎠sin 1 ( ) ⎟− ⎛Longitude = sin 1 ⎜⎝x − CENTER _ XR _ Sun⎞⎠88. Record your values with the other values:27/12/2009 06:24 Sunspot (x, y) =Centre (CENTER_X, CENTER_Y) =Radius (R_SUN) =Latitude =Longitude =02/01/2010 18:42 Sunspot (x, y) =Centre (CENTER_X, CENTER_Y) =Radius (R_SUN) =Latitude =Longitude =89. Now calculate the difference in the longitude, remember that 0 degrees is in thecentre of the image, negative to the left and positive to the right. How manydegrees in longitude did the sunspot travel between the first and last images?ANSWER ~73.5 degrees.90. Calculate the difference in time between the first image and the last image (indays).ANSWER ~6.51 days.91. Calculate the Rotation in degrees per day, where Rotation = Difference inlongitude/Difference in days.ANSWER ~11.3 degrees/day.92. And finally, calculate how long it seems to take the Sun to make a full rotation of360 degrees: Solar Rotation = 360 degrees/ Rotation.ANSWER ~31.9 days for one rotation.93. SYNODIC ROTATION: Remember, the Earth is moving around the Sun in thesame direction at about 1 degree per day (almost 365 days to circle the Sun in ayear). Therefore, the rotation we have calculated will be larger than the actual solarrotation (we can assume that the <strong>SOHO</strong> satellite is at approximately the samedistance from the Sun as the Earth). This is called synodic rotation.21
94. RESULTS:2005 dataset: Period is 26.9 days (synodic) at 5 degrees latitude.2009 dataset: Period is 31.8 days (synodic) at 25 degrees latitude.95. IN CONCLUSION: The surface of the Sun (called the solar photosphere) rotatesfaster close to the equator than at higher latitudes.The synodic rotation of the sun at its equator is approximately 27 days, and nearthe poles approximately 35 days.96. Optional: Calculate the sidereal differential rotation speeds by adding one degreeper day to the apparent movement of the sunspots.22
2.1 VERSION FOR YOUNGER STUDENTSFollow the tutorial up to and including point 47, then instead of calculating the longitudeand latitude using trigonometry, use the following images. These are the same as thoseloaded into Aladin with an additional grid placed on top (the sunspots to use are markedwith a red arrow):2005/01/09 06:2423
2005/01/17 16:00Use the grids to estimate the longitude and latitude of each sunspot, then carry onfollowing the above tutorial from point 63.Once you reach point 82, use the following two images to estimate the longitude andlatitude of the sunspots:24
252009/12/27 06:24
2010/01/02 18:42Then carry on following the tutorial from point 89 to the end.This tutorial will be similar to the 'Tracking Sunspots' tutorial from the <strong>SOHO</strong> classroomexercises:http://soho.esac.esa.int/classroom/docs/Spotexerweb.pdf26
27TROUBLESHOOTINGTIPS
3 TROUBLESHOOTING TIPSHere we list some of the most common factors that may affect the proper functioning ofany of the tools used in this tutorial:Problems opening the <strong>SOHO</strong> <strong>Science</strong> <strong>Archive</strong> and/or Aladin?Both the <strong>SOHO</strong> <strong>Science</strong> <strong>Archive</strong> and Aladin need a Java virtual machine installed on yourcomputer before they can work. Sometimes this is available in your computer by default,other times you need to install it and keep it up to date yourself. Try installing the latestversion from this website:http://java.com/en/download/index.jspProblems sending an image from the <strong>SOHO</strong> <strong>Science</strong> <strong>Archive</strong> to Aladin?Try the following:• Go to Tools in the main <strong>Archive</strong> menu -> Interoperability -> Register with Hub.Click ‘Yes’ if you are told ‘There is no Hub running. Would you like to start one?’.• Go to Tools in the main <strong>Archive</strong> menu -> Interoperability -> Interoperability Status.This opens the Interoperability Monitor window. In the left section, under Clients,you should see a Hub and SSA. Do you also see Aladin? If you do, try sending the<strong>SOHO</strong> image again by right clicking on the thumbnail image of the sun andselecting 'Send To -> Aladin'. If you do not see Aladin in the Clients list, try thefollowing in the Aladin tool:• Go to Interop in the main Aladin menu. If the first two options are ‘Connect withPLASTIC’ and ‘Disconnect from PLASTIC’, close the Aladin tool and reopen it.• Repeat the above, go to the Interop menu in Aladin. It should now say ‘Connectwith SAMP’ and ‘Disconnect from SAMP’. Select the ‘Connect with SAMP’ option. Youshould now see Aladin in the SSA Interoperability Monitor window. You should alsosee this icon in the bottom right corner of Aladin:Try sending the <strong>SOHO</strong> image again from the SSA by right clicking on the thumbnailimage of the sun and selecting 'Send To -> Aladin'.For more troubleshooting tips see:http://soho.esac.esa.int/data/archive/ssa_troubleshooting.html28
ContactPedro.Osuna@esa.intDeborah.Baines@esa.int<strong>ESAC</strong> <strong>Science</strong> <strong>Archive</strong>s and VO Team<strong>SOHO</strong> <strong>Archive</strong> Scientist:Luis.Sanchez@esa.intEUROPEAN SPACE AGENCYAGENCE SPATIALE EUROPÉENNE<strong>ESAC</strong> TUTORIAL29