Hydrohose Automatic Rewind Hose Reel User Manual - ActiveForever
Hydrohose Automatic Rewind Hose Reel User Manual - ActiveForever
Hydrohose Automatic Rewind Hose Reel User Manual - ActiveForever
Create successful ePaper yourself
Turn your PDF publications into a flip-book with our unique Google optimized e-Paper software.
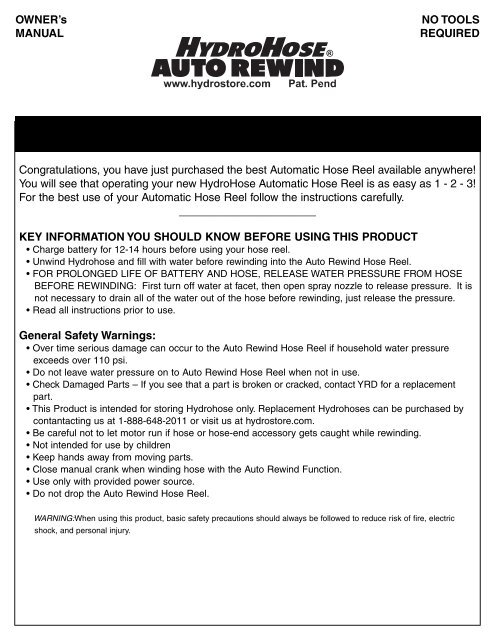
OWNER’sMANUALNO TOOLSREQUIREDCongratulations, you have just purchased the best <strong>Automatic</strong> <strong>Hose</strong> <strong>Reel</strong> available anywhere!You will see that operating your new Hydro<strong>Hose</strong> <strong>Automatic</strong> <strong>Hose</strong> <strong>Reel</strong> is as easy as 1 - 2 - 3!For the best use of your <strong>Automatic</strong> <strong>Hose</strong> <strong>Reel</strong> follow the instructions carefully.______________________KEY INFORMATION YOU SHOULD KNOW BEFORE USING THIS PRODUCT• Charge battery for 12-14 hours before using your hose reel.• Unwind <strong>Hydrohose</strong> and fill with water before rewinding into the Auto <strong>Rewind</strong> <strong>Hose</strong> <strong>Reel</strong>.• FOR PROLONGED LIFE OF BATTERY AND HOSE, RELEASE WATER PRESSURE FROM HOSEBEFORE REWINDING: First turn off water at facet, then open spray nozzle to release pressure. It isnot necessary to drain all of the water out of the hose before rewinding, just release the pressure.• Read all instructions prior to use.General Safety Warnings:• Over time serious damage can occur to the Auto <strong>Rewind</strong> <strong>Hose</strong> <strong>Reel</strong> if household water pressureexceeds over 110 psi.• Do not leave water pressure on to Auto <strong>Rewind</strong> <strong>Hose</strong> <strong>Reel</strong> when not in use.• Check Damaged Parts – If you see that a part is broken or cracked, contact YRD for a replacementpart.• This Product is intended for storing <strong>Hydrohose</strong> only. Replacement <strong>Hydrohose</strong>s can be purchased bycontantacting us at 1-888-648-2011 or visit us at hydrostore.com.• Be careful not to let motor run if hose or hose-end accessory gets caught while rewinding.• Not intended for use by children• Keep hands away from moving parts.• Close manual crank when winding hose with the Auto <strong>Rewind</strong> Function.• Use only with provided power source.• Do not drop the Auto <strong>Rewind</strong> <strong>Hose</strong> <strong>Reel</strong>.WARNING:When using this product, basic safety precautions should always be followed to reduce risk of fire, electricshock, and personal injury.
Step GETTING STARTED:• You must charge battery prior to first use.• Remove battery from battery compartment by slidingcompartment door in direction of arrow.(Fig. 1)• Open accessory compartment door andremove battery charger.• Lift to open, black protective cover on batterycharging input, located on top of battery.(Fig. 2)CHARGER BATTERY• Plug battery charger cord into battery input.(Fig. 2)(Fig. 1) • Plug battery charger into standard 120 Volt, 60Hzhousehold outlet. Charging will begin immediately.(Fig. 3)• Charge battery for 12-14 hours. Battery should be charged indoors with charger unitprovided.• When you begin charging the battery, the charge indicator light, located on top of thebattery will illuminate red. When the battery charge is complete the light will turn off. Ifthe light turns off before 12-14 hours, it is ok to proceed forward, the charge iscomplete. If the red light does not turn off after 12-14 hours the(Fig. 2)charge is considered complete and you may proceed forward (the charge indicator lightmay not be functioning properly. DO NOT OVER CHARGE.• When charging is complete disconnect charger from battery. You may store the batterycharger inside the accessory compartment, located under the Auto <strong>Rewind</strong> <strong>Hose</strong> <strong>Reel</strong>.• Reach into the battery compartment and carefully pull out the red and black wireswith the white connector (power cord). Attach the Auto<strong>Rewind</strong> <strong>Hose</strong> <strong>Reel</strong> power cord to the correspondingconnector on the battery. The connector will only attach in(Fig. 3)one direction.(Fig. 4)• Replace the battery into the battery compartment by pushing the battery up intothe compartment with the wires going in first and the bottom of the batteryfacing the bottom of the Auto <strong>Rewind</strong> <strong>Hose</strong> <strong>Reel</strong>. Replace battery compartmentdoor.(Fig. 4)Step BATTERY(Fig. 6)HYDROHOSE HOOKUP:• Open Accessory compartment door and remove 4ftextension hose.(Fig. 5)• IMPORTANT: Screw male end of extension hoseconnector to the Auto <strong>Rewind</strong> <strong>Hose</strong> <strong>Reel</strong> water inlet first.(Fig. 5)Hand tighten do not over tighten. Then straighten anytwists out of the extension hose.(Fig. 6)• Attach female end of extension hose to your water source. Hand tighten do notover tighten. This end of the hose is a swivel connector, you can straighten anyremaining twisting of the extension hose. DO NOT APPLY WATER PRESSURE YET.(Fig. 7)
(Fig. 7)• Slide open hose access door on front of Auto <strong>Rewind</strong> <strong>Hose</strong> <strong>Reel</strong> andremove your packaged <strong>Hydrohose</strong> from the inside of the Auto <strong>Rewind</strong> <strong>Hose</strong><strong>Reel</strong>. Your <strong>Hydrohose</strong> is already connected tothe Auto <strong>Rewind</strong> <strong>Hose</strong> <strong>Reel</strong>.(Fig. 8)(Fig. 9)(Fig. 8)<strong>Hydrohose</strong>, unwind <strong>Hydrohose</strong> out straight,turn on your water source, and fill with waterbefore rewinding into Auto <strong>Rewind</strong> <strong>Hose</strong><strong>Reel</strong>. This only needs to be done for first use.After this <strong>Hydrohose</strong> can be wound in the reelwith or without water at any length. (Fig. 9)Step IMPORTANT: For first use of yourOPERATING YOUR AUTO REWIND HOSE REEL:• Operating your Auto <strong>Rewind</strong> <strong>Hose</strong> <strong>Reel</strong>.• To <strong>Rewind</strong> your <strong>Hydrohose</strong> push control lever located onPUSH BUTTONside of gear box to the “<strong>Rewind</strong>” position.(Fig. 10)• Push the black button down on front ofhandle and your Auto <strong>Rewind</strong> <strong>Hose</strong> <strong>Reel</strong> willbegin rewinding your <strong>Hydrohose</strong>. Release(Fig. 12)button when the desired amount of hose hasCONTROL LEVERbeen rewound.(Fig. 11)• To unwind your <strong>Hydrohose</strong>, lift the control lever located on side of gearbox to the “Unwind position”. This will disengage the gear box making iteasier to pull the <strong>Hydrohose</strong> out of the reel.(Fig. 10)• <strong>Hydrohose</strong> may be used at any length with or without water pressure applied.• For low battery situations: Your Auto <strong>Rewind</strong> <strong>Hose</strong> <strong>Reel</strong> isequipped with a manual crank. If your battery is too low torewind the hose, recharge it at once. See charging instructions.(Fig. 10)Lift the control lever, located next to gear box, to the unwindposition to disengage the gear box. Then flip out crank handleon manual crank and wind hose in manually. Be sure to push(Fig. 11) in crank handle before using battery powered rewind.(Fig. 12)• Optional ground stakes are located inside the accessory compartment. Insert stakes thru the two holeslocated at bottom of reel and press into soft ground for extra support.• FOR PROLONGED LIFE OF BATTERY AND HOSE, RELEASE WATER PRESSURE FROM HOSE BEFORE REWINDING: First turnoff water at facet, then open spray nozzle to release pressure. It is not necessary to drain all of the waterout of the hose before rewinding, just release the pressure..
Circuit Breaker Feature:Your Auto <strong>Rewind</strong> <strong>Hose</strong> <strong>Reel</strong> is protected from overloading on the motor by a circuit breaker. If theloading on the unit causes to much current to draw on the motor, a circuit breaker will trip to protectthe motor from damage.Causes for overloading on the motor?• <strong>Hose</strong> caught in landscaping while rewinding.• Prolonged use.• Water pressure exceeds 110 psi.If the circuit breaker trips during use, the unit will shut off for approximately 30 seconds. After this shortwaiting period, the Auto <strong>Rewind</strong> <strong>Hose</strong> <strong>Reel</strong> will reset itself and you may begin normal use.Trouble Shooting:Trouble: If battery does not charge.• When charger is plugged into the wall, the red light will indicate that it is charging. If your light doesnot come on, your battery is not charging. Adjust the plugs to be sure it is securely inserted. If nothinghappens, contact YRD.• Check power to outlet• Check connection from battery charger to battery. It should have a snug fit.Trouble: If motor runs but hose does not rewind• Check to make sure the control lever located next to the gear box is positioned on the “<strong>Rewind</strong>”position.Trouble: If hose does not unwind easily.• Check to make sure the control lever located next to the gear box is positioned on the “Unwind”position.• Check to make sure hose is not tangled inside the reel.• Turn off water pressure and open nozzle on end of hose and pull hose.Trouble: If hose starts to rewind and then stops before completely rewinding into reel.• Check to make sure the hose is not tangled inside the reel.• Check to make sure the hose is not tangled on an obstacle preventing it from being rewound into thereel.• Wait 30 seconds then attempt to rewind. The Auto <strong>Rewind</strong> <strong>Hose</strong> <strong>Reel</strong> is protected from overload onthe motor with a circuit breaker feature. Should the hose have too much resistance rewinding thecircuit breaker will trip to protect the motor. It will take approximately 30 seconds to reset.• Turn off water pressure and open the spray nozzle to release pressure from the hose, then attempt torewind the hose.Trouble: If hose leaks.• Check to make sure the connection inside the reel is tight.• Disconnect hose from inside of reel and re-attach to hose reel. Be careful not to cross thread theconnector.
1 Year Limited WarrantyYeiser Research and Development LLC (YRD), 1957 Friendship Drive, Suite A, El Cajon Ca. 92020 (Manufacturer) warrants to theoriginal purchaser only that the enclosed product is free from material and workmanship defects under normal household use forone (1) year from date of purchase. Defective product or part must be returned, freight prepaid, to the manufacturer at the aboveaddress (Attention: Parts Department) along with proof of purchase. Upon receipt of the aforesaid, the defective product or part willbe repaired or replaced at the option of the Manufacturer without charge to the original purchaser and returned to the customerfreight collect.This limited warranty does not apply to damage resulting from accident, neglect, misuse, commercial use, alteration, operation notin accordance with instruction or repairs made or attempted by unauthorized persons.This limited warranty applies only to the product enclosed and does not apply to the battery and battery charger.THE MANUFACTURER’S LIABILITY HEREUNDER IS LIMITED SOLELY TO THE REPAIR OR REPLACEMENT OF THEDEFECTIVE PRODUCT OR PART AND THE MANUFACTURER SHALL IN NO EVENT BE LIABLE FOR ANY INCIDENTAL ORCONSEQUENTIAL DAMAGES WHICH MAY RESULT FROM ANY DEFECT IN MATERIAL OR WORKMANSHIP OR FROM THEBREACH OF ANY EXPRESS OR IMPLIED WARRANTY.Some states do not allow the exclusion or limitation of incidental or consequential damages, or a limitation of how long an impliedwarranty lasts, so the above limitations may not apply to you. This warranty gives you specific legal rights, and you may have otherrights which may vary from state to state.


