


You also want an ePaper? Increase the reach of your titles
YUMPU automatically turns print PDFs into web optimized ePapers that Google loves.
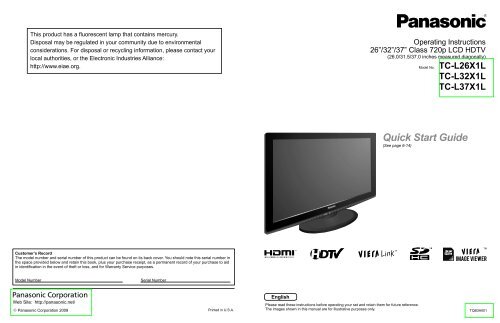
This product has a fluorescent lamp that contains mercury.Disposal may be regulated in your community due to environmentalconsiderations. For disposal or recycling information, please contact yourlocal authorities, or the Electronic Industries Alliance:http://www.eiae.org.Operating Instructions26”/32”/37” Class 720p LCD HDTV(26.0/31.5/37.0 inches measured diagonally)Model No.TC-L26X1LTC-L32X1LTC-L37X1L<strong>Quick</strong> <strong>Start</strong> <strong>Guide</strong>(See page 6-14)Customer’s RecordThe model number and serial number of this product can be found on its back cover. You should note this serial number inthe space provided below and retain this book, plus your purchase receipt, as a permanent record of your purchase to aidin identification in the event of theft or loss, and for Warranty Service purposes.TMModel NumberSerial NumberWeb Site: http://panasonic.net/© <strong>Panasonic</strong> Corporation 2009 Printed in U.S.A.EnglishPlease read these instructions before operating your set and retain them for future reference.The images shown in this manual are for illustrative purposes only.TQB3A001
Turn your own living room into a movie theater!Experience an amazing level of multimedia excitementEnjoy rich multimediaContentsPlease read before using the unitSafety Precautions ······································· 4SD memory cardCamcorder<strong>Quick</strong> <strong>Start</strong> <strong>Guide</strong>Accessories/Optional Accessory ····· 6Basic Connection ····························· 8Identifying Controls ························ 12First Time Setup····························· 13<strong>Quick</strong> <strong>Start</strong><strong>Guide</strong>HDMI, the HDMI logo and High-Definition Multimedia Interface aretrademarks or registered trademarks ofHDMI Licensing LLC.VIERA Link is a trademark of<strong>Panasonic</strong> Corporation.SDHC Logo is a trademark.AmplifierHome theatersystemVCRDVD recorder/Blu-ray DiscrecorderPersonalcomputerSet Top BoxDVD player/Blu-ray Disc playerThis product qualifies for ENERGY STARin the “Home” setting and this is the settingin which energy savings will be achieved.Any modifications to the “Home” setting orother factory default settings could result ingreater energy consumption beyond levelsthat meet ENERGY STAR qualifications.Enjoy your TV!Basic FeaturesWatching TV ··············································· 15Using VIERA TOOLS ································· 17Viewing from SD Card ······························· 18Watching Videos and DVDs ······················· 20Displaying PC Screen on TV ····················· 22Playing an iPod on TV ······························· 23Advanced FeaturesHow to Use Menu Functions(picture, sound quality, etc.) ······················· 26VIERA Link TM “HDAVI Control TM ” ················ 30Lock ··························································· 36Editing and Setting Channels····················· 38Closed Caption ·········································· 40Input Labels ··············································· 41Using Timer ················································ 42Recommended AV Connections ················ 43FAQs, etc.Ratings List for Lock ·································· 44Technical Information ································· 45Care and Cleaning ····································· 49FAQ ···························································· 50Specifications ············································· 52Viewing Advanced FAQs, etc.HDAVI Control is a trademark of<strong>Panasonic</strong> Corporation.Manufactured under license from DolbyLaboratories.DOLBY and the double-D symbol aretrademarks of Dolby Laboratories.iPod is a trademark of Apple Inc.,registered in the U.S. and other countries.2 3
Safety PrecautionsCAUTIONRISK OF ELECTRIC SHOCKDO NOT OPENWARNING: To reduce the risk of electric shock, do not remove cover or back.No user-serviceable parts inside. Refer servicing to qualified service personnel.Note to CATV System InstallerThis reminder is provided to direct the CATV system installer’s attention to Article 820-40 of the NEC that provides guidelines forproper grounding and, in particular, specifies that the cable ground shall be connected to the grounding system of the building, asclose to the point of cable entry as practical.Secure VentilationSlots and openings in the cabinet and the back or bottom are provided for ventilation, and to ensure reliable operation of the LCDTV and to protect it from overheating. These openings must not be blocked or covered. There should be at least 10 cm of spacefrom these openings. The openings should never be blocked by placing the LCD TV on a bed, sofa, rug or other similar surface.This LCD TV should not be placed in a built-in installation such as a bookcase unless proper ventilation is provided.Important Safety Instructions1) Read these instructions.2) Keep these instructions.3) Heed all warnings.4) Follow all instructions.5) Do not use this apparatus near water.6) Clean only with dry cloth.7) Do not block any ventilation openings. Install in accordance with the manufacturer’s instructions.8) Do not install near any heat sources such as radiators, heat registers, stoves or other apparatus (including amplifiers) thatproduce heat.9) Do not defeat the safety purpose of the polarized or grounding-type plug. A polarized plug has two blades with one wider thanthe other. A grounding type plug has two blades and a third grounding prong. The wide blade or the third prong are provided foryour safety. If the provided plug does not fit into your outlet, consult an electrician for replacement of the obsolete outlet.10) Protect the power cord from being walked on or pinched particularly at plugs, convenience receptacles,and the point where they exit from the apparatus.11) Only use attachments / accessories specified by the manufacturer.12) Use only with the cart, stand, tripod, bracket or table specified by the manufacturer, or sold with theapparatus. When a cart is used, use caution when moving the cart / apparatus combination to avoid injuryfrom tip-over.13) Unplug this apparatus during lightning storms or when unused for long periods of time.14) Refer all servicing to qualified service personnel. Servicing is required when the apparatus has been damaged in any way,such as power-supply cord or plug is damaged, liquid has been spilled or objects have fallen into the apparatus, the apparatushas been exposed to rain or moisture, does not operate normally, or has been dropped.15) Operate only from the type of power source indicated on the marking label. If you are not sure of the type of power supplied toyour home consult your television dealer or local power company.16) Follow all warnings and instructions marked on the LCD TV.17) Never push objects of any kind into this LCD TV through cabinetslots as they may touch dangerous voltage points or short out partsthat could result in a fire or electric shock. Never spill liquid of anykind on the LCD TV.18) If an outside antenna is connected to the tele vi sion equipment,be sure the antenna system is grounded so as to provide someprotection against voltage surges and built up static charg es.In the U.S. Section 810-21 of the National Electrical Codeprovides information with respect to proper grounding of the mastand supporting structure, grounding of the lead-in wire to anantenna discharge unit, size of grounding conductors, location ofantenna discharge unit, connection to grounding electrodes, andre quire ments for the grounding electrode.EXAMPLE OF ANTENNAGROUNDING AS PER(NEC) NATIONALELECTRICALCODEGROUND CLAMPELECTRICSERVICEEQUIPMENTThe lightning flash witharrowhead within a triangle isintended to tell the user thatparts inside the product are arisk of electric shock to persons.The exclamation point withina triangle is intended totell the user that importantoperating and servicinginstructions are in thepapers with the appliance.ANTENNALEAD-IN WIREANTENNADISCHARGE UNIT(NEC SECTION 810-20)GROUNDINGCONDUCTORS(NEC SECTION 810-21)GROUND CLAMPSPOWER SERVICE GROUNDINGELECTRODE SYSTEM(NEC ART 250, PART H)19) An outside antenna system should not be lo cat ed in the vicinity of overhead power lines, other electric light, power circuits, orwhere it can fall into such power lines or circuits. When installing an outside antenna system, extreme care should be taken tokeep from touching such power lines or circuits as contact with them might be fatal.20) Unplug this LCD TV from the wall outlet and refer servicing to qualified service personnel under the following conditions:a. When the power cord or plug is damaged or frayed.b. If liquid has been spilled into the LCD TV.c. If the LCD TV has been exposed to rain or water.d. If the LCD TV does not operate normally by following the operating instructions.Adjust only those controls that are covered by the operating instructions as improper adjustment of othercontrols may result in damage and will often require extensive work by a qualified technician to restore the LCDTV to normal operation.e. If the LCD TV has been dropped or the cabinet has been damaged.f. When the LCD TV exhibits a distinct change in performance - this indicates a need for service.21) When replacement parts are required, be sure the service technician uses replacement parts specified by the manufacturer thathave the same characteristics as the original parts. Unauthorized substitutions may result in fire, electric shock, or other hazards.22) WARNING: TO REDUCE THE RISK OF FIRE OR ELECTRIC SHOCK, DO NOT EXPOSE THIS APPARATUS TO RAIN,MOISTURE, DRIPPING OR SPLASHING.DO NOT PLACE LIQUID CONTAINERS (FLOWER VASES, CUPS, COSMETICS, ETC.) ABOVE THE SET(INCLUDING ON SHELVES ABOVE, ETC.).23) WARNING: SMALL PARTS CAN PRESENT CHOKING HAZARD IF ACCIDENTALLY SWALLOWED. KEEP SMALLPARTS AWAY FROM YOUNG CHILDREN.DISCARD UNNEEDED SMALL PARTS AND OTHER OBJECTS, INCLUDING PACKAGING MATERIALSAND PLASTIC BAGS/SHEETS TO PREVENT THEM FROM BEING PLAYED WITH BY YOUNG CHILDREN,CREATING THE POTENTIAL RISK OF SUFFOCATION.24) CAUTION: TO PREVENT ELECTRIC SHOCK, DO NOT USE THIS PLUG WITH A RECEPTACLE OR OTHER OUTLETUNLESS THE BLADES CAN BE FULLY INSERTED TO PREVENT BLADE EX PO SURE.25) CAUTION: USE WITH OTHER STAND MAY RESULT IN INSTABILITY POSSIBLY CAUSING INJURY.26) CAUTION: DANGER OF EXPLOSION IF BATTERY IS INCORRECTLY REPLACED. REPLACE ONLY WITH THE SAMEOR EQUIVALENT TYPE.27) CAUTION: This LCD TV is for use only with the following optional accessory. Use with any other type of optionalaccessories may cause instability which could result in the possibility of injury.(All of the following accessories are manufactured by <strong>Panasonic</strong> Corporation)• Wall-hanging bracket: TY-WK3L2RWAlways be sure to ask a qualified technician to carry out set-up.4 5
Accessories/Optional AccessoryCheck you have all the items shown.AccessoriesAccessoriesAttaching the pedestal to TVFix securely with assembly screws A . (Total 4 screws)Tighten screws firmly.Remote ControlTransmitterN2QAYB000321Batteries for theRemote ControlTransmitter (2)AA BatteryUniversal Dock foriPod (p. 23)TNM2AX0011Cleaning clothFerrite corePedestalTBL2AX00261 (TC-L26X1L, TC-L32X1L)TBL2AX00271 (TC-L37X1L)AC Plug ConverterAccessoriesAssemblyscrews (4)M4 × 10AA<strong>Quick</strong> <strong>Start</strong><strong>Guide</strong>Optional AccessoryHook* Adapters sold separately.OpenWall-hanging bracketTY-WK3L2RWOperating Instructions<strong>Quick</strong> setup guide(For viewing programming)Please contact your nearest <strong>Panasonic</strong> dealer topurchase the recommended wall-hanging bracket.For additional details, please refer to the wall-hangingbracket installation manual.Installing the remote’s batteriesNote the correct polarity(+ or -).CloseCautionIncorrect installation may causebattery leakage and corrosion,resulting in damage to the remotecontrol.Do not mix old and new batteries.• Do not mix different battery types (suchas alkaline and manganese batteries).•Do not use rechargeable (Ni-Cd)batteries.Do not burn or break batteries.WARNINGFoam mat or thicksoft clothAlways be sure to ask a qualified technician to carry out set-up.Incorrect fitting may cause equipment to fall, resulting in injury and product damage.Do not disassemble or modify the pedestal.Otherwise the TV may fall over and become damaged, and personal injury may result.CautionDo not use any other TV and displays.Otherwise the TV may fall over and become damaged, and personal injury may result.Do not use the pedestal if it becomes warped or physically damaged.If you use the pedestal when it is physically damaged, personal injury may result. Contact your nearest <strong>Panasonic</strong>Dealer immediately.During set-up, make sure that all screws are securely tightened.If sufficient care is not taken to ensure screws are properly tightened during assembly, the pedestal will not bestrong enough to support the TV, and it might fall over and become damaged, and personal injury may result.Reference of connectionAntenna terminal Pin terminals HDMI terminalredbluegreengreenFirmly tighten by hand. Match colors of plugs and terminals.Insert firmly.Insert firmly.Accessories/Optional Accessory6 7
Basic ConnectionTVExample 1Connecting Antenna (To watch TV)VHF/UHF AntennaCable TVVHF/UHF Antenna• NTSC (National Television System Committee):Conventional broadcasting• ATSC (Advanced Television Systems Committee):Digital TV Standards include digital high-definition television(HDTV), standard-definition television (SDTV), data broadcasting,multi-channel surround-sound audio and interactive television.TVExample 2Connecting DVD recorder (VCR) (To record/playback)AV Equipment(e.g. DVD Recorderor VCR)VHF/UHF AntennaDVD RecorderIf the source has a higher resolution signal(480p/720p/1080i), connection can be made withthe use of a Component Video or HDMI cable.VCRConnection can be made with the use of an RFcable and Composite Video/S Video cable. (p. 11)NoteCable TVTo connect the antenna terminal and Cable BoxANT INVHF/UHF Antennaor(If no Cable Box)orCable BoxANT OUTBack of the TVDIOHDMI 1 HDMI 2ANTENNACable InAC 110-127 V60 HzPower Cord(Connect after all theother connections.)Cable Box/Cable• You need to subscribe to a cable TV service to enjoy viewing theirprogramming.If using a Cable Box, set the TV channel to CH3 or CH4 for regular cable.• You can enjoy high-definition programming by subscribing to a highdefinitioncable service.The connection for high-definition can be done with the use of HDMI orComponent Video cable. (p. 11)• To view high-definition programming select the correct video input. (p. 20)Not all cables and external equipment shown in this book are supplied with the TV.For more details on the external equipment’s connections, please refer to the operating manuals for the equipment.ATSC is not available except in U.S.A., Canada, and/or Mexico.To connect the antenna terminal and DVD recorder or VCRVHF/UHF AntennaANT INANT OUTAV Equipment(e.g. DVD Recorder or VCR)(with TV tuner)Dock for iPod(DC 5V 500mA MAX)Back of the TVPCAUDIO INDIGITALAUDIO OUTVIDEOLAUDIORCVIDEO IN 1BYPBPRCOMPONENT INLAUDIORPower CordHDMI 1 HDMI 2ANTENNACable InConnecting TV and AV equipmentPlease refer to A - C on p. 11AC 110-127 V60 HzA<strong>Quick</strong> <strong>Start</strong><strong>Guide</strong>Basic Connection (TV + DVD Recorder or VCR)(Antenna + TV)8 9
Basic Connection (Continued)Example 3Connecting DVD recorder (VCR) and satellite receiverAV cable connectionsTVTo connect the antenna terminal and Satellite Receiver and DVD recorder or VCRNoteANT INSatellite ReceiverDVD RecorderorVCRVHF/UHF AntennaANT INSatelliteReceiverDock for iPod(DC 5V 500mA MAX)Back of the TVPCAUDIO INANT OUTDVD Recorder or VCR(with TV tuner)DIGITALAUDIO OUTVIDEOLAUDIORVHF/UHF AntennaCVIDEO IN 1BYPBPRCOMPONENT INYou can enjoy high-definitionprogramming by subscribing tohigh-definition satellite service.Connection can be done with theuse of HDMI or Component Videocable. (p. 11)LAUDIORPower CordHDMI 1 HDMI 2ANTENNACable InConnecting TV and AV equipmentPlease refer to A - C on p. 11.For details of external equipment connections, please refer to the operating manuals for the equipment.AC 110-127 V60 HzAHigh-Definition Standard-DefinitionNoteA To use HDMI terminalsHDMI 1 HDMI 2HDMIAV OUTAV Equipmente.g. Blu-ray DiscplayerConnecting to the HDMI terminals will enable you to enjoy high-definition digital images and high-quality sound.For “VIERA Link TM connections”, please refer to p. 31.B To use COMPONENT terminalsYPBPRLAUDIORCOMPONENT INgreenblueredwhiteredSome programs contain a copyright protection signal to prevent recording.When the copyright protection program is displayed, do not connect the other TV monitor through a VCR. Video signals fedthrough VCRs may be affected by copyright protection systems and the picture will be distorted on the other TV monitor.For more details on the external equipment’s connections, please refer to the operating manuals of this equipment.Ygreen greenbluebluePBPRCOMPONENTVIDEO OUTred redLwhite white AUDIOR OUTred redRecorders may also be connected to COMPOSITE or S VIDEO terminals. (see below)C To use COMPOSITE terminalsOUTVIDEOLAUDIORVIDEO IN 1yellowwhiteredyellow yellowwhiteLwhiteCOMPOSITEOUTRred redAV Equipmente.g. Blu-ray DiscplayerAV Equipmente.g. DVD Recorderore.g. VCR<strong>Quick</strong> <strong>Start</strong><strong>Guide</strong>Basic Connection (AV cable connections)(TV + DVD Recorder or VCR + Satellite Receiver)10 11
Identifying ControlsTV controls/indicatorsFront of the TVSelects channels in sequenceFirst Time Setup“First time setup” is displayed only when the TV is turned on for the first time after the power cord isinserted into a wall outlet and when “Auto power on” (p. 28-29) is set to “No”.orTurn the TV On with the POWER buttonorVolume up/down(TV)(Remote)Power indicator( on: red,off: no light)Remote control sensorWithin about 23 feet (7 meters) in front of the TV set.NoteMenu navigationsChanges the input modeChooses menu and submenu entries.POWER buttonThe TV consumes a limited amount of power as long as the power cord is inserted into the wall outlet.Do not place any objects between the TV remote control sensor and remote control.Switches TV On or Off (Standby)Changes the input mode (p. 20)VIERA Link menu (p. 34-35)Displays Sub Menu (p. 15, 28)Colored buttons(used for various functions)(for example, p. 14, 18, 34)Volume up/downSound mute On/OffChanges aspect ratio (p. 16)Switches to previously viewed channelor input modes.External equipment operations(p. 35)Remote controlClosed Caption On/Off (p. 15)Selects Audio Mode for TV viewing (p. 15)Exits from menu screenDisplays Main Menu (p. 26)Displays VIERA TOOLS (p. 17)Viewing from SD Card (p. 18-19)Selects/OK/ChangeReturns to previous menuChannel up/downDisplays or removes the channelbanner (p. 16)Operates the Favorite channel listfunction. (p. 16)Numeric keypad to select any channel(p. 15) or press to enter alphanumeric inputin menus. (p. 14, 20, 34, 36, 38, 41, 42)Use for digital channels. (p. 15)■ Press to exit froma menu screen■ Press to returnto the previousscreen* This setting will be skipped next time if you select “Home”.Select your languageLanguageEnglishEspañolFrançaisBe sure to select “Home”Please select your viewing environmentHomeStoreselectokselectPlease confirm your selection (Home) before pressing OK button.■ If you select “Store” by mistake in , confirmation screen will bedisplayed.You are selecting the mode for store demonstrationYesNookselectSelect “No” and return to previous screen .If you select “Yes”, Screen enters store demonstration mode.To display the “Please select your viewing environment” screen again as shownabove and select “Home”, do one of the following:• Press and hold down the side POWER button.• Unplug the TV and plug it again.Adjust the clockFirst time setupLanguageClockANT/Cable setupInput labelsClockYearMonthDayHourMinute20091710 AM10nextselectsetokselect itemYear: Select the yearMonth: Select the monthDay: Select the dayHour: Adjust the hourMinute: Adjust the minute<strong>Quick</strong> <strong>Start</strong><strong>Guide</strong>First Time SetupIdentifying Controls12 13
First Time Setup (Continued)■ Press to exit froma menu screenNoteTo change setting(Language/Clock/ANT/Cable setup/Input labels) later, goto Menu screen(p. 28)About broadcastingsystemsAnalog (NTSC):ConventionalbroadcastingDigital (ATSC):New programmingthat allows you toview more channelsfeaturinghigh-quality video andsoundATSC is not availableexcept in U.S.A.,Canada, and/orMexico.Auto channel setupSelect “ANT/Cable setup”First time setupLanguageClockANT/Cable setupInput labelsSelect “ANT in”ANT/Cable setupANT inAuto programCablenextselectsetselectANT inCable: Cable TVAntenna: AntennaNot used: Skip TV tuningSelect "Not used" when no wire is connected to the "Antenna/Cable" terminal.Typical when Cable/Satellite box is connected to a TV input.Prevents accidental tuning to an unavailable signal.Select “Auto program”ANT/Cable setupANT inAuto programCablenextselectSelect scanning mode (ALL channels/Analog only/Digital only)Auto programAll channelsAnalog onlyDigital onlyAuto programProgress8%Number of analog channels 10Number of digital channels 0Press RETURN to quitokselectgo to<strong>Start</strong> scanning the channelsAvailable channels (analog/digital) are automatically set.All channels: Scans digital and analog channelsAnalog only: Scans Analog channels onlyRETURNDigital only: Scans Digital channels onlyConfirm registered channelsprogramApplyCancell Caption Favorite Add... ...Yes... ...Yesselect“Apply”okIf OK is not pressed after selecting “Apply”, the channels will not be saved.The channel will be saved when no operation is performed for 60 seconds and the “Manualprogram” menu will also exit automatically.If you perform scanning more than twice, previously saved channels are erased.Set the Input labelsFirst time setupLanguageClockANT/Cable setupInput labelsInput labelsComponentHDMI 1HDMI 2HDMI 3GAMEVideo 1Video 2PC(example: TC-L37X1)ornextselectselectsetGLabel: [BLANK] SKIP/VCR/DVD/CABLE/SATELLITE/DVR/GAME/AUX/RECEIVER/COMPUTER/Blu-ray/CAMERA/DVD REC/HOME THTR/MONITOR/MEDIACTR/MEDIA EXT/OTHERVideo 2PCSelectABC → abcYOKRETURNDeleteGAMEG A ASwitches Input mode alphabet tonumericWatching TVConnect the TV to a cable box/cable, set-top-box, satellite box or antenna cable (p. 8-11)Listenwith SAP(SecondaryAudioProgram)To watch TV and other functionsTurn power on14 15ClosedcaptionDisplay theSUB MENUor(TV)Select a channel number(TV)updownorNoteIf the mode is not TV, pressselect TV. (p. 20)and■ To directly input the digitalchannel numberWhen tuning to a digitalchannel, press the button toenter the minor number in acompound channel number.example: CH15-1:NoteReselect “Cable” or “Antenna” in “ANT in” of “ANT/Cable setup” to switch thesignal reception between cable TV and antenna. (p. 14, 39)The channel number and volume level remain the same even after the TV isturned off.■ Select Audio Mode for watching TVDigital modePress SAP to select the next audio track (if available) when receiving a digitalchannel.Audio track 1 of 2(English)Analog modePress SAP to select the desired audio mode.• Each press of SAP will change the audio mode. (Stereo/SAP/Mono)■ Switches Closed caption mode On or OffClosed caption OnClosed caption Off■ Press SUB MENU to show sub menu screen. (p. 28)This menu consists of shortcuts to convenient functions.SUBMENUSetup SUB MENUChannel surf modeAllSet favoriteEdit CH captionSignal meter<strong>Quick</strong> <strong>Start</strong><strong>Guide</strong>Viewing Watching TVFirst Time Setup
Watching TV (Continued)■ Other Useful Functions (Operate after )InformationRecallChangeaspectratio■ Displays or removes the channel banner.ChannelClock15-2 THE NEWS12:30 PMABC-HD CC SAP TV-G 1080i Standard 4:3 30StationidentifierSAPindicationSignalresolutionPicturemodeSleep timerremaining timeClosed caption Rating LevelAspect ratio■ Press FORMAT to cycle through the aspect modes. (p. 45)• 480i, 480p: FULL/JUST/4:3/ZOOM• 1080i, 720p: FULL/H-FILL/JUST/4:3/ZOOMUsing VIERA TOOLSVIERA TOOLS are the easy way to access high use menu items. They are displayed as shortcut icons onthe TV screen.Unlike a conventional menu, you can enjoy using, playing or setting a function quickly.Display VIERA TOOLSSelect the itemselectnextCall upa favoritechannel■Set Favorite FeatureDisplay the SUB MENU.123SUBMENUSelect “Set favorite”Setup SUB MENUChannel surf modeAllSet favoriteEdit CH captionSignal meterSet the displayed channelSet favorite 1/31 26-1■ FAVORITEChannel numbers registered in Favorite are displayed on the favorite tunescreen. Select the desired broadcast station with the cursor or use numberbuttons. (see below)selectokselect the listnumberFavorite Feature■Use Favorite Feature1Display “Favorite channels”23Select the channelFavorite channels 1/31 26-12345Set Favorite channelFavorite channels 1/31 26-12okselector■ Press to exit froma menu screeniPod<strong>Start</strong> playing an iPod (p. 24)Displayed “VIERA Link control” menu (p. 34-35)<strong>Start</strong> Slideshow (p. 18-19)Displayed “Game mode setting” menu.Select the Picture mode setting.(Game/Standard (Vivid/Cinema/Custom))Please select Picture mode.Game mode allows optimum picture settingsfor gaming.GameStandardDisplayed “ECO/energy saving” (p. 28)Viewing Using VIERA TOOLSWatching TV2345orsave the displayedchannelselect the list number(to save the channelwithout pressing OK)345■To change the pagePress repeatedly to change betweenpages(1/3, 2/3, 3/3 or exit)■ Press to returnto the previousscreenDelete a favorite channelSet favorite 1/31 26-12345selectdelete(while holding down)Changes the page forward/backward16 17
SlideshowViewing from an SD CardYou can view photos taken with a digital camera or digital video camera and saved on an SD card.(Media other than SD Cards may not be reproduced properly.)Photo viewerInsert the SD cardVIERA IMAGE VIEWERThe VIERA Image Viewer is a function that lets you easily view still and motion images on a VIERA television bysimply inserting an SD card into the VIERA SD card slot.SD CardInsert the cardLabel surfaceRemove the card Compliant card type (maximumcapacity): SDHC Card (16 GB), SDCard (2 GB), miniSD Card (1 GB)Press in lightly(requiring miniSD Card adapter)on SD Card,For cautions and details on SDPush until aclick is heardthen release.Cards (p. 46)■ Press to exit froma menu screen■ Press to returnto the previousscreen* This setting will be skipped next time unless you select “Set later”.Set “SD card setting” and select “Play SD card now”“SD card setting” will be displayed automatically each time an SD card isinserted for the first time.SD card settingPlay SD card automaticallySet laterPlay SD card nowselectchangeOff:■ Manual operation (“Play SD card automatically” is “Off”)Display “Photo viewer” <strong>Start</strong> SlideshowsetSelect the data to be viewedPhoto viewerAll photosTotal 238NamePana0001Date03/04/2009Size1029×1200RSelectSlideshowOKRETURNGFoldersBThumbnail viewPana0001 Pana0002 Pana0003 Pana0004Pana0005 Pana0006 Pana0007 Pana0008Pana0009 Pana0010 Pana0011 Pana0012Sort by monthYSort by dateTo SlideshowSelected picture information is displayed.Total number of images.NoteSlideshow: A Slideshow will startautomatically next time.Thumbnail: The Photo viewer menu will bedisplayed automatically next time.Set later: “SD card setting” menu will bedisplayed repeatedly.The data can be played manually.selectviewDepending on the JPEG format, “Information” contents may not be displayedcorrectly. Refer to p. 46 (Data format for SD card browsing) for details.ViewRotatePrev.PlayNextRETURNDisplays one at a timeTo display/hide Navigation areaReturn to Thumbnail viewNavigation areaAccessingRotatePrev.PlayNextRETURNSingle photo viewselectnextPresent status(While reading the data)Prev.AccessingSlideshowPauseNextRETURNRotate 90 degrees (counter-clockwise)To next photoRotate 90 degrees (clockwise)To previous photo18 19SortPhotosettings■To sort by Folder, month or dateInSelect sort typePhoto viewerFolders (ascending order of numeric/alphabet)All photosTotal 238NamePana0001Date03/04/2009Size1029×1200RSelectSlideshowAccessingRSelectOKRETURNGPana0001 Pana0002 Pana0003 Pana0004Pana0005 Pana0006 Pana0007 Pana0008Pana0009 Pana0010 Pana0011 Pana0012FoldersBSort by monthYSort by dateSelect the directory.Photo viewerAll photosSort by date15Date03/04/2009Number of photos32 photosSlideshowOKRETURN03/04/200932 photos11/20/20088 photosG02/15/200916 photos10/10/20083 photosB01/01/200910 photos09/28/200858 photosY12/25/200824 photos09/23/200828 photosSort by month (descending order of the month)Sort by date (descending order of the date )selectviewPhoto viewerAll photos03/04/2009Total 32NamePana0001Date03/04/2009Size1029×1200In or ■Adjust the pictureDisplay “Photo settings”Select the itemPhoto settingsPictureAudioSlideshow settingsBackground musicOff■Slideshow settingsSlideshow settingsSpeedFastRepeatOffTransitionOffEffectSepiaSpeedRepeatTransitionEffectselectchangenextSelectAdjustAccessingRSelectSlideshowOKRETURNPicture 1/2Reset to defaultsPicture modeBack lightG+20Pana0001 Pana0002 Pana0003 Pana0004Pana0011 Pana0012 Pana0013 Pana0014Pana0055 Pana0056 Pana0057 Pana0058VividContrast 0example :Picture menuPicture menu/Audio menu (p. 26)■Set the Background musicBYReturn topreviousscreenSelectAdjustBackground music OffselectchangeSelect the Background music from 3 types.Each Background music plays for 90 seconds.(Off/Music 1/Music 2/Music 3)NoteTo stop in mid-cyclePressYou can set how many seconds each image is displayed in Slideshow mode.(Very fast/Fast/Medium/Slow/Very slow)Turn the slideshow Repeat function on or off (On/Off).Select transition effect (Off/Wipe ↓/Wipe ↑/Wipe →/Wipe ←/Comb ↑↓/Comb →←/Dissolve/Checker wipe/Random)Select conversion effect (Off/Sepia/Gray scale)Viewing Viewing from SD Card
Displaying PC Screen on TVThe screen of the PC connected to the unit can be displayed on the TV.You can also listen to PC sound with the audio cable connected. To connect PC (p. 43)Playing an iPod on TVYou can enjoy iPod music/videos/photos on your TV, and you can also charge the battery by connectingthe Universal Dock for iPod to your TV.Display the Input select menuSelect “PC”Input select1 TV2 Component3 HDMI 14 HDMI 25 HDMI 36 Video 17 Video 28 PCPCAUXGAMEGAMEGAME(example: TC-L37X1)Corresponding signals(p. 48)■Controls and basic functionsPlugConnect to the back panel ofthis TV.IndicatorThis indicator lights up whenthe iPod is connected.Set up Universal Dock for iPodDock cableConnects the universal dockto this TV.iPod connector terminalConnects your iPod.■Connecting the Universal Dock for iPodEnsure that the power of this TV is switched off before you connected the Universal Dock.Connect the plug of the Universal Dock to the Dock for iPod terminal of this TV.■ PC menu setting (change as desired)Making settings “How to Use Menu Functions” to (p. 26)Menu Item Adjustments/Configurations (options)Reset to defaults Resets PC adjustPicturePCadjustmentsAudio menu (p. 26)SyncDot clockH-positionV-positionClock phaseInputresolutionH-frequencyV-frequency■ To return to TV /H & V: The H and V sync signals are input from the HD/VD connector. (p. 48)On green: Uses a synchronized signal on the Video G signal, which is input from the Gconnector. (p. 48)Alleviates the problem if a picture appears to be vertically-striped, flickers partially or isblurred.Adjusts the horizontal position.Adjusts the vertical position.DisplaysPC screenAlleviates the problem if the whole picture appears to flicker or is blurred.First adjust the Dot Clock to get the best possible picture, then adjust theClock Phase so that a clear picture appears.NoteIt may not be possible to display a clear picture due to poor input signals.Switches to wide display.Input signal switched from 640×480 to 800×480Input signal switched from 1024×768 to 1280×768 or 1366×768Displays the H (Horizontal)/V (Vertical) frequencies.Display rangeHorizontal: 15 - 110 kHzVertical: 48 - 120 HzBack of the TV22 23Dock for iPod(DC 5V 500mA MAX)DAInstalling the ferrite corePull back the tabs(in two places)OpenNoteDo not connect any other optional dock. (Available included Universal Dock for iPod only)■Connecting your iPodInsert your iPod into the connector’s terminal of the Universal Dock.iPod(not included)The indicator lightsup when the iPodis inserted, andcharging begins.■Disconnecting the Universal Dock for iPodSwitch off the power of the TV.Press the cablethrough and closeNote<strong>Panasonic</strong> has no warranty for iPod data management.Do not twist your iPod when inserting it or taking it off from the universaldock, and be careful not to knock over this universal dock when youriPod is inserted.Do not take off your iPod from the universal dock while you play youriPod with the TV.It is recommended that you update your iPod software before using itwith the universal dock. The updater for the iPod software is available onthe Apple website.Attach the dock adapter (which should be supplied with your iPod) to thedock for the stable use of the iPod. If you need an adapter, consult youriPod dealer.1. Switch off the iPod.2. Pull out the plug of the Universal Dock from the Dock for iPod terminal of the TVViewing Playing an iPod on TVDisplaying PC Screen on TV
Playing an iPod on TV(Continued)Playing an iPod on this TVPreparationsSet up iPod Universal Dock for iPod (P. 23).Before connecting/disconnecting the iPod, turn the TV off or reduce the volume of the TV to its minimumUse the menu on your iPod to select the appropriate video/photo output settings for your TV. (Refer to theoperating instructions of your iPod.)Display main windowConnect your iPod (not included) firmly Select iPod icon in VIERA TOOLS (p. 17)OperatePlaybackwindow(Music/Video/Podcast)InFull screen (Only for video playback)MoveMusic02:10 / 05:12MoviesMoveMusic0:24/3:241. People All2. GoodMovemorningVideos3. Stand up4. Sing a song5. MondayPodcasts6. Star7. Thank youRemote01:02 / 05:23Settings1 of 1Select OKReturnRETURN R Prev. page G Next page BY■ Available TV remote control buttonsMove the cursor/SelectReverse/ForwardorPlayStopSkip Reverse/ForwardPause■ Press to exit froma menu screen■ Press to returnto the previousscreeniPod will start recharging regardless ofwhether this unit is on or off.Select the category in Selector tabSelector tab List window Playback window selectMusicVideosPodcastsRemoteSettingsSelectOKRETURNMusicPlaylistsArtistsAlbumsSongsAudiobooksRGB01:02 / 05:23Select track in List window and playMusicVideosPodcastsRemoteSettingsSelectOKRETURNArtists - AXXAlbums - CorrectionPeopleGood morningStand upSing a songMondayStarThank youR4 of 7Prev. pageGNext pageBSing a songAXXCorrectionY01:02 / 05:23YiPodnext/setSelector tabs:Switches between these categories.(Music/Videos/Podcasts/Remote/Settings).List window:Displays list of selected categories.Playback window:Displays track information of playing data.selectnext/setGo back to previous pageProceed to next pageFor more information, refer to the operating instructions for iPod.■Compatible iPod models.Model Memory size Model Memory sizeiPod touch 2nd generationiPod nano 4th generation(video)8 GB, 16 GB,32 GB8 GB, 16 GBiPod classiciPod nano 2nd generation(aluminum)80 GB,160 GB2 GB, 4 GB,8 GBiPod classic 120 GB iPod 5th generation (video) 60 GB, 80 GBiPod touch 1st generationiPod nano 3rd generation(video)8 GB, 16 GB,32 GBiPod 5th generation (video)4 GB, 8 GB iPod nano 1st generationCompatibility depends on the software version of your iPod.30 GB1 GB, 2 GB,4 GB24 25Using TVremote(Photo)iPODoptionsInSelect “Remote”MusicVideosPodcastsRemoteSettingsSelectOKRETURNMusicPlaylistsArtistsAlbumsSongsAudiobooksRGB01:02 / 05:23Screen will be switched when “Remote”is selected.SelectOperateYou can operate an iPod with iPod displayusing the TV remote control.* For iPod touch user, please proceed withoperations though display of iPod.Select “settings”MusicVideosPodcastsRemoteSettingsOKRETURNMusicPlaylistsArtistsAlbumsSongsAudiobooksRGSelect the item and adjustiPod optionsPictureAudioPlug and PlayShuffleRepeatModelVersionOnOffOffxxxxx1.0.0(example)BYYselectchangeset■ Available TV remote control buttonsPlayStopReverse/ForwardSkip Reverse/ForwardPauseMove the cursor/SelectSet/AccessReturn to previous menuExitPicture Select and adjust the items (p. 26)Audio Select and adjust the items (p. 26)Plug and playShuffleRepeatSet automatic startup (On/Off)Select shuffle mode.(Off/Songs/Albums)Select repeat mode.(Off/One/All)Viewing Playing an iPod on TV
How to Use Menu FunctionsVarious menus allow you to make settings for the picture, sound, andother functions so that you can enjoy watching TV best suited for you.Display menu(Continued)Channel■ Menu listMenu Item Adjustments/Configurations (alternatives)Sets the mode to select the channel with Channel up/down buttonChannel surf mode(All/Favorite/Digital only/Analog only)• Favorite: Only channels registered as FAVORITE (p. 16)Language Selects the screen menu language (p. 13) Languagesurf modeAllClock Adjusts the clock (p. 13) Clock■ Press to exit froma menu screen■ Press to returnto the previousscreenDisplays the functions that can be set(varies depending on the input signal)Select “Setup”MenuPictureAudioTimerLockVIERA LinkSD cardClosed captionSetupSelect the itemSetup 1/2Channel surf modeLanguageAllClockANT/Cable setupInput labelsDisplay Sub MenuSUBMENUnextselectnextselectSetupANT/Cable setup Sets channels (p. 39) ANT/Cable setupInput labels Selects the terminal and label of the external equipment (p. 41) Input labelsVIERA Link settingsECO/energy savingAdvancedsetupVIERA LinkControls equipment connected to HDMI terminals (p. 32) (On/Off)• “Power off link”, “Power on link”, and “Default speakers” cannot be selected if “Off” is set. VIERA Link OnPower on link Sets “Power on link” of HDMI connection equipment (p. 32) (Yes/No) Power on link YesPower off link Sets “Power off link” of HDMI connection equipment (p. 32) (Yes/No) Power off link YesStand-by powersaveAuto powerstand-bySet “Stand-by power save” of HDMI connection equipment. (p. 32) (No/Yes)Set “Auto power stand-by” of HDMI connection equipment. (p. 32)(No/Yes (with reminder)/Yes (no reminder)Stand-by power saveNoAuto power stand-byDefault speakers Selects the default speakers (p. 32) (TV/Theater) Default speakers TVPower saveNo signal for 10minutesNo activity for 3hoursAuto power onPlay SD cardautomaticallyReduces screen brightness to lower power consumption. Eye-friendly for viewing in a dark room.(Standard/Saving)Power save StandardTo conserve energy, the TV automatically turns off when NO SIGNAL and NO OPERATION is performedfor more than 10 minutes. (Enable/Disable)NoteNo signal for 10 minutesNot in use when setting “Auto power on”, “On/Off Timer”, “Lock”, “SD mode” or Digital channel.Enable• “No signal for 10 minutes was activated” will be displayed for about 10 seconds when the TV is turnedon for the first time after turning the power off by “No signal for 10 minutes”.• The on-screen display will flash 3, 2 and 1 to indicate the last three (3) remaining minutes prior to the shut-off.To conserve energy, the TV automatically turns off when no operation of remote or side panel keycontinues for more than 3 hours. (Enable/Disable)NoteNo activity for 3 hoursNot in use when setting “Auto power on”, “On/Off Timer or PC input display.Disable• “No activity for 3 hours was activated” will be displayed for about 10 seconds when the TV is turned onfor the first time after turning the power off by “No activity for 3 hours”.• The on-screen display will flash 3, 2 and 1 to indicate the last three (3) remaining minutes prior to the shut-off.Turns TV On automatically when the cable box or a connected device is turned On. (No/Yes)TV power cord must be plugged into this device. TV comes on every time the power is restored.Auto power on No• The “Sleep” timer, “On / Off timer”, and “First time setup” will not function if “Auto power on” is set. (p. 42)Set “Thumbnail” or “Slideshow” to play back SD cards automatically. (Slideshow/Thumbnail/Set later/Off)NoPlay SD card automaticallySet laterHow to Use Menu Functions(picture, sound quality, etc.)AdvancedSelect the itemSetup SUB MENUChannel surf modeAllSet favoriteEdit CH captionSignal meterselectsetornextReset to defaults Performing Reset will clear all items set with Setup, such as channel settings. (p. 38) Reset to defaults■ Sub menu listMenu Item Adjustments/Configurations (alternatives)Channel surf modeSets the mode to select the channel with Channel up/down button (All/Favorite/Digital only/Analog only)SetupSUB MENUAbout Displays TV version and software license. AboutSet favorite Sets favorite channels. (p. 16)Edit CH caption Changes the station identifier. (p. 39)Signal meter Checks the signal strength if interference or freezing occurs on a digital image. (p. 39)28 29
VIERA Link TM “HDAVI Control TM ”You can enjoy more convenient operation with the “HDAVI Control” function in the “VIERA Link”menu.For more details on the “HDAVI Control” function, refer to p. 30or■ Press to exit froma menu screenDisplay VIERA Link menuorSelect the itemRecord nowStop recordingVIERA Link controlRecorderSpeaker outputSelectTVRecord nowStop recordingVIERA Link controlHome theaterSpeaker outputSetTVVIERA Linkselectset or nextchangeselectnextSpeakercontrolVIERA Linkcontrolonly with theTV’s remotecontrol(for “HDAVIControl 2 orlater”)(Continued)You can select Home theater or TV speakers for audio output.Control theater speakers with the TV’s remote control.This function is available only when <strong>Panasonic</strong> Amplifier orPlayer theater is connected.Select “Speaker output”Select “Home theater” or “TV”selectRecord nowStop recordingVIERA Link controlRecorderSpeaker outputTVchange■Home theater: Adjustment for equipmentVolume up / downMuteThe sound of the TV is muted.When the equipment is turned off, the TV speakers take over.Selecting “Home theater” turns the equipment onautomatically if it is in standby mode.■TV: The TV speakers are on.In the VIERA Link menu, you can select HDMI connected equipment and access it quickly. Continue using yourTV’s remote control to operate the equipment, pointing it at the TV.Select “VIERA Link control”Select the equipment you want to access.(Recorder/Home theater/Player/Camcorder/LUMIX)selectRecord nowStop recordingVIERA Link controlRecorderSpeaker outputTVchangeYou can select available items only.If there is more than one equipment item, anumber after the name indicates the number ofitems. (e.g. Recorder 1/Recorder 2/Recorder 3)The number of equipment items that can beconnected is three for recorders, and a totalof three for Home theater/Player/Camcorder/LUMIX.NoteThere is a limit to the number of HDMIconnectors.Operate the equipment with the TV’s remote control, pointing it at the TV.To operate the equipment, read the manual of the equipment.■ Available TV’s remote control buttonsWhether an operation is available differs depending on the connected equipment.SUBMENUMove the cursor/SelectSet/AccessReturn to previous menuDisplay the functionsmenu on the equipmentAvailable when the purpose of the keys isdisplayed on screenExitPlayStopReverse/ForwardSkip Reverse/ForwardPauseClosed captionVIERA Link TM “HDAVI Control TM ”Advanced■ Press to returnto the previousscreenDirect TVrecording(for “HDAVIControl 3 orlater”)Channel Up/DownSAP (Select Audio Mode)- 0-9 Select digital subchannelRecords the current program on the recorder immediately.Select “Record now” Select “Stop recording”, when you want to stop recordingselectselectVIERA Link control34 35Record nowStop recordingRecorderSpeaker outputTVFor optimal recording, the settings of the recorder mightbe required. For details, read the manual of the recorder.setRecord nowStop recordingVIERA Link controlRecorderSpeaker outputTVsetRecording will not stop automatically when theprogram is finished.
LockYou can lock specified channels or shows to prevent children from watching objectionable content.■ Press to exit froma menu screenCautionMake a note of yourpassword in caseyou forget it. (If youhave forgotten yourpassword, consultyour local dealer.)NoteWhen you select alocked channel,a message will bedisplayed that allowsyou to view thechannel if you inputyour password.Display menuSelect “Lock”MenuPictureAudioTimerLockVIERA LinkSD cardClosed captionSetupInput your 4-digit password- - - -RETURNnextselectYou will be asked to enter yourpassword each time you displaythe Lock menu.A 4-digit code must be entered to view a blocked program or change rating settings.PasswordIf it is your first time entering theEnter password.password, enter the passwordtwice in order to register it.Select the Lock modeLockModeChannelGameProgramChange passwordOffOffOffOffSelect the itemLockModeCustomChannelOffGameOffProgramOffChange passwordSetsetselectselectsetOff:All:Unlocks all the locksettings of “Channel”,“Game” and “Program”.Locks all the inputsregardless of the locksettings of “Channel”,“Game” and “Program”.Custom: Locks specified inputs of“Channel”, ”Game” and“Program”.“Channel”, ”Game” and“Program” are not accessibleunless “Custom” is selected in“Mode”.■ To select the channel or the rating of the program to be locked36 37ChannellockGame lockProgramlockChangepasswordNoteSelect up to 7 (1-7) channels to be blocked. These channels will be blocked regardless of theprogram rating.Select “Mode” and set to “Custom”Select channel to lock.Channel lockModeChannel 1Channel 2Channel 3Channel 4Channel 5Custom34---selectsetLocks Channel 3, Channel 4 and externalinputs.Select “Game” in 5 and set to “On”.■ To set a rating level“V-chip” technology enables restricted showsto be locked according to TV ratings.Select “Mode” and set to “On”.Program lockModeMPAAU.S.TVC.E.L.R.C.F.L.R.OnOffOffOffOffsetselectSelect the rating category you wishto follownextProgram lockModeMPAAU.S.TVC.E.L.R.C.F.L.R.OnOffOffOffOffMPAA: U.S movie ratingsU.S.TV: U.S TV program ratingsC.E.L.R.:Canadian English ratingsC.F.L.R.: Canadian French ratingsselect■ To change the passwordIn , select “Change password” andpress OKInput the new 4-digit password twiceTo lock/unlock all channels:Select “Mode” and set to “All” or “Off”.All: Locks all channelsOff: Unlocks all channelsselectsetOn: LocksOff: UnlocksSelect the rating to be lockedselectExample of “MPAA” (U.S movie ratings)NR No ratingG General Audience: All ages admittedPG Parental Guidance SuggestedPG- Parents Strongly Cautioned: Inappropriate13 for children under 13RRestricted: Under 17 requiresaccompanying parent or adult guardianNC-17No one 17 and under admittedX Adults onlyTo get more information (p. 44)LockModeChannelGameProgramChange passwordOffOffOffOffChange passwordEnter new password.This television is designed to support the “Downloadable U.S. Region Rating System” when available.(Available only in U.S.A.)The Off rating is independent of other ratings.When placing a lock on a specific-age-based-rating level, the Off rating and any other more restrictive ratings willalso be blocked.- - - -RETURNLockAdvanced
Editing and Setting ChannelsThe current channel settings can be changed according to your needs and receptionconditions.Display menu■ Press to exit froma menu screenSelect “Setup”MenuPictureAudioTimerLockVIERA LinkSD cardClosed captionSetupSelect “ANT/Cable setup”Setup 1/2Channel surf modeLanguageAllClockANT/Cable setupInput labelsReset to defaultsSelect the functionANT/Cable setupANT inAuto programManual programSignal meterSetCablenextselectnextselectnextselectAutoprogramSetautomaticallyManualprogramSetmanuallyAutomatically searches and adds available channels to the memory.Select “ANT in”Select a scanning mode (p. 14)Select Cable or AntennaAuto programOr select “Not used”. (p. 14)okAll channelsSelect “Auto program”Analog onlyANT/Cable setupANT inAuto programManual programSignal meterCablenextselectUse this procedure when changing the channel setup orchanging the channel display.Also, use this to add or skip channels from the channellist manually.You can select a channel tuning mode (Digital only/Analog only) in “Channel surf mode”(p. 28)Select “Edit”Manual programEditApplyCancelChannel Caption Favorite Add... ...Yes2... Yes3 ...... Yes4 ...... Yes5 ...Select the item to be editedManual programEditApplyCancelChannel Caption Favorite Add... ...Yes2... Yes3 ...... Yes4 ...... Yes5 ......Favorite6 ... Yes... Yes7 ......Caption8 ...Yes... Yes9 ...Select OKRETURNAddR Prev.page G Next page B YProceed tonext pageGo back to previous pageTo cancel the EditManual programselectnextselect the itemto edit (Caption/Favorite/Add)next• Caption:Changes the station identifier• Favorite:Registers channel to FavoriteList• Add:Adds or skips channelsEditApplyCancelFavorite AddChannelselectCaption... ...Yes2... Yes3 ...next4 ...... Yes... Yes5 ...Digital onlyselectSettings are made automaticallyAfter the scanning is completed, select “Apply”.(see below ).All previously saved channels are erased.GEditCaptionEdit CH captionChannelCaptionChangeABC → abcYOKRETURNDelete80-101---CaptionSelect or edit the station identifier.(maximum 7 characters available)FavoriteelSet favorite 1/31 26-12selectchangeset/nextselectnextSet favorite Select the numberAddPress OK to select “Yes (add)” or “No (skip)”Move cursor to channel numberManual programEditApplyCancelChannel Caption Favorite Add... ...Yes2... Yes3 ...programSelect “Apply”ApplyCancelCaption Favorite Add... ...YesselectorPress OK to tuneto the channel.select “Apply”Changes will be lost. Continue?Yes Nook(returns to “ANT/Cable setup”)select “Yes”okEditing and Setting ChannelsAdvanced■To reset the settings of setup menuSelect “Reset to defaults” in Setup menu ( ) andpress OKInput your 4-digit password with number buttonsSelect “YES” on the confirmation screen and press OKSignalmeterChecksignalstrengthCheck the signal strength if an interference is found or freezing occurs on a digital image.Signal meterChannelTune manuallySignal strength1-1Current 30%Peak level 45%orSignal intensitychangechannelokIf the signal is weak, check the antenna.If no problem is found, consult your local dealer.NoteNot available if “Cable” is selected in “ANT in”(see above).Available only for digital antenna channels.If “Lock” (p. 36) is activated and “ANT/Cable setup” is selected, “Enter password.” will be displayed.38 39
Closed CaptionDisplay menuInput LabelsDisplay menu■ Press to exit froma menu screenClosed captionDisplayClosedcaptionThe television includes a built-in decoder that is capable of providing a text display of the audio.The program being viewed must be transmitting Closed caption (CC) information. (p. 45)■ Select the item and setClosed captionselectMode Select “On” (when not using, selectReset to defaults“Off”).ModeAnalogDigitalDigital settingOnCC1PrimaryThe settings in “Analog” or “Digital”depend on the broadcaster.setAnalogCC1-4:T1-4:(Choose the Closed caption serviceof Analog broadcasting.)Information related to pictures(Appears at bottom of screen)Textual information(Appears over entire screen)Digital (The Digital Closed captionmenu lets you configure the wayyou choose to view the digitalcaptioning.)Select the setting.“Primary”, “Second.”, “Service 3”, “Service4”, “Service 5”, “Service 6”■ To make more in-depth display settings in digital programsSelect “Digital setting” and press OKSelect the item and setDigital settingSizeFontStyleForegroundFore. opacityBackgroundBack. opacityOutlineSelect “Closed caption”MenuPictureAudioTimerLockVIERA LinkSD cardClosed captionSetupAutomaticAutomaticAutomaticAutomaticAutomaticAutomaticAutomaticAutomaticselectset■ To reset the settingsSelect “Reset to defaults” and press OKnextselectSize: Text sizeFont: Text fontStyle: Text style (Raised, Depressed, etc.)Foreground: Color of textFore. opacity: Opacity of textBackground: Color of text boxBack. opacity: Opacity of text boxOutline: Outline color of text(Identify the setting options on the screen.)■ Press to exit froma menu screenInput labelsDisplaylabels ofConnecteddevicesDevices connected to external input terminals can be labeled for easier identification duringinput selection. (In selecting input mode from p. 20 )■ Select the terminal and label of the external equipmentInput labelsComponentHDMI 1HDMI 2HDMI 3Video 1Video 2PCGAMEGAME(example: TC-L37X1)LabelVideo 1VCR[example]Select “Setup”MenuTerminalPictureAudioTimerLockVIERA LinkSD cardClosed captionSetupSelect “Input labels”Setup 1/2Channel surf modeLanguageAllClockANT/Cable setupInput labelsorselectsetInput labelsComponentGSelectABC → abcnextselectnextselectYOKRETURNDeleteG A ASwitches Input mode from alphabetical to numericTerminals: Component/HDMI 1-3*/Video 1-2/PC* HDMI 3 (TC-L37X1L, TC-L32X1L only)Label: [BLANK] SKIP/VCR/DVD/CABLE/SATELLITE/DVR/GAME/AUX/RECEIVER/COMPUTER/Blu-ray/CAMERA/DVD REC/HOME THTR/MONITOR/MEDIA CTR/MEDIA EXT/OTHERFor the PC terminal, only “SKIP” is available.If “SKIP” is selected, the INPUT button press will skip its input.Each selected label will be displayed on “Input select” screen.(p. 20)Input LabelsClosed CaptionAdvanced40 41
Using TimerThe TV can automatically turn On/Off at the designated date and time.The Clock must be set before On time/Off time settings. (p. 13)The “Sleep” timer and “On / Off timer” will not work if the “Auto power on” (p. 28) is set.Display menuRecommended AV ConnectionsThese diagrams show our recommendations on how to connect the TV unit to your various equipment.For other connections, consult the instructions for each piece of equipment and its specifications.Select “Timer”Menunextor* 2Back of the TVAC 110-127 V 60 HzAC Cord(Connect after all theother connections arecomplete.)orCable TVCable Box■ Press to exit froma menu screen■ Press to returnto the previousscreenNoteThe TV automaticallyturns Off after 90minutes when turnedOn by the Timer.This operation will becancelled if the Offtime is selected or if akey is pressed.PictureAudioTimerLockVIERA LinkSD cardClosed captionSelect the timer to setTimerSleepTimer 1Timer 2Timer 3Timer 4Timer 5SleepTimer 1~Timer 5Set the timer■ To set “Sleep” (Off Timer)selectselectnextTurns Off automaticallyTurns On/Off automatically(5 timers can be set.)Set to shut the unit off after a pre-selected amount of time.0/30/60/90 (minutes)SleepSleep (minutes)60set■ To set “Timer 1-5” (On/Off Timer)Select the item and setTimer 1Timer setInputsChannelDayOn timeOff timeOnTV10-37/6[FRI]1:15 AM12:45 AMTimer setInputsChannelDayorselectSUN/MON/TUE/WED/THU/FRI/SAT(displays the nearest future date)MON-FRI/SAT-SUN/DAILY/Every SUN/Every MON/Every TUE/Every WED/Every THU/Every FRI/ Every SATOn timeOff timeAM/PMsetClearTimer setting (On/Off)Select the inputsSelect the channelSelect the dayThe time to turn OnThe time to turn Off42 43orRGB PC cableConversionadapter (ifnecessary)■ To watchcamcorder imagesCamcorderVCRDVD Player(For HDMIconnection,HDMI compatibleequipment only.For connectionusing HDMI-DVIConversion cable,see HDMI 1 or HDMI2 connection on thispage.)* 2Opticaldigitalaudio cable■ PCOPTICALINAmplifierDock for iPod(DC 5V 500mA MAX)PCAUDIO INDIGITALAUDIO OUTAudiocableVIDEOLAUDIORVIDEO IN 1■ To listen to the TVthrough speakersYPBPRCOMPONENT INLAUDIORHDMI 1 HDMI 2ANTENNACable In■ To watch DVDsDVD Player/Set Top Box* 1 Please see p. 26-27 for setup when using an external analog audio cable with an HDMI to DVI cable.* 2 HDMI 3 (TC-L37X1L, TC-L32X1L only)orAudiocableConnectwithA or Boror■ DVD Recorder /VCRA HDMI cableB HDMI-DVIConversioncable +Audio cable* 1Recommended AV ConnectionsUsing TimerAdvanced
Ratings List for Lock“V-chip” technology enables you to lock channels or shows according to standard ratings set by theentertainment industry. (p. 37)■ U.S. MOVIE RATINGS (MPAA)NRNO RATING (NOT RATED) AND NA (NOT APPLICABLE) PROGRAMS. Movie which has not been rated orwhere rating does not apply.G GENERAL AUDIENCES. All ages admitted.PG PARENTAL GUIDANCE SUGGESTED. Some material may not be suitable for children.PG-13 PARENTS STRONGLY CAUTIONED. Some material may be inappropriate for children under 13.R RESTRICTED. Under 17 requires accompanying parent or adult guardian.NC-17 NO ONE 17 AND UNDER ADMITTED.X ADULTS ONLY.■ U.S. TV PROGRAMS RATINGS (U. S. TV)Age-based Age-based Possible ContentGroup Ratings SelectionsDescriptionNRTV-NRViewable(Not Rated)BlockedNot Rated.TV-YViewableBlockedAll children. The themes and elements in this program are specificallydesigned for a very young audience, including children from ages 2-6.YouthFV BlockedTV-Y7ViewableDirected to older children. Themes and elements in this program mayBlockedinclude mild physical or comedic violence, or may frighten childrenunder the age of 7.TV-GViewableBlockedGeneral audience. It contains little or no violence, no strong language,and little or no sexual dialogue or situations.D,L,S,V (all selected) Parental guidance suggested. The program may contain infrequentTV-PG • Any combination of coarse language, limited violence, some suggestive sexual dialogueD, L, S, Vand situations.GuidanceD,L,S,V (all selected)TV-14 • Any combination ofParents strongly cautioned. This program may contain sophisticatedD, L, S, Vthemes, sexual content, strong language and more intense violence.L,S,V (all selected)TV-MA • Any combination ofMature audiences only. This program may contain mature themes,L, S, Vprofane language, graphic violence, and explicit sexual content.FV: Fantasy/Cartoon Violence. V: Violence S: Sex L: Offensive Language D: Dialogue with sexual content.■ CANADIAN ENGLISH RATINGS (C. E. L. R.)EExempt - Exempt programming includes: news, sports, documentaries and other information programming,talk shows, music videos, and variety programming.C Programming intended for children under age 8. No offensive language, nudity or sexual content.C8+Programming generally considered acceptable for children 8 years and over. No profanity, nudity or sexualcontent.G General programming, suitable for all audiences.PG Parental Guidance suggested. Some material may not be suitable for children.14+Programming contains themes or content which may not be suitable for viewers under the age of 14. Parentsare strongly cautioned to exercise discretion in permitting viewing by pre-teens and early teens.18+ 18+ years old. Programming restricted to adults. Contains constant violence or scenes of extreme violence.■ CANADIAN FRENCH RATINGS (C. F. L. R.)E Exempt - Exempt programming.GGeneral - Programming intended for audience of all ages. Contains no violence, or the violence content isminimal or is depicted appropriately.8 ans+8+ General - Not recommended for young children. Programming intended for a broad audience but containslight or occasional violence. Adult supervision recommended.13 ans+Programming may not be suitable for children under the age of 13 - Contains either a few violent scenes or oneor more sufficiently violent scenes to affect them. Adult supervision strongly suggested.16 ans+Programming may not be suitable for children under the age of 16 - Contains frequent scenes of violence orintense violence.18 ans+ Programming restricted to adults. Contains constant violence or scenes of extreme violence.CautionThe V-Chip system that is used in this set is capable of blocking “NR” programs (non rated, not applicable andnone) as per FCC Rules Section15.120(e)(2). If the option of blocking “NR” programs is chosen “unexpected andpossibly confusing results may occur, and you may not receive emergency bulletins or any of the following types ofprogramming:”• Emergency Bulletins (Such as EAS messages, weather warnings and others)• Locally originated programming • News • Political • Public Service Announcements • Religious • Sports • WeatherTechnical InformationClosed caption (CC)For viewing the CC of digital broadcasting, set the aspect to FULL (If viewing with H-FILL, JUST, ZOOM or 4:3;characters might be cut off).The CC can be displayed on the TV if the receiver (such as a set-top box or satellite receiver) has the CC set Onusing the Component or HDMI connection to the TV.If the CC is set to On on both the receiver and TV when the signal is 480i (except for the HDMI connection), the CCmay overlap on the TV.If a digital program is being output in analog format, the CC data will also be output in analog format.If the recorder or output monitor is connected to the TV, the CC needs to be set up on the recorder or outputmonitor.Aspect Ratio (FORMAT)Press the FORMAT button to cycle through the aspect modes. This lets you choose the aspect depending on theformat of the received signal and your preference. (p. 16)(e.g.: in case of 4:3 image)FULL JUST44 45FULLEnlarges the 4:3 image horizontally to the screen’s side edges. Stretches to justify the 4:3 image to the four corners of the(Recommended for anamorphic picture)screen.(Recommended for normal TV broadcast)H-FILL 4:3H-FILLEnlarges the 4:3 image horizontally to the screen’s side edges.The side edges of the image are cut off.ZOOMZOOMEnlarges the 4:3 image to the entire screen.(Recommended for Letter Box)Side barJUSTStandard(Note that “Image retention” of the side bar may occur fromdisplaying it for a long time.)Note480i (4:3), 480i (16:9), 480p (4:3), 480p (16:9):FULL, JUST, 4:3 or ZOOM1080i / 720p:FULL, H-FILL, JUST, 4:3 or ZOOMZoom adjustmentsVertical image position and size can be adjusted in “ZOOM”.Select “Zoom adjustments” on the “Picture” menu. (p. 26-27)V-position: Vertical position adjustmentV-size: Vertical size adjustmentTo reset the aspect ratio(OK)Technical InformationRatings List for LockFAQs, etc.
Technical Information (Continued)MessageSD card slot is empty. The card is not inserted.MeaningNo photos The card has no data or this type of data is not supported.Cannot read fileData format for SD Card browsingPhoto:Still images recorded with digital still cameras compatible with JPEG files of DCF* and EXIF**standardsData format: Baseline JPEG (Sub-sampling: 4:4:4, 4:2:2 or 4:2:0)Max. number of files: 9,999Image resolution: 160 x 120 to 10,000,000* DCF (Design rule for camera file system): A Japan Electronics and Information Technology Industries Association’s standard** EXIF (Exchangeable Image File Format)CautionA JPEG image modified with a PC may not be displayed.Partly degraded files might be displayed at a reduced resolution.NoteFolder structure viewed in PCDCIM100_P ANAP1000001.JPGP1000002.JPGP1000003.JPGP1000004.JPGCreated automatically3-digit folder number + 5-digit arbitrary characters4-digit arbitrary characters + 4-digit file numberUsable characters: 1-byte “a to z”, “A to Z”, “0 to 9,” and “_”The folder and file names may be different depending on the digital camera used.For the suitable SD Memory Cards, please confirm the latest information on the following website.http://panasonic.jp/support/global/cs (This site is in English only)Cautions in handling SD Card:Do not remove the card while the unit is accessing data (this can damage card or unit).Do not touch the terminals on the back of the card.Do not subject the card to high pressure or impact.Insert the card in the correct direction (otherwise, card may be damaged).Electrical interference, static electricity or erroneous operation may damage the data or card.Back up the recorded data at regular intervals in case of deteriorated or damaged data or erratic operation of the unit.(<strong>Panasonic</strong> is not liable for any deterioration or damage of recorded data.)SD Card warning messagesThe file is broken or unreadable.The TV does not support the format.VIERA Link TM “HDAVI Control TM ”HDMI connections to some <strong>Panasonic</strong> equipment allow you to interface automatically. (p. 30)This function may not work normally depending on the equipment condition.The equipment can be operated by other remote controls with this function on even if TV is in Standby mode.Image or sound may not be available for the first few seconds when the playback starts.Image or sound may not be available for the first few seconds when Input mode is switched.Volume function will be displayed when adjusting the volume of the equipment.If you connect the same kind of equipment at once (for example: one DIGA to HDMI 1 / another DIGA to HDMI 2), VIERA Link TMis available for the terminal with the smaller number.If you connect equipment that has “HDAVI Control 2 or later” function to the TV with HDMI cable, the sound from DIGITALAUDIO OUT terminal can be output as multi channel surround.“HDAVI Control 4” is the newest standard (current as of December, 2008) for the HDAVI Control compatible equipment.This standard is compatible with the conventional HDAVI equipment.HDMI connectionHDMI (high-definition multimedia interface) allows you to enjoy high-definition digital images and high-quality sound by connectingthe TV unit and the devices.HDMI-compatible equipment (*1) with an HDMI or DVI output terminal, such as a set-top box or a DVD player, can be connectedto the HDMI connector using an HDMI compliant (fully wired) cable.HDMI is the world’s first complete digital consumer AV interface complying with a non-compression standard.If the external equipment has only a DVI output, connect to the HDMI terminal via a DVI to HDMI adapter cable (*2).When the DVI to HDMI adapter cable is used, connect the audio cable to the audio input terminal.Audio settings can be made on the “HDMI 1 in”, “HDMI 2 in” or “HDMI 3 in”* menu screen. (p. 26)* HDMI 3 in (TC-L37X1L, TC-L32X1L only)Applicable audio signal sampling frequencies (L.PCM): 48 kHz, 44.1 kHz, 32 kHz(*1): The HDMI logo is displayed on an HDMI-compliant device.(*2): Enquire at your local digital equipment retailer shop.CautionUse with a PC is not assumed.All signals are reformatted before being displayed on the screen.If the connected device has an aspect adjustment function, set the aspect ratio to “16:9”.These HDMI connectors are “type A”.These HDMI connectors are compatible with HDCP (High-Bandwidth Digital Content Protection) copyright protection.A device having no digital output terminal may be connected to the input terminal of either “COMPONENT”, “S VIDEO”, or“VIDEO” to receive analog signals.The HDMI input terminal can be used with only the following image signals: 480i, 480p, 720p, 1080i.Match the output setting of the digital device.For details of the applicable HDMI signals, see p. 48.DIGITAL AUDIO OUT terminalsYou can enjoy your home theater by connecting a Dolby Digital (5.1 channel at ATSC only) decoder and “Multi Channel (ATSConly)” amplifier to the DIGITAL AUDIO OUT terminals.CautionDepending on your DVD player and DVD-Audio software the copyright protection function may operate and disable optical output.When an ATSC channel is selected, the output from the DIGITAL AUDIO OUT jack will be Dolby Digital. When an NTSCchannel is selected, the output will be PCM.Technical InformationPicture modeVivid:Provides enhanced picture contrast and sharpness for viewing in a well-lit room.Standard: Recommended for normal viewing conditions with subdued room lighting.Cinema: For watching movies in a darkened room. It provides a soft, film-like picture.Game: For playing video game. This mode will be set automatically if “GAME” is selected from Input label setting (p. 41)Custom (Photo): Customizes each item according to your taste.Photo is displayed in JPEG menu.NotePicture mode will be automatically set to “Standard” if you change the Input label from “GAME” to other labels.Picture mode will be automatically set to “Game” if you change from an Input label other than “GAME” to “GAME” label.FAQs, etc.46 47
Technical Information (Continued)Care and CleaningAspect Ratio: 4:3Size 1 Size 2Aspect Ratio: FULL/JUST(H-FILL/ZOOM)H sizeThe width will be decreased on both sides toreduce noise.First, unplug the Power cord plug from the wall outlet.Display panelThe front of the display panel has been specially treated. Wipe the panel surface gently using only a cleaning cloth or a soft, lintfreecloth.If the surface is particularly dirty, soak a soft, lint-free cloth in diluted mild liquid dish soap (1 part mild liquid dish soap dilutedby 100 times the amount of water) and then wring the cloth to remove excess liquid. Use this cloth to wipe the surface of thedisplay panel, then wipe it evenly with a dry cloth of the same type until the surface is dry.Do not scratch or hit the surface of the panel with fingernails or other hard objects. Furthermore, avoid contact with volatilesubstances such as insect sprays, solvents, and thinner; otherwise, the quality of the surface may be adversely affected.Input signal that can be displayed* Mark: Applicable input signal for Component (Y, PB, PR), HDMI and PChorizontal frequency (kHz) vertical frequency (Hz) COMPONENT HDMI PC525 (480) / 60i 15.73 59.94 * *525 (480) /60p 31.47 59.94 * *750 (720) /60p 45.00 59.94 * *1,125 (1,080) /60i 33.75 59.94 * *640 × 400 @70 31.47 70.08 *640 × 480 @60 31.47 59.94 *Macintosh13” (640 × 480) 35.00 66.67 *640 × 480 @75 37.50 75.00 *852 × 480 @60 31.47 59.94 *800 × 600 @60 37.88 60.32 *800 × 600 @75 46.88 75.00 *800 × 600 @85 53.67 85.08 *Macintosh16” (832 × 624) 49.73 74.55 *1,024 × 768 @60 48.36 60.00 *1,024 × 768 @70 56.48 70.07 *1,024 × 768 @75 60.02 75.03 *1,024 × 768 @85 68.68 85.00 *Macintosh 21” (1,152 × 870) 68.68 75.06 *1,280 × 768 @60 47.70 60.00 *1,280 × 1,024 @60 63.98 60.02 *1,366 × 768 @60 48.36 60.00 *NoteSize 1 Size 2 The width will be increased on both sides toreduce noise.See pages 26-27 for more informationSignals other than above may not be displayed properly.The above signals are reformatted for optimal viewing on your display.PC Input Terminals ConnectionCabinetIf the cabinet becomes dirty, wipe it with a soft, dry cloth.If the cabinet is particularly dirty, soak the cloth in a weak mild liquid dish soap and then wring the cloth dry.Use this cloth to wipe the cabinet and then wipe it dry with a dry cloth.Do not allow any mild liquid dish soap to come into direct contact with the surface of the LCD TV.If water droplets get inside the unit, operating problems may result.Avoid contact with volatile substances such as insect sprays, solvents, and thinner; otherwise, the quality of the cabinet surfacemay be adversely affected or the coating may peel off. Furthermore, do not leave it for long periods in contact with articles madefrom rubber or PVC.PedestalCleaningWipe the surfaces with a soft, dry cloth. If the unit is particularly dirty, clean it using a cloth soaked with water towhich a small amount of mild liquid dish soap has been added and then wipe with a dry cloth.Do not use products such as solvents, thinner, or household wax for cleaning, as they can damage the surfacecoating. (If using a chemically-treated cloth, follow the instructions supplied with the cloth.)Do not attach sticky tape or labels, as they can make the surface of the pedestal dirty. Do not allow long-termcontact with rubber, vinyl products, or the like. (Doing so will cause deterioration.)Power cord plugWipe the plug with a dry cloth at regular intervals. (Moisture and dust can lead to fire or electrical shock.)Care and CleaningTechnical InformationComputer signals which can be input are those with a horizontal scanning frequency of 15 to 110 kHz and vertical scanning frequencyof 48 to 120 Hz. (However, the image will not be displayed properly if the signals exceed 1,200 lines.)Some PC models cannot be connected to the set.There is no need to use an adapter for computers with IBM PC/AT compatible D-sub 15P terminal.The maximum resolution: 1,280 × 1,024If the display resolution exceeds these maximums, it may not be possible to show fine detail with sufficient clarity.Signal Names for D-sub 15P Connector11121314156 7 8 9 101 2 3 4 5Pin Layout for PC Input TerminalPin No. Signal Name Pin No. Signal Name Pin No. Signal NameR GND (Ground) NC (not connected)G GND (Ground) NCB GND (Ground) HD/SYNCNC (not connected) NC (not connected) VDGND (Ground) GND (Ground) NC48 49FAQs, etc.
FAQBefore requesting service or assistance, please follow these simple guides to resolve the problem.If the problem still persists, please contact your local <strong>Panasonic</strong> dealer or <strong>Panasonic</strong> Service Center for assistance.For details (p. 53)White spots orshadow images(noise)Check the position, direction,and connection of the antenna.Interference orfrozen digitalchannels(intermittent sound)Change the direction of antennafor digital channels.Check “Signal meter” (p. 39).If the signal is weak, check theantenna and consult your localdealer.The LCD panel movesslightly when it ispushed with a finger.A clattering soundmight be heardThis is not a malfunction.There is some looseness aroundthe panel to prevent the damage tothe panel.Pictures from externalequipment are distorted whenthe unit is connected via HDMIIs the HDMI cable connected properly?(p. 31, 43)Turn Off the TV unit and equipment, thenturn them On again.Check an input signal from the equipment.(p. 48)Use equipment compliant withEIA/CEA-861/861B.When the channel is changed onan STB that is connected withHDMI, “HDMI” may be displayedon the top left of the screenThis is not a malfunction.Recording does notstart immediatelyCheck the settings of the recorder. Fordetails, read the manual of the recorder.The remote control doesnot workAre the batteries installed correctly? (p. 6)Are the batteries new?If there is a problem with your TV, please refer to the table below to determine the symptoms, then carry out thesuggested check. If this does not solve the problem, please contact your local <strong>Panasonic</strong> dealer, quoting the modelnumber and serial number (both found on the rear of the TV).50 51Screen Sound OtherProblemSome spots remainbright or darkChaotic image, noisyNo image can bedisplayedOnly spots are displayedinstead of imagesNeither image norsound is producedActionsThe LCD panel is made up of a few million pixels and isproduced with advanced technology through an intricateprocess. Sometimes a few pixels may be bright or dark.These pixels do not indicate a defective panel and willhave no impact on the performance of the TV.Check nearby electrical products(car or motorcycle ignition systems, fluorescent lamp, etc.)Check Picture menu (p. 26)Check the cable connections.Check that the correct input has been selected.Check the channel settings. (p. 38)Check the antenna cables.Is the power cord plugged into the outlet?Is the TV unit turned On?Check Picture menu (p. 26) and volume.Check the AV cable connections. (p. 8-11)Check that the correct input has been selected. (p. 20)Black Box appears Change settings of Closed caption (CC). (p. 40)No sound is producedSound is unusualUnknown sound heard1- Sounds from TVcabinet2- Tick/Click sound3- Buzzing soundThe main unit is hot.Are the speakers’ cables connected correctly? (p. 43)Is “Sound Mute” active? (p. 12)Is the volume set to the minimum?Is “TV speakers” set to “Off”? (p. 26)Change “SAP” settings. (p. 15)Check “HDMI 1 in”, “HDMI 2 in” or “HDMI 3 in”* settings.* HDMI 3 in (TC-L37X1L, TC-L32X1L only) (p. 26)Set “SAP” setting to “Stereo” or “Mono”.Check the HDMI device connected to the unit.Set the audio setting of the HDMI device to“Linear PCM”.If digital sound connection has a problem,select analog sound connection.1- Changes in the temperature and humidity of the room may causethe TV’s cabinet to expand or contract and produce metallicsounds. This is not a sign of faulty operation or a malfunction.2- When the TV is powered on, an electrical component in the TVactivates producing a tick/click sound. This is not a sign of faultyoperation or a malfunction.3- Electrical circuits are active while the TV set is on.This is not a sign of faulty operation or a malfunction.The main unit radiates heat and some of the parts maybecome hot. This is not a problem for performance orquality.Set up in a location with good ventilation.Do not cover the ventilation holes of the TV with atablecloth, etc., and do not place on top of other equipment.Frequently Asked QuestionsFAQs, etc.
SpecificationsPower SourcePowerConsumptionDisplay panelSoundPC signalsMaximumStandby conditionTC-L26X1L TC-L32X1L TC-L37X1LAC 110-127 V, 60 Hz79 W0.6 WAspect Ratio 16:9Visible screen size(W × H × Diagonal)(No. of pixels)26” class (26.0 inchesmeasured diagonally)22.7 ” × 12.8” × 26.0”(576 mm × 324 mm × 661 mm)120 W0.7 W32” class (31.5 inchesmeasured diagonally)27.5 ” × 15.4 ” × 31.5 ”(698 mm × 392 mm × 800 mm)1,049,088 (1,366 (W) × 768 (H)) [4,098 × 768 dots]Speaker1-way 2 speakers slim under SP SystemAudio Output 10 W [5 W + 5 W] (10 % THD) 20 W [10 W + 10 W] (10 % THD)Channel Capability-ATSC/NTSC (Digital/Analog)Operating ConditionsConnection TerminalsVIDEO IN 1VIDEO IN 2COMPONENT INHDMI 1-3*VGA, SVGA, XGA, WXGA, SXGAHorizontal scanning frequency 31 - 69 kHzVertical scanning frequency 59 - 86 HzVHF/ UHF: 2 - 69, CATV: 1 - 135Temperature:Humidity:32 °F – 95 °F (0 °C – 35°C)20 % – 80 % RH (non-condensing)VIDEO: RCA PIN Type × 1 1.0 V[p-p] (75 Ω)AUDIO L - R: RCA PIN Type × 2 0.5 V [rms]176 W0.6 W37” class (37.0 inchesmeasured diagonally)32.2 ” × 18.1 ” × 37.0 ”(819 mm × 460 mm × 940 mm)VIDEO: RCA PIN Type × 1 1.0 V [p-p] (75 Ω)S VIDEO: Mini DIN 4-pin Y: 1.0 V[p-p] (75 Ω) C: 0.286 V [p-p] (75 Ω)AUDIO L - R: RCA PIN Type × 2 0.5 V [rms]Y: 1.0 V [p-p] (including synchronization)PB, PR: ±0.35 V [p-p]AUDIO L-R: RCA PIN Type × 2 0.5 V [rms]TYPE A Connector × 3 (TC-L37X1L, TC-L32X1L), TYPE A Connector × 2 (TC-L26X1L)• This TV supports “HDAVI Control 4” function.* HDMI 3 (TC-L37X1L, TC-L32X1L only)PCD-SUB 15PIN: R,G,B / 0.7 V [p-p] (75 Ω)HD, VD / 1.0 - 5.0 V [p-p] (high impedance)Card slot SD CARD slot × 1DIGITAL AUDIO OUT PCM / Dolby Digital, Fiber OpticFEATURESDimensionsMass(W × H × D)Including TV standTV Set onlyCLOSED CAPTION, V-ChipHDMI (HDAVI Control 4)Vesa compatible, Photo viewer26.2” × 18.7” × 8.6”(664 mm × 474 mm × 217 mm)26.2” × 17.1” × 4.7 ”(664 mm × 434 mm × 118 mm)31.5 ” × 21.7 ” × 8.6 ”(798 mm × 551 mm × 217 mm)31.5 ” × 20.2 ” × 3.7 ”(798 mm × 511 mm × 93 mm)36.1 ” × 24.5 ” × 11.3 ”(915 mm × 620 mm × 287 mm)36.1 ” × 22.8 ” × 3.9 ”(915 mm × 577 mm × 97 mm)Including TV stand 23.2 lb. (10.5 ) NET 28.9 lb. (13.1 ) NET 35.9 lb. (16.3 ) NETTV Set only 19.9 lb. (9.0 ) NET 25.1 lb. (11.4 ) NET 30.9 lb. (14.0 ) NETPeruSpecifications[TC-L26X1L] [TC-L32X1L] [TC-L37X1L]18.7 ” (474 mm)17.1 ” (434 mm)26.2 ” (664 mm)4.7 ” (118 mm)4.3 ”(108 mm)21.7 ” (551 mm)20.2 ” (511 mm)31.5 ” (798 mm)3.7 ” (93 mm)3.3 ”(83 mm)24.5 ” (620 mm)22.8 ” (577 mm)36.1 ” (915 mm)3.9 ” (97 mm)3.5 ”(87 mm)FAQs, etc.14.2 ”(359 mm)8.6 ” (217 mm)14.2 ”(359 mm)8.6 ” (217 mm)15.8 ”(399 mm)11.3 ” (287 mm)NoteDesign and Specifications are subject to change without notice. Mass and Dimensions shown are approximate.52 53


