
You also want an ePaper? Increase the reach of your titles
YUMPU automatically turns print PDFs into web optimized ePapers that Google loves.
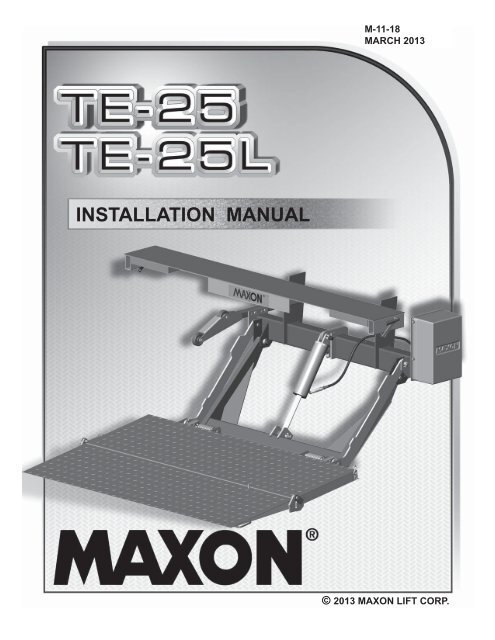
M-11-18MARCH 2013INSTALLATION MANUAL© 2013 MAXON LIFT CORP.
TABLE OF CONTENTSWARNINGS ........................................................................................................................... 4SAFETY INSTRUCTIONS .................................................................................................... 5NOTICE ................................................................................................................................. 5LIFTGATE COMPONENTS ................................................................................................... 6PARTS BOX FOR TE-25 & TE-25L PAINTED (GRAVITY DOWN) ....................................... 7PARTS BOX FOR TE-25 & TE-25L GALVANIZED (GRAVITY DOWN) ................................ 8PARTS BOX FOR TE-25 & TE-25L PAINTED (POWER DOWN) ......................................... 9PARTS BOX FOR TE-25 & TE-25L GALVANIZED (POWER DOWN) ................................ 10TE-25 MANUALS & DECALS...............................................................................................11VEHICLE REQUIREMENTS ............................................................................................... 12<strong>STEP</strong> 1 - INSTALL EXTENSION PLATES .......................................................................... 15WELD PAINTED EXTENSION PLATE TO VEHICLE .......................................... 16BOLT GALVANIZED EXTENSION PLATE TO VEHICLE .................................... 19WELD GALVANIZED EXTENSION PLATE TO VEHICLE ................................... 22BOLT INSTALLATION BRACKETS (GALVANIZED EXTENSION PLATE) ......... 23<strong>STEP</strong> 2 - WELD LIFTGATE TO VEHICLE ......................................................................... 24<strong>STEP</strong> 3 - RUN HYDRAULIC LINES ................................................................................... 26GRAVITY DOWN - WITHOUT HYDRAULIC LOCK ........................................... 26GRAVITY DOWN - WITH HYDRAULIC LOCK ................................................... 28POWER DOWN - WITHOUT HYDRAULIC LOCK ............................................. 31POWER DOWN - WITH HYDRAULIC LOCK ...................................................... 33<strong>STEP</strong> 4 - ATTACH OPTIONAL BATTERY BOX & FRAME TO VEHICLE (IF EQUIPPED) . 36<strong>STEP</strong> 5 - RUN POWER CABLE .......................................................................................... 44<strong>STEP</strong> 6 - CONNECT POWER CABLE ................................................................................ 46<strong>STEP</strong> 7 - INSTALL CONTROL SWITCH ............................................................................. 47
<strong>STEP</strong> 8 - ADD HYDRAULIC FLUID TO RESERVOIR ........................................................ 50<strong>STEP</strong> 9 - CONNECT POWER CABLE TO BATTERY ......................................................... 52<strong>STEP</strong> 10 - REMOVE LOCKING ANGLE & CHECK FOR INTERFERENCE ........................... 53<strong>STEP</strong> 11 - BOLT PLATFORM OPENER TO LIFTGATE ...................................................... 58<strong>STEP</strong> 12 - PLATFORM ADJUSTMENT (IF REQUIRED) .................................................... 60<strong>STEP</strong> 13 - FINISH WELDING LIFTGATE TO VEHICLE ..................................................... 62<strong>STEP</strong> 14 - ADJUST SAFETY HOOK (IF REQUIRED) ....................................................... 63<strong>STEP</strong> 15 - WELD ON LOCK BRACKET (IF EQUIPPED) ................................................... 64<strong>STEP</strong> 16 - VEHICLE TAILLIGHT POSITIONING (IF REQUIRED) ..................................... 65ATTACH DECALS ............................................................................................................... 66TOUCHUP PAINTED OR GALVANIZED FINISH ............................................................... 68SYSTEM DIAGRAMS ......................................................................................................... 69PUMP & MOTOR SOLENOID OPERATION (GRAVITY DOWN) ....................................... 69HYDRAULIC SCHEMATIC (GRAVITY DOWN) ................................................................... 70ELECTRICAL SCHEMATIC (GRAVITY DOWN) ................................................................. 71PUMP & MOTOR SOLENOID OPERATION (POWER DOWN) .......................................... 72HYDRAULIC SCHEMATIC (POWER DOWN) .................................................................... 73ELECTRICAL SCHEMATIC (POWER DOWN) ................................................................... 74OPTIONS ........................................................................................................................... 75OPTIONAL LIFTGATE COMPONENTS .............................................................................. 75
Comply with the following WARNINGS and SAFETY INSTRUCTIONS while installingLiftgates. See Operation Manual for operating safety requirements.WARNINGS!WARNING• Do not stand, or allow obstructions, under the platform when lowering the Liftgate. Be sure yourfeet are clear of the Liftgate.• Keep fingers, hands, arms, legs, and feet clear of moving Liftgate parts (and platformedges) when operating the Liftgate.• Correctly stow platform when not in use. Extended platforms could create a hazard forpeople and vehicles passing by.• Make sure vehicle battery power is disconnected while installing Liftgate. Connect vehiclebattery power to the Liftgate only when installation is complete or as required in the installationinstructions.• If it is necessary to stand on the platform while operating the Liftgate, keep your feet and anyobjects clear of the inboard edge of the platform. Your feet or objects on the platform can becometrapped between the platform and the Liftgate extension plate.• Never perform unauthorized modifi cations on the Liftgate. Modifi cations may result in early failureof the Liftgate and may create hazards for Liftgate operators and maintainers.• Recommended practices for welding on steel parts are contained in the current AWS (AmericanWelding Society) D1.1 Structural Welding Code - Steel. Damage to Liftgate and/or vehicle, andpersonal injury can result from welds that are done incorrectly.• Welding on galvanized parts gives off especially hazardous fumes. Comply with WARNING decalon the galvanized part (FIG. 4-1). To minimize hazard remove galvanizing from weld area, provideadequate ventilation, and wear suitable respirator.FIG. 4-111921 Slauson Ave. Santa Fe Springs, CA. 90670 (800) 227-4116 FAX (888) 771-77134
SAFETY INSTRUCTIONS SAFETY INSTRUCTIONS• Read and understand the instructions in this Installation Manual before installing Liftgate.• Before operating the Liftgate, read and understand the operating instructions in OperationManual.• Comply with all WARNING and instruction decals attached to the Liftgate.• Keep decals clean and legible. If decals are illegible or missing, replace them. Free replacementdecals are available from <strong>Maxon</strong> Customer Service.• Consider the safety and location of bystanders and location of nearby objects when operating theLiftgate. Stand to one side of the platform while operating the Liftgate.• Do not allow untrained persons to operate the Liftgate.• Wear appropriate safety equipment such as protective eyeglasses, faceshield and clothing whileperforming maintenance on the Liftgate and handling the battery. Debris from drilling and contactwith battery acid may injure unprotected eyes and skin.• Be careful working by an automotive type battery. Make sure the work area is well ventilated andthere are no fl ames or sparks near the battery. Never lay objects on the battery that can short theterminals together. If battery acid gets in your eyes, immediately seek fi rst aid. If acid gets on yourskin, immediately wash it off with soap and water.• If an emergency situation arises (vehicle or Liftgate) while operating the Liftgate, release the controlswitch to stop the Liftgate.• A correctly installed Liftgate operates smoothly and reasonably quiet. The only noticeable noiseduring operation comes from the power unit while the platform is raised and lowered. Listen forscraping, grating and binding noises and correct the problem before continuing to operate Liftgate.NOTICENOTICE• <strong>Maxon</strong> Lift is responsible for the instructions to correctly install MAXON Liftgates ontrucks or trailers only.• Liftgate installers, not <strong>Maxon</strong> Lift, are responsible for reviewing and complying with allapplicable Federal, State, and Local regulations pertaining to the trailer or truck.11921 Slauson Ave. Santa Fe Springs, CA. 90670 (800) 227-4116 FAX (888) 771-77135
LIFTGATE COMPONENTS! CAUTIONPrevent injuries and equipment damage. Before cutting the shipping strapsfrom the Liftgate, put Liftgate on level ground that will support at least 1500pounds. Be careful lifting and moving components (such as extension plate)after shipping straps are removed.NOTE: Make sure you have all components and parts before you start installing Liftgate.Compare parts in the part box and each kit box with packing list closedin each box. If parts and components are missing or incorrect, call:<strong>Maxon</strong> Customer ServiceCall (800) 227-4116 orSend e-mail to customersupport@maxonlift.comSINGLE <strong>STEP</strong>(TE25L, IF EQUIPPED)EXTENSION PLATE(GALVANIZED)OPENEREXTENSION PLATE(PAINTED)<strong>STEP</strong>(TE25L, IF EQUIPPED)11921 Slauson Ave. Santa Fe Springs, CA. 90670 (800) 227-4116 FAX (888) 771-7713TE-25 OR TE-25L LIFTGATE(PLATFORM WITH WEDGE FLIPOVER SHOWN)PARTS BOXCOMPONENTSFIG. 6-16
PARTS BOX FOR TE-25 & TE-25L PAINTED(GRAVITY DOWN)ITEM QTY. PART NO. DESCRIPTION1 4 030458 SCREW, TAPPING #10 X 1/2” LG.2 7 050079 CLIP, FRAME3 1 055011 HANDLE, RUBBER4 1 125674 CLAMP, JIFFY #1305 1 202406 ELBOW, BRASS 1/4” X 1/4”6 1 203417 RENTAL LOCK BRACKET (OPTIONAL)7 1 203570 INNER BRACKET, RENTAL LOCK (OPTIONAL)8 10 205780 TIE, PLASTIC 7” LG.9 10 206864 TIE, PLASTIC 12-14” LG.10 3 214663 CLAMP, #8 RUBBER LOOM11 1 215345 SPRING, EXTENSION12 1 224370-07 HOSE, 1/4” I.D. PLASTIC, 60-1/2” LG.13 1 228012 ADAPTER, 9/16”-18M - 1/4F, STRAIGHT14 2 251333 FLAT 1/8” X 2” X 2” LG.15 1 264422 CABLE ASSEMBLY, 175 AMPS, 38’ LG.16 1 267959-01 MOLDED SWITCH ASSEMBLY17 1 280635-01 HOSE, 3/8” HP, SAE O-RING #6M-JIC#618 2 900057-5 SCREW, SELF TAPPING, #10-24 X 1” LG.19 1 906497-02 LUG, 2 GA COPPER20 1 906709-02 VALVE, FLOW REGULATOR, #6SAE, 2 GPM21 1 906722-01 ELBOW, 90 DEG, NPSC, O-RING #6M-MTABLE 7-111921 Slauson Ave. Santa Fe Springs, CA. 90670 (800) 227-4116 FAX (888) 771-77137
PARTS BOX FOR TE-25 & TE-25L GALVANIZED(GRAVITY DOWN)ITEM QTY. PART NO. DESCRIPTION1 4 030458 SCREW, TAPPING #10 X 1/2” LG.2 7 050079 CLIP, FRAME3 1 125674 CLAMP, JIFFY #1304 1 202406 ELBOW, BRASS 1/4” X 1/4”5 10 205780 TIE, PLASTIC 7” LG.6 10 206864 TIE, PLASTIC 12-14” LG.7 3 214663 CLAMP, #8 RUBBER LOOM8 2 283307-01 BRACKET, INSTALLATION9 1 224370-07 HOSE, 1/4” I.D. PLASTIC, 60-1/2” LG.10 1 228012 ADAPTER, 9/16”-18M - 1/4F, STRAIGHT11 2 251333 FLAT 1/8” X 2” X 2” LG.12 1 264422 CABLE ASSEMBLY, 175 AMPS, 38’ LG.13 1 267959-01 MOLDED SWITCH ASSEMBLY14 1 268405-01 KIT, HYDRAULIC LOCK VALVE, STD TUK, G/D15 1 280635-01 HOSE, 3/8” HP, SAE O-RING #6M-JIC#616 REF283257-01 KIT, EXTENSION PLATE HARDWARE, 96” INSTALL283257-02 KIT EXTENSION PLATE HARDWARE, 102” INSTALL16A13TEAR DROP (LOCK NUT) 1/2”-13 (96” EXTENSION PLATE)283700-0115 TEAR DROP (LOCK NUT) 1/2”-13 (102” EXTENSION PLATE)16B13HEX BOLT, 1/2”-13 X 1-3/4” LG.(96” EXTENSION PLATE)901024-215 HEX BOLT, 1/2”-13 X 1-3/4” LG. (102” EXTENSION PLATE)17 2 900057-5 SCREW, SELF TAPPING, #10-24 X 1” LG.18 1 906497-02 LUG, 2 GA COPPER19 1 906709-02 VALVE, FLOW REGULATOR, #6SAE, 2 GPM20 1 906722-01 ELBOW, 90 DEG, NPSC, O-RING #6M-M21 2 900035-3 HEX HEAD CAP SCREW, 1/2”-13 X 1-1/2” LG.22 2 901011-9 HEX NUT,1/2”-1323 2 902000-13 FLAT WASHER, 1/2”, .032”11921 Slauson Ave. Santa Fe Springs, CA. 90670 (800) 227-4116 FAX (888) 771-7713TABLE 8-18
PARTS BOX FOR TE-25 & TE-25L PAINTED(POWER DOWN)ITEM QTY. PART NO. DESCRIPTION1 4 030458 SCREW, TAPPING #10 X 1/2” LG.2 7 050079 CLIP, FRAME3 1 055011 HANDLE, RUBBER4 1 125674 CLAMP, JIFFY #1305 1 203417 RENTAL LOCK BRACKET (OPTIONAL)6 1 203570 INNER BRACKET, RENTAL LOCK (OPTIONAL)7 10 205780 TIE, PLASTIC 7” LG.8 10 206864 TIE, PLASTIC 12-14” LG.9 3 214663 CLAMP, #8 RUBBER LOOM10 1 215345 SPRING, EXTENSION11 2 251333 FLAT 1/8” X 2” X 2” LG.12 1 264422 CABLE ASSEMBLY, 175 AMPS, 38’ LG.13 1 264951-04 MOLDED SWITCH ASSEMBLY, 6 POSITION, 9” LG.14 1 267959-01 MOLDED SWITCH ASSEMBLY15 1 280634-01 HOSE, 3/8” HP, JIC#6F-JIC#616 1 280635-01 HOSE, 3/8” HP, SAE O-RING #6M-JIC#617 2 900057-5 SCREW, SELF TAPPING, #10-24 X 1” LG.18 1 905152 ELBOW, 90 DEG, O-RING, SAE6-JIC37 #619 1 906497-02 LUG, 2 GA COPPER20 1 906709-02 VALVE, FLOW REGULATOR. #6SAE, 2 GPM21 1 906722-01 ELBOW, 90 DEG, NPSC, O-RING #6M-MTABLE 9-111921 Slauson Ave. Santa Fe Springs, CA. 90670 (800) 227-4116 FAX (888) 771-77139
PARTS BOX FOR TE-25 & TE-25L GALVANIZED(POWER DOWN)ITEM QTY. PART NO. DESCRIPTION1 4 030458 SCREW, TAPPING #10 X 1/2” LG.2 7 050079 CLIP, FRAME3 1 125674 CLAMP, JIFFY #1304 10 205780 TIE, PLASTIC 7” LG.5 10 206864 TIE, PLASTIC 12-14” LG.6 3 214663 CLAMP, #8 RUBBER LOOM7 2 283307-01 BRACKET, INSTALLATION8 2 251333 FLAT 1/8” X 2” X 2” LG.9 1 264422 CABLE ASSEMBLY, 175 AMPS, 38’ LG.10 1 264951-04 MOLDED SWITCH ASSEMBLY, 6 POSITION, 9” LG.11 1 267959-01 MOLDED SWITCH ASSEMBLY12 1 268405-02 KIT, HYDRAULIC LOCK VALVE, STD TUK, P/D13 1 280634-01 HOSE, 3/8” HP, JIC#6F-JIC#614 1 280635-01 HOSE, 3/8” HP, SAE O-RING #6M-JIC#615 REF283257-01 KIT, EXTENSION PLATE HARDWARE, 96” INSTALL283257-02 KIT, EXTENSION PLATE HARDWARE, 102” INSTALL15A13TEAR DROP (LOCK NUT) 1/2”-13, (96” EXTENSION PLATE)283700-0115 TEAR DROP (LOCK NUT) 1/2”-13, (102” EXTENSION PLATE)15B13HEX BOLT, 1/2”-13 X 1-3/4” LG. (96” EXTENSION PLATE)901024-215 HEX BOLT, 1/2”-13 X 1-3/4” LG. (102” EXTENSION PLATE)16 2 900057-5 SCREW, SELF TAPPING, #10-24 X 1” LG.17 1 905152 ELBOW, 90 DEG, O-RING, SAE6-JIC37 #618 1 906497-02 LUG, 2 GA COPPER19 1 906709-02 VALVE, FLOW REGULATOR. #6SAE, 2 GPM20 1 906722-01 ELBOW, 90 DEG, NPSC, O-RING #6M-M21 2 900035-3 HEX HEAD CAP SCREW, 1/2”-13 X 1-1/2” LG.22 2 901011-9 HEX NUT, 1/2”-1323 2 902000-13 FLAT WASHER, 1/2”, .032”11921 Slauson Ave. Santa Fe Springs, CA. 90670 (800) 227-4116 FAX (888) 771-7713TABLE 10-110
TE-25 MANUALS & DECALSITEM QTY. PART NO. DESCRIPTIONREF. 1 266404-08 KIT, MANUAL & DECAL TE-25/TE-25L1 1 220382 DECAL, 2500# CAPACITY2 1 251867-03 DECAL, OPERATING INSTRUCTIONS3 1 282479-01 DECAL, WARNING & SAFETY4 1 264507 DECAL, UP & DOWN5 1 265736-01 DECAL, PINCH HAZARD WARNING6 1 282847-02 DECAL, STOW WARNING7 1 M-11-18 MANUAL, TE-25/TE-25L INSTALLATION8 1 M-11-19 MANUAL, TE-25/TE-25L OPERATION9 1 M-11-20 MANUAL, TE-25/TE-25L MAINTENANCETABLE 11-111921 Slauson Ave. Santa Fe Springs, CA. 90670 (800) 227-4116 FAX (888) 771-771311
1. Check for correct clearances(FIGS. 12-1and 12-2) on vehicleto prevent interferencebetween vehicle andLiftgate.VEHICLE REQUIREMENTSNOTE: Body Maximum and Minimum Operating Bed Height for Standard Platform:Maximum height for TE-25 is 54” (Unloaded). Minimum height is 44”(Loaded).Maximum height for TE-25L is 44” (Unloaded). Minimum height is38” (Loaded). Do not install this Liftgate on vehicle bodies equipped withswing open doors.NOTE: Make sure vehicle is parked on level ground while preparing vehicle andinstalling Liftgate.NOTE: Dimensions are provided as reference for fi tting Liftgate to vehicle body.NOTE: Measure the width of the Liftgate and the width of the vehicle body beforeyou start doing this procedure. Ensure the Liftgate is the correct width forvehicle.VEHICLEBODYEXTENSIONPLATE54” MAX. (UNLOADED)44” MIN. (LOADED)12”VEHICLEBODYEXTENSIONPLATE 12”13-3/4”- 23-3/4”30-1/8”24-5/8”MOUNTINGPLATECLEARANCES FOR TE-25FIG. 12-134”28-1/2”MOUNTINGPLATE10-11/16”10-11/16”11921 Slauson Ave. Santa Fe Springs, CA. 90670 (800) 227-4116 FAX (888) 771-771344” MAX. (UNLOADED)38” MIN. (LOADED)13-3/16”- 19-3/16”CLEARANCES FOR TE-25LFIG. 12-212
VEHICLE REQUIREMENTS - Continued2. Fit the Liftgate to a truck body by cutting the truck frame asshown in FIGS. 13-1 and 14-1.12”5”REAR SILLCAUTION• To prevent aluminum platform from being damaged, make sure vehicle frameis cut correctly and rear sills are modified if over 5” in height for high bedmodels, and 4” in height for low bed models. If the cutouts are incorrect,platform may hit vehicle frame or underbody when stowing the Liftgate. Thebottom of the platform may also hit the sill.• Installer is responsible for ensuring that vehicle body and frame modificationsdo not adversely affect the integrity of the body and frame.NOTE: The dimensions, shown in the illustration below, are maximums except asindicated.PLATFORM CLEARANCECUTOUT AREA(WITHIN DASHED LINES)16”BODY FLOORBODY CROSS MEMBERSTRUCK FRAMEVEHICLE FRAME CUT FOR TE-25FIG. 13-111921 Slauson Ave. Santa Fe Springs, CA. 90670 (800) 227-4116 FAX (888) 771-771313
VEHICLE REQUIREMENTS - ContinuedREAR SILLBODY FLOOR8”4”PLATFORM CLEARANCECUTOUT AREA(WITHIN DASHED LINES)17-3/4”BODY CROSS MEMBERSTRUCK FRAMEVEHICLE FRAME CUT FOR TE-25LFIG. 14-111921 Slauson Ave. Santa Fe Springs, CA. 90670 (800) 227-4116 FAX (888) 771-771314
<strong>STEP</strong> 1 - INSTALL EXTENSION PLATESNOTE: TE-25 Liftgates may be equipped with two types of extensions plates. Thepainted extension plate (FIG. 15-1) does not have bolt holes and is weldedon. Weld-on support straps and spacers (fl ats), provided with parts bags,must be used. The galvanized extension plate (FIG. 15-2) has bolt holesso it can be bolted to vehicle body. It also has holes for bolt-on installationbrackets, provided with parts bags. Refer to the following instructions forinstalling painted extension plates or galvanized extension plates.PAINTED WELD-ON EXTENSION PLATEFIG. 15-1GALVANIZED BOLT-ON EXTENSION PLATEFIG. 15-211921 Slauson Ave. Santa Fe Springs, CA. 90670 (800) 227-4116 FAX (888) 771-771315
<strong>STEP</strong> 1 - INSTALL EXTENSION PLATES - ContinuedWELD PAINTED EXTENSION PLATE TO VEHICLECAUTIONTo protect the original paint system if equipped, a 3” wide area of paint mustbe removed from all sides of the weld area before welding.NOTE: Before welding extension plate to vehicle body, make sure:• Inboard edge of extension plate is fl ush with the top of sill on vehicle body.• Top surface of extension plate is level with the ground.1. Center the extensionplate on vehiclebody. Weld theextension plate tovehicle body sill asshown in FIGS. 16-1and 16-22” LG. (TYP.)EQUALLY SPACEDBETWEEN 5” LG. WELDS1/4”1/4”EXTENSION PLATE WELDS - VIEWED FROM ABOVEFIG. 16-12” LG, 6 PLACESEQUAL SPACING(TYP.)1/4”1/4”5” LG. (TYP.), 4 PLACESCENTER OVER WIDTH OF 2CHANNELS AND 2 TUBES(UNDER FLOOR PLATE -SEE DASHED LINES)2 PLACES1” GAPSILL(PART OF VEHICLE BODY)11921 Slauson Ave. Santa Fe Springs, CA. 90670 (800) 227-4116 FAX (888) 771-77131/4”2 PLACES1” GAPEXTENSION PLATE WELDS - VIEWED FROM UNDERNEATHFIG. 16-216
<strong>STEP</strong> 1 - INSTALL EXTENSION PLATES - Continued2. Get the extension spring (FIG. 17-1A) from partsbox. Hook one end of spring in loop (FIG. 17-1A)under extension plate (FIG. 17-1). Next, hook oppositeend of spring in eye of the safety hook (FIG.17-1A).EXTENSION PLATEEXTENSION SPRING PLACEMENTFIG. 17-1LOOPSAFETYHOOKSAFETY HOOKEXTENSION PLATEHOOKING EXTENSION SPRING- RH SIDE VIEWFIG. 17-1AEXTENSIONSPRINGEYE11921 Slauson Ave. Santa Fe Springs, CA. 90670 (800) 227-4116 FAX (888) 771-771317
<strong>STEP</strong> 1 - INSTALL EXTENSION PLATES - Continued3. Make 2 support straps (FIG. 18-1) and2 spacers (FIG. 18-2) to keep Liftgate inproper position. (While welding Liftgate tovehicle, support straps keep platform levelwith extension plate and spacers keep 1/8”between platform and extension plate.)4. Place 2 temporary support straps on the extensionplate as shown in FIGS. 18-3 & 18-3A. Also,put 2 temporary spacers (FIG. 18-3A) betweenplatform and extension plate as shown in FIG.18-3A. Weld the straps and spacers to extensionplate (FIG. 18-3A).1” (APPROX. - TYP.STRAP OVERHANG)1/8” SPACERSUPPORT STRAP(3/8” X 4” STEEL FLAT)FIG. 18-11”2-1/2”SPACER (1/8” X 1” STEEL FLAT)FIG. 18-21/4”4”5”1/4” LG. TACK, SUPPORTSTRAP TO EXTENSIONPLATE (1 WELD ONLY),SPACER & SUPPORTSTRAP TO EXTENSIONPLATE (1 WELD ONLY)4”1/2” (APPROX. - TYP.SPACER OVERHANG)11921 Slauson Ave. Santa Fe Springs, CA. 90670 (800) 227-4116 FAX (888) 771-7713SUPPORTSTRAPSFIG. 18-3STRAP & SPACER WELDS(TYPICAL - STRAP & SPACER AT BOTHENDS OF EXTENSION PLATE)FIG. 18-3A18
<strong>STEP</strong> 1 - INSTALL EXTENSION PLATES - ContinuedBOLT GALVANIZED EXTENSION PLATE TO VEHICLECAUTIONTo preserve the corrosion resistance properties of the galvanized finish,MAXON recommends bolting the galvanized extension plate to vehicle.NOTE: The extension plate has bolt holes so it can be bolted to vehicle body. Vehiclebody must be drilled according to instructions. If necessary, extensionplate may also be welded to vehicle body. Do the following bolting or weldinginstructions.1. Mark and drill holes into rear sill as shown in FIGS. 19-1 and 20-1.14”19”1-1/2”24”34”41”48”55”62”72”77”82”96”94-1/2”1-1/4”11921 Slauson Ave. Santa Fe Springs, CA. 90670 (800) 227-4116 FAX (888) 771-7713REARSILLUSE 19/32” DRILL(13 PLACES)3-1/8”HOLE ONLY REQUIREDWHEN BOLTINGTHROUGH CORNER POST.HOLE ONLY REQUIREDWHEN BOLTINGTHROUGH CORNER POST.REAR SILL - HOLE LOCATIONS FOR 96” WIDE VEHICLEFIG. 19-119
<strong>STEP</strong> 1 - INSTALL EXTENSION PLATES - Continued17”1-1/2”22”4-1/2”27”37”HOLES ONLY REQUIREDWHEN BOLTINGTHROUGH CORNER POST.44”REARSILL51”58”65”102”100-1/2”97-1/2”85”80”75”USE 19/32” DRILL(15 PLACES)1-1/4”3-1/8”HOLES ONLY REQUIREDWHEN BOLTINGTHROUGH CORNER POST.11921 Slauson Ave. Santa Fe Springs, CA. 90670 (800) 227-4116 FAX (888) 771-7713REAR SILL - HOLE LOCATIONS FOR 102” WIDE VEHICLEFIG. 20-120
<strong>STEP</strong> 1 - INSTALL EXTENSION PLATES - Continued2. Get hex bolts and tear drop nuts fromextension plate kit in the parts box.Then, bolt extension plate to rear sillas shown in FIG. 21-1.FRAME BOLT, HEX1/2”-13 X 1 3/4” LG, GR8(13 PLACES 96”, 15 PLACES 102”)DRILLED HOLE(13 PLACES 96” EXTENSION PLATE,15 PLACES 102” EXTENSION PLATE)EXTENSIONPLATEREARSILLTEAR DROP NUT 1/2”-13(13 PLACES 96” EXTENSION PLATE,15 PLACES 102” EXTENSION PLATE)BOLT EXTENSION PLATEFIG. 21-111921 Slauson Ave. Santa Fe Springs, CA. 90670 (800) 227-4116 FAX (888) 771-771321
`<strong>STEP</strong> 1 - INSTALL EXTENSION PLATES - ContinuedWELD GALVANIZED EXTENSION PLATE TO VEHICLE!WARNINGWelding on galvanized parts gives off especially hazardous fumes. To minimizehazard remove galvanizing from weld area, provide adequate ventilation,and wear suitable respirator.CAUTIONTo preserve the corrosion resistance properties of the galvanized finish,MAXON recommends bolting the galvanized extension plate to vehicle.Center the extension plate on vehicle body. Before welding extension plate to vehiclebody, make sure top surface of extension plate is fl ush with fl oor of vehicle body.Weld the extension plate to vehicle body sill as shown in FIGS. 22-1 and 22-2.3/16”EXTENSIONPLATEEXTENSIONPLATEVEHICLEBODY3/16”EXTENSION PLATE WELDS - VIEWED FROM ABOVEFIG. 22-1WELD LENGTH & SPACE:2” - 11 3/4” (96” WIDEVEHICLE)2” - 12 1/2” (102” WIDEVEHICLE)3/16”11921 Slauson Ave. Santa Fe Springs, CA. 90670 (800) 227-4116 FAX (888) 771-7713VEHICLEBODYWELD LENGTH & SPACE:3/16” 2” - 11 3/4” (96” WIDE VEHICLE)2” - 12 1/2” (102” WIDE VEHICLE)EXTENSION PLATE WELDS - VIEWED FROM UNDERNEATHFIG. 22-222
<strong>STEP</strong> 1 - INSTALL EXTENSION PLATES - ContinuedBOLT INSTALLATION BRACKETS (GALVANIZED EXTENSION PLATE)Bolt 2 installation brackets (parts bag items) on theextension plate as shown in FIG. 23-1. Tighten hexnuts securely.FLAT WASHER1/2”(2 PLACES)BOLTING ON INSTALLATION BRACKETSFIG. 23-1CAP SCREW1/2”-13 X 1-1/2” LG.(2 PLACES)BRACKET(2 PLACES)HEX NUT1/2”-13(2 PLACES)11921 Slauson Ave. Santa Fe Springs, CA. 90670 (800) 227-4116 FAX (888) 771-771323
<strong>STEP</strong> 2 - WELD LIFTGATE TO VEHICLE! WARNINGPrevent injuries and equipment damage. Keep the LOCKING ANGLE in placeuntil instructed to remove it.1. Unfold the platform and fl ipoveras shown in FIG. 24-1.2. Attach chain and hoist on each side ofplatform at positions shown in FIG. 24-2.(Place chain all around platform). Hoistthe Liftgate and then place fl oor jackunder main frame (FIG. 24-2). Jack theLiftgate into position. Make sure vehiclefl oor is horizontal and pins are lined up asshown in FIG. 24-2.PLATFORM & FLIPOVER UNFOLDEDFIG. 24-1HOIST HEREVEHICLE FLOOR(HORIZONTAL)LOCKING ANGLE(REF)MOUNTINGPLATE11921 Slauson Ave. Santa Fe Springs, CA. 90670 (800) 227-4116 FAX (888) 771-7713MAIN FRAMEPINSVERTICALFLOOR JACKFIG. 24-224
<strong>STEP</strong> 2 - WELD LIFTGATE TO VEHICLE - Continued! WARNINGPainted Liftgates are shipped from factory with mounting plates that are tackwelded to main frame. Weld as shown in illustration before operating Liftgate.CAUTIONPrevent damaging hydraulic hoses. If welding next to hydraulic hoses,use a protective cover such as a welding blanket to cover the hoses.CAUTIONTo protect the original paint system if equipped, a 3” wide area of paint mustbe removed from all sides of the weld area before welding.NOTE: The following instructions 3 and 5 apply to painted Liftgates, only. Mountingplates on galvanized Liftgates are fully welded to main frame at the factory,and are suitable for vehicle with 33-3/4” frame width. Galvanized mountingplates should not be removed and repositioned. Painted mounting plates aretack welded so they can be repositioned.3. Check if both mountingplates line up with vehicleframe. If mounting platesdo not line up, remove tackwelds from one mountingplate (FIG. 25-1). Make sureLiftgate stays centered onvehicle. Reposition mountingplate against vehicle frame.Keep mounting plate in verticalposition. Tack weld asshown in FIG. 25-1. Repeatfor second mounting plate(reposition and tack weld).NOTE: Weld both mountingplates to vehicle framebefore welding mountingplates to main frame.4. Clamp both mounting platesto vehicle frame. Weld themounting plates to vehicleframe as shown in FIG. 25-2.Remove clamps.VEHICLE FRAME(TYPICAL TRUCKFRAME SHOWN)ORIGINAL TACK WELDS(REMOVE TO REPOSITIONMOUNTING PLATE)TACK(TYPICAL - RH & LH 1/4”MOUNTING PLATES)MAIN FRAME(CUT-AWAY VIEW)REPOSITIONING MOUNTING PLATE(RH SIDE SHOWN)FIG. 25-1VEHICLE FRAME(TYPICAL TRUCKFRAME SHOWN)2” LG. 4 PLACES(TYPICAL - RH & LHMOUNTING PLATES)1/4”MAIN FRAME(CUT-AWAY VIEW)MOUNTINGPLATEMOUNTINGPLATEWELD TO VEHICLE FRAME AND MAIN FRAME(RH SIDE SHOWN)FIG. 25-211921 Slauson Ave. Santa Fe Springs, CA. 90670 (800) 227-4116 FAX (888) 771-771325
<strong>STEP</strong> 3 - RUN HYDRAULIC LINESGRAVITY DOWN - WITHOUT HYDRAULIC LOCK1. Unbolt the pump cover asshown in FIG. 26-1.2. Get the hydraulic system parts(FIG. 26-2 and TABLE 26-1)from parts box.HYDRAULIC SYSTEM PARTSFIG. 26-2UNBOLTING PUMP COVERFIG. 26-13. Run hose (FIG. 26-2, ITEM 3) and plastic hose (FIG. 26-2, ITEM 4) from power unitto cylinder as follows.1CYLINDER(REF)2356MOUNTINGPLATEPOWER UNIT(REF)74!PUMP MOUNTPLATEMAINFRAMECAUTIONCAPSCREWS(5 PLACES)POWER UNIT(REF)FLATWASHERS(5 PLACES)PUMP COVERAlways route hydraulic hoses clear of moving parts, brake lines, sharp edgesand exhaust systems. Avoid making sharp bends in hoses. Attach securely.If drilling is necessary, first check behind the drilling surface so you do notdamage any fuel lines, vent lines, brake lines or wires.NOTE: Make sure arrow on fl ow controlvalve points toward thepump (FIG. 26-2, ITEM 2).ITEM QTY. P/N DESCRIPTION1 1 906722-01 ELBOW, 90 DEG, O-RING, #6 M-M2 1 906709-02 FLOW REGULATOR VALVE, 2 GPM3 1 280635-01 HOSE ASSEMBLY, 3/8”HP, 54” LG.4 1 224370-07 PLASTIC HOSE, 60-1/2” LG.5 1 228012 ADAPTER, 9/16”-18”M - 1/4”F6 1 202406 ELBOW, BRASS 1/4” X 1/4”7 REF 906728-01 DUAL BARBED FITTING, 1/64” I.D.8 1 906786-01 UNION, STRAIGHT, #6” M-MHYDRAULIC SYSTEM PARTSTABLE 26-111921 Slauson Ave. Santa Fe Springs, CA. 90670 (800) 227-4116 FAX (888) 771-771326
<strong>STEP</strong> 3 - RUN HYDRAULIC LINESGRAVITY DOWN - WITHOUT HYDRAULIC LOCK - ContinuedNOTE: Hydraulic lines and electrical lines must be run into pump box through sealinggrommets (FIG. 27-1). To ensure a good seal on hydraulic & electricallines, never cut the sealing grommets.4. Connect hose (FIG. 27-1, ITEM 3) to powerunit. Connect plastic hose (FIG. 27-1, ITEM4) to barbed fitting (FIG. 27-1, ITEM 7) onpump reservoir.NOTE: Make sure arrow on fl owcontrol valve points towardthe pump (FIG. 27-2,ITEM 2).5. Connect elbow, fl ow control valve, andhose (FIG. 27-2, ITEMS 1, 2 & 3) to cylinder.Also, connect fi ttings and plastic hose(FIG. 27-2, ITEMS 4, 5, & 6) to cylinder. Toprevent kinking, position plastic hose (FIG.27-2, ITEM 4) as shown in FIG. 27-2.GROMMETS12HOSES RUN FROMPOWER UNITFIG. 27-1653434711921 Slauson Ave. Santa Fe Springs, CA. 90670 (800) 227-4116 FAX (888) 771-7713HOSES RUN TOHYDRAULIC CYLINDERFIG. 27-227
<strong>STEP</strong> 3 - RUN HYDRAULIC LINESGRAVITY DOWN - WITH HYDRAULIC LOCK1. Unbolt the pump cover asshown in FIG. 28-1.2. Get the hydraulic system parts(FIG. 28-2 and TABLE 28-1)from parts box.839HYDRAULIC SYSTEM PARTSFIG. 28-2UNBOLTING PUMP COVERFIG. 28-13. Run hose (FIG. 28-2, ITEM 3) and plastic hose (FIG. 28-2, ITEM 4) from power unit tocylinder as follows.1CYLINDER(REF)2POWER UNIT(REF)56MOUNTINGPLATE74!PUMP MOUNTPLATEMAINFRAMECAUTIONCAPSCREWS(5 PLACES)POWER UNIT(REF)FLATWASHERS(5 PLACES)PUMP COVERAlways route hydraulic hoses clear of moving parts, brake lines, sharp edgesand exhaust systems. Avoid making sharp bends in hoses. Attach securely.If drilling is necessary, first check behind the drilling surface so you do notdamage any fuel lines, vent lines, brake lines or wires.NOTE: Make sure arrow on flow controlvalve points toward thepump (FIG. 28-2, ITEM 2).ITEM QTY. P/N DESCRIPTION1 1 906722-01 ELBOW, 90 DEG, O-RING, #6 M-M2 1 906709-02 FLOW REGULATOR VALVE, 2 GPM3 1 280635-01 HOSE ASSEMBLY, 3/8”HP, 54” LG.4 1 224370-07 PLASTIC HOSE, 60-1/2” LG.5 1 228012 ADAPTER, 9/16”-18”M - 1/4”F6 1 202406 ELBOW, BRASS 1/4” X 1/4”7 REF 906728-01 DUAL BARBED FITTING, 1/64” I.D.8 1 906786-01 UNION, STRAIGHT, #6” M-M9 1 282620-06 HYD LOCK VALVE ASSEMBLY, 12VHYDRAULIC SYSTEM PARTSTABLE 28-111921 Slauson Ave. Santa Fe Springs, CA. 90670 (800) 227-4116 FAX (888) 771-771328
<strong>STEP</strong> 3 - RUN HYDRAULIC LINESGRAVITY DOWN - WITH HYDRAULIC LOCK - ContinuedNOTE: Hydraulic lines and electrical lines must be run into pump box through sealinggrommets (FIG. 29-1). To ensure a good seal on hydraulic & electricallines, never cut the sealing grommets.4. Connect hose (FIG. 29-1, ITEM 3) to powerunit. Connect plastic hose (FIG. 29-1, ITEM 4)to barbed fi tting (FIG. 29-1, ITEM 7) on pumpreservoir.NOTE: Make sure arrow on fl ow controlvalve points toward the pump(FIG. 29-2, ITEM 2).5. Connect elbow, fl ow control valve, union,hydraulic lock, and hose (FIG. 29-2, ITEMS 1,2, 3, 8 & 9) to cylinder. Also, connect fittingsand plastic hose (FIG. 29-2, ITEMS 4, 5, & 6)to cylinder. To prevent kinking, position plastichose (FIG. 29-2, ITEM 4) as shown in FIG.29-2.GROMMETS1HOSES RUN FROMPOWER UNITFIG. 29-1285693434711921 Slauson Ave. Santa Fe Springs, CA. 90670 (800) 227-4116 FAX (888) 771-7713HOSES RUN TOHYDRAULIC CYLINDERFIG. 29-229
<strong>STEP</strong> 3 - RUN HYDRAULIC LINESCONNECT HYDRAULIC LOCK VALVE TO PUMP- GALVANIZED ONLY1. Route lock valve wiring, alonghydraulic hose, from lockvalve solenoid to power unit(FIG. 30-1). Then, insert wiringthrough grommet on the pumpmounting plate.2. At the power unit, disconnectcontrol switch, BLACKwire from S2 Valve (FIG.30-2). Then reconnect controlswitch BLACK wire tolock valve BLACK wire (maleterminal).3. Connect the lock valveBLACK wire (female terminal)to S2 valve as shown in FIG.30-2.4. Remove ground bolt frompump (FIG. 30-2). Then,bolt lock valve WHITE wire,(ring terminal) to pumpmanifold (FIG. 30-2)CONTROL SWITCH WIRINGHARNESSBLACK WIRE(DISCONNECTED)BLACK WIRE,FEMALE TERMINALSTARTERSOLENOID (REF)LOCK VALVECYLINDER (REF) WIRINGHYDRAULIC LOCKFIG. 30-1LOCK VALVESOLENOIDPOWERUNITPUMP MOUNTINGPLATEMOTOR (REF)GROUND BOLTRING TERMINALWHITE WIRE11921 Slauson Ave. Santa Fe Springs, CA. 90670 (800) 227-4116 FAX (888) 771-7713BLACK WIRE,FEMALE TERMINALBLACK WIRE,MALE TERMINALS2 VALVEBLACK WIRELOCK VALVEWIRINGHYDRAULIC LOCK, GRAVITY DOWNFIG. 30-230
<strong>STEP</strong> 3 - RUN HYDRAULIC LINESPOWER DOWN - WITHOUT HYDRAULIC LOCK1. Unbolt the pump coveras shown in FIG. 31-1.2. Get the hydraulic system parts(FIG. 31-2 and TABLE 31-1)from parts box.MOUNTINGPLATEMAINFRAMECAPSCREWS(5 PLACES)CAUTIONFLATWASHERS(5 PLACES)PUMP MOUNTPLATEPOWER UNITPUMP COVERUNBOLTING PUMP BOX COVERFIG. 31-1!Always route hydraulic hoses clear of moving parts, brake lines, sharp edgesand exhaust systems. Avoid making sharp bends in hoses. Attach securely.If drilling is necessary, first check behind the drilling surface so you do notdamage any fuel lines, vent lines, brake lines or wires.3. Run hoses (FIG. 31-2 and TABLE 31-1, ITEMS 3 & 5) from power unit to cylinder asfollows.POWER UNIT(REF)NOTE: Make sure arrow on fl ow controlvalve points toward the pump(FIG. 31-2, ITEM 2).11921 Slauson Ave. Santa Fe Springs, CA. 90670 (800) 227-4116 FAX (888) 771-77131CYLINDER(REF)42 5HYDRAULIC SYSTEM PARTSFIG. 31-23ITEM QTY. P/N DESCRIPTION1 1 906722-01 ELBOW, 90 DEG, O-RING, #6 M-M2 1 906709-02 FLOW REGULATOR VALVE, 2 GPM3 1 280634-01 HOSE ASSEMBLY, 3/8”HP, 50”LG.4 1 905152 ELBOW, 90 DEG SAE #6-JIC37 #65 1 280635-01 HOSE ASSEMBLY, 3/8”HP, 54”LG.HYDRAULIC SYSTEM PARTSTABLE 31-131
<strong>STEP</strong> 3 - RUN HYDRAULIC LINESPOWER DOWN - WITHOUT HYDRAULIC LOCK - ContinuedNOTE: Hydraulic lines and electrical lines must run into pump box through sealinggrommets (FIG. 32-1). To ensure a good seal on hydraulic & electricallines, never cut the sealing grommets.4. Connect hoses (FIG. 32-1, ITEMS 3 & 5)to power unit.NOTE: Make sure arrow on fl ow controlvalve points toward the pump(FIG. 32-2, ITEM 2).5. Connect elbow, fl ow control valve, andhose (FIG. 32-2, ITEMS 1, 2 & 3) to cylinder.Also, connect second elbow and hose(FIG. 32-2, ITEMS 4 & 5) to cylinder. Toprevent kinking, position hoses (FIG. 32-2,Items 3 & 5) as shown in FIG. 32-2.3GROMMETSHOSES CONNECTIONS ONPOWER UNITFIG. 32-15GROMMETS11921 Slauson Ave. Santa Fe Springs, CA. 90670 (800) 227-4116 FAX (888) 771-77133412HOSES RUN TOHYDRAULIC CYLINDERFIG. 32-2532
<strong>STEP</strong> 3 - RUN HYDRAULIC LINESPOWER DOWN - WITH HYDRAULIC LOCK1. Unbolt the pump coveras shown in FIG. 33-1.2. Get the hydraulic system parts(FIG. 33-2 and TABLE 33-1) fromparts box.MOUNTINGPLATEMAINFRAMECAPSCREWS(5 PLACES)CAUTIONFLATWASHERS(5 PLACES)PUMP MOUNTPLATEPOWER UNITPUMP COVERUNBOLTING PUMP BOX COVERFIG. 33-1!Always route hydraulic hoses clear of moving parts, brake lines, sharp edgesand exhaust systems. Avoid making sharp bends in hoses. Attach securely.If drilling is necessary, first check behind the drilling surface so you do notdamage any fuel lines, vent lines, brake lines or wires.3. Run hoses (FIG. 33-2 and TABLE 33-1, ITEMS 3 & 5) from power unit to cylinder as follows.POWER UNITNOTE: Make sure arrow on fl ow control(REF)valve points toward the pump(FIG. 33-2, ITEM 2).11921 Slauson Ave. Santa Fe Springs, CA. 90670 (800) 227-4116 FAX (888) 771-771312647HYDRAULIC SYSTEM PARTSFIG. 33-235ITEM QTY. P/N DESCRIPTION1 1 906722-01 ELBOW, 90 DEG, O-RING, #6 M-M2 1 906709-02 FLOW REGULATOR VALVE, 2 GPM3 1 280634-01 HOSE ASSEMBLY, 3/8”HP, 50” LG.4 1 905152 ELBOW, 90 DEG SAE #6-JIC37 #65 1 280635-01 HOSE ASSEMBLY, 3/8”HP, 54”LG.6 1 906786-01 UNION, STRAIGHT, #6” M-M7 1 282620-06 HYD LOCK VALVE ASSEMBLY, 12VHYDRAULIC SYSTEM PARTSTABLE 33-133
<strong>STEP</strong> 3 - RUN HYDRAULIC LINESPOWER DOWN - WITH HYDRAULIC LOCK - ContinuedNOTE: Hydraulic lines and electrical lines must run into pump box through sealinggrommets (FIG. 34-1). To ensure a good seal on hydraulic & electricallines, never cut the sealing grommets.4. Connect hoses (FIG. 34-1, ITEMS 3 & 5)to power unit.NOTE: Make sure arrow on fl ow controlvalve points toward the pump(FIG. 34-2, ITEM 2).5. Connect elbow, fl ow control valve, union,hydraulic lock, and hose (FIG. 34-2, ITEMS 1,2, 5, 6, & 7) to cylinder. Also, connect secondelbow and hose (FIG. 34-2, ITEMS 3 & 4) tocylinder. To prevent kinking, position hoses(FIG. 34-2, Items 3 & 5) as shown in FIG.34-2.3GROMMETSHOSES CONNECTIONS ONPOWER UNITFIG. 34-15GROMMETS4311921 Slauson Ave. Santa Fe Springs, CA. 90670 (800) 227-4116 FAX (888) 771-77131 26HOSES RUN TOHYDRAULIC CYLINDERFIG. 34-27534
<strong>STEP</strong> 3 - RUN HYDRAULIC LINESCONNECT HYDRAULIC LOCK VALVE TO PUMP- GALVANIZED ONLY1. Route lock valve wiring, alonghydraulic hose, from lockvalve solenoid to power unit(FIG. 35-1). Then, insert wiringthrough grommet on the pumpmounting plate.2. At the power unit, disconnectcontrol switch, BLACKwire from S2 Valve (FIG.35-2). Then reconnect controlswitch BLACK wire tolock valve BLACK wire (maleterminal).3. Connect the lock valveBLACK wire (female terminal)to S2 valve (FIG 35-2).4. Remove ground bolt frompump (FIG. 35-2). Then,bolt lock valve WHITEwire, (ring terminal) topump manifold (FIG. 35-2)CONTROL SWITCH WIRINGBLACK WIRECYLINDER(REF.)STARTERSOLENOID (REF)LOCK VALVEWIRINGFIG. 35-1MOTOR (REF)LOCK VALVESOLENOIDPOWERUNITPUMP MOUNTINGPLATEGROUND BOLTRING TERMINALWHITE WIREBLACK WIREBLACK WIRE,(DISCONNECTED)11921 Slauson Ave. Santa Fe Springs, CA. 90670 (800) 227-4116 FAX (888) 771-7713S2 VALVEBLACK WIREFEMALE TERMINALBLACK WIRE MALETERMINALHYDRAULIC LOCK, POWER DOWNFIG. 35-235LOCK VALVEWIRING
<strong>STEP</strong> 4 - ATTACH OPTIONAL BATTERY BOX & FRAMETO VEHICLE (IF EQUIPPED)RECOMMENDED CONFIGURATIONNOTE: Make sure the Liftgate power unit, and all batteries on the vehicle for thepower unit, are connected correctly to a common chassis ground.1. Liftgate and optionalbattery box are typicallyinstalled on trailers asshown in FIG. 36-1 andon trucks as shown inFIG. 36-2. See the followingpage for batteryand cable connections.LIFTGATELIFTGATEPOWER UNIT175 AMPFUSED CABLEOPTIONALBATTERY BOX,TYPICAL LOCATIONTRACTOR BATTERIES,TYPICAL LOCATIONCIRCUITBREAKERRECOMMENDED LIFTGATE & OPTIONAL BATTERY BOXINSTALLATION ON TRAILERFIG. 36-1TRUCK BATTERIES,TYPICAL LOCATION175 AMPFUSED CABLE175 AMPFUSED CABLE175 AMPFUSED CABLE11921 Slauson Ave. Santa Fe Springs, CA. 90670 (800) 227-4116 FAX (888) 771-7713LIFTGATELIFTGATEPOWER UNITOPTIONALBATTERY BOX,TYPICAL LOCATIONCIRCUITBREAKERRECOMMENDED LIFTGATE & BATTERY BOXINSTALLATION ON TRUCKFIG. 36-236
<strong>STEP</strong> 4 - ATTACH OPTIONAL BATTERY BOX & FRAMETO VEHICLE (IF EQUIPPED) - Continued2. Select holes on top of battery boxframe to align mounting bracketsfl ush to cross members. Referto FIGS. 37-1A & 37-1B for trailersand FIG. 37-2 for trucks. Boltmounting brackets to battery boxframe as shown in FIG. 37-1C.Torque each bolt and lock nut to85-128 lb-ft.MOUNTINGBRACKETSTRAILER BODYCROSS MEMBERFLUSH BRACKETSFOR TRAILERS(8 PLACES)FIG. 37-1BBATTERY BOXFRAMELOCK NUTWASHERMOUNTINGBRACKETSTRUCK BODYCROSS MEMBERMOUNTINGBRACKETSBOLTING BRACKETS(8 PLACES)FIG. 37-1CALIGNING BATTERYBOX FRAME(TRAILER SHOWN)FIG. 37-1ALOCKWASHERCROSSMEMBERWASHERCAP SCREWBATTERY BOXFRAMEBATTERY BOXFRAME11921 Slauson Ave. Santa Fe Springs, CA. 90670 (800) 227-4116 FAX (888) 771-7713FLUSH BRACKETS FOR TRUCKS(8 PLACES)FIG. 37-237
<strong>STEP</strong> 4 - ATTACH OPTIONAL BATTERY BOX & FRAMETO VEHICLE (IF EQUIPPED) - ContinuedNOTE: If welding mounting brackets to cross members, skip instruction 3.3. Using mounting brackets as a templatemark and drill holes throughcross members (FIG. 38-1). Boltmounting brackets to cross membersas shown in FIGS. 38-2A and38-2B. Torque bolts and lock nutsto 85-128 lb-ft.CAP SCREWS(2 PLACES)CROSSMEMBERSMOUNTINGBRACKETSWASHERS(4 PLACES)CROSSMEMBER1/2” HOLESMARK AND DRILLFIG. 38-1LOCK NUTS(2 PLACES)CROSSMEMBERBOLTING BRACKETS(8 PLACES)FIG. 38-2BLOCK WASHERS(2 PLACES)MOUNTINGBRACKETS11921 Slauson Ave. Santa Fe Springs, CA. 90670 (800) 227-4116 FAX (888) 771-7713BOLTING BATTERY BOX FRAMEFIG. 38-2A38
<strong>STEP</strong> 4 - ATTACH OPTIONAL BATTERY BOX & FRAMETO VEHICLE (IF EQUIPPED) - ContinuedRecommended practices for welding on steel parts are contained in the currentAWS (American Welding Society) D1.1 Structural Welding Code - Steel.Damage to Liftgate and/or vehicle, and personal injury can result from weldsthat are done incorrectly.To prevent pump box components from being damaged by electric currentfrom welding, connect welder grounding cable to the part being welded.CAUTIONCover pump box and optional battery box with flame-resistant covering beforewelding pump box frame to vehicle.4. For galvanized frame, readwarning decal shown in FIGS.39-1A and FIGS. 39-1B beforewelding. Weld each bracket tocross members as shown inFIGS. 39-1A and 39-1C. Weldtop of bracket if accessible.!CROSSMEMBERSWARNINGCAUTIONIF ACCESSIBLE3/16”3/16”CROSSMEMBERSWELDING BRACKETS(8 PLACES)FIG. 39-1C3/16”BRACKET11921 Slauson Ave. Santa Fe Springs, CA. 90670 (800) 227-4116 FAX (888) 771-7713WELDING GALVANIZED, WARNING DECALFIG. 39-1BBOLTING PUMP & BATTERYBOX FRAMEFIG. 39-1A39
<strong>STEP</strong> 4 - ATTACH OPTIONAL BATTERY BOX & FRAMETO VEHICLE (IF EQUIPPED) - ContinuedNOTE: Always connect fused end of power cable to battery positive (+) terminal.NOTE: To connect charge lines, refer to instructions provided with each chargeline kit.5. Connect battery cables, fused cables, and groundcables for 12 volt power as shown in FIG. 40-1 or24 volt power as shown in FIG. 41-1.GROUND CABLE TOPUMP BOX OR COMMONCHASSIS GROUND, 74” LG.(BATTERY BOX KIT ITEM)!WARNINGRemove all rings, watches and jewelry before doing any electrical work.NOTE: MAXON recommends using dielectric grease on all electrical connections.(-) BATTERY CABLETO COMMONGROUNDFUSED CABLE(SEE NOTE)CIRCUITBREAKER11921 Slauson Ave. Santa Fe Springs, CA. 90670 (800) 227-4116 FAX (888) 771-7713FUSED CABLE TO PUMPBOX, 42” LG.(BATTERY BOX KIT ITEM)CABLE10” LG.12 VOLT BATTERY CONNECTIONSFOR 12 VOLT POWERFIG. 40-1CABLE18” LG.40
<strong>STEP</strong> 4 - ATTACH OPTIONAL BATTERY BOX & FRAMETO VEHICLE (IF EQUIPPED) - ContinuedGROUND CABLE TOPUMP BOX OR COMMONCHASSIS GROUND, 74” LG.(BATTERY BOX KIT ITEM)FUSED CABLE TO PUMPBOX, 42” LG.(BATTERY BOX KIT ITEM)CABLE10” LG.12 VOLT BATTERY CONNECTIONSFOR 24 VOLT POWERFIG. 41-1(-) BATTERY CABLETO COMMONGROUNDCABLE18” LG.FUSED CABLE(SEE NOTE)CIRCUITBREAKER11921 Slauson Ave. Santa Fe Springs, CA. 90670 (800) 227-4116 FAX (888) 771-771341
<strong>STEP</strong> 4 - ATTACH OPTIONAL BATTERY BOX & FRAMETO VEHICLE (IF EQUIPPED) - Continued!WARNINGExplosive hydrogen gas from charging batteries can accumulate in batterybox if not vented from the box. To prevent hydrogen gas from accumulating,ensure the 3 ventilation holes in battery box are not plugged or covered.VENTILATION HOLESBATTERY BOX ASSEMBLY (REAR VIEW SHOWN)FIG. 42-111921 Slauson Ave. Santa Fe Springs, CA. 90670 (800) 227-4116 FAX (888) 771-771342
<strong>STEP</strong> 4 - ATTACH OPTIONAL BATTERY BOX & FRAMETO VEHICLE (IF EQUIPPED) - ContinuedREFER TOBATTERY BOXL-SHAPEROD(3 PLACES)ROD ANCHORPOINT(REF, 3 PLACES)FLAT WASHER1/4”MOUNTINGPLATEPAN HEAD SCREW1/4”-20 X 1” LG.BRACKETLOCK WASHER9/16”(4 PLACES)LOCK NUT1/4”-20HEX NUT1/2”-20(4 PLACES)BATTERY BOX ASSEMBLY(12 VOLT POWER CONNECTIONS SHOWN)FIG. 43-1HEX NUT5/16”-18, GR8(3 PLACES)LOCK WASHER#10(3 PLACES)FLAT WASHER9/16”(4 PLACES)FLAT WASHER5/16”(3 PLACES)CAP SCREW1/2”-20 X 2 1/4” LG. GR8(4 PLACES)11921 Slauson Ave. Santa Fe Springs, CA. 90670 (800) 227-4116 FAX (888) 771-771343
<strong>STEP</strong> 5 - RUN POWER CABLENOTE: Make sure the Liftgate power unit, and all batteries on the vehicle for thepower unit, are connected correctly to a common chassis ground.RECOMMENDED CONFIGURATION1. Liftgate powered fromtruck batteries is typicallyinstalled on trailers asshown in FIG. 44-1 andon trucks as shown inFIG. 44-2. See the followingpage for runningthe battery cable.LIFTGATELIFTGATEPOWER UNIT175 AMPFUSED CABLETRACTOR BATTERIES,TYPICAL LOCATIONRECOMMENDED LIFTGATE & OPTIONAL BATTERY BOXINSTALLATION ON TRAILERFIG. 44-1TRUCK BATTERIES,TYPICAL LOCATION175 AMPFUSED CABLE175 AMPFUSED CABLE11921 Slauson Ave. Santa Fe Springs, CA. 90670 (800) 227-4116 FAX (888) 771-7713LIFTGATELIFTGATEPOWER UNITRECOMMENDED LIFTGATE & BATTERY BOXINSTALLATION ON TRUCKFIG. 44-244
<strong>STEP</strong> 5 - RUN POWER CABLE - Continued2. Clip fused power cable to vehicle chassis with fuse nearest thevehicle battery, as shown in FIG. 45-1. Keep enough cable nearthe battery to reach the positive terminal without straining cable(after connection). Run cable to pump box on Liftgate.175 AMP FUSE18” - 24”SPACINGCABLECLIPSCAUTION!Never route an energized wire. Make sure the vehicle battery is disconnected.Always route electrical wires clear of moving parts, brake lines, sharp edgesand exhaust systems. Avoid making sharp bends in wiring. Attach securely.If drilling is necessary, first check behind the drilling surface so you do notdamage any fuel lines, vent lines, brake lines or wires.VEHICLE FRAME(TRUCK FRAME SHOWN)FRONT OF VEHICLECHARGE LINE(TO PUMP BOX)11921 Slauson Ave. Santa Fe Springs, CA. 90670 (800) 227-4116 FAX (888) 771-7713SHORTESTCABLE ENDREAR OF VEHICLETERMINAL LUG(TO VEHICLE BATTERY)FIG. 45-145
<strong>STEP</strong> 6 - CONNECT POWER CABLENOTE: Hydraulic lines and electrical lines must be run into pump box through sealinggrommets (FIG. 46-3). To ensure a good seal on hydraulic & electricallines, never cut the sealing grommets.1. On the bare wire end of fused powercable, keep enough length to attachcopper terminal lug and reach motorsolenoid without putting tension oncable (after connection) (FIG. 46-1).Measure (if needed) and then cutexcess cable from bare wire end ofcable. Put heat shrink tubing (partsbox) (FIG. 46-1) on the end of thecable (leave room for terminal lug).Crimp copper terminal lug (from partsbox) on the fused power cable andshrink the heat shrink tubing (FIG. 46-2).COPPER TERMINAL LUGHEAT SHRINK TUBING(P/N 253316-04)FUSED POWER CABLE(BARE WIRE END)PLACING TERMINAL LUG & HEAT SHRINKTUBING ON FUSED POWER CABLEFIG. 46-1TYPICAL FUSED POWER CABLE WITHTERMINAL LUG INSTALLEDFIG. 46-2CAUTIONTo prevent damage to metal case starter solenoid, hold bottom terminal nutsecurely when loosening and tightening top terminal nut. Do not over-tightenthe terminal nuts. For the 5/16” load terminals, torque nuts 35-40 lbs.-in.Torque the nuts on #10-32 control terminals 15-20 lbs.-in.NOTE: MAXON recommends using dielectricgrease on all electrical connections.2. Remove hex nut and lock washerfrom battery terminal post on themotor solenoid. Connect the fusedpower cable to the motor solenoidas shown in FIG. 46-3. Reinstalland tighten lock washer and hexnut.FUSEDPOWER CABLEMOTORSOLENOIDBATTERYTERMINALPOSTLOCKWASHERHEXNUT11921 Slauson Ave. Santa Fe Springs, CA. 90670 (800) 227-4116 FAX (888) 771-7713TYPICAL FUSED POWER CABLE CONNECTION(GRAVITY DOWN PUMP SHOWN)FIG. 46-346
<strong>STEP</strong> 7 - INSTALL CONTROL SWITCH1. Drill one 3/4“ hole and two #21–size holes inthe vertical post on curb side of vehicle body asshown in FIG. 47-1A. Use template shown inFIG. 47-1B.1-3/4”7/8”NOTE: USE AS A TEMPLATEUSE 3/4”DRILLHOLE DRILLING TEMPLATEFIG. 47-1BNOTE: Hydraulic lines and electrical linesmust run into pump box throughsealing grommets (FIG. 47-2). Toensure a good seal on hydraulic &electrical lines, never cut the sealinggrommets.2. Cut tie strap on coiled wiring harness(FIG. 47-2). Pull the wiring harnessthrough grommet on the pumpmounting plate (FIG. 47-2).USE #21DRILLVEHICLE BODYVERTICAL POST(CURB SIDE)18”RECOMMENDED POSITION FORCONTROL SWITCHFIG. 47-1ATIESTRAPWIRINGHARNESSGROMMET11921 Slauson Ave. Santa Fe Springs, CA. 90670 (800) 227-4116 FAX (888) 771-7713PUMPMOUNTINGPLATEFIG. 47-247
<strong>STEP</strong> 7 - INSTALL CONTROL SWITCH - ContinuedNOTE: MAXON recommends using dielectric grease on all electrical connections.3. Run wiring harness undervehicle body (see dashedline - FIG. 48-1) andup through inside of verticalpost. Then pull controlswitch wiring harness outthe 3/4“ hole drilled invertical post (FIG. 48-1).Connect the control switchwiring to the wiring harnessas shown in FIG. 48-2.Push extended wiring backinto the ¾” hole in the verticalpost until control switchtouches the post. Attachcontrol switch to verticalpost with 2 self-tappingscrews (FIG. 48-2).DECAL(SEE DECALS PAGE)CONTROL SWITCHVEHICLE BODYVERTICAL POSTROUTING CONTROL SWITCH WIRINGFIG. 48-1BLACKWHITEBLACKWHITEGREEN3/4”HOLE11921 Slauson Ave. Santa Fe Springs, CA. 90670 (800) 227-4116 FAX (888) 771-7713SCREW,SELF-TAPPINGGREENRED(POWER DOWNVERSION ONLY)CONTROL SWITCH WIRING CONNECTIONSFIG. 48-248
<strong>STEP</strong> 7 - INSTALL CONTROL SWITCH - ContinuedNOTE: If you plan to install rental lock (see <strong>STEP</strong> 15), wait until <strong>STEP</strong> 15 to installthe control handle grip.4. If liftgate is equipped with paintedextension plate, get the controlhandle grip (FIG. 49-1) fromparts box. Install the handle gripon control handle as shown inFIG. 49-1.CONTROLHANDLE GRIPCONTROLHANDLEEXTENSIONPLATE (REF)INSTALLING CONTROL HANDLE GRIPFIG. 49-111921 Slauson Ave. Santa Fe Springs, CA. 90670 (800) 227-4116 FAX (888) 771-771349
<strong>STEP</strong> 8 - ADD HYDRAULIC FLUID TO RESERVOIRCAUTIONKeep dirt, water and other contaminants from entering the hydraulic system.Before opening the hydraulic fluid reservoir filler cap, drain plug and hydrauliclines, clean up contaminants that can get in the openings. Also, protect theopenings from accidental contamination.NOTE: Use correct grade of hydraulic fl uid for your location.+50 to +120 Degrees F - Grade ISO 32Below + 70 Degrees F - Grade ISO 15 or MIL-H-5606See TABLES 51-1 and 51-2 for recommended brands.1. Pull out fi ller cap (no threads) shown inFIG. 50-1. Fill the reservoir (FIG. 50-1)with hydraulic fl uid to 4” above the bottom(FIG. 50-1).2. Reinstall fi ller cap (FIG. 50-1).RESERVOIR3-1/2” - 4”FILLER CAPPUMP RESERVOIR (GRAVITY DOWNPOWER UNIT SHOWN)FIG. 50-1POWER UNIT(REF)11921 Slauson Ave. Santa Fe Springs, CA. 90670 (800) 227-4116 FAX (888) 771-77133. Bolt on the pump cover as shownin FIG. 50-1. Torque the bolts (capscrews) to 10 - 14 lbs.- in.CAPSCREWS(5 PLACES) FLATWASHERS(5 PLACES)BOLTING ON PUMP COVERFIG. 50-2PUMP COVER50
ISO 32 HYDRAULIC OILRECOMMENDEDBRANDSTABLE 51-1TABLE 51-2PART NUMBERAMSOILAWH-05CHEVRON HIPERSYN 32KENDALLGOLDEN MVSHELLTELLUS S2 V32EXXON UNIVIS N-32MOBILDTE-13M, DTE-24,HYDRAULIC OIL-13ISO 15 OR MIL-H-5606 HYDRAULIC OILRECOMMENDEDBRANDSPART NUMBERAMSOILAWF-05CHEVRONFLUID A, AW-MV-15KENDALLGLACIAL BLUSHELLTELLUS S2 V15EXXONUNIVIS HVI-13MOBILDTE-11MROSEMEAD THS FLUID 1711111921 Slauson Ave. Santa Fe Springs, CA. 90670 (800) 227-4116 FAX (888) 771-771351
<strong>STEP</strong> 9 - CONNECT POWER CABLE TO BATTERYNOTE: MAXON recommends using dielectric grease on all electrical connections.1. Remove nut from negative (-) batteryterminal. Disconnect negative(-) battery cable (FIG. 52-1).2. Remove nut from positive (+)battery terminal (FIG. 52-1).3. Connect fused positive (+) cableto positive (+) battery terminal(FIG. 52-2). Then, reinstall nuton positive (+) battery terminal(FIG. 52-3).4. Reconnect negative (-) batterycable to negative (-) battery terminal(FIG. 52-2). Then, reinstallnut on negative (-) battery terminal(FIG. 52-2).NEGATIVE (-)BATTERY CABLEPOSITIVE (+)BATTERY CABLENUTNUTPOSITIVE (+)BATTERY TERMINALNEGATIVE (-)BATTERY TERMINALDISCONNECTING (-) BATTERY CABLEFIG. 52-1NUTCONNECTING FUSED (+) CABLEFIG. 52-2NUTFUSED (+)CABLEPOSITIVE (+)BATTERY TERMINALNEGATIVE (-)BATTERY TERMINAL11921 Slauson Ave. Santa Fe Springs, CA. 90670 (800) 227-4116 FAX (888) 771-7713NEGATIVE (-)BATTERY CABLE52RECONNECTED BATTERY CABLESFIG. 52-3
<strong>STEP</strong> 10 - REMOVE LOCKING ANGLE & CHECK FORINTERFERENCE! WARNINGTo prevent possible injury, never work in the area under the platform. Getaccess to the locking angle from the back of the Liftgate.NOTE: To operate Liftgate, locking angle must be removed from hydraulic cylinder.2. Remove locking angle (FIG. 53-1) from cylinder pins. Remove the locking angle(FIG. 53-1).PLATFORM(UNFOLDED)FLIPOVER(UNFOLDED)CAUTIONDo not fully pressurize the system in this step. Fully pressurize the system andcheck for hydraulic leaks after Liftgate is fully welded.1. Push control switch to UP position and hold just enough time to pressurize hydraulicsystem. Release control switch. Hydraulic system is ready.COTTER PINSBACK OFLIFTGATELOCKINGANGLECYLINDERPINS11921 Slauson Ave. Santa Fe Springs, CA. 90670 (800) 227-4116 FAX (888) 771-7713FIG. 53-153
<strong>STEP</strong> 10 - REMOVE LOCKING BRACKETS & CHECK FORINTERFERENCE - Continued3. Remove fl oor jack and hoistsporting Liftgate (FIG. 54-1).4. Lower platform to the ground (FIG. 54-2).Look for any interference between liftgateand vehicle as platform is lowered. If theplatform lowers with a “jerking” motion, bleedair from the hydraulic system by doing thefollowing. Push the control switch to theDOWN position until you hear air escapinginto the hydraulic fl uid reservoir. Then, raisethe platform (FIG. 54-3). Look for any interferencebetween liftgate and vehicle as platformis raised. Repeat step until there is no air leftin the system and platform lowers smoothly(FIG. 54-3).FLOOR JACKFIG. 54-1LOWERING PLATFORMFIG. 54-211921 Slauson Ave. Santa Fe Springs, CA. 90670 (800) 227-4116 FAX (888) 771-7713RAISING PLATFORMFIG. 54-354
<strong>STEP</strong> 10 - REMOVE LOCKING BRACKETS & CHECK FORINTERFERENCE - Continued5. Lower platform to the ground (FIG. 55-1).6. For painted extension plate (FIG. 55-2),remove the 2 tack-welded fl ats andspacers. For galvanized extension plate(FIG. 55-3), unbolt the 2 installationbrackets.LOWERING PLATFORMFIG. 55-1FLAT & SPACER(2 PLACES)REMOVING FLATS & SPACERS(PAINTED EXTENSION PLATE ONLY)FIG. 55-2BOLT & BRACKET(2 PLACES)FLAT WASHER & NUT(2 PLACES)EXTENSIONPLATE11921 Slauson Ave. Santa Fe Springs, CA. 90670 (800) 227-4116 FAX (888) 771-7713EXTENSIONPLATEREMOVING INSTALLATION BRACKETS(GALVANIZED EXTENSION PLATE ONLY)FIG. 55-355
<strong>STEP</strong> 10 - REMOVE LOCKING BRACKETS & CHECK FORINTERFERENCE - ContinuedNOTE: Correct any fi t and interference problems before continuing with installation.7. Raise platform to bed height (FIG. 56-1).Heel of platform should butt against theedge of extension plate (FIG. 56-2).PLATFORMRAISING PLATFORMFIG. 56-1EDGES BUTTED TO-GETHER OVER WIDTHOF PLATFORMEXTENSIONPLATE11921 Slauson Ave. Santa Fe Springs, CA. 90670 (800) 227-4116 FAX (888) 771-7713PLATFORM & EXTENSION PLATE WITHEDGES BUTTED TOGETHERFIG. 56-256
<strong>STEP</strong> 10 - REMOVE LOCKING BRACKETS & CHECK FORINTERFERENCE - ContinuedNOTE: Correct any fi t and interference problems before continuing with installation.8. Ensure top surface of platform andextension plate are fl ush at the RH& LH sides of platform (FIGS. 57-1and 57-2). The allowable differencein height is +/- 1/8” maximum asshown.PLATFORM+/- 1/8” (MAX)SURFACES FLUSHSURFACES FLUSHEXTENSIONPLATEDIFFERENCE IN HEIGHT FOR TOP OF PLATFORM& EXTENSION PLATE (RH VIEW)FIG. 57-1+/- 1/8” (MAX)PLATFORM11921 Slauson Ave. Santa Fe Springs, CA. 90670 (800) 227-4116 FAX (888) 771-7713EXTENSIONPLATEDIFFERENCE IN HEIGHT FOR TOP OF PLATFORM& EXTENSION PLATE (LH VIEW)FIG. 57-257
<strong>STEP</strong> 11 - BOLT PLATFORM OPENER TO LIFTGATE1. Make sure platform is atground level.VEHICLE BEDHEIGHT “L”(TE-25 ONLY)54 19-1/2”52 21-1/2”50 22-1/2”48 24-1/2”46 26”44 27”TE-25 LIFTGATE OPENERPOSITION DIMENSIONSTABLE 58-12. Position the opener on main frame as shown.• TE-25 Liftgates:See FIG. 58-1 and TABLE 58-1• TE-25L Liftgates:See FIG. 58-2MAINFRAMEMAINFRAMEPLATFORMOPENER“L”(TABLE 58-1)OPENER POSITION: TE-25 LIFTGATEFIG. 58-121”44”-54”BED HEIGHT38”-44”BED HEIGHT11921 Slauson Ave. Santa Fe Springs, CA. 90670 (800) 227-4116 FAX (888) 771-7713PLATFORMOPENEROPENER POSITION: TE-25L LIFTGATEFIG. 58-258
<strong>STEP</strong> 11 - BOLT PLATFORM OPENER TO LIFTGATE- Continued! CAUTIONIf there is any interference with the platform while stowing Liftgate, check fordamage on bottom of platform, flipover, and the hinge in between. A damagedplatform or flipover may result in personal injury and additional damage toLiftgate.3. Bolt opener to main frame (FIG. 59-1).4. Stow and unstow platform severaltimes to verify it stows and unstowscorrectly and there is no interference(FIGS. 59-2 and 59-3).LOCK NUT1/2”-20CAP SCREW1/2”-20 X 3/1/2” LGPLATFORMOPENERMAINFRAMEBOLTING PLATFORM OPENERFIG. 59-1STOWED PLATFORMFIG. 59-211921 Slauson Ave. Santa Fe Springs, CA. 90670 (800) 227-4116 FAX (888) 771-7713PLATFORM UNSTOWED & LOWEREDFIG. 59-359
<strong>STEP</strong> 12 - PLATFORM ADJUSTMENT (IF REQUIRED)NOTE: Before doing the following procedure, makesure vehicle is parked on level ground.1. Make sure platform is at ground level. Unfold theplatform and fl ipover. As the platform fi rst touchesthe ground, shackles and tip of fl ipover must touchthe ground at the same time (FIG. 60-1). If theshackles and the tip of fl ipover touch the ground atthe same time, RAISE platform to bed height. Tipof fl ipover should be above bed level (FIG. 60-2). Ifindications are correct in both cases (FIGS. 60-1 &60-2), Liftgate is installed correctly and no adjustmentis needed. If indications are incorrect, continuewith instruction 2.NOTE: If tip of fl ipover touches fi rst (FIG. 60-3),do instruction 2. If the shackle touches fi rst(FIG. 61-1), skip instruction 2 and do 3.2. Make sure platform is still at ground level. If theshackle is not touching the ground, measure andcompare distance “A” (FIG. 60-3) with TABLE 60-1to determine the correct shim. Make shims as needed(FIG. 60-5). Weld shim as shown in FIG. 60-4.RAISE TIP OFFLIPOVERTHIS DISTANCE “A”TABLE 60-1REQUIREDSHIMTHICKNESSWELD SIZE“W”7/8” 1/16” 1/16”2” 1/8” 1/8”3” 3/16” 3/16”3-15/16” 1/4” 1/4”TIP OFFLIPOVERTIP OFFLIPOVERPLATFORM & SHACKLESTOUCH GROUNDFIG. 60-1LEVEL LINEPLATFORM EDGE ABOVEBED LEVELFIG. 60-2CENTERED(TOP EDGES FLUSH)“A”(TABLE 60-1)SHACKLES DO NOT TOUCHGROUNDFIG. 60-3PLATFORM11921 Slauson Ave. Santa Fe Springs, CA. 90670 (800) 227-4116 FAX (888) 771-77132-1/4”1-1/2”SHIM(TABLE 60-1)SHACKLE(REF)SHIM (1/16”, 1/8”, 3/16”, or 1/4”)MADE FROM STEEL FLATFIG. 60-52 PLACES“W”(TABLE 60-1)WELDING SHIMS (CURBSIDE SHOWN)FIG. 60-460
<strong>STEP</strong> 12 - PLATFORM ADJUSTMENT (IF REQUIRED)- Continued3. Make sure platform is still at groundlevel. If the tip of flipover is not touchingthe ground, measure and compare distance“B” (FIG. 61-1) with TABLE 61-1to determine how much to grind from theplatform stops (FIG. 61-2). Grind correctamount of metal (TABLE 61-1) from platformstop as shown in FIG. 61-2.LOWER TIP OFFLIPOVERTHIS DISTANCE “B”TABLE 61-1GRIND METAL FROMPLATFORM STOP7/8” 1/16”2” 1/8”3” 3/16”3-15/16” 1/4”4. RAISE the platform, then LOWER it tothe ground. As the platform fi rst touchesthe ground, the tip of fl ipover and shackleshould touch at the same time as shownin FIG. 61-1.“B”(TABLE 61-1)TIP OFFLIPOVERPLATFORM DOES NOTTOUCH GROUNDFIG. 61-1PLATFORMSTOPPLATFORM11921 Slauson Ave. Santa Fe Springs, CA. 90670 (800) 227-4116 FAX (888) 771-7713GRIND HERE(TABLE 61-1)SHACKLE(REF)GRINDING PLATFORM STOPS(CURBSIDE SHOWN)FIG. 61-261
`<strong>STEP</strong> 13 - FINISH WELDING LIFTGATE TO VEHICLEWeld each of the two mounting plates tomain frame and vehicle frame (FIG. 62-1).TYPICAL - BOTHMOUNTING PLATES!WARNINGWelding on galvanized parts gives off especially hazardous fumes. To minimizehazard remove galvanizing from weld area, provide adequate ventilation,and wear suitable respirator.CAUTIONPrevent damage to hydraulic hoses. Before welding next to hydraulic hoses,protect the hoses with a heat-resistant cover such as a welding blanket.CAUTIONTo protect the original paint system if equipped, a 3” wide area of paint mustbe removed from all sides of the weld area before welding.VEHICLE FRAME(TYPICAL TRUCK FRAMESHOWN)1/4”MOUNTING PLATEMAIN FRAMEFIG. 62-11/4”11921 Slauson Ave. Santa Fe Springs, CA. 90670 (800) 227-4116 FAX (888) 771-771362
<strong>STEP</strong> 14 - ADJUST SAFETY HOOK (IF REQUIRED)CHECK SAFETY HOOK FUNCTION1. When raising platform to stowed position,listen for sound of safety hook engagingplatform loop.2. When the Liftgate is stowed, see if platformloop is positioned above the safetyhook as shown in FIG. 63-1.LOOP ADJUSTMENT1. If the safety hook is not positioned correctly(FIG. 63-1), LOWER platform to ground level(see Operation Manual).2. Adjust by bending the platform loop as shownin FIG. 63-2.3. Stow the platform and check for correctsafety hook position. Repeat adjustment ifrequired.LUBRICATION (IF REQUIRED)1. Make sure front surface of safetyhook (FIG. 63-3) is lubricated withautomotive grease. Apply greaseif required.EXTENSIONPLATESAFETYHOOKSAFETYHOOKCONTROL HANDLE ROD(TYPICAL LUBE POINT)CORRECTPOSITIONFIG. 63-1FIG. 63-2PLATFORM LOOP(WRONG POSITION)PLATFORMEXTENSIONPLATEPLATFORM LOOP(WRONG POSITION)CORRECTPOSITIONBRACKETSBEND INTHISDIRECTION11921 Slauson Ave. Santa Fe Springs, CA. 90670 (800) 227-4116 FAX (888) 771-77132. Make sure control handle rod(FIG. 63-3) is lubricated where ithas contact with brackets. Applyautomotive grease if required.SAFETY HOOK -FRONT SURFACEFIG. 63-363
<strong>STEP</strong> 15 - WELD ON LOCK BRACKET (IF EQUIPPED)CAUTIONTo protect the original paint system if equipped, a 3” wide area of paint mustbe removed from all sides of the weld area before welding.CAUTIONPrevent damaged grip. Finish welding rental lock before installing controlhandle grip.NOTE: Before positioning the locking bracket, make sure safety hook is hookedcorrectly to platform loop (see previous step).1. From parts box, get the 6-1/2” lock bracket(P/N 203417), 1” inner bracket (P/N 203570),3/8”-16 x 1” bolt and 3/8”-16 nut (if available)shown in FIG. 64-1. Bolt inner bracket to lockbracket with 3/8”-16 bolt and 3/8”-16 nut. Keepnut loose so bracket can rotate.2. Fit the half-round cut-out end of lock bracketto control handle as shown in FIG. 64-2. Buttthe top face of inner bracket against bottom ofextension plate.3. Position right hand (RH) side face of inner bracketfl ush with RH side of extension plate (FIG. 64-2).Weld top face of inner bracket to bottom of extensionplate (FIG. 64-2). Make sure there is a1/16” gap between inner bracket and lock bracket(FIG. 64-2). Weld lock bracket to control handle(FIG. 64-2). Remove nut and bolt (FIG. 64-2). (Ifrequired, a padlock or freight car-type seal can beused to lock control handle.)HANDLE GRIPEXTENSIONPLATE1/8”INNER BRACKET(TOP FACE)3/8”-16 NUTINNERBRACKETFIG. 64-1(BRACKET FLUSH WITHEXTENSION PLATE)BOLTCONTROLHANDLELOCKBRACKET3/8”-16 BOLTHALF-ROUNDCUT-OUT(LOCK BRACKET)11921 Slauson Ave. Santa Fe Springs, CA. 90670 (800) 227-4116 FAX (888) 771-7713NUT4. Install handle grip (parts box item)on control handle (FIG. 64-2).INNER BRACKET(RH SIDE FACE)1/16” GAPFIG. 64-2LOCKBRACKET 1/8”64
<strong>STEP</strong> 16 - VEHICLE TAILLIGHT POSITIONING(IF REQUIRED)NOTE: Positions are based on using taillights of 6-3/4” height by 5-3/4” width. Largertaillights may interfere with Liftgate. Taillights and attaching hardware are notprovided with the Liftgate.MAIN FRAME19-3/4”19-3/4”PLATFORMOPENER(REFERENCE)LIFTGATE TOP VIEWFIG. 65-1TAILLIGHTANGLE STEEL(NOT SUPPLIED)TAILLIGHTEXTENSIONPLATE(REFERENCE)TAILLIGHTFLIPOVER(REFERENCE)11921 Slauson Ave. Santa Fe Springs, CA. 90670 (800) 227-4116 FAX (888) 771-77133”GROUNDLEVELPLATFORMOPENER(REFERENCE)15-1/4”LIFTGATE SIDE VIEW - LEFT HAND SIDE SHOWNFIG. 65-265
ATTACH DECALSNOTE: Ensure there is no residue, dirt or corrosion where decals are attached. Ifnecessary, clean surface before attaching decals.WARNING DECAL(2 PLACES, LH SIDE NOT SHOWN)P/N 265736-01MAXPRO DECAL267338-01RAISE/LOWER DECALP/N 264507INSTRUCTION DECALP/N 251867-03FIG. 66-1CAPACITY DECALP/N 220382ORCAPACITY DECAL(SPECIAL LIFTGATES ONLY)P/N 220387STOW WARNING DECALP/N 282847-02WARNING DECALP/N 282479-0111921 Slauson Ave. Santa Fe Springs, CA. 90670 (800) 227-4116 FAX (888) 771-771366
ATTACH DECALS - ContinuedCAPACITY DECALP/N 220382RAISE/LOWER DECALP/N 264507WARNING DECAL(2 PLACES, LH SIDE NOT SHOWN)P/N 265736-01MAXPRO DECALP/N 267338-01CAPACITY DECAL(SPECIAL LIFTGATES ONLY)P/N 220387INSTRUCTION DECALP/N 251867-0311921 Slauson Ave. Santa Fe Springs, CA. 90670 (800) 227-4116 FAX (888) 771-7713STOW WARNING DECALP/N 282847-02WARNING DECALP/N 282479-0167
TOUCHUP PAINTED OR GALVANIZED FINISHCAUTIONDamaged cylinder seals and contaminated hydraulic fluid can result frompainting the polished portion of the cylinder rod. To prevent damage, protectthe exposed polished portion of the cylinder rod while painting.• If bare metal or primer is exposed on the painted portions of the Liftgate, touch up thepaint. To maintain the protection provided by the original paint system, MAXON recommendsaluminum primer touchup paint kit, P/N 908134-01.• If bare metal is exposed on galvanized portions of the Liftgate, touch up the galvanizedfi nish. To maintain the protection provided by the original galvanized fi nish, MAXONrecommends cold galvanize spray, P/N 908000-01.11921 Slauson Ave. Santa Fe Springs, CA. 90670 (800) 227-4116 FAX (888) 771-771368
SYSTEM DIAGRAMSPUMP & MOTOR SOLENOID OPERATION (GRAVITY DOWN)STARTERSOLENOIDS2 VALVELIFTGATEFUNCTIONPOWER UNITFIG. 69-1MOTORPRESSURE(PORT A)VENTPORTPOWER UNIT MOTOR & SOLENOID OPERATIONSOLENOID OPERATION( MEANS ENERGIZED)PORTSTARTER SOLLOCK VALVES2 VALVE& MOTOR(ON RH CYLINDER)11921 Slauson Ave. Santa Fe Springs, CA. 90670 (800) 227-4116 FAX (888) 771-7713RAISELOWERAREFER TO VALVES SHOWN ONHYDRAULIC SCHEMATICTABLE 69-169
HYDRAULIC SCHEMATIC (GRAVITY DOWN)AUX. HANDPUMP PORT(PLUGGED)2 GPM FLOWCONTROL VALVERETURN PORT(PLUGGED)S2VALVERELIEF VALVE(SET AT 3250 PSI)PUMPFILTERHYDRAULIC CYLINDERHYDRAULICLOCK VALVE(GALVANIZEDMODELS ONLY)PRESSURE PORTCHECK VALVEMMOTOR(REFERENCE)RESERVOIRVENT PORTDRAIN HOLE(PLUGGED)FILLER HOLE(PLUGGED)11921 Slauson Ave. Santa Fe Springs, CA. 90670 (800) 227-4116 FAX (888) 771-7713FIG. 70-170
ELECTRICAL SCHEMATIC (GRAVITY DOWN)MCABLEASSEMBLYSTARTERSOLENOIDTHERMALSWITCH(IN MOTORCASING)CONTROL SWITCHUPWHITEWHITECABLE WITH175 AMP FUSEGREENGREENDOWNBLACKBLACKS2VALVEHYDRAULICLOCK VALVE(GALVANIZEDMODELS ONLY)11921 Slauson Ave. Santa Fe Springs, CA. 90670 (800) 227-4116 FAX (888) 771-7713BATTERYFIG. 71-171
PUMP & MOTOR SOLENOID OPERATION (POWER DOWN)STARTER SOLENOIDPORT BS1 VALVELIFTGATEFUNCTIONPOWER UNIT MOTOR & SOLENOID OPERATIONSOLENOID OPERATION( MEANS ENERGIZED)PORTSTARTER SOL& MOTORPOWER UNITFIG. 72-1S1 VALVES2 VALVEMOTORS2VALVEPORT ALOCK VALVE(ON RH CYLINDER)11921 Slauson Ave. Santa Fe Springs, CA. 90670 (800) 227-4116 FAX (888) 771-7713RAISEALOWERBREFER TO VALVES SHOWN ONHYDRAULIC SCHEMATICTABLE 72-172
HYDRAULIC SCHEMATIC (POWER DOWN)PORT B - LOWER(POWER DOWN)HYDRAULIC CYLINDERMOTOR(REF)S2VALVES1VALVEFILTER2 GPM FLOWCONTROL VALVEHYDRAULIC LOCK VALVE(GALVANIZED MODELS ONLY)PORT A - RAISERELIEF VALVE 2(SET AT 1100 PSI)RELIEF VALVE 1(SET AT 3200 PSI)PUMPRESERVOIRAUX. HANDPUMP PORT(PLUGGED)11921 Slauson Ave. Santa Fe Springs, CA. 90670 (800) 227-4116 FAX (888) 771-7713DRAIN HOLE(PLUGGED)FIG. 73-173
ELECTRICAL SCHEMATIC (POWER DOWN)UPCONTROL SWITCHMCABLEASSEMBLYSTARTERSOLENOIDGREENGREENTHERMALSWITCH(IN MOTORCASING)REDGREENWHITEDOWNCABLE WITH175 AMP FUSEBLACKS2VALVEBATTERYHYDRAULICLOCK VALVE(GALVANIZEDMODELS ONLY)REDS1VALVE11921 Slauson Ave. Santa Fe Springs, CA. 90670 (800) 227-4116 FAX (888) 771-7713FIG. 74-174
OPTIONSOPTIONAL LIFTGATE COMPONENTSMISCELLANEOUS KITS PART NO. GD PDTRAFFIC CONES 268893-01 X XFRAME MOUNTING BRACKET FOR 2 OVAL LIGHTS 282372-01 X XDUAL <strong>STEP</strong> KIT, GALVANIZED HIGH-BED MODELS ONLY 285479-01G X XDUAL <strong>STEP</strong> KIT (WALK RAMP, GALVANIZED HIGH-BED WALK RAMP MODELSONLY)285479-02G X XDUAL <strong>STEP</strong> KIT, GALVANIZED, WITH 24” LONG BUMPERS 285479-03G X XSINGLE <strong>STEP</strong> KIT, GALVANIZED (38” - 44” BED HEIGHT) 285895-03G X XSINGLE <strong>STEP</strong> KIT WITH BUMPER, GALVANIZED (38” - 44” BED HEIGHT) 285895-04G X XEXTENSION KIT (102” WIDE VEH), TE-33, GALVANIZED 283134-03G X XSTANDARD BUMPER PADS 203410 X X2 <strong>STEP</strong> HD BUMPERS 251416 X XHOOK LOOP REINFORCEMENT KIT 260331 X XHAND PUMP KIT 281614 XHAND PUMP KIT 268075-01 XELECTRICAL KITSIN CAB ON-OFF SWITCH 250477 X XTUK-A-WAY DUAL CONTROL KIT 264845 XTUK-A-WAY DUAL CONTROL KIT 264845-02 X10’ EXTENSION TO POWER CABLE 264849 X XCIRCUIT BREAKER KIT (150AMP) 251576 X XSTREET SIDE CONTROL KIT, TUK-A-WAY, GRAVITY DOWN 280265-01 XSTREET SIDE CONTROL KIT, TUK-A-WAY, POWER DOWN 280265-03 XHAND HELD CONTROL ASSEMBLY (3 COND) 280570-01 XHAND HELD CONTROL ASSEMBLY (4 COND) 280570-03 XGROUND CABLE, 2 GAUGE X 38’ LG. 269190-01 X XCYCLE COUNTER KIT 280590-01 X XLVTS KIT(SINGLE) 280574-01 XLVTS KIT (TUK-A-WAY) 268077-01 X XTOUCH-UP PAINT KITTOUCH-UP PAINT (BCG) WITH ALUMINUM PRIMER, SMALL 908134-01 X XCOLD GALVANIZE SPRAY 908000-01 X X11921 Slauson Ave. Santa Fe Springs, CA. 90670 (800) 227-4116 FAX (888) 771-771375