You also want an ePaper? Increase the reach of your titles
YUMPU automatically turns print PDFs into web optimized ePapers that Google loves.
EXERCISE FREQUENCYTo maintain or improve your condition, plan three workoutseach week, with at least one day of rest betweenworkouts. After a few months of regular exercise, youmay complete up to five workouts each week, ifdesired. Caution: Be sure to progress at your ownpace and avoid overdoing it. Incorrect or excessivetraining may result in injury to your health.Remember, the key to success is make exercise aregular and enjoyable part of your everyday life.SUGGESTED STRETCHESThe correct form for several basic stretches is shown at the right.Move slowly as you stretchÑnever bounce.1. Toe Touch Stretch1Stand with your knees bent slightly and slowly bend forward from yourhips. Allow your back and shoulders to relax as you reach downtoward your toes as far as possible. Hold for 15 counts, then relax.Repeat 3 times. Stretches: Hamstrings, back of knees and back.2. Hamstring Stretch2Sit with one leg extended. Bring the sole of the opposite foot towardyou and rest it against the inner thigh of your extended leg. Reachtoward your toes as far as possible. Hold for 15 counts, then relax.Repeat 3 times for each leg. Stretches: Hamstrings, lower back andgroin.3. Calf/Achilles StretchWith one leg in front of the other, reach forward and place your handsagainst a wall. Keep your back leg straight and your back foot flat onthe floor. Bend your front leg, lean forward and move your hips towardthe wall. Hold for 15 counts, then relax. Repeat 3 times for each leg.To cause further stretching of the achilles tendons, bend your back legas well. Stretches: Calves, achilles tendons and ankles.4. Quadriceps StretchWith one hand against a wall for balance, reach back and grasp onefoot with your other hand. Bring your heel as close to your buttocks aspossible. Hold for 15 counts, then relax. Repeat 3 times for each leg.Stretches: Quadriceps and hip muscles.3411
MAINTENANCE AND TROUBLE-SHOOTINGInspect and tighten all parts of the exercise cycleregularly. Replace any worn parts immediately.40The exercise cycle can be cleaned with a soft, dampcloth. Avoid spilling liquid on the console. Keep theconsole out of direct sunlight or the display may bedamaged. Remove the batteries when storing theexercise cycle.2834333429HOW TO TIGHTEN THE CRANKIf the arms of the Crank (33) become loose, theyshould be tightened in order to prevent excessivewear. Loosenthe crank nuton the left armof the Crank.Place the endof a standardscrewdriver inone of theslots in theslotted cranknut. Lightly tapthe screwdriverwith ahammer toCrankNutturn the slotted crank nut counterclockwise until thearms are no longer loose. Do not overtighten theslotted crank nut. When the slotted crank nut isproperly tightened, retighten the crank nut.33SlottedCrank Nut3419Next, remove the Seat Knob (29) and lift the SideShield Cover (40) off the Side Shields. Grasp bothSide Shields at the top and gently pull them apart.Make sure that the arm of the Crank (33) is in theposition shown in the drawing above. Carefully slidethe Left Side Shield forward off the arm of the Crankand remove it.Locate the Reed Switch (50). Turn the Crank (33) untilthe Magnet (51) is aligned with the Reed Switch.Loosen but do not remove the M4 x 16mm Screw (9).Slide the Reed Switch slightly closer to or away fromBATTERY REPLACEMENTIf the console does not function properly, the batteriesshould be replaced. To replace the batteries, seeassembly step 4 on page 7. In addition, make surethat the console wire is connected to the reed switchwire.HOW TO ADJUST THE REED SWITCHIf the console does not display correct feedback, thereed switch should be adjusted. In order to adjust thereed switch, the Left Side Shield (1) must be removed(refer to the drawing at the top of this page). Using anadjustable wrench, turn the Left Pedal (28) clockwiseand remove it from the Crank (33). Remove the twoM4 x 16mm Screws (9) and three M4 x 38mm SelftappingScrews (34) from the Left Side Shield.5195033the Magnet. Retighten the Screw. Turn the Crank for amoment. Repeat until the console displays correctfeedback. When the Reed Switch is correctly adjusted,reattach the Left Side Shield and Pedal.12
HOW TO ADJUST THE BELTThe exercise cycle features a precision belt that mustbe kept properly adjusted. If the belt causes excessivenoise or slips as you pedal, the belt should bechecked. To do this, the left side shield must first beremoved. Refer to the instructions on page 12 andremove the leftside shield.Next, use anadjustablewrench to turnthe right pedalcounterclockwiseandremove it.Remove theright sideshield.Press down on the center of the Belt (16) between thefront and rear sprockets. There should be from 1/4Óto 3/4Ó of vertical movement in the center of theBelt.16If the Belt (16) is properly adjusted, reattach the sideshields and pedals. If the Belt needs to be adjusted,loosen the M8 Washer Nut (37) on each side of theFlywheel (32).To tighten theBelt, turn thetwo M6 Stopnuts (47) clockwise;to loosenthe belt, turnthe Nuts counterclockwise.Make sure thatthe Flywheel isstraight andtighten the M83716Washer Nuts (37). Reattach the side shields andpedals.324713
PART LISTÑModel No. 831.288070R0200AKey No. Qty. Description Key No. Qty. Description1 1 Left Side Shield2 1 Right Side Shield3 2 Double Tree Fastener4 4 M4 x 12mm Console Screw5 1 Handlebar6 2 Foam Grip7 1 Console8 5 M10 x 25mm Button Screw9 8 M4 x 16mm Screw10 1 Resistance Knob11 1 Resistance Control/Cable12 3 M5 x 30mm Screw13 1 Right Pedal14 1 Handlebar Post15 1 Frame16 1 Belt17 1 Front Stabilizer18 1 Rear Stabilizer19 1 Seat20 1 Seat Post21 9 M8 Nylon Locknut22 1 25.4mm x 63.5mm Bushing23 1 Seat Post Bushing24 2 Wheel Hub25 2 Wheel26 2 Wheel Spacer27 2 M6 x 16mm Self-tapping Screw28 1 Left Pedal29 1 Seat Knob30 4 M8 x 90mm Carriage Bolt31 1 M10 Flat Washer32 1 Flywheel33 1 Crank/Pulley34 3 M4 x 38mm Self-tapping Screw35 1 Flywheel Spacer36 1 Flywheel Axle37 2 M8 Washer Nut38 2 M6 Eye Bolt39 2 Adjustment Bracket40 1 Side Shield Cover41 7 M10 Split Washer42 1 Bearing Assembly43 1 ÒCÓ Magnet Spring44 2 Stabilizer Endcap45 1 ÒCÓ Magnet46 1 M6 x 64mm Bolt47 4 M6 Stop Nut48 1 M8 x 62mm Bolt49 4 M8 Split Washer50 1 Reed Switch/Wire51 1 Magnet52 2 Pulse Grip53 1 Clamp Bolt54 4 1/4Ó Flat Washer55 1 ÒSÓ Hook56 1 Clamp Nut57 1 Reed Switch Clamp58 1 Right Pedal Strap59 1 Left Pedal Strap60 2 Pulse Grip Wire61 3 M5 Nut# 1 Allen Wrench# 1 UserÕs ManualNote: Ò#Ó indicates a non-illustrated part. Specifications are subject to change without notice.14
3321658710111261 14884999919212149492092223292425262715162425262721385851392833133330509212121483246374359533018444436354145174141414042559524237414738394747343454565731
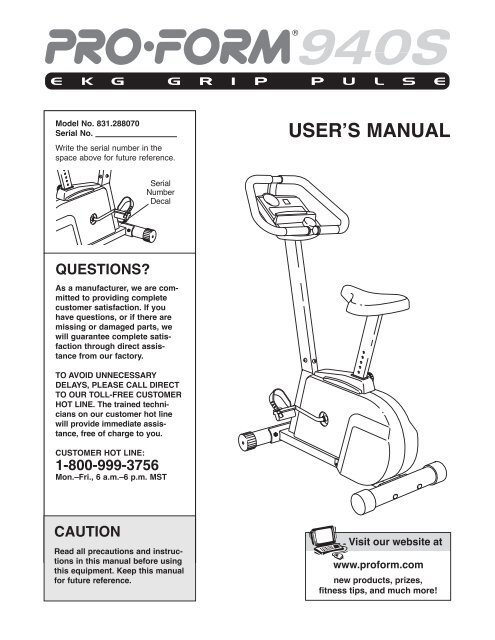
HOW TO ORDER REPLACEMENT PARTSTo order replacement parts, call our Customer Service Department toll-free at 1-800-999-3756, Monday throughFriday, 6 a.m. until 6 p.m. Mountain Time (excluding holidays). To help us assist you, please be prepared to givethe following information:¥ The MODEL NUMBER of the product (831.288070)¥ The NAME of the product (PROFORM¨ <strong>940s</strong> exercise cycle)¥ The SERIAL NUMBER of the product (see the front cover of this manual)¥ The KEY NUMBER and DESCRIPTION of the part(s) (see the PART LIST on page 14 of this manual).PROFORM is a registered trademark of ICON Health & <strong>Fitness</strong>, Inc.LIMITED WARRANTYICON Health & <strong>Fitness</strong>, Inc. (ICON), warrants this product to be free from defects in workmanship andmaterial, under normal use and service conditions, for a period of ninety (90) days from the date of purchase.This warranty extends only to the original purchaser. ICON's obligation under this warranty is limitedto replacing or repairing, at ICON's option, the product through one of its authorized service centers.All repairs for which warranty claims are made must be pre-authorized by ICON. This warranty does notextend to any product or damage to a product caused by or attributable to freight damage, abuse, misuse,improper or abnormal usage or repairs not provided by an ICON authorized service center, productsused for commercial or rental purposes, or products used as store display models. No other warrantybeyond that specifically set forth above is authorized by ICON.ICON is not responsible or liable for indirect, special or consequential damages arising out of or in connectionwith the use or performance of the product or damages with respect to any economic loss, lossof property, loss of revenues or profits, loss of enjoyment or use, costs of removal, installation or otherconsequential damages of whatsoever nature. Some states do not allow the exclusion or limitation of incidentalor consequential damages. Accordingly, the above limitation may not apply to you.The warranty extended hereunder is in lieu of any and all other warranties and any implied warranties ofmerchantability or fitness for a particular purpose is limited in its scope and duration to the terms set forthherein. Some states do not allow limitations on how long an implied warranty lasts. Accordingly, the abovelimitation may not apply to you.This warranty gives you specific legal rights. You may also have other rights which vary from state to state.ICON HEALTH & FITNESS, INC., 1500 S. 1000 W., LOGAN, UT 84321-9813Part No. 163628 R0200APrinted in USA © 2000 ICON Health & <strong>Fitness</strong>, Inc.


