User GUide - De Vos Endo BV
User GUide - De Vos Endo BV
User GUide - De Vos Endo BV
- No tags were found...

Create successful ePaper yourself
Turn your PDF publications into a flip-book with our unique Google optimized e-Paper software.
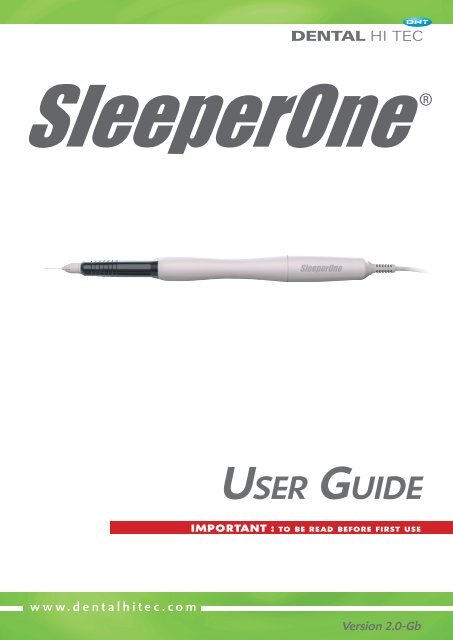
PreciseLightEffective<strong>De</strong>ar <strong>User</strong>,Thank you for purchasing SleeperOne.It’s characteristics and functions will meet up to all of yourexpectations concerning electronically controlled injections.It is important that you perfectly handle the needle(orientation, angulation, delicacy…) as described in this guide.Only the handling of these two parameters will guaranteecomplete success in anaesthesia.ContentsPresentation 4Installation 6SleeperOne functions 8Installing / removing a cartridge and needle 10Cartridge breakage 11SleeperOne Maintenance 12Spare parts 13Technical characteristics 14Warranty conditions 15Utilis SO V2-0-GB.indd 2 17/10/11 09:40
Security rulesTO BE READ IMPERATIVELY BEFORE FIRST USESleeperOne is an electronic dental anaesthesia system designed for local injections before and/or during treatment.SleeperOne is a modern alternative to traditional dental syringes. The dentist should take the usual precautions to ensurethe success of every dental anaesthetic injection.GENERAL RECOMMENDATIONS- SleeperOne® must only be used by a qualified dentalsurgeon.- During use, the handpiece must be under the dentist’sconstant surveillance.- Do not leave SleeperOne® within reach of children.- Do not expose your device to the sun or leave it near aradiator or an air-conditioner.- Do not expose SleeperOne® to water or chemicalproducts.- The plug of the power supply serves as a cut-off andmust remain accessible.- Imperatively wear disposable surgical gloves whenusing SleeperOneRECOMMENDATIONS FOR USE- Only use 1.8ml glass anaesthetic cartridges, with plasticprotection film (to easily withdraw the cartridge in case ofbreakage).- Refer to the cartridge manufacturers’ recommendationsto know the quantities that can be injected persession.- For security reasons, do not screw or unscrew the needleclose to your patients and protect them with safetyglasses.- Each SleeperOne needle, cartridge and accessory mustbe used only on one single patient to prevent risks ofcontamination.- Never re-use the needles and anaesthetic cartridges,each of these items must be destroyed after use in anincinerator allocated for this purpose.- The containers must be disinfected and sterilized aftereach anaesthesia (see procedure p.12).- The holder and handpiece (p.5) must be disinfectedafter each patient (see the indications of disinfectantproduct manufacturers).- Do not leave the needles without protection. Systematicallyreplace the protection after use, using therecapping system on the handpiece holder (p.7).- Never bend a needleBLOCKED NEEDLE- In the case of a blocked needle, SleeperOne willshut down. Replace the blocked needle with a newone.PROTECTION AGAINST ELECTRICSHOCKS· The connection must be made on an alternative singlephasecircuit.· The external voltage should be identical to that onthe material safety data sheet located under thecontrol unit.· The electrical installation must have a security circuitbreaker.· Before every use, check the condition of the plug andpower cable.· Do not pull on the cable to remove the plug from thepower socket.Security level:· Handpiece and control box cables: very low securityvoltage (VLSV-18V).Boutique AFNOR pour : DHT - DENTAL HI TEC le 14/10/2009 11:50 NF EN 980:2008-07Boutique AFNOR pour : DHT - DENTAL HI TEC le 14/10/2009 11:50 EN NF EN 980:2008 980:2008-07 (F)EN 980:2008 (F)5.20 Symbole signifiant «CONSERVER À L'ABRI DE LA LUMIÈRE DU SOLEIL»5.20 Symbole signifiant «CONSERVER À L'ABRI DE LA LUMIÈRE DU SOLEIL»Keep out of direct light and sunNOTE Ce symbole correspond à celui fourni dans l’ISO 7000-0624:2004 ainsi qu’au numéro de symbole 5.6 del'ISO 15223-1:2007.NOTE Ce symbole correspond à celui fourni dans l’ISO 7000-0624:2004 ainsi qu’au numéro de symbole 5.6 del'ISO 15223-1:2007.5.21 Symbole pour «CONSERVER AU SEC»Keep dry5.21 Symbole pour «CONSERVER AU SEC»NOTE Ce symbole correspond à celui fourni dans l’ISO 7000-0626 ainsi qu’au numéro de symbole 5.8 del'ISO 15223-1:2007 («Conserver à l’abri de la pluie»).NOTE Ce symbole correspond à celui fourni dans l’ISO 7000-0626 ainsi qu’au numéro de symbole 5.8 del'ISO 15223-1:2007 («Conserver à l’abri de la pluie»).1919Utilis SO V2-0-GB.indd 3 17/10/11 09:40
<strong>De</strong>scription of the control pedalAll of the commands have an “all or nothing” function. The SleeperOne wireless pedal does not require anaccumulator. It is by pressing on the pedal that you create the energy necessary for the device to function.AspirationPlunger returnFast speed injection :- constant- gradualSlow speed:- constant- auto gradual<strong>De</strong>scription of the wire control pedal (option)All of the commands have an «all or nothing» function.AspirationPlunger return4Fast speed injection :- constant- gradualSlow speed:- constant- auto gradual<strong>De</strong>scription of the control boxDiagnostic LEDS:PowerHandpieceplugInjectionOnly for <strong>De</strong>ntal Hi Tecconfirmed technical service18V DHT electricpower plug(ref. M0144)Only for <strong>De</strong>ntal Hi Tecconfirmed technical serviceDHT wire pedal plug (option)Activation/<strong>De</strong>activationof pedal “beeps”18V DHTelectric power plug(Ref. M0144)Control boxfixing adhesives(Ref. SA0226)Utilis SO V2-0-GB.indd 4 17/10/11 09:40
Prepare your SleeperOneConnectionAssemble the plug adaptor corresponding to your country (photos 1 & 2).Connect the handpiece, power supply and wire pedal (option) as indicatedbelow then plug in the power supply to your mains installation.Your SleeperOne is ready to work.12110/220VAssembling the wireless foot pedalPut in place the pedal hoop.6Present the hoop to the back of the pedal, squeeze it to allow the arms to enterthe oval slots situated at the back of the pedal. (photo 1).Push in the hoop and release; the extremities should appear in the 2 windowssituated beneath the pedal (photo 2)Your wireless pedal is ready to work. It does not require an accumulator.It is by pressing on the pedals that you create the energy necessaryfor it to function.122112Never place the pedal under the chair duringlowering to prevent squashing the pedal’s hoop anddamaging the chair.The wireless pedal is the outcome of advancedresearch. The wireless liaison is very reliablebut like any radio system it can be disturbed byexternal elements : metal furniture (stainless steel…),immediate proximity of a strong radio transmitter(no mobile phones within 1.5m of the control box),a disturbing electronic device (computer...). Wetherefore highly recommend that you carefullychoose the position of the control box and pedal sothey can communicate without being disturbed.This pedal is wireless. The movement of your footon the pedal creates the energy necessary forthe system to function. It is therefore essential toperform fast and strong presses and releases. A slowor incomplete movement may not create enoughenergy to transmit the information to the controlbox.If a pedal release does not have any effect (theinjection remains active), you simply have to pressagain on the same pedal to immobilize the device.The handpiece remains under the dentist’s constantsupervision who must remove it from the work areain case of dysfunction.A technical question? Our team is ready to answer you on +33 241 560 590 or sleeperone@dentalhitec.comUtilis SO V2-0-GB.indd 6 17/10/11 09:40
InstallationInstall the control boxChoosing the site:The LEDS on the control box work only as a diagnostic in case of malfunction, it can therefore be hidden below yourinstrument holder or on the side of a piece of furniture,… (see fig. 6)The control box comes with non-slip feet allowing it to be placed on a horizontal surface. It is also possible to fix it on avertical surface using the supplied adhesives (see photos below).It is recommended to wait 2h minimum before unfixing your control box with a forceps to avoid the adhesives fromcoming loose.The fixation is optimal after 12h.To ensure good communication between the control box and wireless pedal, avoid obstacles, especiallymetallic (computers, boxes...) between the 2 elements. Do not fix / place the box on an electronic device(computer…). Do not place a mobile phone within 1.5 metres of the box, pedal or power supply.+2h1 2 3 4 57Install the handpiece supportSleeperOne is going to be the device for all of your anaesthesias. Thehandpiece must therefore always be immediately on hand just like yourturbine or micro motor.The handpiece support is designed to be placed either on the left or rightof a vertical surface, opening at the top.-Before sticking the handpiece support clean the surface with the«pochette de nettoyage» supplied with the device.- Remove the adhesive’s protective film and position the support on theclean surface.- Wait 24h before placing the handpiece in the support, to ensure optimalfixation.The handpiece slides into the support, with or without a container (fig. 6).The hole on the edge of the support is for recapping the needle. Itenables to recap without risk of contamination.67To prevent accidental pricking, never leave an unprotected needle on the handpiece when on thesupport.Utilis SO V2-0-GB.indd 7 17/10/11 09:41
Your SleeperOne functionsSTART UP / STOPPAGE WITH THE PEDALSleeperOne starts up as soon as you press one of the pedals. Each press is validated by one or two sound signals. Ifnecessary, the «beeps» can be deactivated (see following page).SleeperOne does not contain an on/off button, it automatically goes into low power consumption mode, as soon as thepedals are released. SleeperOne can be plugged into your mains installation to be turned off at night.THE PEDAL FUNCTIONSSleeperOne has different injection modes symbolised by the following pictograms on the pedals:PictogramActionsType of pressSound signal validation(Number of ”beeps”)AnaesthesiasrecommendedComplementary informationSlow auto gradualspeed with a 2second pauseevery 4 secondsa continuouspressSAttached mucosa,palatal… (infiltration intodense tissues)Handpiece light continuously litSlow constantspeeda doublepress*S SIntraligamentary orintraseptalHandpiece light continuouslylit. If there is no resistance to theinjection, the speed will increaseautomatically by 50% after35 seconds to reduce theinjection time.8Fast gradualspeeda continuouspressSInfiltration, nerveblock/spix (infiltrationinto easily extendabletissues, for sensitivepatients)Handpiece light continuously litFast constantspeeda doublepress*S SInfiltration, nerveblock/spix (infiltrationinto easily extendabletissues)Handpiece light continuously litPlunger returna short press(less than1 sec.)S SThe return stopsautomatically when theplunger has reached it’sstarting position.Aspiration for anerve block orinfiltrationa continuouspressS - S - S…Infiltration, nerveblock/spixThe aspiration is stopped byreleasing the pedal.The aspiration can only beperformed after injectinga sufficient quantity ofproduct (approx. 1/8 to 1/4of a cartridge).*The double press is obtained in 2 ways:- You are starting the injection. In this case, press once quickly, and then immediately press again on the same pedal. Adouble «beep» confirms your selection.- You already injecting. Release the pedal for less than 2 seconds then press continuously on the same pedal. A double«beep» confirms your selection.NOTE: After the 2 seconds, identified by a sound signal, the pedal is no longer in double press mode. A new continuouspress will therefore trigger, the slow auto gradual speed or fast gradual speed, depending on the pedal.In case of patient sensitivity when using the fast speeds, use the constant slow or slow autogradual speed.Utilis SO V2-0-GB.indd 8 17/10/11 09:41
Installing / removing a cartridge and needleTO INSTALLMake sure that the plunger is completelyreturned (press the pedal).Place a new cartridge in the container.The use of a used cartridge can be the causeof injection malfunctions.Screw the container ontothe handpiece.Screw the DHT needleonto the container.When you are ready tostart working, remove theneedle cap and place it inthe dedicated hole on thehandpiece holder.Inject in fast speed untilthe first drops come out ofthe needle. You are ready tobegin.10TO REMOVEPress on thepedal to return the plunger to it’s initial position.Recap the needle withthe handpiece holder.Unscrew the container.Unscrew and incineratethe used needle witha device for medicalwaste.Remove the cartridge andplace it in a dispositivefor medical waste. Cleanand sterilise the containeras indicated on themaintenance sheet.Technical information? Our team is ready to help on +33 241 560 590 or sleeperone@dentalhitec.comUtilis SO V2-0-GB.indd 10 17/10/11 09:41
MaintenanceCartridge breakageProcedure to be respected imperatively to prevent serious damage to the equipment which isnot covered by the manufacturer’s warranty.Keep the handpiece faceddownwards at all times.Replace the needle cap withthe handpiece holder.Unscrew the plasticcontainer.Inject in fast speed until the plunger is completely advanced and remove it from thehandpiece.Remove all of the glass debris, especially in the plunger’s throat and inside the handpiece.Make sure that the plunger’s black o’ring is not damaged. Confirm the absence of pieces ofglass in the body of the handpiece.You can run the plunger under water but dry it after with the lowpressure air jet. Never run the handpiece under water.11To replace the plunger, press on the pedal and present the plungerto the body, aligning the 2 throats with the 2 metallic rods inside thebody.Press lightly on the plunger until it is guided inside the body andreturns to its initial position.Never grease or oil your SleeperOne’s plunger, it would cause future malfunctions.Utilis SO V2-0-GB.indd 11 17/10/11 09:41
MaintenanceThe control box, the pedal- Unplug the device before cleaning.- Clean these parts with a clean cloth and an alcohol solution.- Never use powerful solvents or aggressive chemical products.- Never sterilise the control box or pedal.- Never immerse the control unit or pedal in liquid.The handpiece and handpiece holder- Disinfect these 2 elements after each patient.- Use disinfection products dedicated for this purpose.- Never sterilise the handpiece.- Never immerse the handpiece into a liquid.Warning : try the product on a small surface beforehand to make sure that itwill not deteriorate the surface of the handpiece or holder.12The plastic containersClean in a disinfectant bath after use, with or without Ultrasonics.Rinse thoroughly with water + dryAutoclave cycle at 134°C (275°F) according to ISO 17665*After disinfection, thoroughly rinse the container with demineralised water to remove all traces of disinfectantproduct. Failure to respect this rule can produce fast deteriorations (whitening, cracks…) which are not covered by themanufacturers warranty.Utilis SO V2-0-GB.indd 12 17/10/11 09:41
MaintenanceSpare partsYou can order extra accessories from your local dealer or by contacting <strong>De</strong>ntal Hi TEC directly.Plastic containers(Ref. SA050 or SA051)2.5m Low voltage power supply(Ref. C2904)Control box fixing adhesives(Ref. SA0226)13ø 0,30 (30G) - 16 mmRef. C3005ø 0,30 (30G) - 9 mmRef. C3002ø 0,40 (27G) - 13 mmRef. C3001Utilis SO V2-0-GB.indd 13 17/10/11 09:41
Technical characteristicsName: SleeperOne Model: S4<strong>De</strong>vice classification: IIADo not use this device withNominal voltage: CA 100-240 V 50/60 Hza power supply other than theAmbient temperature: Tmra: 10-40°Cone supplied (FW7660).Altitude max.: 3000mClass II power supply enclosed: 18V - 560 mACharacteristics of the radio transmitter:Frequency / Transmission power: 868.3MHz / max. 10mW EIRPData rate / Channel bandwidth / Modulation type : 120 kbps / 280 kHz / ASKDimensions :Handpiece: Diameter: 26 mm · Length: 228 mm · Weight: 70 gHandpiece holder: Height: 75 mm · Width: 44 mm · Length: 44 mmControl box : Length : 109 mm · Width : 78 mm · Height : 24 mm · Weight : 106 gWireless pedal: Length: 250 mm · Width: 180 mm · Height: 63 mm · Weight: 603gWire pedal (option) : Length: 180 mm · Width: 145 mm · Height: 33 mm · Weight: 320gCartridge to be used: 1.8 ml cartridge (ISO 11499)Auto-off: After 10 minutes without useCompliance:We declare on our own liability that this product complies with the EC and CSA regulatory provisions.In the interest of product improvement, <strong>De</strong>ntal Hi Tec reserves the right to make modifications to its products without prior notice.SleeperOne is intended for use in an electromagnetic environment where theelectromagnetic interferences are controlled and defined in tables 1 & 2 on thefollowing pagesThe customer or user of the device must make sure that it is used in an environmentas described and can help to prevent interferences by respecting minimal distancebetween RF communication devices (portable or mobile) (transmitters) andSleeperOne as recommended in table 3, depending on the transmission power ofthe communication device.TABLE 1 - Electromagnetic emissionsEmission testsCompliance:RF emissions CISPR 11 Group 1Electromagnetic environment – DirectivesSleeperOne uses RF energy only for its internal function.Furthermore, its RF emissions are very low and not likely to cause any interferencein nearby electronic equipment.RF emissions CISPR 11IEC 61000-3-2 Harmonics transmissionIEC 61000-3-3 Voltage fluctuations /Flicker emissionsClass BClass ACompliesThe use of SleeperOne is suitable for use in all types of establishments, including domestic establishments and those directly connected tothe public low-voltage power supply network that supplies buildings used for domestic purposes.TABLE 2 - Electromagnetic immunityImmunity testElectrostatic discharge(ESD) IEC 61000-4-2Electrical fast transient/burstIEC 61000-4-4SurgeIEC 61000-4-5Voltage dips, short interruptions and voltagevariations on power supply input linesIEC 60601- test level±6 kV contact±8 kV air±2 kV for power supply lines±1 kV for input/output lines±1 kV differential mode±2 kV common mode< 5% UT (> 95% dip in UT) for 0.5 cycles40% UT (60% dip in UT) for 5 cycles70% UT (30% dip in UT) for 25 cycles< 5% UT (> 95% dip in UT) for 5 sec3 A/mCompliance level±6 kV contact±8 kV air±2 kV±1 kV±1 kV±2 kV0 V / 10 ms92 V / 100 ms161 V / 500 ms0 V / 5000 msNot ApplicableElectromagnetic environment guidanceFloors should be wood, concrete or ceramic tile. If floors are covered with syntheticmaterial, the relative humidity should be at least 30%.14Mains power quality should be that of a typical commercial or hospital environment.Mains power quality should be that of a typical commercial or hospital environment.If the user requires continued operation during power mains interruptions, it isrecommended to use an uninterruptible power supply.Power frequency (50/60 Hz) magnetic fieldIEC 61000-4-8Power frequency magnetic fields should be at levels characteristic of a typical locationin a typical commercial or hospital environment.NOTE: UT is the a.c mains voltage prior to application of the test level.Immunity testConducted RFIEC 61000-4-6Radiated RFIEC 61000-4-3IEC 60601 Test level required3 Vrms150 kHz to 80 MHz3 V/m80 MHz to 2,5 GHzCompliance level3 V3 V/mNOTE 1: At 80 MHz and 800 MHz, the higher frequency range applies.NOTE 2: These guidelines may not apply in all situations. Electromagnetic propagation is affected by absorption andreflection from structures, objects and people.a) Field strengths from fixed transmitters, such as base stations for radio (cellular/cordless) telephones and land mobileradios, amateur radio, AM and FM radio broadcast and TV broadcast cannot be predicted theoretically with accuracy.To assess the electromagnetic environment due to fixed RF transmitters, an electromagnetic site survey should beconsidered. If the measured field strength in the location in which the equipment is used exceeds the applicable RFcompliance level above, the device should be observed to verify the normal operation. If abnormal performance isobserved, additional measures may be necessary, such as reorienting or relocating the device.b) Over the frequency range 150 kHz to 80 MHz, the field strengths should be less than 3 V/m.Electromagnetic environment – guidancePortable or mobile RF communications equipment should not be usedcloser to any part of the equipment, including cables, than the recommendedseparation distance calculated from the equation applicable to the frequencyof the transmitter.Recommended separation distanced = [3,5/V1] √Pd = [3.5/E1] √P 80 MHz to 800 MHzd = [7/E1] √P 800 MHz to 2,5 GHzWhere P is the maximum output power rating of the transmitter in watts (W),according to the manufacturer and d is the recommended separation distancein metres (m) b .Field strengths from fixed RF transmitters, as determined by an electromagneticsite survey, should be less than the compliance level in each frequency range.Interference may occur in the vicinity of equipment marked with the followingsymbol:TABLE 3 - Recommended separation distances between portable & mobile RF communications equipment and SleeperOneSeparation distance according to frequency of transmitter (m)150 kHz to 80 MHz80 kHz toà 800 MHz800 kHz to 2,5 GHzRated maximum output powerof transmitter (W)d=[ 3,5 ]√Pd=[ 3,5 ]√Pd=[ 7 ]√P0.010.11101000,120,371,173,6911,67For transmitters rated at a maximum output power not listed above, therecommended separation distance d in metres (m) can be estimated using theequation applicable to the frequency of the transmitter, where P is the maximumoutput power rating of the transmitter in watts (W) according to the transmittermanufacturer.0,120,371,173,6911,670,120,371,173,6911,67NOTE 1: At 80 MHz and 800 MHz, the higher frequency range applies.NOTE 2: These guidelines may not apply in all situations. Electromagneticpropagation is affected by absorption and reflection from structures, objectsand people.This appliance must not be disposed ofwith household wasteIt contains dangerous substances, whichcan have important consequences for theenvironment and human health. It must berecycled in a specific treatment facility.If you are concerned by the European WEEEdirective, please contact your distributor or the <strong>De</strong>ntal Hi Teccompany who will take all of the necessary measures towards thecollection and recycling of the device.DHT · BP 30051 · F 49308 Cholet cedex FRANCE · +33(0) 241 561 616Utilis SO V2-0-GB.indd 14 17/10/11 09:41
<strong>User</strong> guideWarranty conditionsDENTAL Hi Tec offers a two-year warranty for SleeperOne from the date of purchase.This warranty does not apply to the sterilisable accessories. The implementation of the warranty requires the submission of theoriginal proof of purchase indicating the date of purchase. This warranty only applies if the SleeperOne is used in compliance withthe operating instructions and tolerances as indicated in this manual.The warranty is invalid if:- a technical repair is made to the device by an unapproved person.- the device is damaged by an external source (lightning, fire, water damage, negligence or accident), by improper use or noncompliantinstallation.- the device is adapted to operating norms that are different from those indicated on the material safety data sheet locatedunder the control unit.- the purchase documents are changed or altered.- the serial number of the device has been made unreadable.In no case shall the application of this warranty constitute an entitlement to complete replacement of the device or give the right toclaim damages. SleeperOne cannot be subject to return outside of the warranty clauses.15Utilis SO V2-0-GB.indd 15 17/10/11 09:41
For any complementary information,contact our advisors:Clinical & technical information: +33 241 560 590or sleeperone@dentalhitec.comInnovation for dental anaesthesiaPhotos : DHT / Stéphane Rivière. Document et photos non contractuels NOSO-1011-GB-2.0BP 30051 · ZI de l’Appentière · 49280 Mazières-en-Mauges · FRANCEworld@dentalhitec.comwww.dentalhitec.comNon-contractual photos. © Copyright DENTAL HI TEC, Cholet, FranceAll rights reserved. Texts, pictures, graphics, and their arrangement on DENTAL HI TEC documents are protected by copyright and other protection laws.The contents of this document may not be copied, distributed, changed or made available to third parties for commercial purposes.Utilis SO V2-0-GB.indd 16 17/10/11 09:41