Bosch Rexroth VEP**.2 Project Planning Manual - Womack Machine ...
Bosch Rexroth VEP**.2 Project Planning Manual - Womack Machine ...
Bosch Rexroth VEP**.2 Project Planning Manual - Womack Machine ...

Create successful ePaper yourself
Turn your PDF publications into a flip-book with our unique Google optimized e-Paper software.
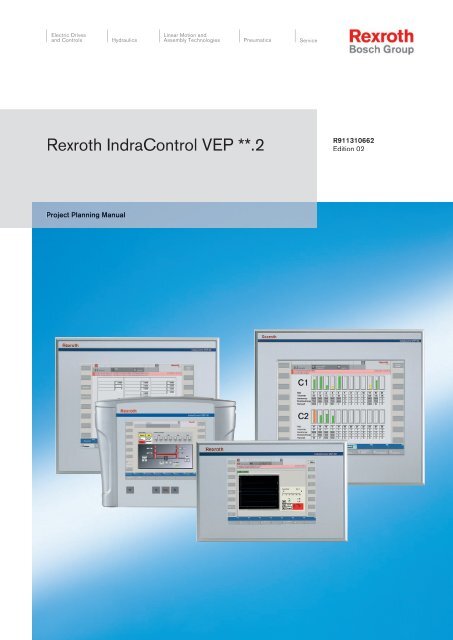
Electric DrivesLinear Motion andand Controls HydraulicsAssembly Technologies Pneumatics Service<strong>Rexroth</strong> IndraControl VEP **.2R911310662Edition 02<strong>Project</strong> <strong>Planning</strong> <strong>Manual</strong>
About this Documentation IndraControl VEP **.2Title<strong>Rexroth</strong> IndraControl VEP **.2Type of Documentation<strong>Project</strong> <strong>Planning</strong> <strong>Manual</strong>Document TypecodeDOK-SUPPL*-<strong>VEP**.2</strong>****-PR02-EN-PInternal File ReferenceDocument Number, 120-2100-B379-02/ENPurpose of DocumentationThis documentation describes the embedded terminalsIndraControl VEP 30.2, VEP 40.2 und VEP 50.2.Record of RevisionsDescriptionReleaseDateNotes120-2100-B379-01/EN 08/05 First Edition120-2100-B379-02/EN 11/07 Second EditionCopyright© 2007 <strong>Bosch</strong> <strong>Rexroth</strong> AGCopying this document, giving it to others and the use or communicationof the contents thereof without express authority, are forbidden. Offendersare liable for the payment of damages. All rights are reserved in the eventof the grant of a patent or the registration of a utility model or design(DIN 34-1).ValidityThe specified data is for product description purposes only and may notbe deemed to be guaranteed unless expressly confirmed in the contract.All rights are reserved with respect to the content of this documentationand the availability of the product.Published by<strong>Bosch</strong> <strong>Rexroth</strong> AGBgm.-Dr.-Nebel-Str. 2 • D-97816 Lohr a. MainTelephone +49 (0)93 52/40-0 • Tx 68 94 21 • Fax +49 (0)93 52/40-48 85http://www.boschrexroth.com/Dept. BRC/EAP2 (JK)Dept. BRC/EAY2 (NH)NoteThis document has been printed on chlorine-free bleached paper.DOK-SUPPL*-<strong>VEP**.2</strong>****-PR02-EN-P
IndraControl VEP **.2Contents IContents1 System Presentation 1-11.1 Brief Description of the IndraControl VEP 30.2, VEP 40.2 and VEP 50.2 ................................... 1-1IndraControl VEP **.2.............................................................................................................. 1-1Embedded Terminals with Keypad.......................................................................................... 1-2Embedded Terminals with Touch Screen ............................................................................... 1-2Front Panel of the IndraControl VEP 30.2............................................................................... 1-2Front Panel of the IndraControl VEP 40.2............................................................................... 1-4Front Panel of the IndraControl VEP 50.2............................................................................... 1-51.2 Operating System ......................................................................................................................... 1-51.3 Commissioning ............................................................................................................................. 1-52 Important Directions for Use 2-12.1 Appropriate Use............................................................................................................................ 2-1Introduction .............................................................................................................................. 2-1Areas of Use and Application .................................................................................................. 2-22.2 Inappropriate Use ......................................................................................................................... 2-23 Safety Instructions for Electric Drives and Controls 3-13.1 Introduction ................................................................................................................................... 3-13.2 Explanations ................................................................................................................................. 3-13.3 Hazards by Improper Use............................................................................................................. 3-23.4 General Information ...................................................................................................................... 3-33.5 Protection Against Contact with Electrical Parts........................................................................... 3-43.6 Protection Against Electric Shock by Protective Low Voltage (PELV) ......................................... 3-53.7 Protection Against Dangerous Movements .................................................................................. 3-63.8 Protection Against Magnetic and Electromagnetic Fields During Operation andMounting ....................................................................................................................................... 3-73.9 Protection Against Contact with Hot Parts.................................................................................... 3-83.10 Protection During Handling and Mounting.................................................................................... 3-83.11 Battery Safety ............................................................................................................................... 3-93.12 Protection Against Pressurized Systems...................................................................................... 3-94 Technical Data 4-14.1 Technical Data of the Front Panel ................................................................................................ 4-1IndraControl VEP 30.2............................................................................................................. 4-1IndraControl VEP 40.2............................................................................................................. 4-1IndraControl VEP 50.2............................................................................................................. 4-14.2 Technical Data of the PC Box....................................................................................................... 4-24.3 Technical Data of the 24 V Power Supply Unit............................................................................. 4-2DOK-SUPPL*-<strong>VEP**.2</strong>****-PR02-EN-P
II Contents IndraControl VEP **.24.4 Ambient Conditions....................................................................................................................... 4-34.5 Weight........................................................................................................................................... 4-34.6 Used Standards ............................................................................................................................ 4-44.7 Wear Parts.................................................................................................................................... 4-54.8 Compatibility Test ......................................................................................................................... 4-55 Dimensions 5-15.1 Housing Dimensions..................................................................................................................... 5-1Housing Dimensions of the IndraControl VEP 30.2CC ........................................................... 5-1Housing Dimensions of the IndraControl VEP 30.2CG........................................................... 5-3Housing Dimensions of the IndraControl VEP 30.2CG with Housing ExtensionIndraControl VAS 02.1............................................................................................................. 5-5Housing Dimensions of the IndraControl VEP 40.2CE ........................................................... 5-7Housing Dimensions of the IndraControl VEP 50.2CH ........................................................... 5-95.2 Installation................................................................................................................................... 5-11Installation Notes ................................................................................................................... 5-11Mounting Cut-Out .................................................................................................................. 5-11Mounting Dimensions of the IndraControl VEP 30.2CC........................................................ 5-12Mounting Dimensions of the IndraControl VEP 30.2CG's Bracket Housing ......................... 5-13Mounting Dimensions of the IndraControl VEP 40.2CE........................................................ 5-14Mounting Dimensions of the IndraControl VEP 50.2CH........................................................ 5-156 Display and Operating Components 6-16.1 Backlight Dimming ........................................................................................................................ 6-16.2 Operating Components of the IndraControl VEP 30.2CG............................................................ 6-2Keypad..................................................................................................................................... 6-2Relay Contacts Connection of the IndraControl VEP 30.2CG's Keys..................................... 6-3Housing Extension IndraControl VAS 02.1 ............................................................................. 6-46.3 Touch Screen ............................................................................................................................... 6-57 Pin Assignments 7-17.1 Connector Panel without Special Interfaces................................................................................. 7-17.2 Connector Panel with Profibus DP Master ................................................................................... 7-17.3 Connector Panel with DeviceNet Master...................................................................................... 7-17.4 Interfaces ...................................................................................................................................... 7-2Overview.................................................................................................................................. 7-2Serial Interface COM1 ............................................................................................................. 7-3USB Interfaces ........................................................................................................................ 7-4Ethernet Interface .................................................................................................................... 7-5VGA Interface .......................................................................................................................... 7-6Combined Keyboard/Mouse Interface..................................................................................... 7-724 VDC Power Supply............................................................................................................. 7-7Profibus Interfaces................................................................................................................. 7-10DeviceNet Interfaces ............................................................................................................. 7-12VEP 30.2CG Cable Outlet ..................................................................................................... 7-15DOK-SUPPL*-<strong>VEP**.2</strong>****-PR02-EN-P
IndraControl VEP **.2Contents III8 Maintenance and Installation 8-18.1 General Information ...................................................................................................................... 8-18.2 LCD Display.................................................................................................................................. 8-18.3 CMOS Battery............................................................................................................................... 8-28.4 Extension Cards ........................................................................................................................... 8-29 Software 9-19.1 General Information ...................................................................................................................... 9-19.2 First Commissioning ..................................................................................................................... 9-29.3 Touch Calibration.......................................................................................................................... 9-29.4 <strong>Rexroth</strong> CE Settings ..................................................................................................................... 9-3<strong>Rexroth</strong> CE Settings – Ethernet Adapter................................................................................. 9-3<strong>Rexroth</strong> CE Settings – Application Settings ............................................................................ 9-4<strong>Rexroth</strong> CE Settings – Services .............................................................................................. 9-5<strong>Rexroth</strong> CE Settings – System Info......................................................................................... 9-69.5 Windows CE 4.2 .NET .................................................................................................................. 9-7Operation ................................................................................................................................. 9-7Memory Distribution................................................................................................................. 9-8USB Support.......................................................................................................................... 9-10Microsoft Programs ............................................................................................................... 9-10FTP Server ............................................................................................................................ 9-11Web Server............................................................................................................................ 9-11Telnet Server ......................................................................................................................... 9-11CE User Configuration........................................................................................................... 9-119.6 IndraLogicWinCE........................................................................................................................ 9-129.7 WinStudio.................................................................................................................................... 9-1210 Ordering Information 10-110.1 Type Code .................................................................................................................................. 10-1IndraControl VEP 30.2........................................................................................................... 10-2IndraControl VEP 40.2........................................................................................................... 10-3IndraControl VEP 50.2........................................................................................................... 10-4IndraControl VAS 02.1........................................................................................................... 10-510.2 Accessories ................................................................................................................................ 10-6Connectors and Ready-Made Cables ................................................................................... 10-6Storage Media ....................................................................................................................... 10-611 Disposal and Environmental Protection 11-111.1 Disposal ...................................................................................................................................... 11-1Products................................................................................................................................. 11-1Packaging Materials .............................................................................................................. 11-111.2 Environmental Protection............................................................................................................ 11-1No Release of Hazardous Substances ................................................................................. 11-1Materials Contained in the Products ..................................................................................... 11-1Recycling ............................................................................................................................... 11-2DOK-SUPPL*-<strong>VEP**.2</strong>****-PR02-EN-P
IV Contents IndraControl VEP **.212 List of Figures 12-113 Index 13-114 Service and Support 14-114.1 Helpdesk..................................................................................................................................... 14-114.2 Service Hotline............................................................................................................................ 14-114.3 Internet........................................................................................................................................ 14-114.4 Helpful Information...................................................................................................................... 14-1DOK-SUPPL*-<strong>VEP**.2</strong>****-PR02-EN-P
IndraControl VEP **.2 System Presentation 1-11 System Presentation1.1 Brief Description of the IndraControl VEP 30.2, VEP 40.2and VEP 50.2The embedded terminals IndraControl VEP 30.2, VEP 40.2 and VEP 50.2are PC-based machine operator terminals. Depending on the respectiveapplication or configuration they can also perform control functions.Note: In this documentation the embedded terminalsIndraControl VEP 30.2, VEP 40.2 and VEP 50.2 are named asIndraControl VEP **.2. Information on the models IndraControlVEP 30.1, VEP 40.1 and VEP 50.1 you will find indocumentation "<strong>Rexroth</strong> IndraControl VEP / VEH", DOK-SUPPL*-VEH/VEP****-PR02-EN-P.IndraControl VEP **.2The embedded terminals IndraControl VEP **.2 are provided as differentvariants. Principally, they differ in their display size.VEP 30.2CC VEP 30.2CGDisplay8.4" TFTTouch screenYesKeys No YesFig. 1-1: Front of the IndraControl VEP 30.2DisplayTouch screenKeysVEP 40.2CE12.1" TFTYesNoFig. 1-2: Front of the IndraControl VEP 40.2DisplayTouch screenKeysVEP 50.2CH15" TFTYesNoFig. 1-3: Front of the IndraControl VEP 50.2All IndraControl VEP **.2 devices are equipped with an identical PC-Box.DOK-SUPPL*-<strong>VEP**.2</strong>****-PR02-EN-P
1-2 System Presentation IndraControl VEP **.2PC boxPC104 slots 1Depending on the device type free orequipped.Voltage supplyShort-time UPSFig. 1-4:PC boxEmbedded Terminals with KeypadEmbedded Terminals with Touch ScreenFront Panel of the IndraControl VEP 30.224 VDCIntegrated charging circuit and buffercapacitor boardThe keypad consists of a chemical resistant polyester foil with embossedkeys.The front panel with touch screen allows to operate the applicationsoftware via the touch-sensitive surface of the display without keyboardand mouse.IndraControl VEP 30.2CC with Touch ScreenVEP_30_Front.FH9Fig. 1-5:Front of the IndraControl VEP 30.2CCDOK-SUPPL*-<strong>VEP**.2</strong>****-PR02-EN-P
IndraControl VEP **.2 System Presentation 1-3IndraControl VEP 30.2CG with Touch Screen and 5 KeysVEP302CG.bmpFig. 1-6:Front of the IndraControl VEP 30.2CGHousing Extension IndraControl VAS 02.1The IndraControl VEP 30.2CG can be expanded with the housingextension IndraControl VAS 02.1 by a start, stop and an emergencypushbutton. Either the IndraControl VAS 02.1 can be ordered as separatedevice or as option "GE" in the type code.Fig. 1-7: Housing extension IndraControl VAS 02.1vas02_1.bmpDOK-SUPPL*-<strong>VEP**.2</strong>****-PR02-EN-P
1-4 System Presentation IndraControl VEP **.2Front Panel of the IndraControl VEP 40.2IndraControl VEP 40.2CE with Touch ScreenVEP_40_Front.FH9Fig. 1-8:Front of the IndraControl VEP 40.2CEDOK-SUPPL*-<strong>VEP**.2</strong>****-PR02-EN-P
IndraControl VEP **.2 System Presentation 1-5Front Panel of the IndraControl VEP 50.2IndraControl VEP 50.2CH with Touch ScreenIndraControlVEP50VEP_50_Front.FH9Fig. 1-9:Front of the IndraControl VEP 50.2CH1.2 Operating System1.3 CommissioningFor license reasons IndraControl VEP **.2-type devices are only deliveredwith already installed operating system. For further information about theoperating system please refer to chapter 9, "Software".Mount the device properly (for this, see chapter 5, "Dimensions"). Then,connect the device to the power supply and, if required, to the network.DOK-SUPPL*-<strong>VEP**.2</strong>****-PR02-EN-P
1-6 System Presentation IndraControl VEP **.2DOK-SUPPL*-<strong>VEP**.2</strong>****-PR02-EN-P
IndraControl VEP **.2 Important Directions for Use 2-12 Important Directions for Use2.1 Appropriate UseIntroduction<strong>Rexroth</strong> products represent state-of-the-art developments andmanufacturing. They are tested prior to delivery to ensure operating safetyand reliability.The products may only be used in the manner that is defined asappropriate. If they are used in an inappropriate manner, then situationscan develop that may lead to property damage or injury to personnel.Note:<strong>Bosch</strong> <strong>Rexroth</strong>, as manufacturer, is not liable for any damagesresulting from inappropriate use. In such cases, the guaranteeand the right to payment of damages resulting frominappropriate use are forfeited. The user alone carries allresponsibility of the risks.Before using <strong>Rexroth</strong> products, make sure that all the pre-requisites forappropriate use of the products are satisfied:• Personnel that in any way, shape or form uses our products must firstread and understand the relevant safety instructions and be familiarwith appropriate use.• If the product takes the form of hardware, then they must remain intheir original state, in other words, no structural changes arepermitted. It is not permitted to decompile software products or altersource codes.• Do not mount damaged or faulty products or use them in operation.• Make sure that the products have been installed in the mannerdescribed in the relevant documentation.DOK-SUPPL*-<strong>VEP**.2</strong>****-PR02-EN-P
2-2 Important Directions for Use IndraControl VEP **.2Areas of Use and ApplicationThe embedded terminals IndraControl VEP **.2 are PC-based machineoperator terminals, that can – depending on the application orconfiguration – also perform control functionalities.Note:The embedded terminals IndraControl VEP **.2 may only beused with the accessories and parts specified in thisdocument. If a component has not been specifically named,then it may not be either mounted or connected. The sameapplies to cables and lines.Operation is only permitted in the specified configurations andcombinations of components using the software and firmwareas specified in the relevant function descriptions.2.2 Inappropriate UseThe embedded terminals IndraControl VEP **.2 have been developed foruse in control tasks.Typical areas of application of the IndraControl VEP **.2 devices:• Handling and assembly systems,• Packaging and foodstuff machines,• Printing and paper processing machines,• <strong>Machine</strong> tools.IndraControl VEP **.2-type devices may only be operated under theassembly, installation and ambient conditions as described here(temperature, system of protection, humidity, EMC requirements, etc.)and in the position specified.Using the embedded terminals IndraControl VEP **.2 outside of theabove-referenced areas of application or under operating conditions otherthan described in the document and the technical data specified isdefined as “inappropriate use".The embedded terminals IndraControl VEP **.2 may not be used, if• they are subject to operating conditions that do not meet the abovespecified ambient conditions. This includes, for example, operationunder water, in the case of extreme temperature fluctuations orextreme maximum temperatures or if• <strong>Bosch</strong> <strong>Rexroth</strong> has not specifically released them for that intendedpurpose. Please note the specifications outlined in the general SafetyInstructions!DOK-SUPPL*-<strong>VEP**.2</strong>****-PR02-EN-P
IndraControl VEP **.2 Safety Instructions for Electric Drives and Controls 3-13 Safety Instructions for Electric Drives and Controls3.1 IntroductionRead these instructions before the initial startup of the equipment in orderto eliminate the risk of bodily harm or material damage. Follow thesesafety instructions at all times.Do not attempt to install or start up this equipment without first reading alldocumentation provided with the product. Read and understand thesesafety instructions and all user documentation of the equipment prior toworking with the equipment at any time. If you do not have the userdocumentation for your equipment, contact your local <strong>Bosch</strong> <strong>Rexroth</strong>representative to send this documentation immediately to the person orpersons responsible for the safe operation of this equipment.If the equipment is resold, rented or transferred or passed on to others,then these safety instructions must be delivered with the equipment.WARNINGImproper use of this equipment, failure to followthe safety instructions in this document ortampering with the product, including disablingof safety devices, may result in materialdamage, bodily harm, electric shock or evendeath!3.2 ExplanationsThe safety instructions describe the following degrees of hazardseriousness in compliance with ANSI Z535. The degree of hazardseriousness informs about the consequences resulting from noncompliancewith the safety instructions.Warning symbol with signalwordDegree of hazard seriousness accordingto ANSIDeath or severe bodily harm will occur.DANGERDeath or severe bodily harm may occur.WARNINGBodily harm or material damage may occur.CAUTIONFig. 3-1: Hazard classification (according to ANSI Z535)DOK-SUPPL*-<strong>VEP**.2</strong>****-PR02-EN-P
3-2 Safety Instructions for Electric Drives and Controls IndraControl VEP **.23.3 Hazards by Improper UseDANGERHigh voltage and high discharge current!Danger to life or severe bodily harm by electricshock!DANGERDangerous movements! Danger to life, severebodily harm or material damage byunintentional motor movements!WARNINGHigh electrical voltage due to wrongconnections! Danger to life or bodily harm byelectric shock!WARNINGHealth hazard for persons with heartpacemakers, metal implants and hearing aids inproximity to electrical equipment!Surface of machine housing could be extremelyhot! Danger of injury! Danger of burns!CAUTIONCAUTIONRisk of injury due to improper handling! Bodilyharm caused by crushing, shearing, cutting andmechanical shock or incorrect handling ofpressurized systems!Risk of injury due to incorrect handling ofbatteries!CAUTIONDOK-SUPPL*-<strong>VEP**.2</strong>****-PR02-EN-P
IndraControl VEP **.2 Safety Instructions for Electric Drives and Controls 3-33.4 General Information• <strong>Bosch</strong> <strong>Rexroth</strong> AG is not liable for damages resulting from failure toobserve the warnings provided in this documentation.• Read the operating, maintenance and safety instructions in yourlanguage before starting up the machine. If you find that you cannotcompletely understand the documentation for your product, please askyour supplier to clarify.• Proper and correct transport, storage, assembly and installation aswell as care in operation and maintenance are prerequisites foroptimal and safe operation of this equipment.• Only persons who are trained and qualified for the use and operationof the equipment may work on this equipment or within its proximity.• The persons are qualified if they have sufficient knowledge of theassembly, installation and operation of the equipment as well as anunderstanding of all warnings and precautionary measures noted inthese instructions.• Furthermore, they must be trained, instructed and qualified toswitch electrical circuits and equipment on and off in accordancewith technical safety regulations, to ground them and to mark themaccording to the requirements of safe work practices. They musthave adequate safety equipment and be trained in first aid.• Only use spare parts and accessories approved by the manufacturer.• Follow all safety regulations and requirements for the specificapplication as practiced in the country of use.• The equipment is designed for installation in industrial machinery.• The ambient conditions given in the product documentation must beobserved.• Use only safety features and applications that are clearly and explicitlyapproved in the <strong>Project</strong> <strong>Planning</strong> <strong>Manual</strong>.For example, the following areas of use are not permitted: constructioncranes, elevators used for people or freight, devices and vehicles totransport people, medical applications, refinery plants, transport ofhazardous goods, nuclear applications, applications sensitive to highfrequency, mining, food processing, control of protection equipment(also in a machine).• The information given in the documentation of the product with regardto the use of the delivered components contains only examples ofapplications and suggestions.The machine and installation manufacturer must• make sure that the delivered components are suited for hisindividual application and check the information given in thisdocumentation with regard to the use of the components,• make sure that his application complies with the applicable safetyregulations and standards and carry out the required measures,modifications and complements.• Startup of the delivered components is only permitted once it is surethat the machine or installation in which they are installed complieswith the national regulations, safety specifications and standards of theapplication.• Technical data, connections and operational conditions are specified inthe product documentation and must be followed at all times.DOK-SUPPL*-<strong>VEP**.2</strong>****-PR02-EN-P
3-4 Safety Instructions for Electric Drives and Controls IndraControl VEP **.2• Operation is only permitted if the national EMC regulations for theapplication are met.The instructions for installation in accordance with EMC requirementscan be found in the documentation "EMC in Drive and ControlSystems".The machine or installation manufacturer is responsible forcompliance with the limiting values as prescribed in the nationalregulations.3.5 Protection Against Contact with Electrical PartsNote:This section refers to equipment and drive components withvoltages above 50 Volts.Touching live parts with voltages of 50 Volts and more with bare hands orconductive tools or touching ungrounded housings can be dangerous andcause electric shock. In order to operate electrical equipment, certainparts must unavoidably have dangerous voltages applied to them.DANGERHigh electrical voltage! Danger to life, severebodily harm by electric shock!⇒ Only those trained and qualified to work with or onelectrical equipment are permitted to operate, maintainor repair this equipment.⇒ Follow general construction and safety regulations whenworking on high voltage installations.⇒ Before switching on power the ground wire must bepermanently connected to all electrical units accordingto the connection diagram.⇒ Do not operate electrical equipment at any time, evenfor brief measurements or tests, if the ground wire is notpermanently connected to the points of the componentsprovided for this purpose.⇒ Before working with electrical parts with voltage higherthan 50 V, the equipment must be disconnected fromthe mains voltage or power supply. Make sure theequipment cannot be switched on again unintended.⇒ The following should be observed with electrical driveand filter components:⇒ Wait five (5) minutes after switching off power to allowcapacitors to discharge before beginning to work.Measure the voltage on the capacitors before beginningto work to make sure that the equipment is safe totouch.⇒ Never touch the electrical connection points of acomponent while power is turned on.⇒ Install the covers and guards provided with theequipment properly before switching the equipment on.Prevent contact with live parts at any time.⇒ A residual-current-operated protective device (RCD)must not be used on electric drives! Indirect contactmust be prevented by other means, for example, by anovercurrent protective device.⇒ Electrical components with exposed live parts anduncovered high voltage terminals must be installed in aprotective housing, for example, in a control cabinet.DOK-SUPPL*-<strong>VEP**.2</strong>****-PR02-EN-P
IndraControl VEP **.2 Safety Instructions for Electric Drives and Controls 3-5To be observed with electrical drive and filter components:DANGERHigh electrical voltage on the housing!High leakage current! Danger to life, danger ofinjury by electric shock!⇒ Connect the electrical equipment, the housings of allelectrical units and motors permanently with the safetyconductor at the ground points before power isswitched on. Look at the connection diagram. This iseven necessary for brief tests.⇒ Connect the safety conductor of the electricalequipment always permanently and firmly to thesupply mains. Leakage current exceeds 3.5 mA innormal operation.⇒ Use a copper conductor with at least 10 mm² crosssection over its entire course for this safety conductorconnection!⇒ Prior to startups, even for brief tests, always connectthe protective conductor or connect with ground wire.Otherwise, high voltages can occur on the housingthat lead to electric shock.3.6 Protection Against Electric Shock by Protective LowVoltage (PELV)All connections and terminals with voltages between 0 and 50 Volts on<strong>Rexroth</strong> products are protective low voltages designed in accordance withinternational standards on electrical safety.WARNINGHigh electrical voltage due to wrongconnections! Danger to life, bodily harm byelectric shock!⇒ Only connect equipment, electrical components andcables of the protective low voltage type (PELV =Protective Extra Low Voltage) to all terminals andclamps with voltages of 0 to 50 Volts.⇒ Only electrical circuits may be connected which aresafely isolated against high voltage circuits. Safeisolation is achieved, for example, with an isolatingtransformer, an opto-electronic coupler or whenbattery-operated.DOK-SUPPL*-<strong>VEP**.2</strong>****-PR02-EN-P
3-6 Safety Instructions for Electric Drives and Controls IndraControl VEP **.23.7 Protection Against Dangerous MovementsDangerous movements can be caused by faulty control of the connectedmotors. Some common examples are:• improper or wrong wiring of cable connections• incorrect operation of the equipment components• wrong input of parameters before operation• malfunction of sensors, encoders and monitoring devices• defective components• software or firmware errorsDangerous movements can occur immediately after equipment isswitched on or even after an unspecified time of trouble-free operation.The monitoring in the drive components will normally be sufficient to avoidfaulty operation in the connected drives. Regarding personal safety,especially the danger of bodily injury and material damage, this alonecannot be relied upon to ensure complete safety. Until the integratedmonitoring functions become effective, it must be assumed in any casethat faulty drive movements will occur. The extent of faulty drivemovements depends upon the type of control and the state of operation.DANGERDangerous movements! Danger to life, risk ofinjury, severe bodily harm or material damage!⇒ Ensure personal safety by means of qualified andtested higher-level monitoring devices or measuresintegrated in the installation. Unintended machinemotion is possible if monitoring devices are disabled,bypassed or not activated.⇒ Pay attention to unintended machine motion or othermalfunction in any mode of operation.⇒ Keep free and clear of the machine’s range of motionand moving parts. Possible measures to preventpeople from accidentally entering the machine’s rangeof motion:- use safety fences- use safety guards- use protective coverings- install light curtains or light barriers⇒ Fences and coverings must be strong enough toresist maximum possible momentum, especially ifthere is a possibility of loose parts flying off.⇒ Mount the emergency stop switch in the immediatereach of the operator. Verify that the emergency stopworks before startup. Don’t operate the machine if theemergency stop is not working.⇒ Isolate the drive power connection by means of anemergency stop circuit or use a starting lockout toprevent unintentional start.⇒ Make sure that the drives are brought to a safestandstill before accessing or entering the dangerzone. Safe standstill can be achieved by switching offthe power supply contactor or by safe mechanicallocking of moving parts.DOK-SUPPL*-<strong>VEP**.2</strong>****-PR02-EN-P
IndraControl VEP **.2 Safety Instructions for Electric Drives and Controls 3-7⇒⇒Secure vertical axes against falling or dropping afterswitching off the motor power by, for example:- mechanically securing the vertical axes- adding an external braking/ arrester/ clampingmechanism- ensuring sufficient equilibration of the vertical axesThe standard equipment motor brake or an externalbrake controlled directly by the drive controller arenot sufficient to guarantee personal safety!Disconnect electrical power to the equipment using amaster switch and secure the switch againstreconnection for:- maintenance and repair work- cleaning of equipment- long periods of discontinued equipment use⇒ Prevent the operation of high-frequency, remotecontrol and radio equipment near electronics circuitsand supply leads. If the use of such equipment cannotbe avoided, verify the system and the installation forpossible malfunctions in all possible positions ofnormal use before initial startup. If necessary, performa special electromagnetic compatibility (EMC) test onthe installation.3.8 Protection Against Magnetic and Electromagnetic FieldsDuring Operation and MountingMagnetic and electromagnetic fields generated near current-carryingconductors and permanent magnets in motors represent a serious healthhazard to persons with heart pacemakers, metal implants and hearingaids.WARNINGHealth hazard for persons with heartpacemakers, metal implants and hearing aids inproximity to electrical equipment!Persons with heart pacemakers, hearing aids and⇒metal implants are not permitted to enter the followingareas:- Areas in which electrical equipment and parts aremounted, being operated or started up.- Areas in which parts of motors with permanentmagnets are being stored, operated, repaired ormounted.⇒ If it is necessary for a person with a heart pacemakerto enter such an area, then a doctor must beconsulted prior to doing so. Heart pacemakers thatare already implanted or will be implanted in thefuture, have a considerable variation in their electricalnoise immunity. Therefore there are no rules withgeneral validity.⇒ Persons with hearing aids, metal implants or metalpieces must consult a doctor before they enter theareas described above. Otherwise, health hazards willoccur.DOK-SUPPL*-<strong>VEP**.2</strong>****-PR02-EN-P
3-8 Safety Instructions for Electric Drives and Controls IndraControl VEP **.23.9 Protection Against Contact with Hot PartsCAUTIONHousing surfaces could be extremely hot!Danger of injury! Danger of burns!Do not touch housing surfaces near sources of heat!⇒Danger of burns!After switching the equipment off, wait at least ten (10)⇒minutes to allow it to cool down before touching it.Do not touch hot parts of the equipment, such as⇒housings with integrated heat sinks and resistors.Danger of burns!3.10 Protection During Handling and MountingUnder certain conditions, incorrect handling and mounting of parts andcomponents may cause injuries.CAUTIONRisk of injury by incorrect handling! Bodilyharm caused by crushing, shearing, cutting andmechanical shock!Observe general installation and safety instructions⇒with regard to handling and mounting.Use appropriate mounting and transport equipment.⇒Take precautions to avoid pinching and crushing.⇒Use only appropriate tools. If specified by the product⇒documentation, special tools must be used.Use lifting devices and tools correctly and safely.⇒For safe protection wear appropriate protective⇒clothing, e.g. safety glasses, safety shoes and safetygloves.Never stand under suspended loads.⇒Clean up liquids from the floor immediately to prevent⇒slipping.DOK-SUPPL*-<strong>VEP**.2</strong>****-PR02-EN-P
IndraControl VEP **.2 Safety Instructions for Electric Drives and Controls 3-93.11 Battery SafetyBatteries contain reactive chemicals in a solid housing. Inappropriatehandling may result in injuries or material damage.CAUTIONRisk of injury by incorrect handling!Do not attempt to reactivate discharged batteries by⇒heating or other methods (danger of explosion andcauterization).Never charge non-chargeable batteries (danger of⇒leakage and explosion).Never throw batteries into a fire.⇒Do not dismantle batteries.⇒Do not damage electrical components installed in the⇒equipment.Note:Be aware of environmental protection and disposal! Thebatteries contained in the product should be considered ashazardous material for land, air and sea transport in the senseof the legal requirements (danger of explosion). Disposebatteries separately from other waste. Observe the legalrequirements in the country of installation.3.12 Protection Against Pressurized SystemsCertain motors and drive controllers, corresponding to the information inthe respective <strong>Project</strong> <strong>Planning</strong> <strong>Manual</strong>, must be provided withpressurized media, such as compressed air, hydraulic oil, cooling fluidand cooling lubricant supplied by external systems. Incorrect handling ofthe supply and connections of pressurized systems can lead to injuries oraccidents. In these cases, improper handling of external supply systems,supply lines or connections can cause injuries or material damage.CAUTIONDanger of injury by incorrect handling ofpressurized systems !⇒ Do not attempt to disassemble, to open or to cut apressurized system (danger of explosion).⇒ Observe the operation instructions of the respectivemanufacturer.⇒ Before disassembling pressurized systems, releasepressure and drain off the fluid or gas.⇒ Use suitable protective clothing (for example safetyglasses, safety shoes and safety gloves)⇒ Remove any fluid that has leaked out onto the floorimmediately.Note:Environmental protection and disposal! The media used in theoperation of the pressurized system equipment may not beenvironmentally compatible. Media that are damaging theenvironment must be disposed separately from normal waste.Observe the legal requirements in the country of installation.DOK-SUPPL*-<strong>VEP**.2</strong>****-PR02-EN-P
3-10 Safety Instructions for Electric Drives and Controls IndraControl VEP **.2NotesDOK-SUPPL*-<strong>VEP**.2</strong>****-PR02-EN-P
IndraControl VEP **.2 Technical Data 4-14 Technical Data4.1 Technical Data of the Front PanelIndraControl VEP 30.2DisplayVEP 30.2CC8.4" TFT, 800 x 600 pixels262,144 colorsVEP 30.2CGOperation Touch screen Touch and key operation with 5 keys. As anoption: housing extension VAS02.1 withstart-, stop- and emergency pushbutton.Surface – Front panelDegree of protection Front panel IP 65 acc. to DIN 40 050,IEC 529IndraControl VEP 40.2Color: RAL 7035 light grayIP 40 acc. to DIN 40 050; IEC 529 (valid forcomplete device)Front type 1 acc. to NEMA (UL)Type 1 acc. to NEMA (UL)Fig. 4-1: Technical data, front panel of the IndraControl VEP 30.2DisplayOperationSurface – Front panelVEP 40.2CE12.1" TFT, 800 x 600 pixels262,144 colorsTouch screenColor: RAL 7035 light grayDegree of protection Front panel IP 65 acc. to DIN 40 050, IEC 529IndraControl VEP 50.2Front type 1 acc. to NEMA (UL)Fig. 4-2: Technical data, front panel of the IndraControl VEP 40.2DisplayOperationSurface – Front panelVEP 50.2CH15“-TFT, 1024x768 pixels262,144 colorsTouch screenColor: RAL 7035 light grayDegree of protection Front panel IP 65 acc. to DIN 40 050, IEC 529Front type 1 acc. to NEMA (UL)Fig. 4-3: Technical data, front panel of the IndraControl VEP 50.2DOK-SUPPL*-<strong>VEP**.2</strong>****-PR02-EN-P
4-2 Technical Data IndraControl VEP **.24.2 Technical Data of the PC BoxPC boxProcessorWorking memoryCompact flash cardInterfacesavailable in all variantsInterfacesoptionalSlotsIntel Ultra Low Voltage Celeron 400MHz; integrated graphic controller with typ. 8 MBshared memory128 MB128 MB• 1 x external VGA connection (15-pin, HD-Sub)• 2 x USB 1.1 connection (type A)• 1 x Ethernet connection (RJ 45, 10/100 Base-T)• 1 x keyboard/mouse connection (PS/2)• 1 x serial standard interface RS232 (9-pin, D-Sub)Depending on the used PC104 cards1 PC104 slotDegree of protection PC box: IP 20Voltage supplyMax. power consumption formaximum configuration24 VDC53 WFig. 4-4:Technical data, PC box of the IndraControl VEP **.2 devices4.3 Technical Data of the 24 V Power Supply UnitNominal input voltage:24 VDCInput voltage range: 24 VDC (+19 V to +30 V)Noise and surge immunity:Max. input current:Max. inrush current:Output voltages:+5 V+12 VMax. output power:Fig. 4-5:Umax = 35 V (for t < 100 ms)2.2 A7 A / 6 msCurrent(max.)5 A1.8 A46 WTechnical data of the 24 V power supply unitTolerance (incl. residualripple)+/-3 %+/-4 %DOK-SUPPL*-<strong>VEP**.2</strong>****-PR02-EN-P
IndraControl VEP **.2 Technical Data 4-34.4 Ambient ConditionsMax. surroundingair temperatureMax. temperaturegradientIn operation Transport Storage+5 °C to +45 °C -20 °C to +60 °C -20 °C to +60 °CTemporal temperaturechanges up to 3 K per minuteHumidity Min. rel. humidity: 5 %Max. rel. humidity: 85 %Min. abs. humidity: 1 g/m³Max. abs. humidity: 25 g/m³Non-condensingAir pressureMechanicalstrengthcorresponding to climaticclass 3K3 according toEN 60721-3-3Up to 2,000 m abovesea level according toEN 61131-2Max. vibration:Frequency range: 10...150 HzExcursion: 0.075 mm at10...57 HzAcceleration: 1 g at57...150 HzAccording to EN 600068-2-6Temporal temperaturechanges up to 3 K per minuteMin. rel. humidity: 5 %Max. rel. humidity: 75 %Min. abs. humidity: 1 g/m³Max. abs. humidity: 25 g/m³Non-condensingcorresponding to climaticclass 2K2 according toEN 60721-3-2Up to 3,000 m abovesea level according toEN 61131-2Max. shock:15 g 11 msaccording to EN 60068-2-27No disturbance of thefunction.Degree of pollution 2 2 2Overvoltage category 2 - -Temporal temperaturechanges up to 3 K per minuteMin. rel. humidity: 5 %Max. rel. humidity: 85 %Min. abs. humidity: 1 g/m³Max. abs. humidity: 25 g/m³Non-condensingcorresponding to climaticclass 1K2 according toEN 60721-3-1Up to 3,000 m abovesea level according toEN 61131-2Max. shock:15 g 11 msaccording to EN 60068-2-27No disturbance of thefunction.Fig. 4-6:Ambient conditions4.5 WeightVEP 30.2CCVEP 30.2CGVEP 40VEP 50Approx. 2.3 kgApprox. 3.0 kgApprox. 3.8 kgApprox. 5,4 kgFig. 4-7:Weight of the IndraControl VEP **.2 devicesDOK-SUPPL*-<strong>VEP**.2</strong>****-PR02-EN-P
4-4 Technical Data IndraControl VEP **.24.6 Used StandardsThe system components of the embedded terminal IndraControl VEP **.2correspond to the following standards:StandardEN 60 204-1EN 50 081-2EN 50 082-2EN 60 742EN 60 950EN 61 131EN 61 131-2EN 418EN 60 529EN 60 068-2-6EN 60068-2-27EN 60721-3-3EN 60721-3-2EN 60721-3-1Fig. 4-8:Used standardsMeaningElectrical equipment of machinesBasic technical standard, emitted interference(industrial environment)Basic technical standard, noise immunity (industrialenvironment)Transformer for 24 V power supply unit, protectiveseparationOvervoltage category IIRequirements concerning the 24 V outputsRequirements concerning the 24 power supply<strong>Machine</strong> safety, EMERGENCY STOP devicesDegrees of protection (incl. housings and installationcompartments)Vibration testShock testClassification of ambient conditionsClassification of ambient conditionsClassification of ambient conditionsNote: Concerning delivered embedded terminals all CErequirements are fulfilled. After plugging-in extension cards,however, a new CE test has to be executed.UL/CSA CertificationThe devices of the IndraControl VEP **.2 family are basically certificatedaccording to• UL508 (Industrial Control Equipment) and• C22.2 No. 142-M1987 (CSA)However, it is possible that there are combinations or extension stageswith restricted or missing certification. Thus, verify the registrationaccording to the UL marking on the device.Note:To guarantee an UL/CSA-compliant operation, you have tofulfill the following conditions:• Use 60/75 °C copper wire only.Note:The UL/CSA marking is only valid for the device in its deliverystatus. After having modified the device, e. g. after plugging-inadditional extension cards, the UL compliancy has to beverified.DOK-SUPPL*-<strong>VEP**.2</strong>****-PR02-EN-P
IndraControl VEP **.2 Technical Data 4-54.7 Wear PartsWear Parts without Warranty• The service life of the backlight is limited to a certain number ofoperating hours. After this time the backlight will produce only 50 % ofits original brightness. This time differs for the used displays:Manufacturer's specifications for the service life of the displays:8,4" : Typ. 20,000 hours• 12,1":Typ. 40,000 hours• 15":Typ. 30,000 hours• CMOS battery: Life at least 5 years. To exchange this battery, pleasecontact the <strong>Bosch</strong> <strong>Rexroth</strong> Service.• Capacitor pack of the short-time UPS: The number of charging cyclesof the capacitor pack and thus, its service life is dependent on thesurrounding air temperature, in which the capacitor pack is used.Surrounding air temperature is defined as the temperature, in whichthe embedded terminal or the capacitor pack is situated, e.g. theinternal temperature of the control cabinet or in a operator panelhousing.4.8 Compatibility TestSurrounding air temperature Service life Maintenance interval45 °C 48.000 h 5 years at continuousoperationFig. 4-9: Capacitor packIf you don't exactly know the conditions, <strong>Bosch</strong> <strong>Rexroth</strong> recommendsto exchange the capacitor pack every 5 years.All <strong>Rexroth</strong> controls and drives are developed and tested according to thelatest state-of-the-art.As it is impossible to follow the continuing development of all materials(e. g. lubricants in machine tools) which may interact with our controls anddrives, it cannot be completely ruled out that any reactions with thematerials used by <strong>Bosch</strong> <strong>Rexroth</strong> might occur.For this reason, before using the respective material a compatibility testhas to be carried out for new lubricants, cleaning agents etc. and ourhousings/our housing materials.DOK-SUPPL*-<strong>VEP**.2</strong>****-PR02-EN-P
4-6 Technical Data IndraControl VEP **.2DOK-SUPPL*-<strong>VEP**.2</strong>****-PR02-EN-P
IndraControl VEP **.2 Dimensions 5-15 Dimensions5.1 Housing DimensionsHousing Dimensions of the IndraControl VEP 30.2CCThe front panel width of the VEP 30.2CC is 296 mm and the height is200 mm.2962008,4"VEP_30CC_Frontansicht.FH9Fig. 5-1:Front view of the IndraControl VEP 30.2CCDOK-SUPPL*-<strong>VEP**.2</strong>****-PR02-EN-P
5-2 Dimensions IndraControl VEP **.2725M415.5VEP_302CC_Seitenansicht.FH9Fig. 5-2:Front view of the IndraControl VEP 30.2CCVEP_302CC_Ansicht_auf_ das_Anschlussfeld.FH9Fig. 5-3:Top view on the IndraControl VEP 30.2CCDOK-SUPPL*-<strong>VEP**.2</strong>****-PR02-EN-P
IndraControl VEP **.2 Dimensions 5-337217VEP_302CC_Ansicht_von_unten.FH9Fig. 5-4:Bottom view on the IndraControl VEP 30.2CCHousing Dimensions of the IndraControl VEP 30.2CGThe width of the VEP 30.2CG is 306 mm and the height is 241 mm.VEP_30CG_Frontansicht.FH9Fig. 5-5:Front view of the IndraControl VEP 30.2CGDOK-SUPPL*-<strong>VEP**.2</strong>****-PR02-EN-P
5-4 Dimensions IndraControl VEP **.2306241.42297575282VEP_30CG_Rückansicht.FH9Fig. 5-6:Rear view of the IndraControl VEP 30.2CGThe mounting points illustrated in figure "Rear view of theIndraControl VEP 30.2CG" are 4 threaded bolts M4 with a length of12 mm.DOK-SUPPL*-<strong>VEP**.2</strong>****-PR02-EN-P
IndraControl VEP **.2 Dimensions 5-5Housing Dimensions of the IndraControl VEP 30.2CG with HousingExtension IndraControl VAS 02.1The width of the IndraControl VEP 30.2CG with IndraControl VAS 02.1 is306,0 mm and the height is 283,9 mm.VEP302CG_mit_VAS021_Frontansicht.FH9Fig. 5-7:Front view of the IndraControl VEP 30.2CG with housing extensionIndraControl VAS 02.1DOK-SUPPL*-<strong>VEP**.2</strong>****-PR02-EN-P
5-6 Dimensions IndraControl VEP **.2306283.97575282VEP302CG_mit_VAS021_Rückansicht.FH9Fig. 5-8:Rear view of the IndraControl VEP 30.2CG with housing extensionIndraControl VAS 02.1M492.780.2124.2VEP302CG_mit_VAS021_Ansicht_von_unten.FH9Fig. 5-9: Bottom view on the IndraControl VEP 30.2CG with housingextension IndraControl VAS 02.1DOK-SUPPL*-<strong>VEP**.2</strong>****-PR02-EN-P
IndraControl VEP **.2 Dimensions 5-7Housing Dimensions of the IndraControl VEP 40.2CE35029012,1"VEP_40CE_Frontansicht.FH9Fig. 5-10:Front view of the IndraControl VEP 40.2CEDOK-SUPPL*-<strong>VEP**.2</strong>****-PR02-EN-P
5-8 Dimensions IndraControl VEP **.278.35M5M415.5VEP_402CE_Seitenansicht.FH9Fig. 5-11:Side view of the IndraControl VEP 40.2CEVEP_402CE_Ansicht_auf_das_Anschlussfeld.FH9Fig. 5-12:Top view on the IndraControl VEP 40.2CEDOK-SUPPL*-<strong>VEP**.2</strong>****-PR02-EN-P
IndraControl VEP **.2 Dimensions 5-924443.5VEP_402CE_Ansicht_von_unten.FH9Fig. 5-13:Bottom view on the IndraControl VEP 40.2CEHousing Dimensions of the IndraControl VEP 50.2CH40737015,0"VEP_50CH_Frontansicht.FH9Fig. 5-14:Front view of the IndraControl VEP 50.2CHDOK-SUPPL*-<strong>VEP**.2</strong>****-PR02-EN-P
5-10 Dimensions IndraControl VEP **.233M5M48215.55VEP_502CH_Seitenansicht.FH9Fig. 5-15:Side view of the IndraControl VEP 50.2CHVEP_502CH_Ansicht_auf_das_Anschlussfeld.FH9Fig. 5-16:Top view on the IndraControl VEP 50.2CHDOK-SUPPL*-<strong>VEP**.2</strong>****-PR02-EN-P
IndraControl VEP **.2 Dimensions 5-11134.547.5VEP_502CH_Ansicht_von_unten.FH9Fig. 5-17:Bottom view on the IndraControl VEP 50.2CH5.2 InstallationInstallation Notes• When installing the embedded terminal observe to ensure anergonomic operation. Additionally, ensure that all moving machinecomponents are in sight of the operator.• Avoid installation locations exposed to direct sunlight, as the screenreadability is reduced and additional heat development can occur.• Install the embedded terminal in a manner ensuring easy access tothe connector panel (top side).• Provide a sufficient minimum clearance of 50 mm for cooling andcable routing around the device.• Lay all connecting cables in loops and use strain reliefs for all cables.• Keep a suitably large distance from sources of interference.Mounting Cut-OutFor mounting the embedded terminal proceed as follows:1. Create a mounting cut-out with the corresponding number of holes,diameter 5 mm, according to the illustrations "Mounting dimensions"on the following page.2. Insert the embedded terminal from the front into the cut-out. Theninsert the mounting bolts M4 into the drilled holes.3. Fasten the embedded terminal by screwing the nuts at the rear sideof the mounting bolts.DOK-SUPPL*-<strong>VEP**.2</strong>****-PR02-EN-P
5-12 Dimensions IndraControl VEP **.2Mounting Dimensions of the IndraControl VEP 30.2CC264 Mounting cut-out161612.5168Mounting cut-out175135.5135.512.5VEP_30CC_Rückansicht.FH9Fig. 5-18:Mounting dimensions of the IndraControl VEP 30.2CCDOK-SUPPL*-<strong>VEP**.2</strong>****-PR02-EN-P
IndraControl VEP **.2 Dimensions 5-13Mounting Dimensions of the IndraControl VEP 30.2CG's BracketHousing7575VEP_30CG_Einbaumaße.FH9Fig. 5-19: Mounting dimensions of the IndraControl VEP 30.2CG's brackethousingDOK-SUPPL*-<strong>VEP**.2</strong>****-PR02-EN-P
5-14 Dimensions IndraControl VEP **.2Mounting Dimensions of the IndraControl VEP 40.2CE318 Mounting cut-out16258 Mounting cut-out137.5 137.5Seal(remove protective foilbefore mounting)167.5167.5167.57.5VEP_40CE_Rückansicht.FH9Fig. 5-20:Mounting dimensions of the IndraControl VEP 40.2CEDOK-SUPPL*-<strong>VEP**.2</strong>****-PR02-EN-P
IndraControl VEP **.2 Dimensions 5-15Mounting Dimensions of the IndraControl VEP 50.2CH375 Mounting cut-out16Seal(remove protective foilbefore mounting)16 338 Mounting cut-out1961967.5177.5 177.57.5VEP_50CH_Rückansicht.FH9Fig. 5-21:Mounting dimensions of the IndraControl VEP 50.2CHDOK-SUPPL*-<strong>VEP**.2</strong>****-PR02-EN-P
5-16 Dimensions IndraControl VEP **.2DOK-SUPPL*-<strong>VEP**.2</strong>****-PR02-EN-P
IndraControl VEP **.2 Display and Operating Components 6-16 Display and Operating Components6.1 Backlight DimmingThe backlight as background lighting of the display has a limited lifetime(see section 4.7, "Wear Parts").To extend the service life of the LCD backlight, the flat screen displayfeatures a backlight dimming. This function "darkens" the display to half ofits original brightness, if no operation of the embedded terminal hasoccurred for a certain period of time.The length of the time interval can be set under Windows CE in the"Display Properties". You can call up the "Display Properties" either byright mouse click on the desktop or via Start – Settings – Control Panel –Display.The default value is 5 minutes. Avoid longer waiting times than 5 minutesto ensure a longer service life of the backlight.BacklDimm.BMPFig. 6-1:Display properties – Backlight dimmingNote:The modified values for the backlight dimming have to besaved with "Save Registry" to the registering data base.DOK-SUPPL*-<strong>VEP**.2</strong>****-PR02-EN-P
6-2 Display and Operating Components IndraControl VEP **.26.2 Operating Components of the IndraControl VEP 30.2CGKeypadThe IndraControl VEP 30.2CG provides a keypad with 5 keys. To wirethese keys externally, they are additionally guided outwards via relaycontacts.As an option, the IndraControl VEP 30.2CG can be expanded with thehousing extension IndraControl VAS 02.1 by a start, stop and anemergency pushbutton.Position of the IndraControl VEP 30.2CG's KeysVEP30.2CG keysVAS02.1 with start, stop and emergency pushbuttonVEP302CG_mit_VAS021_Tastenbeschreibung.FH9Fig. 6-2:Position of the IndraControl VEP30CG's keys with housing extensionVAS 02.1VEP 30.2CG keyLeft arrowRight arrowUp arrowDown arrowInfoFig. 6-3:Corresponding key of a standard keyboardArrow to the leftArrow to the rightArrow pointing upArrow pointing downCONTROL + IKeys of the IndraControl VEP 30.2CGDOK-SUPPL*-<strong>VEP**.2</strong>****-PR02-EN-P
IndraControl VEP **.2 Display and Operating Components 6-3Relay Contacts Connection of the IndraControl VEP 30.2CG's KeysThe relay contacts are guided outwards via a 6-pin connector X103. Thisconnector is situated close to the COM1 connection of the PC box.VEP302CG_X103.bmpFig. 6-4:Relay contacts connection of the IndraControl VEP 30.2CG's keysNote:Use only copper wire to connect these terminals. Tighten thescrews of the screw terminals with a torque of 0.25 Nm(2,25 lb in).Pin Assignment X103Fig. 6-5:PINFunction1 Arrow to the left2 Arrow pointing down3 Info4 Arrow pointing up5 Arrow to the right6 Common contactPin assignment X103DOK-SUPPL*-<strong>VEP**.2</strong>****-PR02-EN-P
6-4 Display and Operating Components IndraControl VEP **.2X103654321K1 K2 K3 K4 K5InfoVEP302_Tasten_Relaiskontakte_Anschluss.FH9Fig. 6-6:Scheme of the relay contactsNote: The maximum load for each contact must not exceed 1ampere!Housing Extension IndraControl VAS 02.1The IndraControl VAS 02.1 provides a start, stop and emergencypushbutton.PINFunction1 S2 (start) LED - cathode2 S2 (start) LED - anode3 S1 (stop) – NC contact4 S1 (stop) – NC contact5 S1 (stop) – NO contact 16 S1 (stop) – NO contact 17 S2 (start) – NO contact 28 S2 (start) – NO contact 29 S3 (emergency stop) – NC contactcircuit 110 S3 (emergency stop) – NC contactcircuit 111 S3 (emergency stop) – NC contactcircuit 212 S3 (emergency stop) – NC contactcircuit 2Fig. 6-7: Pin assignment of the housing extension IndraControl VAS 02.1Note:Use only copper wire to connect these terminals. Tighten thescrews of the screw terminals with a torque of 0.25 Nm(2,25 lb in).DOK-SUPPL*-<strong>VEP**.2</strong>****-PR02-EN-P
IndraControl VEP **.2 Display and Operating Components 6-5121110987654321S3S2Emergency stopStartR16K49H1S1StopVAS021_Start_Stop_Notaus_Beschaltung.FH9Fig. 6-8: Scheme of the housing extension IndraControl VAS 02.1Note: The maximum load for each contact must not exceed 1ampere!6.3 Touch ScreenAll variants are provided with a touch screen, that allows the operation ofthe application software via the touch-sensitive surface of the display.A short touch of the touch screen is taken as "left mouse click". To carryout a "right mouse click", the touch screen has to be touched at thecorresponding position for approx. 2 seconds.DOK-SUPPL*-<strong>VEP**.2</strong>****-PR02-EN-P
6-6 Display and Operating Components IndraControl VEP **.2DOK-SUPPL*-<strong>VEP**.2</strong>****-PR02-EN-P
IndraControl VEP **.2 Pin Assignments 7-17 Pin Assignments7.1 Connector Panel without Special InterfacesVEP2_Anschlussfeld.FH9Fig. 7-1:Connector panel without special interfaces7.2 Connector Panel with Profibus DP MasterVEP2_Anschlussfeld_Profibus_DP.FH9Fig. 7-2:Connector panel with Profibus DP master7.3 Connector Panel with DeviceNet MasterVEP2_Anschlussfeld_DeviceNetMaster.FH11Fig. 7-3:Connector panel with DeviceNet masterDOK-SUPPL*-<strong>VEP**.2</strong>****-PR02-EN-P
7-2 Pin Assignments IndraControl VEP **.27.4 InterfacesNote:Not each variant provides all the described interfaces. Whichinterfaces are integrated in the respective device depends onthe device configuration.CAUTIONMalfunctions caused by insufficient shielding!Use only shielded cables and metallic/conductive⇒connector or coupling covers with large-area screencontact.OverviewDes. on thehousingType of connection Type of connector (integrated) Mating connector or cable(from outside)- PS/2 Keyboard/Mouse Mini-DIN PS/2 female connector,6-pinMini-DIN PS/2 male connector,6-pinEthernetNetwork connection:Ethernet 10Base T / 100Base XRJ45 female connector,8-pinRJ45 connector,twisted pair, 8-coreVGAVGA connection of an externalCRT monitorVGA HD female connector,15-pinVGA HD male connector,15-pinCOM1Serial interfaceRS232 (UART 16550 equivalent),not assignedD-Sub male connector,9-pinD-Sub female connector,9-pinUSB1,USB2USB interfacesUSB female connector,type A, 4-pinUSB male connector,4-pin24 V Power supply: 24 VDC Weidmüller male connector strip,SL 5.08 mm pin spacing,4-pinWeidmüller female connectorstrip, SL 5.08 mm pin spacing,4-pinOptional:DP-M Profibus DP master D-Sub female connector,9-pinD-Sub male connector, IP 20,9-pinandConfig Configuration interface Profibus D-Sub male connector,9-pinD-Sub female connector,9-pinFig. 7-4:InterfacesDOK-SUPPL*-<strong>VEP**.2</strong>****-PR02-EN-P
IndraControl VEP **.2 Pin Assignments 7-3Serial Interface COM1Serial Interface COM1D-Sub male connector, 9-pinType:RS232Cable length:Max. 15 mCable type:Shielded, cross section min. 0.14 mm²Transmission rate: Max. 115200 bits/sHandshake:Hardware and software handshake (XON, XOFF)Interrupt (IRQ): 4I/O address:(3F8H)BIOS presettings: EnabledFig. 7-5: Serial interface COM1COM1 56 9DCDRXTXDTRGNDDSRRTSCTSRI19To peripheraldevices (withouttouch screen)Shield applied to the metal housingof the plug-in connectorCom_sst.cdrFig. 7-6:Pin assignment of the COM1 interfaceDOK-SUPPL*-<strong>VEP**.2</strong>****-PR02-EN-P
7-4 Pin Assignments IndraControl VEP **.2USB InterfacesUSB InterfacesThe devices feature two USB interfaces (USB1 and USB2) according tothe USB 1.1-specification.Note:The maximum power consumption of the connected devicemust not exceed 500 mA. If the load exceeds 500 mA, theinternal current monitoring is activated.USB1USB2 3 4USB_PUSB1USB2USB_M1234USB deviceShieldShield applied to the metal housingof the plug-in connectionUsb_sst.cdrFig. 7-7:USB interfacesPin Function1 USB power supply (max. 500 mA)2 Data -3 Data +4 USB groundFig. 7-8:Pin assignment of the USB interfacesDOK-SUPPL*-<strong>VEP**.2</strong>****-PR02-EN-P
IndraControl VEP **.2 Pin Assignments 7-5Ethernet InterfaceEthernet InterfaceThe embedded terminal can be connected with an Ethernet network viaan Ethernet interface.RJ45 female connector, 8-pinType:Ethernet 10Base T / 100Base XCable length:Max. 100 mCable type:Shielded, 2-core, twistedTransmission rate:10 or 100 Mbits/sFig. 7-9: Ethernet – Network connectionEthernetmax. 100 mEthernet RJ458112345678To the networkEthernet_sst.cdrFig. 7-10:Pin assignment of the Ethernet interfaceThe configuration of the Ethernet interface is described in chapter 9,"Software".DOK-SUPPL*-<strong>VEP**.2</strong>****-PR02-EN-P
7-6 Pin Assignments IndraControl VEP **.2VGA InterfaceVGA Interface for ExternalMonitorAn external monitor (CRT), that can be operated parallel to the integratedflat screen via the integrated video adapter, can be connected to the VGAinterface.• Video RAM: Max. 8 MBNote:Please observe that the external monitor has to be alreadyconnected during the booting process of the embeddedterminal, as otherwise the VGA interface is not initialized bythe BIOS.HD female connector, 15-pinCable length:Cable type:Max. resolution:Fig. 7-11: VGA interfaceMax. 1.5 mShielded, cross section min. 0.14 mm²1024 x 768 pixelsmax. 1.5 m1VGA15REDGREENBLUEID2GNDRED GNDGREEN GNDBLUE GND-Digital GNDID0ID1HsyncVsyncID3123456789101112131415DisplayShield applied to the metal housingof the plug-in connectionVga_sst.cdrFig. 7-12:Pin assignment of the VGA interfaceDOK-SUPPL*-<strong>VEP**.2</strong>****-PR02-EN-P
IndraControl VEP **.2 Pin Assignments 7-7Combined Keyboard/Mouse InterfaceKeyb. – PS/2 Mini DIN Keyboard /Mouse InterfacePS/2 Mini-DIN female connector, 6-pinCable length:Max. 1.5 mCable type:Fig. 7-13:Keyboard/mouse interfaceShielded, cross section min. 0.14 mm²KeybKeybKeyboard Data1max. 1.5 m6 54 32 1ShieldMouse DataGNDPower, +5VDCKeyboard ClockMouse Clock23456KeyboardShield applied to the metal housingof the plug-in connectiontastatur_sst.cdrFig. 7-14:Pin assignment of the keyboard/mouse interface24 VDC Power SupplyX10 – 24 VDC Power SupplyAll internally required voltages are generated with electrical isolation via aDC/DC converter. The connection is designed as male connector strip SL5.08 mm pin spacing, 4-pin. To this connector terminal, cables with across section of maximum 2.5 mm² can be connected.X10_+1 2 3 4Pin1234Assignment24V24V0V0VVEP_x10.FH9Fig. 7-15:Pin assignment of the 24 VDC connection X10Note:Use only copper wire to connect these terminals. Tighten thescrews of the screw terminals with a torque of 0.6 Nm(5,5 lb in).ParametersValueRated voltage U N 24 VDC; (+19 V to +30 V)Residual ripple for U NSee figure belowNoise and surge immunityU max= 35 V (for t < 100 ms)Current consumption for U NMax. 2.2 ALine-side fuse4,0 A time-lagReverse voltage protectionVia isolating diodeFig. 7-16: Technical data of the 24 VDC connectionDOK-SUPPL*-<strong>VEP**.2</strong>****-PR02-EN-P
7-8 Pin Assignments IndraControl VEP **.2DANGERDanger without protective separation!⇒ The 24 VDC input voltage must comply with therequirements of the "Protective separation".⇒ Plug and unplug the connector only in no-voltagecondition!400V + 5%400V400V - 5%L1 L2 L3PEFig. 7-17: Safety transformer according to EN 607420V+ 24Vsichertrafo.cdrInterfering AC voltage components such as resulting from an uncontrolled3-phase current bridge connection without smoothing with a ripple factor(see DIN 40110/10.75, section 1.2) of 5 % are permissible.It follows from the above that as upper voltage limit the greatest absolutevalue is 30.2 V and as lower voltage limit the lowest absolute value is18.5 V.1.05 x 28.8 V = 30.2 VUpper limit28.8 V0.866 x 30.2 V = 26.1 V1.05 x 20.4 V = 21.4 VLower limit 20.4 V30 elcos (30 ) = 0.8660.866 x 21.4 V = 18.5 V0twechsel.cdrFig. 7-18:Illustration of the limit values for the 24 VDC voltageDOK-SUPPL*-<strong>VEP**.2</strong>****-PR02-EN-P
IndraControl VEP **.2 Pin Assignments 7-9L1L2L3PEPE10 2 (green/yellow)Power supply withsafety transformeracc. to EN 6074224 VDCCross sections dependon current consumption;min. is 4 mm 2.For higher current consumptionuse 2 x 4 mm2.Max. length 4 m6 2 (1)(blue)AAB24 V load0 V loadEarth bar10 2 (green/yellow) (2)Cross sections depend onthe current consumption;min. is 0,75 mm 2 (3)A = Terminal block 4 2B = Terminal block 10 2: Terminals in isolated arrangementOperator terminal(24 VDC version)Display with frontkeypad and PCe. g.terminal block UK6-FSI/6 withcircuit breaker TCP6,0A of PHOENIX CONTACT (4)Power supplyPEX10(1) Easily removable and visible(2) PE bars should be preferably arranged on the mounting platein a conductive manner. In the case of isolated arranged PEbars both ends have to be connected with the mounting plateby means o copper strips with a maximum length of 20 cm.The cross section of the copper strips has to be, at least,equal to that of the incoming mains cable.2(3) 0,75 mm up to 6 m1,5 mm 2 up to 10 mDistances exceeding 10 m requirea separate local power supply!(4) Without additional external protection false polarity ofconnector X10 might destroy the coperator terminal (firedanger). The reason for this is the grounding of the 0 V in theoperator terminal and simultaneousley to that grounding of the0 V load (PELV).24V_Trafo.FH7Fig. 7-19:Wiring of power connection 24 V to the embedded terminalCAUTIONDestruction of the embedded terminal causedby polarity reversal when the 0 V load issimultaneously grounded.Polarity reversal of the X10 connector might destruct⇒the operator terminal, if there is no additionalexternal protection (fire danger). The reason for thisis the grounding of the 0 V in the operator terminaland simultaneously to that the grounding of the 0 Vload (PELV).DOK-SUPPL*-<strong>VEP**.2</strong>****-PR02-EN-P
7-10 Pin Assignments IndraControl VEP **.2Profibus InterfacesProfibus Master Interface DP-MThis interface is only provided for IndraControl VEP **.2 devices withProfibus configuration.PIN Signal designation PIN Signal designation1 RGND – Reference potential 2 NC3 RxD/TxD-P – Transmit/receive 4 NC5 DGND – Reference potential 6 VP – Supply voltage plus7 NC 8 RxD/TxD-N – Transmit/receive9 NCFig. 7-20:Pin assignment of the Profibus master interface DP-MProfibus Diagnostic Interface ConfigPIN Signal designation PIN Signal designation1 NC 2 RxD – Receive Data3 TxD – Transmit Data 4 DTR – Data Terminal Ready5 GND – Signal ground 6 NC7 RTS – Ready To Send 8 CTS – Clear To Send9 NCFig. 7-21:Pin assignment of the Profibus diagnostic interface Config RS232CTechnical Data of the Profibus Master InterfaceInterface dataCommunication interface:Diagnostic interface:Fig. 7-22:Profibus DP, max. 12 Mbauds,isolatedRS 232C, 9600 bauds, non-isolatedTechnical data of the Profibus master interfaceDOK-SUPPL*-<strong>VEP**.2</strong>****-PR02-EN-P
IndraControl VEP **.2 Pin Assignments 7-11Status and Diagnostic Indicators of the Profibus MasterThe status and diagnostic indicators of the Profibus master card aresituated in special housing cut-outs on the rear side of theIndraControl VEP **.2 devices.When it is switched on, the Profibus master card performs a self-test.After the initialization phase of this test (2-3 seconds), the two LEDs ERRand STA turn dark and the yellow RDY LED lights, if the test issuccessfully completed. If not, the RDY LED starts flashing and theprocessing of the program is stopped. The further meanings of the displayduring the initialization phase are listed below.RDY LED yellow: ReadyOn:DP-M ready for operationFlashes cyclically: Bootstrap loader activeFlashes irregularly: Hardware or system errorOff:Hardware defectRUN LED green: RUN (communication)On:Communication runningFlashes cyclically: Ready for communicationFlashes irregularly: Improper configurationOff:No communicationERR LED red: Error (error)On:Communication interface errorOff:Communication interface OKSTA LED yellow: StatusOn:Data exchange with slaves active (master)Data exchange with master active (slave)Off:No data exchangeDOK-SUPPL*-<strong>VEP**.2</strong>****-PR02-EN-P
7-12 Pin Assignments IndraControl VEP **.2DeviceNet InterfacesDeviceNet Master Interface DN-MThis interface is only provided for IndraControl VEP **.2 devices withDeviceNet configuration.PIN Signal designation Signal color1 V- (GND) Black2 CAN_LOW Blue3 Shield --4 CAN_HIGH White5 V+ (+24 V) RedFig. 7-23:Pin assignment of the DeviceNet master interface DN-MDeviceNet Master Interface ConfigPIN Signal designation PIN Signal designation1 NC 2 RxD – Receive Data3 TxD – Transmit Data 4 DTR – Data Terminal Ready5 GND – Signal ground 6 NC7 RTS – Ready To Send 8 CTS – Clear To Send9 NCFig. 7-24:Pin assignment of the DeviceNet diagnostic interface ConfigRS232CDOK-SUPPL*-<strong>VEP**.2</strong>****-PR02-EN-P
IndraControl VEP **.2 Pin Assignments 7-13Technical Data of the DeviceNet Master Interface• Connection of maximum 64 DeviceNet devices (incl. DeviceNetmaster) via the bus• Process image with maximum 7 kbytes (inputs and outputs)• 16-Bit processor with interrupt and DMA controller• 8 KB DPM, 512 KB Flash and 128 KB RAM• CAN controller SJA 1000• Isolated DeviceNet interface according to ISA11898, maximum500 kbauds• Non-isolated diagnostic interface RS232C, 9600 bauds.Baud rate Max. length for cable typeThick cable Thin cable Thick/thin cable125 kbits/s 500 m 100 m L thick +5 x L thin
7-14 Pin Assignments IndraControl VEP **.2Status and Diagnostic Indicators of the DeviceNetMasterWhen it is switched on, the DeviceNet master card performs a self-test.After the initialization phase of this test (2-3 seconds) the yellow RDY-LEDlights, if the test is successfully completed. If not, the RDY LED startsflashing and the processing of the program is stopped. The furthermeanings of the display during the initialization phase are listed below.RDY LED yellow: ReadyOn:DN-M ready for operationFlashes cyclically: Bootstrap loader activeFlashes irregularly: Hardware or system errorOff:Hardware defectRUN LED green: RUN (communication)On:Communication runningFlashes cyclically: Communication stoppedFlashes irregularly: Missing or faulty configurationOff:No communicationNET On green: Communication established at the busFlashes green: No communication at the busOn red:Critical connection errorFlashes red:Time monitoring errorOff:No operating voltage at the busMOD On green: Device is workingFlashes green: Ready for operationOn red:Non-correctable errorFlashes red:Subordinated errorOff:No operating voltageDOK-SUPPL*-<strong>VEP**.2</strong>****-PR02-EN-P
IndraControl VEP **.2 Pin Assignments 7-15VEP 30.2CG Cable OutletThe outlet for the connection cables is situated on the rear side of theVEP 30.2CG device.Fig. 7-28: VEP 30.2CG cable outletVEP302_CG_Kabelabgang.bmpTo guide the cables away from the device in a bundle, it is recommendedto use flexible, divisible corrugated tubes with a nominal width of 23 mmmanufactured by PMA. The tubes are PMA-CO-FLEX PACO corrugatedtubes with the designation PACO-23B.DOK-SUPPL*-<strong>VEP**.2</strong>****-PR02-EN-P
7-16 Pin Assignments IndraControl VEP **.2DOK-SUPPL*-<strong>VEP**.2</strong>****-PR02-EN-P
IndraControl VEP **.2 Maintenance and Installation 8-18 Maintenance and Installation8.1 General InformationThe embedded terminals IndraControl VEP **.2 are maintenance-free.Some components are subject to wear and must be replaced.CAUTION!Maintenance work in the device is onlypermissible by skilled staff!If hardware and/or software components have to be⇒exchanged, please contact the <strong>Bosch</strong> <strong>Rexroth</strong>Service or ensure that only skilled staff changes therespective components.MaintenanceInclude the following measures in your maintenance schedule:• Clean the screen surface at least once a week with an anti-static clothor window cleaning agent containing denatured alcohol.Dissolution of the keypad surface and thedisplay seal through contact with solvents!⇒ Do not use any solvents (e. g. paint thinner)!CAUTION!• At least once a year, check all plug and terminal connections forproper tightness and damage. Check that cables are not broken orcrushed. Replace damaged parts immediately.• Check the fan at least once a year.DANGERRisk of injury through rotating fan impeller!Keep hands and fingers clear of the fan impeller, and⇒do not insert any items.Note:Concerning spare parts function compatibility is ensured for atleast 5 years.8.2 LCD DisplayA fading backlight causes a progressive deterioration of the LCD display'sreadability, so that a backlight exchange will be necessary. For furtherinformation please contact the <strong>Bosch</strong> <strong>Rexroth</strong> Service.DOK-SUPPL*-<strong>VEP**.2</strong>****-PR02-EN-P
8-2 Maintenance and Installation IndraControl VEP **.28.3 CMOS BatteryThe IndraControl VEP **.2 devices are provided with a lithium battery tobuffer the real-time clock in the BIOS. If this battery is empty or weak, thetime setting is lost in the BIOS. To exchange this battery, please contactthe <strong>Bosch</strong> <strong>Rexroth</strong> Service.WARNINGBatteries might cause fire, explosions orchemical burn!Do not load, remove, destroy, burn or heat batteries⇒over100 °C.Dispose old batteries immediately and properly.Keep away from children!8.4 Extension CardsSlots for PC104 BusTo place extensions cards one slot for PC104 bus is available.Inserting an Extension CardCAUTION!Risk of damage to the embedded terminal orcorruption of application software byintegrating not-released extension cards!Due to the use of the embedded operating system,⇒you can insert only special extension cards in theIndraControl VEP **.2 devices. To exchangeextension cards, please contact the <strong>Bosch</strong> <strong>Rexroth</strong>Service.DOK-SUPPL*-<strong>VEP**.2</strong>****-PR02-EN-P
IndraControl VEP **.2 Software 9-19 Software9.1 General InformationThe IndraControl VEP **.2-type devices are delivered with the embeddedoperating system Microsoft Windows CE .NET 4.2. The operating systemcontained in the FWA has to be separately ordered. Furthermore, thisFWA contains the PLC "IndraLogicWinCE" and the visualization softwareWinStudio "lite". To be able to use the IndraLogicWinCE, the license mustbe enabled. The functional range of the visualization software WinStudio"lite" is restricted. If you want to use an extended functional range, youhave to order a license.The following tables provide an overview of the available licenses.Ordering designation Part number DescriptionFWA-VEP*02-CWL-01VRS-D0 R911310115 Windows CE 4.2 .NET withpreinstalled IndraLogicWinCE andWinStudio "lite".Languages: German, EnglishFWA-VEP*02-CWL-01VRS-E3 R911170464 Windows CE 4.2 .NET withpreinstalled IndraLogicWinCE andWinStudio "lite".Languages: German, EnglishFig. 9-1:Firmware typesOrdering designation Part number DescriptionSWL-VE**01-ILC-01VRS-NN R911308258 IndraLogicWinCE licenseSWS-WINSTU-RUN-06VRS-D0-WCE1K5 R911306954 WinStudio Runtime licenseMax. 1,500 variables, 256 arrayelements, 32 class elementsSWS-WINSTU-RUN-06VRS-D0-WCE4K R911306951 WinStudio Runtime licenseMax. 4,000 variables, 512 arrayelements, 32 class elementsFig. 9-2:Software optionsNote:All necessary settings of the IndraControl VEP **.2 devices,especially the network settings are made via the configurationdialog "<strong>Rexroth</strong> CE Settings". Settings directly made in thecontrol panel of Windows CE are overwritten by the <strong>Rexroth</strong>CE Settings! In addition, the <strong>Rexroth</strong> CE Settings affect theOPCServer.ini.All settings made under Windows CE are saved in theWindows CE registration database. Therefore, it is necessaryto save each modification via the desktop icon Save Registryor Start – Program Files – Tools – Save Registry.DOK-SUPPL*-<strong>VEP**.2</strong>****-PR02-EN-P
9-2 Software IndraControl VEP **.29.2 First CommissioningTo be able to configure the IndraControl VEP **.2 devices comfortablyduring the first commissioning, the configuration applications touchcalibration and the <strong>Rexroth</strong> CE Settings start automatically. For justdelivered devices these settings are already made ex works.Note: To reset the IndraControl VEP **.2 to its original status, (e. g.the device cannot be operated because of wrong touchcalibration), delete file boot.boo in the main directory of thecompact flash card. If you restart the IndraControl VEP **.2the device behaves like after the first start.9.3 Touch CalibrationFor this, touch exactly the 4 calibration points one after each other with atouch pen (red point at the arrowhead). After having actuated the lastcalibration point, the display changes to the Windows desktop after awaiting time of approx. 5 seconds. Here you can verify the propercalibration of the touch screen and confirm the settings with "OK".If the touch calibration shall be repeated later, you can start it via thedesktop icon "Touch Calibration" or via the start menu Start – ProgramFiles – Tools – Touch Calibration.Calibration.bmpFig. 9-3:Touch calibration of the IndraControl VEP **.2 devicesDuring the first commissioning the configuration tool "<strong>Rexroth</strong> CESettings" starts automatically after the touch calibration.DOK-SUPPL*-<strong>VEP**.2</strong>****-PR02-EN-P
IndraControl VEP **.2 Software 9-39.4 <strong>Rexroth</strong> CE Settings<strong>Rexroth</strong> CE Settings – Ethernet AdapterAll basic settings of the IndraControl VEP **.2 devices are made by thetool "<strong>Rexroth</strong> CE Settings". This tool starts automatically during the firstcommissioning after the touch calibration. As an alternative, it can bestarted via the desktop icon "<strong>Rexroth</strong> CE Settings" or via the start menu:Start – Program Files – Tools – <strong>Rexroth</strong> CE Settings.In this tab you can configure the Ethernet Adapter of theIndraControl VEP **.2 device.Eth_VEP2.bmpFig. 9-4:<strong>Rexroth</strong> CE Settings – Ethernet AdapterObtain an IP address via DHCPAutomatic assignment of the network parameters via DHCP.Specify an IP address<strong>Manual</strong> configuration of the network parameters.• IP Address: <strong>Manual</strong> input of the device's IP address.• Subnet Mask: <strong>Manual</strong> input of the subnet mask.• Gateway: <strong>Manual</strong> input of the Gateway.• DNS: <strong>Manual</strong> input of the Domain Name Server.DOK-SUPPL*-<strong>VEP**.2</strong>****-PR02-EN-P
9-4 Software IndraControl VEP **.2<strong>Rexroth</strong> CE Settings – Application SettingsIn this tab you can configure the settings for autostart and thevisualization connection to the control.Note:Settings made in the Application Settings directly affect theOPCServer.ini!Application_VEP2.bmpFig. 9-5:<strong>Rexroth</strong> CE Settings – Application SettingsVisualization• None: No visualization variant is automatically started.• Remote Desktop: Autostart of the Remote Desktop Client. A PC withRemote Desktop Server in the network is operated by remote controlvia the IndraControl VEP **.2. The IP of the PC to be remotelyoperated has to be registered under Ethernet Server IP.• Web Browser: Start of a web visualization. The IP of the Web Serverproviding the web side has to be registered under Ethernet Server IP.• WinStudio: Autostart of fileStorageCard\<strong>Rexroth</strong>\Winstudio\startup.cmd. The user can modify thefile to adapt the start behavior.If WinStudio was selected, the OPC server is registered and thecorresponding information is entered in the OPCServer.ini.• VisiWin: Autostart of file StorageCard\<strong>Rexroth</strong>\Winstudio\startup.cmd.The user can modify the file to adapt the start behavior.• IndraWorks Operation: Use of the IndraWorks Operation Desktop.• UserStart: Autostart of fileStorageCard\<strong>Rexroth</strong>\User\startup.cmd.The user can define thecomplete start process in this file.• Upload from DataSource: Downloads file startup.cmd via FTP fromthe control (enter the IP of the FTP server under Ethernet Server IP) toStorageCard\<strong>Rexroth</strong>\startup.cmd.• Autostart of the PLC: Via checkbox "Start PLC automatically (licenseneeded)" the autostart of the internal soft PLC IndraLogic isdetermined. To use the PLC a license is required.DOK-SUPPL*-<strong>VEP**.2</strong>****-PR02-EN-P
IndraControl VEP **.2 Software 9-5UDP Real Time Data Transmission• Send real time telegram to PLC. Selection, if the data are to be sentto the control (control IP) via UDP telegram.• PLC IP: IP address of the control to which the UDP telegrams are tobe sent.Data Source for the Visualization• Type of control: Selection of the control to be visualized.• PPC SYNAX• PPC VM (VisualMotion)• CML 20• CML 40• IndraLogicCE• IndraDrive• Name of the PLC: Logic name of the PLC in the OPC configuration.• Timeout: Timeout time until the communication interrupt isrecognized.• Serial communication: Setting the interface parameters for the serialconnection to the control.• Ethernet: Setting the IP address for the Ethernet connection to thecontrol.<strong>Rexroth</strong> CE Settings – ServicesIn this tab you can set the start of FTP, WEB and Telnet server.Dienste_VEP2.bmpFig. 9-6:<strong>Rexroth</strong> CE Settings – ServicesDOK-SUPPL*-<strong>VEP**.2</strong>****-PR02-EN-P
9-6 Software IndraControl VEP **.2<strong>Rexroth</strong> CE Settings – System InfoStart FTP server automaticallyThe autostart of the internal FTP server can be set here.Start WEB server automaticallyThe autostart of the internal web server can be set here.Start Telnet server automaticallyThe autostart of the internal telnet server can be set here.In this tab you will find information on the FWA and the IndraControlhardware.SysInfo_VEP2.bmpFig. 9-7:<strong>Rexroth</strong> CE Settings – System InfoFWA version:Display of part short text, version and part number of the FWA.CE core version:Display of the CE core version.Operating hours:Display of the IndraControl devices' runtime.Screen resolution:Display of the screen resolution.Working memory:Display of the RAM memory available for the user.Memory location of the settingsDisplay of the device setting's memory location.DOK-SUPPL*-<strong>VEP**.2</strong>****-PR02-EN-P
IndraControl VEP **.2 Software 9-79.5 Windows CE 4.2 .NETDesktop.bmpFig. 9-8:Windows CE 4.2 .NET desktopThe Windows CE 4.2 .NET operating system image provides variousprograms and tools.OperationTouch ScreenTo operate the IndraControl VEP **.2 devices use your finger or better atouch pen.The function of the "right mouse button" is activated by touching thescreen for 2 seconds. For a better appreciation of this waiting time a smallcircle appears around the mouse pointer.CAUTIONDanger of touch screen destruction!Do not use any inappropriate and pointed objects to⇒operate the touch screen.Text Input via Virtual KeyboardTo enter texts into the corresponding dialogs, a virtual keyboard, that youcan operate via the touch screen, is automatically opened. To call up thiskeyboard manually, activate the "Input Panel" icon in the start bar on theright bottom side of the desktop. Here, you can also modify the size of thevirtual keyboard or close it.DOK-SUPPL*-<strong>VEP**.2</strong>****-PR02-EN-P
9-8 Software IndraControl VEP **.2Memory DistributionWindows CE is an embedded operating system using parts of the workingmemory as RAM disk. The rest of the working memory is provided asprogram and storage memory.Activate the "Memory" tab under Start – Settings – Control Panel –System to set the distribution between the "Storage memory" and the"Program memory".• Storage memory: A defined sector in the working memory, to whichdata are written. All data copied on the IndraControl VEP **.2 devices(not on the storage card), are written to this sector.• Program memory: A defined sector in the working memory used forexecutable programs.SystemProperties_Memory.bmpFig. 9-9:System properties – working memoryIf the slider is moved to the left, more memory to run programs isreserved. So, these programs can run with a better performance. If theslider is moved to the right, more memory to store data is reserved."Allocated" indicates the reserved memory in KB. "In Use" shows theactually used memory.Note:After modifying the memory distribution, the registry has to besaved using the "Save Registry" function!DOK-SUPPL*-<strong>VEP**.2</strong>****-PR02-EN-P
IndraControl VEP **.2 Software 9-9Fig. 9-10: Selecting the virtual keyboardSetKeyboard.bmpFig. 9-11: Virtual keyboard, smallSmallKeyboard.bmpFig. 9-12: Virtual keyboard, largeLargeKeyboard.bmpDOK-SUPPL*-<strong>VEP**.2</strong>****-PR02-EN-P
9-10 Software IndraControl VEP **.2USB SupportWindows CE .NET 4.2 is an embedded operating system with selecteddevices and drivers. For this reason, only particular USB devices releasedby <strong>Bosch</strong> <strong>Rexroth</strong> can be operated at the IndraControl VEP **.2 devices.It is possible that other devices mentioned in the table below may work,however, <strong>Bosch</strong> <strong>Rexroth</strong> does not assume any warranty for this.Device class Exact designation RemarkUSB keyboardStandard USB keyboards withoutinternal USB stroke.HP model no.: KU-0133Logitech Internet Navigator KeyboardCherry G81-3000USB mouseUSB memory stickIBM model: MO09BOCherry Mouse Model M-5000Microsoft Basic Optical MouseIOMEGA Mini 128MB USB2.0Fig. 9-13:Released USB devicesMicrosoft ProgramsThe following programs can be either called up by links on the desktop orby the start menu.Microsoft File Viewer• Microsoft Excel Viewer: Program to display table files in *.XL*format.• Microsoft Image Viewer: Program to display image files, slideshowsand to generate slideshows.• Microsoft PDF Viewer: Program to display portable document files in*.PDF format.• Microsoft PowerPoint Viewer: Program to display presentation filesin *.PPT and *.PPS format.• Microsoft Word Viewer: Program to display text documents in *.DOCand *.RTF format.Further Microsoft Programs• Command Prompt: MS DOS prompt.• Internet Explorer: Program to display web sides.• Media Player: Program to display media data.• Microsoft WordPad: Program to display and generate text data.• Remote Desktop Connection: Remote desktop client. Permits tooperate computers by remote control with the remote desktop serverin the network.• Windows Explorer: Program to display the file structure and to createand delete files.DOK-SUPPL*-<strong>VEP**.2</strong>****-PR02-EN-P
IndraControl VEP **.2 Software 9-11Further Desktop Icons• My Computer: Shows data structure and files on theIndraControl VEP **.2 device.• Recycle Bin: Recycle bin.• My Documents: Opens the folder "My Documents".• Save Registry: Saves the Windows CE 4.2 .NET registry.• Shortcut to repllog: Starts the active sync server allowingconnections from another computer via an active sync connection.• WinStudio CE Server: Starts the WinStudio CE server. For furtherinformation please refer to chapter 9.7, "9.7".FTP ServerThe FTP server can be activated or deactivated via the <strong>Rexroth</strong> CEsettings (see section <strong>Rexroth</strong> CE Settings – Services on page 9-5). If auser logs in as "Anonymous" at the FTP server, he will get access todirectory \FTP_Public on the RAM disk. This directory is automaticallygenerated while accessing the FTP server for the first time. If a userregistered on the CE device logs in, he has also access to directory\FTP_Public\Storagecard, that allows direct access to the compact flashcard. The users are registered via the control panel.Note:A password must be assigned to the user via the controlpanel, so that he can log in as registered user on the FTPserver.Web ServerTelnet ServerA web server, that can be activated via the <strong>Rexroth</strong> CE Setings, isintegrated in the device (see section <strong>Rexroth</strong> CE Settings – Services onpage 9-5). The home directory for the web server isWindows\www\wwwpub. The web application must be configured on thecompact flash card under\Storagecard\CE\Profiles\Windows\www\wwwpub. During the start, thedata are automatically copied to the home directory.The telnet server is deactivated.CE User ConfigurationEntries in the start menu as well as desktop links and web applicationsare configured on the compact flash card under\Storagecard\CE\Profiles\Windows and its subdirectories. When startingthe device, all files are copied to the Windows system directory and areinterpreted.DOK-SUPPL*-<strong>VEP**.2</strong>****-PR02-EN-P
9-12 Software IndraControl VEP **.29.6 IndraLogicWinCEThe IndraControl VEP **.2 devices contain the soft PLC IndraLogicWinCE(according to EN 61131-3). To be able to use this PLC in the IndraControlVEP **.2 devices, it is necessary to order a license to enable theIndraLogicWinCE.The IndraLogic can be enabled via Start – Program Files – <strong>Rexroth</strong> –IndraLogic – ILConfigurator.ILCELICENSE.bmpFig. 9-14:Enabling the IndraLogicWinCE9.7 WinStudioThe IndraControl VEP **.2 devices contain the runtime of the visualizationsoftware WinStudio "lite". The functional range of the "lite" variant isrestricted. If an extended functional range is required, you have to order alicense (see chapter 9.1 "9.1").Variables 500Arrays 256Class elements 32Number of missing images 1Simultaneously used drivers 1Fig. 9-15:Functional range of WinStudio "lite"To transmit a visualization application to the IndraControl VEP **.2 device,you have to start the WinStudio CE server. For this, use thecorresponding desktop icon or path Start – Program Files – <strong>Rexroth</strong> –WinStudio – Shortcut to CE Server.DOK-SUPPL*-<strong>VEP**.2</strong>****-PR02-EN-P
IndraControl VEP **.2 Software 9-13RemoteAgent.bmpFig. 9-16:WinStudio CE Server – Remote Agent• Connection status: Shows the status of the connection.• Log: Shows log messages.• Setup: Button to call up the setup dialog.• Start: Button to start the visualization application.• Exit: Button to finish the Remote Agent.Remote Agent – SetupRemoteAgentSetup.bmpFig. 9-17:Remote Agent – Setup• Device Connection: Configuration of the connection. Connections arepossible via TCP/IP or via a serial interface. Infra-red is not possible.In the case of a serial connection, the baud rate and the use of thesignals RTS and CTS can be configured via button "Advanced".• Run CEView on startup: Here, you can choose, if the CEView shallbe automatically started while starting the system.• License: Here, you can license the product or modify the license.• Users: The safety system can be started here. It allows the usermanagement.DOK-SUPPL*-<strong>VEP**.2</strong>****-PR02-EN-P
9-14 Software IndraControl VEP **.2DOK-SUPPL*-<strong>VEP**.2</strong>****-PR02-EN-P
IndraControl VEP **.2 Ordering Information 10-110 Ordering Information10.1 Type CodeThe embedded terminals VEP 30.2, VEP 40.2 and VEP 50.2 are availableas different variants according to the following type codes:DOK-SUPPL*-<strong>VEP**.2</strong>****-PR02-EN-P
10-2 Ordering Information IndraControl VEP **.2IndraControl VEP 30.2Abbrev.ColumnExample:1 2 3 4 5 6 7 8 910 1 2 3 4 5 6 7 8 920 1 2 3 4 5 6 7 8 930 1 2 3 4 5 6 7 8 9VEP30 . 2CCU-128NA-CAD-128-NN-FW401. Product1.1 VEP. . . . . . . . = VEP2. Line2.1 30 . . . . . . . . . . . . . . . = 303. Design3.1 2 . . . . . . . . . . . . . . . . . . . . . . = 24. Front plate and display4.1 <strong>Rexroth</strong> design4.1.1 8.4", Touch-Screen(suitable for food industry). . . = CC4.1.2 8.4", Touch-Screen;Housing with 5 keys . . . . . . . . = CG5. Additional option5.1 Short time UPS. . . . . . . . . . . . . . . . = U6. Memory capacity (RAM)6.1 128 MB . . . . . . . . . . . . . . . . . . . . . . . . . = 1287. Interface 17.1 NN-NN, not equipped . . . . . . . . . . . . . . . . . . . = NN7.2 P1-NN . . . . . . . . . . . . . . . . . . . . . . . . . . . . . . . = NA7.3 DN-NN. . . . . . . . . . . . . . . . . . . . . . . . . . . . . . . = NB8. System configuration8.1 Celeron, min. 400 MHz . . . . . . . . . . . . . . . . . . . . . . . . = CA9. Supply voltage9.1 DC 24 V. . . . . . . . . . . . . . .. . . . . . . . . . . . . . . . . . . . . . . . . = D10. Compact Flash size10.1 128 MB. . . . . . . . . . . . . . . . . . . . . . . . . . . . . . . . . . . . . . . . . . . = 12811. Other design11.1 without. . . . . . . . . . . . . . . . . . . . . . . . . . . . . . . . . . . . . . . . . . . . . . . . . . . = NN11.2 Housing extension (VAS02). . . . . . . . . . . . . . . . . . . . . . . . . . . . . . . . . . = GE12. Firm- und Software12.1 Denotes that firmware and software must be ordered as separate subposition = FW2Note:1 InterfaceNN = not equippedP1 = PROFIBUS-DP master moduleDN = DeviceNet2Other design "GE" is only available with Front plate and display "CG"Fig. 10-1: Type code of the IndraControl VEP 30.2Type_VEP302.FH11DOK-SUPPL*-<strong>VEP**.2</strong>****-PR02-EN-P
IndraControl VEP **.2 Ordering Information 10-3IndraControl VEP 40.2Abbrev.ColumnExample:1 2 3 4 5 6 7 8 910 1 2 3 4 5 6 7 8 920 1 2 3 4 5 6 7 8 930 1 2 3 4 5 6 7 8 9VEP40 . 2CEU-128NN-CAD-128-NN-FW401. Product1.1 VEP. . . . . . . . .= VEP2. Line2.1 40 . . . . . . . . . . . . . . . = 403. Design3.1 2 . . . . . . . . . . . . . . . . . . . . . . = 24. Front plate and display4.1 <strong>Rexroth</strong> design4.1.1 12.1", Touch-Screen(suitable for industry food). . . = CE5. Additional option5.1 Short time UPS. . . . . . . . . . . . . . . . = U6. Memory capacity (RAM)6.1 128 MB . . . . . . . . . . . . . . . . . . . . . . . . . = 1287. Interface 17.1 NN-NN, not equipped . . . . . . . . . . . . . . . . . . . = NN7.2 P1-NN . . . . . . . . . . . . . . . . . . . . . . . . . . . . . . . = NA7.3 DN-NN. . . . . . . . . . . . . . . . . . . . . . . . . . . . . . . = NB8. System configuration8.1 Celeron, min. 400 MHz . . . . . . . . . . . . . . . . . . . . . . . . = CA9. Connecting voltage9.1 DC 24 V. . . . . . . . . . . . . . .. . . . . . . . . . . . . . . . . . . . . . . . . = D10. Compact Flash size10.1 128 MB . . . . . . . . . . . . . . . . . . . . . . . . . . . . . . . . . . . . . . . . . . . = 12811. Other design11.1 none . . . . . . . . . . . . . . . . . . . . . . . . . . . . . . . . . . . . . . . . . . . . . . . . . . . . = NN12. Firmware and software12.1 Denotes that firmware and software must be ordered as separatesubposition. . . . . . . . . . . . . . . . . . . . . . . . . . . . . . . . . . . . . . . . . . . . . . . . . . . . = FWNote:1 InterfaceNN = not equippedP1 = PROFIBUS-DP master moduleDN = DeviceNetType_VEP402.FH11Fig. 10-2: Type code of the IndraControl VEP 40.2DOK-SUPPL*-<strong>VEP**.2</strong>****-PR02-EN-P
10-4 Ordering Information IndraControl VEP **.2IndraControl VEP 50.2Abbrev.ColumnExample:1 2 3 4 5 6 7 8 910 1 2 3 4 5 6 7 8 920 1 2 3 4 5 6 7 8 930 1 2 3 4 5 6 7 8 9VEP50 . 2CHN-128NN-CAD-128-NN-FW401. Product1.1 VEP. . . . . . . . .= VEP2. Line2.1 50 . . . . . . . . . . . . . . . = 503. Design3.1 2 . . . . . . . . . . . . . . . . . . . . . . = 24. Front plate and display4.1 <strong>Rexroth</strong> design4.1.1 15", Touch-Screen(suitable for industry food). . . = CH5. Additional option5.1 Short time UPS. . . . . . . . . . . . . . . . = U6. Memory capacity (RAM)6.1 128 MB . . . . . . . . . . . . . . . . . . . . . . . . . = 1287. Interface 17.1 NN-NN, not equipped . . . . . . . . . . . . . . . . . . . = NN7.2 P1-NN . . . . . . . . . . . . . . . . . . . . . . . . . . . . . . . = NA7.3 DN-NN. . . . . . . . . . . . . . . . . . . . . . . . . . . . . . . = NB8. System configuration8.1 Celeron, min. 400 MHz . . . . . . . . . . . . . . . . . . . . . . . . = CA9. Connecting voltage9.1 DC 24 V. . . . . . . . . . . . . . .. . . . . . . . . . . . . . . . . . . . . . . . . = D10. Compact Flash size10.1 128 MB . . . . . . . . . . . . . . . . . . . . . . . . . . . . . . . . . . . . . . . . . . . = 12811. Other design11.1 none . . . . . . . . . . . . . . . . . . . . . . . . . . . . . . . . . . . . . . . . . . . . . . . . . . . . = NN12. Firmware and software12.1 Denotes that firmware and software must be ordered as separatesubposition. . . . . . . . . . . . . . . . . . . . . . . . . . . . . . . . . . . . . . . . . . . . . . . . . . . . = FWNote:1 InterfaceNN = not equippedP1 = PROFIBUS-DP master moduleDN = DeviceNetType_VEP502.FH11Fig. 10-3: Type code of the IndraControl VEP 50.2DOK-SUPPL*-<strong>VEP**.2</strong>****-PR02-EN-P
IndraControl VEP **.2 Ordering Information 10-5IndraControl VAS 02.1Abbrev.ColumnExample:1 2 3 4 5 6 7 8 910 1 2 3 4 5 6 7 8 920 1 2 3 4 5 6 7 8 930 1 2 3 4 5 6 7 8 9VAS02 . 1-001-NNN-NN401. Product1.1 IndraControl V = VAS2. Line2.1 Housing extension . . . = 023. Design3.1 1 . . . . . . . . . . . . . . . . . . . . . . = 14. Device assignment4.1 VEP30 . . . . . . . . . . . . . . . . . . . . . = 0015. Option 15.1 standard. . . . . . . . . . . . . . . . . . . . . . . . . . = NNN6. Other design6.1 none . . . . . . . . . . . . . . . . . . . . . . . . . . . . . . . . . . . . = NNNote1 OptionNNN = Stop-, Start- and Emergency-stop buttonType_VAS02.FH11Fig. 10-4: Type code of the IndraControl VAS 02.1DOK-SUPPL*-<strong>VEP**.2</strong>****-PR02-EN-P
10-6 Ordering Information IndraControl VEP **.210.2 AccessoriesConnectors and Ready-Made CablesOrdering designation of theready-made cablesIKB0033/000.0PN: R911291808Profibus cableMating connectorof theunitINS0541/K01<strong>Rexroth</strong> cableIKB0033IKB0033Design of the cable endINS0541/K01IKB0034/000.0PN: R911291809INS0541/K01IKB0034IKB0034Fig. 10-5:Connectors and cables for IndraControl VEP **.2 devicesStorage MediaOrdering designation Part number DescriptionCFM01.1-0128-N-LBA-NN-NW R911308469 Compact flash module 128 MbytesFig. 10-6: Storage media of the IndraControl VEP **.2 devicesDOK-SUPPL*-<strong>VEP**.2</strong>****-PR02-EN-P
IndraControl VEP **.2 Disposal and Environmental Protection 11-111 Disposal and Environmental Protection11.1 DisposalProductsOur products can be returned to us free of charge for disposal. However,it is a precondition that the products are free of oil, grease or other dirt.Furthermore, the products returned for disposal must not contain anyundue foreign matter or foreign component.Please send the products free domicile to the following address:<strong>Bosch</strong> <strong>Rexroth</strong> AGElectric Drives and ControlsBürgermeister-Dr.-Nebel-Straße 2D-97816 Lohr am MainPackaging MaterialsThe packaging materials consist of cardboard, wood and polystyrene.These materials can be easily recycled. For ecological reasons, pleaserefrain from returning the empty packages to us.11.2 Environmental ProtectionNo Release of Hazardous SubstancesMaterials Contained in the ProductsOur products do not contain any hazardous substances, which may bereleased in the case of appropriate use. Accordingly, our products willnormally not have any negative effect on the environment.Electronic DevicesElectronic devices mainly contain:• steel• aluminum• copper• synthetic materials• electronic components and modulesMotorsMotors mainly contain:• steel• aluminum• copper• brass• magnetic materials• electronic components and modulesDOK-SUPPL*-<strong>VEP**.2</strong>****-PR02-EN-P
11-2 Disposal and Environmental Protection IndraControl VEP **.2RecyclingDue to their high content of metal most of the product components can berecycled. In order to recycle the metal in the best possible way, theproducts must be disassembled into individual modules.Metals contained in electric and electronic modules can also be recycledby means of special separation processes. The synthetic materialsremaining after these processes can be thermally recycled.If the products contain batteries or rechargeable batteries, these batteriesare to be removed and disposed before they are recycled.DOK-SUPPL*-<strong>VEP**.2</strong>****-PR02-EN-P
IndraControl VEP **.2 List of Figures 12-112 List of FiguresFig. 1-1: Front of the IndraControl VEP 30.2 1-1Fig. 1-2: Front of the IndraControl VEP 40.2 1-1Fig. 1-3: Front of the IndraControl VEP 50.2 1-1Fig. 1-4: PC box 1-2Fig. 1-5: Front of the IndraControl VEP 30.2CC 1-2Fig. 1-6: Front of the IndraControl VEP 30.2CG 1-3Fig. 1-7: Housing extension IndraControl VAS 02.1 1-3Fig. 1-8: Front of the IndraControl VEP 40.2CE 1-4Fig. 1-9: Front of the IndraControl VEP 50.2CH 1-5Fig. 3-1: Hazard classification (according to ANSI Z535) 3-1Fig. 4-1: Technical data, front panel of the IndraControl VEP 30.2 4-1Fig. 4-2: Technical data, front panel of the IndraControl VEP 40.2 4-1Fig. 4-3: Technical data, front panel of the IndraControl VEP 50.2 4-1Fig. 4-4: Technical data, PC box of the IndraControl VEP **.2 devices 4-2Fig. 4-5: Technical data of the 24 V power supply unit 4-2Fig. 4-6: Ambient conditions 4-3Fig. 4-7: Weight of the IndraControl VEP **.2 devices 4-3Fig. 4-8: Used standards 4-4Fig. 4-9: Capacitor pack 4-5Fig. 5-1: Front view of the IndraControl VEP 30.2CC 5-1Fig. 5-2: Front view of the IndraControl VEP 30.2CC 5-2Fig. 5-3: Top view on the IndraControl VEP 30.2CC 5-2Fig. 5-4: Bottom view on the IndraControl VEP 30.2CC 5-3Fig. 5-5: Front view of the IndraControl VEP 30.2CG 5-3Fig. 5-6: Rear view of the IndraControl VEP 30.2CG 5-4Fig. 5-7: Front view of the IndraControl VEP 30.2CG with housingextension IndraControl VAS 02.1 5-5Fig. 5-8: Rear view of the IndraControl VEP 30.2CG with housingextension IndraControl VAS 02.1 5-6Fig. 5-9: Bottom view on the IndraControl VEP 30.2CG with housingextension IndraControl VAS 02.1 5-6Fig. 5-10: Front view of the IndraControl VEP 40.2CE 5-7Fig. 5-11: Side view of the IndraControl VEP 40.2CE 5-8Fig. 5-12: Top view on the IndraControl VEP 40.2CE 5-8Fig. 5-13: Bottom view on the IndraControl VEP 40.2CE 5-9Fig. 5-14: Front view of the IndraControl VEP 50.2CH 5-9Fig. 5-15: Side view of the IndraControl VEP 50.2CH 5-10Fig. 5-16: Top view on the IndraControl VEP 50.2CH 5-10Fig. 5-17: Bottom view on the IndraControl VEP 50.2CH 5-11Fig. 5-18: Mounting dimensions of the IndraControl VEP 30.2CC 5-12Fig. 5-19: Mounting dimensions of the IndraControl VEP 30.2CG'sbracket housing 5-13Fig. 5-20: Mounting dimensions of the IndraControl VEP 40.2CE 5-14DOK-SUPPL*-<strong>VEP**.2</strong>****-PR02-EN-P
12-2 List of Figures IndraControl VEP **.2Fig. 5-21: Mounting dimensions of the IndraControl VEP 50.2CH 5-15Fig. 6-1: Display properties – Backlight dimming 6-1Fig. 6-2: Position of the IndraControl VEP30CG's keys with housingextension VAS 02.1 6-2Fig. 6-3: Keys of the IndraControl VEP 30.2CG 6-2Fig. 6-4: Relay contacts connection of the IndraControl VEP 30.2CG'skeys 6-3Fig. 6-5: Pin assignment X103 6-3Fig. 6-6: Scheme of the relay contacts 6-4Fig. 6-7: Pin assignment of the housing extension IndraControl VAS 02.16-4Fig. 6-8: Scheme of the housing extension IndraControl VAS 02.1 6-5Fig. 7-1: Connector panel without special interfaces 7-1Fig. 7-2: Connector panel with Profibus DP master 7-1Fig. 7-3: Connector panel with DeviceNet master 7-1Fig. 7-4: Interfaces 7-2Fig. 7-5: Serial interface COM1 7-3Fig. 7-6: Pin assignment of the COM1 interface 7-3Fig. 7-7: USB interfaces 7-4Fig. 7-8: Pin assignment of the USB interfaces 7-4Fig. 7-9: Ethernet – Network connection 7-5Fig. 7-10: Pin assignment of the Ethernet interface 7-5Fig. 7-11: VGA interface 7-6Fig. 7-12: Pin assignment of the VGA interface 7-6Fig. 7-13: Keyboard/mouse interface 7-7Fig. 7-14: Pin assignment of the keyboard/mouse interface 7-7Fig. 7-15: Pin assignment of the 24 VDC connection X10 7-7Fig. 7-16: Technical data of the 24 VDC connection 7-7Fig. 7-17: Safety transformer according to EN 60742 7-8Fig. 7-18: Illustration of the limit values for the 24 VDC voltage 7-8Fig. 7-19: Wiring of power connection 24 V to the embedded terminal 7-9Fig. 7-20: Pin assignment of the Profibus master interface DP-M 7-10Fig. 7-21: Pin assignment of the Profibus diagnostic interface ConfigRS232C 7-10Fig. 7-22: Technical data of the Profibus master interface 7-10Fig. 7-23: Pin assignment of the DeviceNet master interface DN-M 7-12Fig. 7-24: Pin assignment of the DeviceNet diagnostic interface ConfigRS232C 7-12Fig. 7-25: Maximum cable lengths in relation to the used cable 7-13Fig. 7-26: Specification of the DeviceNet power supply cable 7-13Fig. 7-27: Specification of the DeviceNet data line 7-13Fig. 7-28: VEP 30.2CG cable outlet 7-15Fig. 9-1: Firmware types 9-1Fig. 9-2: Software options 9-1Fig. 9-3: Touch calibration of the IndraControl VEP **.2 devices 9-2DOK-SUPPL*-<strong>VEP**.2</strong>****-PR02-EN-P
IndraControl VEP **.2 List of Figures 12-3Fig. 9-4: <strong>Rexroth</strong> CE Settings – Ethernet Adapter 9-3Fig. 9-5: <strong>Rexroth</strong> CE Settings – Application Settings 9-4Fig. 9-6: <strong>Rexroth</strong> CE Settings – Services 9-5Fig. 9-7: <strong>Rexroth</strong> CE Settings – System Info 9-6Fig. 9-8: Windows CE 4.2 .NET desktop 9-7Fig. 9-9: System properties – working memory 9-8Fig. 9-10: Selecting the virtual keyboard 9-9Fig. 9-11: Virtual keyboard, small 9-9Fig. 9-12: Virtual keyboard, large 9-9Fig. 9-13: Released USB devices 9-10Fig. 9-14: Enabling the IndraLogicWinCE 9-12Fig. 9-15: Functional range of WinStudio "lite" 9-12Fig. 9-16: WinStudio CE Server – Remote Agent 9-13Fig. 9-17: Remote Agent – Setup 9-13Fig. 10-1: Type code of the IndraControl VEP 30.2 10-2Fig. 10-2: Type code of the IndraControl VEP 40.2 10-3Fig. 10-3: Type code of the IndraControl VEP 50.2 10-4Fig. 10-4: Type code of the IndraControl VAS 02.1 10-5Fig. 10-5: Connectors and cables for IndraControl VEP **.2 devices 10-6Fig. 10-6: Storage media of the IndraControl VEP **.2 devices 10-6DOK-SUPPL*-<strong>VEP**.2</strong>****-PR02-EN-P
12-4 List of Figures IndraControl VEP **.2DOK-SUPPL*-<strong>VEP**.2</strong>****-PR02-EN-P
IndraControl VEP **.2 Index 13-113 Index224 VDC power supply 7-7AAccessories 10-6Appropriate useArea of application 2-2Introduction 2-1Uses 2-2BBacklight dimming 6-1CCOM1 interface 7-3Compatibility test 4-6Connectors and ready-made cables 10-6DDeviceNet masterTechnical Data of the interface 7-13Dimensions 5-1Housing dimensions of the IndraControl VEP 30.2CC 5-1Housing dimensions of the IndraControl VEP 30.2CG 5-3Housing dimensions of the IndraControl VEP 40.2CE 5-7Installation notes 5-11Mounting cut-out 5-11Mounting dimensions of the IndraControl VEP 40.2CE 5-14Display and operating components 6-1Disposal 11-1EEnvironmental Protection 11-1Ethernet interface 7-5FFront panel of the IndraControl VEP 30.2 1-2Front panel of the IndraControl VEP 40.2 1-4Front panel of the IndraControl VEP 50.2 1-5Front panel of the VEP 30.2CC 1-2IIllustration of the limit values for the 24 VDC voltage 7-8Inappropriate use 2-2Consequences, Discharge of liability 2-1IndraControl VEP 40.2CE 1-4IndraControl VEP 50.2CH 1-5Interfaces 7-224 VDC power supply 7-7DeviceNet master interface Config 7-12DeviceNet master interface DN-M 7-12Ethernet interface 7-5Profibus diagnostic interface Config 7-10Profibus master interface DP-M 7-10Serial interface COM1 7-3USB interfaces 7-4DOK-SUPPL*-<strong>VEP**.2</strong>****-PR02-EN-P
13-2 Index IndraControl VEP **.2MVGA interface 7-6Maintenance 8-1Extension cards 8-2General information 8-1LCD display 8-1Materials 11-1Mounting dimensionsBracket housing of the IndraControl VEP 30.2CG 5-13IndraControl VEP 30.2CC 5-12IndraControl VEP 50.2CH 5-15OOperating components of the IndraControl VEP 30.2CG 6-2Ordering information 10-1PPin assignments 7-1Profibus masterStatus and Diagnostic indicators 7-11Technical data of the interface 7-10PS/2 keyboard connection 7-7RRecycling 11-2SSafety Instructions for Electric Drives and Controls 3-1Safety transformer according to EN 60742 7-8Serial Interface COM1 7-3Storage media 10-6System presentation 1-1Brief description 1-1Commissioning 1-5Operating system 1-5TTechnial DataFront panel 4-1Technical data 4-1Ambient conditions 4-3PC box 4-2Used standards 4-5Weight 4-4Technical Data24 V power supply unit 4-2Wear parts 4-6Touch screen 6-5Type code 10-1UUL/CSA certification 4-5USB interfaces 7-4Use See appropriate use and inappropriate useVVEP 30.2CG cable outlet 7-15DOK-SUPPL*-<strong>VEP**.2</strong>****-PR02-EN-P
IndraControl VEP **.2 Index 13-3WWiring of power connection 24 V to the embedded terminal 7-9DOK-SUPPL*-<strong>VEP**.2</strong>****-PR02-EN-P
13-4 Index IndraControl VEP **.2DOK-SUPPL*-<strong>VEP**.2</strong>****-PR02-EN-P
IndraControl VEP **.2 Service and Support 14-114 Service and Support14.1 Helpdesk14.2 Service Hotline14.3 Internet14.4 Helpful InformationOur service helpdesk at our headquarters in Lohr, Germany, will assistyou with all kinds of inquiries.Contact us:• By phone through the Service Call Entry CenterMonday to Friday: 7:00 am – 6:00 pm CET+49 (0) 9352 40 50 60• By fax+49 (0) 9352 40 49 41• By E-mail: service.svc@boschrexroth.deOut of helpdesk ours please contact our German service departmentdirectly:+49 (0) 171 333 88 26or+49 (0) 172 660 04 06Hotline numbers for other countries can be found in the addresses ofeach region on the Internet (see below).Additional notes regarding service, maintenance and training, as well asthe current addresses of our sales and service offices can be found onhttp://www.boschrexroth.com/Outwith Germany please contact our sales/service office in your area first.For quick and efficient help please have the following information ready:• detailed description of the fault and the circumstances• Information on the name plate of the affected products, especially typecodes and serial numbers• Your phone and fax numbers and E-mail address, so we can contactyou in case of questionsDOK-SUPPL*-<strong>VEP**.2</strong>****-PR02-EN-P
14-2 Service and Support IndraControl VEP **.2DOK-SUPPL*-<strong>VEP**.2</strong>****-PR02-EN-P
<strong>Bosch</strong> <strong>Rexroth</strong> AGElectric Drives and ControlsP.O. Box 13 5797803 Lohr, GermanyBgm.-Dr.-Nebel-Str. 297816 Lohr, GermanyPhone +49 (0)93 52-40-50 60Fax +49 (0)93 52-40-49 41service.svc@boschrexroth.dewww.boschrexroth.comR911310662Printed in GermanyDOK-SUPPL*-<strong>VEP**.2</strong>****-PR02-EN-P