
You also want an ePaper? Increase the reach of your titles
YUMPU automatically turns print PDFs into web optimized ePapers that Google loves.
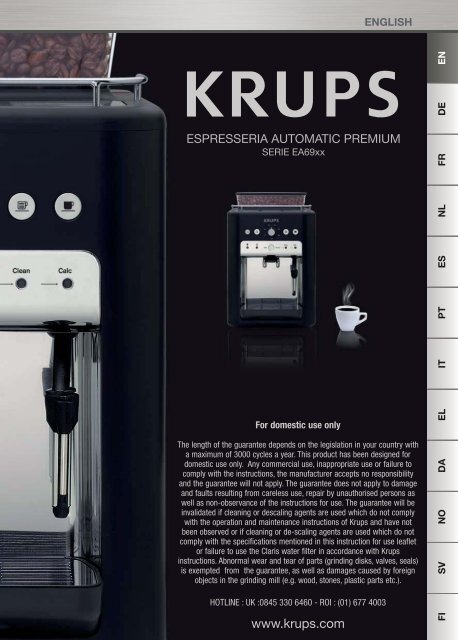
ESPRESSERIA AUTOMATIC PREMIUM<br />
SERIE EA69xx<br />
For domestic use only<br />
The length of the guarantee depends on the legislation in your country with<br />
a maximum of 3000 cycles a year. This product has been designed for<br />
domestic use only. Any commercial use, inappropriate use or failure to<br />
comply with the instructions, the manufacturer accepts no responsibility<br />
and the guarantee will not apply. The guarantee does not apply to damage<br />
and faults resulting from careless use, repair by unauthorised persons as<br />
well as non-observance of the instructions for use. The guarantee will be<br />
invalidated if cleaning or descaling agents are used which do not comply<br />
with the operation and maintenance instructions of <strong>Krups</strong> and have not<br />
been observed or if cleaning or de-scaling agents are used which do not<br />
comply with the specifications mentioned in this instruction for use leaflet<br />
or failure to use the Claris water filter in accordance with <strong>Krups</strong><br />
instructions. Abnormal wear and tear of parts (grinding disks, valves, seals)<br />
is exempted from the guarantee, as well as damages caused by foreign<br />
objects in the grinding mill (e.g. wood, stones, plastic parts etc.).<br />
HOTLINE : UK :0845 330 6460 - ROI : (01) 677 4003<br />
www.krups.com<br />
ENGLISH<br />
A1<br />
EN<br />
DE<br />
FI SV NO DA EL IT PT ES NL FR
KRUPS SERIE EA69xx<br />
Empty<br />
coffee<br />
grounds<br />
Meaning of lights :<br />
Fill tank Clean Calc On/Off<br />
� � � � �<br />
� � � � �/�<br />
� � � � �/��<br />
� � � � �<br />
�/� � � � �<br />
� � � � �<br />
� � � � �<br />
� �/� � � �<br />
� �/� � � �/�<br />
� � � � �<br />
� � � � �<br />
� � �/� � �<br />
� � � � �<br />
� � � � �<br />
� � � �/� �<br />
� �/� � �/� �<br />
� � �/� �/� �<br />
� � � � �<br />
�/� �/� �/� �/� �<br />
� : Light off<br />
� : Light on<br />
Meaning<br />
The appliance is ready for a coffee or steam cycle.<br />
Slow flashing: the device is in the preheating phase<br />
or an initialisation cycle.<br />
Double flash: a 2 coffee cycle is in process.<br />
Product support information in operating<br />
parameters setting mode.<br />
Empty coffee grounds collector + clean drawer.<br />
Check coffee grounds collector is not missing or<br />
incorrectly positioned.<br />
Check cleaning tray is not missing or incorrectly<br />
positioned.<br />
Set water hardness.<br />
Fill tank with water. Check water tank is not missing<br />
or incorrectly positioned.<br />
Coffee cycle has stopped due to lack of water.<br />
Fill tank with water.<br />
Setting auto off automatic cut-off.<br />
Cleaning program requested or in process.<br />
Cleaning program: preparing cleaning or rinsing cycle<br />
Setting coffee temperature.<br />
Scale removal program requested or in process.<br />
Scale removal program: preparing scale removal<br />
or rinsing cycle.<br />
Rinsing cycle or scale removal cycle: request to<br />
empty water tank, rinse it and fill with fresh water.<br />
Request for long rinsing (about 150 ml).<br />
Long rinsing in process.<br />
Constant flashing: operating fault.<br />
�/� : Light flashing<br />
�/�� : Light double flashing
1<br />
2<br />
3<br />
4<br />
5<br />
6<br />
7<br />
8<br />
9<br />
10<br />
11<br />
12<br />
13<br />
14<br />
!<br />
ENGLISH<br />
DESCRIPTION<br />
CONTENTS<br />
1<br />
1.1 Warning signals 1<br />
1.2 Information on espresso coffee 2<br />
1.3 Warning safety instructions 2<br />
1.4 Limits to use 3<br />
BEFORE FIRST USE 4<br />
2.1 Measuring water hardness 4<br />
2.2 Claris - Aqua Filter System cartridge 4<br />
SETTINGS 5<br />
3.1 Setting water hardness 5<br />
3.2 Setting coffee temperature 5<br />
3.3 Setting automatic shut-off (auto-off) 5<br />
PREPARING THE APPLIANCE 6<br />
RINSING OF CIRCUITS 7<br />
PREPARING THE GRINDER 7<br />
PREPARING ESPRESSO AND LONG COFFEES 7<br />
7.1 Preparing an espresso (from 20 to 70 ml) 8<br />
7.2 Preparing a cup of long coffee (from 80 to 220 ml) 8<br />
7.3 2-cup function 8<br />
PREPARING STEAM 9<br />
8.1 Frothing milk 9<br />
SETTING UP THE AUTO-CAPPUCCINO XS6000 10<br />
MAINTAINING YOUR APPLIANCE 10<br />
10.1 Emptying the coffee grounds collector, the cleaning tray and the drip tray 10<br />
10.2 Machine cleaning program 11<br />
10.3 Scale removal program 12<br />
10.4 Machine long rinsing program 14<br />
10.5 General Maintenance 15<br />
MOVING THE APPLIANCE 15<br />
ELECTRICAL OR ELECTRONIC PRODUCT AT END OF SERVICE LIFE 15<br />
TROUBLESHOOTING AND CORRECTIVE ACTIONS 15<br />
RECIPES 17<br />
Caution! : This machine must only be used with approved accessories for the guarantee to be valid.<br />
XS 3000<br />
Packet of<br />
10 cleaning<br />
tablets<br />
(two tablets<br />
supplied)<br />
F 054<br />
Descaling<br />
powder<br />
(one sachet<br />
supplied)<br />
Accessories (sold separately) Photos are not contractual<br />
F 088<br />
Claris – Aqua<br />
Filter System<br />
Cartridge<br />
(not supplied)<br />
XS6000<br />
Auto-Cappuccino<br />
Set (not<br />
supplied)<br />
XS 4000<br />
KRUPS<br />
Cleaning fluid<br />
for Cappuccino<br />
system<br />
(not supplied)<br />
EN<br />
DE<br />
FI SV NO DA EL IT PT ES NL FR
KRUPS SERIE EA69xx<br />
1<br />
1<br />
Water tank<br />
handle/lid<br />
Ground coffee setting<br />
Water tank<br />
Cleaning tray<br />
DESCRIPTION<br />
Coffee grounds collector<br />
Coffee outlets with height<br />
adjusting handle<br />
Removable drip grid<br />
and tray<br />
Cleaning inlet<br />
Digital display for parameter setting<br />
Steam button<br />
Coffee volume rotating button<br />
1.1 Warning signals<br />
Empty coffee grounds collector,<br />
the coffee drawer and drip tray<br />
Fill water tank<br />
+<br />
Topview<br />
Proceed with cleaning Light on<br />
Proceed with long rinsing<br />
Proceed with scale removal<br />
Coffee bean container lid<br />
Coffee bean container<br />
Servicing flap with cup rest<br />
Coffee volume rotating knob<br />
Water level floats<br />
Light flashing<br />
Steam nozzle<br />
“On/Off” key and light Strong coffee key<br />
“Empty coffee grounds” and “clean tray” light<br />
“Fill water tank” light<br />
Grinding fineness<br />
setting knob<br />
Metal grinding wheel<br />
Standard coffee key<br />
“Scale removal” light<br />
“Clean” light<br />
“Rinsing/servicing” key
ENGLISH<br />
1.2 Information on espresso coffee<br />
Dear Customer,<br />
Thank you for having purchased this <strong>Krups</strong> Automatic. We are sure you will enjoy both the quality<br />
of the coffee it makes and how easy it is to use.<br />
Whether you want a short, strong shot of a ristretto, a good espresso, a bigger and milder lungo, or<br />
a creamy cappuccino, your automatic coffee / espresso machine has been designed so you can<br />
enjoy the same quality at home as at the bistro, whatever the time of day and right through the week.<br />
Thanks to its Thermoblock System, its 15 bar pump and because it uses real coffee beans that are<br />
ground just before the coffee is made, your <strong>Krups</strong> Automatic will give you a drink containing maximum<br />
aroma, with a fine creamy golden brown top produced by the natural oils contained in coffee<br />
beans.<br />
Drink your espresso from small porcelain cups rather than the usual coffee cup or mug.<br />
To obtain an espresso at just the right temperature and a nice compact creamy top, we advise you<br />
to pre-heat your cup.<br />
After a few trial runs you will find the type of mix and roast of the coffee beans that suits your taste.<br />
The quality of the water used is obviously another essential factor in the coffee you make.<br />
And make sure the water used is fresh out of the tap (contact with the air tends to make it stagnate),<br />
that it is free from chlorine odours and cold.<br />
Espresso coffee is richer in aroma than a conventional filter coffee. Despite its stronger, longer-lasting<br />
taste, espresso in fact contains less caffeine than filter coffee (about 60 to 80 mg per cup as compared<br />
with 80 to 100 mg per cup). This is due to the shorter percolation time.<br />
Due to the visibility of the containers and its automatic cleaning and scale removal programs, your<br />
<strong>Krups</strong> Automatic is extremely easy to use.<br />
1.3 Important: Safety instructions<br />
• Read the instructions for use carefully before first using your appliance and keep them for reference:<br />
Incorrect use of the appliance will release KRUPS from any responsibility.<br />
• This appliance is intended to be used in the household only. The appliance is NOT intended to be<br />
used in the following applications:<br />
- staff kitchen areas in shops, offices and other working environments;<br />
- farm houses<br />
- by clients in hotels, motels and other residential type environments;<br />
- bed and breakfast type environments.<br />
If used in the above types of environments the product will not be covered by the manufacturer's<br />
guarantee.<br />
• Place on a flat, stable, heat-resistant surface away from sources of heat and water splashes.<br />
• Plug the appliance only to an earthed mains socket. Check that the power supply voltage shown<br />
on the appliance’s rating plate corresponds to that of your electrical installation.<br />
• Make certain not to place the appliance on a hot surface such as a hot-plate or use it close to a<br />
naked flame.<br />
• Immediately take the plug out of the socket if you notice any problem while coffee is being made.<br />
• Do not pull the power supply cord to remove the plug.<br />
• Do not let the power supply cord hang down from a table or work surface.<br />
• Do not put your hand or the power supply cord on the hot parts of the appliance.<br />
2<br />
EN<br />
DE<br />
FI SV NO DA EL IT PT ES NL FR
KRUPS SERIE EA69xx<br />
• This appliance is not intended for use by persons (including children) with reduced physical, sensory<br />
or mental capabilities, or lack of experience and knowledge, unless they have been given supervision<br />
or instruction concerning use of the appliance by a person responsible for their safety.<br />
• Children should be supervised to ensure that they do not play with the appliance.<br />
• For safety reasons, do not use the appliance if the power supply cord or plug are damaged. Only have<br />
the power supply cord replaced by an authorised KRUPS service centre.<br />
• Always refer to the instructions when removing scale from the appliance.<br />
• Protect the appliance against humidity and freezing.<br />
• Do not use the appliance if it does not operate correctly or if it has been damaged. In this case, have<br />
the appliance examined by a KRUPS authorized service centre (see list in KRUPS Service handbook).<br />
• Apart from cleaning and scale removal in accordance with the appliance’s user instructions, any intervention<br />
on the appliance must be performed by an authorised <strong>Krups</strong> service centre.<br />
• In the interests of safety, only use accessories and consumables certified by KRUPS for your appliance.<br />
• Any error in connection negates the guarantee.<br />
• Unplug the appliance as soon as you stop using it over a prolonged period and when you clean it.<br />
• All appliances are subject to stringent quality control. Practical tests using appliances taken at random<br />
are conducted and this may explain any marks showing prior use.<br />
• You are advised against using multiple plugs and/or extension leads.<br />
• Do not put water into the coffee bean container and/or under the servicing flap.<br />
• Be careful of the direction of the steam nozzle as steam can cause scalding.<br />
• Failure to ensure scale removal, cleaning and regular maintenance or the presence of foreign bodies in<br />
the grinder will mean that the guarantee will not be valid.<br />
1.4 Limits to use<br />
This Espresso machine must only be used to prepare espressos or coffee, to froth up milk and heat liquids.<br />
This product has been designed for domestic use only. Any commercial use, inappropriate use<br />
or failure to comply with the instructions, the manufacturer accepts no responsibility and the guarantee<br />
will not apply.<br />
3
Fill a glass with water and<br />
immerse a stick in it.<br />
ENGLISH<br />
0 1 2 3 4<br />
After 1 minute the hardness measurement will appear (moderately hard water).<br />
2.2 Claris cartridge - aqua filter system F088 (only available as accessory)<br />
■ To get the best taste from your coffee and extend your appliance’s service life, we advise you to use only<br />
the Claris - Aqua Filter System cartridge sold as an accessory.<br />
It comprises a scale-removing substance and activated carbon that reduces chlorine, impurities, lead,<br />
copper, pesticides, etc. that are present in the water. Minerals and trace elements will then be preserved.<br />
F088<br />
BEFORE FIRST USE<br />
2.1 Measuring water hardness<br />
■ Before using the appliance for the first time or if you have noted a change in water hardness, it is<br />
advisable to adapt the appliance to the water hardness. To determine the water hardness, use the<br />
measuring stick delivered with your appliance or contact with your water authority.<br />
!<br />
Filter the water using the Claris-Aqua<br />
Filter System<br />
cartridge to reduce<br />
carbonate hardness by as<br />
much as 75 %*<br />
Chlorine – up to 85 %*<br />
Lead – up to 90 %*<br />
Copper – up to 95 %*<br />
Aluminium – up to 67 %*<br />
!<br />
2<br />
Degree of<br />
hardness<br />
1 sec.<br />
0<br />
Very soft<br />
* indications provided by the manufacturer<br />
1<br />
soft<br />
Note : Use filtered water, but not bottled mineral water.<br />
Mechanism to indicate the<br />
month the cartridge was<br />
fitted and when to replace<br />
it (after 2 months at most).<br />
2<br />
Moderately hard<br />
Installing the cartridge in<br />
the machine.<br />
On first use, screw the<br />
filter cartridge into the<br />
bottom of the water tank.<br />
3<br />
hard<br />
4<br />
Extremely hard<br />
° f 7,2° >12,6° >25,2° > 37,8°<br />
° dH 4° >7° >14° > 21°<br />
° e 5° >8,75° >17,5° > 26,25°<br />
Place a receptacle under<br />
the steam nozzle.<br />
Run 300 ml of water by<br />
pressing the rinse button<br />
once for more than<br />
3 seconds.<br />
You can repeat this<br />
operation if you wish.<br />
Note : The Claris cartridge needs to be replaced after about every 50 litres of water or every two months at least.<br />
3 sec.<br />
4<br />
EN<br />
DE<br />
FI SV NO DA EL IT PT ES NL FR
KRUPS SERIE EA69xx<br />
Plug the appliance into<br />
the mains power supply<br />
but do not turn it on.<br />
5<br />
Press the back of the cup<br />
stand to remove it.<br />
3.1 Setting water hardness<br />
The “water tank” light<br />
will come on.<br />
3.2 Setting the coffee temperature<br />
!<br />
!<br />
Press the ‘Service’ and<br />
keys at the same<br />
time. .<br />
Note : Appliances are pre-set in the factory for hardness level 3.<br />
Press the steam key<br />
to switch to coffee<br />
temperature setting =><br />
The ‘calc’ light will<br />
come on.<br />
The digital display for parameter<br />
setting is under<br />
the servicing flap.<br />
0 = Very soft<br />
1 = Soft<br />
2 = Moderately hard<br />
3 = Hard<br />
4 = Very hard<br />
Note : Appliances are pre-set in the factory to 2, average temperature.<br />
Press the key as<br />
many times as are needed<br />
to select the desired<br />
coffee temperature.<br />
3.3 Setting the automatic electrical power supply shut-OFF (auto-off)<br />
!<br />
3<br />
SETTINGS<br />
�<br />
Press the key as many<br />
times as are needed to select<br />
the hardness level for the<br />
water used.<br />
Note : Appliances are pre-set in the factory to 1 hour.<br />
1 2 3
It is possible to turn your<br />
machine off automatically<br />
after a number of preprogrammed<br />
hours.<br />
Press the steam key to<br />
switch to automatic<br />
shut-off setting=><br />
!<br />
!<br />
4<br />
ENGLISH<br />
Note : At each stage you can memorise settings by pressing the key if you have finished setting satisfactorily<br />
or continue the procedure. If no other setting is made in the next 30 seconds, the lights will go off and<br />
the settings shown will be recorded. The settings will remain memorised even if there is a power failure.<br />
You can change these settings at anytime by repeating the same operations.<br />
Pull out and fill the water<br />
tank.<br />
!<br />
!<br />
!<br />
The ‘clean’ light<br />
will come on.<br />
PREPARING THE APPLIANCE<br />
Put it back in place by<br />
pressing firmly and close<br />
the lid again.<br />
Open the coffee bean<br />
container lid. Add the coffee<br />
beans (250 g maximum).<br />
1 = 1 H<br />
2 = 2 H<br />
3 = 3 H<br />
4 = 4 H<br />
Close the coffee bean<br />
container lid again.<br />
Note : Do not fill the water tank with hot water, milk or any other liquid. If you turn on the appliance when<br />
the water tank is not in place or not correctly filled (under the “min.” level,), the “fill water tank” light will<br />
come on and making an espresso or a cup of coffee will be made impossible.<br />
Caution! : Never put ground coffee in the coffee container.<br />
Press the key as many<br />
times as are needed to<br />
select the desired duration.<br />
Caution! : It is recommended that you do not use oily, caramelised or flavoured coffee beans for<br />
this machine. These kinds of beans may damage the machine.<br />
Caution! : Check that the coffee beans do not contain any foreign particles such as grit, as any damage<br />
caused by the presence of foreign particles will negate the guarantee.<br />
Do not put water into the coffee bean container.<br />
Remember to fit the drip tray to avoid waste water flowing onto the work surface and<br />
staining it or scalding you. Check that your water tank is clean.<br />
6<br />
EN<br />
DE<br />
FI SV NO DA EL IT PT ES NL FR
KRUPS SERIE EA69xx<br />
7<br />
5<br />
RINSING OF CIRCUITS<br />
Turn the appliance on by<br />
pressing the button.<br />
The light will flash<br />
during the pre-heating and<br />
initialisation cycle.<br />
!<br />
6<br />
PREPARING THE GRINDER<br />
■ You can choose the strength of your coffee by setting the coffee bean grinding fineness.<br />
■ The finer the grinding setting, the stronger and creamier the coffee should be.<br />
■ Set the desired fineness for grinding by turning the ‘Grinding fineness setting’ knob.<br />
!<br />
7<br />
!<br />
Rinsing out the coffee circuit:<br />
Place a container under the coffee nozzles.<br />
Press the 'Service' button quickly to start a<br />
coffee circuit rinsing cycle, which will<br />
automatically stop after around 40 ml.<br />
PREPARING ESPRESSO AND LONG COFFEES<br />
Rinsing out the steam circuit:<br />
Place a container under the steam nozzle<br />
and press the ’Service’ button for<br />
3 seconds to start a steam circuit rinsing<br />
cycle, which will automatically stop after<br />
around 300 ml.<br />
Note : It is preferable to rinse the 2 circuits out at least once after the machine has not been used for several<br />
days. Each time you plug your machine in, it will carry out an initialisation cycle.<br />
Turn to the left for<br />
finer grind.<br />
Caution! : Do note change the setting during grinding.<br />
Never force the grinding fineness setting button<br />
�<br />
1.S<br />
� �<br />
Turn to the right<br />
for coarser grind.<br />
Caution! : Your appliance is designed to make coffee from coffee beans only.<br />
When you first make coffee with the machine or after a long period of absence or a<br />
cleaning or scale removal procedure, a little steam and hot water will come out of the<br />
steam nozzle (priming).<br />
Splashing or scalding may occur if the coffee outlets are set too high in relation to the size<br />
of the cups.
7.1 Preparing an espresso<br />
■ The quantity of water for an espresso must be between 20 and 70 ml.<br />
■ Each time you plug your machine in, it will carry out an initialisation cycle.<br />
■ Press the button . The light will flash during the pre-heating and initialisation cycle.<br />
�<br />
You have now prepared your appliance.<br />
The light will stay on.<br />
Put a cup under the coffee outlets.<br />
You can lower or raise the coffee<br />
outlets to suit the size of your cups.<br />
!<br />
Select the key to get<br />
a strong espresso or the<br />
key to get a standard<br />
espresso.<br />
7.2 Preparing a cup of coffee<br />
■ The quantity of water for a cup of coffee must be between 80 and 220 ml.<br />
!<br />
!<br />
!<br />
ENGLISH<br />
You can change the volume<br />
of water at any time.<br />
Note : To stop coffee flowing into the cup, you can either again press one of the or , keys or turn the<br />
knob to the min. position.<br />
Note : The ground coffee is moistened with a little hot water after the grinding stage.<br />
A few moments later, percolation as such starts.<br />
Beyond a certain amount of coffee in the cup, we recommend - in order to obtain a stronger coffee to divide<br />
your preparation into two separate cycles. Example 2 x 70ml cycles for a cup of 140 ml.<br />
Caution! : Do not remove the water compartment before the end of the cycle<br />
(that is around 15 seconds after the coffee has finished dripping through).<br />
7.3 2-cup function<br />
■ You can use your appliance to make 2 cups of coffee or espresso. Remember not to remove the cups<br />
after the first cycle. You have now prepared your appliance. The light will stay on.<br />
� ! Note : The appliance will automatically<br />
sequence 2 complete<br />
coffee-making cycles.<br />
Put two cups under the<br />
coffee outlets.<br />
You can lower or raise the<br />
coffee outlets to suit the<br />
size of your cups.<br />
�<br />
X 2<br />
Select the key or key according to your choice,<br />
pressing twice rapidly in succession.<br />
The light will come on with a double flash to confirm<br />
that you have ordered 2 cups of coffee.<br />
� �<br />
Note : If you first press the key and then the (or vice versa), the second action will not be taken into account.<br />
-<br />
+<br />
8<br />
EN<br />
DE<br />
FI SV NO DA EL IT PT ES NL FR
KRUPS SERIE EA69xx<br />
8.1 Frothing milk<br />
Check that the steam<br />
nozzle is correctly fitted.<br />
9<br />
PREPARING STEAM<br />
■ Steam froths up the milk to make a cappuccino or a caffe latte, for example, and also heats up liquids.<br />
As you need a higher temperature to produce steam than to make an espresso, the appliance runs an<br />
additional pre-heating phase for steam.<br />
!<br />
8<br />
!<br />
Press the key.<br />
The light will flash while the appliance heats up.<br />
Once pre-heating has been completed, the light will remain on continuously and you can start producing<br />
steam by again pressing the key.<br />
Press the button again to stop the cycle.<br />
Caution! : Be careful, because the cycle does not stop immediately.<br />
Note : We advise you to use very fresh, very cold milk. The milk and jug must be cold, ideally between 6 and<br />
10 °C. We therefore advise you against putting the jug under hot water before using it.<br />
�<br />
To remove any remaining<br />
milk from the steam nozzle,<br />
place a container<br />
under the nozzle and press<br />
the key.<br />
!<br />
Pour the milk into your<br />
milk jug. Immerse the<br />
nozzle in the milk.<br />
Let the steam escape for<br />
at least 10 seconds and<br />
then again press the<br />
key to stop the process.<br />
Activate the steam<br />
function as explained<br />
above.<br />
Once your milk is frothy<br />
enough...<br />
The steam nozzle can be removed for more intense cleaning. Wash it out with<br />
water and a little washing up liquid and a small non-abrasive brush. Rinse and<br />
dry it. Before putting it back, ensure that the air inlet holes are not blocked by<br />
any milk residues. If necessary, unblock them using the needle supplied. Do not<br />
wash the steam nozzle in the dishwasher.<br />
Note : To interrupt the steam function, just press any key. Be careful as the nozzle may be hot.<br />
If the nozzle is blocked, unblock it using the needle supplied.<br />
The maximum duration for production of steam per cycle is limited to 2 minutes.<br />
...again press the key<br />
to stop the cycle.
9<br />
SETTING UP THE AUTO-CAPPUCCINO XS 6000<br />
(SOLD SEPARATELY)<br />
■ This auto-cappuccino accessory makes it easier to make a cappuccino or a caffe latte.<br />
XS 6000<br />
Attach the various parts<br />
together.<br />
!<br />
!<br />
10<br />
Select the cappuccino or<br />
caffe latte position on<br />
the special nozzle.<br />
Press the button to<br />
start and then to stop<br />
the cycle<br />
Note : The tube must not be twisted to ensure that the selector is in the correct position.<br />
ENGLISH<br />
Place your cup under<br />
the coffee outlets and<br />
start a coffee / espresso<br />
cycle.<br />
Caution! : To prevent milk from drying on the auto-cappuccino accessory, it must be cleaned<br />
thoroughly. It is recommend that you wash it immediately by carrying out a cycle with<br />
steam and the accessory pot filled with water in order to clean the inside of the nozzle.<br />
To do so, you can also use a liquid cleaner XS4000, available as an accessory.<br />
MAINTAINING YOUR APPLIANCE<br />
10.1 Emptying the coffee grounds collector, the coffee tray and the<br />
drip tray<br />
■ The drip tray receives waste water and the coffee grounds collector receives used coffee<br />
grounds. The coffee cleaning tray allows you to eliminate any deposits of coffee grounds.<br />
If the light comes<br />
on, remove, empty and<br />
clean the drip tray.<br />
!<br />
!<br />
1 2<br />
�<br />
�<br />
1- Remove, empty and clean<br />
the coffee grounds collector.<br />
2- Remove the cleaning tray<br />
Fill up the milk pot and<br />
place a cup or a glass<br />
underneath the autocappuccino<br />
nozzle.<br />
Clean it under water and<br />
dry thoroughly.<br />
1 2<br />
�<br />
�<br />
First put the cleaning<br />
tray back then the<br />
coffee grounds collector.<br />
The drip tray is equipped<br />
with floats to tell you<br />
when to empty it.<br />
Caution! : As soon as you remove the coffee grounds collector, you will have to empty it completely<br />
to avoid any overflow.<br />
Note : The light will remain on if the coffee grounds collector is not slotted in fully or not fitted correctly or<br />
if it has been put back in less than 4 seconds. You cannot make espresso or coffee while the<br />
is flashing. The coffee grounds collector has a capacity of 9 coffees.<br />
light is on or<br />
10<br />
EN<br />
DE<br />
FI SV NO DA EL IT PT ES NL FR
KRUPS SERIE EA69xx<br />
Rinsing the coffee circuit - see page 7<br />
10.2 Machine cleaning program - total duration: about 20 minutes<br />
■ You should perform the cleaning program about every 350 preparations of espresso or coffee.<br />
■ The appliance will let you know when you need to proceed with cleaning through the ‘clean’<br />
light coming on.<br />
Press the ‘Service’ button<br />
to start up the cleaning<br />
program. The ‘clean’ and<br />
‘coffee ground collector’ lights<br />
will flash.<br />
11<br />
!<br />
Caution! : To benefit from the guarantee conditions, it is essential to perform the appliance cleaning<br />
cycle when informed to do so. Be sure to follow the procedure closely, step by step.<br />
You can continue to use the appliance when the light is on, but you are advised to perform<br />
the program as soon as possible.<br />
Remove and empty<br />
the drip tray.<br />
1 2<br />
�<br />
�<br />
1- Remove, empty and clean<br />
the coffee grounds collector.<br />
2- Remove the cleaning tray<br />
Clean it under water and<br />
dry thoroughly.<br />
1 - Cleaning cycle ± 10 mn<br />
The ‘clean’ light becomes steady.<br />
The cleaning cycle will be run automatically.<br />
The pump sucks up water intermittently. This operation lasts about 10 minutes<br />
and the ‘clean’ light will flash again.<br />
Empty your waste water<br />
container and put it back<br />
under the coffee outlets.<br />
Remove, fill and re-fit the<br />
water tank.<br />
Again press the ‘Service’<br />
button to start the first<br />
rinsing cycle.<br />
Place a container with a<br />
minimum capacity of<br />
0.6 l under the coffee<br />
outlets.<br />
Press the back of the<br />
cup stand to remove it<br />
and insert a cleaning<br />
pellet (<strong>Krups</strong> XS3000)<br />
in the cleaning pipe.<br />
1 2<br />
� Press the ‘Service’<br />
�<br />
First put the cleaning tray<br />
back then the coffee<br />
grounds collector.<br />
Light goes off.<br />
XS3000<br />
button to start up the<br />
cleaning program.<br />
2 - First rinsing ± 5 mn<br />
The ‘clean’ light will become steady again.<br />
The program continues.<br />
A first rinsing cycle will be run automatically. It allows the appliance<br />
to be rinsed and remaining detergent to be eliminated.<br />
This first rinsing cycle lasts about 5 minutes<br />
and once finished the ‘clean’ light will flash again.
Empty your waste water<br />
container and put it back<br />
under the coffee outlets.<br />
Remove and empty your<br />
waste water container.<br />
!<br />
!<br />
!<br />
Again press the ‘Service’<br />
button to start the second<br />
rinsing cycle.<br />
Empty the drip tray and fit<br />
it again.<br />
3 - Second rinsing ± 5 mn<br />
Fill your water tank.<br />
ENGLISH<br />
The ‘clean’ light again becomes steady.<br />
A second cleaning cycle will be run automatically.<br />
This second rinsing cycle lasts about 5 minutes.<br />
Once the second rinsing cycle has finished, the ‘clean’<br />
light will go off.<br />
Your appliance<br />
will be ready for<br />
use again.<br />
Note : If there is not enough water in the water tank when you start the program, the light will come on<br />
to warn you. Add the appropriate amount of water to the container and cleaning will continue automatically.If<br />
your machine is unplugged during cleaning or in the event of power failure, you will have to restart the cleaning<br />
program right from the start. This is essential due to water circuit rinsing reasons. In this case, you will<br />
need to use another cleaning tablet. Be sure to complete the entire cleaning cycle to avoid any risk of irritation<br />
(seek medical advice if cleaning solutions are accidently swallowed).<br />
The cleaning cycle is a continuous cycle. Do not put your hands under the coffee outlets and steam nozzle<br />
during the cycle.<br />
Caution! : Only use <strong>Krups</strong> (XS3000) cleaning tablets. We cannot be held responsible for any damage<br />
that may result from the use of tablets from other brands. You can obtain cleaning<br />
tablets from <strong>Krups</strong> Service Centres.<br />
Caution! : Make certain to protect your work surface during cleaning and scale removal cycles,<br />
especially if it is made of marble, stone or wood.<br />
10.3 Scale removal program - total duration : about 22 minutes<br />
■ The quantity of scale deposited depends on the hardness of the water used.<br />
■ The appliance will automatically warn you by the ‘calc’ light coming on when you need to proceed<br />
with scale removal.<br />
■ This program is only accessible when the machine requests it.<br />
!<br />
!<br />
Caution! : To benefit from the guarantee conditions, it is essential to perform the appliance<br />
scale removal cycle when informed to do so. Be sure to follow the procedure closely<br />
step by step.<br />
You can continue to use the appliance when the light is on, but you are advised to<br />
perform the program as soon as possible.<br />
Caution! : If your product is equipped with our Claris - Aqua Filter System F088 cartridge, please<br />
remove it during the descaling operation.<br />
12<br />
EN<br />
DE<br />
FI SV NO DA EL IT PT ES NL FR
KRUPS SERIE EA69xx<br />
13<br />
!<br />
!<br />
Caution! : Make certain to protect your work surface during cleaning and scale removal cycles,<br />
especially if they are made of marble, stone or wood.<br />
Press the ‘Service’ key to<br />
start up the scale removal<br />
program. The ‘calc’<br />
and lights will flash.<br />
Remove and clean the<br />
drip tray.<br />
Place a container with a<br />
minimum water capacity<br />
of 0.6 l under the coffee<br />
outlets and under the<br />
steam nozzle.<br />
Empty the tank and fill it<br />
with lukewarm water up<br />
to the ‘calc’ marking.<br />
F054<br />
Dissolve a sachet of<br />
<strong>Krups</strong> scale remover<br />
F054 (40 g).<br />
Caution! : Only use <strong>Krups</strong> F054 scale removal product. You can obtain scale remover from <strong>Krups</strong> Service<br />
Centres. The manufacturer may not be held responsible for damage to the appliance<br />
through use of other products.<br />
Replace the water tank.<br />
The light will go off.<br />
Once you have performed<br />
all these operations, press<br />
the ‘Service’ key.<br />
2 - First rinsing ± 6 mn<br />
A first rinsing is needed to eliminate the remaining scale remover.<br />
This cycle is run automatically. It lasts about 6 minutes.<br />
Empty your container<br />
full of waste water.<br />
Empty the drip tray and<br />
then put it back again<br />
together with the<br />
container as previously.<br />
1 - Scale removal cycle ± 10 mn<br />
The ‘calc’ light will become steady.<br />
The scale removal cycle will have started and will be run<br />
automatically. The pump will suck up water intermittently to<br />
be expelled by the coffee nozzles and then the steam nozzle.<br />
This operation lasts about 10 minutes. Once finished, the<br />
‘water tank’ and ‘calc’ lights will flash.<br />
Empty, clean and rinse the<br />
water tank and then fill it<br />
again up to the “Max.<br />
level.<br />
Replace your water tank.<br />
The ‘calc’ light will flash<br />
and the light will go<br />
off.<br />
3 - Second rinsing ± 6 mn<br />
At the end of the first rinsing, the ‘calc’ light will flash. A second automatic cycle will last 6 minutes.<br />
Press the ‘Service’ key.<br />
The ‘calc’ light will<br />
become steady. The<br />
automatic cycle will last<br />
6 minutes.
Remove your waste<br />
water container and the<br />
drip tray then fit them<br />
again.<br />
Again press the ‘Service’ key.<br />
The ‘calc’ light will become<br />
steady. A second automatic<br />
cycle will last 6 minutes.<br />
Your appliance is now ready for use again.<br />
!<br />
!<br />
Once the second<br />
rinsing is finished, the<br />
‘calc’ light will go off.<br />
Empty the drip tray and<br />
then fit it again.<br />
ENGLISH<br />
Empty and then fill your<br />
water tank.<br />
Note : If there is not enough water in the water tank, you will be warned by the light. Add the appropriate<br />
amount of water to the tank and scale removal will continue automatically.<br />
If a power failure occurs during the cycle, you will have to start it up again from the start.<br />
Caution! : Be sure to complete the entire scale removal cycle to avoid any risk of intoxication.<br />
The scale removal cycle is a continuous cycle. Do not put your hands under the coffee<br />
outlets and steam nozzle during the cycle.<br />
10.4 Long rinsing program<br />
■ The appliance will warn you when you need to perform long rinsing through<br />
the “clean” and “calc” lights flashing.<br />
Remove, fill and replace<br />
the tank.<br />
Under the coffee outlets<br />
and steam nozzle place a<br />
recipient that can contain<br />
at least 0.15 L.<br />
Press the “Service” key to<br />
start up the long rinsing<br />
program. The “clean” and<br />
“calc” lights will become<br />
fixed.<br />
10.5 General maintenance<br />
■ Always remove the power supply cord from the socket and let your appliance cool down before cleaning it.<br />
■ Do not use utensils or cleaning products likely to scratch or corrode the appliance.<br />
■ Wipe the body of the appliance on the outside using a moist cloth.<br />
Clean the cleaning tray, the drip tray and its grid, the To make the cleaning of the coffee grounds collec- Rinse the water tank<br />
SERIE<br />
coffee grounds<br />
EA 6910<br />
collector and its front part using<br />
warm water and washing up liquid detergent.<br />
tor easier, dismantle it as shown above.<br />
with fresh water.<br />
14<br />
�<br />
�<br />
+<br />
Once long rinsing has<br />
been completed, the<br />
‘clean’ and ‘calc’ lights<br />
will go off.<br />
14<br />
EN<br />
DE<br />
FI SV NO DA EL IT PT ES NL FR
KRUPS SERIE EA69xx<br />
15<br />
!<br />
11<br />
!<br />
MOVING THE APPLIANCE<br />
■ Keep the packing and use it again to move the appliance.<br />
12<br />
13<br />
Caution! : Cleaning tray, Drip tray and its grid, Coffee grounds collector and its front part<br />
and the water tank are not designed to go into the dishwasher.<br />
Caution! : If the unpacked appliance is dropped, it is advisable to have it inspected by an authorised<br />
Service Dealer.<br />
ELECTRICAL OR ELECTRONIC PRODUCT AT END OF SERVICE LIFE<br />
Let’s all help protect the environment !<br />
� Your appliance contains valuable materials which can be recovered or recycled.<br />
� Leave it at a local civic waste collection point.<br />
TROUBLESHOOTING, CORRECTIVE ACTIONS<br />
The appliance does not turn on<br />
after I press the button.<br />
Water or steam are coming out of<br />
the steam nozzle unexpectedly.<br />
The espresso or coffee is not hot<br />
enough.<br />
The coffee is too weak or not<br />
strong enough.<br />
The coffee flows too slowly.<br />
The coffee is not creamy enough.<br />
Check that the power supply cord plug is correctly inserted in the socket.<br />
If used often, some drops of water may run out of the steam nozzle.<br />
Change the coffee temperature setting.<br />
Heat the cups by rinsing them under hot water.<br />
Check that the coffee bean compartment contains coffee and that it is running<br />
through properly.<br />
Avoid using oily, caramelised or flavoured coffee beans.<br />
Reduce the volume you have selected using the knob.<br />
Select the button.<br />
Turn the fineness of grind button to the left to obtain a finer grind.<br />
Make your coffee in two separate cycles by using the 2 cup function.<br />
Turn the fineness of grind button to the right to obtain a coarser grind (may depend<br />
on the kind of coffee being used).<br />
Carry out one or more rinsing cycles.<br />
Turn the grinding fineness knob towards the left for a finer grind (may depend<br />
on the type of coffee used).<br />
Change the Claris Aqua Filter System cartridge (follow the installation procedure<br />
on page 4).<br />
Carry out one or two rinsing cycles.
The machine has not produced<br />
any coffee.<br />
You used ground coffee instead<br />
of coffee beans.<br />
The grinder makes a strange<br />
noise.<br />
The grinding fineness button is<br />
difficult to turn.<br />
Steam does not come out of the<br />
nozzle.<br />
Not enough froth on the milk.<br />
The milk froth is too bubbly.<br />
The Auto-Cappuccino accessory<br />
does not suck up the milk (accessory<br />
sold separately).<br />
The cleaning or descaling program<br />
will not start.<br />
After having filled the water tank,<br />
the light remains on.<br />
After having emptied the coffee<br />
grounds collector, the light<br />
remains on.<br />
A power failure occurred during<br />
a cycle.<br />
There is water or coffee under<br />
the appliance.<br />
The 4 red lights flash permanently.<br />
ENGLISH<br />
An incident has been detected during the coffee making process.<br />
The machine automatically re-initialises and is ready for a new cycle.<br />
Use your vacuum cleaner to remove the ground coffee in the coffee bean<br />
container.<br />
There are foreign particles in the grinder.<br />
Contact your <strong>Krups</strong> helpline.<br />
Only adjust the grinder when it is operating.<br />
After switching off your appliance and leaving it to cool:<br />
Make sure the tip of the steam nozzle is properly affixed. Make sure the<br />
steam nozzle is not clogged at the aerator (if necessary clean the steam<br />
nozzle aerator with the needle supplied). Empty the tank and remove the<br />
Claris filter. Fill the tank with mineral water high in calcium (> 100 mg/litre<br />
or .015oz/gallon), it may take as many as 5 to 10 cycles of steam at 60 seconds<br />
each cycle to achieve a continuous jet of steam. Once you have a<br />
continuous jet of steam you should not have to use this particular type of<br />
water again.<br />
Using the needle supplied unblock the small air inlet at the top of the<br />
nozzle if required.<br />
Use a cold container and very fresh, very cold semi-skimmed and milk that<br />
has been opened recently.<br />
Try changing the type of milk if this does not work try UHT milk or skimmed milk.<br />
Check that the 2 ends of the small stainless steel tube in the flexible part<br />
of the steam nozzle are fitted together properly.<br />
Check that the tube that goes into the milk is not blocked.<br />
Check that the flexible tube is not twisted and that it is correctly fitted into<br />
the accessory to avoid any air being sucked in.<br />
After having turned the machine off and left it to cool, unblock the outlet<br />
of the Auto-Cappuccino accessory.<br />
These programs are only possible when the machine requests them<br />
('clean' or 'calc' light on).<br />
Check for correct positioning of the tank in the coffee maker.<br />
Check that the float at the bottom of the tank moves freely.<br />
Rinse the accessory and if necessary remove scale.<br />
Remove the collector, make certain that it is empty, wait for 8 seconds and<br />
then fit it again.<br />
Check that the cleaning tray is correctly pushed in.<br />
The appliance will re-initialise automatically when power is turned on and<br />
be ready for a new cycle.<br />
The drip tray has overflowed: empty it and clean the cleaning drawer.<br />
Check that the drip tray is fitted correctly.<br />
Do not remove the water tank before the end of the cycle.<br />
Unplug the machine, remove the Claris cartridge, wait for 20 seconds and<br />
then turn it all back on.<br />
If the fault persists, note the number which appears on the display under<br />
the cup tray and contact the <strong>Krups</strong> Consumer Service.<br />
HELPLINE: If you have any product problems or queries, please contact our Customer Relations<br />
Team first for expert help and advice: UK : 0845 330 6460 - ROI : (01) 677 4003<br />
or consult our website - www.krups.co.uk<br />
16<br />
EN<br />
DE<br />
FI SV NO DA EL IT PT ES NL FR
KRUPS SERIE EA69xx<br />
Here are some recipes you can make using your <strong>Krups</strong> Automatic :<br />
• Cappuccino<br />
For a cappuccino, the ideal proportions are as follows: 1/3 hot milk, 1/3 coffee, 1/3 milk froth.<br />
• Caffe Latte<br />
To make coffee with milk, also often called Latte Macchiato, the proportions are as follows: 3/5 hot milk, 1/5<br />
coffee, 1/5 milk froth<br />
• For these milk-based preparations, it is best to use cold skimmed milk straight from the refrigerator (ideally<br />
between 6 and 8° C).<br />
• To finish off, you can sprinkle with cocoa.<br />
• Café Crème<br />
• Prepare a conventional espresso in a large cup.<br />
• Add a little cream to get a café crème.<br />
• Café corretto*<br />
• Prepare a cup of espresso as usual.<br />
• Then add 1/4 or 1/2 of a liqueur glass of Cognac to taste.<br />
You can also use anisette, brandy, Sambuca, Kirsch or Cointreau. There are many other ways to give some<br />
punch to your espresso. Just use your imagination.<br />
• Coffee liqueur*<br />
• Mix 3 cups of espresso, 250 g of brown sugar candy and 1/2 litre of Cognac or Kirsch in an empty 0.75 litre<br />
bottle.<br />
• Leave the mixture to marinate for at least 2 weeks.<br />
You will obtain a delicious liqueur. A real treat for coffee lovers.<br />
• Italian style iced coffee<br />
4 scoops of vanilla ice-cream, 2 cups of espresso with sugar to taste, 1/8 l milk, fresh cream, grated chocolate.<br />
• Mix the cold espresso with the milk.<br />
• Serve the scoops of ice-cream into the glasses, pour the coffee onto them and decorate with fresh cream and<br />
grated chocolate.<br />
• Coffee à la frisonne*<br />
• Add a small glass of rum to a cup of sweetened espresso.<br />
• Decorate with a good layer of fresh cream and serve.<br />
• Flambed espresso*<br />
2 cups of espresso, 2 small glasses of Cognac, 2 teaspoons of brown sugar, fresh cream.<br />
• Pour the Cognac into heat-resistant glasses, heat and light.<br />
• Add the sugar, mix, pour in the coffee and decorate with fresh cream.<br />
• Espresso parfait*<br />
2 cups of espresso, 6 egg yolks, 200g sugar, 1/8 litre of sweetened fresh cream, 1 small glass of orange<br />
liqueur.<br />
•Beat the egg yolks with the sugar until it forms a thick, frothy mass.<br />
• Add the cold espresso and the orange liqueur.<br />
• Then mix in the whipped fresh cream.<br />
• Pour the mix into saucer champagne glasses or ordinary.<br />
• Put the champagne glasses in the freezer.<br />
(*: Remember, over-indulgence in alcohol is bad for the health.)<br />
17<br />
14<br />
RECIPES