2nd Grade Science Lesson Plan Week 26 - St. Edwards University
2nd Grade Science Lesson Plan Week 26 - St. Edwards University
2nd Grade Science Lesson Plan Week 26 - St. Edwards University

You also want an ePaper? Increase the reach of your titles
YUMPU automatically turns print PDFs into web optimized ePapers that Google loves.
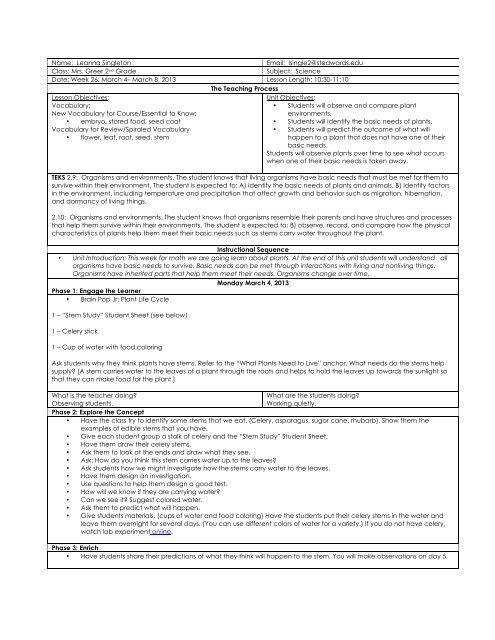
Name: Leanna SingletonEmail: lsingle2@stedwards.eduClass: Mrs. Greer 2 nd <strong>Grade</strong>Subject: <strong>Science</strong>Date: <strong>Week</strong> <strong>26</strong>: March 4– March 8, 2013 <strong>Lesson</strong> Length: 10:30-11:10The Teaching Process<strong>Lesson</strong> Objectives:Unit Objectives:Vocabulary:New Vocabulary for Course/Essential to Know:• <strong>St</strong>udents will observe and compare plantenvironments.• embryo, stored food, seed coat• <strong>St</strong>udents will identify the basic needs of plants.Vocabulary for Review/Spiraled Vocabulary• <strong>St</strong>udents will predict the outcome of what will• flower, leaf, root, seed, stemhappen to a plant that does not have one of theirbasic needs.<strong>St</strong>udents will observe plants over time to see what occurswhen one of their basic needs is taken away.TEKS 2.9: Organisms and environments. The student knows that living organisms have basic needs that must be met for them tosurvive within their environment. The student is expected to: A) identify the basic needs of plants and animals. B) Identify factorsin the environment, including temperature and precipitation that affect growth and behavior such as migration, hibernation,and dormancy of living things.2.10: Organisms and environments. The student knows that organisms resemble their parents and have structures and processesthat help them survive within their environments. The student is expected to: B) observe, record, and compare how the physicalcharacteristics of plants help them meet their basic needs such as stems carry water throughout the plant.Instructional Sequence• Unit Introduction: This week for math we are going learn about plants. At the end of this unit students will understand allorganisms have basic needs to survive. Basic needs can be met through interactions with living and nonliving things.Organisms have inherited parts that help them meet their needs. Organisms change over time.Monday March 4, 2013Phase 1: Engage the Learner• Brain Pop Jr: <strong>Plan</strong>t Life Cycle1 – “<strong>St</strong>em <strong>St</strong>udy” <strong>St</strong>udent Sheet (see below)1 – Celery stick1 – Cup of water with food coloringAsk students why they think plants have stems. Refer to the “What <strong>Plan</strong>ts Need to Live” anchor. What needs do the stems helpsupply? [A stem carries water to the leaves of a plant through the roots and helps to hold the leaves up towards the sunlight sothat they can make food for the plant.]What is the teacher doing?What are the students doing?Observing students.Working quietly.Phase 2: Explore the Concept• Have the class try to identify some stems that we eat. (Celery, asparagus, sugar cane, rhubarb). Show them theexamples of edible stems that you have.• Give each student group a stalk of celery and the “<strong>St</strong>em <strong>St</strong>udy” <strong>St</strong>udent Sheet.• Have them draw their celery stems.• Ask them to look at the ends and draw what they see.• Ask: How do you think this stem carries water up to the leaves?• Ask students how we might investigate how the stems carry water to the leaves.• Have them design an investigation.• Use questions to help them design a good test.• How will we know if they are carrying water?• Can we see it? Suggest colored water.• Ask them to predict what will happen.• Give students materials. (cups of water and food coloring) Have the students put their celery stems in the water andleave them overnight for several days. (You can use different colors of water for a variety.) If you do not have celery,watch lab experiment online.Phase 3: Enrich• Have students share their predictions of what they think will happen to the stem. You will make observations on day 5.
What is the teacher doing?Observing students, helping any that need it.What are the students doing?Working together in groups.Summary/Conclusion of the lesson:Review what we have learned for the day. Answer any questions students have, and tell them what we will be learning the nextday. Remind them to work on any homework they may have at home.Notes/ReflectionPhase 1: Engage the Learner• Brain Pop Jr: <strong>Plan</strong>t Adaptations.Tuesday March 5, 2013Materials1 – “<strong>St</strong>em <strong>St</strong>udy” <strong>St</strong>udent Sheet1 – Hand lensConduct a “Making Meaning Conference”. Go over student predictions from the stem investigation.What is the teacher doing?Observing the students.What are the students doing?Working quietly with their groups.Phase 2: Explore the Concept• Have students break open their celery to see inside the tubes.• What has happened to the leaves?• Ask them to record their findings on their “<strong>St</strong>em <strong>St</strong>udy” <strong>St</strong>udent Sheet in their science notebook.Phase 3: Enrich• Have students Round Robin to discuss the predictions and the actual results. Review the function of the stem and addto the anchor.What is the teacher doing?Observing the students.What are the students doing?Working quietly.Summary/Conclusion of the lesson:Review what we have learned. Answer any questions students have, and tell them what we will be learning the next day.Remind them to work on any homework they may have at home.Notes/ReflectionPhase 1: Engage the Learner• Brain Pop Jr.: Parts of a <strong>Plan</strong>t.Wednesday March 6, 2013Materials:1 – “My Flower” recording sheet (see below)1 – Flower per student.Have a discussion about what the purposes of flowers are (to make seeds to make new plants, the petals attract “pollinators”,some flowers then develop fruit).A diagram may be used as well.
What is the teacher doing?Observing and helping students.Phase 2: Explore the ConceptAsk students:What are the students doing?Working quietly with their groups.• What did your flower look like?• How was your flower like someone else’s in the class? How was it different?• What did you observe when you studied your flower?Phase 3: Enrich<strong>St</strong>udents can record their answers in a foldable or <strong>Science</strong> Notebooks. <strong>St</strong>udents will use illustrations and diagrams to support theirunderstanding.What is the teacher doing?Observing and helping students.What are the students doing?Working quietly with their groups.Summary/Conclusion of the lesson:Review what we learned toady. Answer any questions students have, and tell them what we will be learning the next day.Remind them to work on any homework they may have at home. Remind them that we have an assessment on Friday.Notes/ReflectionThursday March 7, 2013Phase 1: Engage the Learner• Watch BrainPop Jr Video: <strong>Plan</strong>t Life Cycle.• Discuss what information students gained from this video.• Discuss the different parts of the life cycle of a plant.• Discuss what happens in each stage.• Discuss how the cycle continues.What is the teacher doing?Observing and helping students.Phase 2: Explore the ConceptMaterials:What are the students doing?Working quietly with their groups.1- Craft stick1- Paper lunch bagcrayons or markersscissorsgluelarge piece of chart paper (per class)• Ask students to pull out their drawings of their growing bean plant over time.• What did it look like at first?• “A seed.” On a huge cycle anchor, draw the first stage as a seed, next ask students what happened next.• They may not know that the seed germinated underground, but they did see the soaked seed and drew that.• Ask them to return to their drawings. What happened next after the plant germinated? “It grew and made a stem andleaves. Yes.” Say: This stage is called a seedling. Draw each stage on the cycle graphic organizer.• What happened next? “It grew flowers.”• Go through each stage and post with student approval on the graphic organizer.
Phase 3: Enrich• Have students make puppets with paper bags or drawings glued to craft sticks of each stage. They will work in groupsof 6 to make a puppet show presentation for the class. Turn a table or several desks on their side to make a puppetstage.1. Narrator will interview each plant stage and ask them who they are and what is happening in their life.2. seed3. germinating seed4. seedling5. plant with blossoms6. plant with fruitOR: Have students create a comic strip that shows the <strong>Plan</strong>t Life Cycle. The “characters” in the comic should be the differentstages of the life cycle and should teach the life cycle in a fun way.What is the teacher doing?Observing and helping students.What are the students doing?Working quietly with their groups.Summary/Conclusion of the lesson:Review what we learned this week. Answer any questions students have, and tell them what we will be learning the next week.Remind them to work on any homework they may have at home.Notes/ReflectionFriday March 8, 2013Phase 1: Engage the Learner• Brain Pop Jr. Video: Any of the <strong>Plan</strong>t ones we have watched…for review.• AssessmentWhat is the teacher doing?Observing and helping students.Phase 2: Explore the Concept• Finish the assessmentWhat are the students doing?Working quietly.Phase 3: Enrich• After the assessment they can fix their science journal if they need to.What is the teacher doing?Observing and helping students.What are the students doing?Working quietly with their groups.Summary/Conclusion of the lesson:Review what we learned this week. Answer any questions students have, and tell them what we will be learning the next week.Remind them to work on any homework they may have at home.Notes/Reflection