USG0071 LX100 Door Lock Users Guide - Lathem Time Corporation
USG0071 LX100 Door Lock Users Guide - Lathem Time Corporation
USG0071 LX100 Door Lock Users Guide - Lathem Time Corporation

You also want an ePaper? Increase the reach of your titles
YUMPU automatically turns print PDFs into web optimized ePapers that Google loves.
Model <strong>LX100</strong>Proximity <strong>Door</strong> <strong>Lock</strong>User’s <strong>Guide</strong><strong>Lathem</strong> Security SolutionsCopyright © 2009 <strong>Lathem</strong> <strong>Time</strong> <strong>Corporation</strong>. All rights reserved.Document No: <strong>USG0071</strong>
<strong>Lathem</strong> Security SolutionsIMPORTANT!• Disassembling the <strong>LX100</strong> in any way will void the warranty.• The <strong>LX100</strong> is designed for interior use only.• The <strong>LX100</strong> is not recommended for building exit doors.• The <strong>LX100</strong> is not reversible from Right to Left hand or vice-versa.Make sure you have the correct model for your door.• There are 2 backup keys included for emergency purposes. <strong>Lathem</strong>does not manufacture or stock extra keys. Store them appropriately.• Make sure your door is between 1 3/8” – 2” thick.• <strong>Lock</strong> requires 4 AA (1.5 volt) alkaline batteries not included.THIS EQUIPMENT COMPLIES WITH FCC CLASS-A REQUIREMENTSPURSUANT SUBPART J OF PART-15This device complies with Part 15 of the FCC Rules. Operation is subject to the following two conditions: (1)this device may not cause harmful interference, and (2) this device must accept any interference received,including interference that may cause undesired operation.WARNING: Changes or modifications to this product not expressly approved by the party responsible forcompliance could void the user’s authority to operate this equipment.NOTE: This equipment has been tested and found to comply with the limits for a Class A digital device,pursuant to Part 15 of the FCC Rules. These limits are designed to provide reasonable protection againstharmful interference in a business installation. This equipment generates, uses, and can radiate radiofrequency energy and, if not installed and used in accordance with the instructions, may cause harmfulinterference to radio communications. However, there is no guarantee that interference will not occur in aparticular installation. If this equipment does cause harmful interference to radio or television reception,which can be determined by turning the equipment off and on, the user is encouraged to try to correct theinterference by one or more of the following measures:This Class A digital apparatus complies with Canadian ICES-003.Page 2
<strong>LX100</strong> User’s <strong>Guide</strong>IntroductionThe <strong>LX100</strong> is a keyless proximity door lock that fits moststandard doors. Simply replace your existing cylindrical styledoor handle with the <strong>LX100</strong> for an economical access controlsystem for your business or home. The locks provide standalone operation and do not require the use of a computer or anyexternal device for programming. They are powered by standardalkaline batteries eliminating the need for wiring. The <strong>LX100</strong>uses radio frequency technology to instantly identify proximitybadges and key fobs. No transaction history is retained.<strong>LX100</strong> Features• User-installable access control• 120 user capacity per lock• Operates for 1 year or 4,000 activations on batteries• Heavy duty all metal construction• Lighted display & audio alerts for badge authorization• Stand-alone operation - no computer required• One year warranty• Designed in the USAInstallationPlease refer to the separate Quick Start <strong>Guide</strong> enclosed with thelock for basic installation instructions. More detailed installationinstructions, including the preparation of new doors, arecontained in the back of this User’s <strong>Guide</strong>.Page 3
<strong>Lathem</strong> Security SolutionsUsing the <strong>LX100</strong>When a badge or key fob is placed over the reader window ofthe <strong>LX100</strong>, it instantly reads its unique encoded ID number andverifies that it has been authorized to open the door. The <strong>LX100</strong>comes with five preprogrammed badges which can be usedimmediately following installation with no additional setuprequired.ReaderWindowKeyholeCoverHandlePage 4
<strong>LX100</strong> User’s <strong>Guide</strong>Good BadgeIf the badge or key fob has been programmed into to the lock,the <strong>LX100</strong> flashes a blue light, sounds a positive tone, andengages the door handle to allow access. The default unlockwindow to open the door is 5 seconds, but this can becustomized for each lock to 3 or 10 seconds (see CustomizingUnlock Window).TouchBadge toReaderWindowLightFlashesBLUEPressHandleDown toOpen <strong>Door</strong>Bad BadgeIf a badge or key fob has not been programmed into the lock, the<strong>LX100</strong> will flash a red light and a sound a negative tone. Thehandle will not engage the latch and the door will not open.LightFlashesREDHandle WillNot Open<strong>Door</strong>Page 5
<strong>Lathem</strong> Security SolutionsBadges and Key FobsThe <strong>LX100</strong> supports the use of <strong>Lathem</strong> proximity ID badges(included with lock) or optional <strong>Lathem</strong> proximity key fobs thatusers can simply attach to their key chains. The use of badgesor key fobs is an individual user preference, and they can beused interchangeably on any lock.A badge or key fob can be programmed to be one of two distincttypes of users of the <strong>LX100</strong>: Master or UserMaster BadgesMasterBadgeStickerThe Master not only allows access through the door, but alsoprovides additional administrative rights to the holder so they canadd and remove users as needed. The <strong>LX100</strong> supports up to two(2) Master badges or key fobs. Each Master can add up to 59individual <strong>Users</strong>. Therefore, the <strong>LX100</strong> supports up to 120 totalauthorized users including the two Masters. The <strong>LX100</strong> comeswith one preprogrammed Master badge, which is identified bythe global key sticker located in the lower left corner of one of thebadges. This Master badge can begin accessing the lock andadding or removing users as needed without any additionalprogramming (see Adding a Master).Page 6
<strong>LX100</strong> User’s <strong>Guide</strong>User BadgesA User badge or key fob allows access through the door. Userbadges or key fobs are added by a Master badge. There can beup to 59 User badges assigned to each Master card. The <strong>LX100</strong>comes with four (4) preprogrammed User badges. Thesebadges do not have the global key sticker like the Master badge.These User badges can begin accessing the lock immediatelywith no additional programming needed.Page 7
<strong>Lathem</strong> Security SolutionsBackup KeysThe keys enclosed with your <strong>LX100</strong> are for backup purposes inthe event of badge loss or battery failure only. Keep your keys ina protected and easy-to-remember location OUTSIDE of theroom the lock is on. <strong>Lathem</strong> does not manufacture or stock extrakeys. You are responsible for their safekeeping.1. The keyhole cover is attached using a high-powered magnet.Your backup keys also have a smaller magnet embedded onone side to assist in removing the keyhole cover. Or, youcan use your fingernail to pry open the cover.2. After removing keyhole cover, place key in keyhole witharrow and notch pointing up to align with dot above keyhole.3. Insert key and turn to the right until key stops.4. While key is turned, push handle down to open door.Page 8
<strong>LX100</strong> User’s <strong>Guide</strong>Adding a Master BadgeRemove the interior handle from over the battery compartment.Press the Program Button four times, one right after another.ProgramButtonPressandRelease4 <strong>Time</strong>sThe blue light will appear and you will hear a long beep.LightTurnsBLUEPage 9
<strong>Lathem</strong> Security SolutionsSelect badge to assign as a Master, and place it over the readerwindow. Note: If this is a current User badge, you must firstdelete this User from the <strong>LX100</strong> before it can be added as aMaster.Touch Badgeor Fob to beprogrammedas a MasterLightFlashes 5<strong>Time</strong>sThe light will flash blue five times, and the Master badge is nowprogrammed. Place the extra Master badge sticker included withthe lock on the corner of the badge.MasterBadgeStickerTest your new Master badge by placing it back over the readerwindow. You should hear a short beep, followed by 5 flashingblue lights. Your Master badge has been successfullyprogrammed.If you see a red light and hear 3 quick beeps the Master badgewas not successfully programmed. Repeat these steps untilsuccessfully added.Page 10
<strong>LX100</strong> User’s <strong>Guide</strong>Adding a User BadgePlace a Master badge over the reader window until you hear abeep.MasterBadgeThe blue light will begin flashing. Place a new User badge overthe reader window.New UserBadgeFlashingBLUElightYou will hear an ascending tone, and the User badge is nowadded. You have 5 seconds after adding a badge, to continueadding more badges by placing them on the reader window. Tofinish the process, simply wait 5 seconds for the window totimeout. You will hear a buzz, and the lock returns to normaloperating mode.Page 11
<strong>Lathem</strong> Security SolutionsDeleting an Individual Badge OnlyYou can not individually delete a Master badge. Only Userbadges can be individually deleted. You must reset the lock,deleting ALL badges, to delete a Master badge (see Resettingthe <strong>Lock</strong>).Place the Master badge used to originally add the User over thereader window three (3) times in succession. You will hear abeep each time and the blue light will flash.MasterBadgePlace onWindow3 <strong>Time</strong>sin a rowWithin 5 seconds, place the User badge you wish to delete overthe reader window.UserBadge tobedeletedListen fortwo sets ofascendingtonesThe User badge is now deleted.Page 12
<strong>LX100</strong> User’s <strong>Guide</strong>Deleting All User Badges OnlyYou can delete all of the User badges assigned to a specificMaster badge without deleting the Master badge itself.Place the Master badge, originally used to add the <strong>Users</strong>, overthe reader window four (4) times in succession. You will hear abeep each time and the blue light will flash.MasterBadgePlace onWindow4 <strong>Time</strong>sin a rowWithin 5 seconds, place ANY User badge over the readerwindow.User Badgeto bedeletedALL of the User badges are now deleted, but the Master badgeis still programmed.Page 13
<strong>Lathem</strong> Security SolutionsCustomize Unlock Window <strong>Time</strong>This specifies the door open time after a valid badge is used.Remove the interior handle from over the battery compartment.Press the Program Button once to set the unlock window to 3seconds.Press the Program Button twice within 2 seconds to set theunlock window to 5 seconds.Press the Program Button three times within 2 seconds to set theunlock window to 10 seconds.You will hear either 3, 5 or 10 beeps confirming your setting.ProgramButtonPressandRelease1 to 3<strong>Time</strong>sPage 14
<strong>LX100</strong> User’s <strong>Guide</strong>“Meeting Mode” Setting (<strong>Lock</strong> Bypass)Warning: Meeting Mode disables the lock and bypasses theuse of badges for authorization. When in this mode, the lockwill function only as a door handle. These badges will serve as“on/off switches” if a room is being used for a long meeting, etc.1. The badge(s) you assign to Meeting Mode will serve thisfunction solely and cannot be used as a User badge. So,if you have a badge that’s been programmed as a Userbadge and want to reprogram it as Meeting Mode badge,you must first clear the User badge programming aspreviously described in “Deleting an Individual Badge”.2. Remove Interior handle & place Master badge on displayonce, then remove. After you hear one “beep” and seeblue light flashing, press the programming button once.TouchMasterBadge toReaderWindowPressbuttonONCEPage 15
<strong>Lathem</strong> Security Solutions3. The light will now flash red and blue. Place the badgeyou want to program for Meeting Mode on the display.You will hear 4 ascending notes (1-2-3-4).Place unprogrammedUserBadge on ReaderWindow whilelights are flashing4. This badge will now allow you to turn off theauthorization of badges and override the lock for as longas you wish. To return the lock to normal, simply presentthe Meeting Mode badge once more or any badgeprogrammed to this lock.5. Label the badge as you prefer in the “Name” field(i.e. “Meeting Badge for Conference Rm.”) and storebadge in a secure location.6. To clear the Meeting Mode badge see “Deleting anIndividual Badge”. This will return the badge to a vacant,un-programmed status.7. You can program up to 58 Meeting Mode badges perMaster badge.Page 16
<strong>LX100</strong> User’s <strong>Guide</strong>Resetting the <strong>Lock</strong>Remove the Interior handle.Press and hold down the Program Button for 5 seconds.ProgramButtonPressand Holdfor 5SecondsThe blue LED will appear and you will hear one beep, followedby 3 ascending tones. Release the Program Button. The lock isnow completely reset and all badges have been removed. Youmust add new badges, including a Master badge, to begin usingthe lock again.Page 17
<strong>Lathem</strong> Security SolutionsUsing Multiple <strong>Lock</strong>sIf you have purchased multiple <strong>LX100</strong>s, you can configure andchange the badge accessibility to each of your locks as youprefer. Remember that each lock is stand alone which meansyou must program them individually. However, this also meansyou have greater flexibility to customize access to rooms asemployees or work areas change.For example, if you want to program a User badge from <strong>Lock</strong> #1to also access <strong>Lock</strong> #2, simply use <strong>Lock</strong> #2’s Master badge toadd it to <strong>Lock</strong> #2.Please note: We suggest you maintain a list of which badges areprogrammed to which locks (example below), location ofemergency backup keys and Meeting Mode badges. Keep thelist updated frequently.Sample <strong>Lock</strong> Assignment List<strong>Lock</strong> Location Master Badge(s) <strong>Users</strong>InventoryConference RoomJohnJohnRitaIT Closet John PhilMikeCynthiaMikeCynthiaPhilOffice Suite B Rita NonePage 18
<strong>LX100</strong> User’s <strong>Guide</strong>Maintaining the <strong>Lock</strong>The <strong>Lathem</strong> <strong>LX100</strong> is designed for years of trouble-freeoperation. The only routine maintenance typically required is thechanging of batteries and occasional cleaning.You should routinely check your batteries every few monthsdepending on the usage of door.LOW BATTERY INDICATOR: When the batteries begin to runlow, you will see the Red light flash and a beep after badges areused. You may also notice that the volume of the beepsdecreases. Change all four batteries (AA alkaline only) as soonas possible.Clean handle by spraying a small amount of glass cleaner on toa towel and wipe handles with soft towel.Periodically inspect handles for tampering, vandalism or “wearand tear”. After a period of usage, you may find it beneficial toretighten the connecting screws by removing the Interior handleand using a screwdriver.Page 19
<strong>Lathem</strong> Security SolutionsInstalling the <strong>Lock</strong>PLEASE NOTE: We have used a Right hand <strong>LX100</strong> forpurposes of demonstration in this User <strong>Guide</strong>.1. Affix the gaskets to the Exterior handle and battery pack.Use the 4 “dimple” guides in each corner and insert them incorresponding holes, peel away sticker and attach.2. Install connecting pillars to Exterior handle with pillar wrenchincluded as shown below.PillarwrenchPage 20
<strong>LX100</strong> User’s <strong>Guide</strong>3. Insert axle (short axle for thinner doors, longer axle forthicker doors included) into center turning hub. Make surethe “dot” is up on the turning hub and holes are verticalon axle.4. Insert securing pin downward thru top of turning hole, thruaxle until pin is completely thru.5. Bend “legs” of pin outward around turning hole to secure.You may require pliers to do this.Page 21
<strong>Lathem</strong> Security Solutions6. If the axle and pillars fit, you may elect to keep your currentlatch in place or remove it and replace with the latchincluded. To expand latch for larger door hole, hold front oflatch with one hand and pull on center axle hub. Make surethat latch slope faces the same direction the door closes.Secure with 2 small latch screws provided.7. Place Exterior handle on door: <strong>Guide</strong> wire thru door holeover top of latch assembly. Place connecting pillars thrulatch holes and axle thru center hole. Make sure the dot isstill up on the axle turning hub.Page 22
Futures Thinking for Academic LibrariansConclusionEffective futures work requires observation, intuition, interpretation, creativity, and imagination. Theaim of futures research is to reorient our thinking. For the futurist Gordon, the worth of a forecast is inhow well it prepares us for an inherently uncertain future. He advocated that we reflect on:Whether it has illuminated the unknown while shaking our assumptions, forcing us to clarify ourthinking, stimulating and structuring difficult discussions, and getting us to ask the rightquestions and face the hard choices required to adapt ourselves and our organizations tomanage future change (2009, p. 24).Based on the participant responses to the wide range of possible scenarios we presented, it seems wehave indeed helped academic librarians think about what questions to ask and choices to make to thrivein the future. We hope it does the same for you.ReferencesBazerman, M., & Watkins, M. (2004). Predictable surprises: The disasters you should have seen comingand how to prevent them. Boston, MA: Harvard Business School Press.Dator, J. A. (2002). Introduction: The future lies behind – thirty years of teaching futures studies. In J.A.Dator (Ed.), Advancing futures: Future studies in higher education (pp. 1-32). Westwood, CT:Praeger.Day, G. & Schoemaker, P. (2006). Peripheral vision: Detecting the weak signals that will make or breakyour company. Boston, MA: Harvard Business School Press.Deiss, K. & Petrowski, M.J. (2009) ACRL 2009 strategic thinking guide for academic librarians in the neweconomy. Chicago, IL: ACRL. Retrieved fromhttp://www.acrl.org/ala/mgrps/divs/acrl/issues/value/acrlguide09.pdf.Giesecke, J. (Ed.). (1998). Scenario planning for libraries. Chicago, IL: ALA Editions.Gordon. A. (2009). Future savvy: Identifying trends to make better decisions, mange uncertainty, andprofit from change. New York, NY: American Management Association.Hines, A., & Bishop P. (2006). Thinking about the future: <strong>Guide</strong>lines for strategic foresight. Washington,DC: Social Technologies.Johansen, R. (2007). Get there early: Sensing the future to compete in the present. San Francisco, CA:Berrett-Koehler Publishers.Mead, M. (2005). The world ahead: An anthropologist anticipates the future R. B. Textor, (Ed.). NewYork, NY: Berghahn Books.Page 23http://www.ala.org/ala/mgrps/divs/acrl/issues/value/futures.cfm
<strong>Lathem</strong> Security Solutions11. Make sure Exterior handle and battery pack are straight asyou tighten connector screws.12. Connect wire to circuit board underneath the bottom batteryon the battery pack. Observe how pins align with plasticconnector.13. Push back any excess wire thru the rectangular opening.Page 24
<strong>LX100</strong> User’s <strong>Guide</strong>14. Install 4 new AA (1.5 volt) alkaline batteries (not included)into battery pack on Interior handle. Make sure they areinstalled in the correct direction and are firmly seated inposition. You will hear a buzz, indicating the lock isenergized.15. Place Interior handle cover over battery pack and securewith 2 screws on top and bottom. Do not over-tighten theInterior handle! Doing so may affect the performance of thelock.Page 25
<strong>Lathem</strong> Security SolutionsPreparing a New <strong>Door</strong>Verify that your new door is 1 3/8” – 2” thick.1. Use the enclosed “<strong>Door</strong> Cutting Template” to mark your drillholes.Note: Position template at correct height (suggested:38” or 97 mm from floor). Mark center for lock hole.2. Drill 2 1/8” hole through door. Do this by drilling oncefrom each side to center of door to avoid damaging door.3. Drill 1 1/8” latch hole being sure to align the center of thelatch hole with the center of the main door hole.Page 26
Latch InstallationUse enclosed “Strike Plate Cutting Template” to cut andinstall latch in door as indicated below.<strong>LX100</strong> User’s <strong>Guide</strong>1. Insert latch into 1 1/8” latch hole in “width” of door. Latchis expandable, depending on the size of your door hole,to 2 ¾”. To expand latch, hold front of latch with onehand and pull on center axle hub.2. Trace around the perimeter of the latch faceplate tocreate your chisel border. Remove latch in order tochisel.3. Chisel out wood as indicated on template (1/8”) untilfaceplate fits flat with door edge.Important: Be sure to install the latch to match your lock(Right or Left hand).4. Make sure that latch slope faces the same direction thedoor closes.5. Fasten latch to door with 2 small latch screws.Page 27
<strong>Lathem</strong> Security SolutionsStrike Plate & Dust Boot Installation1. If you are installing on an existing door jamb, you may beable to use your existing strike. However, it is recommendedthat you use the strike included.2. On a new door, use the “Strike Plate Cutting Template” tomark and install the strike plate. Center the metal strike plateover the dust boot with the curved edge facing the interior ofthe room. The goal is to have the metal strike plate flush withyour door jamb.3. Insert dust boot and secure strike plate with screws provided.Test opening and closing of door and adjust as needed.Page 28
<strong>LX100</strong> User’s <strong>Guide</strong>TroubleshootingProblemNo response from badgeBadge will not operate door(error beep heard)SolutionMake sure you’re holding badge on windowand allow 1 – 2 seconds.Batteries may be expired. Replace with newbatteries.Badge damaged – replace badge.Badge not assigned – follow steps to enrollUser badgeBadge damaged – replace badge.Can’t assign User badgeMaximum badges assigned – each Masterbadge can program up to 58 User badges.You have probably exceeded this maximum.Master badge not assigned – follow steps toassign master badge.Red light beepingSound is lowTurn handle, but latchsticks, won’t return tooutright position.Button isn’t making a“beep” when programming.Batteries appear to bedead and keys aremisplaced.Badge not enrolled for lock. Or, batteries arelow and should be replaced. Be sure to usefour new AA alkaline batteries.Batteries are low or not installed properly.One battery could be inserted in the wrongdirection.Check the Interior door handle to make sureit’s not overly tightened. Loosen screwsslightly.Follow programming instructions as printedand use ascending notes (1-2-3-4) as anindicator of successful programming.Remove lock from door.Page 29
<strong>Lathem</strong> Security SolutionsOne Year Warranty<strong>Lathem</strong> warrants the hardware product described in this guide against defects inmaterial and workmanship for a period of one year from date of original purchasefrom <strong>Lathem</strong> or from an authorized <strong>Lathem</strong> reseller. The conditions of thiswarranty and the extent of the responsibility of <strong>Lathem</strong> <strong>Time</strong> <strong>Corporation</strong>(“<strong>Lathem</strong>”) under this warranty are listed below.1. This warranty will become void when service performed by anyoneother than an approved <strong>Lathem</strong> warranty service center results indamage to the product.2. This warranty does not apply to any product which has been subject toabuse, neglect, or accident, or which has had the serial number alteredor removed, or which has been connected, installed, adjusted, orrepaired other than in accordance with instructions furnished by<strong>Lathem</strong>.3. This warranty does not cover labor cost for removing and reinstallingthe machine for repair, or any expendable parts that are readilyreplaced due to normal use.4. The sole responsibility of <strong>Lathem</strong> under this warranty shall be limited torepair of this product, or replacement thereof, at the sole discretion of<strong>Lathem</strong>.5. If it becomes necessary to send the product or any defective part to<strong>Lathem</strong> or any authorized service dealer, the product must be shippedin its original carton or equivalent, fully insured with shipping chargesprepaid. <strong>Lathem</strong> will not assume any responsibility for any loss ordamage incurred in shipping.6. WARRANTY DISCLAIMER AND LIMITATION OF LIABILITY: Exceptonly the limited express warranty set forth above, the products are soldwith no expressed or implied warranties of any kind, and the impliedwarranties of merchantability and fitness for a particular purpose arehereby expressly disclaimed. No warranties are given with respect toproducts purchased other than from <strong>Lathem</strong> or an authorized <strong>Lathem</strong>reseller and any such products are purchased “as is, with all faults.” Inno event will <strong>Lathem</strong> be liable for any direct, special, or consequentialdamages arising out of or in connection with the delivery, use orinability to use, or performance of this product. In any event anylimited remedy given herein shall be deemed to have failed of itsessential purpose; <strong>Lathem</strong>’s maximum liability shall be to refund thepurchase price upon return of the product.7. Proof of date of purchase from <strong>Lathem</strong> or an authorized <strong>Lathem</strong>reseller is required for warranty service on this product.8. This Warranty grants specific legal rights. Additional legal rights, whichmay vary by locale, may also apply.9. Should any difficulties arise with the performance of this product duringwarranty, or with any <strong>Lathem</strong> authorized service center, contact<strong>Lathem</strong> at the address below.<strong>Lathem</strong>, Inc.200 Selig Drive, SW, Atlanta, GA 30336404-691-0405www.lathem.comPage 30
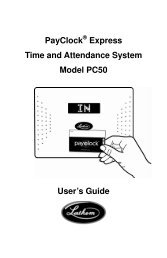
<strong>LX100</strong> User’s <strong>Guide</strong>AccessoriesAccessories are normally available from the place where youoriginally purchased your <strong>LX100</strong> door lock or online athttp://shop.lathem.comAdditional Proximity Badges (RF-BADGE)Use to add more users to your door lock orreplace lost or stolen badges. These are thesame badges used with <strong>Lathem</strong>’s PC50Proximity <strong>Time</strong> & Attendance System.Proximity Key Fobs (RFKEY-5)These compact alternatives to badgesattach to a key chain for convenient use.Badge Reels(BREL-5)Attach these retractable badge reels to abelt for quick access to the badge atanytime.Proximity <strong>Time</strong> & Attendance System (PC50-KIT)Employees use the same badge to unlockdoors as well clock in and out. PayClockExpress comes with time clock, USB cable,software and 15 additional proximity badges.Page 31
<strong>Lathem</strong> Security SolutionsPage 32