Prisma Plus Assembly Guide - Schneider Electric
Prisma Plus Assembly Guide - Schneider Electric
Prisma Plus Assembly Guide - Schneider Electric

You also want an ePaper? Increase the reach of your titles
YUMPU automatically turns print PDFs into web optimized ePapers that Google loves.
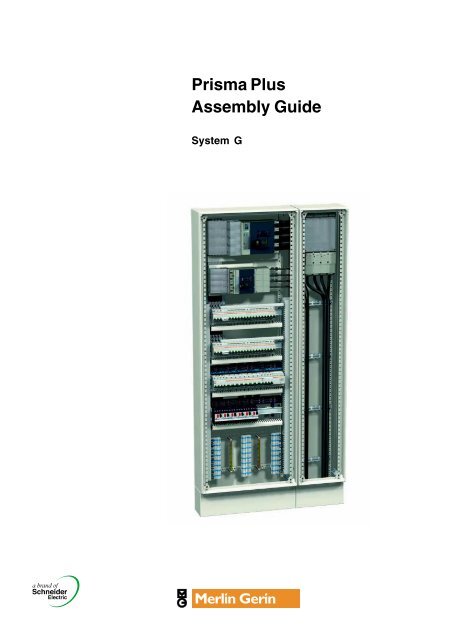
PrefaceThis guide proposes a procedure for assembling the <strong>Prisma</strong> <strong>Plus</strong> “System G”.We have designed it to help you successfully complete your first projects. It ensuresthat assembling and cabling staff, for whom it is intended, will benefit from theconsiderable experience in this field acquired by <strong>Schneider</strong> <strong>Electric</strong> and itscustomers. In short, it is an essential workshop tool.There are several approaches for assembling <strong>Prisma</strong> <strong>Plus</strong> components. In thisguide we propose one approach which you can add to according to yourprofessional organisation and experience.This guide does not replace the technical manuals supplied in the packing of eachcomponent, but recommends an assembly sequence for the components andprovides information to complement that given in the manuals (assembly tips andtricks, specific assembly recommendations, warnings, etc.).<strong>Assembly</strong> guide - System G - Version 5.01Merlin Gerin
<strong>Assembly</strong> guide - System G - Version 5.03Merlin Gerin
Presentation of the componentsWall-mount enclosure structure1. Pillar2. Rear panel3. Functional upright4. Top plate5. Bottom plate6. Gland plate7. Side panelMounting plates and switchgear8. Horizontal Compact NS incoming unit on mounting plate9. Multi 9 mounting plate: modular rail10. ContactorsBusbars11. Powerclip insulated busbar12. Tap-off blocksDistribution blocks13. Multiclip14. Comb busbarWiring running15. Trunking16. Trunking for fine wiringPower cables17. Incoming connection block18. Power supply block19. Earthing terminal blockFront panel finish20. Front plate support frame21. Front plate22. BarrierCover panels23. Transparent door24. Plain wicket door<strong>Assembly</strong> guide - System G - Version 5.04Merlin Gerin
Presentation of the componentsPD3906742641818171320221191471216103151956212324<strong>Assembly</strong> guide - System G - Version 5.05Merlin Gerin
Instructions for useThis manual describes a procedure for assembling the <strong>Prisma</strong> <strong>Plus</strong> “system G”. Itthus indicates the order in which the cubicle components are to be assembled: thetechnical assembly instructions are found in the manuals supplied in the packagingof each componentThe drawings often represent the wall-mount enclosures in vertical position but it isbetter to work horizontally on a table.A) Before starting to assemble, you must first identify and sort thecomponents.B) The actual assembly process, divided up into 7 stages, is organised asfollows:1 – Assembling the rear panel of the wall-mount/floor standing enclosure2 – Installing the busbars3 – Installing the mounting plates4 – Running and cabling the power circuits5 – Running and cabling the low power and auxiliary circuits6 – Installing the partitioning7 – Finishing the front panel and fitting the switchboard panelsEach assembly stage is symbolised by a pictogram also found in the assemblymanual. In most cases, the pictogram in the manual can be seen through thepackaging’s plastic film.For some configurations of the cubicle in question, you will not have to carry out allthe operations proposed.C) Testing as per standard IEC 60439-1 must be carried out.D) The last stage consists of packing the switchboard to ensure protection ofthe cubicles during transport.<strong>Assembly</strong> guide - System G - Version 5.06Merlin Gerin
ToolsThe recommended tool lists for this section are not complete, but represent theminimum tools required to assemble, cable and inspect the <strong>Prisma</strong> <strong>Plus</strong> “system G”cubicles.Assembling and cabling toolsb Individual toolsThe tool kit belonging to the assembling and cabling staff must contain at least thefollowing tools:DD382164Type of assemblySwitchboard mounting: enclosure,mounting plate and panels exceptfor switchgearTools1 ratchet wrench1 extension piece1 x 10 and 13 mm wrench1 wrench bit socket1 screwdriver1 wrench bit for screwdriver1 wrench bit for pozidriv no. 2 recess1 x 8 flat screwdriver1 portable jig-sawMounting the switchgear and Socket 7, 8, 10, 13, 16, and 17 mmtightening the connections Hexagon socket bit 4, 5, 6, 8 and 10(Compact NS, etc.)Wrench bit for pozidriv no. 1, 2 and 3 recessDD382258Cabling the switchboard1 flat screwdriver 3 mm - 3.5 mm - 4 mm - 5.5 mm1 pozidriv no. 2 screwdriver1 electrician’s knife1 flat nose pliers1 stripping pliers1 cable cutter1 crimping tool1 diagonal cutting pliers1 half round nose pliers1 bell or testerb Group toolsK 1 torque wrench to tighten all electrical connections to the required torque (max.torque 50 Nm).K 1 set of shears to cut flexible bars.K 1 punching machine for flexible bars.K 1 electrical saw.K 1 drill.K 1 vacuum cleaner for switchboard cleaning.NB: When crimping the lugs, only the pliers recommended by the lug manufacturermust be used.DD382260Inspection toolsb Individual toolsThe quality inspector’s basic individual tools are the same as for the assemblingand cabling staff, with in addition the few tools below:K 1 small hinged mirror.K 1 electrical lamp or portable lamp.b Group toolsK 1 control console.K 1 dielectrometer.K 1 Multimeter.DD382261DD382263<strong>Assembly</strong> guide - System G - Version 5.07Merlin Gerin
Assemble the rear panel of thewall-mount/floor-standingenclosuresAssembling the IP 55 wall-mount enclosuresDD382297b Take the rear panel, pillars and the assembly manual out of the packingb Store the rest of the packingTip: The mounting hardware must be carefully associated with each wall-mountenclosure.During storage, take measures to prevent damaging component paintwork.b Mount the pillars on the rear panelDD382299DD382300DD382298b Couple the ducts, additional wall-mount or floor-standing enclosuresThe combination kit must be used to couple wall-mount enclosures.When coupling the enclosures, ensure that the gaskets are positioned properly.Tip: Do not handle the rear panel of the wall-mount or floor-standing enclosure usingthe pillars.<strong>Assembly</strong> guide - System G - Version 5.010Merlin Gerin
Install the busbarsAim: This stage consists of positioning the supports and barsmaking up the busbars.Tip: If cutting oil is used, the busbars must be cleaned prior to assembly as oiladversely affects insulation properties.NB:K Busbar overall dimensions do not vary with current strength.K Whatever the busbar type, the order of the bars is always the same: from thefront to the rear N, L1, L2 and L3.K With the rear busbar, the Neutral is to the left, then L1, L2, L3.DD382301Installing the Powerclip 125 to 630 A insulated busbarNB: The busbars are mounted before the mounting plates, except for plates cat. no.03032, 03073 and 03074 that must be mounted before the Powerclip insulatedbusbar (for more details on mounting plate installation, refer to the assembly stage“Installing the mounting plates”).To prevent assembly interference between busbar supports and mounting plates,we recommend that you follow the assembly order below:b Position the mounting plates but do not secure themb Define the busbar support positionsb Remove the mounting plates except for those that have to be mountedbefore the busbarb Secure the supports and clip the Powerclip insulated busbar into thenotchesNB: Pay attention to the mounting direction of the Powerclip insulated busbar (referto the assembly manual).When the Powerclip busbar is supplied by a power supply block, ensure that itreaches the top level of the incoming device mounting plate.If busbar length needs to be adjusted, cutting must be extremely accurate and onno account exceed the cutting line.When handling the Powerclip busbar, take care not to break the end of thed partitions. For safety reasons (creepage distance, insulation, etc.), do notinstall a Powerclip busbar with a broken partition.b Store the covers of the Powerclip insulated busbar. They will be installedonce the wall-mount or floor-standing enclosure has been cabled.DD382302Installing the 160 to 400 A rear busbars in vertical positionb Fit the busbar with its supports but do not screw them on as they may betransferred later when laying the power cables.b Mark the bars (N – L1 – L2 – L3).DD382303Installing the 160 to 630 A multi-stage busbars in the ductb Fit the multi-stage busbar with its supportsb Mark the bars (N – L1 – L2 – L3).<strong>Assembly</strong> guide - System G - Version 5.011Merlin Gerin
Install the mounting platesAim: This stage consists of defining the position of the mountingplates in the wall-mounted or floor-standing enclosure and installingthem with their devices.DD382304The order of assembly of the mounting plates and devices depends on the technicalfeatures of the devices.NB: To define the position of a mounting plate of a functional unit, you need to knowthe overall dimensions of the functional unit, i.e. the number of modules(1 module = 50 mm). This number is given in the mounting plate assembly manualand the catalogue. The reference m0 is the reference starting point for installation ofthe first mounting plate. There is 1 reference m0 at each corner, materialised by amark and a slot, used to hook up a measuring tape to measure the height to becomplied with when installing a mounting plate.Installing the mounting plates and switchgearb Mount the devices on their mounting plateDD382307m0XHDD382305DD382306Device Fixing <strong>Assembly</strong> orderCompact NS and INS Fixed b Place the devicey 630 Aon the mounting plateb Install the equippedmounting plateWithdrawable b Place the plinth or rack onor plug-in the mounting plateb Install the equippedmounting plateb Plug in the deviceModular devices Modular b Install the railsystem b Place the modular deviceson the railb Define the positions of the functional unit mounting plates and install them:K the position of a mounting plate depends on the overall dimensions of thefunctional unit that is characterised by a number of modules (1 module = 50 mm),K the number of modules is given in the catalogue and in the assembly manual,K install the equipped mounting plates starting at level m0.DD382308Checking switchgear positionThis operation allows operator inspection and prevents incorrect positioning of thefunctional unit with respect to the front panel, once the wall-mount or floor-standingenclosure has been fully cabled.Use of the front panel enables mounting plate and device position to be validated.b Place the necessary front plate mounting parts:K place the functional uprights in the wall-mount/floor-standing enclosure,K place the uprights in the IP55 wall-mount enclosure,K place the sides in the IP30 duct.b Install the front plates to check device position.Also check the depth of the devices mounted on an adjustable modular rail.DD382309b Remove the front panel without taking the front plates apart, as well as thesides for the IP 30 wall-mount (or floor-standing) enclosure and ductcombination.<strong>Assembly</strong> guide - System G - Version 5.012Merlin Gerin