Regency Hume Manual - Pivot Stove & Heating
Regency Hume Manual - Pivot Stove & Heating
Regency Hume Manual - Pivot Stove & Heating

Create successful ePaper yourself
Turn your PDF publications into a flip-book with our unique Google optimized e-Paper software.
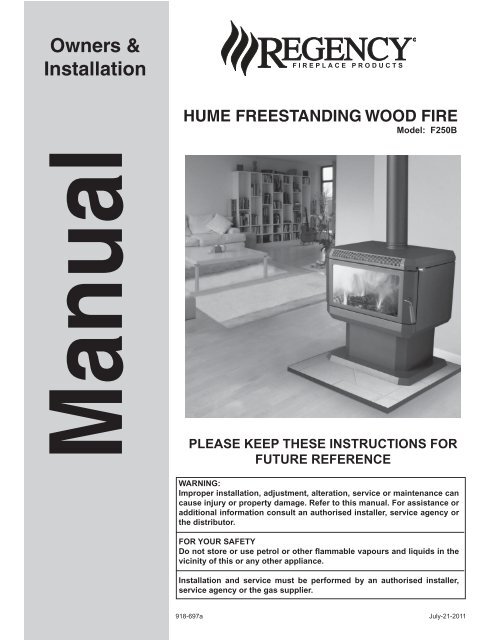
Owners &InstallationHUME FREESTANDING WOOD FIREModel: F250B<strong>Manual</strong>PLEASE KEEP THESE INSTRUCTIONS FORFUTURE REFERENCEWARNING:Improper installation, adjustment, alteration, service or maintenance cancause injury or property damage. Refer to this manual. For assistance oradditional information consult an authorised installer, service agency orthe distributor.FOR YOUR SAFETYDo not store or use petrol or other flammable vapours and liquids in thevicinity of this or any other appliance.Installation and service must be performed by an authorised installer,service agency or the gas supplier.918-697aJuly-21-2011
Thank-you for purchasing aREGENCY FIREPLACE PRODUCT.The pride of workmanship that goes into each of our products will give you years of trouble-freeenjoyment. Should you have any questions about your product that are not covered in this manual,please contact the REGENCY DEALER in your area.Keep those REGENCY FIRES burning.SAFETY NOTE: If this wood fi re is not properly installed, a house fi re may result. For your safety,follow the installation instructions, contact local building, fi re offi cials, or authority having jurisdictionabout restrictions and installation inspection requirements in your area.The authority having jurisdiction should be consulted before installation to determine the need toobtain a permit.2<strong>Regency</strong> <strong>Hume</strong> Freestanding Wood Fire
TABLE OF CONTENTSData Badge............................................................................4Unit Dimensions ....................................................................5INSTALLATIONResidential Installation...........................................................6Safety Guidelines and Warnings ...........................................6Brick & Cast Installation.........................................................6Clearance to Combustibles ...................................................7Floor Protection .....................................................................7OPERATING INSTRUCTIONSOperating Instructions ...........................................................8Air Slide Control.....................................................................8First Fire ................................................................................8MAINTENANCEMaintenance ..........................................................................9Creosote ................................................................................9- Ways to Prevent & Keep Units Free of Creosote .........9Glass Maintenance ................................................................9Door Latch Adjustment ..........................................................9Wood Storage ........................................................................9PARTS LIST<strong>Stove</strong> Assembly ...................................................................10WARRANTYWarranty ..............................................................................11<strong>Regency</strong> <strong>Hume</strong> Freestanding Wood Fire 3
SAFETY LABELThis is a copy of the label that accompanieseach F250B Freestanding Wood Fire. Wehave printed a copy of the contents here foryour review.NOTE: <strong>Regency</strong> units are constantly beingimproved. Check the label on the unit and ifthere is a difference, the label on the unit is thecorrect one.4<strong>Regency</strong> <strong>Hume</strong> Freestanding Wood Fire
UNIT DIMENSIONS<strong>Regency</strong> <strong>Hume</strong> Freestanding Wood Fire 5
INSTALLATIONRESIDENTIALINSTALLATION1) Please read this entire manual before youinstall and use your new wood fi re. Failureto follow instructions may result in propertydamage, bodily injury or even death. Beaware that local Codes and Regulations mayoverride some items in this manual. Checkwith your local inspector.2) THE APPLIANCE AND FLUE-SYSTEMSHALL BE INSTALLED IN ACCORDANCEWITH AS/NZS 2918:2001 AND THE AP-PROPRIATE REQUIREMENTS OF THERELEVANT BUILDING CODE OR CODES.APPLIANCES INSTALLED IN ACCORD-ANCE WITH THIS STANDARD SHALLCOMPLY WITH THE REQUIREMENTS OFAS/NZS 4013 WHERE REQUIRED BY THEREGULATORY AUTHORITY.ANY MODIFICATION OF THE APPLIANCETHAT HAS NOT BEEN APPROVED INWRITING BY THE TESTING AUTHORITYIS CONSIDERED TO BE IN BREACH OFTHE APPROVAL GRANTED FOR COMPLI-ANCE WITH AS/NZS 4013.CAUTION: MIXING OF APPLIANCE ORFLUE-SYSTEM COMPONENTS FROMDIFFERENT SOURCES OR MODIFYINGTHE DIMENSIONAL SPECIFICATION OFCOMPONENTS MAY RESULT IN HAZ-ARDOUS CONDITIONS. WHERE SUCHACTION IS CONSIDERED, THE MANU-FACTURER SHOULD BE CONSULTEDIN THE FIRST INSTANCE.3) Select a position for your <strong>Regency</strong> <strong>Stove</strong>.Consult the minimum clearance chart foryour model and set the stove in place. Forclose clearance installation use listed doublewall connector systems.4) To insure vertical alignment, suspend a plumbbob from the ceiling over the exact centerof your stove fl ue and mark a spot on theceiling to indicate the center of the chimney.5) Check that the area above the ceiling is clearfor cutting. Re-confi rm the clearance fromthe stove to combustibles to insure that theyare within the prescribed limits.6) Mark the location of the pedestal base on thefl oor, then move the stove aside and markthe position of the fl oor protector.7) Install chimney according to chimney manufacturersinstructions. The performance ofyour wood fi re is governed to a very largepart by the chimney system. Too short achimney can cause diffi cult start-up, dirtyglass, backsmoking when door is open, andeven reduced heat output. Too tall a chimneymay prompt excessive draft which can resultin very short burn times and excessiveheat output.8) The fl oor protector must be of non-combustiblematerial. Refer to page 7 for fl oorprotector clearances.9) When the fl oor protection is complete, positionthe stove with the fl ue collar centeredunder the installed chimney.10) In seismically active areas, <strong>Regency</strong> recommendsthat your unit is secured to the fl oorby using the bolt down holes inside thepedestal.11) Do not connect this unit to a chimneyserving another appliance.SAFETY GUIDELINESAND WARNINGS1) Never use petrol, petrol type lantern fuels,kerosene, charcoal lighter fuel, or similarliquids to start or ‘freshen up’ a fi re in yourheater. Keep all such liquids well away fromthe heater while it is in use.2) Keep the door closed during operation andmaintain all seals in good condition.3) Do not burn any quantities of paper, garbage,and never burn fl ammable fl uids such aspetrol, naptha or engine oil in your stove.4) If you have smoke detectors, prevent smokespillage as this may set off a false alarm.5) Do not overfire heater. If the chimney connector,fl ue baffl e or the stove top begin toglow, you are overfiring. Stop adding fuel andclose the draft control. Overfi ring can causeextensive damage to your stove includingwarpage and premature steel corrosion.Overfi ring will void your warranty.6) Do not permit creosote or soot build-upin the chimney system. Check and cleanchimney at regular intervals. Failure to doso can result in a serious chimney fi re.7) Your <strong>Regency</strong> stove can be very hot. Youmay be seriously burned if you touch thestove while it is operating, keep children,clothing and furniture away. Warn childrenof the burn hazard. For safety reasons aguard around the fi re is recommended.8) The stove consumes air while operating,provide adequate ventilation with an airduct or open a window while the stove is inuse.9) Do not connect this unit to a chimney fl ueserving another appliance.10) Do not use grates or andirons or othermethods for supporting fuel. Burn directlyon the base or bricks where supplied.11) Open the draft control fully for 10 to 15seconds prior to slowly opening the doorwhen refuelling the fi re.12) Do not connect your unit to any air distributionduct.13) Your wood fi re should burn dry, standardfi rewood only. The use of cut timber, plywood,“mill ends”, etc. is not allowed as thisfuel can easily overheat your wood fi re.Evidence of excessive overheating will voidyour warranty. As well, a large portion ofsawmill waste is chemically treated timber,which is illegal to burn in many areas. Saltdrift wood and chemically treated fi re logsalso must not be burned in your wood fi re.14) No combustible material should be closerthan the clearances as specified on page7.15) DO NOT OPERATE WITH BROKENGLASS.BRICK & CASTINSTALLATIONInsert the rear cast plate fi rst and then the sideplates ensuring the cut out sections lock in firmly.The bricks can then be placed on the base of thefi rebox between the cast side and rear plates.Firebrick is included to extend the life of yourstove and radiate heat more evenly.6<strong>Regency</strong> <strong>Hume</strong> Freestanding Wood Fire
INSTALLATIONMINIMUM CLEARANCE TOCOMBUSTIBLE MATERIALSFlo-MetSuper Single *(1)HawkwindStandardAHD SpecialInsulated *(2)A 400mm 400mm 450mmB 210mm 180mm 300mmC 200mm 200mm 200mmD 181mm 181mm 181mmE 123mm 123mm 123mmF 400mm 400mm 400mmG 1015mm 1015mm 1015mmH 1120mm 1120mm 1120mmFloor ProtectionA combustible fl oor must be protected by non-combustible material (liketile, concrete board, or as defined by local codes) extending beneaththe heater as follows;From Sides:From Front:From Back:123mm400mm181mmThe fl oor protector should consist of 6mm thick cement fi bre sheetwhich has a thermal resistance of 0.8m 2 k/w for 4mm sheets of cementfi bre sheet.IMPORTANT* (1) The Flomet Super Single flue kit must be installed with a 130 o x900mm stainless refl ective shield between decromesh.* (2) The AHD Special Insulated flue kit must be installed with a40mm air gap around the fl ue to any combustible surfaces and theceiling ring must be spaced as such to provide an air gap of 20mm tothe ceiling. The AHD Special Insulated flue kit must be installed witha perforated ceiling plate and 250mm dia. x 195mm high heatshieldpositioned directly above the ceiling plate.The flue pipe shall extend not less than 4.6m above the top of the floor protector.NOTE: Installation must be carried out by a licensed installer in accordancewith AS/NZS 2918:2001.<strong>Regency</strong> <strong>Hume</strong> Freestanding Wood Fire 7
OPERATING INSTRUCTIONSOPERATINGINSTRUCTIONSWith your unit now correctly installed and safetyinspected by your local authority, you are nowready to start a fi re. Before establishing yourfi rst fi re, it is important that you fully understandthe operation of your draft control.CAUTION: THIS APPLIANCE MUST BEMAINTAINED AND OPERATED AT ALL TIMESIN ACCORDANCE WITH THESE INSTRUC-TIONS.CAUTION: THE USE OF SOME TYPES OFPRESERVATIVE-TREATED WOOD AS A FUELCAN BE HAZARDOUS.WARNING: ANY MODIFICATION OF THE AP-PLIANCE THAT HAS NOT BEEN APPROVEDIN WRITING BY THE TESTING AUTHORITYIS CONSIDERED AS BREACHING AS/NZS4013.WARNING: DO NOT USE FLAMMABLELIQUIDS OR AEROSOLS TO START ORREKINDLE THE FIRE.WARNING: DO NOT USE FLAMMABLE LIQ-UIDS OR AEROSOLS IN THE VICINITY OFTHIS APPLIANCE WHEN IT IS OPERATING.WARNING: DO NOT STORE FUEL WITHINHEATER INSTALLATION CLEARANCES.WARNING: OPEN AIR CONTROL (ANDDAMPER WHEN FITTED) BEFORE OPENINGFIRING DOOR.For safety reasons and in order to avoidover firing of your unit do not burn yourfire with the door open or ajar.AIR SLIDE CONTROLBoth the primary and air wash drafts are controlledby the control rod located on the right sideof the unit (when facing the unit). To increaseyour draft - pull open, and to decrease - pushclosed. All units have a secondary draft systemthat continually allows combustion air to theinduction ports at the top of the fi rebox, justbelow the fl ue baffl e.Push - ClosedPull - OpenWARNING: To build a fire in ignoranceor to disregard the information containedin this section can cause seriouspermanent damage to the unit and voidyour warranty!!FIRST FIREWhen your installation is completed and inspectedyou are ready for your fi rst fi re.1) Open control fully.2) Open fi rebox door and build a small fi re usingpaper and dry kindling on the fi rebrickhearth. Secure door on the fi rebox and waita few minutes for a good updraft in the flue toestablish the fi re. (Leaving the door slightlyopen will help your fi re start more rapidly.)CAUTION: Never leave unit unattendedif door is left open. This procedure is forfire start-up only, as unit may overheatif door is left open for too long.3) With the draft still in the fully open positionadd two or three seasoned logs to your fi re.Form a trench in the ash bed to allow air toreach the rear of the fi rebox prior to closingthe door.4) After about 45 minutes, when your woodhas begun to burn strongly, adjust your draftcontrol down to keep the fi re at a moderatelevel.WARNING: Never build a roaring fire ina cold stove. Always warm your stoveup slowly!5) Once a bed of coals has been establishedon the base of the fi rebox, you may adjustthe draft control to a low setting to operatethe unit at its most efficient mode.6) During the fi rst few fi res, keep the combustionrate at a moderate level and avoid alarge fi re. Only after 5 or 6 such fi res canyou operate the stove at its maximumsetting, and only after the metal has beenwarmed.7) For the fi rst few days, the stove will giveoff an odour from the paint. This is to beexpected as the high temperature paintbecomes seasoned. Windows and/or doorsshould be left open to provide adequateventilation while this temporary conditionexists. Burning the stove at a very hightemperature the first few times may damagethe paint. Burn fi res at a moderate level thefi rst few days.8) Do not place anything on the stove topduring the curing process. This may resultin damage to your paint fi nish.8<strong>Regency</strong> <strong>Hume</strong> Freestanding Wood Fire
MAINTENANCE9) During the fi rst few days it may be morediffi cult to start the fi re. As you dry out yourfi rebrick and your masonry fl ue, your draftwill increase.10) For those units installed at higher elevationsor into sub-standard masonry fi replaces,drafting problems may occur. Consult anexperienced dealer or mason on methodsof increasing your draft.11) Some cracking and popping noises may beexperienced during the heating up process.These noises will be minimal when your unitreaches temperature.12) Before opening your door to reload, opendraft fully for approximately 10 to 15 secondsuntil fi re has been re-established. This willminimize any smoking.13) All fuel burning appliances consume oxygenduring operation. It is important that yousupply a source of fresh air to your unitwhile burning. A slightly opened window issuffi cient for the purpose. If you also havea fi replace in your home, a downdraft maybe created by your <strong>Regency</strong> <strong>Stove</strong> causinga draft down your chimney. If this occurs,slightly open a window near your unit.CAUTION: If the body of your unit, flue baffleor any part of the chimney connector startsto glow, you are overfiring. Stop loading fuelimmediately and close the draft control untilthe glow has completely subsided.14) Green or wet wood is not recommended foryour unit. If you must add wet or green fuel,open the draft control fully until all moisturehas been dispersed by the intense fi re.Once all moisture has been removed, thedraft control may be adjusted to maintainthe fi re.15) If you have been burning your stove on alow draft, use caution when opening thedoor. After opening the damper, open thedoor a crack, and allow the fi re to adjustbefore fully opening the door.16) The controls of your unit or the air supplypassages should not be altered to increasefi ring for any reason.CREOSOTEWhen wood is burned slowly, it producestar and other organic vapours, which whencombined with moisture, form creosote. Thecreosote vapours condense in the relativelycool chimney fl ue of a slow burning fi re. As aresult, creosote residue accumulates on the fluelining. When ignited, this creosote can resultin an extremely hot fi re.WARNING: Things to remember in caseof a chimney fire:1. Close all draft and damper controls.2. CALL THE FIRE DEPARTMENT.Ways to Prevent and Keep UnitFree of Creosote1) Burn stove with the draft control wide openfor about 10-15 minutes every morningduring burning season.2) Burn stove with draft control wide open forabout 10 - 15 minutes every time you applyfresh wood. This allows the wood to achievethe charcoal stage faster and burns up anyunburned gas vapours which might otherwisebe deposited within the system.3) Only burn seasoned wood! Avoid burningwet or green wood. Seasoned wood hasbeen dried at least one year.4) A small hot fi re is preferable to a largesmouldering one that can deposit creosotewithin the system.5) The chimney and chimney connector shouldbe inspected at least once every two monthsduring the heating season to determine is acreosote buildup has occurred.6) Have chimney system and unit cleanedby competent chimney sweeps twice ayear during the first year of use and atleast once a year thereafter or when asignificant layer of creosote has accumulated(3 mm/1/8" or more) it should beremoved to reduce the risk of a chimneyfire.MAINTENANCEIt is very important to carefully maintain yourfi replace stove, including burning seasonedwood and maintaining a clean stove and chimneysystem. Have the chimney cleaned beforethe burning season and as necessary duringthe season, as creosote deposits may build uprapidly. Moving parts of your stove require nolubrication.GLASS MAINTENANCEYour <strong>Regency</strong> stove is supplied with 5 mmNeoceram ceramic glass that will withstandthe highest heat that your unit will produce. Inthe event that you break your glass by impact,purchase your replacement from an authorized<strong>Regency</strong> dealer only, and follow our step-by-stepinstructions for replacement.Allow the stove to cool down before cleaningthe glass, do not clean the glass when it is hot.Do not use abrasive cleaners.DOOR LATCHADJUSTMENTThe door latch may require adjustment as thedoor gasket material compresses over time.Follow the steps below to allow the latch tobe moved closer to the door frame, causing atighter seal;1) Unscrew latching sleeve.2) Remove allen screw.3) Spin door handle clockwise to desired depth.4) Re-install allen screw and latching sleeve.5) Adjust set screw to proper depth to ensurethat the handle does not rotate 360 degrees.17) If you burn the unit too slowly or at too lowa setting your unit will not be operating aseffi ciently as it can. An easy rule of thumbsays that if your glass is clean, then yourfl ue is clean and your exhaust is clean.Burn the stove hot enough to keep yourglass clean and you won't need to cleanyour fl ue as often.WOOD STORAGEStore wood under cover, such as in a shed, orcovered with a tarp, plastic, tar paper, sheetsof scrap plywood, etc., as uncovered wood canabsorb water from rain or snow, delaying theseasoning process.AllenScrewSet ScrewLatchingSleeveRear View of Door shown<strong>Regency</strong> <strong>Hume</strong> Freestanding Wood Fire 9
PARTS LISTPart #DescriptionSTOVE ASSEMBLY1) 1160106 Baffl e Top2) 1160118 Securing Pins3) 1170202 Panel Outer Side Left4) 1170203 Panel Outer Side Right5) 1172001 Top Plate/ Panel6) 1172004 Rear Panel7) 8010301 Bricks Set (Set 9)8) 8010302 Liner Cast Iron (Set)9) 8010303 Liner Cast Iron Sides (L & R)10) 8010305 Liner Cast Iron Back11) 8010306 Air Bar Stainless Steel12) 8010307 Glass Neoceram With Gasket13) 8010313 Door Assembly (without handle)14) 8010309 Air Slide15) 8010310 Ash Lip Panel16) 8010114 Door Handle Set17) F250-917 Fan Assembly18) Pedestal Assembly19) 936-060 Door rope seal 5 ft .6" (not shown)5211614133416 1215181097181710<strong>Regency</strong> <strong>Hume</strong> Freestanding Wood Fire
WARRANTY<strong>Regency</strong> Fireplace Products are designed with reliability and simplicity in mind. In addition, our internal Quality Assurance Teamcarefully inspects each unit thoroughly before it leaves our door. Fireplace Products Australia Pty. Ltd. ("FPI") is pleased toextend this warranty to the original purchaser of a <strong>Regency</strong> Product. This warranty is not transferable.The Warranty:Covered under the agreement against manufacturer's defects from the date of purchase are the following components:The Firebox for 10 years;Steel Baffl es for 12 months;Cast Iron Liners / Baffl es for 2 years;Electrical components (ie. fans, switches) for 12 months.FPI is not liable for freight or labor on any wood burning appliance replaced in fi eld.Repair/replacement parts purchased by the consumer from FPI after the original coverage has expired on the unit will carry a 90 day warranty, validwith a receipt only. Any item shown to be defective will be repaired or replaced at our discretion. No labor coverage is included with these parts.Conditions:Any part or parts of this unit which in our judgement show evidence of such defects will be repaired or replaced at FPI's option, through an accrediteddistributor or agent provided that the defective part be returned to the distributor or agent Transportation Prepaid, if requested.It is the general practice of FPI to charge for larger, higher priced replacement parts and issue credit once the replaced component has been returnedto FPI and evaluated for manufacturer defect.The authorized selling dealer is responsible for all in-field service work carried out on your <strong>Regency</strong> product. FPI will not be liable for results or costsof workmanship from unauthorized service persons or dealers.At all times FPI reserves the right to inspect product in the fi eld which is claimed to be defective.All claims must be submitted to FPI by authorized selling dealers. It is essential that all submitted claims provide all of the necessary information includingcustomer name, purchase date, serial #, type of unit, problem, and part or parts requested, without this information the warranty will be invalid.Exclusions:This warranty does not extend to or include paint, door or glass gasketing, neo-ceramic glass, fi rebrick or trim. It does not cover installation andoperational related problems such as over-fi ring, use of corrosive driftwood, downdrafts or spillage caused by environmental conditions, nearbytrees, buildings, hilltops, mountains, inadequate fl ueing or ventilation, excessive offsets, negative air pressures caused by mechanical systemssuch as furnaces, fans, clothes dryers etc.At no time will FPI be liable for any consequential damages which exceed the purchase price of the unit. FPI has no obligation to enhance or modifyany unit once manufactured. ie. as products evolve, fi eld modifi cations or upgrades will not be performed.FPI will not be liable for travel costs for service work.Installation and environmental problems are not the responsibility of the manufacturer and therefore are not covered under the terms of this warrantypolicy.Any unit which shows signs of neglect or misuse is not covered under the terms of this warranty policy.The warranty will not extend to any part which has been tampered with or altered in any way, or in our judgment has been subject to misuse.Freight damage to stoves and replacement parts is not covered by warranty and is subject to a claim against the freight carrier by the dealer.FPI will not be liable for acts of God, or acts of terrorism, which cause malfunction of the appliance.Performance problems due to operator error will not be covered by this warranty policy.Products made or provided by other manufacturers and used in conjunction with the operation of this appliance without prior authorization from FPI,may nullify your warranty on this product.* Subsidy according to job scale as predetermined by FPI.<strong>Regency</strong> <strong>Hume</strong> Freestanding Wood Fire 11
FIREPLACE PRODUCTS AUSTRALIA PTY. LTD.21-23 SOUTH LINK, DANDENONG SOUTHVICTORIA, 3175AUSTRALIANOTE: PLEASE RETAIN YOUR INVOICE AS PROOF OF PURCHASE FOR WARRANTY VERIFICATIONINCORRECT INSTALLATION IS NOT COVERED BY WARRANTYA SERVICE OR CALLOUT FEE WILL BE CHARGED IN THESE CIRCUMSTANCES.© Copyright 2010, FPI Fireplace Products International Ltd. All rights reserved.