Installation & Maintenance - Protectoseal
Installation & Maintenance - Protectoseal
Installation & Maintenance - Protectoseal
- No tags were found...

Create successful ePaper yourself
Turn your PDF publications into a flip-book with our unique Google optimized e-Paper software.
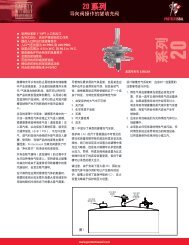
<strong>Installation</strong> & <strong>Maintenance</strong> GuidePage 5PROTECTOSEAL SERIES NO. 20TANK BLANKETING VALVEIf no leakage between the main body and the inlet cap was detected during the leakagetest, then it will not be necessary to remove the inlet cap. If it is desired to remove the inletcap, first remove the #44 tube by loosening the nuts on each end. Then (See Fig. 4)remove the four (4), #19 hex screws and pull the inlet cap out from the main body. Thesecond #37 O-ring may then be inspected for corrosion or damage. If leakage was detectedat any connections in the external filter line (going through the #43 filter), then thesecomponents should be removed for inspection and reapplication of FEP tape on thetapered threads. Refer to page 15 for instructions on cleaning the filter.ReassemblyWhen reassembling the blanketing valve, be sure to replace any worn or damaged O-ringsand gaskets.■ MAIN VALVE (See Fig. 4, 7 & 8)Reinsert the #42 screen assembly into the #41 inlet cap if it was removed. If the inlet caphas been removed, then replace the #37 O-ring, insert the inlet cap into the #18 mainbody, and secure it with the four (4), #19 hex screws and lock washers. Tighten thescrews to 96 in-lbs.Reassemble any connections which were loosened in the external filter line. Apply FEP tapeto any tapered thread connection. Reconnect the #44 tube by attaching and tightening thetwo (2) nuts.Before reassembling the #40 piston assembly (see Fig. 8), the #46 and #47 O-ringsshould be lubricated. Recommended lubricants are DuPont Krytox GPL206 or Dow Corning111 Valve Lubricant, but any seal lubricant which is compatible with both the stored chemicaland the O-ring material may be appropriate. When reinserting the O-rings, be certainthat the larger of the two goes in the groove on the outside center of the piston (see Table7 on page 13 to check O-ring sizes). Reassemble the #48 retainer and, if included, the#51 flow plug. Insert the #49 or #52 hex screw with lock washer and tighten to 60 in-lbs.Push the piston assembly back into the main body. It should move freely in and out of thebore but should not drop through freely. If it does drop through, the wrong size (too small)O-ring must have been put into the outside center groove.■ PILOT VALVE (See Fig. 6)Before reassembling the pilot valve, the #29 and #30 O-rings should be lubricated.Reinsert all six (6) O-rings. It is also recommended that a conservative amount of antiseizecompound be applied to the threads of the lower plug before threading it back intothe pilot body. Hold the poppet upside down, insert the #32 poppet spring in the groove inthe end, and insert the #33 spring pin into the spring. Slide the #35 lower plug assemblyover the spring pin, spring, and poppet, and pop it into place. The poppet should moveeasily up and down inside the lower plug, being pushed up by the poppet spring. Push the#27 upper plug back into the #34 pilot body if it has been removed. The orientation of thecross holes in the upper plug is not important. Slowly, being careful not to damage the endof the stem on the poppet or the seat at the end of the piston, insert the #36 and #37 O-rings into the grooves in the main body. Carefully position the pilot body over the main bodyso that the piston spring fits into the groove in the pilot body. Slowly push the pilot bodytoward the main body so that the hub of the pilot body slides inside the #36 O-ring. BEVERY CAREFUL NOT TO CUT OR DAMAGE THE O-RING! While holding the pilot body in place,insert the four (4), #17 hex screws with lock washers and tighten to 96 in-lbs.