activa 125/135 PE/145
activa 125/135 PE/145
activa 125/135 PE/145

You also want an ePaper? Increase the reach of your titles
YUMPU automatically turns print PDFs into web optimized ePapers that Google loves.
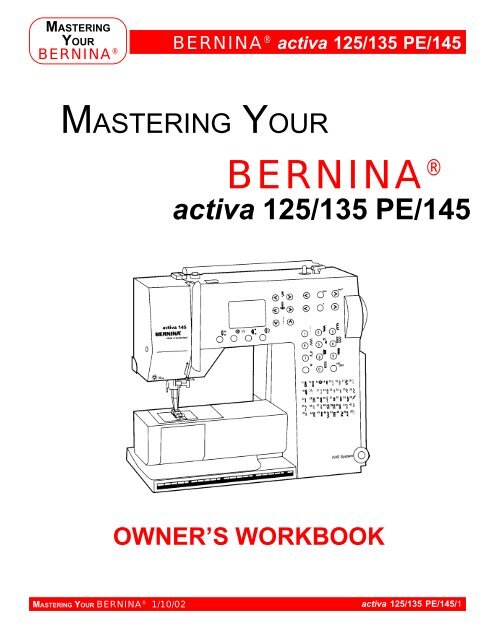
MASTERINGYOURBERNINA ®BERNINA ® <strong>activa</strong> <strong>125</strong>/<strong>135</strong> <strong>PE</strong>/<strong>145</strong>MASTERING YOURBERNINA ®<strong>activa</strong> <strong>125</strong>/<strong>135</strong> <strong>PE</strong>/<strong>145</strong>OWNER’S WORKBOOKMASTERING YOUR BERNINA ® 1/10/02<strong>activa</strong> <strong>125</strong>/<strong>135</strong> <strong>PE</strong>/<strong>145</strong>/1
SECTION ACare and Feeding of Your MachineMachine Set UpOwner’s manual pg.____• Storage of Accessories – attach and detachaccessory cabinet from machine; adjust feet tomake the cabinet stand on tabletop. Arrangeshelves and drawers in cabinet (extra available);insert presser feet & bobbins. (Optional for <strong>125</strong>)• Attach foot control; note storage of cords• Power switch – Owner’s manual pg.____• Extension table + sliding guide (optional)• Presser foot lifter (optional)- acts as a “third hand”- extra 2mm of presser foot lift- drops feed dog to give extra space betweenpresser foot and feed dog- speeds sewing by 20%- alternate size available for use with a sewingmachine cabinetPresser FeetOwner’s manual pgs.____• Importance of using the correct foot• On-screen indicator• Overview of included presser feet• One-piece (<strong>135</strong> <strong>PE</strong>/<strong>145</strong>) vs. Snap-on (<strong>125</strong>)Feed DogOwner’s manual pg. ____ThreadsOwner’s manual pg. ____• Types of thread• Uses for each type of threadNeedlesOwner’s manual pg.____BobbinsOwner’s manual pg.____• Removing the bobbin case• Winding a bobbin• Use bobbin thread cutter• Quick start bobbin – use thread cutter located inthe bobbin area• Clip the thread close to the case beforeremoving the bobbinThreading the Upper ThreadOwner’s manual pg.____• Spool pins and discs – Owner’s manual pg.____- vertical spool pin for stacked and decorativethreads- horizontal spool pin for crosswound threads- use disc closest to diameter of the spool• Optional supplementary thread guide• BERNINA ® thread stand with extra thread guide• Thread machine with the presser foot up untilready to thread the needleThreading the Needle• Side thread cutter – Owner’s manual pg.____• After the needle is threaded, put the threadunder the presser foot• Lower the presser foot• Insert the thread into the cutter; it is cut to theproper length to begin sewingNeedle Stop Adjustment• With the function button – Owner’s manual pg.___• With the optional, upgraded foot control – Owner’smanual pg.___Needle PositionsOwner’s manual pg. ____• Nine positions
MASTERINGYOURBERNINA ®BERNINA ® <strong>activa</strong> <strong>125</strong>/<strong>135</strong> <strong>PE</strong>/<strong>145</strong>Practical/Decorative StitchesOwner’s manual pgs.____• Stitches programmed in the machine• Uses for the stitches – Owner’s manual pgs.___• How to select stitches – Owner’s manual pgs.__Straight Stitching• Seam measuring – stitch plate marks – Owner’smanual pg.____- the following measurements are indicated onthe stitch plate: ¼”, 3 /8”, ½”, 5 /8”, ¾”, and 1”- the line just behind the needle is 4mm- the horizontal lines to the far back and theline in front of the needle are 5 /8” from needle• Quilting/seam guide is included with the machine• Left seam guide and seam guides with rulers areavailable as optional accessories• Straight stitch throat plate available• Basting – stitch #14 (<strong>135</strong> <strong>PE</strong>) or #15 (<strong>145</strong>) orstraight stitch with 5mm length (<strong>125</strong>)Topstitching/EdgestitchingOwner’s manual pgs.____Securing StitchesOwner’s manual pgs.____• Stitch #5 (<strong>135</strong> <strong>PE</strong>) - quilter’s securing program• Stitch #5 (<strong>125</strong>/<strong>145</strong>) - securing stitchSatin Stitches• Thread bobbin case finger to adjust tension• Can taper while sewing• Stabilizer – important to the success of stitchesAltering StitchesOwner’s manual pg.____Restoring Basic SettingsOwner’s manual pg.____Speed Controls• Two ways to control – Owner’s manual pg.___- ½ speed function button- ½ stitch at a time with Needle Up/Down- ½ stitch at a time by tapping the back of theoptional upgraded foot controlChanging the Light BulbOwner’s manual pg.____• Use only 12V 5W. W 2.1 x 9.5d bulbsCleaning the Feed Dog• Periodically remove thread fluff and fabric fuzzwhich collects under the stitch plate. Refer tomanual for step-by-step instructions (pg.___).Cleaning and Lubricating the Hook• Low mass hook system does not requirelubrication• See Owner’s manual page ____ for step-by-stepcleaning instructionsCleaning the Screen• Wipe only with a damp clothCleaning the Outside of the Machine• Wipe with damp cloth. If needed, use a solutionof water and a few drops of liquid soap.IMPORTANT: Never use oil, alcohol, orsolvents of any kind on any part of theexternal surface of the machine.Here’s an idea...Use your birthdaymonth as a reminder to have yourBERNINA ® machine serviced. Takeit to an authorized BERNINA ®technician during the monthof your birthday and you’llnever have to rememberwhen it was last serviced.MASTERING YOUR BERNINA ® 1/10/02<strong>activa</strong> <strong>125</strong>/<strong>135</strong> <strong>PE</strong>/<strong>145</strong>/5
MASTERINGYOURBERNINA ®BERNINA ® <strong>activa</strong> <strong>125</strong>/<strong>135</strong> <strong>PE</strong>/<strong>145</strong>THREADSPoor quality or the wrong type of thread can cause poor stitches on any machine. Thread passes throughthe eye of the needle approximately 37 times in a “see-saw” action before it forms a single stitch. Poorquality thread results in crooked and looped stitches, puckered seams, frayed thread, and/or needlebreakage. To achieve quality stitches, a sewing machine needs three things: correct thread, correct sizeneedle, and properly adjusted thread tensions.Several factors such as the fiber, twist, ply, finish, and size of thread must be considered for use with today’sfabrics for fine stitches.Staple – refers to the length of fibers used to twist together to form a single ply. Domestic threadfiber lengths are usually 1½” to 2½” long while European threads use 5½” to 6½” lengths.Ply – the number of single strands twisted together to make a single thread.Roll – the tendency of thread to roll to the right or left during stitching, causing the stitch toappearslightly crooked. Poor quality threads are more likely to roll.Twist – the crimping of fibers which causes them to interlock firmly into a single ply. Thread shouldnot untwist during stitching. This will cause skipped stitches, thread breakage, crooked stitches, andweak spots in seams.Right twist – most American threads are twisted to the right, causing some rolling.This gives average stitch quality.Left twist – Most commercial and imported threads are twisted to the left, giving betterthan average stitch quality. Left twist resists rolling and makes a larger loop for the hookpoint to enter, reducing skipped stitches.Wearable art embellishment has necessitated the creation and marketing of many new thread types, suchas Sulky’s rayons and metallics. Made in West Germany, these are left twist threads; Mettler and Isacordthreads are also left twist. To test the twist of a thread: while holding the spool in the left hand, roll the strandof thread towards you with one thumb. Left twist will tighten, right twist will loosen.Fiber – refers to the typ eof material used to produce the thread. Some commonly used threads:• Polyester 2 ply – such as Metrosene 100. Good for clothing construction on man-made,natural or blended fabrics. Will tolerate heat up to 450° Fahrenheit. Also Isacordembroidery thread – excellent for embroidery, very abrasion resistant.• Polyester 3 ply cordonnet – topstitching or buttonhole twist – such as Mettler 30/3.• Cotton 2 ply – such as Mettler 60/2 – excellent for French Machine Sewing, delicatemachine embroidery, and darning.• Cotton 2 ply – such as Mettler 30/2 – loose twist for a soft, shiny look in machineembroidery, applique, and buttonholes.• Cotton 3 ply – such as Mettler 50/3 – excellent for clothing construction on natural fibers.Tighter twist than embroidery cotton thread and less puckering on problem fabrics. Cottonthread stretches less than polyester.• Rayon – a lustrous embroidery thread. Weaker than cotton, it is used for decorative work only.MASTERING YOUR BERNINA ® 1/10/02<strong>activa</strong> <strong>125</strong>/<strong>135</strong> <strong>PE</strong>/<strong>145</strong>/6
MASTERINGYOURBERNINA ®BERNINA ® <strong>activa</strong> <strong>125</strong>/<strong>135</strong> <strong>PE</strong>/<strong>145</strong>NEEDLE POSITIONSFabric: Firmly woven fabric, 4” x 6”Needle:90/14 EmbroideryThread:30 wt. cotton embroideryContrasting colorPresser Foot: Reverse Pattern Foot #1Owner’s manual pg.____• The <strong>activa</strong> machines have 9 fixed needle positions.• Fold fabric in half to 2” x 6”.• Select Straight Stitch. The basic settings are displayedon the screen. The needle position indicator is justbelow the stitch width scale; the needle should be incenter position.• Position the fold of the fabric on the 1” mark on theright side of the stitch plate.• Sew about 6 stitches and stop.• Move the needle one position to the left.• Sew another 6 stitches and stop again.• Repeat until all five positions have been sewn.• Leaving the fabric under the foot – move the needleposition back to center.• Sew about 6 stitches and stop.• Move the needle one position to the right.• Sew about 6 stitches and stop.• Move the needle one more position to the right – sewanother 6 stitches and stop again.• Repeat until all five positions have been sewn.MASTERING YOUR BERNINA ® 1/10/02<strong>activa</strong> <strong>125</strong>/<strong>135</strong> <strong>PE</strong>/<strong>145</strong>/9
MASTERINGYOURBERNINA ®BERNINA ® <strong>activa</strong> <strong>125</strong>/<strong>135</strong> <strong>PE</strong>/<strong>145</strong>SEAMINGFabric:Firm fabric – 2 pieces, 4” x 6” eachNeedle:90/14 EmbroideryThread:30 wt. cotton embroideryContrasting colorPresser Foot: Reverse Pattern Foot #1Owner’s manual pg.____• Find the 5 /8” guide line on the stitch plate.• Place fabric pieces right sides together andalign them with the guide line.• Sew a 5 /8” seam on one 6” edge.• Attach the Quilting/Seam Guide to the footand sew a 2” seam on the other side.MASTERING YOUR BERNINA ® 1/10/02<strong>activa</strong> <strong>125</strong>/<strong>135</strong> <strong>PE</strong>/<strong>145</strong>/10
MASTERINGYOURBERNINA ®BERNINA ® <strong>activa</strong> <strong>125</strong>/<strong>135</strong> <strong>PE</strong>/<strong>145</strong>BASTINGFabric:Firm fabric – 2 pieces, 4” x 6” eachNeedle:90/14 EmbroideryThread:30 wt. cotton embroideryContrasting colorPresser Foot: Reverse Pattern Foot #1Owner’s manual pg.____• Place fabric pieces right sides together.<strong>135</strong> <strong>PE</strong>/<strong>145</strong>:• Select the basting stitch (#14 on the <strong>135</strong> <strong>PE</strong> and #15 on the <strong>145</strong>)• Baste a 5 /8” seam along one edge of the fabric using the following steps:- Position fabric under the presser foot and sew one stitch; hold threads when starting.- Pull the fabric from behind, creating the desired stitch length.- Continue in this manner until the seam is complete.<strong>125</strong>:• Select Straight Stitch #1; adjust the length to 5mm• Baste a 5 /8” seam along one edge of the fabric.Note: Loosening the top tension makes the stitches easier to remove.MASTERING YOUR BERNINA ® 1/10/02<strong>activa</strong> <strong>125</strong>/<strong>135</strong> <strong>PE</strong>/<strong>145</strong>/11
MASTERINGYOURBERNINA ®BERNINA ® <strong>activa</strong> <strong>125</strong>/<strong>135</strong> <strong>PE</strong>/<strong>145</strong>TOPSTITCHING/EDGESTITCHINGFabric: Firm fabric – 4” x 6”Needle:90/14 EmbroideryThread:30 wt. cotton embroideryContrasting colorPresser Foot: Edgestitch Foot #10 (optional accessory)Owner’s manual pg.____• Cut fabric in half to create 2 pieces each 2” x 6”.• Sew two pieces together with a 5 /8” seam on the 6” sides.• Press the seam open.• From the right side, position the blade of the foot in the ditch of the seam.• Select Triple Straight Stitch #6.• Move the needle position 3 places to the left.• Sew the length of the seam.• Select the longest stitch length.• Move the needle position to the far right.• Start at the top of the seam as before.• Sew down the length of the seam again.MASTERING YOUR BERNINA ® 1/10/02<strong>activa</strong> <strong>125</strong>/<strong>135</strong> <strong>PE</strong>/<strong>145</strong>/12
MASTERINGYOURBERNINA ®BERNINA ® <strong>activa</strong> <strong>125</strong>/<strong>135</strong> <strong>PE</strong>/<strong>145</strong>SECURING STITCHESFabric:Firm fabric – 3 pieces, 3” x 6” eachNeedle:90/14 EmbroideryThread:30 wt. cotton embroideryPresser Foot: Reverse Pattern Foot #1Owner’s manual pg.____• Fold each fabric piece in half to 1½” x 6”.• Find the 5 /8” seam line on the guide plate.• The BERNINA ® <strong>125</strong>/<strong>135</strong> <strong>PE</strong>/<strong>145</strong> secures in two ways:1 – Select stitch #3 and sew a few stitches. Press the Quick Reverse button located on thefront of the sewing machine and the machine will sew in reverse until the button is released.Continue stitching the seam and secure the end in the same manner.<strong>135</strong> <strong>PE</strong> 2 – Select stitch #5 and stitch. The machine takes six short stitches, then continues with theselected stitch length. Stitch the seam, stopping about ¼” from the end. Press and releasethe Quick Reverse button. The machine will stitch siz short stitches and stop.<strong>125</strong>/<strong>145</strong> 3 – Select stitch #5 and stitch. The machine will automatically reverse after five stitches, thencontinue in a forward motion. Stitch to the end of the seam, then press and release the QuickReverse button. The machine will stitch backward five stitches, and then continue forward againfive stitches and stop.MASTERING YOUR BERNINA ® 1/10/02<strong>activa</strong> <strong>125</strong>/<strong>135</strong> <strong>PE</strong>/<strong>145</strong>/13
MASTERINGYOURBERNINA ®BERNINA ® <strong>activa</strong> <strong>125</strong>/<strong>135</strong> <strong>PE</strong>/<strong>145</strong>SATIN STITCHFabric:Firm fabric – 3 pieces, 3” x 6” eachNeedle:90/14 EmbroideryThread:30 wt. Cotton EmbroideryPresser Foot: Reverse Pattern Foot #1Owner’s manual pg.____• Fold fabric in half to 3” x 6”. Use stabilizer as needed.• Select Stitch #2. Change the stitch length to satin stitch and the stitch width to 5.5mm.• Thread the bobbin thread through the hole in the finger of the bobbin case.• Move the needle position all the way to the left.• Position the raw edge of the fabric on the 3 /8” line (on the right side of the stitch plate).• Sew down this edge about 1”. While continuing to sew, press the stitch width button to taper the stitch to0mm. Then widen the stitch back to maximum. Repeat until the stitching reaches the end of the fabric.• Position the fold of the fabric on the 3 /8” line (on the left side of the stitch plate).• Move the needle position all the way to the right and stitch along the right side of the fabric, taperingand widening the stitching while sewing.• Move the needle position to the center and stitch down the center of the fabric, tapering and wideningthe satin stitch while sewing.MASTERING YOUR BERNINA ® 1/10/02<strong>activa</strong> <strong>125</strong>/<strong>135</strong> <strong>PE</strong>/<strong>145</strong>/14
MASTERINGYOURBERNINA ®BERNINA ® <strong>activa</strong> <strong>125</strong>/<strong>135</strong> <strong>PE</strong>/<strong>145</strong>ALTERED MEMORYFabric: Firm fabric – 6” x 6”Needle:90/14 EmbroideryThread:30 wt. cotton embroideryPresser Foot: Reverse Pattern Foot #1Owner’s manual pg.____• Fold fabric to 3” x 6”.• Select the Blanket Stitch (# 14 on the <strong>125</strong>, #9 on the <strong>135</strong> <strong>PE</strong>, and #21 on the <strong>145</strong>).• Sew a row of stitching as programmed down the center of the sample.• Alter stitch length to 4mm and sew a second row on one side of the first.• Select Zigzag Stitch #2 - (the one used for satin stitching in the previous exercise). Notice the computerremembered all the changes made to the stitch.• Reselect stitch #9 or #21; alter stitch width to 5mm and sew a 3rd row.• Touch CLR - notice the alterations made are gone.• Select stitch #2 again - notice the changes made to it are gone also. CLR returns all stitch alterations backto default settings.• The computer will remember any and all stitches you alter, as long as the clear buttons are not used andas long as the machine is not turned off.Return to Basic Settings: 2 options:Press the external CLR button or manually set changes back to the basic markMASTERING YOUR BERNINA ® 1/10/02<strong>activa</strong> <strong>125</strong>/<strong>135</strong> <strong>PE</strong>/<strong>145</strong>/15
MASTERINGYOURBERNINA ®BERNINA ® <strong>activa</strong> <strong>125</strong>/<strong>135</strong> <strong>PE</strong>/<strong>145</strong>WISH LISTCare and Feeding of Your Machine Accessory Cabinet (<strong>125</strong> only - included with <strong>135</strong> <strong>PE</strong> and <strong>145</strong>) FHS system Slide-on Extension Table with Guide Feet-ures Edgestitch Foot #10 Additional bobbin holders for accessory cabinet Additional presser foot holders for accessory cabinet Stabilizers – Sampler Pack or type __________type __________ Thread – Assortment or size ____ and type ____ Needles – Assortment orsize ____ and type ____size ____ and type ____size ____ and type ____size ____ and type ____size ____ and type ____ Needle Threader Bobbins – Baker’s dozen Spool Bobbin Holders Magnetic Pin Cushion Magnetic Bobbin Holder Straight Stitch Plate Seam Sealant Extra Thread Stand Scissors - 6” or 7” Dressmaker’s shears ____4” or 5” Trimming scissors ____Thread nips ____ Left guide (matches right guide included with machine)____ Seam Guide with Rulers (right and left) ____ Set of Magnifying GlassesMASTERING YOUR BERNINA ® 1/10/02<strong>activa</strong> <strong>125</strong>/<strong>135</strong> <strong>PE</strong>/<strong>145</strong>/16
MASTERINGYOURBERNINA ®BERNINA ® <strong>activa</strong> <strong>125</strong>/<strong>135</strong> <strong>PE</strong>/<strong>145</strong>MASTERING YOURBERNINA ®<strong>activa</strong> <strong>125</strong>/<strong>135</strong> <strong>PE</strong>/<strong>145</strong>OWNER’S WORKBOOKSection BLet’s Start With The BasicsMASTERING YOUR BERNINA ® 1/10/02<strong>activa</strong> <strong>125</strong>/<strong>135</strong> <strong>PE</strong>/<strong>145</strong>/17
MASTERINGYOURBERNINA ®BERNINA ® <strong>activa</strong> <strong>125</strong>/<strong>135</strong> <strong>PE</strong>/<strong>145</strong>SECTION BLet’s Start With The BasicsSeamsTriple Straight Stitch – SL 2-3mmOwner’s manual pg.____• Jeans Foot #8 prevents needle deflection• Non-Stick Straight Stitch Foot #53• This stitch sews strong seams on heavyfabricsZigzag – SL1mm SW1.5mmOwner’s manual pgs.____Vari-Overlock – SL1mm SW4mm NP rightOwner’s manual pg. ____• Can be used with double needle for adecorative hem on knits• Overlock Foot #2 prevents the seam fromrolling as it is being sewnDouble Overlock – SL2mmOwner’s manual pg. ____SW5mmStitching Corners• Use the 5 /8” markings on stitch plate• Engage the Needle Down function• Press heel on optional, upgraded foot controlto lower needle• Utilize the FHS system (optional) to raise andlower the presser foot when turning corners.Oversewing EdgesOwner’s manual pg.____HemsBlind Hem – Owner’s manual pg.____• The Blind Hem Foot #5, along with theblindstitch, produces a superior blind hem.The zigzag part of the stitch is formed overthe guide on the foot, causing the stitch tobe slightly loose, so that the blind hem willnot pucker and does not form a tuck in thefabric.Hand Picked – Feet-ures, Unit B pg.____Triple Zigzag – Feet-ures, Unit A pg.____• This stitch is used for strong, visible hemson firm, coarse fabrics such as denim andcanvas.Double Needle – Feet-ures, Unit A pg.___Neckline Hem – Owner’s manual pg.____Jeans – Feet-ures, Unit B pg.____• Height Compensation ToolMASTERING YOUR BERNINA ® 1/10/02<strong>activa</strong> <strong>125</strong>/<strong>135</strong> <strong>PE</strong>/<strong>145</strong>/18
MASTERINGYOURBERNINA ®BERNINA ® <strong>activa</strong> <strong>125</strong>/<strong>135</strong> <strong>PE</strong>/<strong>145</strong>TRIPLE STRAIGHT STITCHFabric: Denim, 4” x 6”Needle:90/14 JeansThread:All-purposePresser Foot: Reverse Pattern Foot #1Edgestitch Foot #10 (optional accessory)Owner’s manual pg.___• Cut the fabric in half lengthwise forming two pieces, 2” x 6” each.• Select the Triple Straight Stitch #6.• Sew the two pieces together with a 5 /8” seam allowance using Reverse Pattern Foot #1.• Press the seam open.• Change to Edgestitch Foot #10 and adjust the needle position to stitch through the seam allowance.• Adjust the stitch length to 3.5mm.• With the guide of the foot in the ditch of the seam, topstitch the length of the seam on both sides.MASTERING YOUR BERNINA ® 1/10/02<strong>activa</strong> <strong>125</strong>/<strong>135</strong> <strong>PE</strong>/<strong>145</strong>/19
MASTERINGYOURBERNINA ®BERNINA ® <strong>activa</strong> <strong>125</strong>/<strong>135</strong> <strong>PE</strong>/<strong>145</strong>ZIGZAG SEAMFabric: Firm knit – 4” x 6”Needle:80/12 UniversalThread:All-purposePresser Foot: Reverse Pattern Foot #1Owner’s manual pg.___• Cut the fabric piece in half lengthwise, creating two pieces, 2” x 6” each.• Select the Zigzag Stitch #2 – SW 1mm and SL 0.5mm.• Position the fabric to produce a 5 /8” seam down one side.• Stitch the seam.• Clip one seam allowance in the middle.• Press one part of the seam open and leave the other half closed, so the stitch is visible.• Trim and mount the sample.MASTERING YOUR BERNINA ® 1/10/02<strong>activa</strong> <strong>125</strong>/<strong>135</strong> <strong>PE</strong>/<strong>145</strong>/20
MASTERINGYOURBERNINA ®BERNINA ® <strong>activa</strong> <strong>125</strong>/<strong>135</strong> <strong>PE</strong>/<strong>145</strong>SU<strong>PE</strong>R STRETCH SEAMFabric: Heavy Double Knit, 4” x 6”Needle:80/12 UniversalThread:All-purposePresser Foot: Reverse Pattern Foot #1Owner’s manual pg.___• Cut fabric in half lengthwise creating two pieces, 2” x 6” each.• Select stitch #18.• Position the fabric to produce a 5 /8” seam down one side.• Stitch the seam.• Clip one seam allowance in the middle and press one part of the seam open.• Trim and mount the sample.Note: This stitch is good for an open seam on all knit fabrics; works well for sportswear.MASTERING YOUR BERNINA ® 1/10/02<strong>activa</strong> <strong>125</strong>/<strong>135</strong> <strong>PE</strong>/<strong>145</strong>/21
MASTERINGYOURBERNINA ®BERNINA ® <strong>activa</strong> <strong>125</strong>/<strong>135</strong> <strong>PE</strong>/<strong>145</strong>VARI-OVERLOCK SEAMFabric: Cotton Interlock, 4” x 6”Ribbing, 2” x 4”Needle:80/12 UniveralThread:All-purposePresser Foot: Overlock Foot #2Owner’s manual pg.___• Cut an inside curve in one corner of the fabric to simulate a neckline.• Select the Vari-Overlock Stitch #3.• Engage the Needle Down function.• Place folded ribbing along the curved edge of the fabric (ribbing and fabric, right sides together).• Guide the raw edges of the fabric under the pin of the foot and stitch; stitch length and width canbe adjusted, if needed.• Trim the sample and mount with the ribbing pressed to the finished position.MASTERING YOUR BERNINA ® 1/10/02<strong>activa</strong> <strong>125</strong>/<strong>135</strong> <strong>PE</strong>/<strong>145</strong>/22
MASTERINGYOURBERNINA ®BERNINA ® <strong>activa</strong> <strong>125</strong>/<strong>135</strong> <strong>PE</strong>/<strong>145</strong>DOUBLE OVERLOCK SEAMFabric: Single Knit – 4” x 6”Needle:80/12 UniversalThread:All-purposePresser Foot: Overlock Foot #2Owner’s manual pg.___• Cut the fabric in half lengthwise, creating two pieces, 2” x 6’ each.• Select the Double Overlock Stitch #8.• Guide the raw edge along the pin of the Overlock Foot.• The right swing of the needle should go off the fabric edge.• Trim the sample and mount.Note:This is a good overlock seam for loosely knit fabrics and for crossseams in other knits and jerseys.MASTERING YOUR BERNINA ® 1/10/02<strong>activa</strong> <strong>125</strong>/<strong>135</strong> <strong>PE</strong>/<strong>145</strong>/23
MASTERINGYOURBERNINA ®BERNINA ® <strong>activa</strong> <strong>125</strong>/<strong>135</strong> <strong>PE</strong>/<strong>145</strong>STITCHING CORNERSFabric:Firm fabric – 2 pieces, 5” x 5” eachNeedle:80/12 UniversalThread:All-purposePresser Foot: Reverse Pattern Foot #1Owner’s manual pg.___• Select the Straight Stitch #1.• Place fabric pieces right sides together.• Place the fabric under the foot with the top edge even with the horizontal line behind the foot.• The right edge should be even with the 5 /8” seam line.• Engage the Needle Down function.• Sew until the bottom edge touches the horizontal line in front of the needle; stop.• Pivot and continue sewing until you come to the next corner and do the same thing.• Stitch only three sides of this sample.MASTERING YOUR BERNINA ® 1/10/02<strong>activa</strong> <strong>125</strong>/<strong>135</strong> <strong>PE</strong>/<strong>145</strong>/24
MASTERINGYOURBERNINA ®BERNINA ® <strong>activa</strong> <strong>125</strong>/<strong>135</strong> <strong>PE</strong>/<strong>145</strong>OVERSEWING EDGESFabric: Heavy Flannel – 3” x 6”Needle:80/12 UniversalThread:All-purposePresser Foot: Reverse Pattern Foot #1Owner’s manual pg.___• Select the Zigzag Stitch #2.• Finish one 6” edge using the following steps.• Guide edge of fabric under the middle of the presser foot.• The needle should go into the fabric on one stroke of the needle and over the edge on the next stroke.• Do not use too long a stitch or too wide a stitch; the edge should lie flat, not roll.• Match the weight of the thread to the weight of the fabric.• Trim and mount the sample.MASTERING YOUR BERNINA ® 1/10/02<strong>activa</strong> <strong>125</strong>/<strong>135</strong> <strong>PE</strong>/<strong>145</strong>/25
MASTERINGYOURBERNINA ®BERNINA ® <strong>activa</strong> <strong>125</strong>/<strong>135</strong> <strong>PE</strong>/<strong>145</strong>BLIND HEMFabric: Heavy Flannel – 6” x 7”Needle:80/12 UniversalThread:All-purposePresser Foot: Reverse pattern Foot #1 andBlind Hem Foot #5Owner’s manual pg.___• Finish one 6” edge of the fabric following the steps of the previous exercise.• Fold a 2” hem to the wrong side of the fabric and press.• Attach Reverse Pattern Foot #1.• Baste the hem in place, sewing about ¼” from the raw edge.• Select the Blindstitch #7 and attach Blind Hem Foot #5.• Fold hem back to the right side over the basting line.• Sew on the extended hem allowance, keeping the folded edge next to the guide on the foot.• Adjust the stitch width if needed so that the needle barely stitches into the fold.• Mount the sample with the edges folded back as shown in the drawing.MASTERING YOUR BERNINA ® 1/10/02<strong>activa</strong> <strong>125</strong>/<strong>135</strong> <strong>PE</strong>/<strong>145</strong>/26
MASTERINGYOURBERNINA ®BERNINA ® <strong>activa</strong> <strong>125</strong>/<strong>135</strong> <strong>PE</strong>/<strong>145</strong>HAND PICKED HEMFabric: Lightweight broadcloth – 6” x 7”Needle:80/12 UniversalThread:All-purposePresser Foot: Blind Hem Foot #5Owner’s manual pg.___• Turn up a 1” hem along one of the 6” edges and press.• Turn up the depth of the hem again and press.• Fold the entire hem toward the right side of the garment, so that the garment fold isalmost even with the top edge of the hem. A scant 1 /8” to 1 /16” of hem edge shouldbe visible. This will ensure that both folds are caught by the blind hem pick.• Place the fabric under the foot just as a traditional blind hem would be placed.• Sew the hem with Blindstitch #7, making sure that the zigzag pick catches both foldswhile the straight stitch falls off the edge and stitches in air forming a chain along theupper hem edge.• Press and mount the sample.MASTERING YOUR BERNINA ® 1/10/02<strong>activa</strong> <strong>125</strong>/<strong>135</strong> <strong>PE</strong>/<strong>145</strong>/27
MASTERINGYOURBERNINA ®BERNINA ® <strong>activa</strong> <strong>125</strong>/<strong>135</strong> <strong>PE</strong>/<strong>145</strong>TRIPLE ZIGZAG HEMFabric: Firmly woven – 6” x 7”Needle:90/14 EmbroideryThread:30 wt. cotton embroideryPresser Foot: Reverse Pattern Foot #1Owner’s manual pg.___• Fold a 2” hem to the wrong side of the fabric; press.• Select the Triple Zigzag Stitch #6.• Adjust stitch length and width as desired.• From the right side of the fabric, stitch the hem in place, sewing about 1½” from the fold.Note:The guide on the optional slide-on extension table can be used for accuracy.Another option is to use the optional Seam Guide with Ruler.• From the wrong side, trim the excess fabric close to the stitches.• Press and mount the sample.MASTERING YOUR BERNINA ® 1/10/02<strong>activa</strong> <strong>125</strong>/<strong>135</strong> <strong>PE</strong>/<strong>145</strong>/28
MASTERINGYOURBERNINA ®BERNINA ® <strong>activa</strong> <strong>125</strong>/<strong>135</strong> <strong>PE</strong>/<strong>145</strong>DOUBLE NEEDLE HEMFabric: Cotton interlock – 6” x 7”Needle: Double 3.0/80Thread:All-purpose, 2 colorsPresser Foot: Reverse Pattern Foot #1Owner’s manual pg.___• Turn up a 2” hem along one of the 6” edges and press.• Insert a 3.0/80 double needle.• Thread the needles with two different colors of thread.• Place the folded edge of the fabric along the 1” guideline on the right side of the stitch plate.Note:The guide on the optional slide-on extension table can be used for accuracy.Another option is to use the optional Seam Guide with Ruler.• Select stitch #1; sew half of the hem.Note: To be sure the needles will not strike the foot, turn the handwheel to “walk” themachine through the first stitch. Narrow the width as needed to avoid breaking needles.• Select stitch #7 or experiment with similar stitches; stitch the remainder of the seam.• Trim excess fabric from the wrong side of the hem.• Check Feet-ures, Unit A for detailed information on working with Double and Triple needles.Note: This is a good stitch to use when hemming T-shirts and pajamas. You can useother stitches with a double needle for other types of fabrics.• Press and mount the sample.MASTERING YOUR BERNINA ® 1/10/02<strong>activa</strong> <strong>125</strong>/<strong>135</strong> <strong>PE</strong>/<strong>145</strong>/29
MASTERINGYOURBERNINA ®BERNINA ® <strong>activa</strong> <strong>125</strong>/<strong>135</strong> <strong>PE</strong>/<strong>145</strong>NECKLINE HEMFabric: Single knit cotton – 4” x 6”Needle:80/12 UniversalThread:All-purposePresser Foot: Reverse Pattern Foot #1Owner’s manual pg.___• Cut a curve to simulate a neck edge in one corner.• Sew a line of stay-stitching, 3 /8” in from the neck edge using the straight stitch adjusted to alength of 5mm.• Turn the raw edge under and press or baste in place.• Select the Honeycomb Stitch (#54 on the <strong>135</strong> <strong>PE</strong> and #19 on the <strong>145</strong>).• Sew from the right side ¼” from the folded edge.• Trim surplus fabric from wrong side, close to the stitching.Notes: - If the hem stretches, add a strip of Stitch Witchery ® to the edge as it isstay-stitched.- Using the Needle Stop Down function will keep the fabric in place whensewing curves.- The Balance function can be used to make the stitches closer together orfarther apart.• Press and mount the sample.MASTERING YOUR BERNINA ® 1/10/02<strong>activa</strong> <strong>125</strong>/<strong>135</strong> <strong>PE</strong>/<strong>145</strong>/30
MASTERINGYOURBERNINA ®BERNINA ® <strong>activa</strong> <strong>125</strong>/<strong>135</strong> <strong>PE</strong>/<strong>145</strong>JEANS HEMFabric: Denim – 5” x 7”Needle:100/16 or 110/18 JeansThread:All-purposePresser Foot: Jeans Foot #8Note: Specially designed to sew over heavy seams and fabrics, the Jeans Foot #8 guides theneedle through heavy thicknesses and helps to eliminate needle breakage. It is also effectivefor topstitching with buttonhole twist or cordonnet threads.Owner’s manual pg.___• Cut fabric in two pieces, 5” x 3½” each.• Insert a Jeans needle and select stitch #1.• Sew a 5 /8” seam with right sides together.• Press the seam to one side.• Topstitch, using the edge of the foot along the seam as a guide, and stitching through the seamallowances.• Turn up the lower edge twice, about 3 /8” each time.• Topstitch the hem in place, about 1 /8” from the upper edge of the hem.Note: Use the Height Compensation tool to level the surface if needed.• Press and mount the sample.MASTERING YOUR BERNINA ® 1/10/02<strong>activa</strong> <strong>125</strong>/<strong>135</strong> <strong>PE</strong>/<strong>145</strong>/31
MASTERINGYOURBERNINA ®BERNINA ® <strong>activa</strong> <strong>125</strong>/<strong>135</strong> <strong>PE</strong>/<strong>145</strong>WISH LISTLet’s Start WIth The Basics Presser Feet and Attachments: Overlock Foot #2 Embroidery Foot #6 Jeans Foot #8 Edgestitch Foot #10 Straight Stitch Foot #13 Cut and Sew Attachment #80 Slide-on Extension Table with Guide Feet-ures Double Needles 2.0mm 2.5mm 3.0mm Jeans Needles 90/14 100/16 Double Stitch Witchery - 5 /8” roll BERNINA ® Ironing System Curved Hem Ruler 6” Sewing Gauge Seam Pressing Stick BERNINA ® Cutting Mat BERNINA ® 14” RulerMASTERING YOUR BERNINA ® 1/10/02<strong>activa</strong> <strong>125</strong>/<strong>135</strong> <strong>PE</strong>/<strong>145</strong>/32
MASTERINGYOURBERNINA ®BERNINA ® <strong>activa</strong> <strong>125</strong>/<strong>135</strong> <strong>PE</strong>/<strong>145</strong>MASTERING YOURBERNINA ®<strong>activa</strong> <strong>125</strong>/<strong>135</strong> <strong>PE</strong>/<strong>145</strong>OWNER’S WORKBOOKSection COn The EdgeMASTERING YOUR BERNINA ® 1/10/02<strong>activa</strong> <strong>125</strong>/<strong>135</strong> <strong>PE</strong>/<strong>145</strong>/33
MASTERINGYOURBERNINA ®BERNINA ® <strong>activa</strong> <strong>125</strong>/<strong>135</strong> <strong>PE</strong>/<strong>145</strong>SECTION COn The EdgeButtonholesOwner’s manual pg.____Feet-ures, Unit A• Types and Uses• Preparation- proper stabilizers- sometimes using two or more layers- proper adhesion of iron-on stabilizers• Positioning:- marking- full bust can be beginning point- using spacing tape- using Simpflex• Measuring the Button:- to determine length of buttonhole• Grading Seams- using applique scissors• Height Compensation Tool- keep foot level• Buttonhole Leveler• Tension Adjustments• Testing:- always use same fabric, thread and stabilizer• Cutting Open:- seam sealant- block and cutter• Tricks:- wash-a-way stabilizer for high pile fabrics- Stitch Witchery ® for loose wovens or knits• Buttonhole Balance• Programmed Buttonholes (<strong>135</strong><strong>PE</strong>/<strong>145</strong> only)• Corded Buttonholes:- with gimp cord- with threadsSewing Buttons OnOwner’s manual page ____Feet-ures, Unit D• Button Sew-On Stitch (<strong>135</strong><strong>PE</strong>/<strong>145</strong> only)- regular- decorative- snaps, hooks, and charms- tie a quiltEdges• Picot – Feet-ures, Unit D• Shell- blindstitch – Feet-ures, Unit A- hemmer feet #68 or #69 – Feet-ures, Unit I• Rolled and Whipped Edge – Feet-ures, Unit A• Fine Edge – Feet-ures, Unit B• Corded Edge – Feet-ures, Unit B- for tucks- for hems• Designer Hem – Feet-ures, Unit BAttaching Elastics• Types• Methods of applying- turn under- couching over- lingerieMASTERING YOUR BERNINA ® 1/10/02<strong>activa</strong> <strong>125</strong>/<strong>135</strong> <strong>PE</strong>/<strong>145</strong>/34
MASTERINGYOURBERNINA ® <strong>activa</strong> <strong>125</strong>/<strong>135</strong> <strong>PE</strong>/<strong>145</strong>BUTTONHOLES AND EYELETSTY<strong>PE</strong>S AND USES+ XSTANDARD BUTTONHOLEFine to medium weight fabrics. Blouses, shirts, trousers, bedlinens.BERNINA ® STRETCH BUTTONHOLEAll stretch fabrics made from cotton, wool, silk, and synthetic fibers.+ available on the <strong>activa</strong> <strong>125</strong>HEIRLOOM BUTTONHOLEFine to medium weight fabrics. Blouses, shirts, dresses, trousers. children’s and babyclothes, doll clothes, heirloom work.ROUND BUTTONHOLE WITH NORMAL BARTACKMedium to heavy weight fabrics of all types. Clothing, jackets, coats, rainwear.ROUND BUTTONHOLE WITH HORIZONTAL BARTACKMedium to heavy weight fabrics of all types. Clothing, jackets, coats, rainwear.XKEYHOLE BUTTONHOLE WITH NORMAL BARTACKHeavy weight, non-stretch fabrics. Jackets, coats, trousers, leisure wear.KEYHOLE BUTTONHOLE WITH POINTED BARTACKNon-stretch firm fabric. Jackets, coats, leisure wear.KEYHOLE BUTTONHOLE WITH NORIZONTAL BARTACKFirm, non-stretch fabrics. jackets, coats, leisure wear.OXSTRAIGHT STITCH BUTTONHOLEFor prestitching buttonholes and pocket openings. For bound buttonholes & welt pockets.BUTTON SEW-ON PROGRAMFor flat buttons with 2 and 4 holes. For sewing on snaps, hooks, and charms.NARROW ZIGZAG EYELETOpening for cords and narrow ribbons/bands, other decorative work.STRAIGHT STITCH EYELETOpening for cords and narrow ribbons/bands, other decorative work.X available on the <strong>activa</strong> <strong>135</strong> <strong>PE</strong> and <strong>145</strong>O also available on the <strong>activa</strong> <strong>145</strong>MASTERING YOUR BERNINA ® 1/10/02<strong>activa</strong> <strong>125</strong>/<strong>135</strong> <strong>PE</strong>/<strong>145</strong>/35
MASTERINGYOURBERNINA ®BERNINA ® <strong>activa</strong> <strong>125</strong>/<strong>135</strong> <strong>PE</strong>/<strong>145</strong>BUTTONHOLE FEETA number of buttonhole feet are available for BERNINA ® sewing machines.The descriptions below will help differentiate between the various feet.BUTTONHOLE FOOT #3The standard 5mm buttonhole foot.Works with any BERNINA ® sewing machineBUTTONHOLE FOOT #3CThe standard 9mm buttonhole foot.“C” indicates a “coded” foot, with a lightsensor that allows 9mm wide stitching.Works with models 1630 and artista 180.BUTTONHOLE FOOT WITH SLIDE #3BA 5mm foot with a movable slide indicatingbuttonhole length, making it easy tostitch a series of identical buttonholes.Works with any BERNINA ® sewing machine.AUTOMATIC BUTTONHOLE FOOT #3CThe automatic buttonhole foot formachines with a 9mm feed system,indicated by the letter “C”.Works with models 1630 and artista 180.AUTOMATIC BUTTONHOLE FOOT #3AAutomatic foot for machines with a 5mm and9mm feed system. “A” indicates an “automatic”foot, with a light sensor for counting stitches.Works with models 1130-1530 and 150-170Q<strong>PE</strong>.MASTERING YOUR BERNINA ® 1/10/02AUTOMATIC BUTTONHOLE FOOT WITH SLIDE #3ACombines the handy slide measuring system ofButtonhole Foot #3B with the electronic sensor of theolder Automatic Buttonhole Feet #3A and #3C.Works with models <strong>135</strong> <strong>PE</strong>/<strong>145</strong> and 150-180.<strong>activa</strong> <strong>125</strong>/<strong>135</strong> <strong>PE</strong>/<strong>145</strong>/36
MASTERINGYOURBERNINA ®BERNINA ® <strong>activa</strong> <strong>125</strong>/<strong>135</strong> <strong>PE</strong>/<strong>145</strong>STABILIZERSTear-Away Stabilizer: The most commonly used type of stabilizer, designed to providetemporary support of stitching. Placed on the wrong side of the project and carefullypulled away once stitching is complete. Available in three weights – heavy, medium, andlight. Multiple lightweight layers may be preferable to one heavy layer, as they are easierto remove.Cut-Away Stabilizer: The most widely used stabilizer in the commercial market. Doesnot break down under dense stitching, due to the high fiber – rather than paper – content.Excess stabilizer is trimmed away after stitching (leave approximately ¼” of stabilizeraround the edges).Web/Poly-Mesh Type Stabilizer: A specially formulated cut-away stabilizer developedfor use behind lightweight or light-colored fabrics.Water-Soluble Stabilizer: Used for backing and topping, in single or multiple layers.Available in two weights. Excellent for decorative stitching and cutwork as there areno remnants of stabilizer left after removal (it dissolves). As a topping, it keeps stitchesfrom being lost in heavily napped fabrics such as velvet and corduroy.Knit Fusible Interfacing: A very lightweight, flexible interfacing sometimes used as astabilizer, it gives permanent support (as an underlining) to a fabric. Perfect for plackets,garment edges, under buttonholes, and anywhere extra body and stability are needed.Woven Fusible Interfacing: This interfacing is sometimes used as a stabilizer and isgenerally cut on the bias to provide better drape. Gives a firmer hand or finish than knitor non-woven interfacings. Used for lapels, facings, and anywhere a great deal of extrabody and stability are needed.Iron-On Stabilizer: A non-woven product similar to paper. Perfect for knits, this tearawaystabilizer is temporarily bonded to the fabric, inhibiting the tendency of the materialto stretch.Heat Removable Stabilizer: Woven from strands of fiber that are burned away at a lowtemperature, heat removable stabilizers are perfect for heirloom stitchery.Liquid/Spray Stabilizers: Wonderful for sheer fabrics from which all stabilizer must beremoved after stitching, these products are painted or sprayed onto the fabric. Severallight applications of spray stabilizer are preferable to one heavy application.MASTERING YOUR BERNINA ® 1/10/02<strong>activa</strong> <strong>125</strong>/<strong>135</strong> <strong>PE</strong>/<strong>145</strong>/37
MASTERINGYOURBERNINA ®BERNINA ® <strong>activa</strong> <strong>125</strong>/<strong>135</strong> <strong>PE</strong>/<strong>145</strong>MANUAL BUTTONHOLESFabric: Heavy flannel, 6” x 6”Stabilizer: 1 piece, 3” x 6”Needle:90/14 EmbroideryThread:30 weight cotton embroideryPresser Foot: Standard Buttonhole Foot #3Owner’s manual pg.____• Fold one piece of fabric in half to 3” x 6”. Press and insert the stabilizer.• Draw a line 1½” from the fold along the 6” length.• Mark two horizontal lines, running between the fold and the drawn line, spaced about 2” apart.• Select buttonhole #10 – the standard buttonhole.• Position the foot over the first short line, aligning the fold of the fabric with the 5 /8” marking behind the foot.• Sew the first side of the buttonhole.• Stop at the drawn line.• Continue stitching the remaining steps of the buttonhole, following the directions in the owner’s manual.<strong>135</strong> <strong>PE</strong>/<strong>145</strong> only:• Select keyhole buttonhole #11. Place the second short line under the presser foot as before.• Sew the keyhole buttonhole on the second marked line.• Cut one buttonhole open.• Trim and mount the sample.<strong>135</strong> <strong>PE</strong>/<strong>145</strong> onlyMASTERING YOUR BERNINA ® 1/10/02<strong>activa</strong> <strong>125</strong>/<strong>135</strong> <strong>PE</strong>/<strong>145</strong>/38
MASTERINGYOURBERNINA ®BERNINA ® <strong>activa</strong> <strong>125</strong>/<strong>135</strong> <strong>PE</strong>/<strong>145</strong>BUTTONHOLE BALANCEFabric: Heavy flannel, 6” x 9”Stabilizer: 1 piece, 6” x 9”Needle:90/14 EmbroideryThread:30 wt. cotton embroidertPresser Foot: Buttonhole Foot #3 orButtonhole Foot with Slide #3A• Owner’s manual page __.• Select buttonhole #10.• Sew about a 1” buttonhole using the counted stitch method and mark it #1.• Adjust the balance toward the closed stitch icon.• Sew the buttonhole and mark it #2.Note: This buttonhole bead is very dense.• Turn the balance knob toward the open stitch icon.• Sew another buttonhole; now the stitches are farther apart.• Mark the sample with #3.Note: This buttonhole bead is very open.• Return the balance knob to mormal.#3#2#1MASTERING YOUR BERNINA ® 1/10/02<strong>activa</strong> <strong>125</strong>/<strong>135</strong> <strong>PE</strong>/<strong>145</strong>/39
MASTERINGYOURBERNINA ® <strong>activa</strong> <strong>125</strong>/<strong>135</strong> <strong>PE</strong>/<strong>145</strong>BERNINA ® STRAIGHT STITCH BUTTONHOLESThis exercise is for the <strong>activa</strong> <strong>145</strong> onlyFabric: Linen fabric, 6” x 6”Stabilizer: 1 piece, 3” x 6”Needle:90/14 EmbroideryThread:30 weight cotton embroideryPresser Foot: Auto Buttonhole Foot with Slide #3AOwner’s manual page___• Select stitch #12.• Attach Automatic Buttonhole Foot with Slide #3A to the machine.Sample #1Note:Straight stitch buttonholes can be used to pre-sew and reinforce buttonholes onfabrics which fray easily. The buttonhole beads and bartacks will cover the stitching.• Mark three lines perpendicular to the fold, spacing them about 2” apart.• Move the red slide on the foot to 29mm.• Position the fabric under the neeedle, aligning the fold with the 5 /8” marking behind the foot.• Stitch the buttonhole on the first line - Do not remove the fabric.• Select stitch #10 - sew this buttonhole (the same 29mm size) on top of the straight stitch buttonhole.Sample #2Note: Straight stitch buttonholes can be used as a buttonhole on imitation suede and leather.• Select stitch #12 again and sew a straight stitch buttonhole on the second line.Sample #3Note: The distance between the prestitched lines can be adjusted with the stitch width.• Adjust the width of the buttonhole to 5mm.• Sew a second buttonhole on the third line.MASTERING YOUR BERNINA ® 1/10/02<strong>activa</strong> <strong>125</strong>/<strong>135</strong> <strong>PE</strong>/<strong>145</strong>/40
MASTERINGYOURBERNINA ®BERNINA ® <strong>activa</strong> <strong>125</strong>/<strong>135</strong> <strong>PE</strong>/<strong>145</strong>Auto Buttonhole Footwith Slide #3AStandard ButtonholeFoot #3CORDED BUTTONHOLESFabric: Heavy flannel, 6” x 6”Two 10” lengths of gimp cprdStabilizer: 1 piece, 3” x 6”Needle:90/14 EmbroideryThread:Presser Foot:30 weight cotton embroideryStandard Buttonhole Foot #3 (optional with <strong>135</strong> <strong>PE</strong>/<strong>145</strong>) andAuto Buttonhole Foot with Slide #3A (optional with <strong>125</strong>)Owner’s manual pg.____• Fold the fabric in half to 3” x 6”. Press and insert the stabilizer.• Mark a line 1½” from the fold and running the length of the fabric.• Mark two horizontal lines between the fold and the line, spaced about 2” apart.• Select the Standard Buttonhole #10.• Place the fold so it is on the 5 /8” line behind the presser foot.• Lower the needle into the fabric on the first line.• Fold one piece of cord in half; place loop around prong of the Auto Buttonhole Foot with Slide #3A.Note: The cord strengthens the buttonhole on wovens and prevents it from stretching on knits.The thickness of the cord depends on the fabric to be sewn. Suitable cords are perle cord #8,thick hand sewing thread, gimp cord, or crochet cotton.• Sew the buttonhole.• Pull the loop of gimp cord snug and cut tails close to bartack.Note: On knits, pull to back and tie a knot.• Sew another corded buttonhole using the optional Buttonhole Foot #3 on the second line.• The cord may come away from the prong of this foot. Therefore it is advisable to hold the loop of the gimpdown lightly with the finger.• Pull the cord ends to the back with a large hand sewing needle and tie.• Trim and mount sample.MASTERING YOUR BERNINA ® 1/10/02<strong>activa</strong> <strong>125</strong>/<strong>135</strong> <strong>PE</strong>/<strong>145</strong>/41
MASTERINGYOURBERNINA ®BERNINA ® <strong>activa</strong> <strong>125</strong>/<strong>135</strong> <strong>PE</strong>/<strong>145</strong>This exercise is for the <strong>activa</strong> <strong>135</strong> <strong>PE</strong> and <strong>145</strong> onlyBUTTON SEW-ON STITCHFabric: Heavy flannel, 6” x 6”Stabilizer: 1 piece, 3” x 6”Needle:90/14 EmbroideryThread:30 weight cotton embroideryPresser Foot: Button Sew-On Foot #18 (optional accessory)Owner’s manual pg.____• Select the Button Sew-on program (stitch #12 on the <strong>135</strong> <strong>PE</strong> or #13 on the <strong>145</strong>).• Engage the Securing function as you begin—then turn it off—engage it again as you end.• Lower the feed dogs.• Fold the fabric in half to 2” x 6”; press. Insert the stabilizer.Notes: - You can sew buttons on to stay!- A low shank can be made for dresses and blouses or a high shankcan be made for heavier fabrics such as coats and blazers.- Use the Button Sew-On Foot #18 to sew on waistband closures,hook-and-eye fasteners, snaps, curtain rings, and charms.Tecnique #1• Select stitch #12/#14; set up as above.• Use a glue stick to position a button in place.• Adjust the pin on Foot #18 to the highest position for a long shank.• Check the distance between the holes of the button by turning the hand wheel.• Adjust the stitch width if necessary.• Hold the thread tails as you begin to sew.Technique #2• Using the lowest shank setting, attach a charm, a length of ribbon, and a hook-and-eye to the samefabric.• Trim threads close and mount the sample.MASTERING YOUR BERNINA ® 1/10/02<strong>activa</strong> <strong>125</strong>/<strong>135</strong> <strong>PE</strong>/<strong>145</strong>/42
MASTERINGYOURBERNINA ®BERNINA ® <strong>activa</strong> <strong>125</strong>/<strong>135</strong> <strong>PE</strong>/<strong>145</strong>PICOT EDGEFabric: Lightweight single knit cotton, 6” x 4”Needle:80/12 UniversalThread:All-purpose sewing threadPresser Foot: Reverse Pattern Foot #1Owner’s manual pg.____• Select the Vari-Overlock stitch #3 - SW 4-5mm and SL 1.5mm.• Fold under one 6” edge about ½” and press.• Place fabric to the left and position it under the foot so that the stitch, when it swings to the right,will just pass over the folded edge.• On knit fabrics the surplus can be trimmed from the wrong side close to the stitch.• On woven fabrics it is advisable to first sew a row of small zigzag stitches about ¼” from wherethe picot edge will be. Then you will be able to trim close to these stitches after the picot hasbeen stitched.• Trim and mount the sample.This stitch is suitable only for fine, soft fabrics and is ideal for lingerie and nightwear.MASTERING YOUR BERNINA ® 1/10/02<strong>activa</strong> <strong>125</strong>/<strong>135</strong> <strong>PE</strong>/<strong>145</strong>/43
MASTERINGYOURBERNINA ®BERNINA ® <strong>activa</strong> <strong>125</strong>/<strong>135</strong> <strong>PE</strong>/<strong>145</strong>SHELL EDGEFabric: Nylon tricot, 6” x 4”Needle:80/12 UniversalThread:All-purpose sewing threadPresser Foot: Reverse Pattern Foot #1Owner’s manual pg.____• Select the Blind stitch #7 - SW 2.5-5mm and SL 1.5-2mm. The longer the stitch length, thelarger the shells.• Engage the mirror image function.• Fold under one 6” edge about ½” and press.• Place fabric to the left and position it under the foot so that the stitch, when it swings to theright, will just pass over the folded edge.• On knit fabrics the surplus can be trimmed from the wrong side close to the stitch.• On woven fabrics it is advisable to first sew a row of small zigzag stitches about ¼” fromwhere the shell edge will be. Then you will be able to trim close to these stitches after theedge is finished.• Trim and mount the sample.This stitch is suitable for fine, fabrics and is ideal for lingerie and nightwear.MASTERING YOUR BERNINA ® 1/10/02<strong>activa</strong> <strong>125</strong>/<strong>135</strong> <strong>PE</strong>/<strong>145</strong>/44
MASTERINGYOURBERNINA ®BERNINA ® <strong>activa</strong> <strong>125</strong>/<strong>135</strong> <strong>PE</strong>/<strong>145</strong>ROLLED AND WHIP<strong>PE</strong>D EDGEFabric: Lightweight cotton, 6” x 4”Needle:80/12 UniversalThread:All-purpose sewing threadPresser Foot: Buttonhole Foot #3Owner’s manual pg.____• Clean one 6” edge of “whiskers”• Select the ZigZag Stitch #2 - SW 2.5mm and SL 1mm or less.• Select the left needle position.• Loosen the top tension if necessary.• Place cut edge of fabric between the center and right toes of the presserfoot and sew.Notes:- The left swing of the needle should be in the fabric, while the rightswing falls off of the right edge of the fabric.- As the needle swings left, it should roll the fabric into a tiny rolled edge.- The finer the fabric, the finer the needle and thread used.• Trim and mount the sample.This edge finish is used on a single thickness of fine lightweight fabrics.It is also use as a seam finish or as an edge on ruffles, hems etc.MASTERING YOUR BERNINA ® 1/10/02<strong>activa</strong> <strong>125</strong>/<strong>135</strong> <strong>PE</strong>/<strong>145</strong>/45
MASTERINGYOURBERNINA ®BERNINA ® <strong>activa</strong> <strong>125</strong>/<strong>135</strong> <strong>PE</strong>/<strong>145</strong>FINE EDGEFabric: Batiste, 6” x 4”Needle:70/10 UniversalThread:60 wt. needle and bobbinPresser Foot: Edgestitch Foot #10 (optional accessory)Owner’s manual pg.____• Select the ZigZag Stitch #2 - SW 2mm and SL 1mm.• Select the left needle position.• Fold under ½” hem allowance on one 6” edge and press.• Place the fabric right side upper most, to the left of the guide on the foot and sew the edge.• When completed, trim away surplus fabric from the wrong side, close to the stitch.• Mount the sample.Note: Reverse Pattern Foot #1 can be used - settings as above but use center needle position.MASTERING YOUR BERNINA ® 1/10/02<strong>activa</strong> <strong>125</strong>/<strong>135</strong> <strong>PE</strong>/<strong>145</strong>/46
MASTERINGYOURBERNINA ®BERNINA ® <strong>activa</strong> <strong>125</strong>/<strong>135</strong> <strong>PE</strong>/<strong>145</strong>CORDED EDGEFabric: Medium weight cotton, 6” x 4”Pearl Crown Rayon cordNeedle:80/12 UniversalThread:To match cordPresser Foot: Edgestitch Foot #10 (optional accessory)Owner’s manual pg.____• Fold under a ½” hem allowance on one 6” edge and press.• Place the folded edge, right side up, against the left side of the center blade.• Select the ZigZag stitch #2 - SW 2mm and SL 1mm or adjust as needed.• Adjust the needle position so the stitch falls on the folded edge.• The right swing of the needle should barely miss the edge of the fold, stitching in air.• Sew 2 or 3 stitches and stop with the needle down.• Raise the foot, insert the cord under the foot from the right, against the needle.• Pull the cord up through the center slot of the foot and hold it against the left side of the guide.• Continue stitching - the cord will feed into the zigzag stitch.• Trim the excess fabric from the wrong side.• Mount the sample.Note: Cord can be a variety of types - pearl rayon works well.MASTERING YOUR BERNINA ® 1/10/02<strong>activa</strong> <strong>125</strong>/<strong>135</strong> <strong>PE</strong>/<strong>145</strong>/47
MASTERINGYOURBERNINA ®BERNINA ® <strong>activa</strong> <strong>125</strong>/<strong>135</strong> <strong>PE</strong>/<strong>145</strong>DESIGNER HEMFabric: Medium weight cotton, 6” x 4”Pearl Crown Rayon cordNeedle:80/12 SharpThread:All-purpose sewing threadPresser Foot: Edgestitch Foot #10 (optional accessory)• Select Straight Stitch #1.• Select the left needle position.• Turn the raw edge under 3 /8” and press.• Stitch with the fold against the left side of the guide on the presser foot.• Trim away seam allowance as close to stitching as you can get.• Turn the first folded edge under again tightly and place the new fold against the left sideof the guide on the foot.• Stitch again from the wrong side of the fabric as in the first step.• A successful hem will have two parallel lines of stitching on the wrong side ofthe hem and one showing on the right side.• Trim and mount the sample.This is a very narrow two-step hem, easily sewn on straight or bias grains.Works great on sheer farbric.MASTERING YOUR BERNINA ® 1/10/02<strong>activa</strong> <strong>125</strong>/<strong>135</strong> <strong>PE</strong>/<strong>145</strong>/48
MASTERINGYOURBERNINA ®BERNINA ® <strong>activa</strong> <strong>125</strong>/<strong>135</strong> <strong>PE</strong>/<strong>145</strong>ATTACHING ELASTIC LACEFabric: Nylon tricot, 6” x 4”9” of elastic laceNeedle:80/12 UniversalThread:All-purpose sewing threadPresser Foot: Reverse Pattern Foot #1• Select the Running stitch #4.• Adjust stitch length to 1mm.• Engage the needle down function.• Position the elastic wrong side down on the right side of the tricot along one of the 6” edges.• Leave a tail of elastic at the back of the presser foot for a “handle”.• Position the elastic so the stitching is at the bottom edge of the elastic lace.• Stretch the elastic lace gently, as it is being sewn.• After stitching, trim the surplus tricot from the wrong side of the elastic lace, close to thestitching.• Mount the sample.MASTERING YOUR BERNINA ® 1/10/02<strong>activa</strong> <strong>125</strong>/<strong>135</strong> <strong>PE</strong>/<strong>145</strong>/49
MASTERINGYOURBERNINA ®BERNINA ® <strong>activa</strong> <strong>125</strong>/<strong>135</strong> <strong>PE</strong>/<strong>145</strong>TURNED UNDER ELASTICFabric: Lycra - cotton or nylont, 6” x 5”9” of cotton swimwear elastic, ½” wideNeedle:80/12 UniversalThread:All-purpose sewing threadPresser Foot: Reverse Pattern Foot #1• Select the ZigZag stitch #2 - SW 2mm and SL 2mm.• Position the elastic on the wrong side of the fabric, along one 6” edge.• Allow a 2” tail of elastic to extend beyond the fabric.• Using the tail of elastic at the back of the presser foot for a “handle”, stretch the elastica bit to simulate the leg of an exercise leotard or swimsuit.Note: This is the same procedure used to do a turned waistband, using wider elastic.• Sew the elastic to the fabric keeping the edge of the elastic and the edge of the fabric together.• If stopping midway, use the Needle Down function to hold the elastic and fabric in place.• Fold the elastic to the wrong side and overstitch the elastic from the right side using RunningStitch #4 with a length of 1mm.• Adjust presser foot pressure and/or stitch length if elastic stretches out as it is sewn.MASTERING YOUR BERNINA ® 1/10/02<strong>activa</strong> <strong>125</strong>/<strong>135</strong> <strong>PE</strong>/<strong>145</strong>/50
MASTERINGYOURBERNINA ®BERNINA ® <strong>activa</strong> <strong>125</strong>/<strong>135</strong> <strong>PE</strong>/<strong>145</strong>WISH LISTOn The Edge Presser Feet: Edgestitch Foot #10 Embroidery Foot #6 Buttonhole Foot with Slide #3B Button Sew-on Foot #18 Feet-ures Gimp or Pearl Crown Rayon Stitch Witchery - roll Water-soluable stabilizer Buttonhole Space Tape Buttonhole Placement Gauge - Simpflex ruler ½” Drafting Tape Marking Pens/Pencils Applique Scissors - for grading seams Height Compensation Tool Seam Sealent Glue Stick Buttonhole Cutter and Block Set Double Needles Cotton elastics Accessory BoxMASTERING YOUR BERNINA ® 1/10/02<strong>activa</strong> <strong>125</strong>/<strong>135</strong> <strong>PE</strong>/<strong>145</strong>/51
MASTERINGYOURBERNINA ®BERNINA ® <strong>activa</strong> <strong>125</strong>/<strong>135</strong> <strong>PE</strong>/<strong>145</strong>MASTERING YOURBERNINA ®<strong>activa</strong> <strong>125</strong>/<strong>135</strong> <strong>PE</strong>/<strong>145</strong>OWNER’S WORKBOOKSection DGather It Up and Tuck It DownMASTERING YOUR BERNINA ® 1/10/02<strong>activa</strong> <strong>125</strong>/<strong>135</strong> <strong>PE</strong>/<strong>145</strong>/52
MASTERINGYOURBERNINA ®SECTION DGATHER IT UP AND TUCK IT DOWNBERNINA ® <strong>activa</strong> <strong>125</strong>/<strong>135</strong> <strong>PE</strong>/<strong>145</strong>Gathering• Gathering With A Basting Stitch- Lengthen stitch all the way- Tighten top tension for easier removal• Gathering Over A Single Cord- Refer to Feet-ures, Unit B- Embroidery Foot #6 with stitch #2• Gathering Over Two Cords- Buttonhole Foot #3 with Gathering Stitch- Can use elastic thread for shirring• Elastic Thread In Bobbin Case- Refer to Feet-ures, Unit H- Use Black Latch bobbin case• Narrow Casing Elastic- Refer to Feet-ures, Unit A- Open Embroidery Foot #20 with stitch #2• Gathering Foot #16- refer to Feet-ures, Unit D- gathering a single layer- gathering to a flat piece- short stitch length for easing• Ruffler Attachment- refer to Feet-ures, Unit JTucks• Pintuck Feet and Double Needles- refer to Feet-ures, Unit F- which feet go with which needle- how to thread a double needle- how to use grooves in feet• Corded Pintucks- refer to Feet-ures, Unit A- straight tucks- gimp hole- turning corners• Pleats vs Tucks- refer to Feet-ures, Unit C- Edgestitch Foot #10- Reverse Pattern Foot #1• Large Tucks and Pleats- refer to Feet-ures, Unit D- Quilting/Seam Guide- Zipper Foot with Guide #14- Guide Bars with Rulers• Decorative Tucks- refer to Feet-ures, Unit F- sewn with decorative stitches vs straight- corded edges- lace insertedMASTERING YOUR BERNINA ® 1/10/02<strong>activa</strong> <strong>125</strong>/<strong>135</strong> <strong>PE</strong>/<strong>145</strong>/53
MASTERINGYOURBERNINA ®BERNINA ® <strong>activa</strong> <strong>125</strong>/<strong>135</strong> <strong>PE</strong>/<strong>145</strong>GATHERING WITH A BASTING STITCHFabric: Medium weight cotton, 12” x 4”Needle:80/12 UniversalThread:All-purpose sewingPresser Foot: Reverse Pattern #1<strong>135</strong> <strong>PE</strong> and <strong>145</strong>:• Trim all 4 edges of fabric piece with a wavy rotary cutter.• Use all-purpose sewing thread top and bottom.• Select the Basting Stitch (#14 on the <strong>135</strong> <strong>PE</strong> and #15 on the <strong>145</strong>).• Stitch 5 /8” from one 12” edge.• Tie the threads at the beginning to secure and gather the sample up to 6”.<strong>125</strong>:• Select Straight Stitch #1; adjust the length to 5mm• Stitch 5 /8” from one 12” edge.• Tie the threads at the beginning to secure and gather the sample up to 6”.Notes:- Use a fine darning thread; it is easier to remove after a seam has been sewn.- To secure basting stitches, sew a few normal length straight stitches at the beginningand end of the seam.MASTERING YOUR BERNINA ® 1/10/02<strong>activa</strong> <strong>125</strong>/<strong>135</strong> <strong>PE</strong>/<strong>145</strong>/54
MASTERINGYOURBERNINA ®BERNINA ® <strong>activa</strong> <strong>125</strong>/<strong>135</strong> <strong>PE</strong>/<strong>145</strong>GATHERING OVER A SINGLE CORDFabric: Medium weight cotton, 12” x 4”18” of cordNeedle:80/12 UniversalThread:All-purpose sewingPresser Foot: Embroidery Foot #6 (optional accessory)• Trim all four edges of sample fabric before beginning.• Thread the cord through the hole in Foot #6, leaving a 2”-3” tail behind the foot.• Select stitch #2 - SW 2.5mm and SL 2-2.5mm.• Stitch 5 /8” from one 12” edge.• Sew over the cord.• Secure the cord at the beginning and then pull it to gather the sample to 6”.Notes:- Gathering over cord adds additional strength, eliminates thread breakage and allows bettercontrol of gathering.- Drop the feed dog and sew a bartack at the beginning and end of cord for strength.- Do not sew through cording.MASTERING YOUR BERNINA ® 1/10/02<strong>activa</strong> <strong>125</strong>/<strong>135</strong> <strong>PE</strong>/<strong>145</strong>/55
MASTERINGYOURBERNINA ®BERNINA ® <strong>activa</strong> <strong>125</strong>/<strong>135</strong> <strong>PE</strong>/<strong>145</strong>GATHERING OVER TWO CORDSFabric: Medium weight cotton, 12” x 4”30” of cordingNeedle:80/12 UniversalThread:All-purpose sewingPresser Foot: Standard Buttonhole Foot #3 (optional)• Trim all 4 edges of the fabric piece with a wavy rotary cutter.• Place the fabric under the foot and lower the needle but not the foot.• Select the Gathering Stitch (#12 on the <strong>125</strong> and #18 on the <strong>135</strong> <strong>PE</strong> and the <strong>145</strong>).• Fold cord in half and loop around the middle toe of foot #3; lower it.• Lift cord loop from toe and pull cord forward leaving 3” tails behind the foot.• Begin to sew, allowing the two grooves of the buttonhole foot to guide the cord.• Sew along one 12” edge - 5 /8” from the edge.• Pull on both cords to gather the sample to 6”.MASTERING YOUR BERNINA ® 1/10/02<strong>activa</strong> <strong>125</strong>/<strong>135</strong> <strong>PE</strong>/<strong>145</strong>/56
MASTERINGYOURBERNINA ® <strong>activa</strong> <strong>125</strong>/<strong>135</strong> <strong>PE</strong>/<strong>145</strong>BERNINA ® ELASTIC THREAD IN THE BOBBINFabric: Rayon Challis - 12” x 4”Needle:80/12 UniversalThread:All-purpose sewingElastic thread (bobbin)Presser Foot: Reverse Pattern Foot #1Other:Black Latch Bobbin Case• Trim all four edges of the sample fabric before beginning.• A Black Latch bobbin case is suggested.• Wind elastic thread on the bobbin.• Place in bobbincase and adjust tension if necessary.• All-purpose sewing thread is used in the needle.• Select stitch #1 - SL 4mm to 5mm - center needle position - upper tension 7-9.• Draw guidelines on the fabric, spacing them evenly apart.• Sew from the right side of the fabric.• Keep rows flat as sewing.• When finished, steam press the sample, holding the iron over the fabric with the elasticside up. Do not touch the iron to the fabric.• Leave the fabric flat until dry.MASTERING YOUR BERNINA ® 1/10/02<strong>activa</strong> <strong>125</strong>/<strong>135</strong> <strong>PE</strong>/<strong>145</strong>/57
MASTERINGYOURBERNINA ®BERNINA ® <strong>activa</strong> <strong>125</strong>/<strong>135</strong> <strong>PE</strong>/<strong>145</strong>NARROW CASING ELASTICFabric: Medium weight cotton, 9” x 4”12” of 1 /8” or ¼” cotton elasticNeedle:80/12 UniversalThread:All-purpose sewingPresser Foot: Reverse Pattern Foot #1• Trim all four edges of the sample fabric before beginning.• Measure and mark the elastic for amount needed. Allow a 2” tail at both ends.• Draw a line on the wrong side of the fabric where the elastic is to go (this couldbe the line on apattern where a casing is suggested).• Place the elastic over the line and under the foot and needle - sew a few straight stitches backwardand forward to secure the elastic.• Select ZigZag Stitch #2; adjust width to clear the elastic.• Stretch the elastic gently to give the fullness desired.• When you reach the other end, secure in the same manner as the beginning.• Even out the gathers.MASTERING YOUR BERNINA ® 1/10/02<strong>activa</strong> <strong>125</strong>/<strong>135</strong> <strong>PE</strong>/<strong>145</strong>/58
MASTERINGYOURBERNINA ® <strong>activa</strong> <strong>125</strong>/<strong>135</strong> <strong>PE</strong>/<strong>145</strong>BERNINA ® GATHERING FOOT #16Fabric: Medium weight cotton, 10” x 4”Needle:80/12 UniversalThread:All-purpose sewingPresser Foot: Wide Gathering Foot #16 (optional accessory)• Trim all four edges of the sample fabric before beginning.• Select stitch #1 - lengthen to 5mm.• Place fabric to be gathered under the foot.• Guide the fabric, keeping the raw edges even with the right edge of the foot, or use the seamlines on the throat plate.Notes:- There are three things that effect the amount of gathers:1. Fabric Weight - The lighter weight the fabric, the easier to gather.2. Tension - Increased upper tension will increase the amount of gathering.3. Stitch Length - The longer the stitch length, the tighter the gathers.- Use the basting stitch (<strong>135</strong> <strong>PE</strong>/<strong>145</strong> only) to increase gathers in heavier weight fabricssuch as woolens and corduroys.MASTERING YOUR BERNINA ® 1/10/02<strong>activa</strong> <strong>125</strong>/<strong>135</strong> <strong>PE</strong>/<strong>145</strong>/59
MASTERINGYOURBERNINA ®BERNINA ® <strong>activa</strong> <strong>125</strong>/<strong>135</strong> <strong>PE</strong>/<strong>145</strong>RUFFLERFabric: Medium weight cotton, 12” x 4”Needle:80/12 UniversalThread:All-purpose sewingPresser Foot: Ruffler Attachment #86 (optional accessory)• Trim fabric with wavy rotary cutter before sewing.• Select stitch #1 - SL 1mm-5mm. The longer the stitch length, the deeper the pleat.• Needle position is center.• Set the adjustmin lever on the attachment at 1.• Place the fabric to be ruffled between the two blades, snugging it against the edge of theseam guide slot, making sure it is slightly beyond the needle.• Lower the foot and begin sewing.• If gathers are too deep, turn the adjusting screw counter clockwise; if too shallow, turn thescrew clockwise.Note: Loosening the needle tension to 3-4 will allow some subsequentadjustment of the fullness.MASTERING YOUR BERNINA ® 1/10/02<strong>activa</strong> <strong>125</strong>/<strong>135</strong> <strong>PE</strong>/<strong>145</strong>/60
MASTERINGYOURBERNINA ® <strong>activa</strong> <strong>125</strong>/<strong>135</strong> <strong>PE</strong>/<strong>145</strong>BERNINA ® PINTUCKS AND DOUBLE NEEDLESFabric:Needle:Thread:Presser Foot:Lightweight cotton, 6” x 4”, starchedDouble (size should correspond to foot)All-purpose sewingPintuck Foot #30, #31, #32, or #33 (optional accessories)• Select the desired presser foot and corresponding double needle:- Pintuck Foot #30 - 3 groove - 4mm needle- Pintuck Foot #31 - 5 groove - 3mm needle- Pintuck Foot #32 - 7 groove - 2mm needle- Pintuck Foot #33 - 9 groove - 1.6 needle• Insert the double needle and thread with two different colors.• Select the straight stitch #1 - SL 1.75mm-2mm.• Sew at a slower speed and test the movement of the needle. You want to be sure it doesn’t hit thepresser foot.• Top tension can be tightened to create more dimension.• Start sewing in one corner and meander across the fabric.• Position the previously sewn tuck in the groove of the foot and sew 6 more rows evenly spacedacross the fabric, as desired.• Trim, press and mount the sample.MASTERING YOUR BERNINA ® 1/10/02<strong>activa</strong> <strong>125</strong>/<strong>135</strong> <strong>PE</strong>/<strong>145</strong>/61
MASTERINGYOURBERNINA ®BERNINA ® <strong>activa</strong> <strong>125</strong>/<strong>135</strong> <strong>PE</strong>/<strong>145</strong>CORDED PINTUCKSFabric:Lightweight cotton, 5” x 5”, starchedGimp CordNeedle: Double 3.0/80Thread:All-purpose sewingPresser Foot: 5 Groove Pintuck Foot #31 (optional accessory)• Thread the cord through the hole in the needle plate.Note: Cord should be colorfast and shrinkproof.• Thread machine - same thread in both needles and the bobbin.• Sew four random corners.Turning Corners:- When turning a corner it is not possible, with a double needle, to turncompletely in one operation.- Sew to corner; needle in fabric, drop feed dogs.- Turn ½ way, make 1 stitch, place needles in fabric, turn remainder of corner.- Raise feed dogs and continue.• Sew 2 points as on a leaf or star.Turning Points- Sew to corner; needle up.- Pivot work carefully and lower needles back into same place; needleshave changed sides.MASTERING YOUR BERNINA ® 1/10/02<strong>activa</strong> <strong>125</strong>/<strong>135</strong> <strong>PE</strong>/<strong>145</strong>/62
MASTERINGYOURBERNINA ®BERNINA ® <strong>activa</strong> <strong>125</strong>/<strong>135</strong> <strong>PE</strong>/<strong>145</strong>PLEATS vs TUCKSFabric: Medium weight cotton, 8” x 5”Needle:80/12 UniversalThread:All-PurposePresser Foot: Reverse Pattern #1Edgestitch #10 (optional accessory)Reverse Pattern Foot #1:• Starting at the left edge and working across the 8” width, draw 4 lines for folding andpressing. The first 2 lines are 2” apart, second 2 lines are 1¼” apart.Note: By placing the fold even with the right edge of the foot and placing the needleposition all the way to the left to start, it is possible to get 9 different sizes pleats/tucks.• Using Straight Stitch #1, sew the first tuck, on the first line, with needle position all the wayto the left.• Second tuck, on second line, with needle position all the way to the right.- Each position makes about a 1mm difference.Edgestitch Foot #10:• Place the fold of the third pleat to the left of the center blade - right next to it.• Move the needle position all the way to the left and sew.• Position the fold of the last pleat in the same manner. Move the needle position to half leftand sew.- Very small tucks/pleats are possible with this foot.MASTERING YOUR BERNINA ® 1/10/02<strong>activa</strong> <strong>125</strong>/<strong>135</strong> <strong>PE</strong>/<strong>145</strong>/63
MASTERINGYOURBERNINA ®BERNINA ® <strong>activa</strong> <strong>125</strong>/<strong>135</strong> <strong>PE</strong>/<strong>145</strong>LARGE TUCKS/PLEATSFabric: Medium weight cotton, 10” x 4”Needle:80/12 EmbroideryThread:30 wt. Cotton EmbroideryPresser Foot: Zipper Foot with Guide #14 (optional accessory)Zipper foot #14 has a movable guide with 9 markings which ensure precise sewing ofa variety of different size tucks.• Select stitch #1 - SL 2-5mm.• Determine fold line of tuck. Fold on this line and press.• Adjust the guide on the foot for the widest tuck possible.• Place fabric under foot, positioning fold of tuck under the lip of the guide.• Adjust Needle Position to correspond with notch on guide.• Stitch tuck, allowing folded edge of fabric to feed into lip of guide.• The Seam/Quilting Guide that comes with the machine, when attached to the foot, can createa pleat up to 2¼” wide. Note: A left guide is available; also available is a set of guides with a rulerattached; they can be used to create pleats up to 4” wide.• Determine fold line of tuck. Fold on this line and press.• Attach the guide to the foot and adjust for the widest tuck possible.• Place fabric under foot, positioning the guide along the fold of the tuck.• Adjust Needle Position to correspond with notch on guide.• Stitch tuck, allowing the guide to ride on the folded edge of the fabric.MASTERING YOUR BERNINA ® 1/10/02<strong>activa</strong> <strong>125</strong>/<strong>135</strong> <strong>PE</strong>/<strong>145</strong>/64
MASTERINGYOURBERNINA ®BERNINA ® <strong>activa</strong> <strong>125</strong>/<strong>135</strong> <strong>PE</strong>/<strong>145</strong>DECORATIVE TUCKSFabric: Medium weight cotton, 8” x 4”Needle:80/12 EmbroideryThread:30 wt. Cotton Embroidery,Metallic, and matching cordPresser Foot: Depends on technique• Draw 4 lines about ¼” apart, across the width of the fabric.• On the first line - create a tuck, about ¼”, using a decorative stitch.• On the second line - sew a ¼” tuck using a metallic thread with a straight stitch.• Cord the edge of this tuck with a metallic cord as in Section C - Corded Edge.• On the third line create an inverted tuck with lace inserted into it.- Place the edge of the lace against the drawn line, on the right side, and baste in place.- Fold the fabric over the lace and press.- Using Edgestitch Foot #10, place the pressed fold against the left side of the center blade -move needle position to the left enough to catch the lace; stitch to the left of the basting line.- Open out and press again.• On the fourth line insert the lace with the tuck.- Fold wrong sides together and press the last tuck.- Place the edge of the lace in from the fold a scant ¼”.- Using Foot #37 - the ¼” foot - stitch a tuck, catching the lace as you sew.- Press the tuck toward the lace.MASTERING YOUR BERNINA ® 1/10/02<strong>activa</strong> <strong>125</strong>/<strong>135</strong> <strong>PE</strong>/<strong>145</strong>/65
MASTERINGYOURBERNINA ®BERNINA ® <strong>activa</strong> <strong>125</strong>/<strong>135</strong> <strong>PE</strong>/<strong>145</strong>WISH LISTGather It Up and Tuck It Down Presser Feet and Attachments: Embroidery Foot #6 Edgestitch Foot #10 Zipper Foot With Guide #14 Wide Gathering Foot #16 Open Embroidery Foot #20 Pintuck Feet #30 - 3 groove #31 - 5 groove #32 - 7 groove #33 - 9 groove Patchwork Foot #37 Ruffler Attachment #86 Feet-ures Double Needles 1.6mm 2.0mm 2.5mm 3.0mm 4.0mm Guide Bar Set with Rulers Elastic thread Gimp cord Extra Bobbincase Accessory Box GooGone Sewing Iron Metallic Thread and Cord Wavy Rotary Cutter Ruler Cutting Mat Spray SizingMASTERING YOUR BERNINA ® 1/10/02<strong>activa</strong> <strong>125</strong>/<strong>135</strong> <strong>PE</strong>/<strong>145</strong>/66
MASTERINGYOURBERNINA ®BERNINA ® <strong>activa</strong> <strong>125</strong>/<strong>135</strong> <strong>PE</strong>/<strong>145</strong>MASTERING YOURBERNINA ®<strong>activa</strong> <strong>125</strong>/<strong>135</strong> <strong>PE</strong>/<strong>145</strong>OWNER’S WORKBOOKSection EMiscellaneous MagicMASTERING YOUR BERNINA ® 1/10/02<strong>activa</strong> <strong>125</strong>/<strong>135</strong> <strong>PE</strong>/<strong>145</strong>/67
MASTERINGYOURBERNINA ®BERNINA ® <strong>activa</strong> <strong>125</strong>/<strong>135</strong> <strong>PE</strong>/<strong>145</strong>SECTION EMISCELLANEOUS MAGICZipper InsertionOwner’s Manual page ____Feet-ures, Unit B and D - center insertionFeet-ures, Unit A and F - invisibleMending Tears and HolesOwner’s Manual page ____Feet-ures, Unit C and KFringingFeet-ures, Unit BFagotingFeet-ures, Unit BBundlingFeet-ures, Unit BLace InsertionFeet-ures, Unit COutline QuiltingFeet-ures, Unit HHand Look Quilt StitchFeet-ures, Unit ATriple NeedlesFeet-ures, Unit AWing Needles and Double Wing NeedlesFeet-ures, Unit ACouching CordFeet-ures, Unit EBobbinwork BasicsFeet-ures, Units B, E, HPipingFeet-ures, Unit CMASTERING YOUR BERNINA ® 1/10/02<strong>activa</strong> <strong>125</strong>/<strong>135</strong> <strong>PE</strong>/<strong>145</strong>/68
MASTERINGYOURBERNINA ®BERNINA ® <strong>activa</strong> <strong>125</strong>/<strong>135</strong> <strong>PE</strong>/<strong>145</strong>CENTERED ZIP<strong>PE</strong>RFabric:Medium weight cotton, 2 pieces, 4” x 8” eachZipper:5” or 6” ConventionalNeedle:80/12 UniversalThread:All-purpose sewingPresser Feet: Reverse Pattern Foot #1,Zipper Foot #4, andZipper Foot with Guide #14 (optional accessory)Attaching the Zipper:• Using Foot #1 and stitch #1, sew the seam from the bottomto where the zipper stop will be.• Lengthen the stitch to the maximum and continue to within½” from the top of the seam.• Change back to stitch #1; sew the rest of the way to secure.• Press the seam open and place the right side of the zipperagainst the seam allowance, so the zipper teeth are centeredover the seam.• Pin or baste (using a temporary spray adhesive) each side ofthe zipper to the seam allowance only.• Change to Zipper Foot #4; adjust the needle position to theright and to the left as needed to get close to the zipper teeth.• Sew through the zipper tape and seam allowance only, fromthe bottom to the top on each side.• Pin or baste through all layers.Topstitching the Zipper:• Change to Zipper Foot with Guide #14.Left Side:• Adjust the seam guide on the foot so it is one groove to theright of center and change the needle position to far left.• Sewing from the right side of the fabric and starting at thebottom, sink the needle into the seam.• Sew out from the zipper stop about 3 /8”, stop, pivot and makesure the seam guide on the foot is lying in the ditch of theseam.• Sew up the left side of the zipper.Right Side:• Adjust seam guide on the foot so that it is one groove to theleft of center and change the needle position to far right.• Repeat the previous steps, starting at the seam and sewingto the right.• Press and trim the sample. Mount it, attaching it only at thetop. You can then lift the sample and use it as a reference.MASTERING YOUR BERNINA ® 1/10/02<strong>activa</strong> <strong>125</strong>/<strong>135</strong> <strong>PE</strong>/<strong>145</strong>/69
MASTERINGYOURBERNINA ®BERNINA ® <strong>activa</strong> <strong>125</strong>/<strong>135</strong> <strong>PE</strong>/<strong>145</strong>Note: The invisible zipper can be used in place ofa conventional zipper when an uninterrupted designline is desired.• Mark the seam lines on the right side of fabric.• Select Straight Stitch #1.• Refer to the instructions with the zipper for placementon the fabric.• Open the zipper and press the coils flat, from the wrongside, using the synthetic setting on the iron.• Do not sew the seam first as with conventional zippers.Zipper tapes are sewn to fabric sections first, then theseam is sewn.• With right sides together, baste or pin right zipper tapeto right garment piece, so coil is on the 5 /8” seam line.• Using center needle position, place coil in right grooveof Foot #3. Sew until foot is stopped by the zipper pull.Note: Needle should sew as close to coils aspossible without actually sewing into them.• With right sides together, baste or pin left zipper tape toleft garment piece so that the coil is again on the 5 /8”seam line.• Check to be sure the zipper is not twisted.• Place the coil in the left groove of the foot and completeas with the right side.•To sew seam: Close the zipper. Using Zipper Foot #4,place the fabric right sides together and stitch as closeto the zipper as possible, starting about ½” above thebottom of the zipper. Backstitch to begin and sew about2”; then change to Foot #1 to complete the seam.• Press and trim the sample. Mount it, attaching it only atthe top. You can then lift the sample and use it as areference.INVISIBLE ZIP<strong>PE</strong>RFabric:Medium weight cotton, 2 pieces, 4” x 8” eachZipper:5” or 6” InvisibleNeedle:80/12 UniversalThread:All-purpose sewingPresser Feet: Reverse Pattern Foot #1,Standard Buttonhole Foot #3, andZipper Foot #4MASTERING YOUR BERNINA ® 1/10/02<strong>activa</strong> <strong>125</strong>/<strong>135</strong> <strong>PE</strong>/<strong>145</strong>/70
MASTERINGYOURBERNINA ®BERNINA ® <strong>activa</strong> <strong>125</strong>/<strong>135</strong> <strong>PE</strong>/<strong>145</strong>MENDING TEARS AND HOLESFabric: Denim - 4” x 6”Fusible Knit Interfacing, 2” x 2”Needle:90/14 Universal or JeansThread:To suit the fabricPresser Feet: Auto Buttonhole Foot with Slide #3AReverse pattern Foot #1and Darning Foot #9• Make 2 tears in the fabric, about 1” each. Make one hole about ½” round.Method #1:Automatic Darning<strong>135</strong> <strong>PE</strong> and <strong>145</strong>:• Select stitch #13 on the <strong>135</strong> <strong>PE</strong> and stitch #14 on the <strong>145</strong>.• Use Auto Buttonhole Foot with Slide #3A with the feed dog up.<strong>125</strong>:• Select stitch #11.• Use Reverse patern Foot #1 with the feed dog up.• Insert the needle into the area at the left of the top of the tear.• Sew the first vertical row the length of the tear.• Press the Quick Reverse to program the length; continue stitching and the machinewill finish automatically.Method #2: Manual Darning• Bond the fusible knit interfacing to the wrong side of the fabric, covering the hole.• Select stitch #1 and attach Darning Foot #9. Lower the feed dogs.• Hoop fabric to prevent distortion. Stitch back and forth, then up and down, moving thehoop without pressure.Method #1 Method #2MASTERING YOUR BERNINA ® 1/10/02<strong>activa</strong> <strong>125</strong>/<strong>135</strong> <strong>PE</strong>/<strong>145</strong>/71
MASTERINGYOURBERNINA ®BERNINA ® <strong>activa</strong> <strong>125</strong>/<strong>135</strong> <strong>PE</strong>/<strong>145</strong>FRINGINGFabric:Needle:Thread:Presser Feet:Firm fabric - 2 pieces, 4” x 6” each90/14 EmbroideryRayon EmbroideryTailor Tack Foot #7 (optional accessory)Embroidery Foot #6 (optional accessory)• Select stitch #2 - SW 2mm and SL satin - Tension 1 - Tailor Tack Foot #7.• Put a contrast all-purpose sewing thread in the bobbin.• Turn under ½” seam allowance on both pieces of fabric and press.• Butt the folds together under the center of the presser foot, with right sides up.• Guide fabric while sewing, so needle swings pierce both fabric pieces.• Carefully remove the bobbin thread and gently separate the two fabrics, leaving them joinedby strands of the upper thread.• Change to Embroidery Foot #6 and select the Blanket Stitch.• Engage the Mirror Image function, if available and if needed.• Anchor the fringe to the fabric edge by oversewing it.• After fringe is secured on one side, the other fabric can be pulled away.• Trim excess seam allowance from wrong side if needed.MASTERING YOUR BERNINA ® 1/10/02<strong>activa</strong> <strong>125</strong>/<strong>135</strong> <strong>PE</strong>/<strong>145</strong>/72
MASTERINGYOURBERNINA ®BERNINA ® <strong>activa</strong> <strong>125</strong>/<strong>135</strong> <strong>PE</strong>/<strong>145</strong>FAGOTINGFabric:Needle:Thread:Presser Feet:Firm fabric - 2 pieces, 3 ”x 5” each90/14 EmbroideryEmbroideryTailor Tack Foot #7 (optional accessory)Open Embroidery Foot #20 (optional accessory)• Select stitch #2 - SW 2mm and SL satin - Tension 1 - Tailor Tack Foot #7.• Place fabrics right sides together; sew with a 5 /8” seam on a 5” side.• Sew slowly - adjust motor to ½ speed.• When finished sewing the seam, pull the two layers firmly apart and press open.• Change to Open Embroidery Foot #20 for better visibility - may need to stabilize the stitchingarea to prevent tunneling.• From the right side, anchor the fagoting to the fabric on either side with a decorative stitchthrough the seam allowance.• Trim any excess seam allowance if needed.MASTERING YOUR BERNINA ® 1/10/02<strong>activa</strong> <strong>125</strong>/<strong>135</strong> <strong>PE</strong>/<strong>145</strong>/73
MASTERINGYOURBERNINA ®BERNINA ® <strong>activa</strong> <strong>125</strong>/<strong>135</strong> <strong>PE</strong>/<strong>145</strong>BUNDLINGFabric:Needle:Thread:Presser Feet:Firm fabric - 2 pieces, 3” x 5” each90/14 EmbroideryEmbroideryTailor Tack Foot #7 (optional accessory)Open Embroidery #20 (optional accessory)Reverse Pattern Foot #1• Select stitch #2 - SW 2mm and SL satin - Tension 1 - Tailor Tack Foot #7.• Place fabrics right sides together; sew with a 5 /8” seam on a 5” side.• Sew slowly - adjust motor to ½ speed.• When finished sewing the seam, pull the two layers firmly apart and press open.• Change to Open Embroidery Foot #20 for better visibility - may need to stabilize the stitchingarea to prevent tunneling.• From the right side, anchor the fagoting to the fabric on either side with a decorative stitchthrough the seam allowance.• Trim any excess seam allowance if needed.• To “bundle” the fagoting stitches into groups: Select the Triple Straight Stitch #6 - change toReverse Pattern Foot #1; center the foot over the fagoting stitches and sew down the middle.MASTERING YOUR BERNINA ® 1/10/02<strong>activa</strong> <strong>125</strong>/<strong>135</strong> <strong>PE</strong>/<strong>145</strong>/74
MASTERINGYOURBERNINA ®BERNINA ® <strong>activa</strong> <strong>125</strong>/<strong>135</strong> <strong>PE</strong>/<strong>145</strong>LACE INSERTIONFabric: Lightweight cotton 4” x 6”9” insertion lace, ½ ”- ¾” wideNeedle:75/11 UniversalThread:60 wt. cottonPresser Feet: Edgestitch Foot #10 (optional accessory)• Pin or baste the lace in position.First Run:• Select stitch #1 - SL 1.5mm-2mm with the needle position set at half left.• Place the edge of the lace to the left edge of the guide on the foot and sew.• Sew the right side in a like manner using the needle position set at half right.• From the back, carefully cut through the fabric, in the middle of the two rows of stitching.• Press the fabric back against the straight stitch.Second Run:• Select stitch #2 - SW 1.5mm-2mm and SL 0.75mm-1mm with the needle position set at half left.• Place edge of lace first to the left of the blade, with the needle in the half left position, and sew thezigzag stitch over the edge of the lace and the previously sewn straight stitch.• Sew the right side in a like manner using the needle position set at half right.• Trim surplus fabric from the wrong side.MASTERING YOUR BERNINA ® 1/10/02<strong>activa</strong> <strong>125</strong>/<strong>135</strong> <strong>PE</strong>/<strong>145</strong>/75
MASTERINGYOURBERNINA ®BERNINA ® <strong>activa</strong> <strong>125</strong>/<strong>135</strong> <strong>PE</strong>/<strong>145</strong>OUTLINE QUILTINGFabric:Backing:Batting:Needle:Thread:Presser Foot:Cheater block or fabric with large design1 piece coordinating fabric, same size as fabric1 piece low-loft, same size as fabric90/14 QuiltingCotton embroidery for bobbinMonofilament for needleLeather Roller Foot #55 (optional accessory)• Foot #55 allows for easy maneuvering of curves and tight areas.• Select stitch #1 - SL 2.5mm-3.5mm - tension is loosened to about 3-4 - needle position is to the left,depending on the desired look.• Engage the Needle Stop Down function.• Sandwich the batting between the top fabric and the backing. Pin or baste in place.• Bring the bobbin thread to the top of the fabric and select the Securing function to secure thebeginning stitch. Sew; turn the Securing function off. Clip the thread tails.• Stitch in a continuous line around the outside edge of the design or pattern in the fabric. Move thefabric in any direction to follow the design.MASTERING YOUR BERNINA ® 1/10/02<strong>activa</strong> <strong>125</strong>/<strong>135</strong> <strong>PE</strong>/<strong>145</strong>/76
MASTERINGYOURBERNINA ®BERNINA ® <strong>activa</strong> <strong>125</strong>/<strong>135</strong> <strong>PE</strong>/<strong>145</strong>HAND LOOK QUILT STITCHFabric:2 pieces solid cotton - 4” x 6” eachBatting: 1 piece, low-loft - 4” x 6”Needle:90/14 QuiltingThread:Cotton embroidery for bobbinMonofilament for needlePresser Foot: Reverse Pattern Foot #1Owner’s manual page___Note: When using the hand Look Quilt Stitch, the cotton embroidery bobbin thread is pulled to the topof the quilt while the monofilament thread “disappears”, simulating the look of a hand-sewn runningstitch.• Select the Hand Look Quilt Stitch.• Depending on the fabric you may need to increase the upper tension to 6-9.• Balance can be used to adjust the stitch as needed.• This stitch can be sewn in any needle position.• If monofilament thread breaks, decrease the tension.MASTERING YOUR BERNINA ® 1/10/02<strong>activa</strong> <strong>125</strong>/<strong>135</strong> <strong>PE</strong>/<strong>145</strong>/77
MASTERINGYOURBERNINA ®BERNINA ® <strong>activa</strong> <strong>125</strong>/<strong>135</strong> <strong>PE</strong>/<strong>145</strong>TRIPLE NEEDLE WORKFabric: Firmly woven - 6” x 5”Stabilizer: Firm Tear-away or Cutaway - 6” x 5”Needle:TripleThread:Embroidery, 3 different colorsPresser Foot: Reverse Pattern Foot #1 orOpen Embroidery Foot #20 (optional accessory)• Thread each needle with a different color thread.• Select 5 different stitches and sew across the fabric randomly.• When doing decorative needle work you must sew slowly - change motor to ½ speed.Note:To be sure the needles will not strike the foot, turn the handwheel to“walk” the machine through the first stitch. Narrow the width as neede toavoid breaking needles.• Trim threads, then trim sample edges, and mount below.MASTERING YOUR BERNINA ® 1/10/02<strong>activa</strong> <strong>125</strong>/<strong>135</strong> <strong>PE</strong>/<strong>145</strong>/78
MASTERINGYOURBERNINA ®BERNINA ® <strong>activa</strong> <strong>125</strong>/<strong>135</strong> <strong>PE</strong>/<strong>145</strong>WINGING IT ONCEANDWINGING IT TWICEFabric:Needles:Thread:Presser Foot:Broadcloth, 6” x 5”, starchedWing/120Double WingEmbroideryReverse Pattern #1 orOpen Embroidery #20 (optional accessory)Single Wing Needle• Select Double Overlock Stitch #8.• Stitch from corner to corner; the holes will open better on the bias.Note:To be sure the needles will not strike the foot, turn the handwheel to“walk” the machine through the first stitch. Narrow the width as neede toavoid breaking needles.Double Wing Needle• Use a different color of thread in each needles.• Select the Blindstitch #7 and sew to the right or left of the single wing needle stitch.• Select the Honeycomb Stitch (#<strong>145</strong> on the <strong>135</strong> <strong>PE</strong> and #19 on the <strong>145</strong>) or the Double OverlockStitch #8 (<strong>125</strong>).• Sew rows on either side of the last ones.• Select the Gathering Stitch.• Sew rows on either side of the last ones.• Play with other stitches to get different effects.MASTERING YOUR BERNINA ® 1/10/02<strong>activa</strong> <strong>125</strong>/<strong>135</strong> <strong>PE</strong>/<strong>145</strong>/79
MASTERINGYOURBERNINA ®BERNINA ® <strong>activa</strong> <strong>125</strong>/<strong>135</strong> <strong>PE</strong>/<strong>145</strong>COUCHING CORDSFabric: Firmly woven - 6” x 6”Stabilizer:Firm Tear-away or Cutaway - 2 pieces, 6” x 5” eachNeedle:90/14 EmbroideryThread:Assorted decorative threadsAssorted decorative cordsPresser Feet: Cording Foot #22 - 3 groove (optional accessory) andCording Foot #25 - 5 groove (optional accessory)• Select the thread used according to the look that is desired.• Load the feet by moving the black latch away from the top of the foot and placing the cords inthe slots. Cords should feed in from the top and go into theg rooves on the bottom of the foot.Load all cords in the same manner.• Secure the latch across the top of the foot to hold the cords in place.• To stabilize the fabric you may need more than one layer of stabilizer.• Try using different colors of cording in each groove.• Select stitches of your choice. The Running Stitch #4 (lengthen stitch to 3mm-5mm) withvariegated thread works well.• Sew in different directions across the fabric.MASTERING YOUR BERNINA ® 1/10/02<strong>activa</strong> <strong>125</strong>/<strong>135</strong> <strong>PE</strong>/<strong>145</strong>/80
MASTERINGYOURBERNINA ®BERNINA ® <strong>activa</strong> <strong>125</strong>/<strong>135</strong> <strong>PE</strong>/<strong>145</strong>BOBBINWORK BASICSFabric: Firmly woven - 6” x 4”Stabilizer: Iron-on, 6” x 4”Needle:90/14 UniversalThread:Pearl Crown Rayon andMonofilamentPresser Foot: Embroidery Foot #6 (optional accessory) orOpen Embroidery Foot #20 (optional accessory)Blacklatch Bobbincase (optional accessory)• Press the stabilizer onto the wrong side of the fabric.• Wind the decorative thread on the bobbin and insert it into the case.• Thread the needle with monofilament; upper tension may need to be loosened for certaindecorative threads.• Sew from the wrong side of the fabric for this technique.• Select stitch #15 on the <strong>125</strong>, #22 on the <strong>135</strong> <strong>PE</strong> or #23 on the <strong>145</strong>.• Sew randomly across the fabric.Notes: -When using heavier threads the stitch length should be longer.-Never use the sewing bobbin case when using heavier threads, as it maycause the tension spring to stretch and affect regular sewing; use a Black Latchbobbin caseMASTERING YOUR BERNINA ® 1/10/02<strong>activa</strong> <strong>125</strong>/<strong>135</strong> <strong>PE</strong>/<strong>145</strong>/81
MASTERINGYOURBERNINA ®BERNINA ® <strong>activa</strong> <strong>125</strong>/<strong>135</strong> <strong>PE</strong>/<strong>145</strong>PI<strong>PE</strong>D PORTIONSFabric: Firmly woven - 6” x 4”Cotton - 2” x 15”Cable Cord - 18”Stabilizer:1 piece iron-onNeedle:90/14 UniversalThread:All-PurposePresser Foot: Bulky Overlock #12• Fabric strips should be cut 1¼” plus the circumference of the cord being used.Note: Strips should be cut on the bias; however, crosswise and lengthwisestrips may be used if there are no corners to be turned or curves to maneuver.• Fold the wrong side of the fabric around the filler cord and position it under the presserfoot with the folded edge to the left and the cord under the center of the foot so it ridesin the large groove.• Select Straight Stitch #1 and with the needle in one of the right positions, begin stitching.The stitches will be alongside the cord, creating a 5 /8” seam.• Once the piping is made, it is ready to be inserted into a seam.• Cut the other fabric piece in half, making two 2” x 6” pieces.• Insert the piping using the same foot.MASTERING YOUR BERNINA ® 1/10/02<strong>activa</strong> <strong>125</strong>/<strong>135</strong> <strong>PE</strong>/<strong>145</strong>/82
MASTERINGYOURBERNINA ®BERNINA ® <strong>activa</strong> <strong>125</strong>/<strong>135</strong> <strong>PE</strong>/<strong>145</strong>WISH LISTMiscellaneous Magic Presser Feet and Attachments:Embroidery Foot #6 Tailor Tack Foot #7 Edgestitch Foot #10 Bulky Overlock Foot #12 Zipper Foot with Guide #14 Open Embroidery Foot #20 Cording Foot #22 Cording Foot #25 Leather Roller Foot #55 Blacklatch Bobbincase Feet-ures Spray Stabilizer Decorative Threads Metallic Rayon Cotton Monofilament Thread Smoke Clear Spring Hoops for mending Thread Stand Blunt Point Scissors for lace Needles Single Wing Double Wing Triple Embroidery Cotton Batting Fusible Interfacing Bernina Ironing SystemMASTERING YOUR BERNINA ® 1/10/02<strong>activa</strong> <strong>125</strong>/<strong>135</strong> <strong>PE</strong>/<strong>145</strong>/83
MASTERINGYOURBERNINA ®BERNINA ® <strong>activa</strong> <strong>125</strong>/<strong>135</strong> <strong>PE</strong>/<strong>145</strong>MASTERING YOURBERNINA ®<strong>activa</strong> <strong>125</strong>/<strong>135</strong> <strong>PE</strong>/<strong>145</strong>OWNER’S WORKBOOKSection FProgramming PizzazzMASTERING YOUR BERNINA ® 1/10/02<strong>activa</strong> <strong>125</strong>/<strong>135</strong> <strong>PE</strong>/<strong>145</strong>/84
MASTERINGYOURBERNINA ®BERNINA ® <strong>activa</strong> <strong>125</strong>/<strong>135</strong> <strong>PE</strong>/<strong>145</strong>This exercise is for the <strong>activa</strong> <strong>135</strong> <strong>PE</strong> and <strong>145</strong> onlySECTION FPROGRAMMING PIZZAZZThis section is designed to teach how the memory features of the <strong>135</strong> <strong>PE</strong>/<strong>145</strong> work by sewing asampler. Programming enables a group of stitches to be selected, altered, manipulated, combinedand stored.Memory CapacityOwner’s manual pages ______• 30 spaces for storage• Long term - contents remain until they are deletedFunctionsOwner’s manual pages ______• Motor Speed• Needle Stop Down• Pattern End (<strong>135</strong> <strong>PE</strong>/<strong>145</strong> only)• Balance• Mirror Image (<strong>145</strong> only)Alphabets (<strong>145</strong>)Owner’s manual pages ______• Block letters - upper and lower case• Numbers and charactersProgramming (<strong>135</strong> <strong>PE</strong>/<strong>145</strong> only)Owner’s manual pages ______• Easy push button method of programming stitches• Programmed stitches can be viewed on the screen by scrolling through them.• Programmed stitches can be deleted or overwritten.Buttonhole Memory (<strong>135</strong> <strong>PE</strong>/<strong>145</strong> only)Owner’s manual pages ______• Short term memory• Long term memoryMASTERING YOUR BERNINA ® 1/10/02<strong>activa</strong> <strong>125</strong>/<strong>135</strong> <strong>PE</strong>/<strong>145</strong>/85
MASTERINGYOURBERNINA ®BERNINA ® <strong>activa</strong> <strong>125</strong>/<strong>135</strong> <strong>PE</strong>/<strong>145</strong>This exercise is for the <strong>activa</strong> <strong>135</strong> <strong>PE</strong> and <strong>145</strong> onlyPROGRAMMING PIZZAZZFunction SamplerSpecific sewing directions for this sampler are on the following page.Row #1Motor SpeedRow #2Needle Stop DownRow #3Pattern EndRow #4Mirror Image(<strong>145</strong> only)Row #5BalanceMASTERING YOUR BERNINA ® 1/10/02<strong>activa</strong> <strong>125</strong>/<strong>135</strong> <strong>PE</strong>/<strong>145</strong>/86
MASTERINGYOURBERNINA ®BERNINA ® <strong>activa</strong> <strong>125</strong>/<strong>135</strong> <strong>PE</strong>/<strong>145</strong>This exercise is for the <strong>activa</strong> <strong>135</strong> <strong>PE</strong> and <strong>145</strong> onlyPROGRAMMING PIZZAZZFunction SamplerFabric: Muslin, 6” x 6”Stabilizer:Tear-away as neededNeedle:90/14 UniversalThread:30 wt. cotton embroideryin a contrasting colorPresser Feet: Reverse Pattern Foot #1 andOpen Embroidery Foot #20 (optional accessory)Row #1 - Sewing Speed• Select Straight Stitch #1; sew down the 9” length of the fabric.• Change speeds as you sew.• The <strong>activa</strong> <strong>125</strong>/<strong>135</strong> <strong>PE</strong>/<strong>145</strong> have 2 speeds.• The Clr button does not affect the motor speed.Row #2 - Needle Stop• Engage the Needle Down function.• Sew half way down, stop.• Sew the rest of the way and stop once more. The machine stops instantly without coasting.• The Clr button does not affect the needle up/down function.Row #3 - Pattern End (<strong>135</strong> <strong>PE</strong>/<strong>145</strong> only)• Select stitch #30 on the <strong>135</strong> <strong>PE</strong> and #50 on the <strong>145</strong>.• Engage Pattern End.• Using Open Embroidery Foot #20, sew until the machine stops.• Move the fabric forward about 1”.• Program 3 of the same stitches into the memory.• With the Pattern End function still engaged, sew until the machine stops.Row #4 - Mirror Image (<strong>145</strong> only)• Use Reverse Pattern Foot #1.• Select stitch #21 on the <strong>145</strong>.• Sew one row across the fabric.• Engage Mirror Image and sew a second row next to the first.Row #5 - Balance• Select stitch #8 - sew about one third the distance using the programmed settings; stop.• Adjust the “balance” to the opened symbol.• Sew the next third.• Adjust the balance symbol to the closed symbol.• Sew the last third.• Return the “balance” knob to normal.Note: Clr does not undo Needle Down, Alteredsettings for buttonholes, or Motor SpeedMASTERING YOUR BERNINA ® 1/10/02<strong>activa</strong> <strong>125</strong>/<strong>135</strong> <strong>PE</strong>/<strong>145</strong>/87
MASTERINGYOURBERNINA ®BERNINA ® <strong>activa</strong> <strong>125</strong>/<strong>135</strong> <strong>PE</strong>/<strong>145</strong>This exercise is for the <strong>activa</strong> <strong>135</strong> <strong>PE</strong> and <strong>145</strong> onlyPROGRAMMING PIZZAZZBasic Information for Memory Mania and SamplerAccessing MemoryOwner’s manual page___• Press the external MEM button on the front of the machine.• Memory cursor appears to the left, the number of available spaces blinks and the word MEM appearson the screen.ProgrammingOwner’s manual page___• Select the stitch desired and the stitch number appears on the screen.• Touch the MEM+ button and the selected stitch is programmed.• The number of available spaces appears.• Continue programming in this way.• Scroll through the programmed memory using the scroll arrows on either side of the MEM button.• Altered stitches can be saved in the memory; needle position as well as width and length can be saved.• Delete all unwanted functions before programming.Corrections in MemoryOwner’s manual page___• Programmed stitches can be deleted or overwritten.• Scroll to the stitch you wish to change or wish to delete.• Select the stitch you wish to replace it with and press the MEM+ button. The new stitch is saved over theoriginal one. Or press delete and the stitch is cleared.Viewing Memory ContentsOwner’s manual page___• Use the arrows on either side of MEM to scroll thru the memory.Saving and Leaving MemoryOwner’s manual page___• To save the contents simply touch the center MEM button. All entries are saved and the memory closes.• All stored programs can be recalled at any time - even after the machine is turned off.Memory CapacityOwner’s manual page___• The total capacity is 30 spaces (meaning 30 individual stitch patterns).MASTERING YOUR BERNINA ® 1/10/02<strong>activa</strong> <strong>125</strong>/<strong>135</strong> <strong>PE</strong>/<strong>145</strong>/88
MASTERINGYOURBERNINA ®BERNINA ® <strong>activa</strong> <strong>125</strong>/<strong>135</strong> <strong>PE</strong>/<strong>145</strong>This exercise is for the <strong>activa</strong> <strong>135</strong> <strong>PE</strong> and <strong>145</strong> onlyMEMORY MANIAProgramming and Editing PracticeFabric: Muslin - 6” x 6” (folded to 3” x 6”)Stabilizer:As neededNeedle:90/14 UniversalThread:30 wt. cottonPresser Foot: Reverse Pattern Foot #1Row #1 and #2 (<strong>145</strong> only)• Select the Alphabet button.• Program “Bernana” and the date in Block letters.• Select Pattern End 1x and stitch.• Edit the memory by changing the first “A” to an “I” and stitch.Row #3• Open Memory and delete the contents by pressing the “clr/del” button. Keep it depressed and pressthe MEM button.• On the <strong>135</strong> <strong>PE</strong> - select stitch #24/1x and #22/3x and stitch #24/1x.• On the <strong>145</strong> - select stitch #42/1x and stitch #23/3x and stitch #42/1x.• Select Pattern End 1x.• Sew one group.Row #4 (<strong>145</strong> only)• Select stitch #49.• Enter it into the memory 1x• Engage mirror image and enter it into the memory again 1x.• Sew a row across the fabric.MASTERING YOUR BERNINA ® 1/10/02<strong>activa</strong> <strong>125</strong>/<strong>135</strong> <strong>PE</strong>/<strong>145</strong>/89
MASTERINGYOURBERNINA ®BERNINA ® <strong>activa</strong> <strong>125</strong>/<strong>135</strong> <strong>PE</strong>/<strong>145</strong>MEMORY SAMPLERThis exercise is for the <strong>activa</strong> <strong>135</strong> <strong>PE</strong> and <strong>145</strong> onlyFabric: Muslin - 6” x 6” (folded to 3” x 6”)Stabilizer:As neededNeedle:90/14 UniversalThread:30 wt. cottonPresser Foot: Reverse Pattern Foot #1Before stitching this exercise, read the information completely and stitch the Memory Mania exercise fromthe previous page.- Sew out stitches or motifs on muslin first.- Leave space below and above the center row, where the monogram is.- Draw guide lines to guide the rows of stitches.- Sampler can be laid out as below or use your creative license.- Add or delete rows as needed to create desired look.Row #1Use Wing needle<strong>135</strong> <strong>PE</strong>: Stitch #23<strong>145</strong>: Stitch #43Row #2<strong>135</strong> <strong>PE</strong>: Stitch #28 1x, #24 3x, #28 1x<strong>145</strong>: Stitch #31 1x, #42 3x, #31 1xRow #3<strong>135</strong> <strong>PE</strong>: Stitch #24 1x, #30 1x, #24 1x, #30 1x, #24 1x<strong>145</strong>: Stitch #47 1x, #50 1x, #47 1x<strong>135</strong> <strong>PE</strong> <strong>145</strong>Row #4Use a double needle with a different color of threadin each needle.<strong>135</strong> <strong>PE</strong>: Stitch #27<strong>145</strong>: Stitch #36Row #5Name/dateRow #6 (<strong>145</strong> only)Stitch #50 1x, Mirror Image, #50 1xRow #7 (<strong>145</strong> only)Stitch #42 1x, Mirror Image, #37 1xClear Mirror Image, #37 1x, #42 1x, #1 6xMASTERING YOUR BERNINA ® 1/10/02<strong>activa</strong> <strong>125</strong>/<strong>135</strong> <strong>PE</strong>/<strong>145</strong>/90
MASTERINGYOURBERNINA ®BERNINA ® <strong>activa</strong> <strong>125</strong>/<strong>135</strong> <strong>PE</strong>/<strong>145</strong>This exercise is for the <strong>activa</strong> <strong>135</strong> <strong>PE</strong> and <strong>145</strong> onlyBUTTONHOLE MEMORYFabric: Heavy flannel, 6” x 9”Stabilizer: 1 piece, 6” x 9”Needle:90/14 EmbroideryThread:30 wt. cotton embroidertPresser Foot: Buttonhole Foot with Slide #3AShort Term Memory• Fold fabric in half to 3” x 9”.• Space the buttonholes evenly across the fabric.• Select Standard Buttonhole #10 and attach Buttonhole Foot with Slide #3A.• Sew the first bead; stop at the desired length and press the Quick Reverse button.• The machine will sew the buttonhole and stop automatically.• The word AUTO appears and the buttonhole has now been programmed in short term memory.• All buttonholes will now be sewn this programmed size until the machine is turned off or a differentbuttonhole is programmed over this one.• Sew a second buttonhole.Long Term Memory• Press MEM+ (after the buttonhole has been programmed).• Turn the machine off and wait 60 seconds. Turn the machine back on.• Select Standard Buttonhole #10 and press MEM button.• Sew a buttonhole on the third line.Note: In order to clear a saved buttonhole, a new buttonhole length must beprogrammed over the previous one.MASTERING YOUR BERNINA ® 1/10/02<strong>activa</strong> <strong>125</strong>/<strong>135</strong> <strong>PE</strong>/<strong>145</strong>/91
MASTERINGYOURBERNINA ®BERNINA ® <strong>activa</strong> <strong>125</strong>/<strong>135</strong> <strong>PE</strong>/<strong>145</strong>WISH LISTProgramming Pizzazz Feet-ures Chalk Wheel Large Ruler - clear Decorative Thread Rayon___ Cotton___ Metallic___ Sewers Aid Interfacing Fusible Tricot__ Fusible Woven__ Needles Embroidery__ Metallic__ Buttonhole Space Tape Buttonhole Placement Gauge - Simpflex Ruler Fabric Marking PenMASTERING YOUR BERNINA ® 1/10/02<strong>activa</strong> <strong>125</strong>/<strong>135</strong> <strong>PE</strong>/<strong>145</strong>/92