Installation Manual - Power & Systems Innovations
Installation Manual - Power & Systems Innovations
Installation Manual - Power & Systems Innovations
- No tags were found...

Create successful ePaper yourself
Turn your PDF publications into a flip-book with our unique Google optimized e-Paper software.
<strong>Installation</strong>, Operationand Maintenance <strong>Manual</strong>PN 750-0064-002EGPE2EGPE2ElectronicGradePanelboardExtensionCURRENT TECHNOLOGY ®EGPE2 INSTALLATION, OPERATION AND MAINTENANCE MANUAL
© 2002, Danaher <strong>Power</strong> Solutions.© 1999, Current Technology, Inc.EGPE2 and the Current Technology logotype are trademarks of Danaher <strong>Power</strong> SolutionsCURRENT TECHNOLOGY ®EGPE2 INSTALLATION, OPERATION AND MAINTENANCE MANUAL
Table of ContentsIntroduction<strong>Installation</strong> AssistancePre-<strong>Installation</strong> Checklist<strong>Installation</strong> MethodsService Configurations3-Phase, 4-Wire WYE3-Phase, 3-Wire DELTA3-Phase, 4-Wire High-Leg DELTA1-Phase, 3-Wire SPLIT-PHASEAssemblyElectrical ConnectionsBefore Applying <strong>Power</strong>Field Startup TestingVerify Operation with MonitoringBase MonitoringL1 Advanced MonitoringL2 Advanced MonitoringL3 Advanced MonitoringTrouble-ShootingOperation / MaintenanceOptionsWarrantySpecifications<strong>Installation</strong> Notes4-5567889910-1212-151515161717181919202020-2122CURRENT TECHNOLOGY ® EGPE2 INSTALLATION, OPERATION AND MAINTENANCE MANUAL 3
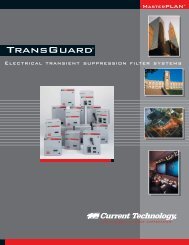
Your Guide to <strong>Installation</strong>of the EGPE2 Electronic-GradePanelboard ExtensionToday’s sophisticated electronic equipment requires superiorsuppression filter systems. By selecting Current Technology ®devices, you have taken a critical step toward decreasing downtimeand ensuring longer product life for your equipment.The EGPE2 Electronic Grade Panelboard Extension is designedto protect sensitive electrical and electronic equipment connected asbranch circuits to standard commercial panelboards against theharmful effects of lightning strikes, internally-generated transientsand high frequency noise. The reliable EGPE2 surge protectivedevice fulfills the single-pulse surge current capacity testingrecommendations per NEMA LS1-1992, paragraphs 2.2.9 and 3.9.The Current Technology, Inc. EGPE2 combines easy andflexible installation with many special features to deliver moreperformance than any other device in its class.The EGPE2 enclosure is designed for attachment to a standardcommercial panelboard or it can be mounted stand-alone. Its versatileenclosure design with removable end plates allows attachmentto either the top or bottom of a panelboard’s enclosure in order toform a continuous space for the exit of branch circuit wiring.The EGPE2 offers a full range of monitoring options from themost basic phase indicator lights, audible alarm and counters to themost sophisticated power quality monitoring features offered in anysurge suppression product. These features include the following:• Display of true RMS phase voltages• Display of neutral-to-ground voltage and current• Counting of swells, surges, sags and outages• Display of percent available protection remainingThe EGPE2 incorporates the same patented “Failure Free ISB”(Integrated Suppression Bus) found in other Current Technology,Inc. products. Redundant MOV fusing prevents individual componentfailure from rendering the protection mode useless. Instead,the failed component safely removes itself from the circuit and allremaining protection is allowed to continue operating as designed.Special circuitry allows the percent remaining protection to bemeasured. An alarm is provided if capacity drops below50 percent.4CURRENT TECHNOLOGY ®EGPE2 INSTALLATION, OPERATION AND MAINTENANCE MANUAL
<strong>Installation</strong> AssistanceThank you for choosing Current Technology’s EGPE2 SurgeSuppression System. We look forward to fulfilling your facility-widesurge suppression filter system needs.Monday through Friday, 8:00 a.m. to 5:00 p.m. (EST):800.238.5000 or 804.236.3300Nights, weekends and U.S. holidays:888.200.6400Seven-Year Limited WarrantyCurrent Technology ® EGPE2 products are warranted for a period ofseven years from date of purchase.Patent NoticeThe Current Technology ® EGPE2 is protected by patents which may be issued after the publication of this document,as well as by one or more of the following patents: 5,023,746; 4,835,650; 4,675,538; 4,675,772; 5,191,502;4,860,502; 4,127,888; 5,146,357; 4,794,490; 5,257,157. Current Technology, Inc will enforce and protect its patentrights as provided by Section 35 USC and a $500,000 litigation protection insurance policy.Purpose and Applicationsof the EGPE2 Electronic GradePanelboard Extension productsThe Importance ofCorrect <strong>Installation</strong>The EGPE2 product family is designed as an enhancement to astandard commercial panelboard allowing it to provide surge suppressionto all connected loads. The EGPE2 uses proven Metal OxideVaristors (MOVs) and an efficient capacitive filter system to reduce oreliminate transients, impulses, and high-frequency noise within abuilding’s electrical system.This manual provides guidelines for the proper installation of theEGPE2 family of devices. Proper product selection and compliancewith these guidelines will help your new suppression system provideyears of reliable service. If installers are unsure about the facility’selectrical configuration or have other installation-related questions, it isrecommended they consult with a master electrician or other qualifiedelectrical professional.When shortcuts are taken or installation procedures are notfollowed, the EGPE2 system may be damaged or may not provideadequate protection. Improper installation may also void the warranty.It is extremely important to follow these installation procedurescarefully.This manual is designed to step you through the procedure ofinstalling the EGPE2 product onto your standard commercialpanelboard. It does not address other installation issues that areincidental to the assembly or installation of the joining panelboard towhich it will be attached. However, should you have questions aboutinstalling the EGPE2 onto your panelboard please call CurrentTechnology, Inc. Technical Support at 800.238.5000.CURRENT TECHNOLOGY ®EGPE2 INSTALLATION, OPERATION AND MAINTENANCE MANUAL5
W A R N I N G !WARNING! The EGPE2’s warranty is voided if the unit is damaged asa result of improper installation or the installer’s failure to verify thefollowing conditions prior to installation.Pre-<strong>Installation</strong> ChecklistBefore beginning➤ Confirm that the voltage(s) and service configuration shownon the EGPE2 product label are consistent with the voltage andsevice configuration of the panel to which it is being attached andthat both the EGPE2 and the panelboard labeling is consistentwith the voltage and service configuration of the facility in whichthe panelboard is being installed. A model number is printed onthe label affixed to the inside of the EGPE2. Each model numbercorresponds to the voltage and service configurations printed inthe table below:PRODUCT LABEL DESIGNATIONEGPE2-xx-120/240-2G-F or SEGPE2-xx-120/208-3GY-F or SEGPE2-xx-220/380-3GY-F or SEGPE2-xx-277/480-3GY-F or SEGPE2-xx-347/600-3GY-F or SEGPE2-xx-120/240-3GHD-F or SEGPE2-xx-240-3DG-F or SEGPE2-xx-480-3DG-F or SSYSTEM VOLTAGE, SERVICE CONFIGURATION120/240VAC, 1ø 3-wire SPLIT-PHASE, w/ground120/208VAC, 3ø 4-wire WYE, w/ground220/380VAC, 3ø 4-wire WYE, w/ground277/480VAC, 3ø 4-wire WYE, w/ground347/600VAC, 3ø 4-wire WYE, w/ground120/240VAC, 3ø 4-wire high-leg DELTA, w/ground(B phase must be 208V)240VAC, 3ø 3-wire DELTA, w/ground480VAC, 3ø 3-wire DELTA, w/groundNote: Indicate EGPE2 surge current rating by substituting 60, 80 or 100 for “xx”in the above model numbers. “F” or ”S” indicates “Flush” or “Surface” mounting.➤ Check to ensure that a proper Xo bond is installed betweenthe neutral and ground terminals at the transformer upstream fromall 3ø WYE, 3ø high-leg DELTA, or 1ø SPLIT-PHASE EGPE2devices (see NEC article 250.) Lack of a proper bond will damagethe EPGE2 and void the warranty.➤ Confirm that the environmental conditions are consistentwith the following ranges:• Ambient Temperatures: The EGPE2 must be installedin an area with a temperature between -40° and +140°F.• Humidity: The EGPE2 must be installed in an areawith relative humidity between 5% and 95% noncondensing.• Altitude: The EGPE2 must be installed in a locationwhose altitude is below 13,000 feet.6CURRENT TECHNOLOGY ®EGPE2 INSTALLATION, OPERATION AND MAINTENANCE MANUAL
W A R N I N G !WARNING! Discontinue installation if (1) your conditions are inconsistentwith the checklist above or (2) your conditions cannot be verified.Call Current Technology, Inc.’s Technical Support at 800.238.5000 if youhave any questions.For the Design Engineer andThe Installer:<strong>Installation</strong> Methods forCommon ServiceConfigurationsThe EGPE2 is to be connected to a standard commercial panelboardso that it is in parallel with the electrical system. It may be connectedvia a branch circuit breaker or molded case switch in that panel ordirectly to a bus fitted with feed-through lugs.• Do not connect the EGPE2 to the line side of the mainservice breaker or disconnecting means.• Do not install the EGPE2 where the available short circuitcurrent to the EGPE2 unit is less than 1500 RMSsymmetrical amperes.CURRENT TECHNOLOGY ® EGPE2 INSTALLATION, OPERATION AND MAINTENANCE MANUAL 7
Figures 1-4 show the electrical relationshipbetween the EGPE2 and these four basicservice configurations: WYE, DELTA,High-Leg DELTA and SPLIT-PHASE.FIG. 1:3-Phase, 4-Wire WYECBNA BCGACXo BONDNNGBANGNABCNGGEGPE2 PANELBOARDEARTHGROUNDFIG. 2:3-Phase, 3-Wire DELTACBA BCGCGBAAGABCGGEGPE2 PANELBOARDEARTHGROUND8CURRENT TECHNOLOGY ®EGPE2 INSTALLATION, OPERATION AND MAINTENANCE MANUAL
FIG. 3:3-Phase, 4-Wire High-Leg DELTACXo BONDNNGB*ACBANG*NABCNA BCGNGGEGPE2 PANELBOARDEARTHGROUND* NOTE: HIGH LEG MUST BE B PHASEFLUSH-MOUNTFIG. 4:1-Phase, 3-Wire SPLIT-PHASEL2TOP FEEDBOTTOM FEEDEGPE2L1PANELBOARD3/4" TYP.TRIMPANELBOARDEGPE2ENCLOSURENL2L1SURFACE-MOUNTXo BONDN GNGTOP FEEDBOTTOM FEEDEGPE2PANELBOARDEARTHGROUNDTRIM &CURRENT TECHNOLOGY ® EGPE2 INSTALLATION, OPERATION AND MAINTENANCE MANUAL 9
AssemblyCheck Trim KitBefore you begin assembly, check that the supplied trim kit isappropriate for your particular installation.Like a panelboard, the EGPE2’s trim can be for either flush orsurface mounting. The cover on the EGPE2 should match thepanelboard’s.The EGPE2 can be attached to the top of the panelboard, thebottom of the panelboard, or it can be mounted detached.When attached to the panelboard, the EGPE2 is mounted at theend of the panel opposite the panelboard’s service feeder. For Top-Fed panelboards, mount the EGPE2 at the bottom. For Bottom-Fedpanelboards mount, the EGPE2 at the top.Surface-mountFlush-mount onlyNote: For surface-mount the edges of the trim andthe enclosure are the same for Top-Feed, Bottom-Feed and Stand-Alone mounting.The diagram below shows the three types of flush trim formating the panelboard door to the EGPE2 door.TOP FEEDFLUSH-MOUNTBOTTOM FEEDENCLOSURESTAND-ALONE MOUNTThree Types of Flush-mount TrimPANELBOARDEGPE2TRIMPANELBOARD3/4" TYP.TRIMPANELBOARDENCLOSUREEGPE2EGPE2TRIMENCLOSURESurface trim is the same for Top, Bottom and Stand-Alonemounting.SURFACE-MOUNTTOP FEED BOTTOM FEED STAND-ALONE MOUNTPANELBOARDTRIM &ENCLOSUREEGPE2PANELBOARDTRIM &ENCLOSUREPANELBOARDTRIM &ENCLOSUREEGPE2EGPE2Be sure your trim hardware matches your application.If you do not have the correct trim hardware contact your supplier.10CURRENT TECHNOLOGY ®EGPE2 INSTALLATION, OPERATION AND MAINTENANCE MANUAL
Remove the CoverOpen the cover of the EGPE2 and carefully disconnect the 20 pinribbon cable and the 5 conductor Molex cable from the circuit boardmounted on the door.Remove the door and trim from the enclosure by removing thescrews. Set the door and trim aside.Attaching The EGPE2To The PanelboardCurrent Technology ® recommends attaching the EGPE2’senclosures to the top or bottom of the panelboard’s enclosure so that thevolumes of the two enclosures are joined without a barrier. It is best todo this before the panelboard is mounted to the structure.To join the two enclosures, the top or bottom endplate of theEGPE2 can be removed. Similarly, the top or bottom endplate of mostcommercial panelboards can be removed.If your panelboard is TOP-FED, remove the bottom endplate of thepanelboard and the top endplate of the EGPE2.If your panelboard is BOTTOM-FED, remove the top endplate ofthe panelboard and the bottom endplate of the EGPE2.Attach the EGPE2 to the panelboard using the supplied collarhardware and screws. Tip: a set of four small C-clamps helps hold theparts in place while the screws are inserted and tightened. Refer to theillustration below showing an EGPE2 being mounted to the bottom of apanelboard.Note: The panelboard and EGPE2 enclosures can also be joined together using a closenipple, lockwashers and bushings. Such installations, however, will limit the ability topass conductors between the two enclosures.CURRENT TECHNOLOGY ® EGPE2 INSTALLATION, OPERATION AND MAINTENANCE MANUAL 11
7 3/4"EGPE2-60,8010 3/4"EGPE2-100ISBALLOWABLE AREA FOR CONDUIT ENTRYPunch Conduit OpeningsMount the PanelboardAnd EGPE2 AssemblyIf desired, punch holes for branch circuit conduits at this time orwait until the EGPE2 and panelboard are mounted to the structure.Mount the joined panelboard and EGPE2 to the buildingstructure using construction methods and hardware appropriate foryour site. Be sure to fasten both the EGPE2 enclosure and thepanelboard enclosure to the building structure.If you choose to mount the EGPE2 as a stand-alone enclosure,locate the EGPE2’s enclosure according to the guidelines in thefollowing section “Electrical Connections”.Electrical ConnectionsPhases, Neutral & Ground: The terminal lugs of the yellow device(ISB) in the EGPE2 must be electrically connected by the installerto the appropriate terminals in the panelboard. Before makingconnections, read and remove the WARNING tag from the groundlug marked “G” of the ISB.Overcurrent Protection: The installer may choose to connect thephase conductors to circuit breakers in the panelboard or connectthe conductors directly to the panelboard’s bus using feed-throughlugs (if available).Note: If applicable, please consult specifying engineer’srecommendation prior to making connections.If breakers are used for connecting the phase conductorsCurrent Technology recommends using a breaker in the range of 60to 100 amps.12CURRENT TECHNOLOGY ®EGPE2 INSTALLATION, OPERATION AND MAINTENANCE MANUAL
W A R N I N G !WARNING: If the available short circuit current at the EGPE2 is less than1500 RMS symmetrical amperes do not install the EGPE2. Examples ofsystems with available short circuit currents less than 1500 amperesinclude the outputs of small UPS systems and small AC inverters.Conductor Size: Current Technology recommends using #8 to #2 AWGcopper conductors for connecting the phases, neutral and groundbetween the EGPE2 and the point of connection on the panelboard.Routing and Wire Length: Keep conductors as short as possible andavoid sharp bends. Excess conductor length and sharp bends drasticallydecrease the effectiveness of the EGPE2 as a surge suppressor.This especially applies to EGPE2’s mounted as a stand-alone enclosure.For stand-alone enclosures Current Technology recommendskeeping conductor lengths to less than 2 feet.The illustration below shows suggested conductor routing for atop-fed panelboard. Routing in bottom-fed panelboards is similar butreversed. Note that conductors from the EGPE2 always connect withinthe panelboards to lugs or breakers closest to the EGPE2. The lugs onthe EGPE2’s yellow device (ISB) may be rotated to facilitate routing.NGUSE BREAKERSNEAREST EGPE2 UNITFEED-THROUGHLUGS(IF USED)ROUTING IF BREAKERSARE USEDNOTE: USE EITHERBREAKERS ORFEED-THROUGH LUGS,NOT BOTHROUTING IF FEED-THROUGH LUGSARE USEDA B CNWIREWAYALLOWANCEGAlso refer to Figures 1 through 4 for a schematic of connectionsfor different service configurations.CURRENT TECHNOLOGY ® EGPE2 INSTALLATION, OPERATION AND MAINTENANCE MANUAL 13
If EGPE2 is MountedDetachedWARNING: The performance of the EGPE2 will be severely limitedif the conductors are too long, of too small a wire gauge, or havesharp bends.These factors should be addressed during the design of aninstallation to ensure that there is a suitable place reserved for thestand-alone EGPE2 next to its point of connection to the panelboardit is protecting. The selected mounting location should ensure shortconductor runs and a minimum of bends. If bends are requiredthey should be sweeping bends. Do not make sharp 90° bends foraesthetic purposes.Connecting Form C Dry ContactsEGPE2s equipped with Advanced Monitoring options have adual set of Form “C” dry contacts available for connection to userprovidedremote alarm and monitoring circuits.The installer must provide the appropriate raceway and wiringfor this circuit observing the restrictions on conduit openingsillustrated in an earlier section of this manual. The installer mustroute the monitoring conductors via the EGPE2’s door hinge to theblue terminal blocks on the door-mounted circuit board. Selectthe appropriate materials and routing to allow the door to openand close.The following diagram shows the Form “C” contact configuration.The annotations on the diagram match the markings on theblue terminal block.NO1 C1 NC1 NO2 C2 NC2FCC TERMINAL BLOCKCompleting the <strong>Installation</strong>Closing the EnclosuresAfter completing the connection of all devices in the EGPE2 tothe panelboard, proceed with the rest of the panelboard wiring asyou would any normal panelboard by installing the feeders andbranch circuits.Install the provided closure strip across the front of the panelassembly between the panelboard enclosure and the EGPE2enclosure. Refer to the Fig. 4.14CURRENT TECHNOLOGY ®EGPE2 INSTALLATION, OPERATION AND MAINTENANCE MANUAL
Install the interior breaker trim and door to the user-suppliedpanelboard.Reinstall the hinged cover on the EGPE2 unit, reconnecting the 20pin ribbon cable and 5 pin Molex connector to the circuit board on theback of the door.If the EGPE2 is connected via circuit breakers make sure thosebreakers are in the “off” position before energizing the panel andproceeding with the testing and startup of the EGPE2.If the EGPE2 is directly connected to the bus do not apply poweruntil you have carefully performed the tasks in the next section.Before Applying <strong>Power</strong>Checklist➤ Field Testing: Your EGPE2 has been carefully tested before leavingthe factory. However, the performance of this unit as a surgesuppression device can be confirmed in the field prior to startupusing a portable DTS-2 Tester.The optional DTS-2 Tester may have been purchased along withyour EGPE2 or Field Startup Testing Service may have been specifiedduring the purchase of the EGPE2. Check with the owner or owner’srepresentative to see if this test is required at your site.If you have questions about Field Startup Testing or would like to arrange forthis service call Current Technology, Inc. Technical Support at 800.238.5000.➤ Confirm Pre-<strong>Installation</strong> Checklist: Confirm that the “Pre-<strong>Installation</strong>Checklist” found in the beginning of this manual was completedcorrectly before proceeding.➤ Battery <strong>Installation</strong>: Your EGPE2 will be equipped with a 9-volt batteryif you purchased “L2 Advance Monitoring” or “L3 MasterMIND”monitoring. Look at the circuit board behind the door. If there is a 9-volt battery present it will need to be removed, turned around andreinserted into the holder so that the contacts “snap” into place. If thealarm sounds, press the “ALARM DISABLE” button on the front of thedoor. The battery is installed backwards for shipping purposes.➤ Confirm Line Voltage: Measure the line to line voltages feeding thepanelboard and be sure they are within 10% of the rated line voltageof the EGPE2. Use the following table to determine the range ofacceptable voltages for each model of the EGPE2.CURRENT TECHNOLOGY ® EGPE2 INSTALLATION, OPERATION AND MAINTENANCE MANUAL 15
Acceptable Voltage Ranges for All EGPE2 ModelsEGPE NOMINAL L-L -10% TO +10%MODEL NO. VOLTAGE L-L VOLTAGEEGPE2xx-120/240-2G 240 216 to 264EGPE2xx-120/208-3GY 208 188 to 228EGPE2xx-220/380-3GY 380 342 to 419EGPE2xx-277/480-3GY 480 432 to 528EGPE2xx-347/600-3GY 600 540 to 660EGPE2xx-120/240-3GHD 240 216 to 264EGPE2xx-240-3DG 240 216 to 264EGPE2xx-480-3DG 480 432 to 528Note: “xx” specifies rating of 60, 80, or 100 kAW A R N I N G !WARNING! Do not apply power if the measured voltage is not within therange specified for the EGPE2 model being installed.➤ Apply power to the EGPE2 by closing the circuit breaker(s) (orother disconnecting means) feeding the EGPE2 or energizing thepanelboard if the EGPE2 is connected directly to the bus.➤ If you have either the L2 or L3 Advanced Monitoringoptions, be sure to re-enable the alarm by pressing the “ALARMDISABLE” button. The “ALARM DISABLED” light should notbe illuminated and the alarm should not be audible.Verify Proper OperationDepending on which monitoring option your EGPE2 came with youcan verify proper operation of the unit as follows:➤ If your EGPE2 has Base Monitoring (see picture): Verify that thegreen indicating lights are illuminated and that the red “fault” lightsare off. Three-phase units have three (3) green indicating lightslabeled “A”, “B”, and “C”. Split-phase units should only havelights “A” and “C” illuminated.EGPE2 with base monitoring.16CURRENT TECHNOLOGY ®EGPE2 INSTALLATION, OPERATION AND MAINTENANCE MANUAL
➤ If your EGPE2 has L1 Advanced Monitoring (see picture): Verify that thegreen indicating lights are illuminated and that the red “fault” lights areoff. Three-phase units have three (3) green indicating lights labeled“A”, “B”, and “C”. Split-phase units should only have lights “A” and“C” illuminated.EGPE2 with L1 advanced monitoring.The L1 Advanced Monitoring option is equipped with 2 sets ofForm “C” contacts. The relay containing the contacts is in the “alarmcondition” when the power is off to the unit, when the unit is encounteringloss of power to one or more phases, or the EGPE2 is encounteringmore than 50% loss of capacity due to internal fuse operation. Test theoperation of the Form “C” contacts by de-energizing the EGPE2 andchecking the state of the contacts with a continuity tester or observingthe effect of the contacts on the user-provided remote alarm circuits.For additional information about the L1 Advanced Monitoringoption, see the Advanced Monitoring Operating <strong>Manual</strong>.➤ If your EGPE2 has L2 Advanced Monitoring (see picture): Verify that thegreen indicating lights are illuminated and that the red “fault” light isoff. Three-phase units have three (3) green indicating lights labeled“A”, “B”, and “C”. Split-phase units should only have lights “A” and“C” illuminated.EGPE2 with L2 advanced monitoring.The L2 Advanced Monitoring option contains an audiblealarm that should not operate under normal conditions. The alarm canbe tested by pressing the “ALARM TEST” button on the front of thedoor. The “LOW BATTERY” light should not be illuminated. If it is,change the 9 volt battery on the circuit board behind the door.The L2 Advanced Monitoring option is equipped with 2 sets ofForm “C” contacts. The relay containing the contacts is in the “alarmcondition” when the power is off to the unit, when the unit isencountering loss of power to one or more phases, or the EGPE2 isencountering more than 50% loss of capacity due to internal fuseoperation. Test the operation of the Form “C” contacts by de-energizingthe EGPE2 and checking the state of the contacts with a continuitytester or observing the effect of the contacts on the user-providedremote alarm circuits.The L2 Advanced Monitoring option is also equipped with a surgecounter. The number of surges detected by the counter is displayed on a6 digit LCD display on the front of the EGPE2 door. The surge counterwill also increment each time power is applied to the unit after being inthe “off” state. The counter can be reset by pressing and holding thebutton marked “RESET” for 3 seconds.For additional information about the L2 Advanced Monitoringoption, see the Advanced Monitoring Operating <strong>Manual</strong>.CURRENT TECHNOLOGY ® EGPE2 INSTALLATION, OPERATION AND MAINTENANCE MANUAL 17
➤ If your EGPE2 has L3 MasterMIND Monitoring (see picture): Verifythat the green indicating lights are illuminated and that the red“fault” light is off. Three-phase units have three (3) green indicatinglights labeled “A”, “B”, and “C”. Split-phase units should onlyhave lights “A” and “C” illuminated.EGPE2 with L3 MasterMIND monitoring.The L3 MasterMind monitoring option contains an audiblealarm that should not operate under normal conditions. The alarmcan be tested by pressing the “ALARM TEST” button on the frontof the door. The “LOW BATTERY” light should not be illuminated.If it is, change the 9-volt battery on the circuit board behindthe door.The L3 MasterMind Monitoring option is equipped with 2 setsof Form “C” contacts. The relay containing the contacts is in the“alarm condition” when the power is off to the unit, when the unitis encountering loss of power to one or more phases, or the EGPE2is encountering more than 50% loss of capacity due to internalfuse operation. Test the operation of the Form “C” contacts byde-energizing the EGPE2 and checking the state of the contactswith a continuity tester or observing the effect of the contacts onthe user-provided remote alarm circuits.The L3 MasterMIND Monitoring option has the same featuresas the L2 Advanced Monitoring plus these additional features:• RMS Voltage readout• % Protection Available• Swell Counter• Surge Counter• Sag Counter• Outage CounterFor additional information about the L3 MasterMind Monitoringoption, see the Advanced Monitoring Operating <strong>Manual</strong>.18CURRENT TECHNOLOGY ®EGPE2 INSTALLATION, OPERATION AND MAINTENANCE MANUAL
Trouble-ShootingYour Current Technology EGPE2 suppression system does notrequire periodic maintenance. The unit’s heavy-duty designshould preclude the need for any repairs; however, the followingindications and procedures may be appropriate:INDICATIONOne or more phaseindicator lights are off.MasterTest hand-held test unit orMasterMind Advanced Monitoringindicates less than 50% availablecapacity.Portable Diagnostic Test Set(Current Technology Model DTS-2) Indications are not in range forthe product.PROCEDURE1. Check that the external power source supplying powerto unit is energized.2. Check that the circuit breaker or switch (if appropriate)feeding the EGPE2 is turned “on.”3. Check the cables connecting the door-mounteddevices to the suppression module.4. If all of above are O.K., contact factory.5. If breaker is tripped, use a portable Diagnostic Test Set(DTS-2) to verify unit integrity before resetting thebreaker.Contact factory.Contact factory.<strong>Installation</strong> AssistanceOur staff is available to support you around the clock.Monday through Friday, 8:00 a.m. to 5:00 p.m. (EST):800.238.5000 or 804.236.3300Nights, weekends and U.S. holidays:888.200.6400Operation / MaintenanceThe EGPE2 Electronic Grade Panelboard Extension shouldprovide years of uninterrupted service.With several levels of monitoring available, the user should be ableto verify the normal operation of the EGPE2 and confirm that it isconnected correctly to the power system.Current Technology does recommend two periodic tests in order to:• Verify that the unit is able to clamp surges to anacceptable level• Verify that the unit has acceptable surgehandling capacity.These tests should be scheduled maintenance events in your facility.They can be performed in house with the aid of the DTS-2 Portable TestSet and the MasterTEST Portable Set or requested as a service fromCURRENT TECHNOLOGY ® EGPE2 INSTALLATION, OPERATION AND MAINTENANCE MANUAL 19
Current Technology, Inc. or their authorized service representative.OptionsThe EGPE2 Electronic Grade Panelboard Extension is availablewith the following options:• L1 Advanced Monitoring• L2 Advanced Monitoring• L3 MasterMIND Monitoring• DTS-2 Portable Test Kit• MasterTEST Portable Test Kit7-Year Limited WarrantyWarranted to be defect-free and performance-guaranteed for up to7 years.SpecificationsWeight and Dimensions:MODELEGPE2-100EGPE2-80EGPE2-60ENCLOSURE SIZE/WEIGHT16”H x 20”W x 5.6”D / 48 lbs / 21.8 kg16”H x 20”W x 5.6”D / 40 lbs / 18.2 kg16”H x 20”W x 5.6”D / 38 lbs / 17.2 kgSingle-Pulse Surge Ratings: The following single pulse surgeratings are measured and presented in accordance with NEMA LS1-1992 and can be verified with independent laboratory test reports:MODELEGPE2-60EGPE2-80EGPE2-100SINGLE-PULSE SURGE RATINGS60 kA: all modes80 kA: all modes100 kA: all modesRepetitive surge rating: The following repetitive surge currentcapacities were achieved in all modes utilizing a 1.2 x 50 µsec, 20kV open circuit voltage, 8 x 20 µsec, 10 kA short circuit currentCategory C3 bi-wave at one minute intervals without performancedegradation of more than 10% deviation of clamping voltage.REPETITIVE SURGE CURRENT CAPACITY PER MODEMODELEGPE2-60EGPE2-80EGPE2-100IMPULSES> 3,500> 4,000> 4,500Operating Frequency: 47 to 63 Hertz20CURRENT TECHNOLOGY ®EGPE2 INSTALLATION, OPERATION AND MAINTENANCE MANUAL
Noise Attenuation: The following EMI-RFI noise rejection or attenuationvalues for the EGPE2 are in compliance with test and evaluation proceduresoutlined in NEMA LS1 -1992, paragraphs 2.2.11 and 3.11.:EMI-RFI FILTER ATTENUATION (dB)ATTENUATION FREQUENCYPRODUCTEGPE2-60,80EGPE2-100100 KHz 1MHz 10MHz 100MHz50 dB 37 dB 38 dB 53 dB44 dB 33 dB 36 dB 53 dBNote: Standardized insertion loss data obtained utilizing MIL-STD-220A 50 ohm insertion lossmethodology. Noise source path = 100’ to model maximum average circuit distance, filter connectiondistance = 6”.Standards and Listings: The following standards and listings apply to theEGPE2 product line:ANSI/IEEE C62.41 - 1991 and C62.45 - 1992ANSI/IEEE C62.1 and C62.11Canadian Standards (CUL)FIPS PUB 94NEMA LS1-1992 GuidelinesNFPA (NEC), 75 and 78UL 1449 2nd Edition, 1283, 50Compatibility: The EGPE2 Electronic Panelboard Extension is compatiblewith General Electric, Square D, Siemens, or Cutler Hammer/Westinghouse lighting panelboards.Dimensions: 20”W x 16”H x 5.82”DFor additional information, see the EGPE2 Electronic Grade PanelboardExtension Suppression Filter System Guide SpecificationsCURRENT TECHNOLOGY ® EGPE2 INSTALLATION, OPERATION AND MAINTENANCE MANUAL 21
<strong>Installation</strong> Notes22CURRENT TECHNOLOGY ®EGPE2 INSTALLATION, OPERATION AND MAINTENANCE MANUAL
IndexAssemblyBefore Applying <strong>Power</strong>Electrical ConnectionsField Startup Testing<strong>Installation</strong> Assistance<strong>Installation</strong> Methods<strong>Installation</strong> NotesIntroductionMonitoringBase MonitoringL1 Advanced MonitoringL2 Advanced MonitoringL3 Advanced MonitoringOperation / MaintenanceOptionsPre-<strong>Installation</strong> ChecklistService Configurations1-Phase, 3-Wire SPLIT-PHASE3-Phase, 3-Wire DELTA3-Phase, 4-Wire High-Leg DELTA3-Phase, 4-Wire WYESpecificationsTrouble-ShootingVerify Operation with MonitoringBase MonitoringL1 Advanced MonitoringL2 Advanced MonitoringL3 Advanced MonitoringWarranty10-121512-151557224-51617171819206989820-21191617171820CURRENT TECHNOLOGY ® EGPE2 INSTALLATION, OPERATION AND MAINTENANCE MANUAL 23
Danaher <strong>Power</strong> SolutionsCurrent Technology Products5900 Eastport Blvd.Richmond, VA 23231Tel: 804.236.3300800-238-5000www.currenttechnology.cominfo@currenttechnology.comPrinted in U.S.A. All Rights Reserved. PN 750-0064-002 CURRY/4M/7.02 C-2171