

Piper J-3 Cub Power 46 ARF+ Manual - Hangar 9
Piper J-3 Cub Power 46 ARF+ Manual - Hangar 9
Piper J-3 Cub Power 46 ARF+ Manual - Hangar 9
- No tags were found...

Create successful ePaper yourself
Turn your PDF publications into a flip-book with our unique Google optimized e-Paper software.
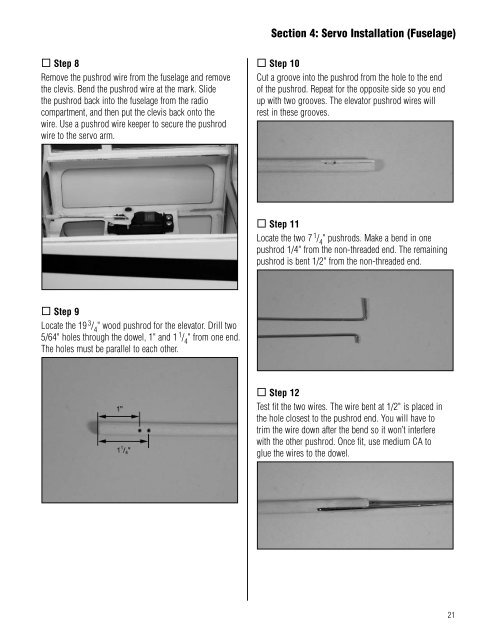
Section 4: Servo Installation (Fuselage) Step 8Remove the pushrod wire from the fuselage and removethe clevis. Bend the pushrod wire at the mark. Slidethe pushrod back into the fuselage from the radiocompartment, and then put the clevis back onto thewire. Use a pushrod wire keeper to secure the pushrodwire to the servo arm. Step 10Cut a groove into the pushrod from the hole to the endof the pushrod. Repeat for the opposite side so you endup with two grooves. The elevator pushrod wires willrest in these grooves. Step 11Locate the two 7 1 / 4" pushrods. Make a bend in onepushrod 1/4" from the non-threaded end. The remainingpushrod is bent 1/2" from the non-threaded end. Step 9Locate the 19 3 / 4" wood pushrod for the elevator. Drill two5/64" holes through the dowel, 1" and 1 1 / 4" from one end.The holes must be parallel to each other. Step 12Test fit the two wires. The wire bent at 1/2" is placed inthe hole closest to the pushrod end. You will have totrim the wire down after the bend so it won’t interferewith the other pushrod. Once fit, use medium CA toglue the wires to the dowel.21


