

Port forwarding a QSDR04RTC with a Netopia 3000 Router: - Q-See
Port forwarding a QSDR04RTC with a Netopia 3000 Router: - Q-See
Port forwarding a QSDR04RTC with a Netopia 3000 Router: - Q-See
- No tags were found...

You also want an ePaper? Increase the reach of your titles
YUMPU automatically turns print PDFs into web optimized ePapers that Google loves.
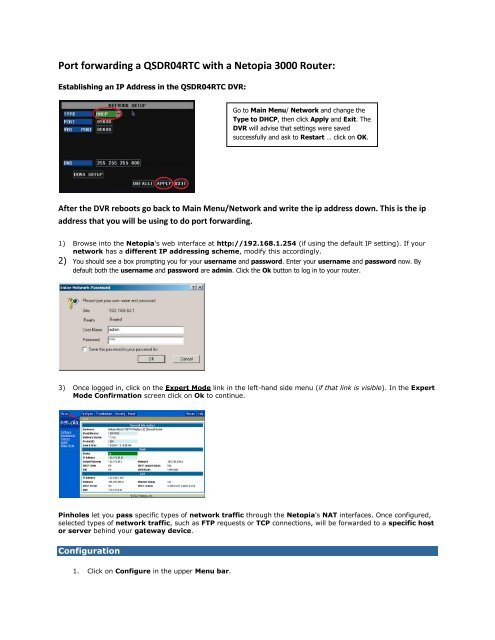
<strong>Port</strong> <strong>forwarding</strong> a <strong>QSDR04RTC</strong> <strong>with</strong> a <strong>Netopia</strong> <strong>3000</strong> <strong>Router</strong>:Establishing an IP Address in the <strong>QSDR04RTC</strong> DVR:Go to Main Menu/ Network and change theType to DHCP, then click Apply and Exit. TheDVR will advise that settings were savedsuccessfully and ask to Restart … click on OK.After the DVR reboots go back to Main Menu/Network and write the ip address down. This is the ipaddress that you will be using to do port <strong>forwarding</strong>.1) Browse into the <strong>Netopia</strong>'s web interface at http://192.168.1.254 (if using the default IP setting). If yournetwork has a different IP addressing scheme, modify this accordingly.2) You should see a box prompting you for your username and password. Enter your username and password now. Bydefault both the username and password are admin. Click the Ok button to log in to your router.3) Once logged in, click on the Expert Mode link in the left-hand side menu (if that link is visible). In the ExpertMode Confirmation screen click on Ok to continue.Pinholes let you pass specific types of network traffic through the <strong>Netopia</strong>'s NAT interfaces. Once configured,selected types of network traffic, such as FTP requests or TCP connections, will be forwarded to a specific hostor server behind your gateway device.Configuration1. Click on Configure in the upper Menu bar.
2. Click on Advanced.1. Under the NAT heading in the Network Configuration box click on the Pinhole selection.2. Click on the Add button.3. In the Pinhole Entry box, enter the parameters for your pinhole. For example, to add a DVR Server:a. In the Pinhole Entries table, in the first line, type the name you would like associated <strong>with</strong> thepinhole. For this example you might call it DVR1 for a server name.PLEASE NOTE: Each pinhole you configure must have a unique name associated <strong>with</strong> it. If youshould duplicate the pinhole name in a subsequent entry, it will overwrite the first entry. Forthis DVR there will be three ports to forward- 90, 9000, 18004.b. Protocol Select is TCP by default. Different protocols can be selected from the drop-down menuwhen appropriate.c. Because the <strong>Netopia</strong> uses port 80, we need to change the http port in the DVR to 90.d. External <strong>Port</strong> Start is 90 for this example.e. External <strong>Port</strong> End is also 90 for this example.f. Enter the Internal IP Address of your DVR server.g. The Internal <strong>Port</strong> is 90.h. Click on Submit to save the changes.i. Click on the Add More Pinholes link. This takes you back to the Pinholes "menu" screen.4. Again, click on Add in the Pinholes box and repeat the previous steps to add the other two portsthat the DVR needs- 9000, 18004.5. Once you have finished <strong>with</strong> the configuration of the pinholes, click on the in the upper right handcorner. This will validate that the settings are legal for your network.6. Click Save and Restart. This will restart the <strong>Netopia</strong> and retain the pinhole configuration.7. That’s it… you can now go to http://www.canyouseeme.org and test the ports.8. Follow the instructions for allowing Active X in the IE Browser, then just enter the address of the DVRinto the Address box as follows.(*Adjust for any network differences)**Because we had to changethe http port to 90, we have to add :90 after the address.9.10. That’s it… you should now have a login screen for your DVR.


