op. manual - Denver Instrument
op. manual - Denver Instrument
op. manual - Denver Instrument
- No tags were found...

Create successful ePaper yourself
Turn your PDF publications into a flip-book with our unique Google optimized e-Paper software.
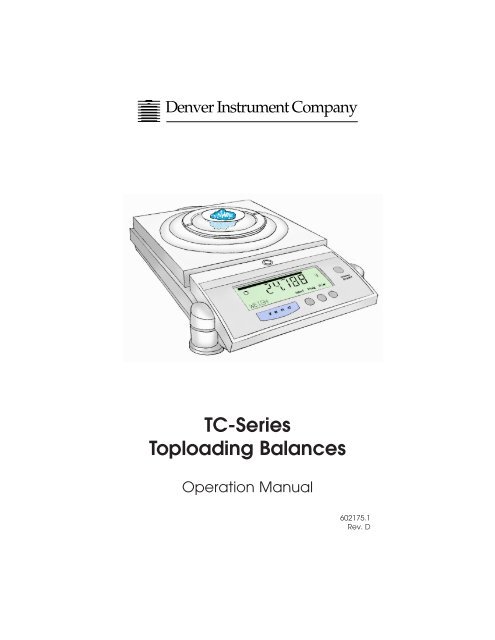
<strong>Denver</strong> <strong>Instrument</strong> CompanyTC-SeriesT<strong>op</strong>loading BalancesOperation Manual602175.1Rev. D
Declaration Of Conformity<strong>Denver</strong> <strong>Instrument</strong> Company declares that the following products:TC-Series Balancesconform to the Eur<strong>op</strong>ean Union Council Directives and other standardslisted below:73/23/EEC, “Low Voltage Directive”EN 61010-1, “Safety requirements for electrical equipmentfor measurement, control, and laboratory use.Part 1. General requirements”89/336/EEC, “Electromagnetic Compatibility Directive”EN 55011, Group 1, Class A, “Limits and methods of measurementof radio disturbance characteristicsof industrial, scientific, and medical (ISM) radiofrequencyequipment”EN 50082-1, “Electromagnetic compatibility - Genericimmunity standard; Part 1: Residential, commercial,and light industry”Further information may be obtained from the manufacturer, or fromthe manufacturer’s representative:manufacturer:<strong>Denver</strong> <strong>Instrument</strong> Company6542 Fig StreetArvada, CO 80004 USAmanufacturer’s representative:<strong>Denver</strong> <strong>Instrument</strong> Company, Ltd.<strong>Denver</strong> HouseSovereign WayTrafalgar Business parkDownham marketNorfolk, UK PE38 9SW
Table Of ContentsDeclaration of Conformity . . . . . . . . . . . . . . . . . . . . . . . . . . . . .iiIntroduction . . . . . . . . . . . . . . . . . . . . . . . . . . . . . . . . . . . . . . . .1Unpacking Your Balance . . . . . . . . . . . . . . . . . . . . . . . . . . . . . .1Model Specifications . . . . . . . . . . . . . . . . . . . . . . . . . . . . . . . . .2Installation . . . . . . . . . . . . . . . . . . . . . . . . . . . . . . . . . . . . . . . . . .3Setup . . . . . . . . . . . . . . . . . . . . . . . . . . . . . . . . . . . . . . . . . . . . . .4Display and Keypad . . . . . . . . . . . . . . . . . . . . . . . . . . . . . . . . . .6Software Layout . . . . . . . . . . . . . . . . . . . . . . . . . . . . . . . . . . . . .8Calibration . . . . . . . . . . . . . . . . . . . . . . . . . . . . . . . . . . . . . . . . .9Basic Weighing . . . . . . . . . . . . . . . . . . . . . . . . . . . . . . . . . . . .13Units . . . . . . . . . . . . . . . . . . . . . . . . . . . . . . . . . . . . . . . . . . . . . .14Statistics . . . . . . . . . . . . . . . . . . . . . . . . . . . . . . . . . . . . . . . . . . .17Environmental . . . . . . . . . . . . . . . . . . . . . . . . . . . . . . . . . . . . . .21Animal Weighing . . . . . . . . . . . . . . . . . . . . . . . . . . . . . . . . . . .24Count Mode . . . . . . . . . . . . . . . . . . . . . . . . . . . . . . . . . . . . . . .26Check Weighing . . . . . . . . . . . . . . . . . . . . . . . . . . . . . . . . . . . .28Good Laboratory Practice . . . . . . . . . . . . . . . . . . . . . . . . . . .31Serial . . . . . . . . . . . . . . . . . . . . . . . . . . . . . . . . . . . . . . . . . . . . .35Stored Tare Weights . . . . . . . . . . . . . . . . . . . . . . . . . . . . . . . . .41Batch Weighing . . . . . . . . . . . . . . . . . . . . . . . . . . . . . . . . . . . .44System . . . . . . . . . . . . . . . . . . . . . . . . . . . . . . . . . . . . . . . . . . . .46Password . . . . . . . . . . . . . . . . . . . . . . . . . . . . . . . . . . . . . . . . . .49Specific Gravity . . . . . . . . . . . . . . . . . . . . . . . . . . . . . . . . . . . .50Factory Settings . . . . . . . . . . . . . . . . . . . . . . . . . . . . . . . . . . . .52Troubleshooting . . . . . . . . . . . . . . . . . . . . . . . . . . . . . . . . . . . .54Setting the Scale . . . . . . . . . . . . . . . . . . . . . . . . . . . . . . . . . . .55Interface details and Serial Commands . . . . . . . . . . . . . . . . .57Linearity Procedure . . . . . . . . . . . . . . . . . . . . . . . . . . . . . . . . .60Linearity Weight Settings . . . . . . . . . . . . . . . . . . . . . . . . . . . . .63Glossary of Terms . . . . . . . . . . . . . . . . . . . . . . . . . . . . . . . . . . .64Gram Conversion Chart . . . . . . . . . . . . . . . . . . . . . . . . . . . . . .65Menu Tree . . . . . . . . . . . . . . . . . . . . . . . . . . . . . . . . . . . . . . . . .66External Transformers . . . . . . . . . . . . . . . . . . . . . . . . . . . . . . . .69Accessories . . . . . . . . . . . . . . . . . . . . . . . . . . . . . . . . . . . . . . . .69Cleaning Instructions . . . . . . . . . . . . . . . . . . . . . . . . . . . . . . . .70Maintenance . . . . . . . . . . . . . . . . . . . . . . . . . . . . . . . . . . . . . .70Warranty Instructions . . . . . . . . . . . . . . . . . . .Inside Back Coveri
You have purchased a quality precision weighing instrumentthat requires handling with care.Read entire contents of this Operation Manual prior to<strong>op</strong>erating your new <strong>Denver</strong> <strong>Instrument</strong> balance.Disclaimer Notice“Calibrate your balance using the internal calibrationweight or a reference weight of the appr<strong>op</strong>riate tolerance(class). An instrument can be no more accurate than thestandard to which it has been compared. For assistance inthe selection of reference weights, please contact thefactory”.Class A Digital Devices:Notice: This equipment has been tested and found to complywith the limits for a Class A digital device, pursuant to Part 15 ofthe FCC rules. These limits are designed to provide reasonableprotection against harmful interference when the equipment is<strong>op</strong>erated in a commercial environment. The equipment generates,uses, and can radiate radio frequency energy and, if notinstalled and used in accordance with the instruction <strong>manual</strong>,may cause harmful interference to radio communications.Operation of this device in a residential area is likely to causeharmful interference in which the user will be required to correctthe interference at his own expense.Caution: Changes or modifications not expressly approved bythe manufacturer could void the user’s authority to <strong>op</strong>erate thisequipment.Manufactured in the U.S.A. by:<strong>Denver</strong> <strong>Instrument</strong> Company6542 Fig Street • Arvada, Colorado 80004(303) 431-7255 • (800) 321-1135 • Fax(303) 423-4831ii
IntroductionThank you for selecting a precision <strong>Denver</strong> <strong>Instrument</strong>Company balance. Your balance is designed and engineeredto provide years of reliable performance.WARNINGUse of this product in a manner not specified bythe manufacturer may impair any safety protectionprovided by the equipment!UNPACKING YOUR BALANCECarefully remove your balance from the packing material.The weigh pan assembly and power transformer are removedfrom the balance for shipping but are in the same box.Be sure that you have received each of the following itemswith your balance:• Balance• Operation Manual• Warranty Registration Card• Weigh Pan Assembly:Round pan and ring (for 3.5” or 4.5” pans)or square pan)• Power Transformer!Carefully read this <strong>op</strong>eration <strong>manual</strong> in order to take fulladvantage of the many features of your balance. Be sure toread the section on the pr<strong>op</strong>er care and maintenance ofyour balance so that it will provide you with years of reliableservice.Please complete and return your warranty registration card,so that in the event your balance is lost or stolen, <strong>Denver</strong><strong>Instrument</strong> Company will have a record of your balance’s serialnumber. Also take a moment right now to record themodel and serial number of your balance on the inside backcover of this <strong>manual</strong> for future reference.1
Model SpecificationsAnalytical ModelsModel 6 4 104 204Weighing Range 61g 110g 210gReadability 0.1mg 0.1mg 0.1mgLinearity 0.2mg 0.2mg 0.2mgRepeatability, (s) 0.1mg 0.1mg 0.1mgStabilization Time 10 sec 10 sec 10 secPan Dimensions 3.5” 3.5” 3.5”(9cm) (9cm) (9cm)T<strong>op</strong>loading ModelsModel 203 403 402 602Weighing Range 210g 410g 410g 610gReadability 0.001g 0.001g 0.01g 0.01gLinearity 0.002g 0.003g 0.01g 0.01gRepeatability, (s) 0.001g 0.001g 0.01g 0.01gStabilization Time 3 sec 3 sec 2 sec 2 secPan Dimensions 4.5” 4.5” 6.0” 6.0”(11cm) (11cm) (15cm) (15cm)Model 2102 4102 2101 4101 6101Weighing Range 2100g 4100g 2100g 4100g 6100gReadability 0.01g 0.01g 0.1g 0.1g 0.1gLinearity 0.01g 0.02g 0.1g 0.1g 0.1gRepeatability, (s) 0.01g 0.01g 0.1g 0.1g 0.1gStabilization Time 2 sec 2 sec 2 sec 2 sec 2 secPan Dimensions 8.375x8.375” 6.0” 8.375x8.375” 8.375x8.375” 8.375x8.375”(21x21cm) (15cm) (21x21cm) (21x21cm) (21x21cm)Model 8101 12001 603D 4102D 8102DWeighing Range 8100g 12000g 610/110g 4100/410g 8100/810gReadability 0.1g 0.1g 0.01/0.001g 0.1/0.01g 0.1/0.01gLinearity 0.2g 0.2g 0.01/0.002g 0.1/0.01g 0.2/0.01gRepeatability, (s) 0.1g 0.1g 0.01/0.001g 0.1/0.01g 0.1/0.01gStabilization Time 2 sec 2 sec 2 sec 2 sec 2 secPan Dimensions 8.375x8.375” 8.375x8.375” 4.5” 8.375x8.375” 8.375x8.375”(21x21cm) (21x21cm) (11cm) (21x21cm) (21x21cm)Common SpecificationsElectrical Requirements: 15VDC @ 800 mA with AC Adapter, center pin (+)Controls:Silicone rubber keypad, Zero, Display ON/OFF, and 3 softkeysDisplay:4.5 x 1.75 inch (12.3 x 4 cm) custom LCD with backlightInterface:RS-232 Bidirectional16 weighing units and 2 customCalibration with external weight (minimum of 4 permissible)Custom calibration with internal weight, external weight and weigh value entryCount mode (Average Piece Weight or Piece Counting)Environmental settingsAnimal weighing modeSpecific gravity modeCheck weighing mode (Low and High Limits or Percent to Target)Statistics function (number, min., max., range, average, standard deviation and total)250 last weight storage with edit capabilityStored tare weights (10)User custom setup (10)Password securityDate, time and weigh value of last calibrationBatch weigh with printout of Tare weight, Net weight and Gross weightCustom printout with selection of date/time, sample type, sequence number, balance ID, signature line,and <strong>op</strong>erator.Height above pan (analyticals): 9.5” (24cm)Net Weight:8.7 lbs. (3.9 kg) Round Pan10 lbs. (4.5kg) Square Pan14.6 lbs. (6.6 kg) AnalyticalShipping Weight:12.0 lbs. (5.4 kg) Round Pan13.0 lbs. (5.9 kg) Square Pan17.8 lbs. (8.0 kg) Analytical2
InstallationPreparationThis product is intended for indoor use.Select a level, rigid work area that is free from drafts andvibrations (i.e. away from doors, windows, air conditioningand heating vents).The line voltage to the balance should be reasonably constant(+/-10%) and free from fluctuations.Position balance to allow the removal of the power adapterplug from the wall outlet. It is not advisable to use an outletthat is shared with fluorescent fixtures or other electricalequipment that draws current in an inconsistent manner.Do not locate the balance near magnetic materials, or nearinstruments that incorporate magnets in their design. Avoidareas that experience extreme highs, lows or fluctuations inroom temperature. Excessive temperatures that may affectbalance <strong>op</strong>eration and accuracy are 1) above 105°F (40°C)and 2) below 60°F (15°C).WeighPanDisplayOn/OffBubbleLevelIndicator24.788WEIGH Select Mode PrintZ E R OgDisplayOn/OffLevelingFootLevelingFoot3
SetupCarefully remove the balance and all accessories from thecarton. There are no tie-downs; however there may be packingmaterials under the pan support (square-pan models only).LEVELING THE BALANCE1. The leveling feet are located on the bottom of the balance.Do not turn the balance over. Viewing the balance fromabove, turn all leveling feet counterclockwise until the feetare fully retracted into the balance base.2. Note the position of the bubble on the leveling vial.For maximum weighing accuracy, the bubble should belocated inside the black ring. Some adjustment will likely benecessary.3. Begin with the foot that is <strong>op</strong>posite of the location of thebubble and turn clockwise until the bubble is moved intothe black ring. If necessary, repeat this step with the otherleveling feet until the bubble is positioned in the center ofthe black ring.4. Avoid extending the level feet too far. If it seems necessaryto do so, it is likely that the tablet<strong>op</strong> is not level. Check thesurface on which you have placed the balance; it may benecessary to choose another location.NoteMemo:The bubble moves TOWARD a foot when that foot isturned CLOCKWISE. The bubble moves AWAY from afoot when that foot is turned COUNTERCLOCKWISE.POWERING THE BALANCEWARNINGVerify that you have received the pr<strong>op</strong>er voltagepower supply for your country of use!Insert the power cord into the receptacle located at the backof the balance and plug the power adapter into a wall outlet.The display will perform a quick test in which all segments arebriefly illuminated and display “stabilizing” for 30 seconds.INITIAL WARM-UP PERIODAfter the initial power-up, it is necessary to allow a minimum of3 to 5 hours for the balance components to become warmand for the internal temperature to stabilize.4!
It is not necessary to unplug your balance from the powersource when it is not in use. It is advised to leave the unitplugged in so that all components are warm and the balanceis ready to weigh at any time. If you wish, the display can beturned off to save the segment life, by simply pressing theDisplay On/Off button.WEIGH PAN INSTALLATIONWARNINGMishandling the balance weigh pans cancause serious mechanical damage!The balance weigh pan engages critical and delicatemechanical components inside the balance. Please observethe following precautions when handling the weigh pans:1. Do not apply <strong>manual</strong> pressure to the weigh pan at any time.2. Do not bump the pan.3. Do not dr<strong>op</strong> objects onto the pan.4. Do not attempt to clean or vigorously wipe the pan while it isinstalled on the balance.ROUND-PAN MODELSBalances with 3.5” or 4.5” round pans feature a weigh panassembly that consists of an aluminum pan and an impact protectionring that helps to shield the weigh pan from lateralshocks. (For models with 6” pans, simply place pan on panstem.)1. Place the impact ring on the balance first.2. Center the weigh pan over the impact ring and gently slideor twist (do not push) the pan onto the pan stem.3. When removing the pan for cleaning, remove the impactring first and then pull the weigh pan straight up and off(pulling the pan at an angle could result in mechanicalbreakage).SQUARE-PAN MODELSSimply place the square t<strong>op</strong>-pan on the pan support.You’re ready to begin weighing!!5
Display and KeypadStabilityIndicatorGraphicaldisplayWeigh unitin useTurns backlightand displayon/off.00000000o000000000000WeighPowerdwtlb%gozGNBdrmomgkgC1 C2 HSTSelect Mode PrintNextEnterDisplayOn/OffZEROReturns the displayto zero. Exits a setupfunction.Soft keys provideaccess to balancefunctions and setupfeatures.The balance features an integrated display/keypad. Thehigh-contrast LCD display simultaneously provides alpha andnumeric information for ease in setup and accuracy in interpretationof results.DISPLAYStability Indicator. This icon is illuminated when the balancehas stabilized, indicating that the displayed weight is your finalresult.Weigh Units. The current selected weigh unit is displayed. Thebalance will keep two weigh units resident for ready use at alltimes. Press "Select" to toggle between the two residentweigh units. (Factory default is grams.) See page 14 for acomplete list of weigh units, their display abbreviations andhow to change the current weigh units.6
Functions. The functions align with the soft keys on the keypadto provide access to the balance’s many setup features.Graphical Display. Bar graph indicates remaining capacity ofbalance.KEYPADZero key. Pressing the zero key returns the weight display to azero reading. This is especially useful for taring (subtracting)container weights.Soft keys. Three soft keys align with the displayed functions t<strong>op</strong>rovide easy access to all balance setup features. See “SoftKey Operation”Display On/Off key. Press once to turn backlight off, presstwice to turn the display only off to save segment life. Pressingit again turns the display and backlight back on.SOFT KEY OPERATIONYour balance contains a broad range of features that allowyou to customize the unit to your specific weighing application(s).Navigating through the <strong>op</strong>tions is easy using the “softkey” (software programmable key) <strong>op</strong>eration.Each soft key on the keypad aligns with a balance functionon the display. To select a function, press the key that is justbelow it.To exit any selection in the menu, press the ZERO key and thebalance will return to the weigh screen.DYNAMIC FINE RANGE (603D, 4102D AND 8102D Models)This feature allows the user access to the fine weighing rangeat any point along the entire weighing spectrum. Simply pressthe “Zero” key to rezero the balance and the fine weighingrange is accessed.7
Software LayoutThe balance has a wide variety of modes of <strong>op</strong>eration and setup parameters for different weighing applications. Parameterscan easily be changed by scrolling through the <strong>op</strong>tions andchoosing the desired selection. The different weighing modesinclude: basic weighing, animal weighing, statistics, counting,check weighing and specific gravity calculating. The defaultmode is basic weighing. When a mode is turned ON, the modename will appear in the lower left corner of the display.Basic weighing = WEIGHAnimal weighing = ANIMALBatch Weighing = PromptsStatistics = SAMPLESCounting = PCS (for pieces)Check Weighing = UNDER, OK or OVERSpecific gravity = SPC GRAVITY (and prompts)NoteMemo:Modes must be turned Off to return to basic weighing orentering a new mode will turn the previous mode Off.Setup parameters for <strong>op</strong>timizing the balance for your specificneeds and conditions include: weighing unit, environmental settings,serial interface settings and Good Laboratory Practicecustom printout information.Other administration functions can also be accessed includingsetting password protection, setting users with different parametersor checking system conditions (ie software version).All selection of modes and changes to parameters are madeby pressing the Mode softkey and then using the Next softkeyto scroll through the available <strong>op</strong>tions. When the desired selectionis shown, press the Enter softkey.NoteMemo:On entering a setup function with multiple selections (iebaud rate), the first selection will be the current setting.The following shows the order of the available routines byscreen name, however a complete listing of all selections is thethe Menu Tree on page 66 of the <strong>manual</strong>.8Screen NameCALIBRATEUNITSSTATSENVIROANIMALCOUNTCHECK WEIGHGLPSERIALTARE WEIGHTSBATCHSYSTEMPASSWORDSPC GRAVITYFACTORYFunctionCalibrationWeighing unit selectionStatistics modeEnvironmental settingsAnimal weighing modeCounting modeCheck weighing modeGLP printout and reporting informationSerial interface settingsTare weight recall and setupBatch weighing modeCheck system statusSecurity protection setupSpecific Gravity modeReturn to factory default settings
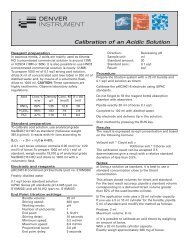
CalibrationYour balance was calibrated at the factory; however, it is necessaryto re-calibrate upon setup and on a regular basisthereafter. The factory recommendation for calibration isonce per week using the maximum permissible weight standard.Reasons for more frequent calibration include 1) movingthe balance, 2) organizational procedures, 3) special samples/applicationswhich require documented calibrationtime/date stamp.Your balance may be calibrated with the internal weight orwith an external mass standard. In the External mode the balancewill recognize the calibration weight as one of the permissibleweight values, whereas in the Manual mode an exactcertified value of the calibration weight is entered.PERMISSIBLE WEIGHTSModelWeight20 30 50 60 100 200 300 400 500 600 1000 2000 400064 X X X X104 X X X X X204 X X X X203 X X X X403 X X X X402 X X X X602 X X X X X X2102 X X X X X4102 X X X X2101 X X X X X4101 X X X X603D X X X X X X X4102D X X X X X XEXTERNAL CALIBRATION (using a mass standard)Be certain that the balance has stabilized.1. Select “Mode”.2. Press “Enter”.modecalibrateNextEnter9
3. Press “Enter” .4. Place massstandard on theweighing pan(see PermissibleWeights Chart). Thebalance recognizesthe mass andautomaticallycalibrates.NOTE! Do notremove weightuntil screen returnsto weigh screen.calexternal0weighNextEnter0.00 gWeighSelect Mode Print5. Once calibrated, the balance will return to the weigh display.MANUAL CALIBRATION (using a mass standard)IMPORTANT!!The decimal point is after the 5th digit. BE CAREFUL to enternumbers in the pr<strong>op</strong>er spaces when <strong>manual</strong>ly calibrating. Forinstance, to calibrate 200 grams, press the “right” arrow twiceand then enter “2”, then press the “Enter” button. To calibrate2000 grams, press the “right” arrow once, enter “2”, then pressthe “Enter” button. If this is done incorrectly, you must go to“Setting Scale”, and perform that procedure before continuing.1. Select “Mode”.modecalibrateNextEnter2. Press “Enter”.calexternalNextEnter10
3. Press “Next”.4. Press “Enter”.5. Enter the desiredmass standardvalue using thearrow keys andpress “Enter”.6. At Add Weightprompt, place themass standardon the weighingpan.calinternalcal<strong>manual</strong>NextNextEnterEnter7. When stable,Press “Enter”.8. Once calibrated,the balance willreturn to the weighdisplay.cal manu g00000.0000000EnterINTERNAL CALIBRATION (using an internal weight to calibrate)Inside the unit is a motor-controlled, certified mass that canbe used to calibrate the balance instead of using an externalweight. Furthermore the time of day and the frequency ofcalibration can also be programmed into the balance as areminder to ensure accurate measurements.1. Select “Mode”.modecalibrateNextEnter2. Press “Enter”.calexternalNextEnter11
3. Press “Enter”calinternalNextEnter4. Press “Enter”calautoNextEnter5. Press “Enter”calcal weight 1NextEnter6. Press “Enter”calstabilizingNextEnter7. Press “Enter”.The display shows“CAL OK” andthen returns tothe normalweighing screen.calcal okNextEnterOweigh0.00 gWeighSelect Mode Print12
CHANGING THE INTERNAL CALIBRATION REMINDER1. From the internalcalibration mode,press “enter”, thenpress “next” toaccess program.set time00:00:00 12. Press “enter”.This will allow the user to toggle the calibration interval programon or off, by pressing the “next” button. To change the intervalpress “enter” when “ON” is displayed.3. Simply use the arrows to scroll through and set the time of dayat which calibration should be performed. When satisfied withthe time for calibration,press “enter”.NextEnter4. To set a secondand third time of dayfor automatic calibration,repeat step 3.0 * *Nextinternal dayEnter5. Next, select the number of days between each calibration,again using the arrows to scroll through the selections. The maximumnumber of days allowed between calibrations is 999 days.When finished, press “enter” and then press “zero” to return tothe weighing screen.Basic WeighingYou are ready to begin weighing if you have:• Set up the balance in an acceptable location (see page 3 )• Calibrate the balance (see page 9 )For <strong>op</strong>timum accuracy, please place your samples as near thecenter of the weighing pan as possible.Your balance is designed to provide accurate measurementsregardless of where you place the sample on the pan; however,repeatability, accuracy and stabilization time are <strong>op</strong>timized ifthe load is placed as close to the center of the pan as possible.Press the ZERO key to access the weighing mode (the wordWEIGH will appear in both the upper right-hand corner and thelower left-hand corner.13
TARINGTo subtract the weight of the sample container:1. Place theempty containeron the weighingpan.2. Press ZERO.Weigh0.00 gSelect Mode Printzeroing3. Add sample to the container and wait for the stability iconto appear (upper left-hand corner).4. The weight of the sample only will appear on the display.StabilityiconOweigh0.00 gWeighSelect Mode PrintUnitsYour balance offers 16 different weigh units and 2 user-customizableunits. Weigh units available (display symbol): Grams(g), Kilograms (kg), Milligrams (mg), Ounces (oz), Troy Ounces(ozt), Pounds (lb), Grains (gn), Pennyweight (dwt), Carats (c),Tael HK, Hong Kong (H), Tael Sing, Singapore (S), Tael Taiwan(T), Momme (mom), Dram (dr), Baht (B), Tola (t), and two custom,user-defined (C1 and C2).14
Selecting Weigh UnitsYour balance will keep two weigh units resident for ready useat all times. To toggle between the two weigh units, press thesoft key “Select” which appears on the main weighing screen.The factory default weigh unit is grams. To change the selectedweigh units:1. Select “Mode”.modecalibrateNextEnter2. Press “Next”.modeunitsNextEnter3. Press “Enter”.unit 1gramsNextgEnter4. To scroll through the weigh units, continue to press “Next”.5. To choose a weigh unit, simply press “Enter”6. Weigh Unit 1 will be stored into memory. Repeat steps 4and 5 above to select Unit 27. To return to the weigh mode, press ZERO.8. Press “Select” to toggle between the two weigh units. Anicon will appear to the right of the weight display indicatingwhich weigh unit is in use.Custom Weigh UnitsTo have the balance automatically perform a multiplicationof the weight value (g) or to set a Custom unit, simply enterthe appr<strong>op</strong>riate factor into one of two Custom units. Thesecan also be set as Unit 1 and Unit 2 for immediate access.15
To enter a Custom unit:1. Select “Mode”.modecalibrateNextEnter2. Press “Next”.modeunitsNextEnter3. Press “Enter “.unit1gramsNextgEnter4. Scroll throughthe weight units,with the “Next” keyuntil CUSTOM isdisplayed.unit1 1customNextEnter5. Press “Enter”.custom1 100000.0000Enter6. Enter the desired factor using the arrow keys.7. To save the factor entry press “Enter”.8. Select UNIT2 or press ZERO to return to the weigh screen.16
StatisticsYour balance has an internal memory of 250 weighing whichcan be used to store, list, select, output or to perform statisticalevaluation of selected weighing. To begin storing weightsto memory statistics must first be turned ON.To turn statistics ON.1. Press “Mode”.modecalibrateNextEnter2. Press “Next”until MODE, STATS.modestatsNextEnter3. Press “Enter”.4. Press “Enter”.The display willreturn to theweigh screen withSAMPLES 0 in thelower left corner.After weighingshave been stored,SAMPLES Xwill show the numberstored.statscalcstatsturn onNextNextEnterEnterPrintWeigh0.00 gSelect Mode Printsamples 0NoteMemo:To rapidly return to the Stats setup, press Select from theweigh screen in the Statistics mode.17
To store a weight to memory1. With the weight on the pan, press “Print”. The SAMPLES willincrease by one showing that the weight has been addedto memory.2. Continue to add more weights to memory.To list stored weights1. Press “Mode”.modecalibrateNextEnter2. Press “Next” untilMODE, STATSmodestatsNextEnter3. Press “Enter”.4. Press “Next” untilSTATS, LIST.statslistNextEnterPrint5. Press “Enter” toshow first storedweight.6. Press “Next”repeatedly to scrollthrough all stored weights7. Press “Enter” to exit to STATS.127.34 gNextEnterPrint18
To edit stored weights1. From STATS, EDITpress “Enter” toshow the firststored weight.statseditNextEnter2. Press “Next”repeatedly toscroll through allstored weights.3. Press the * toremove a weight.127.34 gNext*EnterNoteMemo:Removing a weight does not delete it from memory,but only removes it from being used in the statisticsfunction.4. Continuing to press “Next” will display only the desiredweights5. Press “Enter”to exit to STATS.To calculate statistics including Number, Minimum Weight,Maximum Weight, Range, Average, Standard Deviation andTotal Weight1. From STATS,CALC press “Enter”.statscalcNextEnterPrint2. Press “Next” toscroll througheach statisticalcalculation.3. Press “Enter “ toexit to STATS.number4NextEnterPrint19
To print all calculations1. From STATS, CALC press “Print”.To print any one calculation1. From STATS, CALC press “Enter”.2. Press “Next” to scroll through each statistical calculation.3. Press “Print” on desired screen to print that calculation.To output or print all data through the serial port1. From STATS, LIST press “Print”.2. Press “Enter “to exit to STATS.Statistics PrintoutTo print or output select data1. From STAT, LIST press “Enter”.2. Press “Next” to select data.3. Press “Print” to print this data only.4. Press “Enter “ to exit to STATS.To clear or delete all weights frommemory1. From STATS,CLEAR press“Enter”.statsclearSTATSNUM = 5Min = 300.02MAX = 300.03RNG = 0.01AVE = 300.025STD = 0.004TOT = 1500.11NextEnter2. AT YES, press“Enter” to confirmand exit to STATS.Otherwise press“Next” for NO andthen “Enter “to exitwithout clearing.yesclearNextEnterTo turn statistics OFF1. From the weigh screen press “Select”.2. At STATS, TURN OFF press “Enter” and return to the weigh screen.Or1) From STATS press “Next” until STATS, TURN OFF.2) Press “Enter” and return to the weigh screen.20
EnvironmentalYour balance can be set up for <strong>op</strong>timized weighing to compensatefor varying conditions including building vibration,drafts, surface vibration, etc. The Environmental settings consistof four subsettings including Filter, Stability Speed, StabilitySensitivity and Autozero. Each has multiple selections.Environmental SettingsStabilityStabilityFilter Speed (sec) Sensitivity (counts)Very Low Very Slow 4 Very Fine .25Low Slow 2 Fine .5Normal Normal 1 Normal 1High Fast .5 Coarse 2Very High Very Fast .25 Very Coarse 4Examples Stability StabilityFilter Speed SensitivityGood weighing Normal Normal NormalFilling Low Fast FineLow vibration High Slow CoarseHigh vibration Very High Very Slow Very Coarseor BreezeTo change the Environmental settings:1. Select “Mode”.modecalibrateNextEnter2. Press “Next” untilMODE, ENVIRO.3. Press “Enter“.modeenviroNextEnter21
To change Filter1. From ENVIRO,FILTER press “Enter”.envirofilterNextEnter2. Press “Next” toscroll through the5 selections (verylow, low, normal,high, very high)filternormalNextEnter3. Press “Enter” to select and return to ENVIRO, ST SPEED.To change Stability Speed1. From ENVIRO,STABIL SPEEDpress “Enter”.2. Press “Next” toscroll through the5 selections (veryslow, slow, normal,fast, very fast).3. Press “Enter” toselect and returnto ENVIRO.envirostabil speedst speednormalNextNextEnterEnter22
To change Stability Sensitivity1. From ENVIRO,STABIL SENSpress “Enter”.2. Press “Next” toscroll through the5 selections (verycoarse, coarse,normal, fine, veryfine)3. Press “Enter” toselect and returnto ENVIRO.envirostabil sensst sensnormalNextNextEnterEnterTo change Autozero1. From ENVIRO,AUTOZERO press“Enter”.2. Press “Next” toscroll through the4 selections.enviroautozeroNextEnter3. Press “Enter” toselect and returnto ENVIRO.autozeroNextnormalEnter23
Animal Weighing ModeYour balance is featured with an animal weighing mode toeasily weigh animals which are continuously moving as aweight is taken. This mode must first be turned ON. The weighscreen will show Animal in the lower left corner when the animalweighing mode is ON. Animal weighing settings include:Stability Speed and Stability Sensitivity.Animal Weighing SettingsStabilityStabilitySpeed (seconds) Sensitivity (counts)Slow 8 Very Fine 4Normal 4 Fine 8Fast 2 Normal 16Coarse 32Very Coarse 64Changing the stability speed will vary the integration time.Changing the stability sensitivity is needed to filter the effect ofthe moving animal. If the lock does not come on, decreasethe sensitivity by going to a coarser setting.During weighing when the stability criteria is met the weight willlock on the display. When the weight is removed the displaywill unlock and be ready for the next sample.To turn Animal mode ON1. Select “Mode”.modecalibrateNextEnter2. Press “Next” untilMODE, ANIMAL.modeanimalNextEnter24
3. Press “Enter” forTURN ON.4. Press “Enter”.animalturn onNextEnterTo change StabilitySpeed1. From ANIMAL,STABIL SPEED press“Enter”.2. Press “Next” toscroll through the3 selections.3. Press “Enter” toselect and returnto ANIMAL.animalstabil speedst speednormalNextNextEnterEnterTo change StabilitySensitivity1. From ANIMAL,STABIL SENSpress “Enter”.animalstabil sensNextEnter2. Press “Next” toscroll through the5 selections.3. Press “Enter” toselect and returnto ANIMAL.st sensnormalNextEnterNoteMemo:To rapidly return to the Animal set up, press Select fromthe Animal Weigh screen.To turn OFF animal weighing mode1. From ANIMAL, TURN OFF press “Enter” and returnto the weigh display.25
Count ModeThe balance can be set to count common pieces that arewithin the capacity and resolution of the balance. Pleasenote that counting accuracy will be affected by weight variationamong pieces. Select parts which are appr<strong>op</strong>riate tothe resolution of the balance:• The total sample weight must not exceed the balance capacity• The weight of each piece must be greater than the resolution ofthe balance.See “Specifications” inside the front cover for the capacityand resolution of your particular balance.Your balance may count in the Piece Count or AveragePiece Weight modes.To perform Piece CountingPiece Count allows the <strong>op</strong>erator to perform basic countingof identical items. This <strong>op</strong>eration is carried out by first weighinga known number of items (5, 10, 20, 50 or 100), as follows:1. Select “Mode”.2. Press “Next” untilMODE.COUNT.3. Press “Enter”.4. Press “Enter”.5. Count out 5pieces and placethem on theweighing pan.6. Press “Enter”.The balance willstore the per-piecevalue and returnto the weigh displaywith the precisetotal in thelower left corner.To count additionalpieces, simply addthem to the weighingpan.modecountcountpiece countadd 5 pcsNextNextEnter0.00NextEnterEnter26
To Perform Average Piece WeightAverage piece weight allows the <strong>op</strong>erator to determine thenumber of individual pieces in a mass if the per piece weightis known.1. Select “Mode”.modecalibrateNextEnter2. Press “Next” untilMODE COUNT.modecountNextEnter3. Press “Enter”.countpiece countNextEnter4. Press “Next”.countavg piece wtNextEnter5. Press “Enter”.pc wt00000.00000006. Enter the knownaverage pieceweight using thearrow keys andpress “Enter”.The balance returns to the count displaywith the precise total in the lower left corner.gEnter27
NoteMemo:The Select softkey in the count mode will return to thecount set up. To count additional pieces, simply addthem to the weighing pan.To turn the Count mode off.1. Press “Select”.2. Press “Next” until TURN OFF and press “Enter”.Check WeighingYour balance has two check weighing modes. Low and HighLimits and Percent to Target. In Low and High Limits, the displaywill show the words “UNDER” if the sample is under thelow limit, “OVER” if the sample weight is over the high limit or“OK” if the weight is between the limits. There is also a visualindication in the bar graph. In the Percent to Target, a targetweight is entered and the samples weight is expressed aspercent of the target weight.To set Low and High Limits1. Select “Mode”.modecalibrateNextEnter2. Press “Next” untilMODE, CHECKWEIGH.modecheck weighNextEnter3. Press “Enter”.ck weighlimitsNextEnter28
4. Press “Enter”.5. Enter the lowlimit value usingthe arrow keyslo limit00000.0000000gEnter6. Press “Enter”.7. Enter the highlimit value usingthe arrow keyshi limit00000.0000000gEnter8. Press “Enter” andreturn to the weighscreen in theCheck Weighingmode.0ok40.00gWeighSelect Mode PrintNoteMemo:To rapidly return to the Check Weighing set up, pressSelect from the weigh screen in the Check Weighingmode.To set Percent to Target1. Select “Mode”.modecalibrateNextEnter2. Press “Next” untilCHECK WEIGH.modecheck weighNextEnter29
3. Press “Enter”.ck weighlimitsNextEnter4. Press “Next”.ck weightargetNextEnter5. Press “Enter”.6. Enter the targetweight using thearrow keys.target00000.0000000gEnter7. Press “Enter”and return to theweigh screen inthe Percent toTarget mode.0Weigh40.00 gSelect Mode Print74.18%NoteMemo:To rapidly return to the Check Weighing set up, pressSelect from the Check Weighing screen.30
Good Laboratory PracticeYour balance has a number of features which will allow customizationfor various reporting requirements pertaining toGood Laboratory Practice documentation of results. In GLPset up the parameters of date and time, user, sample typeand sequence number are entered. With the interface of an<strong>op</strong>tional printer or computer via the serial communicationsport, these parameters may be selected to be included ona printout along with the weight. The selection of whichparameters to include on the printout is done in the Serialsetup when the Custom Printout format is chosen. In GLPsetup each of nine users with alphanumeric names may alsohave unique setup parameters including weighing mode(standard weighing, counting, check weighing or animalweighing), printout format including different custom printouts,sample type and weighing units. Once users are set up,simply recalling a user automatically changes the parametersfor that user, if different parameters were set.To save User specific parameters1. Make desiredparameterchanges.2. Select “Mode”.modecalibrateNextEnter3. Press “Next” untilMODE, GLP.modeglpNextEnter4. Press “Enter“.glpuser recallNextEnter31
5. Press “Next” untilGLP,USER SAVE.6. Press “Enter”.7. Press “Next” toselect a User 1-9,then press “Enter”.glpuser saveuser1<strong>op</strong>1NextNextEnterEnter8. Enter the desireduser name usingthe arrow keys upto 12 characters.9. Press “Enter” tosave name.user1<strong>op</strong>1X X X X X X X X XEnterTo recall a user1. From GLP, USERRECALL press“Enter”.glpuser recallNextEnter2. Press “Next” toscroll through thelist of users.user1<strong>op</strong>1NextEnter3. Press “Enter” atthe desired userand exit to theWeigh screen.weigh0.00 gWeighSelect Mode Print32
To set date and time1. From GLP, DATETIME press “Enter”.glpdate timeNextEnter2. Press “Next” untilformat of Month,Day, Year (MM DDYYYY) or Day,Month, DATE TIME,MMDDYYYY.date timeNextmmddyyyyEnter3. Press “Enter”.4. Enter the dateusing the arrowkeys and press“Enter”.mmddyyyy01/01/1970EnterTo set time1. From GLP, 24-HRCLOCK press“Enter”.date timeNext24-hr clockEnter2. Enter the time in24 hour format ofhour, minutes andseconds using thearrow keys andpress “Enter”.00:00:0024-hr clockEnter33
To set sample type1. From GLP, SAM-PLE TYPE press“Enter”.glpsample typeNextEnter2. Enter thedesired nameusing the arrowkeys up to 12 charactersandpress “Enter”.smpl type0 0 0 0 0 0 0 0 0 0 0 0 NextEnterTo set a sequence number1. From GLP, SEQNUMBER press“Enter”.glpseq numberNextEnter2. Enter the desiredstarting numberusing the arrowkeys and press”Enter”.(Maximum 9999)0000seq numberNextEnterNoteMemo:The sequence number will advance by 1 on each successiveprintout.34
SerialThe balance has a serial port which enables communicationswith other serial devices such a printer or computer.The Interface Applications section of this <strong>manual</strong> will assist inselecting the pr<strong>op</strong>er set up parameters. Serial set up parametersinclude: print mode, print format including customprintout, baud rate, parity, bit, echo and handshake. Thefollowing are instructions to change set up parameters.Print mode:Manual - serial port only outputs weight data when the Printkey is pressed and the balance is stable.Stable - serial port outputs weight data automaticallywhen stableInterval – serial port output at the set time intervalSAMPLE OUTPUT CHARTActual output may vary decimal places depending on model.Output can be in one of the following formats:Analytical BalancesType Stable UnstableType 1 1 +100.0001 U +100.00011 + 0.0001 U + 0.0001Type 2 S +100.0002 SD +100.0002S + 0.0002 SD + 0.0002Type 3 ST +100.0001 US +100.0003ST + 0.0001 US + 0.0003Type 4 + 100.0003 + 100.0002+ 0.0003 + 0.0002Type 5 +100.0002 GRAMS +100.0002 US+ 0.0002 GRAMS + 0.0002 USType 6 +100.0002 GRAMS +100.0001 GRAMS+ 0.0002 GRAMS + 0.0001 GRAMSType 7 1 + 100.0002 GRAMS U + 100.0003 GRAMS1 + 0.0002 GRAMS U + 0.0003 GRAMSType 8 S 100.0002 g SD 100.0002 gS 0.0002 g SD 0.0002 gType 9 1+0100.0002 U+0100.00021+0000.0002 U+0000.000235
SAMPLE OUTPUT CHARTActual output may vary decimal places depending on model.Output can be in one of the following formats:T<strong>op</strong>loading BalancesType Stable UnstableType 1 1 +100.002 U +100.0021 +100.003 U +100.003Type 2 S +100.001 SD +100.001S + 0.002 SD + 0.002Type 3 ST +100.003 US +100.003ST + 0.001 US + 0.003Type 4 + 100.003 + 100.001+ 0.0001 + 0.0001Type 5 +100.002 GRAMS +100.003 US+ 0.002 GRAMS + 0.003 USType 6 +100.001 GRAMS +100.002 GRAMS+ 0.001 GRAMS + 0.002 GRAMSType 7 1 + 100.003 GRAMS U + 100.001 GRAMS1 + 0.003 GRAMS U + 0.001 GRAMSType 8 S 100.002 g SD 100.003 gS 0.003 g SD 0.003 gType 9 1+00100.001 U+00100.0021+00000.001 U+00000.002Baud rates: 38,400 1,20019,200 6009,600 3004,800 1502,400Bits/Parity:8 - none7 - even7 - odd7 - noneEcho:Off, OnHandshake: XON/XOFF, None, CTSThe serial port pin configuration:4 3 2 1361 GND 3 OUT2 IN 4 GND
To change print mode1) Select “Mode”.modecalibrateNextEnter2) Press “Next” untilMODE, SERIAL.modeserialNextEnter3) Press “Enter”.serialprint modeNextEnter4) Press “Enter”.mode<strong>manual</strong>NextEnter5) Press “Next” toscroll throughselections andpress Enter. Aselection of 5, 10or 60 seconds isstandard or acustom numberup to 9999 may be entered.intervalNextcustomEnter37
To change formatNine selections of the format are preset for simple weight documentationor communications to a computer. To customizethe printout in addition to the weight the following items canbe individually added:Date and time*Balance IDSample type*Sequence number*Calibration informationOperator name*Signature lines (2)* Specific setup of these items is done in GLP setup1. From SERIAL,FORMAT press“Enter”.serialformatNextEnter2. Press “Next” toscroll throughselections (Type 1-9and CUSTOMPRINT).3. Press “Enter”.formattype 1NextEnterTo set up Custom Print1. From FORMAT,CUSTOM PRINTpress “Enter”.2. Press “Enter” toscroll through availableitems.ondate/timeNext *Enter3. Press “Enter” totoggle ON or OFF as desired.4. Press “*” key to SERIAL, BAUD.38
NoteMemo:If using custom printout, the interval print cannot be setfaster than the time to print the custom printout.To change Baud rate1. From SERIAL,BAUD press“Enter”.serialbaudNextEnter2. Press “Next” toscroll throughselections (150-19200) and press“Enter”.baud9600NextEnterTo change Bits/Parity1. From SERIAL,PARITY press“Enter“.2. Press “Next” toscroll throughselections (8-none,7-even, 7-odd and7-none) and press“Enter”.serialbits/parityNextbits/ptyNext8 - noneEnterEnter39
To change Echo:1. From SERIAL,ECHO press“Enter”.serialechoNextEnter2. Press “Next” toscroll throughselections (Off andOn) and press“Enter”.echooffNextEnterTo change Handshake:1. From SERIAL,HANDSHAKE press“Enter“.2. Press “Next” toscroll throughselections(XON/XOFF andNone) and press“Enter”.serialhandshakeNexthndshakeNextxon/xoffEnterEnter40
Stored Tare WeightsThe balance features the capability to store ten tare weights tomemory for easy recall of weighing objects held in containers.Tare weights can be entered automatically by weighing thecontainer or <strong>manual</strong>ly entering the weight of the container.To store tare weights automatically1. Select “Mode”.modecalibrateNextEnter2. Press “Next” untilMODE, TAREWEIGHTS.3. Press “Enter”.modetare weightsNextEnter4. Press “Next” untilTARE WT, STORE-AUTO.5. Press “Enter” toshow CNTNR 1.tare wtstore-autoNextEnter6. Place containeron pan and whenstable press“Enter”.7. Repeat steps 5and 6 to storeadditional containerweights8. Press “*” to exitto TARE WT.cntnr1cntnr10.00 gNext*Enter43.45 gNext*Enter41
To store tare weights <strong>manual</strong>ly1. Select “Mode”.modecalibrateNextEnter2. Press “Next” untilMODE, TAREWEIGHTS.modetare weightsNextEnter3. Press “Enter”.4. Press “Next” untilTARE WT, STORE-MANUAL.tare wtstore-<strong>manual</strong>NextEnterPrint5. Press “Enter” toshow CNTNR 1.6. Press “Next” untilavailable CNTNRVand (showing noweight) press“Enter” .cntnr150.66 gNextEnterPrint7. Enter containerweight using arrowkeys and then pressEntercntnr100000.0000000Enter8. Repeat steps 5and 6 to storeadditional container weights42
To select a stored tare weight after storing1. Select “Mode”.modecalibrateNextEnterPrint2. Press “Next” untilMODE, TAREWEIGHTS.modetare weightsNextEnterPrint3. Press “Enter“ forselect.tare wtsNextselectEnterPrint4. Press “Enter”.5. Press “Next” toscroll through todesired container.selectcntnr1NextEnterPrint6. Press “Enter” toreturn to the weighscreen with a negativeweight of the container.NoteMemo:Unless a tare weight has been entered, it will showNONE on entry.To print stored tare weights1. From TARE WT, press “Print”.43
To clear stored tare weights1. From MODE,TARE WEIGHT press“Enter”.modetare weightNextEnterPrint2. Press “Next”until TARE WT,CLEAR.tare wtclearNextEnterPrint3. Press “Enter” forCLEAR ALL.4. Press “Enter” toclear all storedNexttare weights orpress “Next” toscroll throughstored containerweights to select just one to clear and press “Enter”.5. Press “Enter” to clear.clearclear allEntertBatch WeighingThe Batch Weighing mode is a sequence of weighing stepswith screen prompts and a specific printout including TareWeight, Net Weight and Gross Weight.To turn batch weighing ON1. Select “Mode”.modecalibrateNextEnter44
2. Press “Next” untilBATCH MODE.modebatch modeNextEnter3. Press “Enter”.4. Press “Enter” toreturn to the weighscreen in Batchmode.batchturn onNextEnterTo perform batch weighing1. Remove weight from the pan and press the ZERO key tozero the balance.2. At the ADD TARE WT prompt, add the weighing container.3. Press “Enter” when stable.4. At the ADD NET WT prompt, add the sample to be weighed.5. Press “Enter” when stable.6. At the PRINT prompt, press the “Print” key. After printing thedisplay will return to the ADD TARE WT prompt to begin thesequence again.NoteMemo:For additional information on the printout, see Customprintout setup.To turn batch weighing OFF1. From weigh display press “Select”.2. From BATCH TURN OFF, press “Enter” to return to the weighdisplay.45
SystemThe balance features <strong>op</strong>tions to identify the specific unit, andits software version or date and time of last calibration. Thisscreen also gives access to secured <strong>op</strong>tions intended forsuper users including a routine to adjust linearity. For accessto the secured routines call your local distributor or <strong>Denver</strong><strong>Instrument</strong> Company.To check softwareversion1. Select “Mode”.modecalibrateNextEnter2. Press “Next” untilMODE, SYSTEM.modesystemNextEnter3. Press “Enter” toshow SYSTEM, SWVERSION.systemsw versionNextEnterPrint4. Press “Enter” toshow SW VERS,XXX.sw versxxxEnterPrintTo checkbalance ID1. From MODE,SYSTEM, press“Enter”.modesystemNextEnter46
2. Press “Next” untilSYSTEM, BALANCEID.systembalances idNextEnterPrint3. Press “Enter” toshow BAL ID,XXXXXXXXX (This isthe balance serialnumber).bal idxxxxxxxxxNextEnterTo display date and time of last calibration1. From MODE, SYS-TEM, press “Enter”.modesystemNextEnterPrint2. Press “Next” untilSYSTEM, LAST CAL.systemlast calNextPrintEnter3. Press “Enter” toshow date of lastcalibration.4. Press “Next” toshow time of lastcalibration.cal dateNext Print03/03/1998Entercal timeNext13:12:17PrintEnter47
5. Press “Next” toshow calibrationweight value.cal weightNext400.00 gPrintEnterTo print calibration data1. From SYSTEM, LAST CAL press “Print”.To enter security routines1. From MODE, SYS-TEM press “Enter”.modesystemNextEnterPrint2. Press “Next” untilSYSTEM, SECURITY.systemsecurityNextEnter3. Press “Enter” forsuper user access.4. Enter the securitypassword usingthe arrow keys andpress “Enter”.supr usrxxxxxxxxxxxxEnter48
PasswordThe balance can be protected from being able to makesetup parameter changes including from being able to calibratethe balance.To password protect the balance1. From MODE,PASSWORD press“Enter”.modepasswordNextEnter2. Enter the desiredpassword up to 12characters usingthe arrow keys.passwordxxxxxxxxxxxxEnter3. Press “Enter” to return to the Weigh screen. You will no longbe able to enter balance setup with the Mode key withoutreentering the correct password.To remove the password protection1. Select Modefrom the Weighscreen to displayPASSWORD,XXXXXXXXXXXX.2. Enter the correctpassword.modecalibrateNextEnter49
Specific GravityThe balance includes the automatic calculation of specificgravity from two weighings (weigh above and weigh below).Both may be new weights or either of the previous weightsmay be used.To calculate specific gravity1. Select “Mode”.modecalibrateNextEnter2. Press “Next”until MODE, SPCGRAVITY.3. Press “Enter”.modespc gravityNextEnter4. The Zero key maybe used to zero thebalance beforeadding weight.5. Press “Enter” toaccept the weighabove value.0.000Nextweigh aboveEnterPrint50
6. Perform theweigh below step.Press “Enter” toaccept the weighbelow value andto display specificgravity calculation.0.000Nextweigh belowEnterPrintxxxspc gravityNextEnterPrintTo turn specific gravity Off1. From MODE,SPC GRAVITY press“Enter”.modespc gravityNextEnter2. Press “Next” untilTURN OFF andpress “Enter”.Or0.000Nextturn offEnterPrint1. From SPC GRAVITYcalculation display, press “Next” for TURN OFF.2. Press “Enter” to return to weigh display.51
Factory SettingsThe balance comes preset with factory default settings. Atsome time you may want to reset the balance to factory settings.To reset to factory default settings1. Select “Mode”.modecalibrateNextEnter2. Press “Next” untilMODE, FACTORY.modefactoryNextEnter3. Press “Enter”.factorycancelNextEnter4. Press “Next”.factoryset defaultsNextEnter5. Press “Enter”.Displayedmomentarily(15 seconds).factorystandby52
6. From completepress “Enter” toreturn to theWeigh screen.factorycompleteNextEnterList of Factory DefaultsUnits1gramsUnit2gramsStatisticsOffCount mode OffCheck weighing OffDate and time 01/01/1970Sequence No (empty)Sample Type (empty)Tare weights noneFilterNormalStability speed NormalStability sensitivity NormalAuto ZeroNormalSerial print mode ManualSerial format Type 1Serial baud 9600Serial Bits/Parity 8-noneSerial EchoOffSerial Handshake XOn/XOffAnimal weighing OffSpecific gravity OffPassworddisabledBatch mode Off53
TroubleshootingDisplay Shows Cause RemedyPower cord notconnected.Connect cord.(Blank Screen) No power to outlet or Check powerimpr<strong>op</strong>er voltage. supply and voltageswitch.O V E RTemporary faultBad connectionin connecting cord.Weight exceedsbalance capacity.Disconnect andreconnect powercord. (Wait at leastfive seconds beforereconnecting it.)Make sureconnectors aresecurely clippedinto sockets,disconnect andreconnect cord.Reduce weight.Unstable Air movement Use draft shield(Stability indicator around balance. and/or changedoes not appearenvironmental setting.and erratic weightdisplay) Unstable location. Move balanceand/or alter filtersetting.Samplenot stationary.Use animal weighingmode.Incorrect weight Balance <strong>op</strong>erating Re-calibratereading. error. balance. Checklevel.Incorrect weigh unit.Pan obstructed.Check weigh unitsetting.Check pan placement. Check <strong>op</strong>tionalin use cover.Display is too dark Contrast needs Contact Customeror too light. to be adjusted. Service.54
Setting the ScaleThe scale may need to be set due to mechanic rebuild, electronicfailure, or incorrect <strong>manual</strong> calibration. A calibrated weight tothe nearest 10, 100, or 1000 of the maximum capacity of the balanceMUST be used. For example, a TL 204 will need a 200g, a TL8101 will need an 8000g.1. Remove any weight on the balance and press the “Zero” keyto re-zero the balance2. Press “Mode” key.Display reads“MODE….CALIBRATE”.3. Press “Next” keyuntil “SYSTEM”appears, then press“Enter”.4. Press “Next” keyuntil “SECURITY”appears, then press“Enter”.(NOTE! If you havepreviously been in thesecurity mode, andhave not unpluggedthe balance, the nextsteps, 6-10 will beunnecessary.)modecalibratesystemsecuritysupr usrxxxxxxxxxxxxNextNextEnterEnterEnter5. “SUPR USR” appears, as well as some asterisks, the first of whichwill be flashing.6. Press the ‘down’ arrow key to advance the first asterisk to “S”.7. Press the ‘right’ arrow key to move to the next digit.8. Press ‘down’ arrow key to advance the second asterisk to “C”.9. Press the ‘right’ arrow key to move to the next digit.10. Press ‘down’ arrow key to advance the third asterisk to “L”.55
11. Press “Enter”.“MAINT….SCALE”appears.12. Press “Enter”.“SCALE….REMOVEWTS” appears.13. Press “Enter”.“STABILIZ” will appearand a countdownwill occur, and then“ZERO CAL” will display,and anothercountdown willoccur. The display willthen read “SCALE….ADD FULL WGT”.14. Place the maximumweight,according to model,on the pan, andpress “Enter”. You willsee the “STABILIZ”,and “FULL CAL”, andcountdowns again.Then the display willread “SCALE…REMOVE WTS”.15. Remove theweight, and press“Enter”. You will see“STABILIZ”, countdown,and then“OFFSET” and countdown.The display willthen read “SCALE….COMPLETE”.16. Press “Zero” toreturn to weighmode.17. Calibrate the balanceaccording to<strong>op</strong>erating instruction<strong>manual</strong> to verify thatscale was set correctly.maintscalescaleremove wtsstabilizzero calscaleadd full wgtscaleremove wtsscalecomplete18. To reset Security, unplug balance, and plug back in.NextNextNextNextNextNextEnterEnterEnterEnterEnterEnter56
Interface Details andSerial CommandsSerial CommandsSET KEYWORD PARAMETERGET KEYWORDDO KEYWORD“•” Decimal point0 - 9 Numeric entryAS Set and Get Autozero sensitivityParameters for set are one of:AUBLSet and Get alternative units (UNITS2),Parameters for set are one of:Set and Get current backlight stateParameters for Set are one of:CommandOFFNORMALSTRONGVERY STRONGGRAMSKGMGMOMMEOZAOZTLBDRAMCARATGRAINHTAELSTAELTTAELPENNYWEIGHTTOLABAHTCUSTOM1CUSTOM2ONOFFCA Get last calibration informationCC Set and Get current containerParameter for Set is a container number between 0 and 10, 0 = no containerCL Check-lowCS Cal scheduleCN Get Statistics sample countCW Get current container weightDD Set and Get current date in DD/MM/YYYYParameter for Set is current date in t he format DD/MM/YYYYCECUDSFLHCLCDo external calibration procedureSet and get current units to Primary (UNITS1) or Alternate (UNITS2)Parameters for Set are one of:Set and Get current display stateParameters for Set are one of:Set and Get current environmental filter lengthParameters for Set are one of:Set and Get current check weight high limitParameter for Set is weight in current units`Set and Get current check weight low limit weightParameter for Set is weight in current unitsPRIALTONOFFVERY_LOWLOWNORMALHIGHVERY_HIGH57
Serial CommandsMM Set and Get current date in MM/DD/YYYY formatParameter for Set is current date in the format MM/DD/YYYYOI Set and Get current <strong>op</strong>erator indexParameter for Set is <strong>op</strong>erator index between 1 and 10ON Set and Get current <strong>op</strong>erator nameParameterPA Set and Get current piece count average weightParameter for Set is average weightPF Set and Get current print formatParameters for Set are one of:PIPMPRPSPTPUSet and Get current print intervalParameters for Set are interval in secondsSet and Get current print modeParameters for Set are one of:Do print current weight dataSet current passwordParameter for Set is password stringSubmit password for testingUse SET PT with password for parameter stringSet and Get Primary units (UNITS1)Parameters for Set are one of:CommandFORMAT_!FORMAT_2FORMAT_3FORMAT_4FORMAT_5FORMAT_6FORMAT_7FORMAT_8FORMAT_9CUSTOMMANUALSTABLEINTERVALGRAMSKGMGMOMMEOZAOZTLBDRAMCARATGRAINHTAELSTAELTTAELPENNYWEIGHTTOLABAHTCUSTOM1CUSTOM2SISet and Get sample typeParameter for Set is sample type character stringSBSet and Get current serial port baud rateParameters for Set are one of: 3840019200960048002400120060030015058
Serial CommandsSD Get sample data.CommandSESHSLSNSet and Get current serial port echo settingsParameters are Set for one of:Set and Get current Serial Port Handshake settingsParameters are Set for one of:Set and Get current serial port parity settingParameters for Set are one of:Set and Get sequence numberParameter for Set is integer sequence numberONOFFNONEXONCTS8-none7-OFF7-ODD7-EVENSPSSSVTTCTTU1U2ZSet and Get current stability speedParameters for Set are one of:Set and Get current stability sensitivityParameters for Set are one of:Get Software VersionSet and Get current Target Weight settingsParameters to Set is weight in current unitsSet and Get Time in 24 hour mode settingsParameters for Set are as follows:Set and Get current value for custom 1 unitsParameter for Set is multiplier conversion factorSet and Get current value for custom 2 unitsParameter for Set is multiplier conversion factorZero (tare)VERY_FASTFASTNORMALSLOWVERY_SLOWVERY_COARSECOARSENORMALFINEVERY_FINEZero (tare)HH/MM/SSWM Set and Get current weigh modeParameters for Set are one of:NORMALCOLLECT_STATSCHECK_TARGETCHECK_LIMITS59
Linearity Procedure(Version 3.10 and Later)Class 1, calibrated weights MUST be used to set linearity. Seeattached chart for acceptable weight values for each model.1. Remove any weight on the balance and press the “Zero” key tore-zero the balance.2. Press “Mode” key.Display reads“MODE….CALIBRATE”.3. Press “Next” keyuntil “SYSTEM”appears, then press“Enter”.4. Press “Next” keyuntil “SECURITY”appears, then press“Enter”.modecalibratesystemsecurityNextNextEnterEnter(NOTE! If you have previously been in the security mode, and havenot unplugged the balance, the next steps, 6-10 will be unnecessary.)5. “SUPR USR”appears, as well assome asterisks, thefirst of which will beflashing.supr usrNextxxxxxxxxxx6. Press the ‘down’arrow key to advance the first asterisk to “L”.Enter7. Press the ‘right’ arrow key to move to the next digit.8. Press the ‘down’ arrow key to advance the second asterisk to “I”.9. Press the ‘right’ arrow key to move to the next digit.10. Press the ‘down’ arrow key to advance the third asterisk to “N”.60
11. Press “Enter”.“MAINT….SCALE”appears.maintscaleNextEnter12. Press “Select”key until “LINEARITY”appears.maintlinearityNextEnter13. Press “Enter”.“CALC LIN…..GET APOINT” appears.14. Press “Select”until “CLEAR DATA”appears.calc linget a pointNextEnter15. Press “Enter”.“CALC LIN…..COM-PUTE” appears.calc lincomputeNextEnter16. Press “Select”until “GET A POINT”appears.17. Press “Enter”.“ADD WGT 1”appears.calc linget a pointNextEnter18. Place 1st weight,according toattached chart forthe model, on thepan.calc linadd wgt 1NextEnter61
19. Press “Enter”. Unitwill display “STABILIZ”,counting down, andthen “AVERAGE”,counting down, then“LIN WGT”, and somenumbers.stabilizaverageNextEnter20. Remove weight,and press “Enter”twice.stabilizlin wgtNextEnter21. Unit will now display“ADD WGT 2”.22. Repeat thisprocess until all ofthe weightsindicated in thechart have beenutilized.23. Press “Enter”.24. Press “Select”until “COMPUTE”appears.stabilizadd wgt 2computecomputedNextNextEnterEnter25. Press “Enter”.Unit should now display “COMPUTE….COMPUTED”.26. Press “Zero” button to go back to weigh mode,and check to see if linearity is set.62
Linearity Weight SettingsModel 1 2 3 4 5 6 7 864 10 20 30 40 50 60104 10 20 50 60 70 90 100204 10 20 30 50 100 150 200203 10 20 30 50 100 150 200403 10 20 50 100 200 300 400402 10 20 50 100 200 300 400603D 50 100 200 300 400 500 600602 50 100 200 300 400 500 6002102 200 400 600 800 1000 1500 20002101 200 400 600 800 1000 1500 20004102D 200 500 1000 1500 2000 3000 40004102 200 500 1000 1500 2000 3000 40004101 200 500 1000 1500 2000 3000 40006101 500 1000 2000 3000 4000 5000 60008102D 1000 2000 3000 4000 5000 6000 7000 80008101 1000 2000 3000 4000 5000 6000 7000 800012001 1000 2000 3000 4000 5000 8000 10000 1200063
Glossary of TermsAverage The statistic average weight of a part used inPiece Weight part countingAuto Zero Automatically correcting the zero display due to slowdrift.Baud Rate The transfer rate unit for serial data transmission intransitions per second between the computer andthe printer.BitBinary digit.Calibration A process where the balance is adjusted to weighrelative to a standard weight.Capacity The maximum mass that a balance is capable ofweighing accurately. (See “Specifications” section orthe max value on the product label for the capacityof your particular model.)Percent Weighing application that uses a preset referenceWeighing value to equal 100% with the numeric display showingthe deviation of the sample weight in percent.Dynamic A dynamically switching fine resolution (10x) whoseFine Range effective measurement range is dependent uponthe sample weight and the gross weight.Electronic An electronic balance senses physical force whenBalance weight is placed on it and translates this force intodigital form.Factory Setting Preset <strong>op</strong>eration parameters set by the manufacturerfor normal applications and conditions. These canbe changed by the user, but they also can be resetusing the Factory mode.Gross Weight The total weight on the balance including tareweight.LevelingHorizontal aligning of the balance during installation using alevel vial.Linearity The amount a weight reading may deviate from astraight line between 0 grams and the maximumcapacity of the balance.ParityA parameter whose values may be odd, even, ornone which is used in a method of error checkinginformation in a data transmission.Permissible An acceptable standard mass which can be usedWeight to calibrate the balance.PieceA weighing application for determining the pieceCounting count of identical weighing pieces.Resolution The smallest fraction of a weight that a balance isable to discern.Example: If weight were added to a balance inincrements of .0001grams, the resolution would bedefined as the amount added before the balancereading would change.64
Glossary of TermsSetupZero WeightZeroingStableIndicatorWeigh PanWeigh UnitThe process of configuring the balance to <strong>op</strong>eratein a certain way.Weight of a container or package that should notbe taken into account in the weighing. This value isalso referred to as the tare weight.Compensating for a tare weight by setting the displayof the balance at zero with the container orother packaging material on the weighing pan.Often called taring.Symbol that is automatically displayed when thebalance reading or weight is not stable. It disappearswhen the reading becomes stable.The round or square surface upon which the objectis placed for weighing.How the weight of the object is expressed.Gram Conversion Chart1 Gram = 0.03527396 AV OZ0.03215075 TROY OZ0.00220462 POUNDS0.64301493 PENNY WEIGHT15.43235835 GRAIN0.77161792 SCRUPLE0.56438339 AV DRAM0.03527396 AP DRAM5.00000000 CARAT0.02671725 TAEL (HK)0.02645547 TAEL (S)0.02666667 TAEL (T)0.26666670 MOMME0.08573532 TOLA0.06596306 BAHT0.00980665 NEWTON65
Menu TreeFrom the weigh screen press the “Mode” key:(Enter key to go right in chart, “Next” key to go down in chart)Screen Screen Screen Screen ScreenCALIBRATE EXTERNAL ADD WEIGHT CAL OKWeigh ScreenINTERNAL CAL INTL Auto Cal Weight 1, etc.Program OffProgram OnSet Time 1Set Time 2Set Time 3Interval DayWeigh ScreenUNITS UNIT1/grams UNIT2/grams Weigh screenKilogramKilogramMilligrams EtcOunceTroy OuncePoundGrainPennyweightCaratTael Hong KongTael SingaporeTael TaiwanMommeDramBahtTolaCustom 00000.000000 UNIT2/gramsSTATS TURN ON/OFF Weigh ScreenCALC NUMBER, etc. LISTLIST NO STATS or data EDITEDIT NO STATS CLEARCLEAR YES TURN OFFENVIRO FILTER NORMAL STABIL SPEEDHIGH “VERY HIGH “VERY LOW “LOW “STABIL SPEED NORMAL STABIL SENSSLOW “VERY SLOW “VERY FAST “FASTSTABIL SENS NORMAL AUTOZEROFINE “VERY FINE “VERY COARSE “COARSE “AUTOZERO NORMAL Weigh ScreenSTRONG “VERY STRONG “OFF “66
Menu Tree (continued)Screen Screen Screen Screen ScreenANIMAL TURN ON STABIL SPEEDSTABIL SPEED NORMAL STABIL SENSFAST “SLOW “STABIL SENS NORMAL Weigh ScreenFINE “VERY FINE “VERY COARSE “COARSE “COUNT PIECE COUNT ADD 5 PCS Weigh ScreenADD 10 PCS “ADD 20 PCS “ADD 50 PCS “ADD 100 PCS “TURN OFF/ON “AVG PIECE WT 00000.0000000 Weigh ScreenCHECK WEIGH LIMITS LO LIMIT HI LIMIT Weigh ScreenTARGET TARGET Weigh ScreenTURN OFF Weigh ScreenGLP USER RECALL USER 1-9 Weigh ScreenUSER SAVE USER 1-9 Entry Screen Weigh ScreenDATE TIME MM/DD/YY “DD/MM/YY “YY/MM/DD “SAMPLE TYPE SMPL TYPE SEQ NumberSEQ NUMBER 0**** USER RECALLSERIAL PRINT MODE MANUAL FORMATSTABLE “INTERVAL CUSTOM 0000 secs5 SEC FORMAT10 SEC “60 SEC “FORMAT TYPE1-9 BAUDCUSTOM PRINT DATE/TIME ON or OFFBALANCE ID “SAMPLE TYPE “SEQ NUMBER “LAST CAL “USER “SIGN LINES “(*to Serial Baud)67
Menu Tree (continued)Screen Screen Screen Screen ScreenSERIAL BAUD 9600 BITS/PARITY4800 “2400 “1200 “600 “300 “150 “38400 “19200 “BITS/PARITY 8-NONE ECHO7-EVEN “7-ODD “7-NONE “ECHO OFF HANDSHAKEON “HANDSHAKE XON/XOFF Weigh ScreenNONE “CTS “TARE WEIGHTS SELECT No Container STORE-AUTOSTORE-AUTO CONTAINER 1-10STORE-MANUAL CONTAINER 1-10 (* to store <strong>manual</strong>)CLEAR Clear All SELECTCNTNR 1-10BATCH TURN ON/OFF Weigh Screen (* to next setup <strong>op</strong>tion)SYSTEM SW VERSION VX.X BALANCE IDBALANCE ID XXX-XXX-XXX LAST CALLAST CALL CAL DATE SECURITYCAL TIMECAL WEIGHT(secured area)SECURITY SUPR USR XXX Weigh screenPASSWORD XXXXXXXX Weigh screenSPC GRAVITY WEIGH ABOVE WEIGH BELOWWEIGH BELOW Calculates Specific GravityFACTORY CANCEL Weigh screenSET DEFAULTS STANDBY (15 seconds)Then COMPLETEWeigh screen68
External TransformersOne of the following external transformers is supplied for usewith the balance:Part # input output mains plug type101627.1 120 VAC ~ 60 hz 15 VDC – – – @ 800 mA North American NEMA 5-15p101556.1 230 VAC ~ 50/60 hz 15 VDC – – – @ 800 mA Continental Eur<strong>op</strong>ean CEE 7/16101557.1 240 VAC ~ 60 hz 15 VDC – – – @ 800 mA United Kingdom BS 1363The tolerance for AC input voltage is +/- 10%NoteMemo:Other main plug configurations may be available.Contact your local distributor or <strong>Denver</strong> <strong>Instrument</strong>Company.AccessoriesA variety of accessories are available from <strong>Denver</strong> <strong>Instrument</strong>to enhance your weighing experience. Contact your localdistributor or <strong>Denver</strong> <strong>Instrument</strong> for part numbers and pricing.Spill CoverLock Down deviceWeigh BelowDraft Ring (for 4.5 and 6 inch round pan models only)Draft Shield (for round pan models only)Calibration WeightsCable, RJ11 (4) - DB25S IBM-PCCable, RJ11 (4) - DB25P PrinterCable, RJ11 (4) - DB9S IBM-ATCable, RJ11 (4) - BluntPrinter, thermal 4” print area, parallel and serial portsPrinter, dot matrix 2” print area, serial only69
Cleaning Instructions• Disconnect electrical power from the balancebefore cleaning.• Do not immerse the balance in any liquid.• Use mild soap or diluted bleach (9 parts water to 1part bleach) with a soft cloth.• Do not use chemical solvents for cleaning.• Before using any cleaning or decontamination methods,except those recommended by the manufacturer,verify with the manufacturer that the pr<strong>op</strong>osedmethod will not damage the equipment.Maintenance!WARNINGThere are no user serviceable parts within the unit.Opening the case will void the warranty.All repairs must be performed by a factory-trained technician.Contact <strong>Denver</strong> <strong>Instrument</strong> Company for your nearest authorizedrepair location.70
Warranty Instructions1. Please return the prepaid, pre-addressed PurchaseRegistration Card to <strong>Denver</strong> <strong>Instrument</strong> Companypromptly upon your purchase of the <strong>Denver</strong> <strong>Instrument</strong>product. The return of the card is not a condition precedentto warranty coverage.2. If you have any questions about a <strong>Denver</strong> <strong>Instrument</strong>product, please call toll-free, 1-800-321-1135 (or FAXdescription of problem to (303) 423-4831) for technicalassistance.3. If it becomes necessary to return your <strong>Denver</strong> <strong>Instrument</strong>product for service, you must obtain a “ReturnAuthorization Number”. Please pack the productsecurely in its original approved packing carton or othersuitable container and include your ReturnAuthorization Number on the shipping label and as aprecaution also a note inside the box. Shipping chargesmust be fully prepaid.Ship to:<strong>Denver</strong> <strong>Instrument</strong> Company6542 Fig StreetArvada, Colorado 80004Purchase Date:Model:Serial Number:
24.788WEIGH Select Mode PrintZ E R OgDisplayOn/Off<strong>Denver</strong> <strong>Instrument</strong> Company6542 Fig Street • Arvada, Colorado 80004 U.S.A.1-800-321-1135 • (303) 431-7255 • Fax (303) 423-4831Eur<strong>op</strong>ean Office:<strong>Denver</strong> <strong>Instrument</strong> Company, Ltd.<strong>Denver</strong> House, Sovereign Way • Trafalgar Business ParkDownham Market, Norfolk PE38 9SW • EnglandTel: (01366) 386242 • Fax: (01366) 386204