TenTec-Orion-2-Manua..
TenTec-Orion-2-Manua..
TenTec-Orion-2-Manua..
- No tags were found...

Create successful ePaper yourself
Turn your PDF publications into a flip-book with our unique Google optimized e-Paper software.
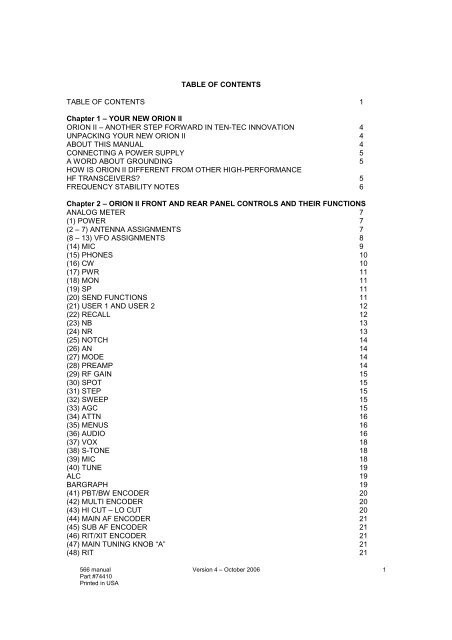
(49) VFO A>M 21(50) and (51) LCK 22(52) VFO B>M 22(53) XIT 22(54) MAIN TUNING KNOB “B” 22(55) SUB RX 22(56) MAIN RX 22(57) FREQUENCY ENTRY AND BAND CHANGE BUTTONS 22(58) VFO A ENTER 22(59) VFO B ENTER 23(60) A>B, B>A, A/B 23(61) ANT 1 24(62) ANT 2 24(63) DC IN 24(64) FUSE 25 A 24(65) GND 24(66) AMP KEY 1 25(67) TX OUT 1 / TX EN 1 25(68) AMP KEY 2 25(69) TX OUT 2 / TX EN 2 26(70) +13.8 VDC 26(71) AUX RX 26(72) XVRT KEY 26(73) XVRT RF 26(74) LINE OUT 26(75) SPARE 26(76) BAND DATA 1 26(77) BAND DATA 2 26(78) EXT SPKR 27(79) KEY 27(80) AUX I/O 27(81) REMOTE 28(82) SERIAL DATA 28Chapter 3 – MENU SYSTEM(TX) TX MENU 29(CW) CW MENU 30(VOX) VOX MENU 31(RX) RX MENU 32(OTHER) OTHER MENU 33(SSB) SSB MENU 34(FILTR) FILTER MENU 35Chapter 4 – OPERATION AND ACCESSORY CONNECTION EXAMPLESBASIC TRANSCEIVE OPERATION 37OPERATING SPLIT FREQUENCY 37OPERATING THE AUTOMATIC ANTENNA TUNER (IF INSTALLED) 38CONNECTING AN EXTERNAL LINEAR AMPLIFIER 38TUNING UP AN EXTERNAL LINEAR AMPLIFIER 39FACTORS THAT AFFECT THE SOUND OF SSB TRANSMIT AUDIOAND THEIR ADJUSTMENT 39SETTING UP ORION II FOR AM TRANSMIT 42FSK OPERATION 42TRANSVERTER HOOKUPS 42566 manual Version 4 – October 2006Part #74410Printed in USA2
DIVERSITY RECEPTION 43WEAK SIGNAL DX RECEPTION AND CONTEST OPERATIONAND THE ORION II 44EXTERNAL CW OUTPUT PLUS CW KEYER OPERATIONFROM PADDLES 48DRAG ADJUSTMENT FOR MAIN TUNING KNOBS “A” AND “B” 48INSTALLATION OF OPTIONAL CRYSTAL ROOFING FILTERS 48MASTER RESET 49UPDATING ORION II OVER THE INTERNET 49TROUBLESHOOTING 50Chapter 5 – SPECIFICATIONS AND TECHNICAL DESCRIPTIONSPECIFICATIONS 52HARDWARE INFORMATION 56SUBASSEMBLY LOCATION 56SIGNAL PATH – MAIN RECEIVER 56SIGNAL PATH – SUBRECEIVER 57SIGNAL PATH – TRANSMITTER 57BLOCK DIAGRAMS AND CABLE ROUTING 58CE DECLARATION OF CONFORMITY 64566 manual Version 4 – October 2006Part #74410Printed in USA3
Chapter 1 – YOUR NEW ORION IIORION II – ANOTHER STEP FORWARDIN TEN-TEC INNOVATIONThe Ten-Tec ORION II represents the mostinnovative HF transceiver ever created foramateur radio use.Our aim in designing and producing thisradio was to meet the demands ofincreasingly intense competition in DX andcontesting, while adding many nonperformancerelated features that the activeham can also appreciate. The features andperformance ORION II brings to ham radiowill enhance HF radio contacts of all sorts,while opening new possibilities for amateurradio operation. ORION II offers world-classreception and transmission of CW, SSB,digital modes, FM, and AM on all 10 HFamateur bands, plus excellent generalcoverage reception via the second (sub)receiver from 100 kHz to 30 MHz.UNPACKING YOUR NEW ORION IIExamine ORION II for signs of shippingdamage. Should any damage be apparent,notify the delivering carrier immediately,stating the full extent of the damage.Retain all damaged cartons. Liability forshipping damage rests with the carrier. Werecommend that you keep the carton andfillers in the event that storage, moving, orshipment becomes necessary.The following hardware and accessoriescome standard with your ORION II. Makesure that you have not overlooked anything.Qty Part # Description1 #27074 Mini-ATC BladeFuse, 25 Amp.1 #35003 Phono Plug1 #35363 8-pin MicrophoneConnector1 #35241 8 pin DIN plug1 #35165 2-pin PowerConnector Shell2 #41020 Female Power Pins1 #35017 Phone Plug, 3-circuit1 #35331 Shell, Band DataPlug15 #41068 Band Data PlugPins1 #38040 .050 Hex Wrench1 #38088 .062 Hex Wrench1 #38313 T10 Torx Wrench1 #46172 Serial Cable1 #46176 Accessory Cable.5-pin DIN to phonofemale1 #74020 Warranty Card1 #74410 User’s <strong>Manua</strong>l1 #86095 DC Power CordFigure 1-1 ORION II Packing KitABOUT THIS MANUALThe ORION II is a firmware updateabletransceiver. Features and functions on thetransceiver may change as time passeswhen new firmware revisions are issued viaTen-Tec’s www.rfsquared.com firmwaredownload website. The latest version of theORION II manual is posted in .pdf format onthe ORION II section of the Ten-Tec websiteat www.tentec.com. Version 4 of thismanual, dated October 2006 is currentthrough version 2.037j of the transceiverfirmware. Schematic diagrams are notincluded in this manual but are available fordownload from the www.rfsquared.comfirmware website.This manual was written byScott E. Robbins, W4PA.566 manual Version 4 – October 2006Part #74410Printed in USA4
CONNECTING A POWER SUPPLYThe ORION II transceiver requires a sourceof well-filtered and regulated DC voltage.The supply voltage can range from +12.8 to+15.0 Vdc but +13.8 Vdc is the optimumvalue. The voltage source must be capableof supplying 22 amperes continuous duty.We recommend using the included DCpower cable (P/N 86095). We have alsoincluded spare connector pins (P/N 41020)and a spare 2 pin power connector shell(P/N 35165) for building your own cable.The power supply plug will attach in onlyone direction to the polarized two-pin DCconnector on the ORION II rear panel. Useno less than #14 gauge (#12 recommended)stranded wires for three-foot longconnections to accommodate the requiredcurrent demand during transmit. Useheavier gauge wire for longer power supplyleads.NOTE: always enable the power source firstand then the transceiver. If a generator oralternator supports the dc source, alwaysturn off the transceiver before starting orshutting off the dc source equipment. Theserecharging devices often generate largevoltage spikes that can damage thetransceiver.A WORD ABOUT GROUNDINGA good ground system is essential foroptimum operation of any HF transmitter.The best solution is to connect all the stationequipment chassis together using a heavygauge of flat ground braid. Use a shortlength of braid to connect to a ground rod. Ifyou are not using a linear amplifier, a lessideal ground may suffice. A groundconnection to a copper cold water pipe wasoften suitable, but that is now a violation ofthe National Electrical Code. Be aware thatmany modern water connections use plasticpipe, and are not suitable groundconnections.Antenna type and its proximity to the stationare also factors in choosing groundmethods. With good resonant antennaslocated away from the station, the ACground in your house wiring might beadequate.HOW IS ORION II DIFFERENT FROMOTHER HIGH-PERFORMANCE HFTRANSCEIVERS?ORION II is different from HF transceiversthat have come before it The originalORION transceiver pioneered the use ofmode-appropriate selectable crystal roofingfilters at the first I-F stage plus DSPbandwidth filtering at the third I-F stage.The ORION II features an even moreadvanced roofing filter stage than theoriginal ORION for optimum receiverperformance.The mode-appropriate roofing filters used inthe ORION II main receiver are thecenterpiece of the radio’s performance. It iscommon for radio designers to be able toproduce a receiver that exhibits in excess of100 dB of available dynamic range. What isnot common is the ability to protect superiorreceiver design from being compromised byreal-life on-band factors (i.e. loud close bysignals).Mode-appropriate roofing filters keep closeby loud signals from having a negativeimpact on receiver performance. A typicalhigh performance HF transceiver isequipped with a 15 to 20 kHz wide roofingfilter at the first I-F stage. Any signal thatappears under the 15 to 20 kHz roofing filter,even if you do not hear it in your receiverpassband, has the potential to compromisereceiver performance. Loss of dynamicrange, third-order intercept or the receiverbreaking into non-linearity (distortion) arepossible results.When dynamic range and third-orderintercept are compromised, the ability tocopy weak signals is also compromised.The typical 100 dB dynamic range highperformance HF radio, in the presence ofloud signals a few kHz above or a few kHzbelow the targeted receiver frequency, couldlose a significant amount of the available100 dB of range! Why? Because thoseloud signals under the 15 to 20 kHz wideroofing filter have had a negative impact onthe overall performance of the receiver.566 manual Version 4 – October 2006Part #74410Printed in USA5
If a mode-appropriate roofing filter issubstituted for the 15 or 20 kHz wide roofingfilter at the first I-F, the result is that close byloud signals do not compromise dynamicrange or third-order intercept point. A 2.4kHz crystal filter will not allow loud signalsthat are 3 or 5 kHz away from the targetfrequency to compromise the overallperformance of the receiver. This is whereevery other HF transceiver that has comebefore ORION II is deficient. Imagine howmuch worse the receiver performance of acompetitor’s radio can be in the presence ofmany loud signals across the band (like in amajor contest).ORION II is equipped with a total of sevenavailable crystal roofing filter slots. Four ofthe seven crystal roofing filters are standard;three are optional. The standard roofingfilters included are 20 kHz, 6 kHz, 2.4 kHz,and 1 kHz. Optional filters are available at1.8 kHz (model 2000), 600 Hz (model 2001)and 300 Hz (model 2002).Note that the 20 kHz and 6 kHz roofingfilters are of limited utility for maintaining theoverall receiver performance level of a highend HF transceiver like ORION II. Theywere included only because AM and FMoperation would require them, and becausesome operators with an interest in “hifidelity”SSB audio will require receiverbandwidths higher than the typical 2.4 kHzcommunications grade roofing bandwidthwould allow. Certainly the use of either a 20kHz or 6 kHz wide roofing filter has thepotential to allow overall receiverperformance (dynamic range and third-orderintercept point) to be seriously compromisedby loud close by signals. For seriousreceiver use, like weak signal DXing andcontesting, a much smaller roofingbandwidth than 20 or 6 kHz is necessary. InORION II for SSB use, it can be as little as1.8 kHz for roofing. For CW, it can be aslittle as 300 Hz, depending on theinstallation of optional filters.signal spacings. For our competitors’transceivers, the 5 kHz spacing numbers arealways significantly worse than the 20 kHzspacing numbers – this is because of thepresence of test signals under a 15 to 20kHz wide roofing filter vs. outside the filter.FREQUENCY STABILITY NOTESOptimal frequency stability in multiconversionsuper-heterodyne receivers likeORION II is a function of design. It isaffected by the choice of high or low-sideplacements for the various local oscillators.All local oscillators are first locked to a 1part-per-million master TCXO. In theORION II, only the 1 st and 2 nd localoscillators have a significant effect on thefrequency stability. The 3 rd LO (andsubsequent frequency translations in theDSP) contribute only sub-Hz temperaturedrift and can be essentially ignored.The first LO (developed by the PLL) isplaced approximately 9 MHz above theoperating frequency. It tracks the 1 ppmdrift of the TCXO, so its maximum frequencyerror is 10.8 to 39 Hz for operating 1.8 to 30MHz respectively. To cancel most of thiserror, the second LO is then placed belowthe 9 MHz first IF at a fixed frequency ofapproximately 8.545 MHz (locked to thesame TCXO). With this low-side placementof the second LO, the frequency drift in the455 kHz second IF is the differencebetween the two LO errors or 10.8 - 8.545Hz = 2.255 Hz. This is 1.25ppm @ 1.8 MHzover the entire temperature range of theTCXO. Conservatively specifying a TCXOwith a larger temperature range thanrequired results in an overall frequencystability of better than 1 ppm over 0 to 50°C.As most ORION II’s are used at roomtemperature your real world stability issubstantially better than 1 ppm at anyoperating frequency.For some recommended real-worldexamples of how roofing filters affect overallreceiver performance, please look at recentARRL Product Reviews from QST magazinewhere dynamic range and third-orderintercept are measured at 20 kHz and 5 kHz566 manual Version 4 – October 2006Part #74410Printed in USA6
(2 – 7) ANTENNA ASSIGNMENTSThe two columns of antenna selection keys(numbered 2 through 7 in the figure above)allow the assignment of up to threeconnected antennas to each of the tworeceivers.The most common arrangement would be tohave a single antenna connected to ANT 1used by either the main receiver only, or bythe main receiver and the subreceiver both.Buttons 2, 4 and 6, as shown above, allowANT 1, ANT 2 or RX ANT to be connectedto the main receiver.Chapter 2 – ORION II FRONT AND REARPANEL CONTROLS AND THEIRFUNCTIONSChapter 2 of the ORION II manual coversthe various controls and connectors on thefront and rear panels, with an explanation ofthe each control and how it is used foroperation of the radio.ANALOG METERAn analog meter is provided at the upper lefthand side of the front of the transceiver. Inreceive, the meter shows S-units of signalstrength for the main receiver.In transmit, the meter shows approximateoutput power (+/- 5%). The power meter isa sampling-type meter and will stay more orless constant when sampling power output,particularly when the transceiver is used inCW mode.A separate bar graph S-meter for thesubreceiver is present on the radio screen.(1) POWERThis button turns the transceiver on and off.To connect an antenna attached to thetransceiver via the ANT 1 rear panel jack tothe main receiver, press button 2 shownabove. The amber LED embedded in thebutton will light, indicating the main receiveris now connected to ANT 1.Pressing button 4 as shown above willconnect the main receiver to ANT 2.When either of the ANT 1 or ANT 2 buttonsin the MAIN RX/TX column is lit, a receiveonly antenna can be substituted for thereceive side of ANT 1 or ANT 2 by pushingbutton 6 as shown in Figure 2-1.Example: With button 2 or button 4 lit, pressbutton 6. The operator will note that thereare now two lighted buttons in this column,either of 2 or 4, plus 6. The radio willautomatically use either ANT 1 or ANT 2 fortransmit and RX ANT for receive in thisconfiguration.Buttons 3, 5, and 7 control the assignmentof the subreceiver to each of the antennasconnected to the radio. The subreceiver caneither share the same antenna in use for themain receiver, or it can be split off to usedwith a separate antenna.An antenna attached to ANT 1, ANT 2, orRX ANT can be used simultaneously withboth receivers or they can be split off toseparate receivers. One receiver cannot beused with two antennas at the same time.566 manual Version 4 – October 2006Part #74410Printed in USA7
One antenna + one receiver, two antennas +two receivers, One antenna + two receiversare the available selections.Additionally, button 2 is used for performinga master reset of the transceiver. See theMASTER RESET description in Chapter 4.(8 – 13) VFO ASSIGNMENTSWhile dual receive transceivers are commontoday, ORION II allows an unprecedentedlevel of flexibility to the operator for mainand subreceiver control with the VFOassignment buttons. Receivers can beassigned to separate VFO’s (the mostcommon arrangement) or both receivers canbe assigned to a single VFO.The operator is permitted to assign eachVFO to either receiver and the transmitter.VFO’s can be adjusted even if NO receiveris selected for them.The two large tuning knobs are for eachVFO. The large knob on the left closest tothe display screen is always VFO A, thelarge knob to the right is always VFO B.Buttons 8 and 9 determine which VFO thetransmitter is assigned to. The TXfrequency also determines the output of theBAND DATA connectors on the ORION rearpanel (see description of 76 BAND DATA 1and 77 BAND DATA 2 elsewhere in thismanual).Buttons 10 and 11 determine which VFO themain receiver is assigned to.Buttons 12 and 13 determine which VFO thesub receiver is assigned to.The assignments of the VFO’s are not onlyshown by the amber LED’s inside thebuttons, and are announced on the displayscreen. Shown in Figure 2-2 below is adefault screen when powering up ORIONafter a master reset.Figure 2-2 ORION II Screen DisplayRefer to Figure 2-2. Next to the 14.250.000frequency display for VFO A are the lettersTR. ‘T’ is for transmitter, ‘R’ is for mainreceiver, and ‘S’ is for sub receiver. As theoperator assigns the transmitter andreceivers using buttons 8 through 13, the TR and S indicators will move back and forthon the screen. If a transmitter or receiverhas no assignment, the annunciator will notbe shown.The main receiver and the transmitter areamateur bands-only coverage. An attemptto assign them to a frequency outside theham bands will result in one of threemessages appearing on the screen:VFO-A OUTSIDE RX RANGE, VFO-BOUTSIDE RX RANGE or FREQUENCYNOT SUPPORTED depending on how theuser was attempting to put the main receiveron a non-amateur frequency.Buttons 8 and 9 can be used to turn thetransmitter off by deselecting both buttons.Push 8 and 9 so neither light is lit. The Tindicator will not be present on the screen.Buttons 12 and 13 can be used in a similarfashion to deselect the subreceiver, butthere will still be audio present through thesubreceiver audio chain on the last usedsubreceiver frequency when doing so – itwill not mute the subreceiver. Subreceiveraudio can be muted by turning the SUB AFencoder all the way counterclockwise or bypressing it to mute. After no VFO isassigned to the subreceiver, the lastsubreceiver frequency will still be audible.566 manual Version 4 – October 2006Part #74410Printed in USA8
The main receiver cannot be disabled; it willalways be assigned to either VFO A or VFOB via buttons 10 and 11.Receivers can be assigned to one VFO orthe other simultaneously. There areadvantages to doing so – see the section ofChapter 4 titled DIVERSITY RECEPTIONfor information on diversity receivecapabilities using the two receivers, theVFO’s and multiple antennas.(14) MICJack used for connection of microphone.The ORION II features the common 8 pinmicrophone jack used by amateur radiotransceivers. Most dynamic or electretmicrophones can be used. When adaptinga microphone, please refer to the wiringdiagrams in Figures 2-3 and 2-4.We include a spare 8-pin microphoneconnector (P/N 35363) with the packing kitto allow rewiring of your current mic for usewith ORION II. The pinout for the 8 pin micconnector on the front of the ORION II isshown in Figure 2-3. Recommended wiringis shown below in Figure 2-4.Figure 2-4 Recommended mic cable wiring.Pin 2 (+10 VDC) need only be connected ifthe microphone element in use is an electretcondenser requiring a polarizing voltage.Keeping chassis ground and mic signalground separated are done to reduce thepossibility of introducing stray hum or RFIinto the transmit audio signal.Note we recommend that the case of themicrophone also be tied to chassis groundon the transceiver via pin 5. This is to helpassure stray RF does not have a path to becoupled into transmit audio.Figure 2-3 Front view, mic connector, onfront panel of ORION IIIt is important that the microphone bodyhave a common ground with the ORION II.We recommend wiring microphone cablesas shown in Figure 2-4.Some microphones are not wired toseparate microphone signal ground fromchassis ground, and the two are tiedtogether. We recommend separate pins foruse for mic negative signal and chassisground as shown in Figure 2-4.566 manual Version 4 – October 2006Part #74410Printed in USA9
(15) PHONESThe PHONES jack is optimally for stereoheadphones. ORION II uses left and rightstereo outputs from two audio amps. Amono plug will short-circuit one of the twoaudio channels unless wired and used asdescribed below. Use a stereo (3-circuit)plug such as one that comes packed withyour radio. Using stereo headphones letsyou take full advantage of ORION II’sadvanced features.Audio from the front panel phones jack to astereo connector is left = tip, right = ring,ground = sleeve.Mono headphones can be used with ORIONII, provided they are wired correctly with astereo plug and the headphone audiosettings in the AUDIO menu are set to theappropriate values. You can use left sideaudio output to mono headphones by wiringthe headphones as shown in Figure 2-5.See (36) AUDIO later in the manual foradjusting the headphone output for monoheadphones as wired below.Figure 2-5 Wiring Mono Headphonesbutton (‘Speed’) and then rotate the MULTIknob for an appropriate CW speed (Note: InSSB modes, SP is used for speechprocessing and displays a different value).commonKey or ditdahFigure 2-6 Paddle Wiring for Using InternalKeyerThe PTT pin (3) on the AUX I/O rear jack orthe PTT connection on the microphone jackmay allow you to connect an independentkeyer or computer to share CW keyingdepending on how this jack has beenconfigured via the menu system.This would be useful if using the output of acomputer program (like contest loggingsoftware) while also desiring a paddle to beconnected to the radio for using the internalkeyer. Connect the CW keying output of thecomputer logging program to PTT pin (3) onthe AUX I/O jack or the microphone jack,and then connect your paddle to either ofthe two panel mounted CW jacks, front orrear. See the description of item PTT inCW as in the manual section for (CW) CWMENU in Chapter 3 and EXTERNAL CWOUTPUT PLUS CW KEYER OPERATIONFROM PADDLES in Chapter 4.(16) CWORION II has two jacks for keying thetransceiver in CW mode. The front panelprovides a ¼” stereo jack for connection ofan external key, keyer, or paddles. SeeFigure 2-6 for proper wiring. The rear panelhas a 1/8” stereo jack connected in parallel(see description of (79) KEY later in themanual). ORION II on initial power-up hasits internal keyer disabled. To use theinternal keyer in a CW mode, press the SP566 manual Version 4 – October 2006Part #74410Printed in USA10
Press the MON button. The volume ofmonitor level is expressed as a value from 1to 100% of available. Monitor is availablethrough either headphones or via thespeaker.The MON function is also usable in FSKmode for monitoring of transmitted tones.(19) SP(17) PWRThis button is used for setting RF poweroutput on ORION. Press the PWR buttonthen turn the MULTI knob to adjust valuefrom 1 to 100. The value set from 1 to 100will roughly correspond to power output inwatts but this will vary a few wattsdepending on band and load impedance.ALC control is present from 5 to 100 wattsoutput - no ALC control below 5 wattsalthough power output can be droppedbelow that level.The PWR button also interacts with theTUNE button (40) for key down poweroutput for tuning an antenna tuner or linearamplifier. See the description of TUNE(button 40) later in this section.If the low level drive transverter output hasbeen activated in the menu system, a lowlevel RF output of approximately +15 dBm(35 mW) will be sent through the XVRT RFjack. This output power value ALCcontrolled and is adjustable from +5 to +15dBm (3.5 to 35 mW) by using the PWR andMULTI control when the transverter output isactivated in the menus.(18) MONORION II is equipped with a transmit audiomonitor to allow the operator to hear actualtransmitted audio. TX EQ, speechprocessing, TX bandwidth, LF rolloff all havean effect on the sound of the transmittedSSB signal, and to properly adjust thesecontrols for no distortion and desired sound,use the monitor.SP has two different functions depending onwhich mode the operator has selected. InSSB modes, the SP control is used forspeech processing. In LSB or USB mode,press the SP button to turn the speechprocessor on and off. When on, use theMULTI knob to adjust from a value of 1 to 9.Higher values represent more processing.Please note on the highest settings of 8 and9 that it is relatively easy to send the radiointo SSB transmit distortion depending onwhere the mic gain and other TX controlsare set! Use the monitor function to listen toyour transmitted audio.The SP button is used for keyer speedcontrol in CW modes. Press the SP buttonwhen in LCW or UCW mode to activate theCW keyer. Speed control is 10 to 50 WPM.(20) SEND FUNCTIONSORION II is equipped with three CWmemories and three voice memories.ORION II will retain three on each mode, fora total of six. An asterisk (*) appears on theORION II screen just to the right of eachbutton when a SEND memory has beenrecorded.To record a message in a voice mode inSEND 1 or SEND 2: Press and hold theappropriate button. A submenu titledDIGITAL VOICE RECORDER CONTROLwill appear at the bottom of the screen.There are five options: EXIT, RECORD,PLAY, DELETE and SAVE. The fivebuttons below these options (numbers 22through 26) are used for these functions.To RECORD a message, depress the PTTbutton on your microphone. (You will not betransmitting on the air when the DIGITALVOICE RECORDER CONTROL menu isshown on screen). Press RECORD (button566 manual Version 4 – October 2006Part #74410Printed in USA11
23) and begin speaking into the microphone.There are 4.54 seconds of availablerecording time for each of the SEND 1 andSEND 2 voice memories. When RECORDis pressed, the legend on the screen abovethe button changes to read STOP.When you are finished recording themessage, press the button again to STOP.When finished, you can check the recordingoff the air by pressing PLAY (button 24).To delete the recording, press DELETE(button 25).To retain the memory after the transceiver ispowered off, press SAVE (button 26). Amessage titled SAVING RECORDING willappear on the ORION II screen for severalseconds during the save process.To exit the voice recorder control menu,press EXIT (button 22). Don’t forget beforepressing EXIT to release the PTT button onyour microphone that you depressed earlierto record the message, or upon exiting yourmic will be live.To play your message while on the air,momentarily push the appropriate SENDbutton and your recording will betransmitted.To record a message in a voice mode inSEND 3: Follow the same instructions asfor SEND 1 or SEND 2. SEND 3’s messagecan be up to 28.1 seconds in length butcannot be retained in memory by using theSAVE button after recording. This memorywill erase after the transceiver is poweredoff.To record a message in CW mode in SEND1, SEND 2, or SEND 3: Press and hold theappropriate button . A submenu titled CWMEMORY KEYER CONTROL will appear atthe bottom of the screen.Please note: CW memories can only berecorded using the internal keyer.There are four options: EXIT, RECORD,PLAY, and DELETE. The four buttonsbelow these options (numbers 22 through25) are used for these functions. Unlikevoice memories, all 3 CW memories areautomatically saved to memory whenrecorded and will retain after powering offthe transceiver.To record a message in CW mode, pressRECORD (button 23) and begin sendingCW. The words EXIT, RECORD, PLAY,and DELETE will momentarily disappearand the word STOP will appear abovebutton 23. When you have completed yourrecording press button 23 to end (STOP).To check your CW memory off the airwithout transmitting, press PLAY (button24). To delete the CW memory, pressDELETE (button 25). To exit the CWmemory keyer control menu, press EXIT(button 22).When playing your CW message on the airusing SEND 1, SEND 2 or SEND 3, the CWkeyer must be turned on. If off, the SENDbuttons will not respond.(21) USER 1 AND USER 2ORION II is equipped with a total of five userprofiles. User profiles are like a “supermemory” – everything on the radio, allsettings, all menu selections, everything willbe saved to a user profile memory. Unliketraditional memories that save frequency,mode, bandwidth and maybe one or twoother parameters.The USER 1 and USER 2 buttons allowsaving and recalling of user profile #1 anduser profile #2. User profiles #3, #4 anddefault (#5) are accessible by pressing theRECALL button (22).To save a user profile in either USER 1 orUSER 2: Press and hold the desired buttonfor two seconds. Two messages will appearon the screen: STORING PARAMETERSET and then STORE COMPLETE.To recall user profile #1 or #2, momentarilypress and release the USER 1 or USER 2buttons. A series of messages will appearon the screen while ORION II recalls storedinformation: RECALLING PARAMETERSET, RESTORING USER MENU SET,RESTORING RADIO STATE, and RECALLCOMPLETE.566 manual Version 4 – October 2006Part #74410Printed in USA12
(22) RECALLThe RECALL button has two differentfunctions. One is to allow recall of savedmemories that have been entered using the200 available “traditional” memories. Theother function is to allow the operator toquickly recall the factory defaults forORION II or to select one of the fourprogrammable user profiles.To use RECALL to bring up either thefactory default settings or a stored userprofile, press and hold the RECALL buttonfor two seconds. A submenu will appear,titled FACTORY DEFAULTS and twooptions EXIT (using button 22) and RECALL(using button 24) will appear at the bottom ofthe screen. The operator can scroll amongthe factory defaults and the four user profilesby turning the MULTI knob located to theupper right of the screen. When turned, thesubmenu display will change to readPARAMETER BACKUP #1, #2…..etc. Theoptions of EXIT, STORE, and RECALL aregiven.Factory defaults will return the radio to thestate as after doing a master reset.Note that PARAMETER BACKUP #1 andPARAMETER BACKUP #2 are duplicates ofthe user profiles that can be saved andrecalled by using the USER 1 and USER 2buttons. #3 and #4 and factory defaults areonly accessible via this RECALL submenu.RECALL is also used for recalling thetraditional memories saved using the VFOA>M and VFO B>M buttons. To access therecall of memories, momentarily press andrelease the RECALL button. A submenutitled MEMORY RECALL will appear.Stored memories can be examined usingthe MULTI knob. Turn the MULTI knob tosee all stored memories with frequency andmode information.Four options are shown under the memorylocations: EXIT, M>VFO A, M>VFO B, andDELETE. Each of these functions usesbuttons 22 through 25, directly under theoptions shown on the screen.To recall a stored memory to VFO A, pressM>VFO A (button 23). To recall a storedmemory to VFO B, press M>VFO B (button24). To delete a stored memory, pressDELETE (button 25). To exit the memoryrecall submenu, press EXIT (button 22).(23) NBThe ORION II is equipped with a DSP noiseblanker that is independently adjustable foreach receiver.To adjust the DSP noise blanker, press NB(button 23). A value of 1 through 9 willappear on the screen just above the NBbutton. Use the MULTI knob to adjust thenoise blanker value from 1 to 9. A highervalue indicates more aggressive noiseblanker action – please note that high noiseblanker settings on loud SSB signals canlead to intermodulation distortion of receivedsignals.The DSP noise blanker is adjustableindependently for each receiver, dependingon which is selected for control by the MAINRX and SUB RX buttons located betweenthe two large main tuning knobs. Seedescription later in this chapter of (55) SUBRX and (56) MAIN RX for information onthese buttons and their functions.Separate from the DSP NB, the mainreceiver only has a hardware noise blankeravailable. See the description of thehardware noise blanker in chapter 3 under(RX) RX MENU. This main receiverhardware noise blanker can be usedtogether with or separate from the DSP NB.The hardware NB can be turned on and offfrom the front panel by pressing and holdingthe NB button for two seconds. It also canbe turned on or off through the menusystem. When the hardware noise blankeris activated on the main receiver, anannunciator marked :H will appear next tothe software noise blanker value on thescreen.(24) NRORION II is equipped with DSP noisereduction that is independently adjustablefor each receiver.566 manual Version 4 – October 2006Part #74410Printed in USA13
There are nine different settings, and eachof the nine are used to determine howaggressively (quickly) the NR adapts andidentifies what is signal and what is noise.Once the noise reduction value has been setfor a given signal, no further adjustment ofthe noise reduction control is needed.Turning the NR to a higher value adjustsonly how fast it adapts to a given signal vs.noise situation.The DSP noise reduction is adjustableindependently for each receiver, dependingon which is selected for control by the MAINRX and SUB RX buttons located betweenthe two large main tuning knobs. See (55)SUB RX and (56) MAIN RX for informationon these buttons and their function.Refer to the section of Chapter 4 titled“Optimal Uses of ORION II Receiver forWeak-Signal DXing and Contesting”.formore information on using DSP NR in weaksignal environments.(25) NOTCHORION II is equipped with a manual notchfilter at the IF level. Press the NOTCHbutton to activate.Both the center frequency of the notch andthe width of the notch filter are useradjustable.When pressing the notch button, the centerfrequency value with the C: annunciator willappear. Example C: 500Hz would be a 500Hz center frequency. The center frequencyis variable from 20 to 4080 Hz in 10, 50, or100 Hz steps (adjustable in the menu usingthe PBT/BW step size control).While the C: value is shown, press theNOTCH button again to change the displayto notch filter width. An annunciator markedW: with the notch width value will be shown.Example: W: 250Hz is a notch filter width of250 Hz. Turn the MULTI knob to adjust thewidth value.(26) ANORION II is equipped with an automaticnotch filter for notching out carriers in voicemodes. Multiple carriers will be notched bythe automatic filter.To activate, press the AN button. Highervalues indicate more aggressive action bythe autonotch for suppressing undesiredcarriers.(27) MODEPushing the MODE button allows selectionof the various operating modes for thetransceiver. Press the MODE button tobring up the mode selection menu.Along the right side of the screen indescending order will be the available modeselections. Each mode selection willcorrespond to one of the buttons numbered28 through 34 in Figure 2-1 at the beginningof Chapter 2. Example: to select USB,press MODE then press button 34 (labeledATTN) to select USB.Available modes are USB, LSB, UCW,LCW, AM, FM, and FSK. UCW and LCWare conventional CW modes, except theoperator chooses whether the BFO is aboveor below the target frequency to minimizeQRM (UCW is CW on the upper sideband,LCW is CW on the lower sideband).When selecting a mode, the last bandwidthfilter selected for that mode will beautomatically recalled for use. USB, LSB,LCW, and UCW are all counted as separatemodes for filter recall – a filter last used inUSB will not be recalled or retained whenswitching the ORION II to LSB.(28) PREAMPThe ORION II main receiver is equippedwith a 12 dB gain preamp. Push thePREAMP button to activate. This button hasno effect on the subreceiver; a built inalways-on preamp is used for it.Pressing the NOTCH button when the W:value is shown will turn off the notch filter.566 manual Version 4 – October 2006Part #74410Printed in USA14
(29) RF GAINThe RFGAIN control is selectableindependently for each receiver. PressRFGAIN and adjust the MULTI knob for avalue between 0 and 100%. RF gain isused to limit receiver sensitivity to minimizeextraneous noise under large-signalconditions.Selecting RF GAIN and turning value downusing the MULTI knob will limit overallreceiver sensitivity for both the analog andDSP receiver stages.DSP receiver gain alone can be limited viathe menu system by the use of the thresholdfunction in programmable AGC, if desired.See the section in Chapter 4 of this manualtitled “Optimal Uses of ORION Receiverfor Weak-Signal DXing and Contesting”and the description of (RX) RX MENUelsewhere in this manual.(30) SPOTORION II is equipped with adjustable CWsidetone and autotracking CW offset. Thisvalue can be adjusted in the menu systemor via the front panel.Pressing and holding the SPOT button willproduce a tone at the value set by theoperator (default is 700 Hz). This tone canbe matched to the received tone of an on-airCW signal to achieve zero beat. Press andhold the SPOT button while tuning in a CWsignal. When the tones match, you are onthe proper frequency.The SPOT value can be adjusted bypressing and holding the SPOT button whileturning the MULTI knob. It is adjustablefrom 300 to 1200 Hz. This value is alsoadjustable via the menu system. See thedescription for (CW) CW MENU inChapter 3.(31) STEPThe tuning step size for each receiver isadjustable in seven different steps, 1, 10,100 Hz and 1, 5, 10, and 100 kHz.Press STEP. A submenu with the sevenvalues will appear, use buttons 28 through34 to select a particular value. STEP size isadjusted per receiver depending on which ofthe MAIN RX or SUB RX buttons locatedbetween the two main tuning knob is lit.There is also a quick step size jump featureaccessible by pressing a lit MAIN RX orSUB RX button (see (55) SUB RX and (56)MAIN RX).(32) SWEEPThe main receiver on the ORION II isequipped with a real-time band sweepdisplay. A separate adjustment in themenus allows for the sweep range to beadjusted in five different increments; thedefault is 72 kHz. See the description inChapter 3 under (RX) RX MENU.Press the SWEEP button. A display ofactivity will appear at the bottom of thescreen, updating several times per second.The center of the sweep scope has “0”above it to indicate kHz offset from centerwhere a signal appears. The other numbersappearing at the top of the sweep scope tothe left and right of the “0” are the distancein kHz from the dial frequency.To tune to a signal seen on the spectrumscope, turn the main tuning knob on themain receiver towards the signal seen onthe scope. If the signal is to the left on thescreen, turn the knob counterclockwise(downward in frequency). If the signal isshown to the right, turn the knob clockwise(upward in frequency). The sweep willhesitate or run slower as the main tuningknob is turned toward the signal of interest.(33) AGCORION II has five selectable AGC settingsthat can be used independently on eachreceiver. The available options are OFF,SLOW, MED, FAST, and PROG.To select AGC setting, press the AGCbutton to cycle through the availablechoices.AGC settings of SLOW, MEDIUM, FAST,and PROGRAMMABLE have a number ofparameters that are user adjustable to place566 manual Version 4 – October 2006Part #74410Printed in USA15
AGC action exactly where the operatordesires. See the description in chapter 3under (RX) RX MENU for detail.(34) ATTNORION II is equipped with a receiveattenuator that can be selectedindependently for each receiver. There arefour selectable steps of (off) or 6 dB, 12 dBand 18 dB of attenuation. To activate, pressthe ATTN button. Pressing the ATTN buttonwill cycle through the four available settings(OFF, 6 dB, 12 dB, 18 dB) and anannunciator on the screen next to the ATTNbutton will indicate the value selected.(35) MENUSORION II has a number of user adjustablesettings that allow the operator to customizepreferences for their particular style ofoperating. Several menus are present inORION II to facilitate this. To access them,press and release the MENUS button.Figure 2-9 Menu Screenexplained in detail in Chapter 3 of thismanual.To exit the menus and go back to normaltransceiver operation, press the MENUSbutton again.The MENUS button can also be used todisplay the currently installed firmwareversion in the transceiver. Push and holdthe MENUS button for two seconds. Thewords TEN-TEC ORION II, the Ten-Teclogo, and the firmware version number willmomentarily appear on the screen.(36) AUDIOORION II has two audio sources (mainreceiver and sub receiver) and each hasfour potential destinations (SPEAKER, andLEFT, RIGHT, or BOTH phones) that theoperator selects. The separate volumecontrols (knobs MAIN AF and SUB AF) letthe operator adjust the audio mix to theheadphones or speaker.To access the audio menu, press theAUDIO button.Figure 2-9 shows the menu screen. Thereare seven selectable menus. To the rightside of the screen, there are seven choices.They are: TX, CW, VOX, RX, Other, SSB,Filtr. Each of these menus can be accessedby pressing the corresponding button (28through 34) next to the right edge of thescreen. In Figure 2-9, button 34 waspressed to access the TX menu. The TXannunciator on the screen is highlighted andthe menu options for TX are shown on thescreen. All seven of the menus areFigure 2-10 AUDIO Routing Submenu.See Figure 2-10. Each selectable item usesbuttons 28 through 34 for selection.“Left:” – is for routing audio to the left sideof stereo headphones. The availablechoices are Main (main receiver audio), Sub(sub receiver audio), and Both (main andsub receiver audio). Press button 28 toselect as desired. “Right:” is for the right566 manual Version 4 – October 2006Part #74410Printed in USA16
side of stereo headphones. “Spkr:“ is forinternal and external speaker audio.If using mono headphones wired with astereo connector as described in thedescription for the phones jack (see button15 description earlier in the manual) – usethe “Left:“ headphone setting to determinewhat audio is heard in your headphones.We recommend stereo headphones forusing ORION II to its fullest effect.“BinRX:” is the unique binaural PanoramicStereo receive feature incorporated inORION II. High-pass and low-pass filtering,combined with time delays, produce a threedimensionalspatial sound from a monauralaudio source.Panoramic Stereo can be used for the CWoperator to automatically zero beat receivedCW signals by listening in stereo. If thesignal is too high or too low for the CWoffset that the operator has selected, thesignal will be heard to the left or to the rightwith stereo headphones. Tuning in thesignal for equal audio in both ears tells theoperator that the signal is zero beat and onthe correct frequency.The CW offset you have selected using theSPOT function (see explanation for button30 above) controls at what frequency thereceived CW signal is centered in yourstereo headphones.Additionally, on CW, spatial dispersionmakes it easier to pick out one signal amongmany. During a CW pileup, the operator canmore easily and quickly pick out singlecallsigns from a number of callers than withmono receive audio.Panoramic Stereo receive also is usablein SSB modes with the same effect. Signalsbelow or above in frequency will be heard inone side or the other of stereo headphonesand when centered assure the operator theyare on frequency.will revert to earlier values set by theoperator.ORION II also provides audio equalizationfor both receivers and for the transmitter.They enable tailoring audio frequencyresponse for greater effectiveness and toaccommodate your preferences.The TX EQ (transmit equalizer) establishesa specific audio profile for your transmittedaudio from either the MIC or AUX audioinput sources. The TX EQ is selectable in 1-dB steps from high pitched at –20 toessentially flat response at to 0 dB to verybassy at +20 dB. Press button 30 and turnthe MULTI knob to adjust values upward ordownward. TX EQ can also be adjustedupwards in 1 dB increments by pushingbutton 30. The MULTI knob can adjust thevalues up or down.RX EQ (main receiver equalization) worksthe same way. More treble or bassresponse from main receiver audio can behad by adjusting this selection with button29 and the MULTI knob.SUBEQ (subreceiver equalization) isidentical in operation to RX EQ, except it isused for sub receiver audio. Press button28 and use the MULTI knob to adjust.The graphs in Figures 2-11, 2-12 and 2-13show the response curves in the center andat the extremes of the equalization controls.Lower numbers of decibels indicate agentler slope.The same curves apply to both receiverequalizers and to the transmitter equalizer.The displayed setting of the equalizersrefers to the amplitude in dB (at about 100Hz) relative to the highest frequency in thepassband. For example, the –20 dB settingproduces –20 dB at 100 Hz relative to 0 dBat 6 kHz.When selecting “BinRX:” on the menu, youwill notice that the headphone settings for“Left:” and “Right:” will also change towhichever receiver you have selectedPanoramic Stereo receive for. When“BinRX:” is set to off, “Left:” and “Right:”566 manual Version 4 – October 2006Part #74410Printed in USA17
Figure 2-11 Minus 20 dB EqualizationAudio FrequencyFigure 2-12 Flat Equalization (0 dB)Audio FrequencyFigure 2-13 Plus 20 dB EqualizationPlease note that there are several factorsthat interact for ORION II SSB transmitaudio. Type of microphone, sound of theoperators voice, distance from themicrophone, the TX EQ settings and the TXfilter BW and LF rolloff settings as selectedin the SSB menu. See the section ofChapter 4 titled FACTORS THAT AFFECTTHE SOUND OF SSB TRANSMIT AUDIOAND THEIR ADJUSTMENT for adescription in more detail how to mostoptimally adjust ORION II SSB transmitaudio. This section of Chapter 4 alsoincludes a chart with some suggestedsettings to get you started.(37) VOXUsed for turning VOX operation on and offfor transmit on voice modes. VOX trip, anti-VOX, and VOX hang settings are adjustedthrough the menu system. When the VOXbutton is pressed, the annunciator “on” willappear on the screen just below the button.If no “on” annunciator is shown, VOXoperation is disabled.(38) S-TONESidetone volume for CW operation. Pressthe S-TONE button. Directly under thescreen a value of 0 (off) to 100 will appear.Use the MULTI knob to change the value.Both the transmitted CW sidetone volumeand the volume from using the SPOTfunction are affected by this setting.(39) MICThe MIC control is used for setting DSPmicrophone gain in SSB modes. Press theMIC button, and then use the MULTI knob toset the desired value.To set the proper level, adjust mic gainupward until the red ALC LED (located justto the right of the S-meter) is flashing. Youmay also employ the use of the monitorfunction (see (18) MON) to properly adjustthe sound of transmitted audio.For microphones with weaker output (likedynamic element) there is also a hardwaremic gain control available for additional gain.See the description of H/W Mic Gain underSSB MENU.566 manual Version 4 – October 2006Part #74410Printed in USA18
(40) TUNEThe TUNE button, when pressed, willtransmit a CW carrier at approximately 20watts output power to allow either theinternal automatic antenna tuner to tune (ifinstalled) or for user adjustment of anexternal antenna tuner or linear amplifier.It may be desirable to have keydown CWcarrier output at the power output level setby using the PWR control (button 17). To doso, press the PWR button immediately afterpushing the TUNE button. Power output willmove from the low power setting towhatever level the PWR control has beenset at with the MULTI knob. Repeatoperation will require pushing TUNE thenPWR again for the higher output value.ALCThe ALC light just to the right of the S-meteris used to indicate when automatic levelcontrol action for the set output of the radiohas been reached. It will flash on and offwith all CW characters transmitted. OnSSB, the ALC light should light on voicepeaks to indicate proper adjustment ofmicrophone gain.At very low power outputs, the ALC light willbe lit continuously when transmitting in SSBmodes. This is normal.BARGRAPHA bargraph meter appears on the ORIONscreen immediately to the right of the VFO Bfrequency display. This un-scaled meter isused as a signal strength reference for thesubreceiver, but no s-unit value is indicated.Additionally, appearing above the bargraphis a display of SWR while transmitting. SWRdisplay is also used to display the legendtuned after use of the internal automaticantenna tuner (if installed).566 manual Version 4 – October 2006Part #74410Printed in USA19
Please read the section describing thefunctions of buttons 55 (SUB RX) and 56(MAIN RX) before proceeding with theinstructions for other controls.(41) PBT/BW ENCODERReceiver bandwidth (BW) and passbandtuning (PBT) are adjustable using thisencoder.DSP bandwidth and passband tuning areselectable independently on each receiverdepending on the status of buttons 55 and56.To adjust BW or PBT value: A green LEDindicator is next to the BW and PBT legendson the front of the radio above the encoder.Press the encoder to switch between BWand PBT. The BW and PBT values areshown per receiver on the screen. BW isadjustable from 100 to 6000 Hz. PBT isadjustable + or – 2.5 kHz from center. PBTcan easily be cleared to zero. When thePBT LED is lit next to the encoder, press theencoder in and hold for two seconds. ThePBT value will revert to zero.BW and PBT step size is adjustable in themenu system in 10, 50, and 100 Hz steps(10 Hz is the default setting). BW and PBTcan also be set to track each otherautomatically on each receiver in the menusystem. See the description of RX MENU inChapter 3.(42) MULTI ENCODERThe MULTI knob is used for control of avariety of transceiver values as assigned bybuttons pressed by the operator.(43) HI CUT – LO CUTORION II has a dual-function HI CUT / LOCUT control that modifies the BW function.HI CUT and LO CUT (referred to audiofrequency) functions allow the operator tomove one edge of the filter at a time towardsor away from the center of the passband.566 manual Version 4 – October 2006Part #74410Printed in USA20
This can be especially useful for rejectingadjacent frequency interference. The HI / LOCUT control changes its function between HICUT and LO CUT when the operator brieflypushes the knob toward the panel. LEDindicators show which function the knob isperforming at any time. The independent HICUT and LO CUT settings each receiverappear on the screen – you will see the BWand PBT values scroll as the knob is turned.Pushing and holding in the HI CUT / LOCUT knob for two seconds will zero out theCUT setting.See Figure 2-15 for examples of HI CUTand LO CUT operation.LO-CUTRECEIVERPASSBANDHI-CUTFigure 2-15 HI CUT and LO CUT effects onthe passband.(44) MAIN AF ENCODERThe MAIN AF encoder is used to controlmain receiver volume output through thespeaker and headphones. Turn to adjust.There is a bargraph display on the screenthat shows setting of MAIN AF, just abovethe BW, PBT, RIT, XIT values that areshown stacked on the left side of the screen.The MAIN AF receiver gain can be muted bypushing the encoder. When muted, the tophalf of the bargraph display on the screenwill disappear to tell the operator it is inmute. Turning or pushing in the encoderknob un-mutes and restores MAIN AF at thelast value used before it was muted.(45) SUB AF ENCODERThe SUB AF encoder is used to control subreceiver volume output through the speakerand headphones. Turn to adjust. There is abargraph display on the screen that showssetting of SUB AF, just above the BW, PBT,RIT, XIT values that are shown stacked onthe right side of the screen.The SUB AF receiver gain can be muted bypushing the encoder. When muted, the tophalf of the bargraph display on the screenwill disappear to tell the operator it is inmute. Turning or pushing in the encoderknob un-mutes and restores SUB AF at thelast value used before it was muted.(46) RIT/XIT ENCODERRIT (receive incremental tuning) is availableto be set independently on each receiverdepending on which of buttons 55 and 56are selected. Press the RIT button (48) toactivate. Turn the RIT knob to adjust in therange of +/- 10 kHz.XIT (transmit incremental tuning) is availableon the transmitter, in the range of +/- 10kHz. Press the XIT button (53) to activateand de-activate. An annunciator on the leftside of the screen will indicate XIT value.To quickly clear RIT and/or XIT, press theRIT/XIT encoder knob. Values willautomatically be reset to zero.(47) MAIN TUNING KNOB “A”and (54) MAIN TUNING KNOB “B”The large tuning knob closest to the screenis for operation of VFO A. The large tuningknob to the far right of the transceiver is foroperation of VFO B.(48) RIT and (53) XITThe RIT and XIT buttons are for turning theRIT and XIT controls on and off. See thedescription of RIT and XIT operation listedunder (46) above.(49) and (52) VFO A>M and VFO B>MThe VFO A>M and VFO B>M buttons areused for storing frequencies on either VFOinto the memory system.To store a frequency from VFO A tomemory, press VFO A>M. A submenu titledMEMORY STORE will appear at the bottomof the screen. Turn the MULTI knob to scrollthrough the available memory locations.There are 200 available memories.At the bottom of the screen there are fourchoices available: EXIT, VFO A>M, VFOB>M, DELETE. Press one of the fourbuttons below the four choices to select.VFO A>M stores the frequency and modefrom VFO A to a selected memory channel.VFO B>M stores the frequency and modefrom VFO B to a selected memory channel.566 manual Version 4 – October 2006Part #74410Printed in USA21
DELETE is to delete a stored memory withno other action taken. EXIT is to exit theMEMORY STORE submenu.Note that pressing either VFO A>M or VFOB>M button allows the operator to actuallystore either VFO’s information as a memory.This was done so if the operator accidentallypressed the VFO A>M button, when theintention was VFO B>M (and vice versa),the memory could still be stored as desired.(50) and (51) LCKThe LCK buttons are to lock the main tuningknobs for VFO A and/or VFO B. Press theleft hand LCK button (50) and the VFO Atuning knob to the left is locked. An amberLED will light inside the button indicating it islocked. Press the right hand LCK button(51) and the VFO B tuning knob to the left islocked. An amber LED will light inside thebutton indicating it is locked.(52) VFO B>MSee description for button 49.(53) XITSee description for button 48.(54) MAIN TUNING KNOB “B”See description for knob 47.(55) SUB RX and (56) MAIN RXButtons 55 (SUB RX) and 56 (MAIN RX)control which receiver is acceptingcommands from the buttons surrounding thescreen, and from the encoders above themain tuning knob. It also utilizes a hiddenstep size jump function (“xm”) that will beexplained further below.Many receiver functions can be setindependently for each receiver. The defaultcondition is to have the MAIN RX (56) buttonlit. Try adjusting some of the receivercontrols like RIT, RFGAIN, BW, AGC,ATTN. Now, press the SUB RX button (55).Note that many of the settings for the itemsyou have adjusted may change on thescreen. That is because you are nowseeing the settings for the sub receiver onthe screen, and you are now ready tochange values for subreceiver functions. Toreturn to main receiver functions, press theMAIN RX button.There is also a step size jump functionaccessible by pressing an already lit MAINRX or SUB RX button.When tuning up and down the band, it maybe useful to be able to quickly jump up onestep size without having to push the STEPbutton (see description for button 31), gointo the submenu, come out, tune, go backinto the STEP submenu, and so forth.To use the jump feature on the mainreceiver: If the MAIN RX button is already lit,press it again. The annunciator on thescreen next to the STEP button will nowmove up to the next highest step size andthe letters “xm” will appear above the shownstep size. To de-select the “xm” feature,press the MAIN RX button again.This feature is also available on thesubreceiver by pressing an already lit SUBRX button.(57) FREQUENCY ENTRY AND BANDCHANGE BUTTONSORION II is equipped with a band-changekeypad that also is used for direct frequencyentry and to access the four bandstackingregisters.To change bands, press the button thatcorresponds to the desired ham band. Note:Press the “0” button for 60 meters (5 MHz).ORION II is equipped with four bandstackingregisters per band that will retain frequency,mode, and receiver bandwidth. Example:Press the 20 button to put the radio on the20 meter band. Repeated pressing of the20 button will cycle through the four bandstacking registers for 20 meters.ORION II uses a default VFO for the bandchange keypad. Next to the frequencydisplays on the screen are “A” and “B” to theextreme left of the screen. One of the twowill be highlighted in reverse text (default isVFO A). This indicates to the operatorwhich VFO will accept band changes fromthe keypad. See description of the A/Bbutton function (60).(58) VFO A ENTERORION II allows for direct frequency entryfrom the keypad for either VFO. To enter afrequency into VFO A, press VFO A ENTERand then use the keypad to enter afrequency. Use the decimal point button.566 manual Version 4 – October 2006Part #74410Printed in USA22
Example: To enter 7.160000 MHz, pressVFO A ENTER, “7”, “.”, “1”, “6”, VFO AENTER. When VFO A ENTER is pressedthe second time during a direct frequencyentry, the remaining digits will be filled withzeros. Note: If VFO A is assigned to themain receiver, and you try to enter a nonhamfrequency, FREQUENCY NOTSUPPORTED will appear on the screen andyou will be returned to the last frequencyused before attempting the invalid directentry.(59) VFO B ENTERRefer to instructions for (58) VFO A ENTER.VFO B ENTER works exactly the same,except the entered frequency will be forVFO B.(60) A>B, B>A, A/BFrequencies can quickly be copied or“flipped” between VFOs by pressing theA>B, B>A, or A/B buttons. A>B copiesfrequency information from VFO A to VFOB. B>A copies frequency information fromVFO B to VFO A. A/B “flips” the two VFO’sfrequency information; what was shown forA copies to B, what was shown for B copiesto A.Note that if trying to copy or flip a non-hamfrequency to the main receiver that the radiowill show an error message on the screenand revert to the last used frequenciesbefore the invalid action was attempted.If the main receiver is assigned to VFO Aand the sub receiver is assigned to VFO B(or vice versa), mode and frequencyinformation will also be copied betweenVFO’s when pressing A/B, A>B, B>A. If thereceivers are both assigned to the sameVFO, or either the main receiver or subreceiver are not assigned to a VFO, thenonly frequency information will be copiedbetween the VFO’s. See (8 – 13) VFOASSIGNMENTS elsewhere in the manualfor a description of how receivers areassigned to VFO’s.Additionally, the A/B button is used tochange the default VFO for band changingwith the keypad. Next to the two frequencydisplays at the extreme left of the screen arethe “A” and “B” annunciators. One of thetwo will be highlighted in reverse text toindicate it is the entry VFO for the bandchange keypad. To change, press and holdthe A/B button for two seconds. Please notethat the default is for VFO A, and poweringoff the transceiver will revert it to the default.566 manual Version 4 – October 2006Part #74410Printed in USA23
(61) ANT 1ORION II is equipped with three antennaconnectors; two for transceive, one forreceive only. ANT 1 is for connection of atransceive antenna. Nominal impedance is50 ohms. The optional automatic antennatuner (if installed) uses the ANT 1 connector.Connect a suitable antenna to this jack, fedwith 50-ohm coaxial cable. This antenna isselected for use by the operator by pressingbuttons on the front panel (see description ofbuttons 2 through 7 earlier in the manual).Also see the descriptions for (62) ANT 2 and(71) AUX RX.(62) ANT 2Like ANT 1, ANT 2 is a transceive antennajack, with nominal impedance of 50 ohms.The optional automatic antenna tuner (ifinstalled ) is not operable for an antennaconnected to ANT 2.Connect a suitable antenna to this jack, fedwith 50 ohm coaxial cable. This antenna isselected for use by the operator by pressingbuttons on the front panel (see description ofbuttons 2 through 7 earlier in the manual).Also see the descriptions for (61) ANT 1 and(71) AUX RX.(63) DC INThis is the dc input connector. ORION IIrequires 23 amps at +13.8 Vdc nominal for100 watts output power. The supply voltagecan range from +12.8 to +15.0 Vdc but+13.8 Vdc is the optimum value.We recommend using the included dc powercable (P/N 86095). We have also includedspare connector pins (P/N 41020) and aspare two-pin power connector shell (P/N35165) for building your own cable. Thepower supply plug will attach in only onedirection to the polarized two-pin dcconnector on ORION’s rear panel. Use noless than #14 gauge (#12 recommended)stranded wires for three-foot longconnections to accommodate the highcurrent demand during transmit. Useheavier gauge wire for longer power supplyleads.(64) FUSE 25 AORION II is equipped with a 25-ampereblade-type automotive fuse. A replacementhas also been provided in the transceiverpacking kit.(65) GNDThe GND wingnut is for connection ofstation ground or counterpoise. See AWORD ABOUT GROUNDING in Chapter 1.566 manual Version 4 – October 2006Part #74410Printed in USA24
(66) AMP KEY 1ORION II is equipped with two sets ofamplifier keying outputs to allow two linearamplifiers to be simultaneously connected tothe transceiver. AMP KEY 1 (and TX OUT 1/ TX EN 1, described next) utilize the ANT 1antenna connector for interfacing to an amp.AMP KEY 1 is typically used as a non-QSKkeying connection for a linear amplifier.However, it is acceptable to connect QSKlinear amplifiers that do not employ a fullbreak-in keying loop to this jack as well.AMP KEY 1 (and AMP KEY 2) are opencollector outputs. RF appearsapproximately 15 mS after AMP KEYcontacts close.An adjustable delay (called EXT T/R Delay1) gives the operator the ability to keep theamplifier keyed longer, preventing drop outsbetween words of SSB VOX or CWoperation. EXT T/R Delay 1 is found in theTX submenu under MENUS.The external amplifier key line should notapply more than +100V (output inactive) norshould it draw more than 250 mA (outputactive). The TX OUT / TX EN jacks for QSKkeying will handle a maximum of +15 Vdcand 100 mA – see (67) TX OUT 1 / TX EN1. Many older linear amplifiers like thosemanufactured by Collins, Drake, andHeathkit have high voltage on the keyline.Such amplifiers require a relay or transistorswitch between the ORION II AMP KEYjacks and the amplifier keyline. If you areunsure if your amplifier is suitable, pleaseconsult the operator’s manual for youramplifier or contact the Ten-Tec servicedepartment. See Chapter 4 for a completedescription on interfacing a linear to theORION II.(67) TX OUT 1 / TX EN 1Many QSK linear amplifiers are equippedwith a full break-in keying loop to assureproper sequencing of amplifier keying whenoperating full break-in CW. TX OUT 1 andTX EN 1 are used for a full break-in linearamp using ANT 1. Do not connect morethan 15 Vdc and 100 mA to the TX OUT orTX EN jacks.TX OUT and TX EN should be connected tothe corresponding QSK loop IN and OUTjacks on your amp. On a Ten-Tec QSKamp, TX OUT is connected to KEY IN andTX EN is connected to KEY OUT viashielded cables (consult the operator’smanual of your non-Ten-Tec QSK amp forthe proper loop information).To use the full break-in keying loop, it mustbe enabled from the MENUS. The keyingloop is turned on and off via the TXsubmenu in the MENUS (see the TX MENUdescription in Chapter 3). Note: If the loop isturned on, and no connections are made itwill prevent the ORION II from transmittingon ANT 1.See Chapter 4 for a complete description oninterfacing a linear to the ORION II.TX EN can also act as a transmit inhibitinput if it is desirable to prevent ORION IIfrom transmitting until other stationaccessories have been switched. Example:The last item keyed from a sequencer usedfor VHF transverter operation. To use theloop in this manner, turn the keying loop onin the MENUS. Connect inhibit line to theTX EN jack. The ORION will not transmituntil a closure to ground appears at the TXEN jack.(68) AMP KEY 2AMP KEY 2 is for connection of a secondlinear amplifier to be used with the ANT 2antenna connector.AMP KEY 2 is typically used as a non-QSKkeying connection for a linear amplifier.However, it is acceptable to connect QSKlinear amplifiers that do not employ a fullbreak-in keying loop to this jack as well.AMP KEY 2 (and AMP KEY 1) are opencollector outputs.An adjustable delay (called EXT T/R Delay2) gives the operator the ability to keep theamplifier keyed longer, preventing drop outsbetween words of SSB or CW operation.EXT T/R Delay 2 is found in the TXsubmenu under MENUS.The external amplifier keyline voltagewarning as described for AMP KEY 1 alsoapplies to AMP KEY 2. See (66).See Chapter 4 for a complete description oninterfacing a linear to the ORION II.566 manual Version 4 – October 2006Part #74410Printed in USA25
(69) TX OUT 2 / TX EN 2TX OUT 2 and TX EN 2 are used for a fullbreak-in linear amp using ANT 2.TX OUT and TX EN should be connected tothe corresponding QSK loop IN and OUTjacks on your amp. On a Ten-Tec QSKamp, TX OUT is connected to KEY IN andTX EN is connected to KEY OUT viashielded cables (consult the operator’smanual of your non-Ten-Tec QSK amp forthe proper loop information).To use the full break-in keying loop, it mustbe enabled from the MENUS. The keyingloop is turned on and off via the TXsubmenu in the MENUS. Note: If the loop isturned on, and no connections are made itwill prevent the ORION II from transmittingon ANT 2.See Chapter 4 for a complete description oninterfacing a linear to the ORION II.TX EN can also act as a transmit inhibitinput if it is desirable to prevent ORION IIfrom transmitting until other stationaccessories have been switched. Example:The last item keyed from a sequencer usedfor VHF transverter operation. To use theloop in this manner, turn the keying loop onin the MENUS. Connect the inhibit line tothe TX EN jack. The ORION II will nottransmit until a closure to ground appears atthe TX EN jack.(70) +13.8 VDCThis jack provides +13.8 Vdc for connectionof accessory equipment. A maximum of 2amps current draw is possible. The jack isequipped with a thermal shut-off, autoreset 2ampere fuse. The jack has voltage presentonly when transceiver power is turned on.Connection of more than one accessoryitem (i.e. the optional #310 fan kit plusanother accessory) via a “Y” cable maycause ground loop problems. See manualsection titled TROUBLESHOOTING.(71) AUX RXThis RCA-style phono connector is forconnection of a receive only antenna. Thisantenna can be used to transceive witheither ANT 1 or ANT 2 being used as thetransmit antenna, merely by selecting theappropriate button on the front panel (seedescription of buttons 2 through 7 on thefront of the radio).(72) XVRT KEY and (73) XVTR RFXVRT KEY is transmit keyline for externaltransverter. Connect this jack to the keylineof your transverter unit. The capabilities andprecautions for this circuit are the same asfor the AMP 1 KEY circuit described above.XVTR RF provides a low-level TX RF outputfor external transverter. The RF output levelis ALC-controlled at approximately +15 dBm- this is adjustable from +5 to +15 dBm byusing the PWR and MULTI control when thetransverter output has been activated in theMENUS. Both transverter supportconnections are activated via the TX menu.See Chapter 4 for complete information anddiagrams on connecting a VHF or UHFtransverter to ORION II.(74) LINE OUTThis is a line level output. What is presentat this jack is determined by the Line OutSource item in the Other: menu. Line levelaudio from the main, sub, or both receiverscan be routed via this jack. There are threeselectable output level of High, Med, Lowthat are selected in the Other: menu underline item Line Out Level. ‘High’ isapproximately 1 V p-p output, ‘Med’ isapproximately .5 V p-p output, ‘Low’ isapproximately .25 V p-p output. Impedance600 ohms. 1 V p-p at 600 ohms (the ‘High’setting) is typically the line level utilized bymost equipment requiring a line level inputsignal. Please note there are also fixed 1 Vp-p 600 ohm line level outputs for main andsub receiver audio, as determined by theAUDIO menu available on the AUX I/Oconnector on the rear panel.(75) SPAREThis is an open jack provided for future useor for custom modifications made by theuser.(76) BAND DATA 1 and(77) BAND DATA 2These are 15-pin receptacles used forswitching accessory devices. BAND DATA1 corresponds to ANT 1 and AMP KEY 1 orTX OUT / TX EN 1. BAND DATA 2corresponds to ANT 2 and AMP KEY 2 orTX OUT / TX EN 2. They contain open-566 manual Version 4 – October 2006Part #74410Printed in USA26
collector active-low lines for 5 to 13-voltcontrol of amplifiers and other devices to beswitched by amateur band selection. Theexternal load should not apply more than+13.8V (output inactive) nor should it drawmore than 250 mA (output active).BAND DATA 1 and BAND DATA 2 outputsare controlled by the ORION II transmitfrequency.Figure 2-17 Band Data Connector Pin-Outspower handling, 4 ohms minimumimpedance load.(79) KEYThe rear panel key jack is wired in parallelwith the front panel CW key jack (seedescription of (16) CW earlier in the manualfor operation, wiring instructions andoperation).(80) AUX I/OTOP80M 160M GND30M 40M 60M15M 17M 20MDIGRTN 10M 12MNCAUX +13.8VFigure 2-19 Rear Panel AUX I/O pin outFigure 2-18 below is a sample example ofcontrolling a relay from the individual pins.Pin 13 - +13.8VPin 5 -40 MBAND DATA 1or BAND DATA 2CONNECTORSimilar connectionsfor other bands.12V RELAYN/O C N/CTO SWITCHEDDEVICE ON 40MFigure 2-18 Connecting a Band-OperatedRelay(78) EXT SPKRThis jack is for connection of an externalspeaker. When connected using a standard1/4” phone plug, the internal speaker inORION II is disabled. Tip of the 1/4” phoneplug is audio, sleeve is ground.Requirements for an external speakerconnected to ORION II is minimum 4 wattsThe AUX I/O jack is an 8-pin DIN receptacleused for interfacing accessory devicerequiring audio in/out connections, FSKconnections and/or an auxiliary PTT input.An 8-pin DIN connector (p/n 46172) and anaccessory cable, (p/n 46176) have beenprovided as part of the ORION II packing kitfor easier connection of the AUX I/O jack toaccessory equipment. The cable is colorcodedas follows: WHITE = pin 1, audioinput. YELLOW = pin 4, line level audiooutput. RED = pin 5, no connection.BLACK = pin 3, push to talk. Ground fromthe 46176 cable is connected to pin 2.Pin 1 is used for a line level audio input froman accessory device (like a TNC or soundcard for digital mode operation). There is again control available for this inputaccessible through the menu system.See the description under SSB MENU inChapter 3.Pin 2 is ground.Pin 3 is a PTT connection. In SSB and AMmodes, when grounded, the radio begins566 manual Version 4 – October 2006Part #74410Printed in USA27
transmitting. In CW modes, the behavior ofthe ORION II when pin 3 is closed to groundis dependent on the setting of the menu itemPTT in CW as in the CW MENU. See thedescription of this item in Chapter 3.This pin can be used for connection of afootswitch for SSB operation, or foraccepting CW from an external keyer orcomputer generated output (like the CWkeying output from popular contest loggingsoftware), or for PTT control of the radio inCW modes.Pin 4 is line level audio output. Whichreceiver(s) are output to here and the levelof audio sent to the jack are controlled bythe Line Out Src and Line Out Levelcommands in the Other menu.Pin 5 and Pin 6 have no connection.Pin 7 is the FSK mark/space input. 5 volts =1 = mark, 0 volts = 0 = space. See FSKOPERATION section in Chapter 4.Pin 8 has no connection.(81) REMOTEThe REMOTE jack is used for connection ofthe model 302R accessory remoteencoder/keypad, allowing armchair tuningand control of transceiver functions.(82) SERIAL DATAThe serial data connector is used for bothloading Flash-ROM updates into thetransceiver and for computer control ofradio. One of the great features aboutORION is that the latest version of the radiois always available from our firmware updatewebsite.Complete computer control of the ORION ispossible via the SERIAL DATA connector.A programmers reference guide and thelatest version of the radio firmware arelocated on Ten-Tec’s firmware update site atwww.rfsquared.comBrief instructions on firmware updating yourtransceiver are provided in Chapter 4.566 manual Version 4 – October 2006Part #74410Printed in USA28
Chapter 3 – MENU SYSTEMORION II is equipped with a series ofmenus, each clearly labeled, for varioustransceiver settings. Most often usedfunctions are available on the transceiverfront panel via buttons and knobs. Menusare used for items for which only anoccasional or one-time adjustment isneeded.To access the MENU system, press theMENUS button located to the upper righthand corner of the radio screen.Figure 3-1 Menu Screen(TX) TX MENUThe TX menu is used for controls related tothe ORION II transmitter. They aredescribed line-by-line below.Internal Tuner refers to the optional internalautomatic antenna tuner in ORION II. Ifinstalled, the tuner can be enabled ordisabled with this line item. The internaltuner is operable on the ANT 1 connectiononly.The internal tuner, when enabled, isactuated by RF. When changing bands, thetuner has no memory feature and will haveto be re-tuned using the TUNE button. Seedescription of (40) TUNE in Chapter 2.Transmitter allows the ORION II transmitterto be disabled. Use the MULTI knob to setto on or off.A menu screen, as shown above in Figure3-1 will appear.There are seven selectable menusaccessible after pressing the MENUSbutton. To the right side of the screen, thereare seven choices: TX, CW, VOX, RX,Other, SSB, Filtr. Each of these menus canbe accessed by pressing the correspondingbutton next to the right edge of the screen.In Figure 3-1, a button was pressed toaccess the TX menu. The TX annunciatoron the screen is highlighted and the menuoptions for TX are shown in text on thescreen.In each menu, to scroll through the availablechoices on the screen, turn the large maintuning knob (“VFO A”) closest to the radioscreen. For each line item, to change thevalues, turn the MULTI knob. To exit themenu system and return to radio operation,press the MENUS button again.Keying Loop 1 is used to enable the TXOUT 1 / TX EN 1 QSK keying loop asdescribed in chapter 2 under (67) TX OUT 1/ TX EN 1. Note: If the loop is turned on andno connections are made it will prevent theORION II from transmitting on ANT 1.Keying Loop 2 is used to enable the TXOUT 2 / TX EN 2 QSK keying loop asdescribed in chapter 2 under (69) TX OUT /TX EN 2. Note: If the loop is turned on andno connections are made it will prevent theORION II from transmitting on ANT 2EXT T/R Delay 1 provides “hang time” for anon-QSK linear amplifier that has beenconnected to the AMP KEY 1 jack on therear of the ORION II. This will prevent theamp from dropping out between words of aCW or SSB transmission. Also see thedescription of (66) AMP KEY 1 in chapter 2.EXT T/R Delay 2 provides “hang time” for anon-QSK linear amplifier that has beenconnected to the AMP KEY 2 jack on therear of the ORION II. This will prevent theamp from dropping out between words of aCW or SSB transmission. Also see thedescription of (68) AMP KEY 2 in chapter 2.Transverter enables low level RF outputfrom the XVRT RF jack on the rear of thetransceiver. When turned on, no RF atregular power output will be transmitted566 manual Version 4 – October 2006Part #74410Printed in USA29
through the ANT 1 or ANT 2 connectors.The XVRT KEY jack for keying of thetransverter is also activated when this menuselection is turned to ‘on’.Also see the transverter connection andoperation description in Chapter 4.The next 10 line items correspond toautomatic antenna selection per band.ORION II provides the ability for the radio toautomatically select an antenna combinationwhen the band change keypad is used tochange amateur bands.The available options are Ant1, Ant2,Ant1/RX, Ant2/RX and ---. The --- dashedline represents “no change” and whenchanging to a band marked as such, theradio will retain the previous antennaselection before the band change wasmade.Ant1 and Ant2 automatically selects theantenna connected to ANT 1 or ANT 2 onthe rear panel for transceive operation.Ant1/RX will select both the antennaconnected to ANT 1 for transmit and thereceive-only antenna connected to AUX RXfor receive. Ant2/RX will select both theantenna connected to ANT 2 for transmitand the receive-only antenna connected toAUX RX for receive.Amp Key Tracks is used to determinewhether the open collector output on theAMP KEY 1 and AMP KEY 2 jacks followseither a PTT signal or the closure of thekeying loop to actuate. When set toKEYING LOOP, no closure will appear atthe AMP KEY 1 and/or AMP KEY 2 jacksuntil the appropriate keying loop has closed(also see description of Keying Loop 1 andKeying Loop 2 in this section).When set to KEY LINE – when the radio isplaced into transmit the AMP KEY 1 andAMP KEY 2 open collector outputs will closeregardless of the state of the keying loop.(CW) CW MENUFigure 3-2 CW MenuTo select the CW menu, press the buttonimmediately adjacent to the screen next tothe CW selection (labeled AGC).CW QSK Delay allows the operator to slowthe QSK action of the transceiver in CWtransmit. A higher value represents moretransmit/receive delay between individualtransmitted CW characters.Internal Keyer can be turned on and off viathe menu system if desired. Please notethat when the radio is in a CW mode that thekeyer can also be turned on and off from thefront panel by pressing SP. See thedescription of (19) SP in Chapter 2.CW Weighting refers to the 3:1 dit:dah ratioemployed by the CW keyer for transmittingMorse code. The length of each dah sent isthree times that of a dit, relative to thespacing between the elements. The defaultvalue is 100%, with an adjustable range of50% to 150%. As weighting increases inpercentage, dits and dahs become longer inlength, maintaining the 3:1 ratio. Asweighting percentage decreases, dits anddahs become shorter, maintaining the 3:1ratio.Sidetone Pitch is the CW offset from carrierthat is used for listening to CW on theORION II. Turn the MULTI knob to adjust.This value is also adjustable from the frontpanel while pressing and holding the SPOTbutton and turning the MULTI knobsimultaneously. Also see the description of(30) SPOT in Chapter 2.566 manual Version 4 – October 2006Part #74410Printed in USA30
CW Rise/Fall allows the operator to adjustthe rise and fall time of the transmitting CWenvelope. The adjustable values are 3 msto 10 ms, depending on whether the internalkeyer or external keying is used, and thespeed at which the internal keyer is set. Thedefault value is 5 ms. Lower values like 3ms will result in a “harder” keying sound witha quicker slope from keying initiation to fullenvelope and back. Higher values result inmore gentler slopes for the CW transmitenvelope on the “make” and “break” andresult in a softer transmitted CW note.For the internal keyer, 3 to 10 ms isavailable at speeds up to 30 WPM. Past 30WPM, the available values are 3 to 5 ms.Keying at “softer” rise and fall times above30 WPM can result in “mushy”, nondefinitivesounding CW transmit.For external keying, the rise and fall timesavailable are 3 ms to 5 ms regardless of thekeyer speed.Key PTT in SSB determines whether or notthe ORION can be put into SSB transmitmode by a closure to the front or rear panelkey jacks. If set to “on”, pressing a CW key(or some other closure to ground connectedeither of the key jacks) will put the radio intotransmit in SSB modes. If set to “off”, theradio will not be put into SSB transmit inSSB modes when a closure to ground ispresent at one of the two key jacks.PTT in CW as determines the action of thetransmitter in relation to a PTT signalappearing either at the front panelmicrophone jack or pin 3 on the AUX I/Ojack on the rear of the transceiver. Pleasenote this menu item does NOT affectanything plugged into either the front panelor rear panel key jacks.All of the below only applies when thetransceiver is being used in LCW or UCWmodes.When set to “key”, a PTT closure at the micjack or on pin 3 of the AUX I/O jack willresult in a transmitted CW signal. A closureto ground will key the radio keydown in CWmode. An external keyer connected toeither the mic jack or AUX I/O pin 3 can beused for transmitting CW.When set to “mox”, a PTT closure at the micjack or on pin 3 of the AUX I/O jack willresult in the radio being put into potentialtransmit. PTT will close, but no signal willbe transmitted. A CW signal (from anexternal source) can then be injected viaone of the two key jacks and the ORION willtransmit CW. When finished, open theclosure and the radio returns to receive.This function can be used to override QSKoperation from an external source and/orprovide exact PTT switching from anexternal source.When set to “none”, ORION will not respondto a PTT closure to ground or a closure atAUX I/O pin 3 when in CW modes.Recommended reading: See EXTERNALCW OUTPUT PLUS CW KEYEROPERATION FROM PADDLES in Chapter4 for practical application.Keyer Mode allows the user to togglebetween Curtis A and Curtis B modes whenusing the ORION II internal keyer for CWoperation.(VOX) VOX MENUFigure 3-3 VOX MenuThe VOX menu is accessible by pressingthe button on the front panel immediately tothe right of the screen next to the “VOX”annunciator.VOX Trip Level is the gain level required toput the radio into transmit. This controldetermines how sensitive the VOX circuitryis to input from the microphone. The lowerthe value set, the more sensitive the VOXtrip becomes.Anti-Vox Level is set to prevent tripping ofthe VOX circuitry. Set as needed to prevent566 manual Version 4 – October 2006Part #74410Printed in USA31
eceiver audio through the speaker fromputting the radio into transmit.Vox Hang is used to define how long theVOX remains engaged after the end of atransmission. This is set to prevent theradio from cycling back and forth betweentransmit and receive during the course of anormal conversation.(RX) RX MENUThe RX menu is accessible by pressing thebutton on the front panel immediately to theright of the screen next to the “RX”annunciator.Sweep Range is used for setting the rangeof the real-time spectrum scope that isavailable on the main receiver. There are 5selectable widths of: 4.5, 9, 18, 36, and 72kHz.AGC is Automatic Gain Control and is usedto provide a reasonably uniform output ataudio from incoming signal strengths ofvarying intensity.One of the most useful, revolutionary newfeatures of ORION II is fully programmableAGC. AGC action can be programmed totaste on each receiver for FAST, MED andSLOW settings, and a fourth setting, PROG,allows the user to adjust any and all of theAGC characteristics.Refer to Figure 3-4 above. To adjust agiven parameter for each receiver, firstselect the desired AGC on the receiversbefore entering the menu system by usingthe AGC button (see (33) AGC in Chapter2).For FAST, MED, and SLOW: The hang andthreshold parameters are fully adjustable.AGC hang is the amount of time that theAGC remains actuated before decay begins.Threshold is the point at which a signal of agiven strength (expressed in microvolts) willactuate the AGC system. The thresholdvalue in the AGC system acts like an IF gaincontrol for the DSP part of the receiver chain– turn the value low and the receiver gaincomes up, as may signal levels andextraneous noise. Decay is used todetermine how fast the IF gain increases inthe absence of a signal above the thresholdvalue.The hang value for FAST, MED, and SLOWis adjustable from 0 to 10.92 seconds. Thethreshold value for FAST, MED, and SLOWis adjustable from 0.37 uV to 191.48 uV.The decay values available are FAST, 80-200 dB/second, MED, 20-80 dB/second,SLOW 5-20 dB/second.The factory default values for FAST, MED,and SLOW are FAST: hang 0.00, decay 80dB/s, threshold 3.03 uV, MED: hang 0.00,decay 40 dB/s, threshold 3.03 uV, SLOW:hang 0.00, decay 10 dB/s, threshold 3.03uV. These default settings apply to both themain and sub receivers. Any default valuefor a given AGC setting (FAST, MED, andSLOW) can be instantly restored to factorydefault value merely by pressing the MULTIknob encoder toward the front panel whilethe parameter is highlighted in the menu.The PROG (programmable AGC) settingprovides full adjustment of all parameters inthe AGC system. In addition to the hangand threshold values being fully adjustableas they are with FAST, MED, and SLOW,the programmable AGC setting allows thedecay rate to be adjusted over its full rangefrom 1 to 2000 dB/second.AGC is an important characteristic of overallreceiver performance for contesting andweak signal DXing. Please also read thesection in Chapter 4 of this manual titled“Optimal Uses of ORION II Receiver forWeak-Signal DXing and Contesting”.PBT Track and BW Track are used tosimultaneously set the PBT and BW valuesfor each receiver with one turn of the MULTIknob. The default value is “off”, allowing thePBT and BW values to be adjustedseparately by receiver. If it is desirable toadjust both PBT and BW on both receiversat the same time, this control can be set to“on”. Additionally, BW setting can becopied between VFO A and VFO B whenusing the A>B, B>A, or A/B buttons on thefront panel if this value is set to “on” (defaultis that BW information is not copied betweenVFOs when frequency information isexchanged).Hardware NB allows the hardware noiseblanker available for the main receiver to beturned on and off. This additional noiseblanking system for the main receiver onlycan either be used together with or566 manual Version 4 – October 2006Part #74410Printed in USA32
independently of the software noise blanker.When activated, the area just above the NBbutton on the bottom of the radio screen willshow the annunciator :H next to any valueset for the software noise blanker. Thehardware noise blanker can also beactivated without going into the menusystem by pressing and holding the NBbutton for two seconds. Also see thedescription of the software noise blanker inChapter 2 under (23) NB.Main RX Sql is the squelch threshold for themain receiver. It represents a signalthreshold measured in -dBm. The higherthe value, the more receive signal will beneeded to break the squelch. Adjust byturning the MULTI knob.Sub RX Sql is the squelch threshold for thesub receiver. It represents a signalthreshold measured in -dBm. The higherthe value, the more receive signal will beneeded to break the squelch. Adjust byturning the MULTI knob.PBT/BW Step allows the operator to choosein what step size the PBT/BW encoderselects filter bandwidths and PBT values.The available choices are 10, 50 and 100Hz.AGC Slope allows users to slightly alter theAGC response of the transceiver above theAGC threshold. The AGC output of theORION II is uniform above the AGCthreshold point, allowing a wide range ofinput signal strengths to appear uniformlyoutput at audio. Some users feel that theability to copy signals is enhanced by havingslightly variability in the AGC output ratherthan having a uniform output.Above the AGC threshold point, thetransceiver can respond uniformly (set toFLAT), or have a rise of 1 db per 10 dB ofsignal input or 2 dB per 10 dB of signal input(settings of 1:10 dB or 2:20 dB).Below the AGC threshold, signals have a1:1 ratio (1 dB rise per 1 dB of signal input)and are not affected by the AGC Slopesetting. See also the description of AGCabove for discussion of AGC threshold.(OTHER) OTHER MENUFigure 3-4 Other MenuThe Other menu is used for ORION IIfunctions that do not fit into one of the othermenu categories.Remote Pod F1, Remote Pod F2, andRemote Pod F3 refer to the control of radiofunctions available via the F1, F2, and F3buttons on the accessory model 302Rremote encoder/keypad available for ORIONII. If you do not have the 302R connected,they will have no function.To scroll through the available choices foreach of Remote Pod F1, Remote Pod F2,and Remote Pod F3, turn the MULTI knob.VFO A/B duplicates the function of the A/Bbutton on the front panel (see (60) A>B,B>A, A/B in Chapter 2). This flips the twofrequencies shown, copying A to B and B toA.Step duplicates the function of the STEPbutton on the front panel (see (31) STEP inChapter 2). Unlike the front panel STEPbutton, the step sizes available are selectedvia repeat pushing of the F1, F2, or F3button depending on which is being used.The radio will cycle through the sevenavailable step sizes.Mode duplicates the function of the MODEbutton on the front panel (see (27) MODE inchapter 2). Unlike the front panel MODEbutton, the step sizes available are selectedvia repeat pushing of the F1, F2, or F3button depending on which is being used.The radio will cycle through the sevenavailable modes.Sweep on/off duplicates the function of theSWEEP button on the front panel (see (32)566 manual Version 4 – October 2006Part #74410Printed in USA33
SWEEP in Chapter 2). The real-timespectrum sweep on the main receiver canbe turned on and off.USER 1 and USER 2 are duplicates of thefront panel USER 1 and USER 2 buttons(see (21) USER 1 and USER 2 in Chapter2). These allow retrieval of the profilememories that are stored in USER 1 andUSER 2.Send 1, Send 2, and Send 3 are duplicatesof the SEND 1, SEND 2 and SEND 3buttons found on the front of the ORION(see (20) SEND 1, SEND 2, SEND 3 inchapter 2). They are used for sendingmemory information stored in either the CWkeyer or voice memories.VFO A Ent and VFO B Ent allow directfrequency entry off the keypad for eitherVFO A or VFO B.The Rem Pod Enter setting determineswhere a band change from the keypad issent (VFO A or VFO B). The ten buttonkeypad on the 302R accessory duplicatesthe band change keypad on the ORION IIunless a function button has first beenpushed for direct frequency entry. Push “9”to change to 40m, “7” to change to 160m,etc. Note that the 302R buttons are notarranged in the same numerical order as thekeypad on the ORION II; it is the location ofthe button in the matrix rather than thenumber on the button on the 302R thatdetermines to what band the radio ischanged.Menu Delay is used to set the encodertuning rates and button responses whileusing the menus.Backlight is used to determine thebrightness of screen characters. High, Med,Low are available choices.VFO-A Enc Rate and VFO-B Enc Ratehave settings of “fast” and “slow”. Unliketuning STEP as set via the STEP button, theRate controls are used to determine howmany steps per revolution of the two maintuning knobs are made. The “fast” rate is 4xthe “slow” tuning rateLike the main tuning knob rates, CW RITRate and SSB RIT Rate are used to varythe rate, but not the step size, of the RITencoder. The “fast” rate is 4x the “slow”tuning rate.If the optional model 302R encoder/keypadis in use, POD Enc Rate can be used tocontrol the tuning knob rate. The “fast” rateis 4x the “slow” tuning rate.LCD Display selects color schemes for thescreen. Turn the MULTI knob to selectdifferent pre-set color setups.FSK Tx Data is used to to determinewhether the MARK tone in FSK operation ison the high tone (2295 Hz) or low tone(2125 Hz). The standard is for FSK to usethe low tone for MARK. FSK direct to theradio from a computer sound card (no TNC)should have this set to ‘high’ so tones willnot be inverted. See the description for FSKOPERATION in Chapter 4.Remote Pod Enc is used for the accessory302R remote encoder/keypad. The 302R’smain tuning knob can be used as a duplicateof VFO A or VFO B by selecting either VFO-A or VFO-B on this menu line item. The302R main tuning knob can also be used forRIT/XIT or PBT/BW operation by selectingRIT/XIT or PBT/BW on this menu line item.Line Out Src determines which receiveraudio output is sent as line level to the linelevel audio output at pin 4 on the rear panelAUX I/O jack. Choices are Main, Sub, Both.Line Out Level determines the level ofoutput at the pin 4 AUX I/O jack. Settingsare High, Med, Low – for most applications(like digital modes) the High setting will beused.(SSB) SSB MENUAux Input Gain is used for adjusting audiogain from an accessory device using the linelevel aux input available on pin 1 of the rearpanel AUX I/O connector.TX Filter BW controls the SSB transmit filterbandwidth. The maximum bandwidth usableby ORION II is 3.9 kHz. Wider bandwidths(above 3 kHz) have a more full-range soundto transmitted SSB audio; narrowerbandwidths are “communications grade”SSB audio. Typical communications audiofor TX Filter BW would be 2.7 kHz.L.F. Rolloff refers to the point where lowend audio response starts for transmittedSSB audio. For example, if TX Filter BW isset to 3000 Hz and L.F. Rolloff is set to 200Hz, the frequency response of the566 manual Version 4 – October 2006Part #74410Printed in USA34
transmitted signal is 200 Hz on the low endto 3200 Hz at the high end. Moving L.F.Rolloff to 100 Hz would move the transmitpassband to 100 Hz to 3100 Hz for a 3000Hz bandwidth. The available values are aminimum of 50 Hz to a maximum of 300 Hz.TX Audio Source allows the radio to haveaudio input through either the front panelmic jack or via the AUX input on pin 1 of therear panel AUX I/O connector. Theavailable choices are MIC, AUX or BOTH.H/W Mic Gain is used for giving thetransceiver additional pre-A/D converter micgain if needed. Some microphones, likedynamics, have relatively weak output andrequire more gain to function with theORION II than a comparable electretcondenser. There is 18 dB of range usablewith this control in 0.5 dB steps. Becausethis mic gain setting is before the A/Dconverter it is much easier to overdrive theradio and send it into distorted SSB transmitthan with the DSP mic gain control. Werecommend using a modest amount of gainwith the H/W Mic Gain control and usingDSP mic gain for adjustment of exactdesired level. Please note that the propersetting of overall mic gain (hardware plusDSP) if this control is used will also dependon where the DSP mic gain control is set –also see (35) MIC.Please also see FACTORS THAT AFFECTTHE SOUND OF SSB TRANSMIT AUDIOAND THEIR ADJUSTMENT in Chapter 4.(FILTR) FILTER MENUFigure 3-5 Filter MenuPlease refer to the discussion of filtering inChapter 1. ORION II provides for up toseven available mode-appropriate I-Froofing filters, not to be confused withtraditional bandwidth filtering as provided forin DSP. Optional roofing filters of 1.8 kHz,600 Hz, and 300 Hz in the ORION II need tobe activated to be used by the operator.Please note: If you activate an optional filterposition and no filter is installed, the radiowill mute on receive!Activating the optional filters is simple. Foreach of the 1.8 kHz, 600 Hz, and/or 300 Hzoptional filters that you have installed, usethe MULTI knob to change the setting from“no” to “yes”.Roofing filters can automatically be selectedby the radio or the operator has the option ofoverride to select one specific filter to beused at all times. The available choices are20 kHz, 6 kHz, 2.4 kHz, 1.8 kHz (if installed),1 kHz, 600 Hz (if installed), 300 Hz (ifinstalled).For automatic selection of appropriateroofing filters, put the Xtal Filter setting onAUTO. When using the DSP BW filtering inthe ORION II (see description of (41) PBTB/W ENCODER in Chapter 2), as athreshold for each filter is crossed, theroofing filters will automatically be selected.Example: After selecting AUTO, pressMENUS to exit out of the menu system andreturn to normal radio operation. As theDSP bandwidth is narrowed, the filters willbe selected or de-selected at the value ofthe roofing filter. For example: the thresholdwhere the 6 kHz filter switches out to the 2.4kHz filter in AUTO mode is 2400 Hz. On thescreen, the roofing filter is represented by ahorizontal line on top of the DSP BW filtershape. The line will widen or narrow as theroofing filters switch in and out.It is possible to override the AUTO settingand use one specific filter at all times. To doso, turn the MULTI knob while Xtal Filter isis highlighted in the menu and pick a roofingfilter. Regardless of DSP BW setting, thisselected filter will be in use as the roofingfilter. Remember: optional roofing filters,must be installed and enabled. Selecting anon-installed filter will mute the receiver. Ifselecting an installed optional filter that is566 manual Version 4 – October 2006Part #74410Printed in USA35
not enabled, the next highest value will bethe actual filter in use.Each of the 600 Hz and 300 Hz optionalroofing filters used in ORION may have tobe centered to line up with the DSP filter.While DSP very accurately repeats from unitto unit, crystal filters do not because ofindividual unit manufacturing tolerances.Set your CW offset to desired value via theCW MENU. Tune in a carrier of reasonablestrength (S7 is good), at your CW offset.Use the Xtal Filter control in the menu toselect the filter you want to center.Example: For the 600 Hz filter, use the 600Hz C.F. Adj control and move the value+300 Hz. If the signal did not drop in level,move the value to –300 Hz. If the signal didnot drop in level, the filter is centered. If thefilter is not centered, move the C.F. Adjcontrol until the signal just starts to drop inlevel. Note the reading. Move to the otherdirection until the signal just starts to drop inlevel. Add this value to the other readingand divide by 2. Set C.F. Adj to this value.Use a similar approach for the 300 Hz filter.You will not have to re-adjust these unlessyou do a subsequent master reset of theradio.DSP Filter Length - The DSP filter length isessentially how sharp (or not) the DSPbandwidth filters are. The higher the valueindicated, the better the shape factor of theDSP BW filtering. The default value is 199,which is the highest setting. Lower valuesdecrease the shape factor of the filters,which can improve well-rounded audiosound of received SSB and AM signals, atthe expense of receiver selectivity. Highervalues = sharper, more selectivity onreceive. Lower values = less sharp, worseselectivity on receive, but for casual SSBand AM operation with no interfering signalspresent in the receiver passband may bedesirable.566 manual Version 4 – October 2006Part #74410Printed in USA36
Chapter 4 – OPERATION ANDACCESSORY CONNECTION EXAMPLESBASIC TRANSCEIVE OPERATIONRefer back to the operating instructions inChapter 2 for (8 – 13) VFO ASSIGNMENTS.The most important point to consider is thatVFO’s are not receivers. Both receivers canbe assigned to one VFO if desired.Typical transceive operation would be tohave the main receiver and the transmitteron VFO A, and the subreceiver on VFO B.To do so, press buttons as shown below inFigure 4-1. Under VFO A, the buttons nextto TX and RX are lit, under VFO B the SUBRX button is lit.Figure 4-1. VFO selection for transceive withmain RX/TX on VFO A, subreceiver VFO B.VFO A is always the main tuning knobclosest to the screen – VFO B is always themain tuning knob at the far right of theORION II.Turn the MAIN AF knob to increase mainreceiver volume. Turn the SUB AF knob toincrease sub receiver volume. Either ofthese can be muted by pressing the encodertowards the radio face. To unmute, press orturn the knob.The AUDIO menu determines the mix ofmain receiver and sub receiver audio heardthrough the speaker or the headphones.See the Chapter 2 description for (36)AUDIO.Antenna selection is determined by thematrix of six buttons at the far left of theradio. A complete description is provided inChapter 2 under (2 –7) ANTENNAASSIGNMENTS.OPERATING SPLIT FREQUENCYOften DX stations will be listening on onefrequency while transmitting on another.The two receivers and two VFO’s in theORION II permit the operator to listen toboth the DX stations frequency and thefrequency where the DX station is listeningfor calls simultaneously. There is no SPLITbutton, but setting up split frequencyoperation only requires pressing the A>Bbutton as shown below.An example using the typical transceivesetup of main RX/TX on VFO A andsubreceiver on VFO B: A DX station istransmitting on 14.195 MHz and listening forcalls on 14.210 MHz. Tune in the DX stationon 14.195 on VFO A. Press A>B toequalize the frequencies on the two VFO’s.Tune VFO A to 14.210. You are nowlistening to the DX station on thesubreceiver on VFO B on 14.195 and areready to transmit (and listen) on 14.210using the main receiver.For weak DX stations operating splitfrequency, it is probably advantageous touse the main receiver for listening to the DXstation and using the subreceiver frequencyfor monitoring the pileup and your transmitfrequency. Starting from the same exampleof main RX/TX on VFO A and subreceiveron VFO B, DX station on 14.195 listening on14.210: Tune in the DX station on 14.195on VFO A. Press A>B to equalize thefrequencies on the two VFO’s. Tune VFO Bto 14.210. Press the button next to TX,under VFO B. You are now listening to theDX station on the main receiver on 14.195on VFO A, and are listening and ready totransmit on 14.210 with the subreceiver andtransmitter on VFO B. See Figure 4-2 forassignment of VFO buttons.566 manual Version 4 – October 2006Part #74410Printed in USA37
Figure 4-2. Split frequency operation withDX station being received on main receivervia VFO A, subreceiver monitoring of pileupand transmit frequency on VFO B.OPERATING THE INTERNAL ANTENNATUNER (if installed)Your ORION II may be equipped with aninternal automatic antenna tuner. Ifinstalled, the tuner is active on the ANT 1jack only, and has a load impedance rangeof 6 to 800 ohms (up to 10:1 SWR).The tuner can be enabled or disabled fromthe menu system. The default condition isto have the tuner enabled. To enable ordisable, press MENUS then select the TXmenu. The first line item in the TX menu isInternal Tuner. Use the MULTI knob to turnthe tuner on or off.The tuner is activated by pressing the TUNEbutton on the front panel. The rig willtransmit a keydown CW carrier atapproximately 20 watts output. The tunerwill activate and tune. When finished, theCW carrier will stop and tuned will appearon the screen just above the sub receiver s-meter (where SWR is normally shown).The tuner will usually stop at a value of 1.5:1SWR or lower. Occasionally it may presenta slightly higher SWR after tuning. This isnormal, and the transceiver will still transmitat full output power with no foldback.The tuner does not automatically reactivatewhen presented with a higher SWR afterchanging frequency. If the tuner was tunedon 14.025 MHz and you later moved to14.200 MHz, the tuner may require re-tuningand can be activated again with the TUNEfeature. However, as the internal tuner inORION II is an L-network (assuringbroadband matching) you may find therange of the tuner when tuned to be largerthan that found on HF transceivers fromother manufacturers that use a Pi- or T-network tuning arrangement.There is no memory feature; the tuner willnot retain the last setting for a particularband or frequency.CONNECTING AN EXTERNAL LINEARAMPLIFIERWhether you have an amplifier that is fullbreak-in, and how the full break-in isaccomplished, will determine the method forconnecting the linear to ORION II.Two sets of keying outputs are provided forthe two available antenna jacks on the radio.AMP KEY 1 and TX OUT / TX EN 1 areused for a linear connected via the ANT 1jack. AMP KEY 2 and TX OUT / TX EN 2are used for a linear amplifier connected viathe ANT 2 jack. RF appears approximatel15 mS after closure of either AMP KEY 1 orAMP KEY 2.Non-QSK linear amplifiers or QSK linearsthat do not employ the use of a keying loopare keyed from the AMP KEY 1 and AMPKEY 2 jacks (see (66) AMP KEY 1 and (68)AMP KEY 2 in chapter 2). Connect the PTTkeying line of your linear amplifier to theAMP KEY 1 or AMP KEY 2 jack as desiredusing a shielded cable with RCA-style malephono connectors at each end.ORION II is equipped with a QSK delayfeature accessible via the CW MENU thatoperates on both the AMP KEY 1 and AMPKEY 2 connections and the TX OUT / TX EN1 and TX OUT / TX EN 2 keying loops. Thiswill allow you to set the amount of delaybetween CW characters desired. Also seethe description in chapter 3 under (CW) CWMENU.NOTE: The external AMP KEY lines shouldnot have applied to them more than +100V(output inactive) nor should it draw morethan 250 mA (output active). Many olderlinear amplifiers like those manufactured byCollins, Drake, and Heathkit have a highervoltage on the keyline. Such amplifiersrequire a relay or transistor switch betweeneither ORION II AMP KEY jack and theamplifier PTT keyline. If you are unsure ifyour amplifier is suitable, please consult the566 manual Version 4 – October 2006Part #74410Printed in USA38
operator’s manual for your amplifier orcontact the Ten-Tec service department.An adjustable delay is available for each ofthe AMP KEY jacks. These are titled EXTT/R Delay 1 and EXT T/R Delay 2. Thesegive the operator the ability to have theamplifier keyed longer by the radio,preventing drop outs between words of SSBor CW operation. EXT T/R Delay 1 andEXT T/R Delay 2 are found in the TXsubmenu under MENUS.Some QSK linear amplifiers incorporate theuse of a full break-in keying loop. Ten-Teclinear amplifiers use a full break-in keyingloop to assure proper sequencing of thekeying between the radio and the amplifier.To use the ORION II with a full break-inlinear amplifier incorporating a keying loop,use the TX OUT 1 / TX EN 1 or TX OUT 2 /TX EN 2 jacks as appropriate for an ampconnected to the ANT 1 or ANT 2 jacks.Connect TX OUT 1 to the keying loop inputon your amp. On Ten-Tec amplifiers, thecorresponding jack is marked KEY IN.Connect TX EN 1 to the keying loop outputon your amp. On Ten-Tec amplifiers, thecorresponding jack is marked KEY OUT.Place the amp in QSK mode. The amplifierwill be used in all modes in the QSKposition. The keying loop voltage andcurrent limits are 15 Vdc and 100 mA.Please note: To use a full break-in keyingloop, it must be enabled from the MENUS.The keying loops are turned on and off viathe TX submenu in the MENUS (see the TXMENU description in Chapter 3). If the loopis turned on, and no connections are made itwill prevent the ORION II from transmitting.TUNING UP AN EXTERNAL LINEARAMPLIFIERThe TUNE button on the front panel can beused for initial linear amplifier tune-up. If anautomatic antenna tuner is installed in yourORION II, go into the TX MENU and disableit. Pressing the TUNE button will provideapproximately 20 watts of keydown CWcarrier output to be used for an initial tuneupof your linear.It may be desirable to increase the keydownpower output when tuning your amplifier. Todo so, press the PWR button after pushingthe TUNE button. Power output will movefrom the low power setting to whatever levelthe PWR control has been set at with theMULTI knob. Repeat operation will requirepushing TUNE then PWR again for thehigher output value.FACTORS THAT AFFECT THE SOUNDOF SSB TRANSMIT AUDIO AND THEIRADJUSTMENTOne of the features of ORION II is a lot offlexibility afforded the operator for thedesired sound of SSB transmit audio. Manypossible settings are available so thatoperators with different styles (orphilosophies) can adjust the radio the waythey want it to sound. Obviously, theoperator who favors rich, full-soundingtransmit audio is not going to have the sameneeds as the DXer who wants maximum“oomph” to try and break an SSB pileup.There are several controls that interact onORION II for SSB transmit audio. Everyoperator is different; we use differentmicrophones, the timbre of voices aredifferent, distance from the microphone willvary. What we intend below is to describewhat is used to tailor transmit SSB audio,and then encourage the operator toexperiment with the settings to find thesound they want.A monitor function (button marked MON) onthe front panel has been provided for theoperator to listen to the sound of actualtransmitted SSB audio. We recommendusing headphones while using the MONcircuit to prevent microphone/speakerfeedback. See the description of (18) MONin Chapter 2.There are five radio controls used for SSBtransmit audio. 1) Transmit bandwidth,which is adjusted using the TX Filter BWcontrol in the SSB menu. 2) Low frequencyrolloff, adjusted with the L.F. Rolloff controlin the SSB menu. 3) Transmit equalization,labeled TX EQ, which is adjusted in theAUDIO submenu found by pushing theAUDIO button on the front panel. 4) DSPMic gain, adjusted via the front panel MICbutton. 5) Hardware mic gain, as adjustedby the H/W Mic Gain control in the SSBmenu. 6) Speech processing, adjusted viathe front panel SP button.Transmit bandwidth is both the frequencyresponse of the transmitted signal and the566 manual Version 4 – October 2006Part #74410Printed in USA39
amount of spectrum occupied by that signal.Typical communications-grade audio forSSB is in the 2.4 to 2.7 kHz range. Some“hi-fi” SSB enthusiasts have beenexperimenting with larger transmitbandwidths in an effort to improve thequality of audio transmitted, and ORION IIhas been provided with the ability to transmiton SSB with a maximum bandwidth of 3.9kHz. Please see the note toward the end ofthis section about wide SSB transmitbandwidths and their potential ramifications.Set the TX Filter BW in the SSB menu to anappropriate value based on your operatingpreferences. For communications- gradeaudio, we recommend starting the ORION IItransmit bandwidth at 2.55 kHz (2550 Hz).For more well-rounded transmit audio, startthe transmit bandwidth at 3.0 kHz (3000 Hz).The ORION II default value for this setting is3000 Hz.The next control to adjust is L.F. Rolloff,also found in the SSB menu. L.F. Rolloffrefers to “low frequency rolloff”. This controlinteracts with the TX Filter BW to determineyour frequency response.For example, if the TX Filter BW is set to3000 Hz, and L.F. Rolloff is set to 150 Hz,the response envelope for your transmittedSSB signal is a low of 150 Hz and a high of3150 Hz for a total bandwidth of 3000 Hz.Using the same 3000 Hz TX Filter BWsetting, if the L.F. Rolloff is changed to 50Hz, the response envelope is now a low of50 Hz to a high of 3050 Hz, for a totalbandwidth of 3000 Hz. You can think of theL.F. Rolloff control as where the “bassresponse” from your voice and the transmitbandwidth is attenuated.The next control to adjust is transmitterequalization. TX EQ can be used to giveyour audio more bass or treble response ata given transmit bandwidth and lowfrequency rolloff setting. It can also be usedto compensate for a microphone with morebass or treble response. ORION II isprovided with audio equalization for thetransmitter. It enables tailoring audiofrequency response for greater effectivenessand to accommodate your preferences. TheTX EQ establishes a specific audio profilefor your transmitted audio from either theMIC or AUX audio input sources. The TXEQ effects from high pitched at –20 dB toessentially flat response at 0 dB to verybassy at +20 dB. It is adjustable in 1-dBsteps.Audio FrequencyFigure 4-3 High RX EQ Response (-20 dB)Audio FrequencyFigure 4-4 Flat RX EQ response (0 dB)Audio FrequencyFigure 4-5 Low RX EQ Response (+20 dB)566 manual Version 4 – October 2006Part #74410Printed in USA40
Refer to Figures 4-3, Figure 4-4, and 4-5.They illustrate responses in the center andat the extremes of the equalization controls.The displayed setting of the equalizersrefers to the amplitude in dB (at about 100Hz) relative to the highest frequency in thepassband. For example, the –20 dB settingproduces –20 dB at 100 Hz relative to 0 dB.Generally, the TX Filter BW, L.F. Rolloff,and TX EQ controls are set once and notadjusted again unless you changemicrophones or want to experiment withdifferent SSB sound.The two most-used SSB transmit controlswill be mic gain (accessible from the MICbutton on the front panel) and the speechprocessor (accessible from the SP button onthe front panel).Mic gain is set by pressing the MIC buttonand talking into the microphone. When youhave reached proper ALC, the red ALC LEDlocated next to the S-meter on the front ofthe radio will flash on voice peaks. Adjustthe mic gain upward until the ALC light isflashing on and off while you aretransmitting. Different microphones willrequire more or less gain. The Ten-Tecmodel 706 communications deskmicrophone will require a small amount ofgain. Microphones like those manufacturedby Heil Sound may require more gain. Thisis normal.There is also a hardware mic gain optionavailable in the SSB menu. H/W Mic Gainis used to boost the input to the A/Dconverter if using a microphone that requiresadditional gain. Please note it is easier tosend the radio into distorted or undesiredaudio response with this control than withthe DSP mic gain control. We recommendusing a modest gain setting with this controlif needed and using the DSP mic gaincontrol to set final value.Speech processing (SP) is provided to givethe operator more “punch” to the transmittedsignal. Speech processing increases theaverage amplitude relative to the peaks foran increase in average power transmitted.Press the SP button (if desired) and use theMULTI knob to adjust the speech processinglevel. Speech processing is generally notused for higher-fidelity SSB audio; its use isprimarily for added intelligibility forcommunications-grade SSB audio. It is alsopossible with high levels of speechprocessing and combinations of microphoneand other settings available to send thetransmitter into distorted SSB output. Usethe MON function to listen to what you aretransmitting and avoid this.The speech processor used in the ORION IIis a true RF compressor, DSP generated.Human voices have peak-to-average ratiosas high as 15 dB. At 100 watts PEP output,the average output power might be as littleas 3 watts! RF compression raises theaverage output power and tends to improveintelligibility by bringing out subtle parts ofspeech. With a digitally generated RFspeech processor, we have the advantageof calculating the RF envelope before themodulation is performed. Microphone audiois sampled and converted to an analyticsignal, and an equation is used to computethe envelope.Note on wide SSB transmit bandwidths:Audio fidelity generally improves with theuse of wider SSB transmit filtering. Using a3.0 kHz or higher bandwidth will have amore “well-rounded” audio response than anarrower bandwidth. As transmit bandwidthwidens, so does the potential forinterference with stations using adjacentfrequencies.Part 97 of the FCC regulations governingamateur radio operation does not specify amaximum transmit bandwidth usable byamateurs for SSB communication.However, FCC regulation 97.307(a) requiresamateur stations not to occupy morebandwidth than is necessary for theemission type being transmitted inaccordance with good amateur practice.Regulation 97.307(b) requires thatemissions outside the necessary bandwidthmust not cause splatter interference tooperations on adjacent frequencies.While these are broad regulations subject tointerpretation, the responsibility forcomplying with the regulations rests with theoperator. Using an SSB transmit bandwidthwider than necessary for communicationsand causing interference to adjacentstations while doing so is specifically whatthese regulations are addressing. Insummary, what may be an acceptable566 manual Version 4 – October 2006Part #74410Printed in USA41
andwidth on a given band at a given timemay not be on another band at another time.See Figure 4-6 for some initial settings forvarious microphones. Remember resultswill vary, and these are just suggestedstarting points.InputSourceInputDevice MODEMICGainAUXGainTXEQHeilGoldline MIC SSB 65 zero -6 dBTen-Tec708A Mic MIC SSB 60 zero 0 dBSoundCard AUX PSK31 zero 75 -14 dBInterfaceSoundCard AUX MFSK zero 55 0 dBInterfaceFigure 4-6 Initial Suggested Microphone SettingsSETTING UP ORION II FOR AMTRANSMITThe same factors that affect SSB transmitalso come into play for AM transmitoperation as well. Speech processor, lowend rolloff, TX bandwidth, mic gain, and TXEQ are all used for AM operation as well.Transmit bandwidth for AM operation is fixedat 6 kHz.Carrier amplitude for AM operation is setautomatically by ORION II. The PWRcontrol on the front is used for PEP outputpower setting in AM operation. A value of100 would correspond to 100 watts PEP AMoutput, or 25 watts carrier power maximum.FSK OPERATIONSelection of the FSK mode will allow theORION II to operate true FSK RTTY. TheFSK circuitry is controlled through the rearAUX I/O jack on the rear panel of thetransceiver.Pin 7 on the I/O jack is the MARK/SPACEinput. This input is typically connected tothe FSK output on a modem or terminalunit. The ORION II receives FSK usinglower sideband. The center of the filterpassband is preset so any bandwidth filterused will be centered on the standard FSKMARK/SPACE 2125/2295 Hz tones.The ORION II display indicates the transmitMARK frequency. There is also a usercontrol called FSK Tx Data in the Othermenu for selecting whether the MARK is thelow tone or high tone (the standard is lowtone). This allows the transceiver to beused with either TTL or open-collectorkeying schemes.The monitor function is available in FSKmode and may be used to monitor thetransmitted tones. (See (18) MON inChapter 2).TRANSVERTER HOOKUPSORION II provides the ability for a VHFtransverter to be connected to the rear panelvia the XVRT KEY, XVRT RF, and AUX RXjacks on the transceiver rear panel.Both the XVRT KEY and XVRT RFtransverter support connections areactivated via the TX menu. Enter the TXMENU (see description under TX MENU inChapter 3), and use the MULTI knob to turnthe transverter output on. This will activateboth the XVRT KEY jack and send RFoutput through the XVRT RF jack.566 manual Version 4 – October 2006Part #74410Printed in USA42
VHF/UHFTRANSVERTERV/UHF RXV/UHF TXXVRTR KEYCOAXSHIELDED WIRE565 TRANSCEIVERRX ANTXVRT RFXVRT KEYFigure 4-7 Connecting a Transverter(Splitantennamode)Basic connection for a transverter is shownin Figure 4-7. The receive side of thetransverter is connected to the AUX RX jack.On ORION II, select VFO A for transceiveoperation by pressing the TX and RXbuttons on the front panel in the VFO Acolumn under the S-meter. Select RX ANTfor MAIN RX/TX on the front panel.The transmit side of the transverter isconnected to the XVRT RF jack. XVTR RFprovides a low level output RF output ofapproximately +15 dBm (35 mW) - thisoutput is ALC controlled and is adjustablefrom +5 to +15 dBm (3.5 to 35 mW) by usingthe PWR and MULTI controls when thetransverter output has been activated in themenus.XVRT KEY is for the PTT connection of yourtransverter.It may be desirable to employ the use of asequencer for proper key sequencing oftransverter, radio, linear amplifier, etc.ORION II can easily be used with asequencer. The last relay output to close onthe sequencer should be connected to theTX EN 1 jack on the rear of the ORION II.Go into the menus and turn on KeyingLoop 1. This keying loop will prevent theradio from transmitting until a closure toground appears at the TX EN 1 jack. Byconnecting the last relay to close on thesequencer to the TX EN 1 jack, the operatorwill have ensured that all required keyingconnections have been closed prior to RFappearing at the output of the XVRT RFjack.DIVERSITY RECEPTIONBecause the ORION II has the ability tohave both receivers tuned by a single VFOsimultaneously, and because both receiverscan be split out to different antennas, aworld of possibilities for diversity receptionare opened.First, a definition of “diversity reception”:Radio reception in which a signal is obtainedby combining or selecting signals, from twoor more independent sources, but whichmay vary in their fading characteristics atany given instant. Good examples would bethe use of one horizontal and one verticalantenna or two horizontal antennasseparated by one wavelength or more.It has been shown from studies that weakand/or fading signals can be copied betterwhen they are heard from two sourcessimultaneously rather than only one. Assignals fade, if another source is available tosimultaneously monitor the signal, the fadingeffect can be somewhat compensated for.This is useful not only for the weakestsignals when chasing DX, but for normalcommunication where signal levels are fairlyreadable but still subject to some QSB.Because ORION II allows you to tune tworeceivers with one VFO, diversity receptionis possible using the two receivers on twoseparate antennas.First, put both receivers on the desiredamateur frequency on VFO A. To do this,merely press all three of the buttons in theVFO A column directly under the S-meter.Now both receivers and the transmitter aretuned by the VFO A tuning knob. PressANT 1 for MAIN RX/TX and ANT 2 for SUBRX. See Figure 4-8.566 manual Version 4 – October 2006Part #74410Printed in USA43
Figure 4-8. Diversity reception with bothreceivers on VFO A. Main receiver andtransmitter are utilizing ANT 1. Subreceiveris utilizing ANT 2.In the AUDIO menu, either combine theaudio outputs of the two receivers in bothheadphones by selecting “Both” for Sub andMain RX audio, or put one receiver in eachear by selecting Main: Left and Sub: RightThe ORION II is now set up for diversityreception with the main receiver andtransmitter on ANT 1 and the subreceiver onANT 2.For low band DXing, it may be desirable tocombine the outputs of the two receiversfrom two different receive antennas whilehaving the transmitter use a third antenna.This is accomplished by connecting receiveonlyantennas to both ANT 2 and the RXANT jacks on the rear panel, and using ANT1 for transmitting. If desired, the ANT 2connector can be inhibited from allowing atransmit signal by enabling Keying Loop 2 inthe menus. See (69) TX OUT 2 / TX EN 2elsewhere in the manual.Put the subreceiver on ANT 2, the mainreceiver on RX ANT and the transmitter onANT 1 by pushing buttons on the front panelso they light up as shown in Figure 4-9.Again put both receivers and the transmitteron VFO A.Figure 4-9. Diversity reception. Mainreceiver on VFO A is using RX ANT jack.Transmitter on VFO A is using ANT 1.Sub receiver uses a second receive antennaconnected to ANT 2.Using this configuration, both receivers canuse independent receive antennas while thetransmitter uses a separate TX antenna, allon the same frequency. Both receivers aretuned simultaneously by turning the VFO Amain tuning knob.WEAK SIGNAL DX RECEPTION,CONTEST OPERATION AND ORION IIWith most transceivers, an operator typicallywould set CW for a low or comfortableoffset, select a narrow bandwidth filter (like250 Hz), turn AGC to either “fast” or “off”,use some setting for DSP noise reductionand start listening for weak signals. Whichis fine – except that “typical” settings likethis used for other radios simply won’tuse ORION II to its maximum capabilities.An important point to ponder: There is noone setting for RX combination (definedas roofing filter, DSP bandwidth filter,DSP NR, and AGC together) that is thecorrect one for ORION II. There are goodplaces to start – and by understanding howthe operation of the high dynamic rangereceiver in ORION II is different from othertransceivers will set you on the correct pathtoward optimum use.Let’s think this through logically. Bandconditions always vary, noise always varies,signals always vary. If you set a transceiverfor one optimal setting to use it for variableconditions, would it seem logical that theoperator would be using the transceiver toits optimum capability each and every time?Refer back to the definition of the use of acrystal roofing filter. The roofing filter isused for keeping strong closeby signals from566 manual Version 4 – October 2006Part #74410Printed in USA44
compromising receiver performance.Listening to a weak signal on a quiet banddoes not meet the definition of need for atight roofing filter. On a band where fewsignals are present other than a desiredtarget weak signal, only a wide roofing filterwould be necessary. Using the 300 Hzroofing filter when listening to a single weaksignal on the low bands gains nothingadditional. In fact, it could hurt your ability tohear a noise floor level weak signal. Why?Among other reasons, all narrow bandwidthfilters suffer from insertion loss – and in the<strong>Orion</strong>, like other transceivers have for manyyears, we use an amplifier to compensatefor crystal filter loss. A 300-Hz filter is goingto have slightly more loss than a 600-Hzfilter. Both of these narrow filters havemore loss than the 1 kHz roofing filter. Theloss, after preamp compensation, is about 2dB. No loud signals nearby = no need fora tight roofing filter. Regardless of DSPbandpass filter setting, we’d recommendusing a wider roofing filter as acceptable forweak signal DXing. The DSP bandpassfiltering does not vary in gain down to theminimum setting of 100 Hz. Therefore, ifthere is no offending signal within 1 kHz,setting the roofing filter at 1 kHz andnarrowing the DSP bandwidth to any desiredvalue is by far the best setup for ORION IIfor single signal DXing.Of course, if you have a pileup 1 kHz away,perhaps a tighter roofing filter is warrantedto keep those loud callers fromcompromising close-in performance.That’s fine – but make sure that the crystalroofing filters are centered.DSP noise reduction in the ORION IIinteracts somewhat with the digital AGCsystem. Here is why: when turning on thenoise reduction, without changing digitalAGC, the receiver will get very quiet, veryquickly. This is not the desired effect ofnoise reduction! The desired effect is toidentify what is signal and what is noise andimprove the ratio between the two, ratherthan making the whole receiver quieter,signals and noise. When DSP NR isselected, digital AGC artificially reduces thethreshold setting of the digital AGC – andyou will notice that the overall noise levelcan increase – but signal-to-noise ratioimproves and that is the ultimate goal of theNR system.In practical terms, how does it work? Thereare 9 different settings, and each of the 9 isused to determine only how aggressively(quickly) the NR adapts and identifieswhat is signal and what is noise. Here isthe rub (and it’s logical): with weak signals, itis harder for any DSP NR system todetermine what is noise and what is signal.When turning DSP NR on with a setting of“1” with a signal that is very weak, it’s goingto take a very long time for the algorithm tofigure out what is signal and what is noise.For a somewhat louder signal (20 dB ormore above the ambient noise level, stillfairly weak) – a setting of “1” will adapt veryfast! What is needed for weak signals ismore aggression. By starting the NR at “3”or “4”, the NR will more quickly adapt towhat is signal and what is noise for a weaksignal. Once the NR has adapted, for thesame signal, no change in NR will bemade when adjusting the value! If youturn the DSP NR on, and just cycle throughthe values looking for “best” – nothing willhappen. Because the DSP NR builds abandpass filter to automatically reducenoise, it produces the same effect asmanually selecting a very narrow DSPpassband filter.Perhaps nothing is more important thanAGC setting, and for single signal weaksignal DXing purposes theprogrammable AGC value is probably theonly setting that the operator shouldconsider using. We suggest using AGChang at either 0.00 or a very small value like0.04. Why? Because with AGC hang, AGCwill grab onto the most recent noise peakand will adjust gain to it for the hang period.After that, decay will begin – this is notgood if you’re trying to listen to a signal atthe noise floor and band noise is varying ontop of the signal! It has been argued byoperators of the original ORION that a smallamount of hang may be desirable to keepthe AGC action ‘smoother’ than it would bewithout hang. This is plausible – but againdepends on the individual and the situation.The threshold value in the AGC systemacts like an IF gain control for the DSPsection of the receiver chain – turn the value566 manual Version 4 – October 2006Part #74410Printed in USA45
low (like to .37 uV) and the receiver gaincomes up, as do the signal levels.The threshold value can also be used todetermine (limit) the top end of availablereceiver gain for the digital part of thereceive chain. Setting the threshold valuehigher in turn imposes that higher limit onthe available range of the RF GAIN control.Example: Listen to band noise with thethreshold set to the lowest value (0.37 uv)and the RF GAIN set at 100. With thesesettings, receiver gain is at maximum.Adjust threshold value to a higher value, like31.91 uv. Note how overall receiver noisehas dropped with the gain reduction. Thetop end of the available range of the RFGAIN control (which is still set at the highestvalue) is now limited by the threshold valuerather than the entire actual available rangeof the receive chain. The crucial part isadjusting decay and threshold. Decay isused to determine how fast the IF gainincreases in the absence of a signal abovethe threshold value. For a conventionalsetting like “fast”, either on ORION II or anyother transceiver, the AGC can actuallyclip both a weak signal and the noise! Wantan example? Tune to a point on the bandwhere there is no signal, only band noise.Set AGC hang at 0.00, threshold at .37 uV,and then start decay rate at 1 dB/s. Turn itup to 2000 dB/s (fastest setting). Hear thebackground noise change? That’s AGCclipping the noise at the fast decay setting.If there’s a weak signal in there at that level– you guessed it, the signal gets clipped too.How to use the programmable AGC foroptimum performance for weak signalDXing: There are two possibilities. Foreach, set hang value at 0.00 or 0.04. Thefirst example we’ll call “quick decay, variablegain” Set the decay to 60 dB/s (which is stillfairly fast) and the threshold at .37 uV whilelistening to a weak signal. As you increasethe threshold to higher values, it is possiblethat the weak signal will come out of thenoise as the system gain decreases and theAGC no longer clips the weak signal and thenoise. The other method is “low threshold,varied decay” to set threshold at a low orthe lowest value for maximum IF gain, andthen use the decay control to adjust, startingfrom the slowest setting of 5 dB/s andworking upward. As decay goes faster, itintroduces clipping. When listening to aweak signal with threshold low, advancethe decay until the point clipping starts(audible change in the noise componentand/or loss of copy of chopping of the weaksignal) – ideally, you want to adjust this tojust before the clipping point for maximumcopy of the weak signal.So, all that being said, how about a “set-itonce-and-leave-it”value for programmableAGC for weak signal DXing?Set AGC hang at 0.00, decay at 40-60 dB/s,and the threshold at .5 uV. This ought toprovide a good enough combination ofsettings to allow just about anything that canbe audible to be detected by the radio (andlikely copied as well) and allow for plenty ofgain. If you need just a little more, you cango in and change the AGC parameters for agiven situation as described above.While you can have an optimal starting pointfor programmable AGC – every signal andevery noise situation is unique! This isprecisely what makes this system soadvantageous over traditional settings of“fast” and “off”.Updated February 2005 in the originalORION manual and reproduced here forORION II owners’ benefit: Anecdotalevidence from weak signal DXers using theoriginal ORION transceiver has suggestedthat for the very weakest of signals, someAGC hang may be desirable to hold theAGC level constant in the presence ofvarying noise. As every noise situation andsignal condition is unique, it is possible forsome operations that the weak signal (ratherthan the most recent noise peak) can holdthe AGC constant and allow the veryweakest of signals to be copied. This willvary with the conditions, and with theoperator themselves for desirability.A practical example from a leading low bandDXer for listening to very weak signals inband noise (no lightning or unusualatmospheric QRN) on 160 meters is toadjust the RF GAIN control upward untilnormal band noise is present. Set decay ata very low value (e.g. 5 dB/s) and adjusthang between 0.3 and 1.0 for best signal-tonoiseratio. Lightning QRN would be adifferent scenario – perhaps using fast AGC566 manual Version 4 – October 2006Part #74410Printed in USA46
with hang at zero and RFGAIN backed downto limit extraneous noise.Consider the settings we have suggested forsingle signal DXing: wider roofing filter, NR(if desired) at a start value of “3” or higher,use of programmable AGC, DSP bandpassfilter set at any value desired. Nowconsider what we started with above:conventional settings on a past transceiverof 250 Hz crystal filter, AGC fast or off, DSPNR on. Let’s say on <strong>Orion</strong>, you’ve put inthe 300 Hz roofing filter, put the DSP BW at100 Hz, turned the AGC to fast or off, putthe DSP NR on “1”, and then went to copy asingle weak CW signal on the low bands.Knowing what you now know, what is thelikely result? Not much chance that desiredsignal is going to be as copyable (orcopyable at all!) as it would be with settingthe transceiver to take it to its fullcapabilities.To summarize for weak signal, singlesignalDXing: Use the programmableAGC settings, adjusting if needed for eachsituation to enhance weak signal copy. Usethe narrow roofing filters only if a loud signalis close enough to warrant it. Gain does notvary for DSP bandpass filters – use anyvalue down to 100 Hz you feel comfortablewith. For weak CW signals, either leave NRoff or start NR at a setting of “3” or “4” forquicker adaptation. Make sure the narrowroofing filters, if you choose to use them, arecentered using the C.F. controls in themenu. Make sure the signal you arelistening to is zero beat at the CW offsetyou have selected.Contest operation is a little different.Generally, contesters will not want to befiddling with controls during the course of thecontest like DSP NR, AGC, etc. unless it’s toquickly adjust some parameter for a givensituation. The needs of the contester aresomewhat different from the single signalDXer. The contester needs the radio to beset for a somewhat optimum set of values tomeet these criterion: 1) the ability to copyboth weak signals and loud signals withAGC good enough to minimize the outputvariability between the two. 2) Theminimization of loud nearby signals havingan effect on overall receiver performanceand 3) having an reasonably optimum “start”setting that will keep the operator fromhaving to constantly adjust controls on theradio.Now, these goals are not common to singlesignal DXing. At first thought, it wouldseem that what would be good for singlesignal weak signal DXing would also holdtrue for contesting – and perhaps forprevious transceivers there was an elementof truth to that. Actually, though, whatwould be good for copying a varying ratio ofsignal strengths under crowded bandconditions is not at all the same as copyingone weak signal with a Beverage receiveantenna under quiet (non-contest)conditions.Recommended start settings for CWcontesting: In the filter menu, set Xtal Filterto AUTO. This will bring in the desiredmode-appropriate roofing filter automaticallyas you adjust the DSP BW filter settingsacross the value of the roofing filter. Likelyloud signals are going to be present nearby,and minimizing them as a factor in overallreceiver performance is paramount. This iswhere every other radio fails under contestconditions. That S9+30 dB CQer 3 kHz upthe band from you? It’s killing the receiverperformance of other radios, even thoughthe operator doesn’t hear the signal throughthe bandwidth filter. With the narrowroofing filter, the ORION II has no negativereaction to the same signal – preservingreceiver performance down to the smallestbandwidths needed for optimal contestoperation.Programmable AGC can also be oftremendous value as it gives the operatorthe ability to determine in their head whatlarge signal strengths can beaccommodated. It also will prevent fastAGC action from chopping up weak signalspresent in the passband, which can happenwith conventional AGC settings.Setting programmable AGC value is a littlemore tricky for contest operation. Obviously,you want a good amount of gain through thesystem, but limit the ability of strong signalsto “blast the operator” in between listening tothe weak ones. Setting the AGC hang valueagain to 0.00 or 0.04, a good starting pointfor threshold value would be approximately1 uV with decay at a somewhat slow valueto prevent signal clipping of the weak onesas noted in the weak signal DXing566 manual Version 4 – October 2006Part #74410Printed in USA47
adjustments for programmable AGC. Thiswill allow good copy of the weaker signalsbut allow the AGC system to compress loudsignals and give uniform signal output forboth the weak and loud signals. Of course,there are times when digging out the weakones is part of contesting as well, and theprog AGC settings for weak signal DXingmay be of use, but setting the most optimalAGC setting for any one signal is not alwaysthe most practical during a contest. Settingprogrammable AGC at 0.00 or 0.04 hang,20 dB/s decay and 1 uV threshold is agood starting point but individual operatorswill want to vary them according to taste andto account for what band you’re operating atthe moment.Where do I set the DSP NR? Obviously,with signals coming in and out, if you chooseto use NR it should be at a higher settinglike “3” or “4” to allow very quick adaptationof each appearing signal. Setting it veryhigh to start could result in signal distortion(particularly on SSB), but setting the valuetoo low may not allow it to act quicklyenough on the weaker signals. There isanother choice, of course, and that is tosimply leave it off – and with the ORION II’sreceiver capabilities individual operatorsmay find this to be the best choice of all.Remember, like all adaptive DSP noisereduction, sometimes it helps, sometimesdoes nothing, sometimes hinders. It alldepends on signal and noise at thatparticular moment. Each operator will useor not use it to taste.EXTERNAL CW OUTPUT PLUS CWKEYER OPERATION FROM PADDLESSome contest logging programs usecomputer generated CW for transmission ofcontest data (CQ’s, reports, etc.) but do notemploy the ability to send CW through anydevice other than input from the computerkeyboard.It is useful in this situation to be able to haveboth an external keyer (in this case, thecomputer) and the internal keyer in theORION II both simultaneously available.The “external keyer” is used for contestCQ’s and information, while a paddleconnected to the internal keyer can be usedby the operator for quickly repeatingnecessary information.Pin 3 on the AUX I/O connector on theORION II rear panel is a PTT connection.In CW modes, this can allow the radio to bekeyed by an external device in CW mode.There is a menu item located in the CWMENU titled PTT in CW as. When this lineitem is set to “key”, a CW signal from anexternal source can be injected into eitherthe mic jack or pin 3 on the AUX I/O cableon the rear of the radio. Connect the outputof the external keyer to pin 3 on the AUX I/Oconnector or the PTT connection on the micjack. Connect your paddle either to thefront panel or rear panel key connector anduse the SP button to enable the internalkeyer. ORION II will now transmit CW eitherthrough the pin 3 input or using the paddlesand internal keyer.DRAG ADJUSTMENT FOR MAIN TUNINGKNOBS “A” AND “B”The two main tuning knobs have individualdrag controls. To adjust the drag on eithertuning knob, hold the silver skirt still whilerotating the knob about a quarter turn.There will be a gentle “click” feel as eachknob is loosened or tightened. Counterclockwisetwisting will loosen them andclockwise twisting will increase the drag.Loosen them up or increase the drag to yourpreference.INSTALLATION OF OPTIONAL CRYSTALROOFING FILTERSIn addition to the four stock roofing filters of20, 6, 2.4 and 1 kHz, there are threeoptional roofing filters available for theORION II. 1.8 kHz (model 2000), 600 Hz(model 2001) and 300 Hz (model 2002).Field installation of these filters is relativelysimple.Remove the top cover of the transceiver.Facing the transceiver, the filters are locatedat the top front left of the transceiver. Thereis a metal shield in place over the filters heldby a single screw – remove this using aPhillips screwdriver. The optional filters areplug-ins and each filter location is marked.The filters MUST be installed with thecorrect orientation and with the suppliedinsulator under each filter.Two of the pins on the bottom of the filterare grounded to the filter case; two are not.566 manual Version 4 – October 2006Part #74410Printed in USA48
Look at the bottom of the optional filter. Twopins are soldered to the filter case, two pinsare ‘open’. If you are facing the front of thetransceiver and holding the filter, thegrounded pins that are soldered to the filtercase should be closest to you and the frontof the radio; the two ungrounded pins shouldbe furthest away from you towards the backof the radio.Plug in the filter, assuring correct orientationand that the insulator is under the filter tokeep it slightly elevated from the filter circuitboard. Re-attach the filter shield over thefilters and re-install the transceiver topcover.After installation, the filters must be enabledvia the menu system to be used. See thedescription provided in Chapter 3 under(FILTR) FILTER MENU.MASTER RESETOn rare occasions, it may be possible toconfuse the microprocessors in thetransceiver to the point where a master resetmay be necessary to restore operating state.A master reset also usually needs to bedone after an upgrade for the transceiver issent via the serial port interface (see thesection titled UPDATIING YOUR RADIOOVER THE INTERNET elsewhere in thischapter).To perform a master reset, turn transceiverpower off. Press and hold the MAIN RX/TXbutton in the ANT 1 column on the far leftside of the radio (this button is described asnumber 2 in Chapter 2 of this manual). Turntransceiver power on, and continue to holdthe MAIN RX/TX button in the ANT 1 columnuntil the message “Master Reset Complete”appears on the bottom of the radio screen.This should take about 5 seconds afterturning radio power on.A prompt will appear at the bottom of thescreen reading “Clear User Settings?” TheUser Settings are the 200 VFO memories(see description of (49) and (52) VFO A>Mand VFO B>M in Chapter 2) and the profilememories stored in the USER 1-4 locations(see (21) USER 1 and USER 2 in Chapter2). Pressing YES by utilizing the AN buttonwill clear out any previous user-entereddata. Pressing NO by utilizing the RECALLbutton will restore ORION II to defaultsettings without disturbing the usermemories.If you answer the “Clear User Settings?”prompt with YES, ORION II will then bringup a prompt reading “Clear Filter Settings?”to the screen. These settings pertain to thecentering of the optional 600 and 300 Hzcrystal filters (See (FILTR) FILTER MENU inChapter 3). If you have these filters installedand centered, you will probably want toanswer NO to avoid repeating the process.UPDATING ORION II OVER THEINTERNETOne of the revolutionary features of theORION II is the ability to upgrade anyexisting transceiver to the latest version ofthe radio.To check what version of the firmware youpresently have installed in ORION II, eitherread the screen when first powering on thetransceiver, or with the power on press andhold the MENUS button for two seconds.Ten-Tec’s firmware update site is located onthe Internet at URL www.rfsquared.comTo upgrade your transceiver, visit thewww.rfsquared.com web site and click on“Get The Latest For Your ORION II”. A linkwill be available with the latest firmwareversion. This link will be titled with the dateand the available version number of thefirmware. Example: “10/19/05 <strong>Orion</strong> IIFirmware Version x.xxx Available ForDownload”.Connect the DB-9 serial port connector onthe back of ORION II to an open serial porton your computer with a standard serial portcable. From www.rfsquared.com,download the file. Note to which folder onyour hard drive the file is being downloaded.This file is an .exe executable. Theexecutable file will have a set of step-bystepinstructions (reproduced below). Go tothe folder where you have downloaded the.exe file, and double click it to execute.Here is the sequence of steps to follow oncethe .exe file has been downloaded fromrfsquared.com:1) Turn Transceiver OFF.2) Connect a PC to the transceiver using theappropriate cable.566 manual Version 4 – October 2006Part #74410Printed in USA49
3) Turn the Transceiver ON while holdingdown the USER2 button. Wait for display toindicate "Flash Update Mode"4) Start the Update program5) Select the COM port to which theTransceiver is attached.6) Choose UPDATE under the PROCESSmenu.7) Select the RUF file under the ProcessMenu.8) The program will update the radio andreport any errors encountered. During theupdate process the <strong>Orion</strong> screen willindicate the current line being processed.9) If a master RESET should be done it willbe indicated on the screen.Suggestions for new features for ORION IIare always welcome – feel free to contactus.TROUBLESHOOTINGWhile we cannot cover every possibleproblem, here are some hints for dealingwith some potential difficulties.Check the obvious. Is your dc power sourceokay? Check power supply, cable andconnector(s). Is the 25 ampere fuse loose ormissing? Antenna problems? Try a dummyload. Is a proper antenna connected?Is any external antenna switch connectedand properly set? Have you checkedORION II’s control settings? Have youdouble-checked ORION II’s many controlsettings, including those on all MENUSscreens, for your intended mode ofoperation?Problem: No audio from receiverIf you are using the SUB Rx, does it have aVFO and an ANT assigned?If frequency controls act normally --Which receiver are you controlling at themoment?What routing is set in the AUDIO menu?If S-meter seems to be reacting to signals --Is receiver squelched? Check squelchthreshold in the RX menu. Check setting ofRF gain controls for main or sub receivers.Try a set of headphones in case the speakerhas failed.Is either receiver muted from pushing theSUB AF or MAIN AF encoders? Is thevolume on either turned all the way off?Check inside the cabinet for cableconnectors that may have loosened inshipment or rough handling.Problem: Distorted SSB transmitBe certain the mic gain is set properly. TheALC LED should flash on voice peaks, butnot remain continuously lit.Check the setting of the speech processor.An excessively high setting can reduceaudio quality.A frequent cause of a distorted SSB signal isinadequate RF grounding resulting in RFfeedback. Common RF grounding problemsare no ground connection, or too long a leadto a good ground. Many problems relate tothe lack of an RF station ground, ascontrasted with a safety ground connection.We recommend bonding all equipmentchassis together with short heavy metalbraid or strap. Make these connections fromchassis ground lug to chassis ground lugand connect the last piece in the chainfeeding the antenna to a good earth ground.This lead needs to be as short as possible.Lengths near ¼ wavelength on any bandused can be particularly troublesome whenthe far end is connected to earth.Another potential cause of distorted SSBarises when the station is in the near field ofthe antenna. This is a problem manyapartment dwellers face.Distorted SSB transmit can result fromchassis ground and signal ground from themicrophone being tied together to acommon connection. This is a commonproblem with third-party microphones.Assure the chassis ground and signalground from the microphone are separated.Problem: No transmit, but receiver(s) OKIs one of the TX LED’s on the buttons to thefar left of the transceiver lit? See thediscussion of buttons 8 and 9 as describedin Chapter 2. If neither of these two buttonsis lit, the radio will not transmit.566 manual Version 4 – October 2006Part #74410Printed in USA50
The transmitter can be disabled in the TXmenu (see Chapter 3). Make sure it has notbeen disabled.Is the gain setting correct for the microphoneinput or AUX I/O as appropriate?Is the KEYING LOOP set properly for yourmode of operation? With no amplifier orwith a non-QSK amplifier the menu shouldindicate keying loops are turned off. Ifeither of the two keying loops are enabledand no connection is made to them, theradio will not transmit.Is the PWR control turned up to anappropriate value?Problem: No receiver(s), transmit OKCheck the PBT setting or turn it off. It maybe set outside the passband.Disconnect any external equipment thatmight be pulling the PTT line MIC or PBTconnector to ground.Is the internal KEYER enabled with a monoplug in the KEY jack? That would cause aconstant stream of dits when you applypower.Check settings of the squelch in the RXmenu and the AF and RF gain controls.Problem: ‘Buzzing’ noise heard onreceived and transmitted signalsConnection of both the #310 fan kitaccessory and a second accessory to thesame rear panel 13.8 Vdc jack via a “Y”cable may cause ground loop problems thatcan result in a buzzing noise being heard ontransmit and/or receive. Disconnect secondaccessory from the rear panel jack.Problem: No operation in VOXCheck the ORION II screen to see if themenu items for VOX are active and setproperly. If any of the three settings is atzero, VOX will not operate.The Ten-Tec model 701 hand microphonewill not operate in VOX mode.The mic element in other (non-Ten-Tec)microphones must be active (open) whenused in VOX mode with ORION II. Thisgenerally means locking the PTT on themicrophone after putting the radio into VOXmode – but every mic is different. Consultthe operation manual of your microphone.Problem: Step size selected is alwaysone level higher than desired and ‘xm’appears above it on the screen.Consult the section of the manual titled (55)SUB RX and (56) MAIN RX. The ‘quickjump’ step size function has been enabled.it can be disabled by pressing an already litMAIN RX or SUB RX button.If the above do not solve your problem,please consult with our service department(865) 428-0364 or service@tentec.com566 manual Version 4 – October 2006Part #74410Printed in USA51
Chapter 5 – SPECIFICATIONS AND TECHNICAL DESCRIPTION566 ORION II HF TRANSCEIVER – SPECIFICATIONSGENERAL:Frequency range:SUB RX500 kHz-30 MHz, Specifications apply > 1.8 MHz;TX & MAIN RX 1.79 – 2.01, 3.49 – 4.07, 5.1 – 5.42, 6.89 – 7.43, 10.09 – 10.16, 13.99 –15.01, 18.06 – 18.175, 20.99 – 21.46, 24.88 – 25.0, 27.99 – 29.71 MHzTuning Step Sizes:Frequency Stability:Rated RF Load:Antenna jacks:Modes:I-Fs:Display:Freq. Control:1, 10, 100, 1k, 5k, 10k and 100 kHz± 1 PPM over operating temperature. TCXO is standard.50 ohms nominal @ 2.0:1 maximum SWR.2x SO-239 transceive, 1x RCA-style phono female receive only.USB, LSB, AM, FM, CWUSB, CWLSB, FSK,Panoramic Stereo TM (Binaural w/spatial perception).Main RX & TX - 9 MHz, 455 kHz, 14.0 kHz;Sub RX - 45 MHz, 450 kHz, 14.0 kHz.320 x 240 pixels, TFT color screen with CCFL backlighting.Receivers operate on any two bands simultaneously; transmitter can beassigned to either receiver.Supply Voltage: 13.8 Vdc nominal. Reverse-polarity & over-voltage protection standard.Operating Temperature Range:Dimensions (H x W x D):0-50° C5.25" x 17.0" x 18.75" (13.3 x 43.2 x 47.6 cm)Weight:Construction:PC control port:20 lb. (9.2 kg)Al chassis, steel cabinet, glass-epoxy printed-circuit boards.EIA-232 standard, DE-9F.The following features & specifications apply to both receivers:Digital AGC systems:Passband Tuning:RX Audio Equalizers:RX Audio OutputPower:RX Headphone Output:Programmable AGC threshold, hold, & decay times, fast attack.Independent controls for each receiver.Independent controls for each receiver.Bass/treble boost/cut up to 6 dB/octave.2 W into 4 ohms, < 3% THD.Designed for 16 – 32 ohms impedance headphones566 manual Version 4 – October 2006Part #74410Printed in USA52
Line-level Output:RX Notch Filters:Auto-Notches:RX Noise Reduction:0 dBm into 600 ohms.IF DSP, > 50 dB depth, adjustable width. Notch affects S-meter.IF DSP, Multi-tone, adjustable on each receiver.IF DSP, adjustable on each receiver.MAIN RECEIVER:SSB Sensitivity:1 MHz.Internal birdies:Current drain:RIT range:S-meter Reference:TX > RX Recovery time:Noise Blankers:None stronger than specified sensitivity.2 A typical, audio reduced.± 10 kHz.S9 = 50 µV.< 20 msTwo independent noise blankers:9 MHz - Hardware - on/off.IF 3 - DSP, adjustable.566 manual Version 4 – October 2006Part #74410Printed in USA53
SUB RECEIVER:SSB Sensitivity:0.35 µV typical for 10 dB SINAD at 2.4 kHz BW.SSB & CW Selectivity:AM Selectivity:FM Selectivity:IP3:IP2:Image Rejection:IF Rejection:590 IF DSP filters - 100-6000 Hz BW.IF DSP filters – 4 & 6 kHz.Ceramic filter - 15 kHz.+5 dBm typical, 20-kHz spacing.+71 dBm typical.> 70 dB.> 70 dB.S-meter Reference: S9 = 50 µVRecovery Time:< 20 ms.Noise Blanker: Software, adjustable 0-9.TRANSMITTER:Power Output:Telegraphy (CW) & SSBDuty Cycle:AM, FM, AFSK, PSKDuty Cycle:+(constant-carrier modes):ALC Adjustable 5-100 W, ± 1 dB.continuous service @ 100Wcontinuous with cooling fan accessory.Microphone Input Impedance: >10 k-ohms at 1 kHz.Microphone Sensitivity:Line-level Input:Speech Processor:TX Bandwidth:TX Frequency Response:TX Equalizer:TX Speech Monitor:SSB Carrier Suppression:Unwanted SidebandSuppression:5 mV for full power output; Internal gain-range adjustment;dc power for electret elements.6 dBm into 600 ohms for full output.RF compression - 0-9 adjustment.900-3900 Hz in 10-Hz steps.50-3900 Hz maximum @ 6 dB points, adjustable.Up to 6-dB/octave; bass/treble boost/cut.Modulated IF after filtering, processing.> 50 dB.> 60 dB at 1 kHz.Harmonic & SpuriousOutputs: > 50 dB below 100 W; > 40 dB below 5 W.T/R Switching:PTT or VOX on SSB, AM, FM, FSK; Adjustable QSK on CWCW Keyer Speed Range:CW Rise & Fall Times:10 -50 wpm, adjustable weighting.Adjustable 3-10 mS566 manual Version 4 – October 2006Part #74410Printed in USA54
CW Offset:XIT Range:FM Deviation:Current Drain:Programmable 100-1200 Hz in 10 Hz steps.Sidetone pitch automatically matches selected CW offset.± 10 kHz± 5 kHz peak nominal.25 A max.566 manual Version 4 – October 2006Part #74410Printed in USA55
HARDWARE INFORMATIONThe transceiver comprises 16 printed circuitboard subassemblies plus one optionalsubassembly, as Figure 5-1 shows:Figure 5-1 ORION II SubassembliesPart # Name Designator81908 Input/Output Board(I/O)81909 Low Pass Filter(LPF)81993 Power Amplifier(PA)81906 RF Converter(RFCNV)566 manual Version 3 – March 2006Part # 74410Printed in USAA0A1A2A381999 9 MHz IF (IF) A482002 I.F. Converter(IFCNV)A581907 Subreceiver (SUB) A681995 Logic and DSP(DSP)A782019 Keypad (KEY) A881936 Power DistributionBoard (PWR)81912 Synthesizer(SYNTH)A9A1081916 Motherboard (MBD) A1182018 Rear ConnectorBoardA1281957 Sweep Amplifier A138198682017optional AutotunerAudio boardA14AudioSee Figure 5-2 for a block diagram showingthe relationship of these subassemblies in thetransceiver. A11, the motherboard, formsORION II’s central electrical spineinterconnecting all but two of the printedcircuit boards (PCBs). For clarity, the blockdiagram does not explicitly show A11’smyriad interconnections. Miniature coaxialcable and connectors carry essentially allsignals between boards. Shield partitionssuppress possible inter-board crosstalk.Subassembly LocationThe centrally located motherboard (A11)connects the logic board (A7), keypad board(A8), and other front panel parts with the I/O(A0) and rear connector (A12) boards whichpopulate the rear panel. Along the way, A11picks up DC and control line connectionsfrom A1, A4, A5, and A6 in 4 compartmentsabove the chassis deck. Below the chassisdeck, A3, A9, and A10 also connect to theMotherboard. The optional internal automaticantenna tuner (A14) connects via wires andplug-in cables to A0. Each signal-processingmodule has its own compartment. Figure5-3 maps the physical locations of thesesubassemblies in ORION‘s chassis.A0 and A2 share the rear panel space, witheach taking up most of the height and abouthalf the width of the panel. The rearconnector board (A12) shares the panel halfdominated by the PA. It carries 5 connectorswhose design suits them to mounting on aboard perpendicular to the panel. Togetherwith 19 connectors on A0, they comprisealmost all of ORION’s input/outputconnectors for DC, audio, control, and RF.The MIC, CW, and PH (headphone) jacksare in front.Signal Path – Main ReceiverFigure 5-4 diagrams the path a main receiverRF signal takes from antenna to audio.A signal from one of ORION’s 3 antennasenters one of the antenna jacks on the rearpanel, where I/O (A0) selects the path to theRFCNV (A3) via cable 2. Amateur bandpreselection, pre-amplification, and highdynamic range conversion to the first IF takeplace in the RF converter.From A3, cable 11 brings the IF signal to the9-MHz IF (A4), where the hardware noiseblanker operates in a wideband environment.Cables 14A and 14B route the wideband IFsignal through the sweep amplifier (A13) toA7 for use in ORION’s band scope feature.Four standard and three optional crystalfilters (selected automatically by the BWcontrol or manually in the menu system)define the tuned signal bandwidth ahead of56
DSP filtering. This stage provides enoughamplification to maintain the receiversensitivity despite unavoidable filter losses.The amplified and band-limited signal feedsthe IF converter board (A5) via cable 16.A5 provides conversion to the 2 nd IF (455kHz), amplification, filtering, and conversionto the 3 rd IF for processing in the A7 logicboard. Cable 18 carries the 14 kHz third IFto the DSP in A7.After digital signal processing in A7, therecovered audio feeds the main receiveraudio input on the audio board, where it ismixed with sub audio or directed to theheadphone amp or the main speaker amp.The main audio travels through cable 48 tothe connector board and is sent to externalspeaker jack or speaker.The synthesizer board (A10) supplies 1 stlocal oscillator signal to A3 via cable 12, and2 nd LO to A5 via cable 19.AUX I/O travels via cable 24. Keying linesget to A7 via A11.From the DSP, cable 17 carries keyed ormodulated 3 rd IF to A5. The 9 MHz outputfrom the IFCNV feeds A3 via cable 13. Theresulting HF signal can go to the XVRTR RFjack on the I/O board through cable 3, or tothe PA (A2) via cable 8.From A2 the path to the LPF board is viacable 7. Cable 27 brings the high levelamateur band HF to AO, the I/O board. Onthe I/O board, the signal is routed to theselected ANT1 or ANT2 RF outputconnector.If it is installed, the optional internalautomatic antenna tuner (A14) is connectedin the ANT1 path only. Cable 26 providesthe A14 input path, and cable 27 is theoutput path. If the transceiver has no A14,cable 28 replaces the autotuner.Signal Path – SubreceiverFor the subreceiver, the signal path starts atan antenna jack selected by the I/O board(A0) and proceeds to A6, the subreceiverboard. This board comprises the entireanalog circuitry of the subreceiver,accomplishing conversion of HF signalssuccessively to 45 MHz, 450 kHz, and 14kHz intermediate frequencies. 3 rd IF signaltravels to the DSP via cable 20 and feedssub RX audio input on the audio board. Theaudio signal also reaches the EXT SPKRand AUX I/O jacks via A11 and A12. FromA12 it runs through wire cable 36 to theinternal speaker.The synthesizer board (A10) supplies a 2 ndlocal oscillator signal and a frequencyreference for the subreceiver’s 1 st localoscillator to A6. Cables 23 and 21 carrythese signals.Signal Path – TransmitterThe TX signal path has the MIC and CW(key/keyer) jacks on A8 as sources. Othersources are the KEY and AUX I/O jacks onA12. The audio signals from MIC travelsthrough cable 47 to the audio board. Thesignal is amplified and passed to thelogic/DSP board (A7) through cable 25. The566 manual Version 3 – March 2006Part # 74410Printed in USA57
Figure 5-2 SubassemblyCabling566 manual Version 3 – March 2006Part # 74410Printed in USA58
Figure 5-3 Plan View of ORION Chassis566 manual Version 3 – March 2006Part # 74410Printed in USA59
Figure 5-4 Main Receiver Signal Path566 manual Version 3 – March 2006Part # 74410Printed in USA60
Figure 5-5 Subreceiver Signal Path566 manual Version 3 – March 2006Part # 74410Printed in USA61
Figure 5-6 Transmit Signal Path566 manual Version 3 – March 2006Part # 74410Printed in USA62
Figure 5-7 Major ORION CablesAss'y From Function & ToName Direction Type Name Assy ID #A0 I/O Sub Rx Ant In RG174 Sub Rx A6 1Main Rx Ant In RG174 Main Rx A3 2XVERT Out RG174 Main Rx A3 3Main Rx Audio Out RG174 DSP/CPU A7 4Tx RFOut RG174 Lowpass A2 5A2 PA PA Temp Out 2-3 Term I/O A0 6PA RF Out RG188 Lowpass A2 7PA RF In RG174 Main RX A3 8T-voltage Out 2-Term Lowpass A2 913.8 V In #16 Red I/O A0 10A3 Main Rx 1st Rx IF Out RG174 9 MHx IF A4 111st LO In RG174 Synth A10 121st Tx IF In RG174 9 MHx IF A4 13A4 9 MHz IF IF to Sweep Amp RG174 Sweep Amp A13 14Main Sweep In RG174 Sweep Amp A13 14A1st IF Out RG174 IF Converter A5 15A5 IF Conv 3rd Tx IF In RG174 DSP/CPU A7 173rd Rx IF Out RG174 DSP/CPU A7 18Main RX LO Ref RG174 Synth A10 19A6 Sub Rx Sub Rx 3rd IF Out RG174 DSP/CPU A7 20Sub 1st LO Ref RG174 Synth A10 21Sub 2nd LO Ref RG174 Synth A10 23A7 DSP/CPU Aux Audio In RG174 Conn A12 24Mic Audio RG174 Key Pad A8 25Power Switch 2-Term Pwr Sw 30S-Meter 4-Term S-Meter 31CCFL Backlight 2-Term CCFL 1-Wht-A 322-Blk-KA8 Keypad Encoder 1 Out 5-Term Enc1 33Encoder 2 Out 5-Term Enc2 34A9 Pwr Dist 5V DC 2-3-Term Dsp/CPU A7 35A11 Motherboard: PWBPower & ControlPWBA12 Conn Speaker 2-Term SpeakerA14 Tuner Tuner RF In RG188 I/O A0 26Tuner RF Out RG188 I/O A0 27No-Tuner Jumper RG188 I/O A0 28Audio Mic Amp RG174 DSP/CPU A7 25Audio Audio RG174 Conn A12 48SCHEMATIC DIAGRAMSORION II schematic diagrams are available as Adobe .pdf files on the company firmwareupdate site located at www.rfsquared.com
CE DECLARATION OF CONFORMITYManufacturer:Ten-Tec, Inc., 1185 Dolly Parton Parkway, Sevierville, TN 37862 USAEquipment details: HF amateur radio transceiver powered by specified external mains powersupplyModel no.: <strong>Orion</strong> IIDescription: HF band amateur radio transceiverDirectives with which the equipment complies: 89/336/EC (EMC directive),1999/5/EC(R&TTE directive), 73/23/EEC (low voltage directive), EN 60950-1 (Information technologyequipment - Safety).Harmonized standards applied:EN 301 489-15 (Specific conditions for commercially available Amateur Radio equipment)EN 301 783-2 (commercially available Amateur Radio equipment. Essential requirements underR&TTE directive)EN 301 783-1 (Technical characteristics and methods of measurement)The following standards are then called by the above:Immunity:EN 61000-4-3 (Radiated RF immunity)EN 61000-4-11 (Voltage dips and interruptions immunity)EN 61000-4-5 (Surges to AC mains input immunity)EN 61000-4-2 (Electrostatic discharge immunity)EN 61000-4-4 (Fast burst transient immunity)EN 61000-4-6 (Conducted RF immunity)Emissions:EN 301 489-1 (EMC standard for Radio Equipment and Services. Part 1: Common TechnicalRequirements.) Used in relation to harmonic emissions on AC mains, radiated and conductedemissions.EN 301 783-1 (Conducted emissions, antenna port, radiated emissions enclosure.)Year in which CE mark was affixed: 2006Authorized Signatory: Jack Burchfield, for and on behalf of Ten-Tec, Inc., Sevierville, TN.,USA, 16 February 2006.