cover RPD15F,25F.qxp - Chamberlain
cover RPD15F,25F.qxp - Chamberlain
cover RPD15F,25F.qxp - Chamberlain
- No tags were found...

Create successful ePaper yourself
Turn your PDF publications into a flip-book with our unique Google optimized e-Paper software.
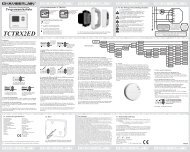
5. FUNCTIONALITY OF REMOTE CONTROLThe upper button on the remote control is normally for the UP direction(open). The lower button on the remote control is normally for the DOWNdirection (close). The middle button stops the shutter in any position asrequired (stop).If, during an upward or downward movement, the button for the reversedirection is pressed, the motor automatically changes the direction oftravel.LEDUP / (Down)STOPDown / (UP)B. Deletion “without” remote control directly via the drive• Disconnect power supply to drive• Connect the free black cable coming from the drive to the (L) cable.• Re-connect power supply now and wait. The drive should turn 2x brieflyand then run to one of the limit switches as a signal that the commandhas been understood. As soon as the drive starts turning, the remotecontrols are deleted.• Disconnect power supply to drive again.• Disconnect link to black cable making sure the free end cannot cause ashort circuit.• For further steps, see “Programming the first remote control”.• End of processen-5Battery: „23A“, 12Volt,Partnumber: 10A14WALL BRACKET (HOLDER):Supplied as standard with each 1-channel and 6-channel remote control(without screws and rawlplugs).Caution! Make sure no electric cables are damaged when fitting thebracket, particularly when installation is to occur near light switches orpower sockets. The installation site should examined carefullybeforehand.PROGRAMMING RADIO REMOTE CONTROLS (HAND-HELDTRANSMITTERS)Up to 40x remote controls can be memorised. The first remote controlprogrammed is also called the “master” remote control.PROGRAMMING A NEW, ADDITIONAL REMOTE CONTROL(not the first one or so-called master)PLEASE NOTE: The following steps must be executed quickly.Read through all the steps first. The easiest way is for a second personto help by reading out the text while the other person presses thebuttons.Step 1: The shutter should not be located at its limit.Via the master remote control:Step 2: Press and hold the STOP button. The drive turns 2x briefly as asignal indicating that the command has been understood(approx. 5 seconds). Wait until the drive stops moving!Step 3: Then press the UP button (upper button) and also the DOWNbutton (lower button) immediately and briefly. Once again thedrive moves 2x briefly as a signal that the command has beenunderstood.Via the new remote control:Step 4: Press and hold the UP button (upper button) on the new remotecontrol immediately. Once again the drive moves 2x briefly as asignal that the command has been understood.• End of processIMPORTANT NOTESNote 1: Between Step 2 and Step 3 only max. 2 seconds are allowed asotherwise the process will be stopped. However, the drive musthave halted beforehand.Note 2: Between Step 3 and Step 4 only max. 7 seconds are allowed.Note 3: Don’t press a new button before the LED on the remote controlhas gone out and the drive has stopped moving. Should thedrive run in one direction for a long time rather than a short time(between Step 2 and Step 3), the process hasn’t worked. Startagain from the beginning.DELETING REMOTE CONTROLSAn individual remote control cannot be deleted. All remote controls aredeleted together. Deletion is possible:A. via the “master” remote controlB. directly via the drive (if the remote control has been lost or the batteryis flat)A. Deletion via the “master” remote control• Disconnect the power supply to the drive (at least 10 seconds)• Press and hold the STOP button on the “master” remote control• Re-connect the power supply now, wait and keep pressing and holdingthe button.After approx. 15 seconds the drive should turn briefly as a signal that ithas understood the command.• End of processPROGRAMMING THE FIRST REMOTE CONTROLREVERSING DIRECTION OF MOVEMENTThe first remote control is the “master” remote control. It also determinesthe direction of movement and decides whether the upper button isactually responsible for UP functionality or the opposite. Even if all thatneeds to be programmed is a reversal of direction of movement, allremote controls that have been programmed must still be deleted first(see Deleting with and without remote control).PLEASE NOTE: If the reason for reprogramming was that the buttons onthe remote control worked the wrong way round (DOWN/UP), press theDOWN button in the following (only applies to new drives with defaultprogramming).• Disconnect drive from power supply• Press and hold UP button or DOWN button (direction of movement) onthe new “master” remote control (stay within radio range of drive)• Re-connect power supply and wait• If it has worked, the drive turns 2x briefly as a signal that the commandhas been understood.• End of processPlease note:• If the process doesn’t work, it could perhaps be that a “master” remotecontrol has already been programmed. Should this not be identifiablehowever, everything will first have to be deleted via “Deletion withoutremote control”.• Were you within the reception range of the motor?• Is the battery in the remote control in order?• Was the period between the connection of the power supply andpressing the button on the remote control longer than 20 seconds?ANTENNA:The cable antenna (see Motor connection) must be accommodated inthe shutter box such that is not wound up together with the shutter. Donot wind the cable antenna around the power line (range of remotecontrol is reduced).CONNECTING A WALL SWITCH (CABLE)See drawing of motor connection for electrical connection details. A wallswitch can be connected via the black cable. No special shutter switch isrequired for this purpose. A standard, 1-pole selector switch often usedfor stairways (automatic reset) is adequate. These are widely available inall shapes and sizes.Function: The first switch pulse starts the drive, the second stops it.The next pulse then starts the drive in the other direction, etc.