4 cylinders + 6 cylinders 4 cylinders + 6 cylinders - Steyr Motors
4 cylinders + 6 cylinders 4 cylinders + 6 cylinders - Steyr Motors
4 cylinders + 6 cylinders 4 cylinders + 6 cylinders - Steyr Motors

Create successful ePaper yourself
Turn your PDF publications into a flip-book with our unique Google optimized e-Paper software.
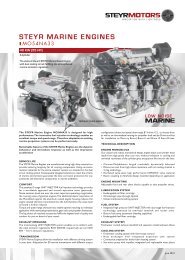
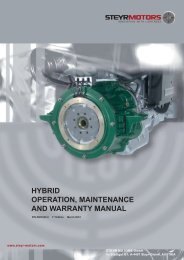
STEYR MOTORS MARINE ENGINES4 CYLINDERS+ 6 CYLINDERSOPERATION,MAINTENANCE ANDWARRANTY MANUALP/N Z001022/0 10 th Edition July 2011www.steyr-motors.comSTEYR MOTORS GmbHIm Stadtgut B1, A-4407 <strong>Steyr</strong>-Gleink, AUSTRIA
WELCOME ABOARDCongratulations on your decision of choosing a STEYR MOTORS marineengine for your boat, and we hope you will enjoy it.STEYR MOTORS GmbH has developed a high-speed diesel engine withtwo stage high-pressure fuel injection specifically for the marine environment.STEYR MOTORS marine engines are designed to be adapted tovarious propulsion systems.To come up to your expectations, please study thoroughly this manual foryour new STEYR MOTORS marine engine to get sufficient information onits operation and handling and to permit an optimal use of the various builtinfunctions.With kind regards,STEYR MOTORS GmbHYOUR STEYR MOTORSMARINE DEALERSTEYR MOTORS GmbHAfter Sales ServiceIm Stadtgut B14407 <strong>Steyr</strong>, Austriawww.steyr-motors.com 10 th Edition, July 2011 P/N Z001022/03
How to use this manualTable of ContentsGENERAL PART PAGE 5 – 12This section contains user instructions and general notes on safety forSTEYR MOTORS marine engines.START-UP AND FUNCTIONS PAGE 15 – 40This section contains brief instruction, function description and normal operation,as well as correct start-up and handling of STEYR MOTORS marine engines.FUEL AND LUBRICANTS PAGE 41 – 44This section defines the requirements as to fuel and lubricants for STEYR MOTORSmarine engines.TECHNICAL DATA PAGE 45 – 62This section contains technical data and product description of STEYR MOTORSmarine engines.OUTPUTPOWERA100%90%80%70%60%50%40%30%CBfull loadspeedrangeDRPMMAINTENANCE, TROUBLE SHOOTING PAGE 63 – 88This section contains instructions for required maintenance and notes on the faultfinding on your STEYR MOTORS marine engine.DEALER´S RESPONSIBILITIES PAGE 89 – 106This section contains instructions for installation acceptance tests, propellerselection, removal from service, start-up after storage, adequate disposal anddealer´s test list.WARRANTY, DISTRIBUTORS PAGE 107 – 118This section contains warranty conditions (services and obligations) for ownersand manufacturers of STEYR MOTORS marine engines.4
GENERAL PARTGeneral ....................................................................................................... 6Marine Engine Overview ............................................................................ 7Product References, Illustrations and Specifications ................................. 8Insurance .................................................................................................... 8Stolen Unit .................................................................................................. 8Owner Identification Card ........................................................................... 8Installation and pre-delivery inspection log ................................................ 9Dealer Service – Maintenance ................................................................... 9Illustration Symbols .................................................................................... 9Repair Service .......................................................................................... 10Replacement Parts ................................................................................... 10Before Casting Off .................................................................................... 10Engine Submersion .................................................................................. 11Bottom Painting .........................................................................................11Boat Bottom .............................................................................................. 11Boating Responsibilities ........................................................................... 12Safety ....................................................................................................... 12Symbols .................................................................................................... 135
MARINE ENGINE OVERVIEWMAKEengine typedisplacement[cm³]STEYR MOTORS M 16 TCAMrated power[kW]exhaustbackpressure[mbar]toleranceexhaustbackpressure± [mbar]charge-airpressure[mbar]*charge-airpressuretolerance± [mbar]max. intakedepression@ ratedpower[mbar]MO156K25 3,200 110 150 ±50 2,400 +50/–100 50MO126K25 3,200 88 150 ±50 2,000 ±100 50MO196K35 3,200 140 150 ±50 2,500 ±100 50MO236K42 3,200 170 150 ±50 2,800 ±100 50MO256K43 3,200 184 150 ±50 2,900 ±100 50MO256H45 3,200 184 150 ±50 2,900 ±100 50MO286H43 3,200 205 150 +0/–50 3,100 ±100 50MO306H43WJ 3,200 215 150 +0/–50 3,300 ±100 50MAKEengine typedisplacement[cm³]STEYR MOTORS M 14 TCAMrated power[kW]exhaustbackpressure[mbar]toleranceexhaustbackpressure± [mbar]charge-airpressure[mbar]*charge-airpressuretolerance± [mbar]max. intakedepression@ ratedpower[mbar]MO114K33 2,100 81 100 ±50 1,900 ±100 50MO144V38 2,100 106 100 ±50 2,280 ±100 50MO144M38 2,100 106 100 ±50 2,250 ±100 50MO164M40 2,100 120 100 ±50 2,740 ±100 50MO174V40 2,100 125 150 +0/–50 3,100 ±50 50MAKEengine typedisplacement[cm³]STEYR MOTORS M 14 TCMrated power[kW]exhaustbackpressure[mbar]toleranceexhaustbackpressure± [mbar]charge-airpressure[mbar]*charge-airpressuretolerance± [mbar]max. intakedepression@ ratedpower[mbar]MO84K32 2,100 55 100 ±50 1,900 ±100 50MO94K33 2,100 66 100 ±50 1,900 ±100 50MAKEengine typedisplacement[cm³]STEYR MOTORS M 14 NAMrated power[kW]exhaustbackpressure[mbar]toleranceexhaustbackpressure± [mbar]charge-airpressure[mbar]*charge-airpressuretolerance± [mbar]max. intakedepression@ ratedpower[mbar]MO54NA33 2,100 40 80 +0/–50 – – 50* at standard reference conditions according to ISO 155507
Product References, Illustrations and SpecificationsWhen reference is made in this manual to a brand name, number, product or specific tool, an equivalent product maybe used in place of the product referred to unless specifically stated otherwise. Equivalent products which are usedmust meet all current local regulations and standards to avoid hazards.Some countries may apply additional internal regulation. Please follow their advices appropriately, example:Austria:Sweden:Finland:Norway:USA:USA:USA:England:France:Germany:Italy:Bundesamt für SchiffahrtNavigation OfficeNavigation OfficeDNV = Det Norske VeritasUSCG = United States Coast GuardABYC = American Boat Yacht CouncilNMMA = National Marine Manufacturers AssociationLR = Lloyds Register of ShippingBV = Bureau VeritasGL = GERMANISCHER LloydRINA = Registro Italiano NavaleAll information, illustrations and specifications contained in this manual are based on the latest product informationavailable at the time of printing. STEYR MOTORS GmbH reserves the right to make changes at any time,without notice, to specifications and models and also to discontinue models, as well as the right to changespecifications or parts at any time without incurring any obligation to equip same on models manufacturedprior to date of such change.Continual accuracy of this manual cannot be guaranteed.All illustrations used in this manual may not depict actual models or equipment and are intended as representativeviews for reference only.InsuranceInsurance on your STEYR MOTORS Marine Engine and boat should be obtained as soon as practical for protectionagainst loss by fire, theft, etc. Consult your local insurance agent.Stolen UnitThe model and serial numbers on your engine are important for you. As to the location of these important numbers,refer to Model and Serial Numbers in the section Technical Data.Record each of these numbers in the spaces provided at the end of this manual and on a separate sheet. Store theseparate sheet in a safe place other than your boat.In case of theft, report the model and serial numbers to your local authorities and your insurance agent.Owner Identification CardWhen you purchases your boat, your dealer was obliged to issue an owner identification card for your STEYRMOTORS Marine Engine.This owner identification card gives proof and is to be submitted in case of warranty claims.8
Installation and pre-delivery inspection logYour STEYR MOTORS Marine dealer is also obliged to complete the installation and pre-delivery inspection log(Chapter “DEALER’S RESPONSIBILITIES”). Required tests and measurements are to be carried out accordingly.A copy of the installation and pre-delivery inspection log and engine registration card are to be forwarded to STEYRMOTORS GmbH.Dealer Service – MaintenanceNOTE:Please do not forget to have confirmed in your manual that the installation and maintenancehave been carried out in accordance with the guidelines.This is also an opportunity to clarify with your STEYR MOTORS marine dealer possible questions arisen during thefirst running hours on your boat, and to establish a service- and maintenance routine.Services will be performed by STEYR MOTORS Marine Dealers at local rates.Costs for service material to be paid by the owner.Illustration SymbolsRefer to the photograph or drawingdescribed in that paragraph.Refer to specific items or featuresdescribed in the text and illustrated on thephotograph.Refer to the general subject of the text.Refer to an item or feature not clearlyvisible on the photograph.9
Repair ServiceAll repair works on your STEYR MOTORS marine engine should be carried out by a licensed STEYR MOTORSMarine Dealer with his professional knowledge, trained staff and special-purpose tools to solve all occuring problems.Preferably, all work on your STEYR MOTORS marine engine should be carried out by the STEYR MOTORS MarineDealer that sold the equipment to you – he knows you and the equipment.If problems occur during a trip, bring your engine to the next STEYR MOTORS Marine Dealer. Information on Dealersand Distributors can be found at the end of this manual.Replacement PartsYour STEYR MOTORS Marine Engine was designed to operate in a marine environment use STEYR MOTORSoriginal replacement parts.Before Casting OffCheck the weather report, wind and water conditions. Tell someone where you are going to and when you expect toarrive or return.Recommended MinimumOn-Board ToolsScrewdriver SetMetric Socket SetMetric Allen Key SetMetric Spanner Setlong nose plierslubrication oil spray12-volt pilot lampflashlightinsulating tapesharp knifeRecommended MinimumOn-Board Spare Partspropeller and small parts for propeller mountingfuel filterimpeller for raw water pumpfusesbulbssealing compoundThese lists represent a suggested MINIMUM, and are not intended to cover all boats or possible boating conditions.10
Engine SubmersionRemove engine from water as quickly as possible and contact your local STEYR MOTORS Marine dealer for service.It is imperative that your dealer removes all water from the engine and immediately relubricates all internal parts.Electrical devices must be replaced. Delay in completing these actions may allow extensive engine damage.Frequently check engine compartment for excessive water accumulation; water depth in bilge should be kept wellbelow flywheel housing. Engine compartment must enable proper venting to avoid condensation to build up on innersurfaces.Bottom PaintingIf your boat is in water where marine growth is a problem, the use of an antifouling paint will reduce the growth rate.* Tin base antifouling paint (TBTA or TBTF) is recommended where its use is permitted.* Copper base antifouling paint may be used, but will require more frequent inspection and replacement of sacrificialanodes. DO NOT PAINT any part of the drive unit with copper base antifouling paint.NOTE:Painting the drive unit with copper base paint will accelerate galvanic corrosion.* Vinyl-butyl base antifouling paint is a recommended alternative.* DO NOT USE any graphite base antifouling paint.NOTE:Never paint anti-corrosion anodes, or their effectiveness will be lost.See your STEYR MOTORS Marine contract partner for an antifouling paint that is suitable foryour area.Boat BottomThe condition of the boat bottom can affect your boat’s performance. Marine growth, present in fresh water as wellas salt water, will reduce boat speed. A boat bottom with evidence of marine growth causes a reduction in top speedof 20 percent or more. Periodically clean the bottom of your boat following the manufacturer’s recommendations.11
Boating ResponsibilitiesAs a boat owner, you have certain responsibilities to others. Be sure that all operators read this manual.You are legally responsible for all occupants of your boat. Instruct at least one of your passengers in the basic fundamentalsof handling your boat in case of an emergency. Show all hands the location of emergency equipment andhow to use it. You are required by law to have one locally approved life jacket for each person aboard, plus one approvedthrowable device for man overboard protection.Learn the waterway rules of the location in which you are going to operate your boat. Navigable waterways are controlledby Federal regulations while inland lakes are controlled by local jurisdictions. Obey these regulations to protectyourself, your passengers and fellow boating enthusiasts.Thoroughly familiarize yourself with weather station warning system signals and waterway traffic signs.Contact your local Coast Guard station and take advantage of their seasonal boat inspections and training courses.SafetyThis manual contains certain information related to the personal safety of you the operator, your passengers andbystanders.The Safety symbol q ATTENTION: appears next to important information to prevent you and others from beinghurt.The symbol NOTE: appears next to important information to keep machinery from being damaged.Observe all notes and safety warnings contained in this manual.WARNINGqCALIFORNIA: PROPOSITION 65 WARNINGDiesel engine exhaust and some of its constituents are known to the state of California to cause cancer, birth defects,and other reproductive harm.12
SymbolsCertain symbols or combinations of symbols may appear on your STEYR MOTORS Marine Engine or on its accessories.It is very important that you understand their meaning or purpose. If any symbol is not clearly understood, seeyour DEALER.“Safety Warning” SymbolsMeans risk of SERIOUS injury is present.Follow instructions in the Operation,Maintenance & Warranty Manual beforeusing motor or accsessory.Means place shift control in NEUTRALbefore starting motor. Follow instructions inOperation, Maintenance & Warranty Manualbefore starting motor.Indicates that ELECTRICITY of more than50 volts is present.Indicates that contents are underpressure.Identifies poisonous material.Indicates a potential fire hazard.“Position Indicator” SymbolsIndicates upward movement.Example: While boat is at planing speed,activating trim switch to raise the bow ofthe boat.Indicates downward movement.Example: While boat is at planingspeed, activating trim switch to lowerthe bow of the boat.“Condition” SymbolsIndicates gear shift control positions:FORWARD, NEUTRAL and REVERSEIndentifies the meter which indicatesaccumulative running hours of engine.Identifies the meter which indicatesbattery voltage or amperage.Identifies the meter which indicatesengine speed expressed in revolutionsper minute.Identifies battery or a meter wichindicates status of battery-generatorcharging system.orIndicates the amount of liquid in tank.Indentifies the meter which indicatesengine coolant pressure.Identifies the meter which indicatesengine coolant temperature.FILTER: Identifies a device whichremoves contaminants from engine’soil system.Identifies the meter which indicates thepressure of engine’s lubricating system.“Functional Description” SymbolsFILTER: Identifies a device whichremoves contaminants from fuel.Identifies the EMERGENCY IGNITIONCUT-OFF SWITCH.Emergency engine stop.FUSE: Identifies a device which protectsthe electrical system from overload.Identifies the negative ground ornegative voltage connection.Identifies engine drain plugs and fittings.Identifies the operating device for startingthe motor.Identifies the STOP SWITCH.It may also identify STOP position ofthe throttle control.“Instructional” SymbolsIndicates FUEL is to be used orFUEL is present.Means read your Operation,Maintenance & Warranty Manualbefore operating the product. It containsinformation or instructions vital foroperation of product.Indicates areas to be lubricated.Indicates OIL is to be used orOIL is present.ENGINE OIL FILL: Location forintroduction of oil into the engine.Indicates lubricating oil used intransmissions.13
START-UP AND FUNCTIONSBefore Starting ......................................................................................... 17Starting the Engine ................................................................................... 18Stopping the Engine ................................................................................. 18Starting the Engine (for SOLAS only) ....................................................... 19Stopping the Engine (for SOLAS only) ..................................................... 19Run In Procedure After Major Overhaul ................................................... 20Definitions ................................................................................................. 20Procedure, Work steps ............................................................................. 20Engine Break-In procedure ...................................................................... 21First Ten Hours ......................................................................................... 21Final Ten Hours of Break-in ...................................................................... 21Operation after Break-In ........................................................................... 22Shifting ..................................................................................................... 23Remote Control Operating Instructions .................................................... 24How to Shift and Control Speed ............................................................... 25Fuel Economy .......................................................................................... 25Gear Box – Information ............................................................................ 25High Altitude Operation ............................................................................ 25Instrument panel ....................................................................................... 26Instrument panel, standard ....................................................................... 26Instrument indication during normal operation ......................................... 27Instrument panel (for SOLAS only) .......................................................... 28Instrument indication during normal operation (for SOLAS only) ............. 29Emergency cut off switch (Lanyard) ......................................................... 30Warning lights and audible alarm ............................................................. 31Electronic Engine Control Unit (ECU) ...................................................... 3215
START-UP AND FUNCTIONSDiagnostic system .................................................................................... 33Twin Installations ...................................................................................... 34Optional Propellers ................................................................................... 34Propellers ................................................................................................. 34Propeller Torque ....................................................................................... 35Propeller care ........................................................................................... 35Water Jet .................................................................................................. 35Operating Procedure for Freezing Temperatures ..................................... 35Salt Water Operation ................................................................................ 35Fuel Pump ................................................................................................ 36Fuel System Checks ................................................................................ 36Fuel Contamination .................................................................................. 36Cooling System (Function Description) .................................................... 37Electrical Equipment ................................................................................. 38Alternator .................................................................................................. 38Battery ...................................................................................................... 38Circuit Breakers ........................................................................................ 39Inversion Switch ....................................................................................... 40Interrupt crankshaft housing ventilation .................................................... 40Instrument Panel ...................................................................................... 40Dry Operation ........................................................................................... 4016
Before StartingFamiliarize yourself with the handling of the boat, in particular how to use transmission, and then proceed as follows:1. Check the bilge for excessive water accumulation. Always keep the bilge clean and dry. Never allow the waterlevel in the engine compartment to exceed the bottom of the oil pan. If water accumulation is unavoidable,install a bilge pump with an automatic control switch.NOTE:The water level in the boat’s engine compartment will increase when the boat is operated ata high incline before planing speed is reached. Excessive water accumulation in the enginecompartment/bilge may cause engine failures.2. Open the raw water intake valve.NOTE:Operate the engine only while the raw water supply is assured or the cooling system isequipped with a flushing device. The raw water pump will be damaged and/or the engine willoverheat if operated without cooling water.3. Open the fuel stop valve.NOTE:Only start the engine when a bubble-free fuel supply is guaranteed. Prior to first start-up ofthe engine (after installation, after storage etc.), purge the fuel system by “ignition ON” for6 x 10 sec.4. Check the operating levels of:* coolant* oil* hydraulic oil* transmission oil* fuel5. Control of electric system:* Charge and charge state of battery.17
Starting the EngineStarting procedure for the STEYR MOTORS marine engine is the same for both cold and warm engines. The enginecontrol unit automatically regulates the fuel supply and the preheating period, for any given temperature.Therefore, the throttle lever should remain in neutral position.1. To start the engine, move throttle lever into idleposition and gear into neutral position.2. Turn ignition key into position ignition “ON”. An audiblealarm will sound and the warning lights areillumiated (temporary), indicating the correct functionof the audible and visual warning systems.NOTE:In case of a low temperaturestart wait until the combined oilpressure/glow plug pre-heatingindication light is turned off,before you continue with the startprocedure.3. Turn ignition key into position “START” and holdin this position until “starting” of engine, butunder no circumstances hold in this position formore than ten seconds.If engine does not start, release ignition key momentarilyand repeat starting procedure.4. As soon as engine starts, release ignition key.The audible alarm will stop when normal oil pressurehas been reached.OFFONSTARTATTENTION:qIf engine fails to start within one minute and/or repeated attempts, contact your STEYRMOTORS Marine dealer.Never turn ignition key to position “START” when engine is running.Stopping the Engine1. Move throttle lever into idle position and gear in neutral position.2. Cool down the engine.3. Turn ignition key to OFF position.ATTENTION:qDo not stop engine at speeds above idle or “accelerate” engine while turning off ignition.This may result in engine failures.18
BUKH STEYR MOTORS SOLASStarting the Engine (for SOLAS only)Starting procedure for the STEYR MOTORS marine engine is the same for cold or warm operating condition. Theengine control unit automatically regulates the fuel supply and the preheating period, for any given temperature.Therefore, the throttle lever should remain in neutral position.G1. To start the engine, move throttle lever into idleposition and gear into neutral position.2. Press the push button for ignition (ill.F; red)(push button lock in place); An audible alarmwill sound and the warning lights are illumiated(temporary), indicating the correct function ofthe audible and visual warning system.NOTE:In case of a low temperaturestart, wait until the combinedoil pressure/glow plug preheatingindication light isturned off, then continue withthe start procedure.STARTONOFF3. Press the button START (ill.G; green) and holdin this position until “starting” of engine, butunder no circumstances hold in this position formore than ten seconds.If engine does not start, release start – pushbutton momentarily and repeat startingprocedure.F4. As soon as engine starts, release start button.The audible alarm will stop when normal oilpressure has been reached.ATTENTION:qIf engine fails to start within one minute and/or repeated attempts, contact your STEYRMOTORS Marine dealer.Never push start button when engine is running.Stopping the Engine (for SOLAS only)1. Move throttle lever into idle position and gear in neutral position.2. Cool down the engine.3. Press push button ignition ON/OFF (ill.F) to disengage from locking position and to shut OFF the engine.ATTENTION:qDo not stop engine at speeds above idle or “accelerate” engine while turning off engine. Thismay result in engine failures.19
Run In Procedure After Major OverhaulThe following run in procedure must be used on STEYR MOTORS engines following a major overhaul, where a majoroverhaul is defined as a replacement of any or all of the following:Crank Shaft, Piston(s), Con rod(s), MonoblockDefinitions* Rated speed … Engine speed with maximum power* Half engine speed … Half of rated speedProcedure, Work stepsPreparation* Engine filled with oil and coolant to max. levels* Oil Shell RIMULA ULTRA 10 W 40* Coolant GLYCOSHELL – 50/50 % water/coolant* STEYR MOTORS engine diagnostic tool connected to the ECUTest method* Remove the expansion tank pressure cap for degassing the system* Start the engine* Run at idle speed for 20 min* Stop the engine* Check coolant and oil level, top up to max. level if necessary* Close the expansion tank with the pressure cap* Start the engine* Warm up the engine (~15 mins.)* Run the boat minimum for 4 hrs at no more than half engine speed* Check oil level, top up to max level* Check the error list in the ECU using the diagnostic programme, if no errors continue run in. If errors occurred,contact STEYR MOTORS After Sales department for further decisions* Warm up the engine (~15 mins.)* Run the boat minimum for 2 hrs at no more than 75 % engine speed* Check the service code list in the ECU using the diagnostic program, if no errors continue run in. If errorsoccurred, contact STEYR MOTORS After Sales department for further decisions* Warm up the engine (~15 mins.)* Start the STEYR MOTORS diagnostic tool data logger* Run the boat minimum for 20 mins. at full rated speed* Stop diagnostic tool data logger and save the file (filename: engine number and datee.g. 68225765_20080910.dat)* Check the service code list in the ECU. If errors occurred, contact STEYR MOTORS After Sales department forfurther decisions* Send the data Log file to STEYR MOTORS After Sales department* Check coolant and oil level at cold engine, top up to max. level if necessary* Continue using the engine acc. to STEYR MOTORS Operator Manual20
GENERALEngine Break-In procedureAll STEYR MOTORS Marine engines have been run for a short period as a final test at the factory. You must followthe Engine Break-In instructions during the first 20 running hours to ensure maximum performance and longestengine life.NOTE:Non-observance of break-in instructions may cause severe engine failure.First Ten HoursMaximum Engine Speed: 75 % of rated speedMaximum Throttle Position: 75 %For the first five to ten minutes of operation, run the engine at low speed (below 1,500 RPM). For the remaining firstten hours of operation, accelerate to bring boat onto plane quickly. After reaching planing reduce throttle to remainat minimum planing. For displacement or semi displacement boats the throttle position of 75 % must not be transcended.Occasionally reduce throttle to idle speed for cooling down.ATTENTION:qWarning indication engine over load during break – in via ECU (Engine Control Unit) TheECU monitors, during the first two hours of engine operation, the load on the engine. Ifthe engine is overloaded (during the first 2 hours of running) the “Check Engine Light” willautomatically illuminate. If the warning light illuminates (CEL light – ON), the throttle positionmust be reduced until this signals are extinguish.Final Ten Hours of Break-inMaximum Short Term Speed: 100 % of rated speedMaximum Short Term Throttle Position: 100 %During the final ten hours of break-in, the engine may run at full speed for five to ten minutes. The remaining hoursshould be operated up to 75 % throttle position. For displacement or semi displacement boats the throttle position of75 % must not be transcended Occasionally reduce the engine speed to cool is down.NOTE:During the break-in period, the engine must not be operated at high rpm for longer periods.During break-in period, be particularly observant of the following:A. Check motor oil level daily. Always maintain oil level in the desired range between the “MIN” and “MAX” markson dipstick. When refilling motor oil, refer to information “Engine Lubrication – Motor Oil” (page 41).B. Check oil pressure control lamp. If the lamp lights up as soon as the boat changes its position (while turning,straightening up the boat or planing), check the oil level in the engine housing by means of dipstick. If necessary,add oil (DO NOT OVERFILL). In case that the oil pressure control lamp is still illuminated with correctoil level, have the engine checked by your STEYR MOTORS Marine dealer as to malfunction of signal or oilpump.NOTE:During normal operation of engine, oil pressure will rise as RPM increases and fall as RPMdecreases. In general, oil pressure will be higher with cold engine oil and specific RPM thanwith hot motor oil.C. Check engine temperature indication. Normal operation between 80° – 95°. In case of audible alarm, checkcoolant level in expansion tank (only with cold engine).D. Deviations from normal operating conditions will be indicated by warning lights and audible alarm. As to exactmeanings see section Error Indication on Instrument Panel.21
GENERALATTENTION:qIn case of non-observance of break-in instructions, warranty may expire.Engine to be filled with recommended oil quality only. See chapter “Engine Lubrication”.Operation after Break-InThe engines specified in this manual are intended to be operated at different speeds and loads, but not allowing fullloadof the engine for more than one hour per 12 running hours. Economic driving may be achieved at the followingspeeds:MO54NA33 3,000 rpmMO84K32MO94K33MO114K33MO144M38MO164M40MO174V40MO126M28MO126K25MO156K25MO196M28MO236K42MO256K43MO256H45MO286H43MO306H43W3,000 rpm3,000 rpm3,000 rpm3,200 rpm3,400 rpm3,400 rpm2,200 rpm2,200 rpm2,200 rpm2,200 rpm3,300 rpm3,600 rpm3,600 rpm3,600 rpm3,600 rpmWhich will prolong engine life and reduce sound emissions.When starting a cold engine, always allow the engine to warm up slowly. Never run the engine at full speed untiloperating temperature is reached. During the first 50 running hours, check the oil level frequently.22
Shifting1. If the gear shift mechanism is disengaged, move the control lever to neutral position. The shift mechanism willautomatically engage.2. To go FORWARD – press the neutral lock button if fitted, and move the control lever forward. Throttle movementwill begin after forward gear engagement.3. To go in REVERSE – press the neutral lock button if fitted, and move the control lever backwards. Throttlemovement will begin after reverse gear engagement.4. To go from FORWARD to REVERSE, or REVERSE to FORWARD, always pause at NEUTRAL and allowengine speed to return to idle.5. After shifting is completed, continue to move the control lever slowly in the desired direction to increase speed.NOTE:A sudden increase in shifting torque on the remote control lever indicates a possible problemin the shifting system. If so, see your STEYR MOTORS dealer as soon as possible for properdiagnosis and and necessary service adjustment. Continued operation under this conditioncould result in damage to the shifting mechanism.23
Remote Control Operating Instructions1Your boat may be equipped with one of the following remote controls:* Single lever control* Dual lever control for twin enginesNOTE: If other than STEYR MOTORS matched remotecontrols are used, follow the manufacturer’srecommendation.Remote controls have the following important features: 1* A single lever which allows to select forward or reverse gear, regulate engine speed, and ensure shifting isdone at low engine speed.* A start-in-neutral-only feature which will protect you from starting your STEYR MOTORS Marine Enginewith engaged gears.The side mount control has a neutral lock button (C) located in the control lever which must be pressed to permitshifting from neutral to forward or reverse. The top mount controls do not have a neutral lock, but there is a neutralratchet position.Side Mount Control* To disengage shift mechanism:1. Place control lever into neutral position (D)2. Press both neutral lock button (C) and shift disengage button (E).3. Move control lever forward to increase throttle(F)(G)Shift Mechanism EngagedShift Mechanism DisengagedThe neutral lock and shift mechanism will automatically engage when the control lever is returned to neutral position.Top Mount Control* To disengage shift mechanism:1. Grasp the control lever hub and pull straight in for approximately 1/4 (6 mm).2. Move control lever forward to increase throttle.The shift mechanism will automatically engage when control lever is returned to neutral.Your boat may be equipped with remote controls other than those described above. When not using STEYR MOTORSmarine engine matched controls, ask your DEALER for operating instructions for the remote control used in your boatsince operation and function may differ from STEYR MOTORS marine engine matched remote controls.ATTENTION:qYour boat should be equipped by manufacturer with a remote control with protection againststarting in gear. Only use a remote control with start-in-neutral-only feature. This feature canprevent injury resulting from unexpected turning of the propeller and sudden movement ofthe boat.24
How to Shift and Control Speed2NOTE:Do not shift into FORWARD or REVERSE unless engine is running. Damage to the shiftmechanism could result from trying to shift without the engine running.Move the control lever to neutral position (D). The shift mechanism will automatically engage. Press neutrallock button (C) on some single side mount control and move the control lever to shift into forward or reverse.The throttle will begin to advance after gear engagement. Continue to move the control lever slowly in the desireddirection to increase speed.(H)(I)(D)(J)(K)Reverse Shift RangeReverse Throttle RangeNeutral positionForward Throttle RangeForward Shift RangeFuel EconomyUsing the fuel economy throttle range (M) can save fuel depending on boat load and hull design. When the boatreaches top speed, reduce engine speed slightly. Make sure the boat maintains to plane when reducing enginespeed. Continue to reduce engine speed slightly while maintaining to plane. Do not allow boat to fall off plane. Thiswill give a comfortable ride and help to save fuel at the same time.2Gear Box – InformationNOTE:You are requested to follow the instructions and recommendations provided by the marinegear box manufacturer.High Altitude OperationYour STEYR MOTORS Marine Engine is turbocharged, and there should not be any noticeable performance lossat high altitudes.25
Instrument panelA E DGJFIA1BA1HCInstrument panel, standardA tachometer F ignition keyA1 function buttons G blind plug – installation option forB engine parameter displaykey switch constant revolutionC warning light – battery charge H audible warning deviceD combined light preheating control &(installed on rear side of panel)warning light engine oil pressure I emergency cut off switch (lanyard)E warning light check engine J circuit breaker (10 amp)If you should need additional instruments or accessories, please contact your STEYR MOTORS Marine dealer.26
Instrument indication during normal operation1. ignition ON (… before starting)System check – see light indicationNOTE: ON (0.7 sec.)At low temperature condition (cold weather) theON (0.7 sec.)combined light for glow plug preheating & engine oilpressure will not extinguish after 0.7 sec. (glow plugONpreheating phase).In this case start engine immediately after the lightextinguishes.ON (0.7 sec.)2. ignition ON (… before starting)Indication active errorON (5 sec.)ON (0.7 sec.)ONON (5 sec.)3. engine running (after start)Normal conditionOFFOFFOFFOFFNOTE:For further information see:“Table – Error indication on Instrument Panel”27
BUKH STEYR MOTORS SOLASInstrument panel (for SOLAS only)AGEDSTARTHJONOFFIA1BA1FCHA tachometer F push button – ignition ON/OFF (red)A1 function buttons G push button START (green)B engine parameter display H audible warning deviceC warning light – battery charge(installed on rear side of panel)D combined light preheating control &I emergency cut off switch (lanyard)warning light engine oil pressureJ circuit breaker (10 amp)E warning light check engineNOTE:Instrument gauges are automatically illuminated if ignition is turned ON.NOTE:In the case of inversion the engine will be automatically shut off, in order to allow normal operationlater.The ignition push button (F) must be switched OFF and ON again, then the engine can be restartedvia the push button START (G).28
BUKH STEYR MOTORS SOLASInstrument indication during normal operation (for SOLAS only)1. ignition ON (… before starting)System check – see light indicationONSTART(0.7 sec.)NOTE: At low temperature condition (cold weather) theON(0.7 sec.)combined light for glow plug preheating & warning lightengine oil pressure will not extinguish after 0.7 sec.ONON(glow plug preheating phase).OFFIn this case start engine immediately after the lightextinguishes.ON (0.7 sec.)2. ignition ON (… before starting)Indication active errorSTARTONOFFON(5 sec.)ON(0.7 sec.)ON3. engine running (after start)Normal conditionSTARTOFFONOFFOFFOFFNOTE:For further information see:“Table – Error indication on Instrument Panel”29
BUKH STEYR MOTORS SOLASEmergency cut off switch (Lanyard)An emergency cut off switch is a feature on the instrument panel. Use of this switch is highly recommended. To properlyuse this feature, attach the lanyard securely to your clothing. Do not attach the lanyard to clothing that will tearaway before the lanyard is pulled from switch to stop the engine. Using this switch is simple and should not interferewith normal operation of the boat. Care must be taken to avoid accidental pulling of lanyard during normal operation.Unexpected loss of forward motion will occur. This could allow occupants to be thrown forward. In case the emergencycut off switch had been activated (lanyard pulled) the engine can be restarted by a person if; the pull knob (ill.pos. 1) of the emergency switch is being pulled and held in this position. While holding the pull knob proceed withthe normal start procedure and start engine. The engine will immediately stop if the pull knob is released under thiscircumstances.1ATTENTION:qThe emergency cut off switch can only be effective when in good working condition.Observe the following:* Lanyard must always be free of entaglements that could hinder its operation.* Once a month, check switch for proper operation. With engine running, pull lanyard.If engine does not stop, see your STEYR MOTORS DEALER for replacement of switch.30
Warning lights and audible alarmYour boat with the STEYR MOTORS Marine Engine engine is equipped with three warning lights and one audiblealarm (mounted behind the instrument panel) to indicate the following operation condition or system deficiencies.(The ECU will also reduce the engine power in case an important operating parameter limit has been exceeded).* Indication Pre-warming Phase (combined indication through oil pressure light. Becomes affective if ambientengine coolant temperature is below 20 °C/68 °F)* Break – In; over load warning* Engine oil pressure too low* High coolant temperature* Sensors or sensor circuit defectAfter ignition is turned “ON” the indication/warning lights are illuminated and the warning horn will sound for less thena second (0.7 sec.) this serves as a functional check for the optical/audible warning system.The indication light and the warning horn remain switched on for 5 sec. after ignition “ON” if a sensor or sensor circuitdefect have been detected and stored in the Engine Control Unit (ECU) (see section Instrument Panel).Please contact your nearest STEYR MOTORS Marine Dealer to get proffesional assistance to verify the deficiencyand to correct any possible failure.If the engine oil pressure is too low, the warning light “engine oil pressure” lights and the audible alarm sounds. Theengine power will be limited. In this case proceed as follows:* Check engine oil level, respectively add engine oil if necessary (refer to chapter Fuel and Lubricants)* Restart engine and watch the oil pressure light. The warning light has to extinguish within 3 or 4 second after thestart. If this does not happen the engine must be stopped immediately. (Ignition “OFF”)In case of an overheating of the exhaust gas cooling system, the warning light “engine control” flashes and the audiblealarm sounds (2 times per second); the engine power is reduced. In this case, proceed as follows:* IMMEDIATELY reduce the engine to idle speed.* Check an clean the raw water filter.* Check the coolant temperature gauge for overheating of engine coolant. If the coolant temperature gaugeindicates overheating of engine coolant, switch for a short time to REVERSE to remove a possible clogging ofthe raw water inlet through large plastic parts etc., and then to FORWARD. Let the engine run at idle speedfor some minutes. If the temperature gauge still indicates an overheating of the engine, the engine is to bestopped. Restart the engine only after having found and eliminated the cause for alarm. See “loss of power” inTrouble Shooting Chart, Technical Data and in section Maintenance. Check coolant level and if necessary,refill coolant until an adequate coolant level is achieved. If the cause for optical/audible alarm cannot be found,consult your STEYR MOTORS Marine dealer.31
Electronic Engine Control Unit (ECU)The STEYR MOTORS Marine engine is equipped with an Electronic Engine Control Unit (ECU) that performs thefollowing:* controls engine functions to ensure maximum efficiency.* self-diagnostic to protect the engine from damage if operating parameter are exceeded.* stores diagnostic data of ECU server circuits for maintenance and service.* stores abuse dataEngine power is reduced if:OperatingParameterEffectnoticedPanelIndicationAdditionalTool-ReadingsAction orpossible reasonHigh engine coolanttemperature limitexceededReduction ofengine speedHorn ON 2x p. sec.Gauge reading>107 °C<strong>Steyr</strong> DiagPower limitationSee table troubleshooting:Cooling systemDefect – enginecoolant sensor orsensor connectionReduction ofengine speedHorn ON 2x p. sec.Gauge reading>120 °C<strong>Steyr</strong> DiagService codeSensor or connectorfailure; see servicecode tableExhaust temperaturelimit exceededReduction ofengine speedHorn and indicationlight “CEL” ON2x p. sec.<strong>Steyr</strong> DiagPower limitationSee table troubleshooting:Raw water coolingsystemDefect – Exhausttemperature sensoror sensor connectionReduction ofengine speedHorn and indicationlight “CEL” ON2x p. sec<strong>Steyr</strong> DiagService codeSensor or connectorfailure; see servicecode tableOil pressure belowlimitReduction ofengine speedHorn continuous andOil indication lightcontinous switchedON<strong>Steyr</strong> DiagPower limitationSee table troubleshooting:Engine oil systemDefect – Oil pressuresensor or sensorconnectionReduction ofengine speedOil pressureindication lightswitched ON1x p. sec.<strong>Steyr</strong> DiagService codeSensor or connectorfailure; see servicecode tableInsufficient boostpressure or defectivesensorReduction ofengine speed<strong>Steyr</strong> DiagPower limitationSee table troubleshooting:Air charge systemEngine speed sensorfaultHigher or unstableidle speed, limitedperformanceNo RPM indicationon tachometer<strong>Steyr</strong> DiagService codeSee table troubleshooting:Speed sensorEngine speedremains at idleNo increase ofengine speed ifthrottle is moved tomax.<strong>Steyr</strong> DiagService codeSee table troubleshooting:Acceleratorpotentiometer failureGovernor positionsystemIrregular enginespeed or stalledengine<strong>Steyr</strong> DiagService codeSee table troubleshooting:Governing system32
Diagnostic systemThe electronic engine control unit monitors the following engine parameters:oil pressure, boost pressure, coolant temperature, exhaust pipe temperature (Hi-riser), sensor control rack, potentiometeraccelerator, speed signalThe ECU carries out self-diagnostic and/or plausibility checks for all input values and sensor connections. In case ofirregularities, there is an optical or audible warning signal. (see page 77)Existing active failures remain stored until the problem has been solved and the code has been cleared from thememory.To select stored service codes, a PC with diagnostic program (VR00134/0) or diagnostic tool (VR00135/1) isnecessary.Malfunction during operation is ranked in three different categories intermittent failure, non essential failure and essentialfailure.33
Twin InstallationsAll STEYR MOTORS Marine Engine inboard models can also be setup for counter-rotation for twin installation. This is done by inversingdirection of cable lines on shift lever in order to achieve a counterrotationof propeller.Counter-rotation is accomplished in the gearbox. The propeller, propellershaft and output gear are the only parts that counter-rotate. Theengine always has standard rotation.4It is customary to operate your propeller as shown on this illustrationfor twin installation.Some boat manufacturers may set up twin installations the oppositeway. When propellers and/or cable lines are removed,care must be taken to attach them at the same position as before,and that the propellers are not exchanged.4Optional Propellers5Propellers are available in all regular sizes for both right- andleft-hand rotation. Stainless steel has greater strength and durabilitythan aluminium. This allows the stainless steel propellerblades to be thinner and still maintain more beam strength thanaluminium propellers. The result is a more efficient propeller thatgives better performance and more fuel economy.Propellers67Right-hand propellers rotate clockwise to propel a boat forward.Right-hand propellers are considered standard-rotation propellers.To identify a right-hand propeller, note the angle (A) of theblade as seen from portside.Left-hand propellers rotate counterclockwise to propel a boatforward. Left-hand propellers are considered counter-rotationpropellers. To identify a left-hand propeller, note the angle (B) ofthe blade as seen from portside.56NOTE:Never interchange a right-hand propeller witha left-hand propeller. This would result in theboat being propelled in reverse when propulsionunits are operated in forward gear, and forwardwhen propulsion units are operated in reversegear. To help you better understand and showthe difference between left-hand and right-handpropellers, see illustrations.After having the propellers serviced, always shift into FORWARD orREVERSE at idle speed and determine wether the boat moves in theright direction. If the boat moves in the OPPOSITE direction, the propellershave not been installed properly.ATTENTION:qFailure to perform above test could result inloss of control.734
Propeller TorqueThe torque of the propeller creates forces that are transmitted to the boat. This can cause the boat to lean to oneside (list).The forces created by the counter-rotating propeller are opposite to the forces created by the standard rotating propeller.When the vertical drives are trimmed equal, these opposite forces balance each other.Propeller careA damaged or unbalanced propeller will cause excessive vibration and a loss of boat speed. Under these conditions,stop the engine and check the propeller for damage. If the propeller seems to be damaged, have it checked andrepaired by your local STEYR MOTORS Marine dealer. Always carry a spare propeller and replace the damagedpropeller as soon as possible.NOTE:Never run with a damaged propeller. Running with a damaged propeller can result in damageto drive components and engine.Water JetWhen using water jet drives, please contact your STEYR MOTORS Marine dealer. As to information on function andapplication, please refer to respective documents and documentation of the drive manufacturer.Operating Procedure for Freezing TemperaturesWhen freezing temperatures are forecast and the boat will be operated and left in the water, the propeller must remainin the tilted down (submerged) position at all times to prevent water in the vertical drive from freezing. Uponcompletion of engine operation, drain the engine as described in Off-Season Storage Preparations.Salt Water OperationFresh water to flush the raw water circuit is recommended after use in salt, polluted, or brackish water to preventdeposits from clogging and corroding the cooling passages. Contact your STEYR MOTORS Marine dealer to obtainan Engine Flushing Kit that allows flushing of the engine when in or out of the water.NOTE:Use in salt or brackish water may require additional anti-corrosion protection.35
Fuel PumpThe STEYR MOTORS Marine Engine is equipped with an electric fuel pump. It is turned “ON” and “OFF” with thekey switch. If the engine is not started within 10 seconds after turning the key switch “ON”, the fuel pump is automaticallyturned off.Fuel System ChecksFill the tank with the recommended fuel. Keeping tanks full reduces water condensation and helps keep fuel cool,which is important to engine performance.Make sure that fuel supply valves (if used) are open, and valve cock seals are absolutely (gas) tight.To insure a prompt start and an even run of the engine, the fuel system is to be rinsed by means of the electric fuelpump (ignition “ON” several times for app. 10 sec.) before starting the engine the first time and/or after every replacementof a fuel filter.Refill at the end of each day’s operation to prevent condensation from contaminating the fuel. Condensation formedin a partially filled tank promotes the growth of microbial organisms that can clog fuel filters and restrict fuel flow.If the engine is equipped with a fuel/water separator, drain off any water that has accumulated. Water in fuel canseriously affect engine performance and may cause engine damage. STEYR MOTORS recommends to install a fuel/water filter with a flow rate of at least 300 l/h at a pressure difference of
Cooling System (Function Description)STEYR MOTORS Marine Engines are equipped with a closed (internal) and an open (external cooling circuit).8Closed Cooling CircuitThe closed cooling circuit includes monoblock as well as exhaustmanifold, heat exchanger and expansion tank. Temperature in theclosed cooling circuit is precisely controlled by means of thermostat.The thermostat determines the amount of coolant circulatingthrough the heat exchanger, thus controlling the operating temperatureof the engine.AA temperature sensor (8/A) controls the cooling temperature. Anexcessive temperature rise of the coolant will cause an opticaland audible alarm (see chart “Error indication on Panel Section”).In this case, engine power will be reduced.The temperature gauge on the instrument panel indicates thecoolant temperature of the engine.9Open Cooling Circuit (Raw Water Circuit)Thermal energy transfered by the engine and absorbed by theengine coolant is drained via the (external) raw water circuit. Rawwater is sucked by the pump via the raw water intake, constantlypumped through supercharger intercooler and heat exchanger,and discharged together with the exhaust gas via the sprinkler.During discharching, the raw water entering the exhaust pipe aditionallycools the exhaust gas.A temperature sensor (9/A) monitors the raw water- and exhaustgas temperature. An excessive rise will cause an optical and audiblealarm (see chart “Error indication on Panel Section”). In thiscase, the engine power will be reduced too.89A0600806009NOTE:Should engine overheat at high speeds, slowly reduce RPM to idling to prevent damages tothe engine. In case of overheating problems, contact your STEYR MOTORS Marine dealer.37
GENERALElectrical EquipmentThe electrical equipment of your STEYR MOTORS Marine engine primarily consists of an alternator with transistorizedvoltage regulator, battery and all necessary connecting cables and leads.AlternatorThe alternator is driven via a poly-V-belt resp. serpentine belt from the 4 cyl. engines and via a V-belt from the 6 cyl.engines and charges the battery at all engine speeds. Output at idle speed is ~ 30 A/12 V and will rise with an enginespeed of 3,000 rpm to maximum output of 90 A/12 V.Optional:The 6 cylinder marine engines may be equipped with an optional 80 A/24 V alternator and DC/DC charger system kit.BatteryFOR ALL 4 CYL. MARINE ENGINESUse a 12-volt battery with a cold testing circuit of 450 A at –18 °C and a capacity of 92 Ah at 27 °C, to ensure thesupply of the electric and electronic components at all operating conditions.FOR ALL 6 CYL. MARINE ENGINESUse a 12-volt battery with a cold testing circuit of 650 A at –18 °C and a capacity of 115 Ah at 27 °C, to ensure thesupply of all electric and electronic components.38
ATTENTION:* Do not use jumper cables and a booster battery to start engine. Remove batteryfrom boat and recharge.q– WRONG CONNECTION WILL DESTROY ELECTRONIC SYSTEM –* Do not charge battery in boat. Fumes vented during battery charging can lead to anexplosion.* Battery electrolyte is a corrosive acid and should be handled with care.If electrolyte is spilled or splashed on any part of the body, immediately flush the exposedarea with liberal amounts of water and obtain medical aid as soon as possible.High resistance in the charging circuit can seriously affect the operation of the electrical system. Unless there isdefinite malfunction in the electrical system, high resistance is sometimes caused by corroded or loose connections.Wherever practical, the electrical connections on your engine have been sealed. However, we recommend that youmake periodic inspections to ensure clean, tight connections throughout the electrical system.NOTE:It is important that the battery connections are correct. The negative battery cable must beattached to the negative terminal (–) on the battery and the engine’s positive cable must beattached to the positive terminal (+) on the battery. If these connections are reversed, theregulating unit may be immediately damaged.Inspect your battery at regular intervals for specific gravity (state of charge), individual cell water level, cleanlinessand clean, tight connections.If the battery has become discharged for no apparent reason, check all electrical system components for malfunction,or a switch left in ON position prior to installing recharged battery.Circuit BreakersSTEYR MOTORS Marine Engine models are protected againstoverload by circuit breakers.0On the base plate of the E-box three thermical triggered50 amp. circuit breakers are installed. (F2) protects theelectric circuit of the glow plugs of cylinder 1 & 2 (4 cyl.)and 1 – 3 (6 cyl.); (F3) protects the electric circuit for theglow plugs of cylinder 3 & 4 (4 cyl.) and 4 – 6 (6 cyl.); (F1)protects electric system and electronic management.The ignition key and instruments are protected by a 10 amp.Fuse located in the main wiring harness under the instrumentpanel (at height of ignition key).10F4F5F6F7F2F1F306011F4F5F6F7F9Fuse supply moduleFuse main circuit supplyFuse fuel-pump circuitFuse glow-plug circuitFuse ignition switch circuit (instrument panel)The installation of any additional electrical accessories requires the protection of individual circuits. Consumption ofcurrent should occur directly at the battery.NOTE:Avoid sparks that will damage the alternator or ECU. Do not attempt to connect or disconnectany part of the electrical system while the engine is running.Fuses for fuel, ECU-supply, glow plug-relay are inside the E-box cover.39
BUKH STEYR MOTORS SOLASInversion SwitchßThe inversion switch is a mercury switch (A) which is actuatedin case of an inclination of the boat in any directionover 70°.Via the main circuit relay the engine is shut down. For safeguarding reasons the inversion switch is to be checkedevery 50 hrs or 6 months. (See service- and maintenancechart page 64).AATTENTION:qAfter such an event, this temporarilystored operating condition is to becancelled from the engine managementsystem by ignition “OFF” = “Reset”.Without “Reset”, a new start of the engineis not possible.1106012Interrupt crankshaft housing ventilation“During an activation of the mercury switch inversion, the bypassvalve (B) for crankshaft housing ventilation is closedtoo.This avoids a possible oil outlet via suction through the airfilter.B1206010Instrument PanelThe engines are supplied with the standard instrument panel.The respective customer may use a self-adapted STEYR MOTORS instrument panel or one which corresponds tohis own ideas and requirements.ATTENTION:qFor not approved alterations which lead to engine failure, no liability can be undertaken.Dry OperationAfter a dry operation of the engine (without raw water cooling), check the impeller of the raw water pump for damages.Replace if necessary. Grease the impeller, use grease from special impeller kit Z011753/2.40
FUEL AND LUBRICANTSFuel Requirements ................................................................................... 42How to Select Fuel ................................................................................... 42Fuel Selection Chart ................................................................................. 42Engine Lubrication .................................................................................... 43Motor Oil ................................................................................................... 43Oil Identification Symbol ........................................................................... 43Disposal of Automotive Waste Products ................................................... 4441
Fuel RequirementsThe STEYR MOTORS Marine Engines are designed for maximum fuel economy. To maintain optimum performance,use diesel fuel according to CEC RF-03-A-84 or equivalent to meet this specification. When temperaturesare below –7 °C (20 °F), use diesel fuels with additives for low temperature operation.How to Select FuelFuel quality is an important factor in obtaining satisfactory engine performance, long engine life, and acceptableexhaust emission levels. Direct injected diesel engines are designed to operate with most diesel fuels marketedtoday. In general, fuels meeting the properties of CEC RF-03-A-84 have provided satisfactory performance. TheASTM D 975 specification, however, does not adequately define the fuel characteristics needed to guarantee thefuel quality. The properties listed in the following fuel selection chart have provided optimum engine performance.Fuel Selection ChartGeneralFuel classificationCEC RF-03-A-84Limit value and unitsCEC RF-03-A-80Limit value and unitsASTM –Test procedureCetane number min. 49 – max. 53 min. 51 – max. 57 D 613 (D 976)Gravity at 15 °C (kg/l) min. 0.835max. 0845min. 0.835max. 0845D 1298Destillation50 %90 %min. 245 °Cmin. 320 °Cmax. 340 °Cmin. 245 °Cmin. 320 °Cmax. 340 °CD 86End pointmax. 370 °Cmax. 370 °CFlash point min. 55 °C min. 55 °C D 93CFPP (Cloud point) max. –5 °C max. –5 °C EN 116 (CEN)Viscosity Kinematic 40 °Cmin. 2.5 mm²/smax. 3.5 mm²/smin. 2.5 mm²/smax. 3.5 mm²/sD 445Sulfur contentmin. 0.2 mass-%max. 0.3 mass-%min. 0.2 mass-%max. 0.5 mass-%D 1266/D 2622D 2785Copper corrosion max. 1 max. 1 D 130Carbon residueConradson number(10 % settling)max. 0.2 mass-% max. 0.2 mass-% D 189Ash max. 0.01 mass-% max. 0.01 mass-% D 482Water content max. 0.05 mass-% max. 0.05 mass-% D 95/D 1744Acid content (strong acid) max. 0.20 mg KOH/g max. 0.20 mg KOH/g D 974Oxidation stability max. 2.5 mg/100 ml max. 2.5 mg/100 ml D 227442
Engine LubricationIf you choose to lubricate your STEYR MOTORS Marine Engineyourself, refer to the Lubrication and Inspection Chart for lubricationpoints and recommended lubricants. Use only STEYRMOTORS recommended lubricants or lubricants of equivalentquality and viscosity. See your STEYR MOTORS dealer for recommendedlubricants.If you choose to have your STEYR MOTORS Marine Engine lubricated,see your local dealer. He will gladly lubricate it at therequired intervals.Motor OilTo obtain the best engine performance and engine life, STEYRMOTORS TURBO Diesel Engine Oil SAE 5 W-50 or 10 W-40(Z010058/0) is recommended. Motor oils are specified by ACEA,API service codes and SAE viscosity numbers. If STEYR MOTORSTURBO Diesel Engine Oil is not available, you are required touse a reputable brand of motor oil labelled for ACEA E7 or B4-02, API CF Service codes and SAE viscosity number 5 W-50 or10 W-40. Refer to oil identification symbol on the container.FOR HEAVY DUTYDIESEL ENGINESInitial factory fill is a full synthetic high quality break-in oil specifiedACEA E7, API CF, SAE 10 W-40. During the break-in period (initial20 hours), frequently check the oil level. Somewhat higher oilconsumption is normal until piston rings are seated. The oil levelshould be maintained between the minimum and maximum markson the dipstick. The space between the marks represents approximately3.7 quarts (3.5 litres). For oil level dipstick location, referto section Maintenance.After first 50 hours of operation change the motor oil and replacethe oil filter. Refer to Service and Maintenance Schedule.Oil Identification Symbol13ACEA E7 or B4-02ACEA E7 or B4-02API CFSAE5 W-5010 W-40Motor oils are specified by ACEA, API service codes, and SAEviscosity numbers. These may be found on the label, top of can,or oil identification symbol.14APISERVICE CODECFNOTE:Some oils meet more then one ACEA or API servicerating. The recommended ACEA or API servicecodes must be among these service ratings.„ Top of Can” Oil Identification Symbol43
Disposal of Automotive Waste ProductsUsed fuel and oil is to be collected in separate containers to permit an eventual subsequent treatment.qThe disposal of any fuel and oil for the engine is subject to the special waste act. The“special waste catalogue” önorm s2100 refers to the necessary disposal in austria.Please follow the local regulations of your country.The operating and maintenance personnel has to take care that fuel and oil as well as other material ranking as specialwaste are deposited at the respective collecting points.Code No.Designation31 423 oil contaminated ground or oil binder54 102 waste oil54 104 fuel54 202 grease54 207 vaseline54 917 compact sealing material54 927 oil contaminated scouring cloth54 928 usel oil- and air filters55 510 colour- or varnish containing waste44
OUTPUTPOWERA100%90%80%70%60%CD50%40%B30%full loadspeedrangeRPMTECHNICAL DATAModel and Serial Numbers ....................................................................... 47Technical Data and OverviewMO54NA33 ............................................................................................... 48Technical Data and OverviewMO84K32, MO94K33, MO114K33 ........................................................... 50Technical Data and OverviewMO144M38, MO164M40, MO174V40 ...................................................... 52Technical Data and OverviewMO196K35, MO236K42 ........................................................................... 54Technical Data and OverviewMO256K43, MO256H45 ........................................................................... 56Technical Data and overviewMO286H43, MO126K25, MO156K25 ....................................................... 58Technical data and overviewMO306H43WJ .......................................................................................... 6045
OUTPUTPOWERA100%90%80%70%60%CD50%40%B30%full loadspeedrangeRPM46
GENERALOUTPUTPOWERA100%90%80%70%60%CD50%40%B30%full loadspeedrangeRPMModel and Serial NumbersThe model and serial number (see ill. 15/16) islocated on the engine as illustrated.These numbers are required for warrantyclaims and ordering parts.FOR ALLFOR ALL4 CYL. MARINE ENGINES 6 CYL. MARINE ENGINESqThe model and serial number of the marine gearbox islocated on the marine gearbox housing as illustrated.To obtain instructions regarding marine gearbox operation,refer to marine gearbox owners manual.170601447
OUTPUTPOWERA100%90%80%70%60%50%40%CBDMO54NA3330%full loadspeedrangeRPMTechnical Data and Overview MO54NA33MAKEtypedisplacementpiston displacementrated power acc. EN ISO 8665:2006(impeller*) KW/HPJet – Drive/InboardZ – Drivenumber of <strong>cylinders</strong>STEYR MOTORS M 14 TCM, TCAM2,133 cm³85.0 x 94.0 mm39/5238/52ignition order 1 – 3 – 4 – 2sense of rotation, seen from frontMO54NA334-cylinder in-line engine (position of cyl. 1 at vibration damper side)rightcompression ratio 17.0:1full-load speed range (rpm)idle speedinjectionfuelfuel filterfuel filter locationair filteroil pressure above 2,000 rpmfilling capacity motor oil3,300 rpm (+0 rpm/–200 rpm)700 rpm (adjustable)Plunger activated, two stage, high pressure with electronicallycontrolled injection rateacc. to CEC RF-03-A-84 (DIN 51601) Cetan >45; diesel fuelNo. 2-D, temperature above –7 °C; No.1-D, temperature below–7 °Crefer to spare part catalogueintake-sidedrefer to spare part catalogue400 – 700 kPa (58 – 101 PSI) microprocessor controlledapprox. 8.0 l engine housing (incl. approx. 1 l oil filter contents)specification motor oil SAE 5W-50/ACEA B4-02/API CF or 10W-40/ACEA E4, E5,E7/API CF P/N0. Z010058/0oil and oil filter change intervals**)oil filteroil filter locationelectric charging systemcooling systemcoolant capacityevery 150 operating hours and/or once per seasonrefer to spare part cataloguepressure-sided14 V/90 A alternator with transistorized voltage regulatordual cooling circuit; thermostat-controlled, pressurized coolingcircuit; circulating pump with heat exchanger on engine; governorpump, external raw water circuit to heat exchange11.5 literscoolant STEYR MOTORS engine coolant –36 °CP/No. Z011785/0*) Efficiency of gearbox = 97.0 %, efficiency of Z-Drive = 95.5 %**) Extended periods to be evaluated upon application and type of usage STEYR MOTORS GmbH.Reserves the right to make changes without notice or obligations.48
MO54NA33OUTPUTPOWERA100%90%80%70%60%CD50%40%B30%full loadspeedrangeRPMOverview for all STEYR MOTORS 4 Cyl. Marine EnginesItem Designation1 Zinc Anode (2 Units)2 Model and Serial Number3 Intake Manifold5 Fuel Pump6 Oil Seperator7 Raw Water Drain Plug8 Valve Crankshaft Housing Ventilation (only SOLAS)9 Oil Drain Plug10 Fuel Filter111 Oil Filter12 Hydraulic Pump13 Raw Water Inlet Fitting14 Raw Water Pump15 Coolant Drain Plug (2 Units)16 Engine Oilcooler17 Oil Suction Pipe18 Oil Dipstick19 Hydraulic Oil Tank20 Cooler Cap21 Potentiometer Accelerator22 Motor Oil Filler Cap24 Rack Position Sensor*)25 Drive Belt26 Cover T-Belt, Lower27 Engine Mount28 Drive Belt Tensioner29 Vibration Damper30 Cover T-Belt, Upper31 Engine Lifting Eye32 Speed Sensor33 Valve Cover34 Heat Exchanger35 Coolant Expansion Tank36 Diagnostic Outlet37 Inversion Switch (only for SOLAS)38 Connector Instrument Panel39 Coolant Temperature Sensor40 Thermostat Housing41 Alternator42 Circuit Breakers43 Engine Management System/Fuses44 Exhaust Temperature Sensor45 Air Filter47 Exhaust Elbow48 Starter Relais (Backside E-Box Ground Plate)49 Starter Motor50 Flywheel51 Flywheel Housing52 Oil Pressure Sensor1918171413121120313029281444352515016 10 9222 3 5 632 33 34 35 36 37 38 3945784748492124252627115404142*) This sensor is magnetism sensitive. All external magnets must be kept away.49
OUTPUTPOWERA100%90%80%70%60%50%40%30%CBfull loadspeedrangeDRPMMO84K32MO94K33MO114K33Technical Data and Overview MO84K32, MO94K33, MO114K33MAKESTEYR MOTORS M 14 TCM, TCAMtype MO84K32 MO94K33 MO114K33displacementpiston displacementrated power acc. EN ISO 8665:2006(impeller*) KW/HPJet – Drive/InboardZ – Drivenumber of <strong>cylinders</strong>2,133 cm³85.0 x 94.0 mm53/7152/70ignition order 1 – 3 – 4 – 2sense of rotation, seen from front64/8663/8478/10577/1044-cylinder in-line engine (position of cyl. 1 at vibration damper side)rightcompression ratio 17.5:1full-load speed range (rpm)idle speedinjectionfuelfuel filterfuel filter locationair filteroil pressure above 2,000 rpmfilling capacity motor oil3,200 rpm(+0 rpm/–200 rpm)700 rpm (adjustable)3,300 rpm(+0 rpm/–200 rpm)3,800 rpm(+0 rpm/–200 rpm)Plunger activated, two stage, high pressure with electronicallycontrolled injection rateacc. to CEC RF-03-A-84 (DIN EN 590) Cetan >49; diesel fuelNo. 2-D, temperature above –7 °C; No.1-D, temperature below–7 °Crefer to spare part catalogueintake-sidedrefer to spare part catalogue400 – 700 kPa (58 – 101 PSI) microprocessor controlledapprox. 8.0 l engine housing (incl. approx. 1 l oil filter contents)specification motor oil SAE 5W-50/ACEA B4-02/API CF or 10W-40/ACEA E4, E5,E7/API CF P/N0. Z010058/0oil and oil filter change intervals**)oil filteroil filter locationelectric charging systemcooling systemcoolant capacityevery 150 operating hours and/or once per seasonrefer to spare part cataloguepressure-sided14 V/90 A alternator with transistorized voltage regulatordual cooling circuit; thermostat-controlled, pressurized coolingcircuit; circulating pump with heat exchanger on engine; governorpump, external raw water circuit to heat exchange11.5 literscoolant STEYR MOTORS engine coolant –36 °CP/No. Z011785/0*) Efficiency of gearbox = 97.0 %, efficiency of Z-Drive = 95.5 %**) Extended periods to be evaluated upon application and type of usage STEYR MOTORS GmbH.Reserves the right to make changes without notice or obligations.50
MO84K32MO94K33MO114K33OUTPUTPOWERA100%90%80%70%60%50%40%30%CBfull loadspeedrangeDRPMOverview for all STEYR MOTORS 4 Cyl. Marine EnginesItem Designation1 Zinc Anode (4 Units)2 Model and Serial Number3 Intercooler4 Fuel/Oil Cooler with Raw Water Drain Plug5 Fuel Pump6 Oil Seperator7 Raw Water Drain Plug8 Valve Crankshaft Housing Ventilation (only SOLAS)9 Oil Drain Plug10 Fuel Filter11 Oil Filter12 Hydraulic Pump13 Raw Water Inlet Fitting14 Raw Water Pump15 Coolant Drain Plug (2 Units)16 Engine Oilcooler17 Oil Suction Pipe18 Oil Dipstick19 Hydraulic Oil Tank20 Cooler Cap21 Potentiometer Accelerator22 Motor Oil Filler Cap23 Boost Pressure Sensor24 Rack Position Sensor*)25 Drive Belt26 Cover T-Belt, Lower27 Engine Mount28 Drive Belt Tensioner29 Vibration Damper30 Cover T-Belt, Upper31 Engine Lifting Eye32 Speed Sensor33 Valve Cover34 Heat Exchanger35 Coolant Expansion Tank36 Diagnostic Outlet37 Inversion Switch (only for SOLAS)38 Connector Instrument Panel39 Coolant Temperature Sensor40 Thermostat Housing41 Alternator42 Circuit Breakers43 Engine Management System/Fuses44 Exhaust Temperature Sensor45 Air Filter46 Turbo Charger47 Exhaust Elbow48 Starter Relais (Backside E-Box Ground Plate)49 Starter Motor50 Flywheel51 Flywheel Housing52 Oil Pressure Sensor*) This sensor is magnetism sensitive. All external magnets must be kept away.19181716151413121120313029284443455251501 2 3 4 5 610 91 32 33 34 35 36 37383917806001212223242526270600211540414206003464748490600451
OUTPUTPOWERA100%90%80%70%60%50%40%30%CBfull loadspeedrangeDRPMMO144M38MO164M40MO174V40Technical Data and Overview MO144M38, MO164M40, MO174V40MAKESTEYR MOTORS M 14 TCM, TCAMtype MO144M38 MO164M40 MO174V40displacementpiston displacementrated power acc. EN ISO 8665:2006(impeller*) KW/HPJet – Drive/InboardZ – Drivenumber of <strong>cylinders</strong>2,133 cm³85.0 x 94.0 mm103/138101/136ignition order 1 – 3 – 4 – 2sense of rotation, seen from front116/156114/154121/165119/1624-cylinder in-line engine (position of cyl. 1 at vibration damper side)rightcompression ratio 17.5:1 17.0:1full-load speed range (rpm)idle speedinjectionfuelfuel filterfuel filter locationair filteroil pressure above 2,000 rpmfilling capacity motor oil3,800 rpm(+0 rpm/–300 rpm)700 rpm (adjustable)4,000 rpm(+0 rpm/–300 rpm)4,000 rpm(+0 rpm/–300 rpm)Plunger activated, two stage, high pressure with electronicallycontrolled injection rateacc. to CEC RF-03-A-84 (DIN EN 590) Cetan >49; diesel fuelNo. 2-D, temperature above –7 °C; No.1-D, temperature below –7 °Crefer to spare part catalogueintake-sidedrefer to spare part catalogue400 – 700 kPa (58 – 101 PSI) microprocessor controlledapprox. 8.0 l engine housing (incl. approx. 1 l oil filter contents)specification motor oil SAE 5W-50/ACEA B4-02/API CF or 10W-40/ACEA E4, E5,E7/API CF P/N0. Z010058/0oil and oil filter change intervals**)oil filteroil filter locationelectric charging systemcooling systemcoolant capacityevery 150 operating hours and/or once per seasonrefer to spare part cataloguepressure-sided14 V/90 A alternator with transistorized voltage regulatordual cooling circuit; thermostat-controlled, pressurized cooling circuit;circulating pump with heat exchanger on engine; governor pump,external raw water circuit to heat exchange11.5 literscoolant STEYR MOTORS engine coolant –36 °CP/No. Z011785/0*) Efficiency of gearbox = 97.0 %, efficiency of Z-Drive = 95.5 %**) Extended periods to be evaluated upon application and type of usage STEYR MOTORS GmbH.Reserves the right to make changes without notice or obligations.52
MO144M38MO164M40MO174V40OUTPUTPOWERA100%90%80%70%60%50%40%30%CBfull loadspeedrangeDRPMOverview for all STEYR MOTORS 4 Cyl. Marine EnginesItem Designation1 Zinc Anode (4 Units)2 Model and Serial Number3 Intercooler4 Fuel/Oil Cooler with Raw Water Drain Plug5 Fuel Pump6 Oil Seperator7 Raw Water Drain Plug8 Valve Crankshaft Housing Ventilation (only SOLAS)9 Oil Drain Plug10 Fuel Filter11 Oil Filter12 Hydraulic Pump13 Raw Water Inlet Fitting14 Raw Water Pump15 Coolant Drain Plug (2 Units)16 Engine Oilcooler17 Oil Suction Pipe18 Oil Dipstick19 Hydraulic Oil Tank20 Cooler Cap21 Potentiometer Accelerator22 Motor Oil Filler Cap23 Boost Pressure Sensor24 Rack Position Sensor*)25 Drive Belt26 Cover T-Belt, Lower27 Engine Mount28 Drive Belt Tensioner29 Vibration Damper30 Cover T-Belt, Upper31 Engine Lifting Eye32 Speed Sensor33 Valve Cover34 Heat Exchanger35 Coolant Expansion Tank36 Diagnostic Outlet37 Inversion Switch (only for SOLAS)38 Connector Instrument Panel39 Coolant Temperature Sensor40 Thermostat Housing41 Alternator42 Circuit Breakers43 Engine Management System/Fuses44 Exhaust Temperature Sensor45 Air Filter46 Turbo Charger47 Exhaust Elbow48 Starter Relais (Backside E-Box Ground Plate)49 Starter Motor50 Flywheel51 Flywheel Housing52 Oil Pressure Sensor*) This sensor is magnetism sensitive. All external magnets must be kept away.19181716151413121120313029284443455251501 2 3 4 5 610 91 32 33 34 35 36 37383917806001212223242526270603611540414206003464748490600453
OUTPUTPOWERA100%90%80%70%60%50%40%30%CBDMO196K35MO236K42full loadspeedrangeRPMTechnical Data and Overview MO196K35, MO236K42MAKESTEYR MOTORS M 16 TCM, TCAMtype MO196K35 MO236K42displacementpiston displacementrated power acc. EN ISO 8665:2006(impeller*) KW/HPJet – Drive/InboardZ – Drivenumber of <strong>cylinders</strong>3,200 cm³85.0 x 94.0 mm136/182134/179ignition order 1 – 5 – 3 – 6 – 2 – 4sense of rotation, seen from front165/221162/2186-cylinder in-line engine (position of cyl. 1 at vibration damper side)rightcompression ratio 17.5:1full-load speed range (rpm) 3,500 rpm (+0 rpm/–200 rpm) 4,200 rpm (+0 rpm/–300 rpm)idle speedinjectionfuelfuel filterfuel filter locationair filteroil pressure above 2,000 rpmfilling capacity motor oil630 rpm (adjustable)Plunger activated, two stage, high pressure with electronicallycontrolled injection rateacc. to CEC RF-03-A-84 (DIN EN 590) Cetan >49; diesel fuelNo. 2-D, temperature above –7 °C; No.1-D, temperature below–7 °Crefer to spare part cataloguesuction-sidedrefer to spare part catalogue400 – 700 kPa (58 – 101 PSI) microprocessor controlledapprox. 12.0 l engine housing (incl. approx. 1 l oil filter contents)specification motor oil SAE 5W-50/ACEA B4-02/API CF or 10W-40/ACEA E4, E5,E7/API CF P/N0. Z010058/0oil and oil filter change intervals**)oil filteroil filter locationelectric charging systemcooling systemcoolant capacityevery 150 operating hours and/or once per seasonrefer to spare part cataloguesuction-sided14 V/90 A alternator with transistorized voltage regulatordual cooling circuit; thermostat-controlled, pressurized coolingcircuit; circulating pump with heat exchanger on engine; governorpump, external raw water circuit to heat exchange13.2 literscoolant STEYR MOTORS engine coolant –36 °CP/No. Z011785/0*) Efficiency of gearbox = 97.0 %, efficiency of Z-Drive = 95.5 %**) Extended periods to be evaluated upon application and type of usage STEYR MOTORS GmbH.Reserves the right to make changes without notice or obligations.54
MO196K35MO236K42OUTPUTPOWERA100%90%80%70%60%50%40%30%CBDfull loadspeedrangeRPMOverview STEYR MOTORS MO196K35, MO236K42Item Designation1 Boost Pressure Sensor2 Zinc Anode (5 Units)3 Intercooler4 Fuel-/Hydr. Oil Cooler5 Engine Oilcooler6 Model and Serial Number7 Oil Seperator8 Raw Water Drain Plug9 Valve Crankshaft Housing Ventilation (only SOLAS)10 Fuel Filter11 Fuel Pump12 Oil Filter13 Raw Water Inlet Fitting14 Raw Water Pump15 Coolant Drain Plug (2 Units)16 Oil Suction Pipe17 Oil Dipstick18 Rack Position Sensor*)19 Engine Lifting Eye20 Motor Oil Filler Cap21 Potentiometer Accelerator22 Drive Belt, Raw Water Pump23 Engine Mount24 Drive Belt Tensioner25 Cover T-Belt, Lower26 Vibration Damper27 Drive Belt, Alternator & Hydr: Pump28 Speed Sensor29 Cover T-Belt, Upper30 Valve Cover31 Heat Exchanger32 Coolant Expansion Tank33 Cooler Cap34 Diagnostic Outlet35 Inversion Switch (only for SOLAS)36 Connector Instrument Panel37 Coolant Temperature Sensor38 Thermostat Housing39 Hydraulic Oil Tank40 Circuit Breakers41 Alternator42 Hydraulic Pump43 Oil Drain Plug44 Starter Motor45 Engine Management System/Fuses46 Exhaust Temperature Sensor47 Air Filter48 Turbo Charger49 Exhaust Elbow50 Starter Relais (Backside E-Box Ground Plate)51 Flywheel52 Flywheel Housing53 Oil Pressure Sensor*) This sensor is magnetism sensitive. All external magnets must be kept away.5518171615464544292827141 2 3 4 5 6 7 2131219 20 21262522232489101106032060332 30 31 32 33 34 35 36 374347 48 4953522505121538394041420603406035
OUTPUTPOWERA100%90%80%70%60%50%40%30%CBDMO256K43MO256H45full loadspeedrangeRPMTechnical Data and Overview MO256K43, MO256H45MAKESTEYR MOTORS M 16 TCAMtype MO256K43 MO256H45displacementpiston displacementrated power acc. EN ISO 8665:2006(impeller*) KW/HPJet – Drive/InboardZ – Drivenumber of <strong>cylinders</strong>3,200 cm³85.0 x 94.0 mm178/239176/236ignition order 1 – 5 – 3 – 6 – 2 – 4sense of rotation, seen from front178/239176/2366-cylinder in-line engine (position of cyl. 1 at vibration damper side)rightcompression ratio 17.5:1full-load speed range (rpm) 4,300 rpm (+0 rpm/–300 rpm) 4,500 rpm (+0 rpm/–300 rpm)idle speedinjectionfuelfuel filterfuel filter locationair filteroil pressure above 2,000 rpmfilling capacity motor oil630 rpm (adjustable)Plunger activated, two stage, high pressure with electronicallycontrolled injection rateacc. to CEC RF-03-A-84 (DIN EN 590) Cetan >49; diesel fuelNo. 2-D, temperature above –7 °C; No.1-D, temperature below–7 °Crefer to spare part cataloguesuction-sidedrefer to spare part catalogue400 – 700 kPa (58 – 101 PSI) microprocessor controlledapprox. 12.0 l engine housing (incl. approx. 1 l oil filter contents)specification motor oil SAE 5W-50/ACEA B4-02/API CF or 10W-40/ACEA E4, E5,E7/API CF P/N0. Z010058/0oil and oil filter change intervals**)oil filteroil filter locationelectric charging systemcooling systemcoolant capacityevery 150 operating hours and/or once per seasonrefer to spare part cataloguesuction-sided14 V/90 A alternator with transistorized voltage regulatordual cooling circuit; thermostat-controlled, pressurized coolingcircuit; circulating pump with heat exchanger on engine; governorpump, external raw water circuit to heat exchange13.2 literscoolant STEYR MOTORS engine coolant –36 °CP/No. Z011785/0*) Efficiency of gearbox = 97.0 %, efficiency of Z-Drive = 95.5 %**) Extended periods to be evaluated upon application and type of usage STEYR MOTORS GmbH.Reserves the right to make changes without notice or obligations.56
MO256K43MO256H45OUTPUTPOWERA100%90%80%70%60%50%40%30%CBDfull loadspeedrangeRPMOverview STEYR MOTORS MO256K43, MO256H45Item Designation1 Boost Pressure Sensor2 Zinc Anode (5 Units)3 Intercooler4 Engine Oil/Fuel/Hydr. Oil Cooler5 Model and Serial Number6 Oil Seperator7 Raw Water Drain Plug8 Valve Crankshaft Housing Ventilation (only SOLAS)9 Fuel Filter10 Fuel Pump11 Oil Filter12 Raw Water Inlet Fitting13 Raw Water Pump14 Coolant Drain Plug (2 Units)15 Oil Suction Pipe16 Oil Dipstick17 Rack Position Sensor*)18 Engine Lifting Eye19 Motor Oil Filler Cap20 Potentiometer Accelerator21 Drive Belt, Raw Water Pump22 Engine Mount23 Drive Belt Tensioner24 Cover T-Belt, Lower25 Vibration Damper26 Drive Belt, Alternator & Hydr: Pump27 Speed Sensor28 Cover T-Belt, Upper29 Valve Cover30 Heat Exchanger31 Coolant Expansion Tank32 Cooler Cap33 Diagnostic Outlet34 Inversion Switch (only for SOLAS)35 Connector Instrument Panel36 Coolant Temperature Sensor37 Thermostat Housing38 Hydraulic Oil Tank39 Circuit Breakers40 Alternator41 Hydraulic Pump42 Oil Drain Plug43 Starter Motor44 Engine Management System/Fuses45 Exhaust Temperature Sensor46 Air Filter47 Turbo Charger48 Exhaust Elbow49 Starter Relais (Backside E-Box Ground Plate)50 Flywheel51 Flywheel Housing52 Oil Pressure Sensor17161514454443282726131 2 3 4 5 6 2121118 19 2025242122237891006028060292 29 30 31 32 33 34 35 364246 47 48525124950214373839404106030*) This sensor is magnetism sensitive. All external magnets must be kept away.0603157
OUTPUTPOWERA100%90%80%70%60%50%40%30%CBfull loadspeedrangeDRPMMO286H43MO156K25MO126K25Technical Data and overview MO286H43, MO156K25, MO126K25MAKESTEYR MOTORS M 16 TCAMtype MO286H43 MO156K25 MO126K25displacementpiston displacementrated power acc. EN ISO 8665:2006(impeller*) KW/HPJet – Drive/InboardZ – Drivenumber of <strong>cylinders</strong>3,200 cm³85.0 x 94.0 mm199/270196/266ignition order 1 – 5 – 3 – 6 – 2 – 4sense of rotation, seen from front107/145105/14385/11684/1146-cylinder in-line engine (position of cyl. 1 at vibration damper side)rightcompression ratio 17.0:1full-load speed range (rpm)idle speedinjectionfuelfuel filterfuel filter locationair filteroil pressure above 2,000 rpmfilling capacity motor oil4,300 rpm(+0 rpm/–300 rpm)630 rpm (adjustable)2,500 rpm(+0 rpm/–200 rpm)2,500 rpm(+0 rpm/–200 rpm)Plunger activated, two stage, high pressure with electronicallycontrolled injection rateacc. to CEC RF-03-A-84 (DIN 51601) Cetan >45; diesel fuelNo. 2-D, temperature above –7 °C; No.1-D, temperature below–7 °Crefer to spare part catalogueintake-sidedrefer to spare part catalogue400 – 700 kPa (58 – 101 PSI) microprocessor controlledapprox. 12.0 l engine housing (incl. approx. 1 l oil filter contents)specification motor oil SAE 5W-50/ACEA B4-02/API CF or 10W-40/ACEA E4, E5,E7/API CF P/N0. Z010058/0oil and oil filter change intervals**)oil filteroil filter locationelectric charging systemcooling systemcoolant capacityevery 150 operating hours and/or once per seasonrefer to spare part cataloguepressure-sided14 V/90 A alternator with transistorized voltage regulatordual cooling circuit; thermostat-controlled, pressurized coolingcircuit; circulating pump with heat exchanger on engine; governorpump, external raw water circuit to heat exchange13.2 literscoolant STEYR MOTORS engine coolant –36 °CP/No. Z011785/0*) Efficiency of gearbox = 97.0 %, efficiency of Z-Drive = 95.5 %**) Extended periods to be evaluated upon application and type of usage STEYR MOTORS GmbH.Reserves the right to make changes without notice or obligations.58
MO286H43MO156K25MO126K25OUTPUTPOWERA100%90%80%70%60%50%40%30%CBfull loadspeedrangeDRPMOverview STEYR MOTORS MO286H43, MO156K25, MO126K25Item Designation1 Boost Pressure Sensor2 Zinc Anode3 Intercooler4 Fuel/Hydr. Oil Cooler5 Model and Serial Number6 Oil Seperator7 Raw Water Drain Plug8 Valve Crankshaft Housing Ventilation (only SOLAS)9 Fuel Filter and water seperator10 Fuel Pump11 Oil Filter12 Raw Water Inlet Fitting13 Raw Water Pump14 Coolant Drain Plug (2 Units)15 Oil Suction Pipe16 Oil Dipstick17 Rack Position Sensor*)18 Engine Lifting Eye19 Motor Oil Filler Cap20 Potentiometer Accelerator21 Drive Belt, Raw Water Pump, Alternator, Hydr. Pump22 Engine Mount23 Drive Belt Tensioner24 Cover T-Belt, Lower25 Vibration Damper26 Speed Sensor27 Cover T-Belt, Upper28 Valve Cover29 Heat Exchanger30 Coolant Expansion Tank31 Cooler Cap32 Diagnostic Outlet33 Inversion Switch (only for SOLAS)34 Connector Instrument Panel35 Coolant Temperature Sensor36 Thermostat Housing37 Hydraulic Oil Tank38 Circuit Breakers39 Alternator40 Hydraulic Pump41 Oil Drain Plug42 Starter Motor43 Engine Management System/Fuses44 Exhaust Temperature Sensor45 Air Filter46 Turbo Charger47 Exhaust Elbow48 Starter Relais (Backside E-Box Ground Plate)49 Flywheel50 Flywheel Housing51 Oil Pressure Sensor52 Water drain point*) This sensor is magnetism sensitive. All external magnets must be kept away.17161512132322454342465251501 3 4 5 241 1118 29 19 202 27 30 44 33 34 32 35 3931366781095308014282125242208015237143840080164847490801759
OUTPUTPOWERA100%90%80%70%60%50%40%CBDMO306H43WJ30%full loadspeedrangeRPMTechnical data and overview MO306H43WJMAKEtypedisplacementpiston displacementSTEYR MOTORS M 16 TCAM3,200 cm³85.0 x 94.0 mmrated power acc. EN ISO 8665:2006(impeller*) KW/HPJet – Drive/Inboard 209/284number of <strong>cylinders</strong>ignition order 1 – 5 – 3 – 6 – 2 – 4sense of rotation, seen from frontMO306H43WJ6-cylinder in-line engine (position of cyl. 1 at vibration damper side)rightcompression ratio 17-0:1full-load speed range (rpm)idle speedinjectionfuelfuel filterfuel filter locationair filteroil pressure above 2,000 rpmfilling capacity motor oil4,300 rpm (+0 rpm/–300 rpm)630 rpm (adjustable)Plunger activated, two stage, high pressure with electronicallycontrolled injection rateacc. to CEC RF-03-A-84 (DIN 51601) Cetan >45; diesel fuelNo. 2-D, temperature above –7 °C; No.1-D, temperature below–7 °Crefer to spare part catalogueintake-sidedrefer to spare part catalogue400 – 700 kPa (58 – 101 PSI) microprocessor controlledapprox. 12.0 l engine housing (incl. approx. 1 l oil filter contents)specification motor oil SAE 5W-50/ACEA B4-02/API CF or 10W-40/ACEA E4, E5,E7/API CF P/N0. Z010058/0oil and oil filter change intervals**)oil filteroil filter locationelectric charging systemcooling systemcoolant capacityevery 150 operating hours and/or once per seasonrefer to spare part cataloguepressure-sided14 V/90 A alternator with transistorized voltage regulatordual cooling circuit; thermostat-controlled, pressurized coolingcircuit; circulating pump with heat exchanger on engine; governorpump, external raw water circuit to heat exchange13.2 literscoolant STEYR MOTORS engine coolant –36 °CP/No. Z011785/0*) Efficiency of gearbox = 97.0 %, efficiency of Z-Drive = 95.5 %**) Extended periods to be evaluated upon application and type of usage STEYR MOTORS GmbH.Reserves the right to make changes without notice or obligations.60
MO306H43WJOUTPUTPOWERA100%90%80%70%60%50%40%CBD30%full loadspeedrangeRPMOverview STEYR MOTORS MO306H43WJItem Designation1 Boost Pressure Sensor2 Zinc Anode3 Intercooler4 Fuel/Hydr. Oil Cooler5 Model and Serial Number6 Oil Seperator7 Raw Water Drain Plug8 Valve Crankshaft Housing Ventilation (only SOLAS)9 Fuel Filter and water seperator10 Fuel Pump11 Oil Filter12 Raw Water Inlet Fitting13 Raw Water Pump14 Coolant Drain Plug (2 Units)15 Oil Suction Pipe16 Oil Dipstick17 Rack Position Sensor*)18 Engine Lifting Eye19 Motor Oil Filler Cap20 Potentiometer Accelerator21 Drive Belt, Raw Water Pump, Alternator, Hydr. Pump22 Engine Mount23 Drive Belt Tensioner24 Cover T-Belt, Lower25 Vibration Damper27 Speed Sensor28 Cover T-Belt, Upper29 Valve Cover30 Heat Exchanger31 Coolant Expansion Tank32 Cooler Cap33 Diagnostic Outlet34 Inversion Switch (only for SOLAS)35 Connector Instrument Panel36 Coolant Temperature Sensor37 Thermostat Housing38 Hydraulic Oil Tank39 Circuit Breakers40 Alternator41 Hydraulic Pump42 Oil Drain Plug43 Starter Motor44 Engine Management System/Fuses45 Exhaust Temperature Sensor46 Air Filter47 Turbo Charger48 Exhaust Elbow49 Starter Relais (Backside E-Box Ground Plate)50 Flywheel51 Flywheel Housing52 Oil Pressure Sensor53 Water drain point*) This sensor is magnetism sensitive. All external magnets must be kept away.17161512132322454342465251501 3 4 5 241 1118 29 19 202 27 30 44 33 34 32 35 3931366781095308018282125242208019237143840080204847490802161
OUTPUTPOWERA100%90%80%70%60%CD50%40%B30%full loadspeedrangeRPM62
MAINTENANCE AND TROUBLE SHOOTINGOwner Service Log ................................................................................... 65FOREWORD ............................................................................................ 65IMPORTANT NOTE .................................................................................. 65Service- and Maintenance Schedule ........................................................ 66MAINTENANCE LOG ............................................................................... 68Table – Error Indication on Instrument Panel ........................................... 70Table – Error Indication on Instrument Panel (for SOLAS only) ............... 72Reading Service Codes ........................................................................... 74Indication and Cancellation of memorised sensor and circuit faults ......... 75Selection and clearing of stored service codes: ....................................... 75Principle service code list ......................................................................... 76Trouble Check Chart ................................................................................ 78Wiring harness ......................................................................................... 80WIRING DIAGRAM/MARINE BASE – 4/6 CYLINDER – 12 V ................. 81WIRING DIAGRAM/MARINE – 4/6 CYLINDER – 2-POLE –12 V (OPTION) ......................................................................................... 82WIRING DIAGRAM/MARINE – 4/6 CYLINDER – 24 V (OPTION) .......... 83WIRING DIAGRAM/MARINE – 4/6 CYLINDER – 2-POLE – 24 V –COMPLETE SYSTEM .............................................................................. 84Description – Wiring harness instrument panels4/6 cyl. marine engines (current version) ................................................. 85WIRING DIAGRAM/INSTRUMENT CAN PANEL – 4/6 CYLINDER –12 V .......................................................................................................... 86WIRING DIAGRAM/INSTRUMENT CAN PANEL – 4/6 CYLINDER –24 V (OPTION) ......................................................................................... 87WIRING DIAGRAM/INSTRUMENT CAN PANEL – 4/6 CYLINDER –Solas – 12 V (OPTION) ............................................................................ 8863
Owner Service LogFOREWORDOn receipt of your new STEYR MOTORS Marine Engine, the authorised dealer has signed the pre-delivery inspectionlog thus confirming to have carried out a pre-delivery service according to the manufacturers specifications.Future service requirements are indicated in this OWNER SERVICE LOG. When these services are carried out, theSTEYR MOTORS Marine dealer will stamp the respective stubs. This servicing will assist in maintaining the valueand satisfactory operation of your STEYR MOTORS Marine Engine.It lies in the owner’s interest that for maintaining warranty and best performance of his STEYR MOTORS MarineEngine he always insists on the sole utilization of STEYR MOTORS – ORIGINAL replacement parts, operationalfluids and lubricants as well as STEYR MOTORS proved service procedures!It is important that you study this booklet carefully as it will assist you in achieving satisfaction from your STEYRMOTORS Marine Engine. Please retain this manual in the boat as it MUST be presented to the STEYR MOTORSMarine dealer whenever you require WARRANTY and/or SERVICE.IMPORTANT NOTEThis manual contains all service activities required for your engine. Checks and maintenance for the otherparts of a complete drive system still need to be completed. Any such procedures are to be found in separate,attached booklet(s) of the individual manufacturer’s literature provided with the gearbox or similar drivecomponents.Whenever this manual refers to components like Manual Operation, Hydraulic Pump, etc., such instructionsonly apply where applicable since they are not used on every engine model.65
Service- and Maintenance ScheduleENGINELUBRICATIONENGINECOOLINGSYSTEMRAW WATERSYSTEMRAW WATERCOOLER(OIL-FUEL-AUX.LUBRICANT)for 246/256 and266, 286, 306,126, 156 onlydailyafter first50 hoursor 6monthsevery150 h.or 12monthsevery300 h.or 24months*) notescheck– for leakage– oil levelchange– oil filter– motor oil– for leakage– fluid levelcheck– hoses, hose clamps– antifreezetemperatureconditionchange – antifreeze*) every 24 month– hoses, hose clamps– zinc anodescheck – raw water pumpV-belt– impeller– raw water pumpif requiredV-belt*)change– impeller*) if required– zinc anodes*) if corroded >50 %preserve – raw water circuit*) after seasoncheck– raw waterclean out desposits inpassages*)pipelineschange– zinc anodes*)required if morethan 50 % materialcorrodedcheck – contaminationAIR FILTER change – air filter elementpreserveafter seasoncheck– for leakage– hosesFUEL SYSTEMdrain – addtiional fuel filterchange – fuel filtercheck – additional fuel filterpreserve – fuel system*) after seasonBATTERY check– acid level– densitiyELECTRONICS check – connections*) after season– connections tighten looseELECTRICALcheckconnections. RenewEQUIPMENT– insulationcables, if required.INVERSIONSWITCHDRIVINGSYSTEMV-BELTfor 6 cyl. modelsPOLY-V-BELT(SERPENTINEBELT)for 4 and 286,306, 126, 156modelscheck(Solas only)re-centercheckchangecheckchange– switch*)– driving unit*)– generator & impellerpumpevery 50 hours orevery 6 monthssee manufacturer’sspecificationsadjust tension– power-steering adjust tension– generator*) if required– power-steering*) if required– belt, pulleys andtighteners for wear– Poly -V-beltevery 1,050 hours orevery 48 months66
Service- and Maintenance SchedulePOLY-V-BELTTENSIONcheckchangeGLOW PLUGS change – plugs*)TIMING BELTcheckchange– belt tension– timing belt*)– water pump,tensionerdailyafter first50 hoursor 6monthsevery150 h.or 12monthsevery300 h.or 24months*) notesevery 1,500 h. orevery 48 monthsevery 1,500 h. orevery 48 monthsevery 1,500 h. orevery 48 monthsVALVES check – valve clearance*) every 750 hoursENGINE TIMING check – set timing every 750 hours– set levers*) every 750 hoursUNIT INJECTORPOWERSTEERINGPUMP OR LOADSENSING HYDR.PUMPGEARBOX-STERNDRIVEFRONTVIBRATIONDAMPERENGINECOMPARTMENTAND BILGESHIFTINGqSTEERINGqSAFETYEQUIPMENTqSHAFTBEARINGGLANDENGINE MOUNTSCREWSWARNINGDEVICEcheckcheckchangecheckchangecheckcheck forcheckcheckcheckcheck– set point every 750 hours– tighten torque every 750 hours– oil level– for leakage– hydraulic oil (ATF)*)– oil level– for leakageevery 750 h. orevery 24 months– gear oil (ATF)*) see manufacturer’s– oil filterspecifications– torque– leakage – water– fuel– exhaustgasrepair or consult yourSTEYR MOTORSMarine dealer– smooth action If required, to bereplaced by your– adjustmentSTEYR MOTORSMarine Dealer– lubricationsee manufacturer’s– oil levelspecifications– remote control– emergency cutout– completeness– conditionlocal rules andconsultation of yourSTEYR MOTORSMarine Dealer– lubrication consult– sealingSTEYR MOTORSMarine Dealercheck – torque*) every 750 hourscheck– function67
MAINTENANCE LOGSticker of 1 st preservation(refer to Installation Manual P/N Z001007-0/Chapter 18/Installation and pre-deliveryinspection report)Sticker of 2 nd preservationDate:Date:Sticker of 3 rd preservationCommissioningDate:Date:Made by:50 h ServiceMade by:150 h ServiceDate:Date:Made by:300 h ServiceMade by:450 h ServiceDate:Date:Made by:600 h ServiceMade by:750 h ServiceDate:Date:Made by:900 h ServiceMade by:1,050 h ServiceDate:Date:68
MAINTENANCE LOGMade by:1,200 h ServiceMade by:1,350 h ServiceDate:Date:Made by:1,500 h ServiceMade by:1,650 h ServiceDate:Date:Made by:1,800 h ServiceMade by:1,950 h ServiceDate:Date:Made by:2,100 h ServiceMade by:2,250 h ServiceDate:Date:Made by:2,400 h ServiceMade by:2,550 h ServiceDate:Date:Made by:2,700 h ServiceMade by:2,850 h ServiceDate:Date:69
Table – Error Indication on Instrument PanelDCBAA audible warning device C combined light preheating control &warning light engine oil pressureB warning light – battery charge D warning light check engineOperating condition:Event: qDuring normale engine operation, or indication in caseof sensor defect while ignition is switched ON.Speed resp. performance limitation during engineoperationIndication status Fault Remarks80° – 90 °COFFoil pressure belowmin. limitcheck oil level,contact authorizedONONworkshopOFF80° – 90°COFFOFFFLASH-ING (1xper sec.)fault oil pressuresensor orsensor connectioncheck oil level,contact authorizedworkshopOFFONONengine overload duringbreak-in periodreduce throttle position until lightgoes OFF (indication duringfirst 2 hours of operation) see“engine break in procedure”70
Indication status Fault Remarks80° – 90 °C FLASHING(2x persec.)ONOFF(2x per sec.)OFFhigh approx105 °C OFFONOFFhigh exhausttemperature(over 80 °C)ordefect exhaust temperaturesensor or bad connectionengine coolanttemperature too highcheck raw watersystem,strainer, impeller pumpcontact authorized workshopafter cooling down,check engine coolantlevelcontact authorized workshop(2x per sec.)120 °CONOFFOFFOFFdefect engine coolantsensor orbad connectionafter cooling down,check engine coolantlevelcontact authorized workshop(2x per sec.)80° – 90 °COFFOFFOFFOFFunstable idle speed, noindication on tachometerdefect speed sensororsensor connectioncontact authorized workshopOFF80° – 90 °CON(2x per sec.)ONOFFOFFTrouble in governing loop,involved components: controlsolenoid, rack, control gearof unit injector, rack positionsensorcontact authorized workshop71
BUKH STEYR MOTORS SOLASTable – Error Indication on Instrument Panel (for SOLAS only)DSTARTCONBOFFA audible warning device C combined light preheating control& warning light engine oil pressureB warning light – battery charge D warning light check engineAOperating condition:Event: qDuring normale engine operation, or indication in caseof sensor defect while ignition is switched ON.Speed resp. performance limitation during engineoperationIndication status Fault Remarks80° – 90 °COFFoil pressure belowmin. limitcheck oil level,contact authorizedONONworkshopOFF80° – 90°COFFOFFFLASH-ING (1xper sec.)fault oil pressuresensor orsensor connectioncheck oil level,contact authorizedworkshopOFFONONengine overload duringbreak-in periodreduce throttle position until lightgoes OFF (indication duringfirst 2 hours of operation) see“engine break in procedure”72
BUKH STEYR MOTORS SOLASIndication status Fault Remarks80° – 90 °C FLASHING(2x persec.)ONOFF(2x per sec.)OFFhigh approx105 °C OFFONOFFhigh exhausttemperature(over 80 °C)ordefect exhaust temperaturesensor or bad connectionengine coolanttemperature too highcheck raw watersystem,strainer, impeller pumpcontact authorized workshopafter cooling down,check engine coolantlevelcontact authorized workshop(2x per sec.)120 °CONOFFOFFOFFdefect engine coolantsensor orbad connectionafter cooling down,check engine coolantlevelcontact authorized workshop(2x per sec.)80° – 90 °COFFOFFOFFOFFunstable idle speed, noindication on tachometerdefect speed sensororsensor connectioncontact authorized workshopOFF80° – 90 °CONONOFFOFFTrouble in governing loop,involved components: controlsolenoid, rack, control gearof unit injector, rack positionsensorcontact authorized workshop73
Reading Service CodesEntering and reading of stored faults via Check Engine Lamp and Diagnostic Outlet Plug (X23):wNeeded device:Tool VR00135/1(normally closed push button switch)connected to Diagnostic Outlet Plug X23.In case this tool is not available:Connect temporarily Pin – Pos. 1 with Pin – Pos. 2of Diagnostic Plug X23(before ignition is turned on at key switch)Connect as above and turn the ignition on to enter error indicationmode.Code indication and indication sequence:18After entering the service code indication modus the EngineManagement System will display a blink code at the Check Engine Light on the dash panel.The blinking sequence will always begin and end with control code indication # 12. Each service code will be repeated3 times to assure your correct reading – see below bar code illustration.Example sequence check engine light: Service code # 14Stroke = Check Engine Light illuminated for 0.3 sec. (Light Off – period within blink sequence 0.4 sec.)Dashed Line = interruption within code indication 1.5 sec.Solid Line = interval interruption between service code 3.0 sec.If more then one service code is stored in the Engine Management System the indication sequence will be continuedblinking additional stored error codes. To delete a memorized service code see description Indication and Cancellationof memorized sensor and circuit faults.For a description of the possible service codes refer to enclosed Table – Service CodesATTENTION:qTo exit from Service code indication. Tool VR00135/1 must be removed (connection betweenPin 1 to Pin 2 opened) before ignition is turned ON again.74
Indication and Cancellation of memorised sensor and circuit faultsSelection and clearing of stored service codes:Procedure:* Ignition – OFF* Connect Tool VR00135/1 to Diagnostic Outlet Plug (X23)* Ignition – ONNOTE:The program changes automatically to indication of service codes.If no service code is stored, only repeating control code reading “Code # 12” will be displayed.Possible memorized codes are indicated as shown in the previous illustrated example (blinking 3xCode # 12 i. e. 3x service code # 14 etc.) The sequence will be prolonged with additional codes ifmore then one service code is stored. See Table – Service codes for description* To delete a determined service code from the Engine Management System concentrate for the 3 rd times flashingthe desired service code. While this service code is displayed the third time the button (Tool VR00135/1) must bepushed and kept in this position (contact open).* The indication on the Check Engine Light changes to a fast blinking of the lamp (app. 4 times per sec.). During thisrapid flashing light the push button must be released (close contact after app. 2 sec.) to delete this service code.NOTE:NOTE:Any other service code have to be selected and cleared individually following the above mentionedprocedure to delete a determined service code.An service code can only be deleted if no defect exists in this circuit. In case of a present activefailure, the service code keeps reappearing until the problem has been repaired and the circuit isproperly working again.* Disconnect Tool VR00135/1 from Diagnostic Outlet Plug (X23) to exit from service code display.NOTE:Watch indication of the Check Engine Light and the Warning Horn after ignition contact. If all servicecodes are deleted from the Engine Management System the indication resumes to 0.7 sec.function test of Check Engine Light and the Warning Horn. For additional details see Chart – OperatingConditions – Instrument panel.75
Principle service code listNOTE: Some codes may not apply due to different application!CODE ABBREV. 150 PINWIREChart -Service Codes (Issue 27.7.2009) update 14.04.2010 ALINVOLVED DEVICE POSSIBLE CAUSE12 Control code Beginning and/or end of loop; while selected in blink codemode13 LoMap X12/B12 Pin2 - 60112-01 boost pressure sensor Voltage level too low (short circuit)14 HiMap X12/B12 Pin2 - 60112-01 boost pressure sensor Voltage level too high (missing connection)17 LoEXH X17/B17 Pin1 - 60118-01 air charge temp.sensor Resistor- signal level too low (short circuit)18 HiEXH X17/B17 Pin1 - 60118-01 air charge temp. sensor Resistor- signal level too high (missing connection)21 LoECT X16/B16 Pin1 - 60114-01 water temperature sensor Resistor- signal level too low (short circuit)22 HiECT X16/B16 Pin1 - 60114-01 Water temperature sensor Resistor- signal level too high (missing connection)23 LoPed1 X13/B13 Pin2 - 60111-01 Potentiometer accelerator Signal level input too low24 HiPed1 X13/B13 Pin2 - 60111-01 Potentiometer accelerator Signal level input too high25 LoVPWR F5/K27 ECU Pin 18 - 15012-02 Main relay Low voltage supply to ECU, F5, K2726 HiVPWR F5/K27 ECU Pin 18 - 15012-02 Main relay Too high voltage on VPROT input27 LoVREF X5/Z3 ECU Pin 3 - 15100-03 Module, connector Low voltage on sensor supply (short circuit, sensor or ECUdefective)28 HiVREF X5/Z1 ECU Pin 3 - 15100-03 Module, connector High voltage on sensor supply (short circuit, ECU29 PedS X13/B13 Pin1,2 - 60111-01,60112-01Accelerator potentiometerswitchdefective)Defect on pedal safety switch, Pin 1-231 LoLPS X18/B18 Pin2 - 60117-02 Lubricant pressure sensor Voltage level too low (short circuit)32 HiLPS X18/B18 Pin2 - 60117-02 Lubricant pressure sensor Voltage level too high (missing connection)33 LoPed2 X13/B13 Pin1 - 60116-01 Potentiometer accelerator Voltage level too low (short circuit)34 HiPed2 X13/B13 Pin1 - 60116-01 Potentiometer accelerator Voltage level too high (missing connection)35 LoRPos X14/B14 PinB - 60112-01 Rack position potentiometer Voltage level too low (short circuit)36 HiRPos X14/B14 PinB - 60112-01 Rack position potentiometer Voltage level too high (missing connection)53 N_RFI X15/B15 Pin2 - 60113-01 RPM-sensor Radio interference / sensor input54 BadSta M1-Pin50 K28/87 - Starter motor K28 start assist relay No start signal from start assist solenoid while startingKl.5055 NoPuls X15/B15 Pin2 - 60113-01 RPM-sensor No speed signal during crank56 Srpos Y14/(B14) PinB - 60112-01 Refer to setting rack pos. Rack calibration out of tolerance57 Rack0 Y14/(B14) PinB - 60112-01 Refer to setting rackpositionBad rack zero position(Y20- mechanical problem or RACK-sensor fault)99 FMSpwm X20/Y20Pin1-31409-01Defect in governor solenoid circuitActuator / solenoidPin2-15012-01(short circuit or missing connection)161 HiVTGc X28/Y28 Pin4- 31416 REA Unit at Turbo Charger Defect in circuit of actuator turbo charger (short circuit)162 LoVTGc X28/Y28 Pin4- 31416 REA Unit at Turbo Charger Defect in circuit of actuator turbo charger (missingconnection)164 CELs L2 60810-01 Check engine lamp Current limit in circuit exceeded (short circuit)165 CELo L2 60810-01 Check engine lamp Missing connection or bulb blown167 FPR_s K24 K24/85 - 31554-01 Fuel pump relay Current limit exceeded in relay circuit (short circuit)168 FPR_o K24 K24/85 - 31554-01 Fuel pump relay No current detected in relay circuit (disconnection)177 MR_s K27 K27/85 - 31558-01 Main Relay No current detected in main relay circuit (short circuit)76
CODE ABBREV. 150 PINWIREChart -Service Codes (Issue 27.7.2009) update 14.04.2010 ALINVOLVED DEVICE POSSIBLE CAUSE178 MR_o K27 K27/85 - 31558-01 Main Relay No current detected in main relay circuit (disconnection)181 WarnLs L3 60616-01 Oil pressure lamp Current limit exceeded (short circuit)182 WarnLo L3 60616-01 Oil pressure lamp No current in circuit of oil pressure lamp(bulb blown or missing connection)186 BadPos Y20 Governor solenoidRack positioning fault, difference of calc. to actual rackposition to high(pos. out of tolerance), common rack or injector gear rodjammed,187 HiFMSC X20/Y20 31409-01; 15012-01 Governor solenoid Defect in governor wire circuit (resistance too high)188 LoFMSC X20/Y20 31409-01; 15012-01 Governor solenoid Defect in governor wire circuit (resistance too low)193 VTG_Bad Y28 Pin4- 31416 REA Unit at Turbo Charger Defect in output circuit (short circuit or missing connection)194 GPR_s K26 K26/85 - 31555-01 Glow assist relay Current limit exceeded in glow plug relay circuit (shortcircuit)195 GPR_o K26 K26/85 - 31555-01 Glow assist relay no current detected in glow plug relay circuit201 HiTEMP --- Operation Limit exceeded -Engine Overheated202 Lop --- Operation Limit exceeded –Lubricant Pressure too low203 Manop --- Operation Limit exceeded –rack position too high(disconnection)Misuse: Engine was operated with too high coolanttemperatureMisuse: Engine was operated with too low lubricantpressureMisuse: Engine operated with manual movement of rackMisuse: Engine had been operated “without Enginemonitoring204 WarBJ205 Ovs Misuse: Over speed (coasting mode)220 --- CMD-Value CMD-Value delivered by CAN-Message invalid or missing221 --- TRQREQ_BAD Torque-Resquest by CAN-Message invalid or missing222 NoVCU CAN CAN TSC1 message from vehicle controller invalid or missing223 NoTCU CAN CANTSC1 message from transmission controller invalid ormissing224 NoM1CUEXT CAN CAN message from 2nd engine controller invalid or missing271 HCU_offline272 HCU_Error273 HCU_overtemp274 HCU_system_overloadCANCANCANCANHybrid Control Unit isoffline Check CAN wiring, HCU supplyHybrid Control Unitgeneral error Check HCU manualElectric unit / motor toohot wait for cooling down, check Hybrid cooling circuitHybrid Control Unitoverloaded Check HCU manual77
Trouble Check ChartATTENTION:qAfter following the “Action” described in chart, and before cranking the engine, makesure there are no loose fuel connections. Make sure engine compartment is free of fuelvapours. Failure to do so could result in fire.Engine won’t startSYMPTOM POSSIBLE CAUSE ACTION1. No fuel in tank or shut-off valveclosedFill tank or open valve.2. Air leak in suction lines Bleed fuel system and check for leaks.3. Fuel line plugged or pump defective Fuel pump may be defective. See yourSTEYR MOTORS Marine dealer.4. Poor fuel quality Replace fuel.5. Water in fuel filter Replace or drain water from fuelfilter. Check fuel supply for watercontamination. If water is present, drainfuel tank and flush with fresh fuel.6. System error or failure Check Engine Management Systemdisplay for service code.7. Battery output insufficient Charge or replace battery.Only for SOLAS ==> 8. Inversion switch actuated Cancelled by ignition “OFF – ON”Starter won’t crank engine1. Battery connections loose orcorrodedCheck for loose connections andcorrosions. Clean connections andthighten.2. Battery is dead Check level of electrolyte and chargebattery.3. Starter connections loose Check connections and tighten. Ifsolenoid clicks when attempting to startengine, see your STEYR MOTORSMarine dealer.4. Ignition switch If inoperative, see your STEYRMOTORS Marine dealer.5. Fuse blown on panel Check and replace if defect.6. Starter auxiliary relay Check terminal connection andfunction of relay.Engine runs erratically 1. Water, air and/or dirt in fuel filter Replace filter. Inspect fuel supply line.2. Anti-siphon valve stuck Clean and inspect or replace. (Tank)3. Fuel pump Check operation of pump. Replacefuel pump. See your STEYR MOTORSMarine dealer.78
Trouble Check Chart – ContinuedSYMPTOM POSSIBLE CAUSE ACTIONEngine vibrates Propeller condition Check for bent, broken, or damagedpropeller Check for weeds on propelleror sterndrive gearcase. Check for bentpropeller shaft.Engine runs but boat makeslittle or no progressUnit injectorFouled propeller etc.See your STEYR MOTORS Marinedealer.Check:1. Propeller for weeds, remove asrequired.2. Propeller for spun hub, repair orreplace.3. Hull for excessive marine growth,clean as required.Performance loss 1. System error or failure Check: using diagnostics for errorsor limitations. Engine coolanttemperature; audible and or visualalarms.Excessive free play in steeringwheelHigh shift effort2. Boat overloaded Reduce load.3. Boat trim Distribute boat load evenly. Adjust trim.4. Excessive water in bilge Drain bilge.5. Boat hull condition See your STEYR MOTORS Marinedealer.6. Improper propeller selection Select proper propeller pitch anddiameter.7. Fuel incorrect Fill tank with correct fuel. Check fuelfilter and fuel flow condition.8. Throttle not fully open Check throttle command lever for fulltravel.9. Overheating Check cooling system. Remove debrisfrom water intake. Check belt tension.Check condition of impeller.Check for clogged heat exchangertubing (in raw water circuit).10. Air intake troubles Check intake air filter.Check ventilation of engine compartment.Steering cable loose1. Remote control or transom bracketshift cableSee your STEYR MOTORS Marinedealer.Replace and adjust.See your STEYR MOTORS Marinedealer.2. Remote control binding See your STEYR MOTORS Marinedealer.3. Engine/drive mechanism binding See your STEYR MOTORS Marinedealer.79
Wiring harnessDesignation Component DescriptionA5 E-Box control unitF1 fuse 50 A main fuseF2 fuse 50 A glow plugsF3 fuse 50 A glow plugsF4 fuse 5 A permanent current modul and K27F5 fuse 10 A switched current for module (K27)F6 fuse 10 A fuel pump (K24)F7 fuse 10 A preheating – control circuitG1alternatorG2 battery to be provided by customerJ1 plug 23-pole connection engine cable – instrument cableK24 relay fuel pumpK26-1 relay preheating – control circuitK26-2 relay preheating – load circuitK27 relay main circuitK28 relay startM1starterM2fuel pumpR10glow pinsX2 (S2) plug 2-pole gears switchX3 (S3) plug 2-pole inversion switch (only SOLAS)X5 (A5) plug 35-pole moduleX12 (B12) plug 3-pole boost-pressure sensoX13 (B13) plug 5-pole potentiometer acceleratorX14 (B14) plug 3-pole rack position sensorX15 (B15) plug 3-pole engine speed sensorX16 (B16) plug 2-pole engine temperature sensoX17 (B17) plug 2-pole exhaust gas temperature sensoX18 (B18) plug 3-pole oil pressure sensorX19 (B19) plug 1-pole oil pressure gauge (optional)X20 (Y20) plug 2-pole control solenoidX22 (B22) without stop trim sensor (optional)X23 plug 6-pole diagnosisX26 (Y26) plug 2-pole disconnection blow-by (only SOLAS)Z1 splice spot earth connection sensorZ2 splice spot earth connection (31) on engineZ3 splice spot ensor supply +5 VZ4 splice spot earth connection (31) on E-box plateZ6 splice spot shield speed sensor lineCable numbers/principal functions:15000-xx ignition – positive(from ignition switch)31100-xx Do not connect mass for sensors withbattery negative!15012-xx +12 volt via main relay and modulatorunit A5601xx-01 Sensor signal to modulator unit A5 and/or instruments.15100-xx +5 volt supply voltage for sensors 606xx-01 Exit from modulator unit A5 to displaysystem (tachometer, temperaturedisplay, ...)30000-xx battery-positive (not secured)30012-xx battery-positive (secured)31000-xx battery negative (GND)80
LJ12365423XK WVHBUMCA GN D E F TSOP RQSTARTERJ1X236541WIRING DIAGRAM/MARINE / MARINE BASE – 4/6 - 4/6 CYLINDER – 12 - V 12VBatt +Batt - –Ign 15Supplied by RelaisSens ECUControl ECUDIAGStartCharge D+Sens 5V 5 VSens - –B+ 24VVCANK24 FUELMainGlow Ass.GlowAktorVTGY50Start Ass.Opt. SenderTrim B22+BATT.FuelBatt +FreiFreiFreiCONNECTOR “A5” "A5" (ENGINE-CONTROL-UNIT)Frei60123-01WS60808-01 ISO60900-01 CAN-H60901-01 CAN-LBatt –Wiring LPS LPS/All / engines before 2007LPSEctEXTCmdRackMap Speed GearswitchOptionaloil senderAWiring MAP/All / All engines before 2007EXCEPTIONS:EXCEPTIONS:ONLY FOR TYP:ONLY FOR TYP:MO 164M40MO 174V40MO 246K41MO 256H45MO 256K43MO 266K43A61001-0260901-0360900-03Z560900-02Z6 60901-0260123-0131000-11Optional2424VVDCDCD+ B+J1 / UJ1 / V5 CAN “H” "H"4 CAN “L” "L"X3/S3 InversX3/S3 SolasX331100-0815100-0560110-0160110-01www.steyr-motors.comR10/56 CYL.R10/1R10/24 CYL.R10/3R10/44 CYL. CYL.R10/66 CYL.2179349_0-03-10022231100-1015100-0760117-01ALLALLENGINEENGINETYPES WITHFOLLOWINGEXCEPTIONSyellow/greenTo fuseF4(Cl. 30 about F4)(Cl. 31)Batt +31100-0815100-0581
WIRING WIRING DIAGRAM DIAGRAM/MARINE / MARINE – - 4/6 CYLINDER – 2-POLE - – 12 - 12V V (OPTION)Batt +Batt - –Ign 15Supplied by RelaisSens ECUControl ECUDIAGStartCharge D+Sens 5V 5 VSens - –B+ 24VVCANK24 FUELStart -MainGlow Ass.Glow -GlowAktorVTGY50Start Ass.Opt. SenderTrim B22yellow/green+BATT.STARTERFuelR10/56 CYL.R10/1R10/24 CYL.Frei Frei FreiBatt +Batt –R10/3R10/44 CYL.R10/6CONNECTOR “A5” (ENGINE-CONTROL-UNIT) 60808-01 ISO6 CYL.Frei60123-01WS60900-01 CAN-H60901-01 CAN-LZ6Z560900-0260901-02CAN “H”CAN “L”To fuseF4(Cl. 30 about F4)(Cl. 31)Wiring Wiring LPS LPS/All / All engines before 2007 2007ALPSEctEXTCmdRackMapSpeed GearswitchOptionaloil senderOptional24 VInversSolaswww.steyr-motors.com2179350_0-03-10022231100-1015100-07ALL ENGINEALL ENGINETYPES WITHTYPES WITHFOLLOWINGFOLLOWINGEXCEPTIONS60117-01Wiring MAP MAP/All / All engines before 2007EXCEPTIONS:ONLY EXCEPTIONS:FOR TYP:ONLY FOR TYP:MO 164M40MO 174V40MO 246K41MO 256H45MO 256K43MO 266K43A31100-0815100-0531100-0815100-0560110-0160110-01Batt +Batt –82
LJ12365423XK WVHBUMCA GN D E F TSOP RQSTARTERB16Z560900-02Z6 60901-02J1X236541WIRING WIRING DIAGRAM/MARINE / MARINE – - 4/6 CYLINDER – 24 - 24 V (OPTION) V Batt +Batt – -Ign 15Supplied by RelaisSens ECUControl ECUDIAGStartCharge D+Sens 5 5V VSens – -B+ 24V VSure PowerConverter 12/24 12/24V V==Fuel PumpRelayK24MainRelay RelayK27PreheatingControl Relay RelayK26/1PreheatingLoad RelayK26/2ControlSolenoidY20VTGY50StartStartRelayRelayK28Trim-SensorTrim-Sensor(Option)(Option)B22B22+BATT.M2F8 - 5 AFuelPumpG2Batt +BATT + 24 VBatt –BATT -AUXCONNECTOR CONNECTOR “A5” (ELECTRONIC-CONTROL-UNIT)"A5" LPS ECTEXTFreiFreiFreiFrei60123-01WS60808-01 ISO60900-01 CAN-H60901-01 CAN-LWiring LPS/All / All engines before 2007 2007ALPSB18ECTEctEXTB17PEDB13RPOSB14MapB12RPM GearGearSwitch switchB15S2Sensor OilPressureGauge(Option)Gauge(Option)B19www.steyr-motors.com60120-0161001-0260901-0360900-03J1 / UJ1 / V60120-015 CAN “H” "H"4 CAN “L” "L"(Cl. 30 about F4)(Cl. 31)60123-0131000-11X3/1 InversX3/2 SolasF861001-01Batt + +/24 / 24V VD+ B+B-R10S3G12180808-0_00_11032931100-1015100-0760117-01ALL ENGINEALL ENGINETYPESTYPESWITHWITHFOLLOWINGEXCEPTIONSWiring Wiring MAP MAP/All / All engines before 2007 2007EXCEPTIONS:ONLYEXCEPTIONS:FOR TYP:ONLY FOR TYP:MO 164M40MO 174V40MO 246K41MO 256H45MO 256K43MO 266K43A31100-0815100-0531100-0815100-0560110-0160110-016 CYL.4 CYL.4 CYL.6 CYL.6 CYL.To fuseF483
WIRING DIAGRAM/MARINE / MARINE – 4/6 - 4/6 CYLINDER CYLINDER – 2-POLE - 2-POLE – 24 - 24V V – COMPLETE SYSTEMBatt +Batt - –Ign 15Supplied by RelaisSens ECUControl ECUDIAGStartCharge D+Sens 5V 5 VSens - –B+ 24VV=CANConverter 12/24V V=K24 FUELStart -MainGlow Ass.Glow -GlowAktorStart Ass.VTGVTGY50Gearbox GearboxpressuresenderB2231024-0130024-01 J1 / XJ1 / Wyellow/greenSTARTER StarterFuelR10/56 CYL.R10/1R10/24 CYL.Frei Frei FreiBatt +Batt –R10/3R10/44 CYL. CYL.R10/6CONNECTOR “A5” (ENGINE-CONTROL-UNIT)60808-01 ISO6 CYL.Frei60123-01WS60900-01 CAN-H60901-01 CAN-LZ6Z560900-0260901-02CAN “H”CAN “L”To fuseF4(Cl. 30 about F4)(Cl. 31)Wiring Wiring LPS LPS/All / All engines before 2007 2007ALPSEctEXTCmdRackMapSpeed GearswitchEngine oilpressure sendersenderInversSolaswww.steyr-motors.com2179729_D-01-10022231100-1015100-07ALL ENGINEALL ENGINETYPES WITHTYPES WITHFOLLOWINGFOLLOWINGEXCEPTIONSEXCEPTIONS60117-01Wiring MAP MAP/All / All engines before 2007EXCEPTIONS:EXCEPTIONS:ONLY FOR TYP:ONLY FOR TYP:MO 164M40MO 174V40MO 246K41MO 256H45MO 256K43MO 266K43A31100-0815100-0531100-0815100-0560110-0160110-01Batt +Batt –84
Description – Wiring harness instrument panels 4/6 cyl. marine engines (current version)Designation Component DescriptionF9fuse 10 AJ1 23-pin plug connection engine cable – instrumentcableS1 switch ignition (red)S2 switch start (green)S3 switch emergency cut off (orange)S7 switch key switch constant revolution (optional)L1 lamp charge controlL2 lamp cel – check engine lampL3 lamp oil pressure/preheating conrolP1 gauge engine coolant temperatureP2 gauge oil pressure (optional)P3 gauge tachometer with running-time meterH22warning hornE10 lighting engine coolant temperature gaugeE11 lighting oil pressure gauge (optional)E12 lighting tachometer gaugeX8 1-pin plug connector illumination switchX24 8-pin plug connector STEYR MOTORS – displayZ1 splice battery +Z2 splice battery –Z3 splice ignition (+)Z4 splice key switch constant revolution24 V interm. cable charge indicator85
LJWIRING WIRING DIAGRAM/INSTRUMENT / INSTRUMENT CAN PANEL – 4/6 - 4/6 CYLINDER – 12 - V 12 VCircuitbreaker Circuit 10Abreaker 10 AF9EmergenceyEmergencyCUT OFFXK WVHBUMCA GN D E F TSOP RQJ1CUT OFFSwithchSwitchS3IgnitionSwitchS1Opt. Opt. GearNeutralSafety-SwitchChargeChargeControlControlLampLampL1CheckCheckEngineEngineLampL2OIL-Preheatingcontrolcontrol LampLampL3Opt. KeyOpt. KeySwith-ConstantSwitch-ConstantRevolutionS7RPM CAN gaugeP31 2M M 1 5 4 2M M1 21 2 1 214 22 13 211 2 3 4 5 6 7 8 9 10 11 12J1 / A15000-01Z2SHUNT8,2 8.2 Ω7W7 WJ1 / C30012-07J1 / E31000-01Z1J1 / G60616-01J1 / H31615-01J1 / J60706-01Z3J1 / LJ1 / M61000-0231000-16 Ground shieldJ1 / P60810-01J1 / QJ1 / SJ1 / TJ1 / UJ1 / V50000-0360120-01 TRIM61001-01 B+/24 / 24V V60901-03 CAN “L” “L”60900-03 CAN “H” “H”– - StartBatt +Batt - –Sens ECUControl ECU61 +24V Vwww.steyr-motors.comSCCSTEYR-CONTROL-CENTER48.08.56N 014.27.47W 117 14:05WarningWarningHornH22SPEED/KN2 3rpm x 1000bar °C8 502,8 73OIL TEMP1500_+X 241 2 3 4Z4Z5StartChargeIlluminationOption1560 CAN2179756-D_00_090213340246014585RPM120Optional fuel sensorOptional fuel sensor86
LJWIRING DIAGRAM/INSTRUMENT / INSTRUMENT CAN CAN PANEL PANEL – 4/6 - CYLINDER 4/6 CYLINDER – 24 V - (OPTION) 24 V (Opt.)CircuitCircuitbreaker 10Abreaker 10 AF9EmergenceyEmergencyCUT OFFXK WVHBUMCA GN D E F TSOP RQJ1CUT OFFSwithchSwitchS3IgnitionSwitchS1Opt. GearOpt. GearNeutral NeutralSafety-SwitchIntermediateIntermediateCable Cable Charge ChargeInidcatorIndicator24 VChargeControl ChargeControlLamp LampL1CheckEngine CheckEngineLamp LampL2OIL-Preheatingcontrol control LampLampL3Opt. KeyOpt. KeySwith-ConstantSwitch-ConstantRevolutionS7RPM CAN gaugeP31 2M M 1 5 4 2 M M85 86 87a 87 301 21 2 1 214 22 13 211 2 3 4 5 6 7 8 9 10 11 12J1 / A15000-01Z2SHUNT SHUNT82 8.2 Ω7W7 WJ1 / C30012-07J1 / E31000-01Z1J1 / G60616-01J1 / H31615-01J1 / J60706-01Z3J1 / L61000-02J1 / M31000-16 Ground shieldJ1 / P60810-01J1 / QJ1 / SJ1 / TJ1 / UJ1 / V50000-0360120-01 TRIM61001-01 B+/24 / 24V V60901-03 CAN “L”60900-03 CAN “H”– - StartBatt +Batt – -Sens ECUControl ECU61 +24V Vwww.steyr-motors.comSCCSTEYR-CONTROL-CENTER49.16.45N 48.08.56N 102.41.11W 014.27.47W 57,4 117 14:0522:57WarningWarningHornH22SPEED/KN10.02 3rpm x 1000bar °C6 8 1 502,8 77.8 73OIL/BARTEMP/°C2650 1500SWITCH_+X 241 2 3 4Z4Z5StartChargeIlluminationOption1560 CAN2180809-0_00_1103293421 03 446.310654523 854RPM51206MAINOptional fuel sensorOptional fuel sensor87
LJWIRING DIAGRAM/INSTRUMENT / INSTR. CAN PANEL – – - 4/6 4/6 CYL. CYL. – Solas SOLAS – 12 - 12 V (OPTION)V (OPT.)ONSTARTOFFCircuitbreakerCircuit10Abreaker 10 AXK WVHBUMCA GN D E F TSOP RQJ1F9IGN (red)ON/OFFSwitch SwitchS1Ignition STARTSwitch (green)S2Opt. Opt. Gear GearNeutralSafety-SwitchEmergenceyEmergencyCUT OFFCUT OFFSwithchSwitchS3ChargeChargeControlControlLampLampL1CheckCheckEngineEngineLampL2OIL-Preheatingcontrol control LampLampL3Opt. KeyOpt. KeySwith-ConstantSwitch-ConstantRevolutionS7RPM CAN gaugeP31 23 4M M3 4 M M1 21 2 1 214 22 13 211 2 3 4 5 6 7 8 9 10 11 12J1 / A15000-01Z2SHUNT8,2 8.2 Ω7W7 WJ1 / C30012-07J1 / E31000-01Z1J1 / G60616-01J1 / H31615-01J1 / J60706-01Z3J1 / L61000-02J1 / M31000-16 Ground shieldJ1 / P60810-01J1 / QJ1 / SJ1 / TJ1 / UJ1 / V50000-0360120-01 TRIM61001-01 B+/24 / 24V V60901-03 CAN “L”60900-03 CAN “H”– - StartBatt +Batt - –Sens ECUControl ECU61 +24VVwww.steyr-motors.comSCCSTEYR-CONTROL-CENTER49.16.45N 48.08.56N 102.41.11W 014.27.47W 57,4 117 14:0522:57WarningWarningHornH22SPEED/KN10.02 3rpm x 1000bar °C6 8 1 502,8 77.8 73OIL/BARTEMP/°C2650 1500SWITCH_+X 241 2 3 4Z4Z5StartChargeIlluminationOption1560 CAN2179755-D_01_0911103421 03 446.310654523 85 4RPM51206MAINOptional Optional fuel fuel sensor88
DEALER’S RESPONSIBILITIESCheck motor oil level ................................................................................ 91Refill motor oil ........................................................................................... 91Oil level for Power Steering ...................................................................... 91Oil level for Transmission ......................................................................... 91Check coolant (closed cooling circuit) ...................................................... 92Drain the raw water circuit of the engine .................................................. 92Check raw water (open circuit with pump) ............................................... 92Cooling System Anodes ........................................................................... 93Anti-Corrosion Anodes ............................................................................. 93Maintainance Poly-V-belt resp. Serpentine Belt ....................................... 94Engine alignment ...................................................................................... 94Air Filter .................................................................................................... 94Adjustment of belts ................................................................................... 95Measuring device VR00515/0 for toothed- and V-belt .............................. 95Alternator belt ........................................................................................... 95Servopump belt (if so) .............................................................................. 95Belt for raw water pump ........................................................................... 95Propeller Selection ................................................................................... 97STEYR MOTORS – Dealer – Check-List ................................................. 98Commissioning REPORT ....................................................................... 100Preparations for Off-Season Storage ..................................................... 102Start-up after Storage ............................................................................. 102ENGINE LOG ......................................................................................... 10389
Check motor oil leveleATTENTION:qCheck with cooled down engine only, or aftera shut down period of app. 3 to 5 min.Then remove oil dipstick (19/A), clean it and insert again intooil dipstick tube (19/A), then remove again and check oil levelon marker.ABRefill motor oilRemove motor oil filler cap (19/B) and add STEYR MOTORSTURBO DIESEL ENGINE OIL 5 W-50/10 W-40 or an equivalentmarked ACEA B4-02/E7, E4, E5 or with API Code CF up to specifiedmaximum marker on oil dipstick.1906005ATTENTION:qMotor oil must not exceed maximum marker.An overfilling results in high operatingtemperatures, foaming (air in oil), loss inefficiency and reduced engine life.Put on the motor oil filler cap.NOTE:Remove possible oil contaminations.The use motor oil with other quality thanspecified warranty canexpire.rOil level for Power SteeringtWhenever you check motor oil level, also check oil level ofpower steering. If required, add automatic transmission oil(available with your STEYR MOTORS Marine dealer). Otherapproved oils, such as GM Servo or Dexron II, may also beused. Do not overfill pump reservoir.Oil level for TransmissionzWhenever you check motor oil level, also check oil level oftransmission. If required, add automatic transmission oil(available with your STEYR MOTORS Marine dealer). Otherapproved oils, such as GM Servo or Dexron II, may also beused. Do not overfill transmission.2106006NOTE:Consider specifications of respectivetransmission manufacturer220600791
Check coolant (closed cooling circuit)ATTENTION:qWith hot engine, the closed cooling circuitis under pressure. Do not try to open theradiator cap or the drain plugs when engineis hot. This may cause severe injuries by hotcoolant. As soon as the engine has cooleddown, the cap may be opened.AuRemove radiator cap (23/A). Coolant level should reach the“MAX” marking (23/B) in the expansion tank.06020ATTENTION:qNOTE:Only add STEYR MOTORS engine coolant.When not using the original STEYRMOTORS coolant, severe damage to thecooling system of your engine may occur.BuDrain the raw water circuit of the engineiATTENTION:qNot draining the raw water circuit in timebefore the winter season and/or daily whenrunning the engine during the winter season,may lead to freeze demage on the engine.Remove drain plug (24/A). Engine empties itself via exhaustsystem.ANOTE:Drain plug (24/A) is not availabe for alltypes, in that case remove the hose.2406015oLoosen 2 hose clamps (25/A) and remove raw water hoses,quickly start the engine so that raw water pump emptiesitself.NOTE:As to procedure for draining the remainingequipment on your boat, see your STEYRMOTORS Marine dealer.ACheck raw water (open circuit with pump)Filling is done automatically via raw water pump after having star-ted the engine.250601692
GENERALCooling System Anodesp üFOR ALL 4 CYL. MARINE ENGINES12» «FOR ALL 6 CYL. MARINE ENGINESThere are 4 sacrificial zinc anodes in the raw water cooling systemnormally, although if an exhaust high riser is used there is one extrafit in it. Which are installed as per ill. 26 and 27.Remove and inspect anodes for galvanic erosion according to themaintenance schedule.Replace anode when material loss is 50 – 75 %.265 (option)3406017Anti-Corrosion AnodesIf additional electronic equipment is installed, each should havean individual anode or grounding device and all grounding devicesmust be interconnected. Follow recommandations of manufacturersof equipment.2706018NOTE:Inspect anodes every 30 days, or morefrequently if used in extremely salty water.Anode is to be replaced according to themaintenance schedule.21Boats that connect to an AC power source (shore power) requireprotection against increased potential of galvanic and “spray current”corrosion. For protection, a galvanic isolator can be installedin series with the grounding (green) wire in the shore power cablebetween the boat and the shore power outlet on the dock. The isolatorblocks direct current (DC) flow, but permits the passage of alternatingcurrent (AC) thus providing a path for ground fault currents.NOTE:If a boat is connected to an AC power source(shore power), and it is not equipped witha galvanic isolator, the zinc anti-corrosionanodes may be unable to handle the addedcorrosion potential.2843060215290602293
GENERALAir FilterAll STEYR MOTORS Marine Engine models are equipped with anair filter at the turbocharger inlet; as to specifications, see Specificationsand Maintenance.ˇLoosen clamp to exchange air filter. Remove air filter. Placeclamp on filter neck and mount air filter onto flange. Tightenclamp. (3 Nm)3106023Maintainance Poly – V – belt resp. Serpentine BeltFOR 4 CYL. MARINE ENGINES˜Occassionally check components for excessive wear and/orclearance on tension bearing.NOTE*):It is recommended to spray frequently somecorrosion inhibiting spray into the springhousing of the belt tensioner.˜*)FOR 6 CYL. MARINE ENGINES32a32b32aand32bOccassionally check components for excessive wear and/or clearance on tension bearing.NOTE:It is recommended to spray frequently some corrosion inhibiting spray into the spring housingof the belt tensionerEngine alignmentEngine alignment requires special tools. The output coupler must be disengaged from the take-off shaft. This shouldbe rechecked during off-season storage preparations. Because of the special tools required, engine alignment is tobe performed by a STEYR MOTORS Marine dealer.NOTE:Failure to check the engine alignment could result in premature failure of engine coupler oruniversal joints.94
Adjustment of beltsFOR 6 CYL. MARINE ENGINES WITH V-BELTMeasuring device VR00515/0 for toothed- and V-beltaWith engine stopped, tension of the belt should be so that ityields for 6 – 13 mm (350 ± 50 N) when pressing your fingeron marked spots (A) and (B). If the belt is too slack, it mayslip through which results in higher wear and bad efficiencyof generator or pump. Belt tension is to be checked after first10 operating hours and then every 50 operating hours.2331AB306024NOTE:Alternator belts and servo pump belts arespecial Marine belts. DO NOT replace bytraditional V-belts.Alternator beltaCheck tension of alternator belt on spot (A) in the center betweencrankshaft belt pulley (1) and alternator belt pulley (2).CsRetighten the belt: – Loosen the alternator holding-downbolts (34/C) and (34/D). Turn the clamping bolt (E) clockwise,(turn away alternator from engine) and increase belt tension(350 ± 50 N).Tighten screws (C) and (D). Check belt tension.ED3406025Servopump belt (if so)NOTE:Servopump is jointly driven with alternator,tension belt via alternator.Belt for raw water pumpaCheck tension of belt for raw water pump halfway (B) betweencrankshaft belt pulley (1) and belt pulley on raw water pump(3).95
FOR 6 CYL. MARINE ENGINES WITH V-BELTd fTo tension the belt: Loosen hexagon screw (35/F). Turn the clampingbolt (36/G) clockwise in order to increase the belt tension to 300± 50 Nm. Tighten hexagon screw (35/F) with a Torque of 23 Nm ± 2to secure idle pulley bracket. Check belt tension.F3506026G360602796
GENERALPropeller SelectiongYour STEYR MOTORS Marine dealer has chosen a propeller designed to deliver top performance and economyunder most conditions. To obtain the maximum percentage of available output ( A ), the engine RPM atFull Throttle should be in the specified Full Load Speed Range ( B ). As to specifications, see TechnicalData and Maintenance.If the engine’s full throttle RPM with normal load is below the specified range, use a propeller with less pitch to increasethe RPM. Should the engine’s full throttle RPM exceed the specified range, the engine RPM and output islimited by the governor. Use a propeller of higher pitch to achieve a RPM reduction in the specified range ( B ).NOTE:Engine damage can result from incorrect propeller selection if• The engine RPM does not attain the specified “Full Load Speed Range”.The engine thus runs in RPM range ( C ).Therefore, use a propeller with a lower pitch.• The engine RPM exceeds the specified “Full Load Speed Range”.Engine speed is therefore above the admissible range ( D ).Therefore, use a propeller with a higher pitch.4 cylinderengine modelMO54NA33MO84K32MO94K33MO114K33MO144V38MO144M38MO164M40MO174V40Full Load Speed Range “B”rated rpm (range of tolerance)3,300 rpm (+0 rpm/–200 rpm)3,200 rpm (+0 rpm/–200 rpm)3,300 rpm (+0 rpm/–200 rpm)3,300 rpm (+0 rpm/–200 rpm)3,800 rpm (+0 rpm/-300 rpm)3,800 rpm (+0 rpm/–300 rpm)4,000 rpm (+0 rpm/–300 rpm)4,000 rpm (+0 rpm/–300 rpm)gOUTPUTPOWERA100%90%80%70%60%50%40%30%CBFullLoadSpeedRangeDRPMMO126K252,500 rpm (+0 rpm/–200 rpm)MO126M282,800 rpm (+0 rpm/–200 rpm)MO156K252,500 rpm (+0 rpm/–200 rpm)MO166M282,800 rpm (+0 rpm/–200 rpm)6 cylinderMO196K35MO236K42MO236K43MO256K433,500 rpm (+0 rpm/–200 rpm)4,200 rpm (+0 rpm/–300 rpm)4,300 rpm (+0 rpm/–300 rpm)4,300 rpm (+0 rpm/–300 rpm)MO256H454,500 rpm (+0 rpm/–300 rpm)MO286H434,300 rpm (+0 rpm/–300 rpm)MO306H43WJ4,300 rpm (+0 rpm/–300 rpm)97
STEYR MOTORS – Dealer – Check-ListNOTE:If STEYR MOTORS HYBRID SYSTEM is in use, check below mentioned points but alsoSTART UP OF HYBRID SYSTEM (see HYBRID INSTALLATION MANUAL P/N Z001044-0/chapter 5) before ignition is turned on or engine is started!1. Remove carton from palette and check the separately packed components are complete and undamaged.2. Visual inspection of engine for transit damage and finish.3. Check coolant and oil level. If required add operational fluids as specified in Operation, Maintenance & WarrantyManual and Service Manual.4. Inform customer about important guidelines in the Installation Manuals and instruct him as to safetyregulations.5. Inform customer about break-in procedure in the Operation, Maintenance & Warranty Manual.6. Advise customer what to do when the engine’s self-diagnostic management system reduces the power.See Electronic Engine Control Unit (ECU) in section Start-up and Operation of Operation, Maintenance &Warranty Manual.7. Check tightness of all cooling water hose clamps.8. Check fuel hoses for correct size and safe routing to and from engine.9. Check battery units for correct polarity and battery for correct capacity.10. Check all electrical connections (engine harness, main connector, accessories, instrument panel)11. Check level of all operational fluids:Motor oilCoolantPower steering fluidDrive or gearReservoir of trim pump12. Fill fuel tank for engine test run.13. Check function of displays on instrument panel.14. Check function of bilge pump and blower.15. Check fuel system for free flow and leaks.16. Check function of trim installation.17. Check function of anchor light, navigation lights and instrument panel lights.18. Install drain plug of bilge.98
19. Steering – Lubricate20. Check condition and tension of all drive belts.21. Check all engine mount screws for tight seat.22. Check for any leaks, deficiencies, signs of wrong use etc.23. Check function of all warning devices installed.24. Read out memorized service codes and make necessary corrective actions.25. Start engine and check for normal instrument display and normal operating noise.26. Obtain propeller load absorption.27. Check installation and fill in commissioning report (Installation Manual P/N Z001007-0, chapter 9 Appendix).28. Grease raw water pump impeller at BUKH-STEYR MOTORS SOLAS engine with original grease ofP/N Z011753/2.29. Carry out Start-Idle-Test and check engine operation. Check behavior of the boat when engine is in idle gear.If there are unpleasant vibrations, adjust the engine speed to a vibration-free operation (see Service Manual)30. Check correct function of gearshift.31. Stop engine and check again the levels of all operational fluids during test run a certain loss operation fluidsmay occur.(Mechanic’s Signature)(Dealer’s Signature)DEALER:.......................................................................................................................................................................ADDRESS AND DATE:.................................................................................................................................................ENGINE TYPE/SERIAL NUMBER:...............................................................................................................................ENGINE RUNNING HOURS:........................................................................................................................................SIGNATURE:.................................................................................................................................................................A copy of the “installation and pre-delivery inspection log” is to be sent toSTEYR MOTORS GmbH, After Sales Service!99
COMMISSIONING REPORTEngine-serial number:Engine-model:*) Hybrid-serial number:Boat Owner:Company/Name:Address/Phone:Dealer:Company:Address/Phone:Type of boat:Model No.:Boat length:Boat weight:Driving system:Gear reduction:mkgDimension of propellers:Special Equipment from STEYR MOTORS(SCC, IFG, Cabin Heating etc.):*) Hybrid-Battery specification:Extended Storage Preservation Procedure (acc. SERVICE Manual/GENERAL/D3)Date of Preservation: # 1 # 2ENGINE-CHECK POINTS:Installation checked according to the installation guide. Following points are in compliance: 1 2 3 4 5 6 7 8 9 10NOTES:*) HYBRID ELECTRICAL CONNECTIONS according schematic “CONNECTION SCHEMATIC-HYBRID”(see Hybrid Installation Manual-schematic with art.nr. 2180526-0)Notes (e.g.: wiring extensions etc.): SYSTEM GROUNDS connected (see Hybrid Installation Manual-schematic with art.nr. 2180526-0) PROTECTION COVERS mounted on: HCU (U, V, W and B+, B–) Generator (U, V, W) Hybrid battery (+/–) END POSITON / FREE MOVEMENT of Coupling Actuator (D-Mode, E-Mode) ensured MAIN SWITCH capacity (between Hybrid battery+ and HCU+): CONSUMERS mounted to Hybrid battery (only to 48 V, max. 100 Amp):Amp (min. 400 Amp) Hybrid-Cooling: Raw water cooling Dual circuit cooling Keel cooling100
COMMISSIONING REPORTBEFORE MEASURING DATA:Correct level of operating fluids (motor oil, gear oil, hydraulic oil, cooling agent) confirmedLeakage (oil, fuel, coolant) checked ok if not detail:*) HYBRID full filled STEYR MOTORS Dealer Check List (find in Hybrid Operation, Maintenance and WarrantyManual) and send signed document to STEYR MOTORS GENERAL Max. Voltage supply from Hybrid-battery bank to HCU(≤57 V): VMEASURING DATA: yesMax. boat speed: knots Fuel flow amount on return-line in idle: l/minMax. engine-rpm by WOT (CMD=5) rpm Motor oil pressure (SMO-EDT): barIdle speed: rpm Engine coolant temp. (SMO-EDT): °CTemperature engine compartment: °C Exhaust raw water temp. (SMO-EDT): °CExhaust backpressure: mbar Boost-pressure at max. rpm (SMO-EDT): mbarActive engine warnings: YES NO if YES which:Instruments adjusted: YESLOG FILE (Idle – Full Load – Idle) name:*) HYBRIDMax. boat speed in E-Mode:knots– with Speed Mode: low mid1 mid2 high– max. engine rpm achieved in E-Mode: rpmD-Mode status on SCC E-Mode ready-red, D-Mode ready-green, HCU-Mode ready-green, GENERATOR(see SCC User Manual Z001071-0; chapter Hybrid menu)NOTES:E-Mode status on SCC E-Mode ready-green, D-Mode ready-red, HCU-Mode ready-green, E-Drive(see SCC User Manual Z001071-0; chapter Hybrid menu)NOTES: YES YESFlow-rate through Hybrid cooling-system:Max. HCU temperature on SCC:Max. E-MOTOR temperature on SCC:Safeguarding instruction carried outManual, warranty and operation explainedl/min (see in Hybrid cooling schematics mentioned above)°C (see SCC User Manual Z001071-0; chapter Hybrid menu)°C (see SCC User Manual Z001071-0; chapter Hybrid menu) YES YESTest made on:(Name in block letters), byPlease immediately return a copy of this report and the Warranty registration card to yourSTEYR MOTORS GENERAL DISTRIBUTOR. Failure to do say may affect factory warranty.101
Preparations for Off-Season StorageAn adequate preservation of the engine will contribute to an efficient and troublefree operation in the long term.Consult your STEYR MOTORS Marine Dealer to get professional assistance in performing a proper off seasonstorage.NOTE:If engine is stored above 1 year, advise your STEYR MOTORS Marine Dealer to theExtended Preservation Procedure (Service Manual P/N Z001019/0, chapter GENERAL D3.1. Change motor oil and oil filter.2. Change fuel filter.3. Check air filter.4. Check coolant (closed circuit).5. Add fuel stabilizer to fuel.6. Drain engine’s raw water system.NOTE:If the raw water is not completely removed from the engine, expensive freeze damage maybe the result.7. Drain raw water system from boat and driving system (consider manufacturer’s instructions as to storage).8. Change gear oil or lubricant.9. Disconnect battery and store it.10. Spray engine outside with corrosion prevention oil.11. Ventilate engine compartment and bilge.Start-up after StorageAn correct start-up of the engine will contribute to an efficient and troublefree operation in the long term.Your STEYR MOTORS Marine Dealer will gladly be available as consultant or for an expert performance.1. Check condition of hoses and hose clamps.2. Clean battery terminals.ATTENTION: Connect RED cable to positive terminal and then BLACK cable to negative terminal.Wrong connection of battery terminals may damage the electronic system.q3. Grease outer sides of terminals.4. Open fuel stop valve and check all fuel lines for leakage.5. Thoroughly check the boat and engine for slack or missing screws or nuts.6. Pump the bilge dry and clean the engine compartment.7. Complete the raw water system.8. Open the raw water inlet.ATTENTION: Insufficient raw water supply may damage the engine and the raw water pump.q9. Test run. Start engine. Check voltmeter, oil pressure- and water temperature gauge. (Make sure that all systemsfunction properly.)10. Check all parts for oil-, fuel- or water leakage.102
ENGINE LOGDateDestinationNumberAbordEngineStartedEngineStoppedService RecordInspection Tune-up Lubrication103
ENGINE LOGDateDestinationNumberAbordEngineStartedEngineStoppedService RecordInspection Tune-up Lubrication104
ENGINE LOGDateDestinationNumberAbordEngineStartedEngineStoppedService RecordInspection Tune-up Lubrication105
106
WARRANTYLIMITED ENGINE WARRANTY ............................................................. 108Engine, Gearbox, Boat Model and Hull Identification Numbers ............. 115STEYR OWNER IDENTIFICATION CARD ............................................ 116SERVICE NETWORK ............................................................................ 117107
STEYR MOTORS – Marine Engines – LIMITED ENGINE WARRANTYSTEYR MOTORS, GmbH (“STEYR MOTORS”) warrants to the original retail purchaser of a product covered underthis Warranty (“the Product”), and to any other person to whom the Product is transferred during the duration of thisWarranty, that in the event of a failure of the Product occurring during the applicable warranty period resulting from adefect in materials or factory workmanship, STEYR MOTORS will, at its option, repair or replace the defective Productaccording to the terms and conditions set forth herein.Products WarrantedThis Limited Warranty applies to all new marine engines manufactured by STEYR MOTORS, GmbH and sold bySTEYR MOTORS or by a STEYR MOTORS approved distributor or dealer until such time as this Warranty may besubsequently updated or revised. This Warranty also applies to the following engine accessories when approved andsupplied by STEYR MOTORS and when installed by STEYR MOTORS or by a STEYR MOTORS approved distributoror dealer:• acc. To enlisted distributor as stated in STEYR MOTORS Service Network(refer to website at www.steyr-motors.com)This Warranty does not apply to any component manufactured by a third party and supplied by STEYR MOTORS aspart of a package. Such non-covered components include, but are not limited to, any MerCruiser Bravo Series sterndrive, ZF Marine transmissions, sail drives, water jet, control lever and commander systems, etc., that may be soldtogether with a <strong>Steyr</strong> engine. Buyers of a package that includes a MerCruiser Bravo Series stern drive should consultthe product literature accompanying the stern drive for details on the warranty provided by its manufacturer, MercuryMarine. The provided warranty registration card with the Mercury Marine/MerCruiser product needs to be returned toSTEYR MOTORS for registration in their system.What You Must Do to Activate the WarrantyOwner RegistrationIMPORTANT: In order to obtain the full benefit of this Warranty, your new <strong>Steyr</strong> engines must be timely registeredat the factory, latest within 3 years from the date of sales document. The engines you have purchasedhave been shipped from the factory together with a Warranty Registration Card, a copy of which is included in yourOperation, Maintenance and Warranty Manual. It is your responsibility to insure that the distributor or dealer fromwhom you purchased the engines fills out the Warranty Registration Card in its entirety and that it is immediatelyforwarded to STEYR MOTORS. The Registration Card must include your name and address, the product numberand serial number(s), date of sale, and type of use, as well as the seller’s name, address, code number and a properlyobtained commissioning report. It must also contain the selling distributor/dealer’s certification that you are theoriginal purchaser and user of the Product.In case of an engine doesn’t get put into operation within the first year from production, the STEYR MOTORS longtermpreservation and conservation procedure must be followed and documented as described in this procedure toprove proper storage handling and re-commissioning of the product.A copy of the Warranty Registration Card, designated “Purchaser’s Copy,” MUST be given to you immediately afterthe card has been completely filled out by the selling distributor/dealer. Your copy of the Warranty Registration Cardshould be retained together with your Owner Identification Card and kept in a safe place. In the event that you everrequire warranty service, you will be required to present your copy of the Warranty Registration Card along with yourOwner Identification Card so that the date of purchase and delivery may be verified and so that the Warranty ClaimForm can be properly completed.Failure to register the Product with the factory within 60 days of the date on which you take delivery of theProduct will cause the warranty period to begin running from the date on which the Product is shipped fromSTEYR MOTORS in Austria, rather than on the date of delivery to you. It is to your benefit to have all Productstimely registered at the factory so that you receive the maximum available coverage under the Warranty and sothat STEYR MOTORS has a means of identifying and contacting you in the event of product updates or servicenotifications.108
Commissioning ReportYour new <strong>Steyr</strong> engines have been shipped together with a form entitled “Commissioning Report,” a copy of whichis included in the installation manual that accompanies your engines. It is your responsibility to insure that this formis completed by the seller (distributor, dealer, or boat builder) at the time of installation and that it is immediately returnedto STEYR MOTORS. Keep a copy of the completed form for your records, as you will be required to present itin the event you ever require warranty service. Failure to complete and immediately return the Commissioning Reportto STEYR MOTORS will cause your warranty to be voided.Base Engine WarrantyThe Base Engine Warranty covers any failure of the Product under normal use and service that occurs during theapplicable period of coverage and that results from a defect in STEYR MOTORS material or factory workmanship (a“Warrantable Failure”).STEYR MOTORS’ Responsibilities under the Base Engine WarrantyDuring the applicable period of coverage under the Base Engine Warranty, and subject to all conditions, limitationsand exclusions herein, STEYR MOTORS will, at its option, either repair or replace the defective Product. In the eventthat STEYR MOTORS elects to repair the Product, STEYR MOTORS will do the following:• STEYR MOTORS will pay for all parts and labor reasonably required to repair the defect responsiblefor the Warrantable Failure.• STEYR MOTORS will pay for all lubricating oil, antifreeze, filter elements, and other similar maintenanceitems replaced during a warranty repair when such items are not reusable due to a WarrantableFailure.• STEYR MOTORS will pay for the usual and customary labor costs for engine removal and reinstallationwhen necessary to repair a Warrantable Failure.Labor costs will be paid by STEYR MOTORS only for work pre-authorized by STEYR MOTORS and performedby an approved service facility during normal business hours. Labor costs will be paid in accordance with STEYRMOTORS’ published standard repair time guidelines. Parts used in warranty repairs may be new STEYR MOTORSparts, STEYR MOTORS-approved rebuilt parts, or repaired parts.Duration of CoverageThe duration of coverage under the Base Engine Warranty depends upon whether your engine application and useare rated for “Pleasure Duty” or for “Commercial Duty”.• For engines rated “Pleasure Duty,” the Base Engine Warranty extends for a period of 24 months oruntil the engines have been operated for 1,000 hours, whichever occurs first.• For engines rated “Commercial Duty,” the Base Engine Warranty extends for a period of 12 months oruntil the engines have been operated for 1,000 hours, whichever occurs first.The period of coverage commences on the date on which the Product is delivered to the first retail purchaser, or thedate on which the unit is first leased, rented or loaned, or when the Product has been operated for 30 hours, whicheveroccurs first.109
Extended Major Components WarrantyThe Extended Major Components Warranty covers any failure under normal use and service of any of the belowlistedparts or castings that occurs during the extended warranty period and that is caused by a defect in material orfactory workmanship:Engine Monoblock CastingEngine CamshaftEngine CrankshaftEngine Connecting RodsCrankshaft SprocketCamshaft SprocketEngine HousingFlywheel HousingSTEYR MOTORS’ Responsibilities under the Extended Major Components WarrantyDuring the applicable period of coverage under the Extended Major Components Warranty, and subject to the conditions,limitations and exclusions herein, STEYR MOTORS will, at its option, either repair or replace the defectivecomponent. STEYR MOTORS’ responsibilities in the event of a repair shall be the same as provided with respectto the Base Engine Warranty, except that the cost of labor for removal and reinstallation is not covered under theExtended Major Components Warranty.Duration of CoverageThe Extended Major Components Warranty extends for a period of 60 months or until the engine has been operatedfor 1,800 hours, whichever occurs first. As with the Base Engine Warranty, the period of coverage commences onthe date on which the Product is delivered to the first retail purchaser or on the date on which the unit is first leased,rented or loaned, or when the Product has been operated for 30 hours, whichever occurs first.1Bushing and bearing failures are not covered.110
Summary of Warranty CoverageType of CoverageBase Engine Warranty– PLEASUREBase Engine Warranty– COMMERCIALExtended MajorComponents WarrantyDuration(Months)Repair Costs Paid by STEYR MOTORSDurationParts Labor Labor for(Hours/) 2 Removal &Reinstallation24 1,000 Yes Yes Yes12 1,000 Yes Yes Yes60 1,000 Yes Yes NoAdditional Coverage for Parts Replaced or Repaired Under WarrantyAny STEYR MOTORS product or part replaced or repaired under the Base Engine Warranty will be covered underthe Base Engine Warranty for the remainder of the warranty period.Warranty Coverage for genuine Spare PartsSTEYR MOTORS warrants genuine spare parts for extent of 6 month from the date of sales.Conditions of Warranty CoverageThis Warranty is expressly conditioned upon proper application, installation, commissioning, operation, and maintenanceof the Product in accordance with the specifications and guidelines set forth by STEYR MOTORS in its Operations,Maintenance and Warranty Manual and in its installation and service manuals. Proper use and operation of theProduct entails, among other things, use of the Product in strict compliance with the following power ratings:Pleasure Duty. This power rating is intended for use in variable load applications where full power is limitedto one (1) hour out of every eight (8) hours of operation. Reduced power operations must be at or below200 RPM of the maximum rated RPM. This rating is an ISO 3046 (ISO 8665) fuel stop power rating and isintended exclusively for pleasure/non-revenue generating applications. Engines rated “Pleasure Duty” maynot be used for any commercial application without voiding the product warranty. A “commercial application”includes any work or employment-related use of the Product, or any use of the Product that creates income,even if the Product is only occasionally used for such purpose. A “commercial application” also includescharter, naval, police, and other similar applications.Commercial Duty. This power rating is intended for intermittent use in variable load applications where fullpower is limited to two (2) hours of every eight (8) hours of operation. Reduced power operations must beat or below 400 RPM of the maximum rated RPM. This rating is an ISO 3046 fuel stop power rating and isintended for applications that operate less than 1,500 hours per year.STEYR MOTORS’ duty of performance under this Warranty is expressly conditioned upon the purchaser’s maintenanceof the following documentation and records which must be made available to STEYR MOTORS in the eventthat warranty service is required:2Whichever occurs first111
• You are responsible for keeping complete and accurate records of all service performed on the enginesand for maintaining a log of all regularly scheduled maintenance in the Owner Service Log included inyour Operations, Maintenance and Warranty Manual.• You are responsible for assuring that at all times the engine hour meter on your <strong>Steyr</strong> engines is ingood working order and in a condition that accurately reflects the total hours that the engines have beenoperated.• You are responsible for keeping copies of the completed Warranty Registration Form and of the CommissioningReport.Limitations and ExclusionsSTEYR MOTORS is not responsible for any engine failure or other problem attributable in whole or in part to any ofthe following:• Any application or installation inconsistent with STEYR MOTORS’ published application and installationguidelines.• Abuse or neglect, including but not limited to operation without adequate coolants or lubricants, overfueling,over-speeding, lack of maintenance of cooling, lubricating or intake systems, improper storage,preservation, rust or corrosion, improper starting, warm-up, run-in or shutdown practices, or failurescaused by incorrect oil or by water, dirt or other contaminants in the fuel or oil.• Unauthorized modifications of the engine.• Use of a service facility not approved by STEYR MOTORS, or use of parts not supplied or approved by<strong>Steyr</strong> <strong>Motors</strong>. For information on approved service partner in your area, please contact STEYR MOTORSor refer to the list of approved service facilities posted on STEYR MOTORS’ website at www.steyrmotors.com.• Prolonged or incorrect storage. Prolonged storage, for purposes of this Warranty, is storage for a periodof over one (1) year from the date of shipment from the STEYR MOTORS factory.• Normal wear or wearout of parts.• Faulty workmanship, whether or not performed by an approved dealer or distributor of STEYR MOTORS,and whether or not occurring in conjunction with a warranty repair.STEYR MOTORS will not pay for any of the following costs, which shall be the sole responsibility of the Owner:• The cost of transporting any STEYR MOTORS engine or product to or from the place of warrantyservice.• The cost of haulage, launch, docking, or cranes.• The cost of lubricating oil, antifreeze, filter elements, and other maintenance items replaced during warrantyrepairs unless such items are not reusable because of the Warrantable Failure.• The cost of any part supplied, or labor performed, by a service facility not approved by STEYR MOTORS.• The cost of any part supplied, or labor performed, by a service facility without the prior authorization ofSTEYR MOTORS.STEYR MOTORS does not warrant any product or component not specifically identified in the “Products Warranted”section of this document. Please note in particular the following:• STEYR MOTORS does not warrant any product or component not manufactured by STEYR MOTORS,except for those accessories specifically identified in the “Products Warranted” section of this documentthat are supplied by STEYR MOTORS and installed by STEYR MOTORS or by a STEYR MOTORS approveddistributor or dealer. Examples of items not warranted are stern drives, sail drives, gear boxes,and water jets, control lever, etc.• STEYR MOTORS does not warrant maintenance components supplied by STEYR MOTORS after90 days of the date on which warranty coverage commences. Maintenance components include, but arenot limited to, sea water pump impellers, zinc plugs, oil filters, fuel filters, air filters, water filters, fuel/waterseparator filters, belts, automatic belt tensioner, timing belt and idler, gaskets, hoses, fuses, brushesand accommodator, fuel injection nozzle valves, expansion tank pressure caps, and thermostats.112
• STEYR MOTORS will not warrant their product with the limited engine warranty if the provided productwarranty registration card will not be submitted and received by STEYR MOTORS within 3 years fromthe date of product manufacturing.IN NO EVENT SHALL STEYR MOTORS BE RESPONSIBLE FOR INCIDENTAL OR CONSEQUENTIAL DAM-AGES. Such excluded damages include, but are not limited to, loss of use (including “down time”), loss of income orbusiness revenue, costs of travel, costs of transport, extra costs required to make the Product accessible as a resultof particular vessel designs and/or installations (including the removal and/or replacement of partitions or material),personal injury, loss of property, cargo damage, fines, taxes, damages to parts or goods other than products specificallycovered by this Warranty, and any other indirect or consequential loss resulting from a Warrantable Failure.Some states do not allow limitations on how long an implied warranty lasts, so the above limitation may notapply to you.THE WARRANTIES SET FORTH HEREIN ARE THE ONLY WARRANTIES MADE BY STEYR MOTORS WITH RE-SPECT TO THE PRODUCT. NO DEALER OR DISTRIBUTOR OF STEYR MOTORS IS AUTHORIZED TO MAKEANY ADDITIONAL WARRANTY, PROMISE, OR REPRESENTATION ON BEHALF OF STEYR MOTORS OR TOMODIFY OR EXTEND THE TERMS OR DURATION OF THIS WARRANTY. ANY WARRANTY IMPLIED BY LAW,INCLUDING ANY IMPLIED WARRANTY OF MERCHANTABILITY OR OF FITNESS FOR A PARTICULAR PUR-POSE, SHALL BE LIMITED IN DURATION TO THE TERM OF THIS WARRANTY.Procedure for Making a Warranty ClaimWarranty service may be obtained from any approved STEYR MOTORS distributor or dealer. For a list of approvedservice locations, please refer to <strong>Steyr</strong> <strong>Motors</strong>’ website at www.steyr-motors.com or contact STEYR MOTORS’ Aftersales Division, the contact information for which is provided on the final page of this document.In the event of a Warrantable Failure arising during the applicable warranty period, a warranty claim must be submittedpromptly IN WRITING. A warranty claim must be made immediately upon discovery of facts that would lead areasonably prudent owner to believe that the Product is defective in materials or factory workmanship, but in no eventmore than 30 days after such discovery.To make a warranty claim, contact any approved STEYR MOTORS distributor or dealer and present your STEYRMOTORS identification card and your copy of the Warranty Registration Form and Owner Service Log. You may alsobe required to present your copy of the Commissioning Report all maintenance and service records.A STEYR MOTORS Warranty Claim Form (a sample copy of which is available from STEYR MOTORS’ website atwww.steyr-motors.com) must be completed by the dealer or distributor and returned to STEYR MOTORS in Austria.It is your responsibility to insure that the Warranty Form is properly completed and to retain a copy for your recordsas proof of the making of a timely warranty claim.All warranty claims MUST be approved by STEYR MOTORS before any warranty work is undertaken. No distributoror dealer of STEYR MOTORS is authorized to approve, or to guarantee approval of, a warranty claim. Any workperformed prior to obtaining authorization from STEYR MOTORS will be at the risk of the owner and/or service facilityundertaking the work. Upon approval of a warranty claim, you are responsible for making the Product available forrepair at the place designated by STEYR MOTORS within a reasonable period of time.IMPORTANT: The foregoing procedures for making a warranty claim are mandatory. Failure to comply withthe requirements for submitting a warranty claim shall be presumed to have deprived STEYR MOTORS ofadequate and timely notice of a defect and shall relieve STEYR MOTORS of any duty of performance underthis Warranty.113
Venue and Applicable LawThis Limited Warranty and the rights and obligations of STEYR MOTORS and of the Owner as they relate to anyproduct supplied by <strong>Steyr</strong> <strong>Motors</strong> shall be governed by and construed in accordance with Austrian law, and any legalaction instituted against STEYR MOTORS as a result of this Warranty shall be brought in Vienna, Austria. In the eventof a legal action commenced against <strong>Steyr</strong> <strong>Motors</strong> in the United States, <strong>Steyr</strong> <strong>Motors</strong> shall have the option to consentto jurisdiction and to require that the action be submitted to binding arbitration according to the commercial rules ofthe American Arbitration Association.MiscellaneousThis Warranty document consists of the complete and final expression of the intent of the parties with respect to thewarranty obligations of STEYR MOTORS. The terms of this Warranty may not be modified except by a writing signedby an authorized representative of STEYR MOTORS. Dealers and distributors of <strong>Steyr</strong> <strong>Motors</strong> engines (whether ornot approved by <strong>Steyr</strong> <strong>Motors</strong>) are not agents of STEYR MOTORS and have no authority to alter the terms of thisWarranty or to waive any condition or requirement stated herein.Should any portion of this Warranty be determined unenforceable in a court of law, the validity and legal effect of theremainder of the document shall not be affected. STEYR MOTORS may in certain circumstances, and at its solediscretion, provide for service outside the scope of this Warranty to update, modify, or repair a product. In that event,<strong>Steyr</strong> <strong>Motors</strong> shall not be deemed to have assumed any additional obligation to the owner or to have modified orwaived any of the provisions of this Warranty.The owner shall be responsible for the cost of investigating complaints found not to be attributable to a defect inSTEYR MOTORS material or factory workmanship.Any STEYR MOTORS product or part replaced under warranty will automatically become the property of STEYRMOTORS.This warranty gives you specific legal rights, and you may also have other rights which vary from state tostate.If You Do Not Receive Satisfactory Warranty ServiceSTEYR MOTORS strives, through an extensive network of independent distributors and dealers, to provide prompt,courteous, and competent warranty service to owners of <strong>Steyr</strong> engines. If you fail to receive satisfactory warrantyservice from a STEYR MOTORS distributor or dealer, please contact STEYR MOTORS after sales division directly.Its contact information is as follows:STEYR MOTORS, GmbHIm Stadtgut B1, 4407<strong>Steyr</strong>, AustriaPhone: +43 7252 222-52Fax: +43 7252 222-29e-mail: service@steyr-motors.comErstellt/Issued: 04.02.2011Kundendienst/After Sales ServiceGeprüft und freigegeben/Approved:04.02.2011/Ing. Rudolf Mandorfer114
Engine, Gearbox, Boat Model and Hull Identification NumbersRecord your engine and gearbox model and serial numbers immediately after purchase.This will enable you to have them available for quick reference when ordering parts or literature.Engine Model No.: –––––––––––––––––––––––––––––––––––––––––––––––––––––Engine Serial No.: –––––––––––––––––––––––––––––––––––––––––––––––––––––Gearbox or Stern Drive Model No.: ––––––––––––––––––––––––––––––––––––––––Gearbox or Stern Drive Serial No.: ––––––––––––––––––––––––––––––––––––––––Ignition Key No.: –––––––––––––––––––––––––––––––––––––––––––––––––––––––Boat Model No.: –––––––––––––––––––––––––––––––––––––––––––––––––––––––Hull Identification No. (HIN): –––––––––––––––––––––––––––––––––––––––––––––Recommended Propeller Size: –––––––––––––––––––––––––––––––––––––––––––Replacement PartsNever use parts of unknown quality on your STEYR MOTORS Marine Engine.Insist on GENUINE-STEYR MOTORS Marine parts.See your local STEYR MOTORS Marine dealer.STEYR MOTORS GMBH 2007All rights reserved to changes or modifications.115
STEYR OWNER IDENTIFICATION CARDOwner’s NameAddressCity State ZipDate of commissioningMODEL # SERIAL #DEALER RECORD CARDENGINE REGISTRATION MODEL SERIALOUT DRIVE REGISTRATION MODEL SERIALTRANSOM MOUNT REGISTRATION MODEL SERIALOwner’s NameAddressCity State ZipDate of commissioningIgnition Key No.Boat Mfgr.Hull No.Boat ModelBoat lengthOwner’s signatureIMPORTANT: The Federal Boat Safety Act requires registration list to be maintained on product sales by manufacturerand DEALER. This is a standard card on which a dealer can keep his records.NameAddressCity State ZipDate of commissioningType of UsePleasure Comml GovtExtended Storage Preservation Procedure(refer to Installation Manual Z001007/0, commissioning REPORT) 1 st preservation 2 nd preservationDealer NameAddressCity State ZipOwner’s e-MailDealer CodeEngine Registration Model # Serial #Boat MfgHull No.Trailer Vin No.Rate Overall Quality ofBoatMotorModelLengthGood Acceptable Poor116
SERVICENETWORKAUSTRIASTEYR MOTORS GmbHIm Stadtgut B1, 4407 STEYR, AUSTRIAPhone +43 7252 222-52Fax +43 7252 222-29e-mail: service@steyr-motors.comhttp://www.steyr-motors.comA full list of our worldwide Service network can you found on our homepage under:http://www.steyr-motors.com/network117
118