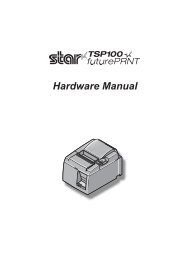
USER MANUAL - Bematech
USER MANUAL - Bematech
USER MANUAL - Bematech

You also want an ePaper? Increase the reach of your titles
YUMPU automatically turns print PDFs into web optimized ePapers that Google loves.
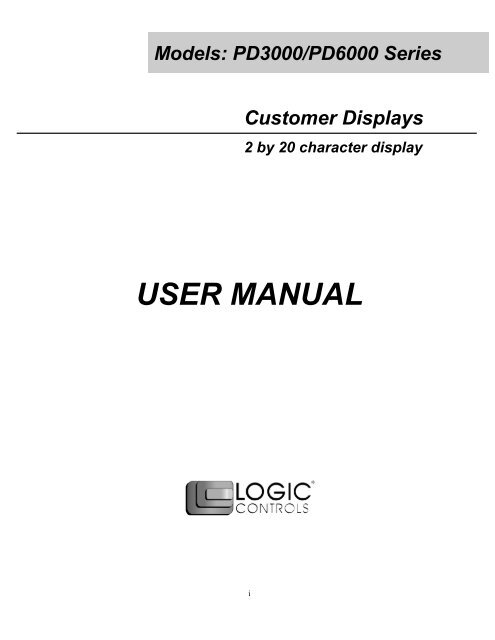
Models: PD3000/PD6000 SeriesCustomer Displays2 by 20 character display<strong>USER</strong> <strong>MANUAL</strong>i
NOTICEThe manufacturer of the POS pole display makes norepresentations or warranties, either expressed or implied, byor with respect to anything in this manual, and shall not beliable for any implied warranties of fitness for a particularpurpose or for any indirect, special or consequentialdamages. Information in this document is subject to changewithout notice and does not represent a commitment on thepart of the manufacturer.FCC NOTICEThis equipment generates, uses, and can radiate radiofrequency energy and if not installed and used in accordancewith this manual, may cause interference to radiocommunications. It has been tested and found to comply withthe limits for a Class A digital device pursuant to Subpart J ofPart 15 of FCC Rules, which are designed to providereasonable protection against interference when operated ina commercial environment. Operation of this equipment in aresidential area is likely to cause interference in which casethe user at his own expense will be required to take whatevermeasures may be required to correct the interference.LOGIC CONTROLS, INC.355 Denton AvenueNew Hyde Park, NY 11040TEL: (516) 248-0400FAX: (516) 248-0443Email: lci@logiccontrols.comhttp://www.logiccontrols.comii
TABLE OF CONTENTSFEATURES............................................................................1MODEL IDENTIFICATION.....................................................2CARTON CONTENTS ...........................................................2INSTALLATION......................................................................3FUNCTIONAL TEST ..............................................................5INTERFACE CONNECTION..................................................8SOFTWARE COMMANDS ..................................................10HARDWARE CONFIGURATION .........................................12DISPLAY CHARACTER CODES.........................................13GENERAL SPECIFICATIONS .............................................14iii
FEATURESThe PD3000/PD6000 family of pole displays offers a wide range ofhigh quality features and models to choice from. Listed below are thefeatures incorporated into each pole display. Not all features areavailable in all models. The model identification chart will assist you inselecting the model best suited to your needs.The PD3000 family has the industry standard 5mm high vacuumfluorescent 5x7 pixel display. The PD6000 family has a pixel height of11.25mm, one of the largest vacuum fluorescent displays on themarket today.Features - All Models• Bright green fluorescent display• Supports high speed serial protocol: up to 19,200 baud rate, 1 stopbit• Automatic message scrolling• Two line display with 20 characters per line• Matched optical lens for better viewing contrast• Ergonomic design• Direct RS232C or parallel interface• Long life and trouble free operation• Five adjustable viewing angles• Simple installation• Available with 120V or 220V Power AdaptersFeatures - Model dependent• Emulation of other popular command sets• User definable character• Parallel pass-thru• True RS232C pass-thru• Real time clock• One time message scrolling• Ability to disable attention code• Ability to change attention code1
MODEL IDENTIFICATIONPD3orPD6 __ __ __ - __ __Blank = No Pass ThruPT = Pass Thru25 = DB25F connector to computerPOWER ADAPTER0 = 120VAC*COMMAND SET1 = 220VAC0 = LOGIC CONTROLS*1 = LOGIC CONTROLS SERIAL/PARALLEL INTERFACEWITH PASS-THRU0 = SERIAL 9600 BAUD*2 = SPECIAL COMMAND SET 1 (Aedex emulation) 1 = SERIAL 600 BAUD3 = SEPCIAL COMMAND SET 2 (Noritaki emulation) 2 = SERIAL 1200 BAUD4 = SPECIAL COMMAND SET 3 (Epson D202 emulation) 3 = SERIAL 2400 BAUD5 = SPECIAL COMMAND SET 4 (Ultimate PD1100XL/XLT) 4 = SERIAL 4800 BAUD9 = OPOS COMMAND SET 5 = SERIAL 19200 BAUD9 = PARALLEL INTERFACE* Default Values** Call for description of Command SetsCARTON CONTENTS1. Pole display, pre-assembled.2. Interface cable, comes with a DB9F connector (to computer) and aDIN6F connector (to pole display) as standard equipment.Optional DB25F connector (to computer) is available.Note: This cable is only supplied with standard serial pole displayswith no pass-thru function.3. Transformer adapter 120VAC to 6.0VAC (optional 220VAC).4. Metal base plate with mounting hardware.5. Quick Installation Guide.2
INSTALLATIONYour PD3000/PD6000 family of pole displays has been preassembledto make the installation as simple as possible.Serial Interface Non-pass-thru Models Installation1. Mount the pole display to the metal base plate using themounting hardware provided.2. The pole display can be used in a freestanding mode orattached to the counter using the remaining mountinghardware.3. Connect the round DIN6M connector from the pole display tothe round DIN6F connector of the interface cable.4. Connect the DB9F connector to the computer’s serial COM1 orCOM2 port.5. Connect the female phone jack of the power adapter to themale phone jack of the interface cable.6. Plug the power adapter into a 120VAC outlet.7. A start up text message (LOGIC CONTROLS POSCOMPONENTS) will be present for a short time. When thismessage disappears the cursor will be displayed at the leftmostdigit of the top row.Parallel Interface Non-pass-thru Models Installation1. Mount the pole display to the metal base plate using themounting hardware provided.2. The pole display can be used in a freestanding mode orattached to the counter using the remaining mountinghardware.3. Connect the DB25M connector to the computer’s parallelprinter port (LPT1).4. Connect the female phone jack of the power adapter to themale phone jack of the pole display cable.5. Plug the power adapter into a 120VAC outlet.6. A start up text message (LOGIC CONTROLS POSCOMPONENTS) will be present for a short time. When thismessage disappears the cursor will be displayed at the leftmostdigit of the top row.3
Serial Interface Pass-thru Models Installation1 Mount the pole display to the metal base plate using themounting hardware provided.2 The pole display can be used in a freestanding mode orattached to the counter using the remaining mountinghardware.3 Connect the DB25M connector to the peripheral device or aserial pass-thru terminator (optional accessory). Turn on powerof the peripheral device.4 Connect the DB9F connector to the computer’s serial COM1 orCOM2 port.5 Connect the female phone jack of the power adapter to themale phone jack of the pole display cable.6 Plug the power adapter into a 120VAC outlet.7 A start up text message (LOGIC CONTROLS POSCOMPONENTS) will be present for a short time. When thismessage disappears the cursor will be displayed at the leftmostdigit of the top row.Parallel Interface Pass-thru Models Installation1 Mount the pole display to the metal base plate using themounting hardware provided.2 The pole display can be used in a freestanding mode orattached to the counter using the remaining mountinghardware.3 Connect the DB25F connector to the peripheral device orparallel pass-thru terminator (optional accessory). Turn onpower of the peripheral device.4 Connect the DB25M connector to the computer’s parallelprinter port (LPT1).5 Connect the female phone jack of the power adapter to themale phone jack at the DB25M/DB25F connector.6 Plug the power adapter into a 120VAC outlet.7 A start up text message (LOGIC CONTROLS POSCOMPONENTS) will be present for a short time. When thismessage disappears the cursor will be displayed at the leftmostdigit of the top row.4
FUNCTIONAL TESTThe following test sequence will verify that your pole display isworking properly. Before you start this procedure, you must install thepole display correctly as outlined under the INSTALLATION section.The functional test should be done under MSDOS command promptby booting up the computer in DOS mode, or shell out to DOS prompt(in window95/98/ME) or COMMAND prompt (in windows NT/2000).NOTE: The actual key entries in the text below are enclosed within quotationmarks ( “ ” ). Do not type the quotation marks as part of your entries.Serial Interface Pole Displays Functional TestThis test procedure assumes the pole display is connected to COM1of the computer. If COM2 is being used, type COM2 where COM1 iscalled out.Close all opened application programs that use the same COM portbefore going into DOS command prompt. Enter the followingcommand lines to open the COM port for communication with the poledisplay:Type “MODE COM1 96,N,8,1” and press the ENTER key.Type “TYPE CON>COM1” and press the ENTER key.PD3000, PD3300, PD3400, PD3500, PD3900, PD6000, PD6300,PD6400, PD6500 and PD69001. Type “ABCDEFGH” and press ENTER key. The display will show“ABCDEFGH” on the first line.2. To end the test press Ctrl-C (hold down Ctrl and press C).PD3200 and PD62001. Type “!#1ABCDEFGH” and press ENTER key. The display willshow “ABCDEFGH” on the first line.2. To end the test press Ctrl-C (hold down Ctrl and press C).5
PD3100-PT, PD3300-PT, PD3400-PT, PD3500-PT, PD6100-PT,PD6300-PT, PD6400-PT and PD6500-PT1. Type “ABCDEFGH” and press ENTER key. The display will show“ABCDEFGH” on the first line.2. Type “^APASSTHRU” ( ^A represents Ctrl-A ) and press ENTERkey. The data will be passed through to the peripheral (e.g. aprinter). These characters are not shown on the display.3. Type “!#^BNUMBER12345”, then press ENTER key. The displaywill show “NUMBER12345” on the first line.4. To end the test press Ctrl-C (hold down Ctrl and press C).PD3200-PT and PD6200-PT1. Type “!#1ABCEDFGH” and press ENTER key. The display willshow “ABCDEFGH” on the first line.2. Type “PASSTHRU” and press ENTER key. The data will bepassed through to the peripheral (e.g. a printer). Thesecharacters are not shown on the display.3. Type “!#1NUMBER12345”, then press ENTER key. The displaywill show “NUMBER12345” on the first line.4. To end the test press Ctrl-C (hold down Ctrl and press C).Parallel Interface Pole Displays Functional TestThis procedure assumes the pole display is connected to the LPT1port of the computer. If parallel port LPT2 is being used, type LPT2where LPT1 is called out.PD3090, PD3390, PD3490, PD3590, PD3990, PD6090, PD6390,PD6490, PD6590 and PD69901. Type “ECHO ABCDEFGH>LPT1” and press ENTER key. Thedisplay will show “ABCDEFGH” on the first line.PD3290 and PD62901. Type “ECHO !#1ABCEDFGH>LPT1” and press ENTER key. Thedisplay will show “ABCDEFGH” on the first line.6
PD3190-PT, PD3390-PT, PD3490-PT, PD3590-PT, PD6190-PT,PD6390-PT, PD6490-PT and PD6590-PT1. Type “ECHO ABCDEFGH>LPT1” and press ENTER key. Thedisplay will show “ABCDEFGH” on the first line.2. Type “ECHO ^APASSTHRU>LPT1” (^A represents Ctrl-A) andpress ENTER key. The data will be passed through to theperipheral (e.g. a printer). These characters are not shown on thedisplay.3. Type “ECHO !#^BNUMBER12345>LPT1”, then press ENTER key.The display will show “NUMBER12345” on the first line.PD3290-PT and PD6290-PT1. Type “ECHO !#1ABCDEFGH>LPT1” and press ENTER key. Thedisplay will show “ABCDEFGH” on the first line.3. Type “ECHO PASSTHRU>LPT1” and press ENTER key. Thedata will be passed through to the peripheral (e.g. a printer).These characters are not shown on the display.3. Type “ECHO !#1NUMBER12345>LPT1”, then press ENTER key.The display will show “NUMBER12345” on the first line.For further testing of OPOS displays (PD3900, PD3990, PD6900 andPD6990), follow the instructions in the readme.doc file after softwareinstallation.7
INTERFACE CONNECTIONSerial Interface Connector ConfigurationThe pin out configuration for the standard serial pole display is aDB9F connector. It plugs directly into the serial port of the computer.1. DCD (tied to pins 4&6)2. NC3. TXD from PC4. DTR (tied to pins 1&6)5. Ground6. DSR (tied to pins 1&4)7. RTS (tied to pin 8)8. CTS (tied to pin 7)9. NCDB9F (to computer)For pass-through models, the display cable comes with twoconnectors. The DB9F is to be connected to the computer while theDB25M is for connection to the peripheral.1. DCD (tied to pins 4&6)2 NC3 TXD from PC4. DTR (tied to pins 1&6)5. Ground6. DSR (tied to pins 1&4)7. RTS (tied to pin 8)8. CTS (tied to pin 7)9. NC1. NC2. TXD to peripheral3. RXD from peripheral4. RTS5. CTS (tied to pin 20)6. NC7. Ground8. NC9-19 NC20 DTR (tied to pin 5)21-25 NCDB9F (to computer)DB25M (to peripheral)8
Parallel Interface Connector ConfigurationAll standard parallel pole displays will have a DB25 male connector. Itis connected to the printer port of the computer.1. –Strobe2. Data 03. Data 14. Data 25. Data 36. Data 47. Data 58. Data 69. Data 710. –Ack11. Busy12-17 NC18-25 GroundDB25M (to computer)For pass-through models, the display cable comes with a dualDB25M/F connector. The DB25M is to be connected to the computerwhile the DB25F is for connection to the peripheral.1. –Strobe2. Data 03. Data 14. Data 25. Data 36. Data 47. Data 58. Data 69. Data 710. –Ack11. Busy12. Paper End13. Select14. -Auto Feed15. -Error16. -Initialize Printer17. -Select In18-25. GroundDB25M (to computer)DB25F (to peripheral)9
SOFTWARE COMMANDSLogic Controls pole displays are controlled by command codes anddata from the computer. The model of pole display that you have willdetermine which command set works with your pole. Refer to themodel identification chart for further information.Commands are transmitted to the pole display as ASCII codes. Thecommand codes listed below are expressed in hexadecimal (base 16)numbers enclosed inside angle brackets < >, in decimal numbersenclosed in parenthesis ( ), and in ASCII characters enclosed in curlybrackets { }. Do not include the brackets as part of the command. ‘ ^ ‘character denotes ‘Ctrl’ in the keyboard. Press and hold ‘Ctrl’, thenpress the next key.LOGIC CONTROLS COMMAND SET (PD3000/PD6000):1. Vertical Scroll Mode , (18), {^R}:Data is written into the second row and transferred to the first rowwhen carriage return is received, leaving the second row empty.2. Normal Display Mode , (17), {^Q}:Data can be written into either row. Moves to the left most digit ofthe other row when line is full.3. Brightness Control , (04), {^D}:The brightness of the display can be adjusted using thiscommand followed by a data byte , , or .4. Back Space , (08), {^H}:The cursor position moves one digit to the left erasing theprevious information.5. Horizontal Tab , (09), {^I}:The cursor position shifts one digit to the right without erasingcharacter at original cursor position.6. Line Feed , (10), {^J}:The cursor position moves to the same position in the other row.In vertical scroll mode, if cursor was in second row, the cursor willnot move and display will scroll up.7. Carriage Return , (13), {^M}:The cursor moves to the left most digit of the row it is in.10
8. Digit Select , (16), {^P}:Moves the cursor to any position on the display with thiscommand followed by a data byte of to , or in decimal(00) to (39).9. Cursor On , (19), {^S}:Turns on the cursor.10. Cursor Off , (20), {^T}:Turns off the cursor.11. Reset , (31), {^_}:All characters are erased and all settings are returned to thepower-on reset conditions.12. Down Load Font :Assign a keyboard key (ASCII code to ) to a differentstyle font. The “X” represents the ASCII code for the selected key.The “F’s” represent the 5 segments that will make up the specialfont.13. Message Scroll ... :Scrolls a continuous message of up to 45 characters.PASS-THRU COMMAND SET (PD3100, PD6100):All software commands of the non-pass-thru model are available withfollowing additional commands for pass-thru control. When power isturned on or after a reset command has been initiated, all text isdisplayed on the pole display.1. Data to Peripheral , (01), :All data following this command will be sent to the peripheral untila “Data to Display” command is received.2. Data to Display , (33)(35)(02), {!}{#}{^B}:All data following this command will be sent to the pole displayuntil a “Data to Peripheral” command is received.11
HARDWARE CONFIGURATIONSerial pole displays were factory configured for serial RS232Cinterface using the following protocol:· 9600 Baud Rate· 8 Data Bits· 1 Stop Bit· No ParityOther optional baud rates are available with factory settings. Refer tothe model identification chart for further information.12
DISPLAY CHARACTER CODESD7 0 0 0 0 0 0 0 0D6 0 0 0 0 1 1 1 1D5 0 0 1 1 0 0 1 1D4 0 1 0 1 0 1 0 1D3 D2 D1 D0 0 1 2 3 4 5 6 70 0 0 0 0 DP SP 0 @ P ‘ p0 0 0 1 1 DC1 ! 1 A Q a q0 0 1 0 2 DC2 " 2 B R b r0 0 1 1 3 DL DC3 # 3 C S c s0 1 0 0 4 DIM DC4 $ 4 D T d t0 1 0 1 5 MS % 5 E U e u0 1 1 0 6 & 6 F V f v0 1 1 1 7 ’ 7 G W g w1 0 0 0 8 BS ( 8 H X h x1 0 0 1 9 HT ) 9 I Y i y1 0 1 0 A LF * : J Z j z1 0 1 1 B + ; K [ k {1 1 0 0 C CR , < L \ l |1 1 0 1 D - = M ] m }1 1 1 0 E . > N ^ n ~1 1 1 1 F RST / ? O _ o13
GENERAL SPECIFICATIONSPD3000PD6000OPTICAL:Number of rows 2 2Number of digits/row 20 20Dot matrix 5 x 7 plus underline 5X7 plus commaDigit height) 0.20in. (5.0mm 0.44in. (11.25mm)Digit width 0.14in. (3.5mm) 0.28in. (7.2mm)Character format ASCII ASCIIBrightness (typical) 690 cd/m 2 700 cd/m 2Display color Green-Blue Green-BlueMTBF (hours) 300,000 300,000MECHANICAL:Weight 2.4 lb. 2.8 lb.Dimensions (in inches) (w x h x d) (w x h x d)Display head 7.9 x 3.4 x 1.75 11.0 x 3.25 x 1.75Rectangular base 2.12 x 2.0 x 2.25 2.12 x 2.0 x 2.25Base plate 4.0 x 0.09 x 8.0 4.0 x 0.09 x 8.0Overall height (typical) 25 25ELECTRICAL:Adapter input powerAdapter output powerENVIRONMENTAL:Operating temperatureStorage temperatureRelative HumidityVibration (10 to 55 Hz.)ShockCABLES & CONNECTORS:SerialDisplay cableInterface cablePower adapterParallelDisplay cable120VAC, 60Hz; optional 220VAC, 50Hz6VAC, 1000mA0 to +50 o C-20 to +70 o C80%, non-condensing4G’s40G’s6-pin DIN (male)6-pin DIN (female)DB9 (female); optional DB25 (female)Phone jack (male)Phone jack (female)DB25 (female)14


![MC9190-G Quick Start Guide [Spanish] (P/N 72-139206-01ES Rev. A)](https://img.yumpu.com/50178248/1/178x260/mc9190-g-quick-start-guide-spanish-p-n-72-139206-01es-rev-a.jpg?quality=85)