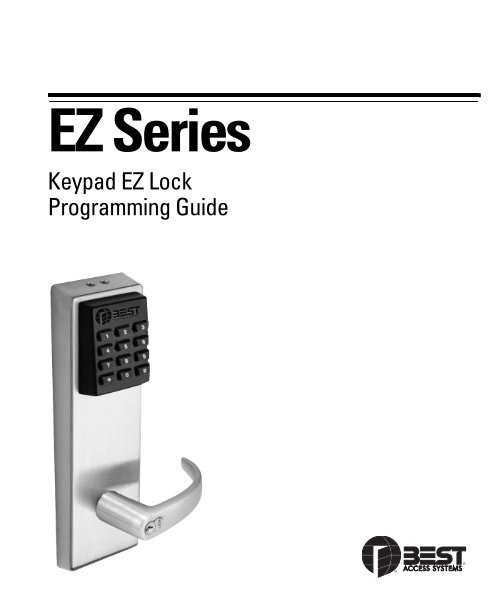
Keypad EZ Lock Programming Guide - Best Access Systems
Keypad EZ Lock Programming Guide - Best Access Systems
Keypad EZ Lock Programming Guide - Best Access Systems
You also want an ePaper? Increase the reach of your titles
YUMPU automatically turns print PDFs into web optimized ePapers that Google loves.
To end passage mode in a <strong>Keypad</strong> <strong>EZ</strong> <strong>Lock</strong>:Step Do this . . . Example . . .1On the keypad, enter your Personal Identification 1234 #Number (PIN), and then press the # key.Note: The green light blinks and the lock ‘chirps’with every valid key press.23Immediately enter * then #.The lock relocks.Introduction to <strong>Keypad</strong> <strong>EZ</strong>Remote unlockaccessSUPPORT SERVICESThe <strong>Keypad</strong> <strong>EZ</strong> remote unlock feature offers a convenient way to unlock a doorfor visitors, contractors, and others who either do not have a PIN or may haveforgotten their PIN.Example of common uses include:■ receptionist entries■ guard stations■ receiving and shipping docksFor more information on installing the remote unlock feature, see InstallationInstructions for <strong>Keypad</strong> <strong>EZ</strong> Remote Unlock (T80922).When you have a question or problem with any component of the <strong>Keypad</strong> <strong>EZ</strong>lock, your first resource for help are the B.A.S.I.S. G & B.A.S.I.S. V ServiceManuals. If you can’t find a satisfactory answer, contact your local BESTrepresentative.TelephonetechnicalsupportBefore you call for technical support, try to be in the location where the problemexists and prepare to provide the following information:■ What you were doing when you encountered the problem and exactly whathappened■ What you have done so far to correct the problem.BEST Representatives provide telephone technical support for all <strong>Keypad</strong> <strong>EZ</strong>products. You may locate the representative nearest you by calling (317) 849-2250 Monday through Friday, between 7:00 a.m. and 4:00 p.m. eastern standardtime; or visit us on the web at www.bestaccess.com.<strong>Keypad</strong> <strong>EZ</strong> <strong>Programming</strong> <strong>Guide</strong> 1–3
Introduction to <strong>Keypad</strong> <strong>EZ</strong>OVERVIEWYour <strong>Keypad</strong> <strong>EZ</strong> <strong>Lock</strong> looks simple enough, but actually it’s masquerading as aone-door sophisticated access control system. So before you start programming,first stop and think about the system design decisions that you’ll need to make.Use the following to help you think through some important decisions and thenrecord your decisions by using the forms that start on page 5–2.First, think about the people in your enterprise■■■■■■Who can you trust with a PIN that can access the lock 24 hours a day,7 days a week?Who can you trust to keep the door unlocked for an indefinite period of time?For more information see page 3–5.Who will be named the Administrator of the <strong>Keypad</strong> <strong>EZ</strong> locks?Will you allow others beside the Administrator to program users? <strong>Keypad</strong> <strong>EZ</strong>allows up to five Supervisor Users, one Supervisor for each group. For moreinformation see page 3–3.Are there any people who might need more than three seconds to open thedoor? These people may include the elderly and people with physicaldisabilities. For more information see page 3–4.Is it an advantage for you to group your people into two or more groups?Advantages include:▲ the ability to delegate the management of (adding, deleting) of PINs▲ the ability to disable whole groups of users at one time▲ the ability to quickly delete whole groups of users at one time.If you have a small business, you may not need to program any Supervisors atall, but if you have a larger firm, or if you have several <strong>Keypad</strong> <strong>EZ</strong> locks, youmay want to at least program one or two Supervisors.Second, think about the <strong>Keypad</strong> <strong>EZ</strong> lock or locks■■■Are they mortise deadbolt locks? If so, who will you allow to override thedeadbolt when it’s thrown?How many digits do you want to use for the PIN (Personal IdentificationNumber): 3, 4, 5, or 6? The lesser the number of digits, the easier the PIN is toremember, but the less secure it is too. The opposite is true for the longerPINs: they’re easier to forget but are more secure. The <strong>Keypad</strong> <strong>EZ</strong> lock isfactory preset to accept 4-digit PINs (for example, 1234).Do you need to let someone remotely unlock the door, such as a receptionistor security guard? If so, you’ll want to take advantage of the remote unlockfeature. For more information see page 1–3.1–4 <strong>Keypad</strong> <strong>EZ</strong> <strong>Programming</strong> <strong>Guide</strong>
Introduction to <strong>Keypad</strong> <strong>EZ</strong>Third, think about the PINs that will be your ‘keys’ to the<strong>Keypad</strong> <strong>EZ</strong> locks.It’s important to think of these PINs as you would a key. Like keys they areimportant security devices that need to be kept safe from compromise.■■■■■How will you create your PINs? Will you use a random number generator orwill you simply use your own creativity?How will you record and keep track of the PINs? This guide includes a <strong>Lock</strong>and User Record form for your use (see page 5–3), but you may want to usean electronic spreadsheet program and keep them secure electronically.How will you pass out the PINs to people? This usually requires writing thePIN down for the user, but you can handwrite them, or you can create a form,or even an agreement that the user can sign that could specify any fees tocharge if the PIN is forgotten or compromised. For more information seepage 3–7.What will you do when someone forgets his PIN? You or a Supervisor couldsimply check your records and remind him verbally. But you may want toreprint his PIN and charge him a small fee. It’s up to you to decide how strictor lenient you want to be, but whatever you decide, a clear policy is usuallyalways better than an unclear one or no policy at all.What if you find that a user has shared her PIN with someone else? You maywant to go as far as to terminate or remove the privileges of that individual andimmediately delete the PIN. In the least you will want to change the PIN. Oryou may want to charge a fee for such a violation.SAMPLE APPLICATIONSThe following are two example applications to help you understand how <strong>Keypad</strong><strong>EZ</strong> locks can be used in real-life applications. The first application is a smallrestaurant. Use this scenario if you have a small number of locks and users.Use the second scenario — a local department store — as a starting point, if youhave at least three locks and at least two Supervisors.Jim’srestaurantJim, the owner of Jim’s Restaurant — a small roadside diner — has five full-timeand two part-time employees. Although he is the owner, he decides to ask Greg,his General Manager, to be the Administrator of the <strong>Keypad</strong> <strong>EZ</strong> locks. The <strong>Keypad</strong><strong>EZ</strong> lock is installed on the storage room door. See Figure 1.1 on page 1–6.Jim also decides that only full-time employees need a PIN because his part-timeemployees are never there unless a full-time employee is.He also decides that, since there are only five employees who will need access,that only one group is necessary. Group 1 is therefore the group that is used. Allusers need to be programmed as part of group 1.<strong>Keypad</strong> <strong>EZ</strong> <strong>Programming</strong> <strong>Guide</strong> 1–5
Introduction to <strong>Keypad</strong> <strong>EZ</strong>Jim also decides that only the Line Assistant — Frank Copland — will have PassageMode privilege. This is the only employee who he wants to authorize to keep thestorage door unlocked. See Figure 1.2 on page 1–6.Here’s a sample of the completed <strong>Lock</strong> Group and User Record that Greg signs.KEYPAD <strong>EZ</strong> LOCK GROUP AND USER RECORDCopy this page for additional groups in your system.Keep group records separate.Group and doorsName of business or division Jim’s RestaurantGroup number & description a 1 — AllSupervisor Name bnoneSupervisor PINnonea. Use group 1, 2, 3, 4, or 5, if used; group 1 is the default.b. For locks with only one group, a Supervisor is optional.Doors accessible by users in this groupFor more doors copy this form.Door descriptionUnlockduration(in secs)Remote unlockinstallation?check oneyesStorage 3 ✔ ✔no<strong>Lock</strong> chassis typecheck onecyl mortise / exitFigure 1.1Page 1 of Jim’s Restaurant’s formUsersRecord up to 25 users that you want to give access to this group.For more than 25 users copy this form.User NameNo Last First PIN1 Copland Frank 7396Figure 1.22 Haydn John 14333 Baker Anna 66924 Beech Fred 13495 Herin Andrew 22996Page 2 of Jim’s Restaurant’s formPrivileges a DateD-bolt Passg deleted✔1–6 <strong>Keypad</strong> <strong>EZ</strong> <strong>Programming</strong> <strong>Guide</strong>
Introduction to <strong>Keypad</strong> <strong>EZ</strong>DepartmentstoreDave, the General Manager of Henderson’s Dept Store #12, has received three<strong>Keypad</strong> <strong>EZ</strong> locks. He has requested them for the following doors:■ Administration office■ Stock room■ Rear doorOf the 18 employees that will need access to these doors, Dave has decided todivide them along departmental lines and designate the Supervisor for eachdepartment as the <strong>Keypad</strong> <strong>EZ</strong> Group Supervisor. Dave also decides to be theAdministrator. His groups look like this:GroupsSales Administration StockBob Smith, Supervisor Sue Jones, Supervisor Gale Seares, SupervisorDavid Parson Angela Bourke Don CoyleFrank Helme Melissa Church Chen HsiehMary Wittenstein Jim Flanders Kevin LaseauKarl Brown Brandi Hancock Stacey O’HaraAnn FultonSarah RussellKate StevensThen using the Groups and Doors table as shown on page 5–2, he organizes histhree groups and decides which of the three locks that the groups will haveaccess to. His groupings look like this:Doors by groupGroups and doorsUse this section to determine and record the doors that will be available tousers in a particular group.Groupnumber Group description Door description1 Sales Admin officeRear door2 Administration Admin officeRear doorStock room3 Stock Stock roomRear doorFigure 1.3Group list using Doors by group form<strong>Keypad</strong> <strong>EZ</strong> <strong>Programming</strong> <strong>Guide</strong> 1–7
Introduction to <strong>Keypad</strong> <strong>EZ</strong>Dave further decides that only the Supervisors and a few others will have deadboltoverride and passage mode privileges. But since Supervisors have these privilegesby default, he does not need to do anything extra with them.Once these decisions have been made, Dave completes three forms, one for eachgroup. Here are the three forms:KEYPAD <strong>EZ</strong> LOCK GROUP AND USER RECORDCopy this page for additional groups in your system.Keep group records separate.Group and doorsName of business or division Henderson’s Dept Store #12Group number & description a 1 — SalesSupervisor Name bBob SmithSupervisor PIN 1243a. Use group 1, 2, 3, 4, or 5, if used; group 1 is the default.b. For locks with only one group, a Supervisor is optional.Doors accessible by users in this groupFor more doors copy this form.Door descriptionUnlockduration(in secs)Remote unlockinstallation?check oneyesAdmin office 3Rear door 3 ✔no✔<strong>Lock</strong> chassis typecheck onecyl mortise / exit✔✔Figure 1.4Sales dept group 1 door listUsersRecord up to 25 users that you want to give access to this group.For more than 25 users copy this form.User NameNo Last First PIN1 Parson David 77232 Helme Frank 13693 Wittenstein Mary 97324 Brown Karl 56555 Fulton Ann 13726 Stevens Kate 44197Figure 1.5Sales dept group 1 user listPrivileges aD-bolt Passg✔✔✔Datedeleted1–8 <strong>Keypad</strong> <strong>EZ</strong> <strong>Programming</strong> <strong>Guide</strong>
Introduction to <strong>Keypad</strong> <strong>EZ</strong>KEYPAD <strong>EZ</strong> LOCK GROUP AND USER RECORDCopy this page for additional groups in your system.Keep group records separate.Group and doorsName of business or divisionGroup number & description aHenderson’s Dept Store #122 — AdministrationSupervisor Name bSue JonesSupervisor PIN 9872a. Use group 1, 2, 3, 4, or 5, if used; group 1 is the default.b. For locks with only one group, a Supervisor is optional.Doors accessible by users in this groupFor more doors copy this form.Door descriptionUnlockduration(in secs)Admin office 3Rear door 3Remote unlockinstallation?check oneyes✔no✔<strong>Lock</strong> chassis typecheck onecyl mortise / exit✔✔Figure 1.6Administration dept group 2 door listUsersRecord up to 25 users that you want to give access to this group.For more than 25 users copy this form.User NameNo Last First PIN1 Bourke Angela 53322 Church Melissa 96553 Flanders Jim 26634 Hancock Brandi 32985 Russell Sarah 66116Figure 1.7Administration dept group 2 user listPrivileges a DateD-bolt Passg deleted✔✔<strong>Keypad</strong> <strong>EZ</strong> <strong>Programming</strong> <strong>Guide</strong> 1–9
Introduction to <strong>Keypad</strong> <strong>EZ</strong>KEYPAD <strong>EZ</strong> LOCK GROUP AND USER RECORDCopy this page for additional groups in your system.Keep group records separate.Group and doorsName of business or division Henderson’s Dept Store #12Group number & description a 3 — StockSupervisor Name bGale SearesSupervisor PIN3221a. Use group 1, 2, 3, 4, or 5, if used; group 1 is the default.b. For locks with only one group, a Supervisor is optional.Doors accessible by users in this groupFor more doors copy this form.Door descriptionUnlockduration(in secs)Remote unlockinstallation?check oneyesAdmin office 3Rear door 3 ✔no✔<strong>Lock</strong> chassis typecheck onecyl mortise / exit✔✔Figure 1.8Stock dept group 3 door listUsersRecord up to 25 users that you want to give access to this group.For more than 25 users copy this form.User NameNo Last First PIN1 Coyle Don 72272 Hsieh Chen 81933 Laseau Kevin 56324 O’Hara Stacey 9972567Privileges a DateD-bolt Passg deletedFigure 1.9 Stock dept group 3 user listDave also completes the Administrator/Supervisor Pin Record as shown onpage 5–2, and uses this to program the three Supervisors into all three locks.Then, once the Supervisors are programmed into the locks, he gives the forms tothe Supervisors, one form for each. Then each Supervisor programs the users intotheir group’s locks.✔✔✔✔1–10 <strong>Keypad</strong> <strong>EZ</strong> <strong>Programming</strong> <strong>Guide</strong>
2 QUICK SETUP GUIDEThis section will get you up and running fast. By using the lock default values, youcan quickly program yourself as the Administrator and add up to 50 users. Thedefault values are:FeatureDefault valuePIN length 4 digitsUnlock duration 3 secondsDeadbolt override no — applies only on mortiseaccessPassage mode noaccessGroup number 1Using defaultvaluesDefaults are factory preset values. For example, the default value for the unlockduration is three seconds. This means that, without changing the unlock durationdefault value, when someone enters a valid PIN, the lock will unlock and then,after three seconds, automatically relock. This gives a person three seconds toopen the door.All of the default values were carefully chosen to work in most <strong>Keypad</strong> <strong>EZ</strong>installations. In most cases, you shouldn’t have to change the default settings. Butmake sure that you think about your users and their convenience and securitybefore using the default values. See page 1–4 for system overview and designdecisions that need to be made.<strong>Keypad</strong> <strong>EZ</strong> <strong>Programming</strong> <strong>Guide</strong> 2–1
Quick Setup <strong>Guide</strong>PIN length The Personal Identification Number (PIN) length can be set to 3, 4, 5,or 6 digits. Keep in mind that the shorter number PINs, although more easilyremembered, are usually less secure. Conversely, the longer number PINs aremore secure, but are more easily forgotten. To change the default PIN lengthsee page 3–2.Deadbolt override access This feature lets users unlock the door with a PIN,even when the deadbolt is thrown. This feature only applies for locks withdeadbolts. If a lock does not have a deadbolt, this feature is not used. By default,the user is programmed without deadbolt override access, but to allow thisaccess, see page 3–5.Passage mode access This feature lets users temporarily put the lock into anunlocked state (like a passage set). Then later the same user — or any user withpassage mode access — can return the lock to its normal locked state. By default,the user is programmed without passage mode access, but to allow this access,after programming users, see page 3–5.Unlock duration This feature lets you adjust the time that the lock momentarilyunlocks during access. By default, the lock will unlock and then, after threeseconds, will relock. If some of your users need more time to get through thedoor, you may want to increase the duration. The unlock duration can be setanywhere between 1 and 60 seconds. To change the unlock duration,see page 3–4.Group number This feature lets you set up as many as five groups of users, eachwith a Supervisor. User groups add another layer of security and allow theAdministrator to share the responsibilities of administrating the adding, changing,deleting, disabling and enabling of PINs. Usually this feature is only needed whenat least two area or shift supervisors need to be held accountable for their users’access. By default, the user is programmed as belonging to group one.2–2 <strong>Keypad</strong> <strong>EZ</strong> <strong>Programming</strong> <strong>Guide</strong>
Setting up alock usingfactory-defaultvaluesQuick Setup <strong>Guide</strong>Tip Temporarily record the codes as you enter them so that you can permanentlyrecord them later using the <strong>Lock</strong> Group and User Record form on page 5–3.Step To . . . You enter . . . Example . . .12Begin programmingmodeChange AdministratorPIN00# 9998# a20# [any 4 numbers]#[same 4 numbers]#3 Add PINs 10# [any 4 numbers]# #Note: Repeat thissequence, changing thefour numbers each time,up to 50 times.4520# 3197# 3197#10# 4994# #End programming99#modeUse the <strong>Lock</strong> Group and User Record on page 5–3 to record the PINsthat you added. Record the Administration code in a separate place,and then secure both logs.a. See page 4–5 if you prefer to use the * key in place of the # key.Lights and Sound KeyGrn Red Grn Red Grn RedGrnRedGrnRed<strong>Programming</strong>mode in processCommand entryacceptedData acceptedMotor runs<strong>Programming</strong>mode endedOne toneData entryfailed.Start over.<strong>Keypad</strong> <strong>EZ</strong> <strong>Programming</strong> <strong>Guide</strong> 2–3
Quick Setup <strong>Guide</strong>2–4 <strong>Keypad</strong> <strong>EZ</strong> <strong>Programming</strong> <strong>Guide</strong>
3 COMPLETESETUP GUIDEUse this section if you want to do any or all of the following:■■■■■■■set PIN lengthset group Supervisor PINsset the unlock durationset privileges: passage mode & deadbolt overridedelete PINsdelete groups of PINsdisable or enable groups of PINsThis section takes you step by step and lets you take full advantage of all the<strong>Keypad</strong> <strong>EZ</strong> features and functions.The tasks are ordered so that, if you were to need different PIN length, groups, adifferent unlock duration, or need to program privileges for some or all users, youcould go through task by task. Optional tasks are marked.<strong>Keypad</strong> <strong>EZ</strong> <strong>Programming</strong> <strong>Guide</strong> 3–1
Complete Setup <strong>Guide</strong>LOCK SETUP AND MANAGEMENTTASK 1:Use these tasks to set up and manage your <strong>Keypad</strong> <strong>EZ</strong> locks. Follow the sequenceand skip those tasks that do not apply to you.BEGIN A PROGRAMMING SESSIONUse this task to be able to do any other task on the following pages.Step You enter . . .1 00# 9998#aa. See page 4–5 if you prefer to use the * key in place of the #key.TASK 2OPTIONAL: SET PIN LENGTHOnly follow these steps if you want to change from the factory-preset four-digitPINs, to three-, five-, or six-digit PINs.Step You enter . . . Example . . .1 30#2 3# for three-digit PINs, OR3#5# for five-digit PINs, OR6# for six-digit PINsThis task will reset the Administration PIN to the factory-preset code. See the tablebelow:New PIN length3 digits 9985 digits 999986 digits 999998New Administration PINPerforming this task will also remove any other programming that you may havedone, such as any user PINs, Supervisor PINs, or unlock duration.You may continue with this programming session, even though your originalAdministration PIN had a different amount of PIN digits. In other words, thisprogramming will not take effect until the programming session ends.3–2 <strong>Keypad</strong> <strong>EZ</strong> <strong>Programming</strong> <strong>Guide</strong>
TASK 3CHANGE THE ADMINISTRATION PINComplete Setup <strong>Guide</strong>You need to perform this task if:■ you have not changed the factory-preset Administration PIN yet, or■ you changed the PIN length from its default four digits to three, five, or sixdigits, or■ you changed the PIN length back to its original four-digit length, or■ you reset the lock using the reset programming command.To change the Administration PIN:Step You enter . . . Example . . .1 20# [any 3, 4, 5, or 6 numbers]#[same 3, 4, 5, or 6 numbers]#20# 3197# 3197#TASK 4OPTIONAL: SET SUPERVISOR PINSIf you are the Administrator, there are two reasons you may want to divide usersinto groups:■ to be able to delegate most programming tasks to one or more people,■ to be able (for example, in an emergency), to disable or delete whole groupsof users at a time, without deleting or disabling other users.You need to perform this task if either of these are true:■ you have decided to give more than one group of users access to a lock■ you have decided to assign a Supervisor to the users even though they are allpart of one group.To set a Supervisor PIN:Step For group . . . You enter . . . Example . . .1 1221#22#23#24#25#3452[New PIN]#[repeat new PIN]#4070# 4070#Note 1: If you are a Supervisor and are performing this task, to change your PIN,you will only be able to do it for the group to which you are associated.<strong>Keypad</strong> <strong>EZ</strong> <strong>Programming</strong> <strong>Guide</strong> 3–3
Complete Setup <strong>Guide</strong>Note 2: Also, if you are a Supervisor and are changing your PIN, you may need toinform the Administrator with the new PIN. Please see the Administrator for anypolicy that may exist.TASK 5OPTIONAL: SET THE UNLOCK DURATIONYou may want to perform this task if a user may need more than three seconds toopen the door. Situations may include:■■■those with physical disabilities, the elderly, or the weakwhere the door opens to an area where dollies, carts, or supplies are carried inand out,any situation where extra time is regularly needed to open the door.To set the unlock duration longer or shorter than three seconds:Step You enter . . . Example . . .1 32#2[number of seconds, 1–60]# 5# [five seconds]TASK 6ADD USER PINSBefore adding user PINs it’s important to complete the form or forms frompage 5–3 so that they can assist you during programming. This will let you avoidthe interruption of having to record a user’s name and PIN after you enter it. Itwill also reduce or eliminate errors in entering or recording.Users must be assigned to a group even if you have chosen not to have more thanone group. In that case, all users should be assigned to group 1.3–4 <strong>Keypad</strong> <strong>EZ</strong> <strong>Programming</strong> <strong>Guide</strong>
To add a user PIN:Complete Setup <strong>Guide</strong>Step You enter . . . Example . . .1 10#2 [PIN number]# 2233#3[group number]#2#4Note:If you are assigning usersto group 1, you can omitthe number and simplyenter the # key. This willenter the default value ofgroup 1.Repeat steps 1–3 for each PIN.TASK 7OPTIONAL: SET USER PRIVILEGESThere are two user privileges:■ Deadbolt override — feature that lets users unlock the door with a PIN, evenwhen the deadbolt is thrown. This feature only applies for <strong>Keypad</strong> <strong>EZ</strong> mortiselocks with deadbolts.■ Passage mode — feature that lets users temporarily put the lock into anunlocked state (like a passage set). Then later the same user — or any userwith passage mode access — can return the lock to its normal locked state. All<strong>Keypad</strong> <strong>EZ</strong> <strong>Lock</strong>s have this feature.You may want to perform this task for a user if:■ the user needs to be able to unlock the door even when the deadbolt isthrown.■ the user can be trusted to unlock a door for an indefinite period.Sample applications where passage mode would make sense:■■■■conference roomsstorage rooms/closetscanteenson any door that needs to remain closed but unlocked.Tip: Proper use of this feature may allow you to avoid giving out PINsunnecessarily. For example, if you have only one <strong>Keypad</strong> <strong>EZ</strong> lock on a storageroom door, the simplest solution may be to give two of your ten employees a PIN<strong>Keypad</strong> <strong>EZ</strong> <strong>Programming</strong> <strong>Guide</strong> 3–5
Complete Setup <strong>Guide</strong>and give both users passage mode privilege, enabling them to keep the doorunlocked during the day. Either of them could then relock it at the end of the day.Note: By default, when a user PIN is programmed the PIN does not have eitherpassage mode or deadbolt override privileges. These privileges must be givenusing a separate programming step.Use the table below to determine the privilege code that corresponds to theprivileges that you want to give to a user. By default all users initially haveprivilege code 0, no privileges.User privilege code quick referencePrivilegecode Passage mode Deadbolt override0 no no1 yes no2 no yes3 yes yesTo assign or remove privileges:Step You enter . . . Example . . .1 12#2 [User’s PIN number]# 2233#341# for passage mode only, OR2# for deadbolt override only, OR3# for both, OR0# for no privilegesRepeat steps 1–3 for each PIN that you want to assignor remove privileges.3–6 <strong>Keypad</strong> <strong>EZ</strong> <strong>Programming</strong> <strong>Guide</strong>
TASK 8END THE PROGRAMMING SESSIONComplete Setup <strong>Guide</strong>After all programming functions have been completed for a particular <strong>Keypad</strong> <strong>EZ</strong>lock, use the task to end the programming session.Step You enter . . .1 99#To program other <strong>Keypad</strong> <strong>EZ</strong> locks, return to page 3–2 and repeat theseries of tasks.TASK 9RECORD, SECURE, AND DISTRIBUTE PINSOnce all <strong>Keypad</strong> <strong>EZ</strong> locks have been programmed you need to ensure that all PINsare properly recorded and secured. If you have not already done so, use the formsthat begin on page 5–3 to record all User, Supervisor and Administration PINs.After safely recording all User, Supervisor, and Administration PINs, you need toinform the users of their new PINs and let them know what locks they haveaccess to and what privileges they may have. If they have passage mode access,you need to instruct them on how to start and end passage mode.Here’s a sample of what a user PIN notice might need to include:User PIN notice and instructionsNamePINDoorsAngela Bourke5332Admin officeRear doorStock doorTo unlock a <strong>Keypad</strong> <strong>Lock</strong>:12Enter your PIN, then press #.Turn the knob or lever handle.Privileges you have❏ Passage mode accesssee instructions ➔❏ Deadbolt override accessTo start passage mode access:12■Enter your PIN, then press #.Within 3 seconds, press then #.The lock stays unlocked. *To end passage mode access:Repeat the steps above.The lock relocks.Caution: Memorize and destroy this PIN notice!Losing this notice is equal to losing a key.Figure 3.1Sample user PIN notice<strong>Keypad</strong> <strong>EZ</strong> <strong>Programming</strong> <strong>Guide</strong> 3–7
Complete Setup <strong>Guide</strong>USER MAINTENANCEDeleting a PINTo delete a PIN, perform the following task in all locks where the user has access:To delete a user’s PIN:Step You enter . . . Example . . .1 11#2 [PIN to be deleted]# 2233#3Repeat steps 1–2 for each PIN that youwant to delete.Deleting agroup of PINsTo delete a whole group of PINs at one time, perform the following task in alllocks where the group of users have access.Note: If you’re trying to reset the lock to its original factory presets (which alsodeletes all users), see page 4–4 instead.To delete a group of PINsStep You enter . . . Example . . .1 00#2 [Administrator or Supervisor PIN]# 3197#3 13#45Administrator only: [Group number]# 1# [Group 1]Administrator only: Repeat steps 3–4 for each group tobe deleted.6 99#Note: Supervisors only have rights to delete the group that they are associatedwith.3–8 <strong>Keypad</strong> <strong>EZ</strong> <strong>Programming</strong> <strong>Guide</strong>
Disabling andenablinggroups of PINsComplete Setup <strong>Guide</strong>There are times when you may want to temporarily disable, and then later reenablea group of users’ PINs. Example occasions when this may be necessary:■■■■strikesholidayssevere weathernational emergenciesTo disable or re-enable a group:Step You enter . . . Example . . .1 00#2 [Administrator or Supervisor PIN]# 3197#345To disable: 15# ORTo re-enable: 14#Administrator only:[Group number to be disabled or re-enabled]# 1#Administrator only:Repeat steps 3–4 for each group to be disabled.6 99#Note: Supervisors only have rights to disable or re-enable the group that they areassociated with.<strong>Keypad</strong> <strong>EZ</strong> <strong>Programming</strong> <strong>Guide</strong> 3–9
Complete Setup <strong>Guide</strong>3–10 <strong>Keypad</strong> <strong>EZ</strong> <strong>Programming</strong> <strong>Guide</strong>
4 MAINTENANCEFor complete service and maintenance information for the <strong>Keypad</strong> <strong>EZ</strong> <strong>Lock</strong>,consult the B.A.S.I.S. G or B.A.S.I.S. V Service Manuals or the TechnicalPublications Library on CD-ROM. These publications have complete parts listsand maintenance instructions.BATTERY MAINTENANCEBattery lifeGenuine factory battery packs are designed for maximum service life. Dependingon the type of chassis you have, the average life of a battery pack is as follows:Chassis typecylindricalmortisea. Typical life is 2–5 years.b. Typical life is 4–5 years.c. Typical life is 3–5 years.d. Typical life is 4–5 years.Estimated number of cyclesStandard (4-cell)battery pack65,000 a130,000 cExtended (8-cell)battery pack130,000 b240,000 dexit hardware 130,000 240,000<strong>Keypad</strong> <strong>EZ</strong> <strong>Programming</strong> <strong>Guide</strong> 4–1
MaintenanceReplacingbatteriesThe <strong>Keypad</strong> <strong>EZ</strong> <strong>Lock</strong> has a warning system to let you know when the battery packis getting low. At the first sign of warning, although you have some time toreplace the batteries before they fail, you need to replace the battery pack as soonas possible. To order replacement battery packs, see your factory representativeor authorized dealer.Replacement part number:■ A60726 — standard, four-cell battery packThere are three battery levels. Depending on the level that the lock happens to bein, the lock access varies. The battery levels are:■ normal — battery level is good.■ warning — battery level is low■ alarm— battery level is very low.Use the following table to determine a <strong>Keypad</strong> <strong>EZ</strong> <strong>Lock</strong>’s level when a valid PIN isentered:Battery Level LEDs Sounder <strong>Access</strong>normal Greengrantedflasheswarning Greenflashes3 long tones granted afterdelayalarm Red & green 3 short tones denied aflashesa. But Supervisor users and the Administrator aregranted access during the alarm battery level, untilthe battery is replaced.4–2 <strong>Keypad</strong> <strong>EZ</strong> <strong>Programming</strong> <strong>Guide</strong>
To replace the battery pack:Maintenance1. Use a T15 Torx bit driver or standard driver to remove the security screw fromthe battery door. See Figure 4.1.Security screwTabsFigure 4.1 Removing the battery door2. Open the battery door and remove it from the escutcheon.3. Remove the old battery pack from the battery compartment.4. Disconnect the battery pack from the battery connector on the wire harness.5. Connect the new battery pack to the battery connector on the wire harnessinside the battery compartment.Caution: When connecting the battery pack, make sure that there are no loosewire connections where the wires are inserted into the connectors and that theconnectors are firmly mated.6. Place the battery pack inside the battery compartment.Note: For the four-cell battery pack, position the battery so that the foam will facethe battery door.Caution: When routing the battery wires, make sure that the wires are notrouted across any sharp edges or over any surface that could damage theirsleeving or wire insulation.<strong>Keypad</strong> <strong>EZ</strong> <strong>Programming</strong> <strong>Guide</strong> 4–3
Maintenance7. Making sure that the battery door does not pinch any wires, insert the tabs ofthe battery door into its mating slots and swing the door closed.Resetting alock to factorypresetcondition8. Use a T15 Torx bit driver or standard driver to secure the battery door withthe security screw. Tighten firmly.You may at some point need to reset or restore a lock to its original factory defaultor preset condition. This will erase all programming that you have done.You may need to do this if:■■a lock needs to be moved to a new locationyou have lost PIN control or lock and user records.Caution: This programming task will delete ALL PINs in all groups and cannotbe undone. To delete only a group of users, see page 3–8.This task will also reset the # key as the enter key if the # key was substituted forthe * key.To reset a lock to factory preset condition:Step You enter . . . Example . . .1 00#2 [Administrator PIN]# 3197#3 33#4 33#5 99#4–4 <strong>Keypad</strong> <strong>EZ</strong> <strong>Programming</strong> <strong>Guide</strong>
Reversing thefunction of the# and * keysMaintenanceAlthough the factory default for completing a programming command is to usethe # key, the * key may be substituted if you prefer this. Some Administratorsmay prefer or expect to use the * key to activate a command since this key wasused in the BEST V Series product.To substitute the * key for the # key:Step You enter . . . Example . . .1 00#2 [Administrator PIN]# 3197#3 36#4 99#After following these steps you must use the * key wherever you see the # key.Alternately, you must use the # key wherever you see the * key.To substitute the # key for the * key, that is, to reset the # key to its default function:Step You enter . . . Example . . .1 00*2 [Administrator PIN]* 3197*3 36*4 99*<strong>Keypad</strong> <strong>EZ</strong> <strong>Programming</strong> <strong>Guide</strong> 4–5
Maintenance4–6 <strong>Keypad</strong> <strong>EZ</strong> <strong>Programming</strong> <strong>Guide</strong>
5 LOCK & USER FORMSUse the forms on the following pages to guide you through the process of settingup locks and adding user PINs.<strong>Programming</strong>commandsreferenceUse this reference to look up the task you need to perform.ForCommand DescriptionSupervisorcan programinstructions,see page . . .00 Begin programming session ■ 3–210 Add PIN ■ 3–411 Delete PIN ■ 3–812 Set privileges ■ 3–513 Delete group ■ 3–814 Enable group ■ 3–915 Disable group ■ 3–920 Set Administrator PIN 3–321 Set Supervisor PIN Group 1 ■ 3–322 Set Supervisor PIN Group 2 ■ 3–323 Set Supervisor PIN Group 3 ■ 3–324 Set Supervisor PIN Group 4 ■ 3–325 Set Supervisor PIN Group 5 ■ 3–330 Set PIN length 3–232 Set unlock duration 3–433 Reset all 4–436 Switch # and * keys 4–599 End programming session ■ 3–7<strong>Keypad</strong> <strong>EZ</strong> <strong>Programming</strong> <strong>Guide</strong> 5–1
<strong>Lock</strong> & user formsGroups anddoorsUse this section to determine and record the doors that will be available to users in aparticular group. See page 3–3 for more information on the use of Supervisors and usergroups.Groupnumber Group description Door descriptionAdministrator/Supervisor PINRecordThis section is for use by the Administrator only!Separate and store in a secure, separate location.Group NamePINCut here12345All (Admin)5–2 <strong>Keypad</strong> <strong>EZ</strong> <strong>Programming</strong> <strong>Guide</strong>
KEYPAD <strong>EZ</strong> LOCK GROUP AND USER RECORDCopy this page for additional groups in your system.Keep group records separate.Group and doorsName of business or divisionGroup number & description aSupervisor Name bSupervisor PINa. Use group 1, 2, 3, 4, or 5, if used; group 1 is the default.b. For locks with only one group, a Supervisor is optional.Doors accessible by users in this groupFor more doors copy this form.Door descriptionUnlockduration(in secs)Remoteunlockinstallation?check oneyes no<strong>Lock</strong> chassis typecheck onecyl mortise / exitQuick setup guideStep To . . . You enter . . . Example1 Begin programming 00# 9998# a2 ChangeAdministrator PINa. The code 9998 is the factory preset Administrator PIN. This PIN does not have long-term security; change it as soon as possible!b. Repeat this sequence as necessary, changing the four numbers each time, up to 50 times.Lights and Sound Key20#, [any 4 numbers] #,[same 4 numbers] #3 Add PINs 10#, [any 4 numbers] # [group number] # b4 End programming 99#20# 3197#3197#10# 4994# 1#5 Use the table to the right to record the PINs that you add. Record the Administration PIN andkeep it separate. Secure all records.<strong>Programming</strong>in process.Data entrystarted.Dataaccepted.<strong>Programming</strong>mode ended.Data entryfailed. Startover.5–3Administrator/Supervisor ___________________________________Date_________________
UsersRecord 25 users that you want to give access to this group.For more than 25 users copy this form.UserNo1NameLast First PINPrivileges aD-bolt PassgDatedeleted2345678910111213141516171819202122232425a. See page 3–5 for instructions on programming deadbolt override and passage mode privileges.page ___ of ___ for group _______________5–4
T80911 Rev A 1880977 ER7991-12 Feb 2004





![B.A.S.I.S. G Service Manual [T63300] - Best Access Systems](https://img.yumpu.com/48375082/1/190x245/basis-g-service-manual-t63300-best-access-systems.jpg?quality=85)

