Fluke 705 - PCE Instruments
Fluke 705 - PCE Instruments
Fluke 705 - PCE Instruments

You also want an ePaper? Increase the reach of your titles
YUMPU automatically turns print PDFs into web optimized ePapers that Google loves.
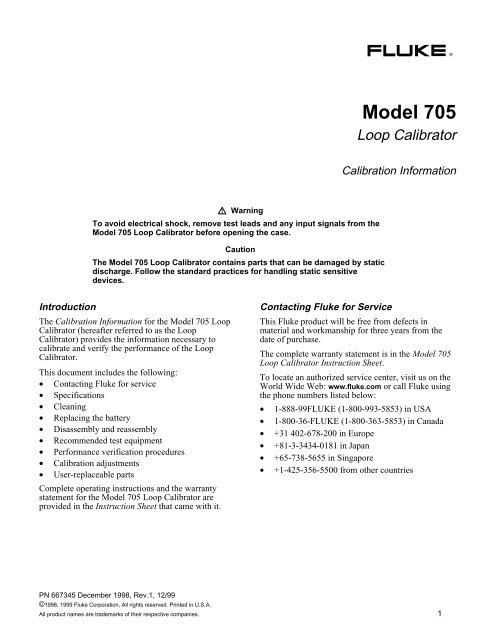
®Model <strong>705</strong>Loop CalibratorCalibration InformationWarningTo avoid electrical shock, remove test leads and any input signals from theModel <strong>705</strong> Loop Calibrator before opening the case.CautionThe Model <strong>705</strong> Loop Calibrator contains parts that can be damaged by staticdischarge. Follow the standard practices for handling static sensitivedevices.IntroductionThe Calibration Information for the Model <strong>705</strong> LoopCalibrator (hereafter referred to as the LoopCalibrator) provides the information necessary tocalibrate and verify the performance of the LoopCalibrator.This document includes the following:• Contacting <strong>Fluke</strong> for service• Specifications• Cleaning• Replacing the battery• Disassembly and reassembly• Recommended test equipment• Performance verification procedures• Calibration adjustments• User-replaceable partsComplete operating instructions and the warrantystatement for the Model <strong>705</strong> Loop Calibrator areprovided in the Instruction Sheet that came with it.Contacting <strong>Fluke</strong> for ServiceThis <strong>Fluke</strong> product will be free from defects inmaterial and workmanship for three years from thedate of purchase.The complete warranty statement is in the Model <strong>705</strong>Loop Calibrator Instruction Sheet.To locate an authorized service center, visit us on theWorld Wide Web: www.fluke.com or call <strong>Fluke</strong> usingthe phone numbers listed below:• 1-888-99FLUKE (1-800-993-5853) in USA• 1-800-36-FLUKE (1-800-363-5853) in Canada• +31 402-678-200 in Europe• +81-3-3434-0181 in Japan• +65-738-5655 in Singapore• +1-425-356-5500 from other countriesPN 667345 December 1998, Rev.1, 12/99©1998, 1999 <strong>Fluke</strong> Corporation, All rights reserved. Printed in U.S.A.All product names are trademarks of their respective companies. 1
<strong>Fluke</strong> <strong>705</strong>Calibration InformationSpecificationsProduct specifications are provided Tables 1 and 2. These specifications are based on a 1-year calibration cycle andapply from 18 ºC to 28 ºC (64 ºF to 82 ºF) unless stated otherwise. Accuracy specifications are given as follows:± ( [ % of reading ] + [ number of least significant digits ] ).Table 1. General SpecificationsMaximum voltage between anyterminal and earth ground orbetween any two terminalsDisplay:30 V0 to 28 V with 0.001 V resolution, 0 to 24 mA with 0.001 mA resolutionOperating Temperature: -10 °C to 55 °CStorage Temperature: -40 °C to 60 °CTemperature Coefficient: ± 0.005 % of range per °C for -0 °C to 18 °C and 28 °C to 55 °CRelative Humidity:Operationing Altitude:Power Requirements:Battery Life (Typical):Shock, Vibration:Size (H x W x L):Weight:95 % to 30 °C,75 % to 40 °C,45 % up to 50 °C,35 % up to 55 °C3000 meters maximumSingle 9 V battery (ANSI/NEDA 1604A or IEC 6LR61)Source Mode: 18 hours; 12 mA into 500 ΩMeasure / Simulate Mode: 50 hours1 meter drop testRandom vibration 2 g @ 5 to 500 Hz32 mm x 87 mm x 187 mm (1.25 in x 3.41 in x 7.35 in)349 g (12.3 oz). With Holster and flex-stand: 601 g (21.2 oz)Safety Certified as compliant to CAN/CSA C22.2 No. 1010.1:1992.Complies with ANSI/ISA S82.01-1994Certification and Table 2. Accurcy SpecificationsFunction Range Resolution AccuracyDC Volts Input + 28 V 0.001 V ± (0.025 % + 1)DC mA Input 24 mA 0.001 mA ±( 0.02 % + 2)DC mA Output 0 mA to 24 mA 0.001 mA ± (0.02 % + 2)Source mode:Simulate mode:Loop Power 0 % -100 % - 0 % 40 second smooth ramp 0 % -100 % - 0 % 15 second smooth ramp 0 % -100 % - 0 % Stair-step ramp in 25 % steps, pausing 5 seconds at each stepCompliance: ≥ 1000 Ω at 20 mAExternal loop voltage requirements: 24 V nominal, 30 V maximum, 12 V minimum≥ 24 VPercent display - 25 % to 125 %Input/Output protectionInput/Output protection on mA range: resettable, nonreplaceable 0.1 A fuse.2
Loop CalibratorCleaningCleaning WarningTo avoid electrical shock, remove testleads and input signals before cleaning.To clean the case, wipe it with a cloth lightlydampened with water and a mild detergent.Do not use abrasives, solvents, or alcohol.Replacing the BatteryWarningTo avoid false readings, which could leadto possible electric shock or personalinjury, replace the battery as soon as thelow battery symbol ( ) appears on theLoop Calibrator’s display.To replace the battery:1. Lift and remove the battery cover to gain accessthe battery compartment. See Figure 1.2. Lift the battery from the case bottom and insert anew 9 V battery.3. Be sure the positive and negative battery postsare oriented correctly, as noted in the bottom ofthe battery compartment.Disassembling and Reassembling theCalibrator WarningTo avoid electric shock or personal injury:• Do not allow water into the case.• Remove any input signals prior toremoving test leads and opening case.• When servicing the Loop Calibrator,use only specified replacement parts.To disassemble and reassemble the Loop Calibrator,refer to Figures 2 and 3 as necessary and perform thefollowing procedure.NoteBoth a Phillips-head screwdriver and a flatbladescrewdriver are required.1. To remove the printed circuit assembly (pca):Remove all test leads from the terminals of theLoop Calibrator.2. Set the rotary switch to OFF.3. Lift and remove the battery cover to gain accessto the battery compartment. Remove the battery.4. Remove all Phillips-head screws from the casebottom.Figure 1. Replacing the BatteryAAK07F.EPS5. Separate the case top from the case bottom.Verify that the battery terminals are being guidedthrough the bottom case before completelyremoving the case bottom.6. Referring to Figure 3, insert a small, flat-bladescrewdriver between the edge of the case top andthe pca. Gently unsnap the case top from the pca.7. Repeat step 6 for each of the remaining snaps thatsecure the pca to the case top.8. Lift the pca from the case top by its edges.9. If the elastomeric strips for the keypad assemblyand LCD are stuck to the pca, remove them, butdo not touch the conductive edges.NoteBefore reinserting the pca, make sure that therotary knob is in the OFF position.3
<strong>Fluke</strong> <strong>705</strong>Calibration InformationLensCase, TopLCDElastomeric StripElastomeric Strip(LCD to PCA)Keypad AssemblyActuator SwitchSwitch Support AssemblyCase, BottomMain PCAScrew, THD Form, PH.P.STL,5-14 x .750BatteryFootBattery DoorFigure 2. Disassembled Loop CalibratorAAK10F.EPS4
Loop CalibratorDisassembling and Reassembling the Calibrator10. To remove the switch support: Use a small,flat-blade screwdriver to gently unsnap thesides and top of the switch support from thesnaps shown in Figure 2.The LCD, keypad assembly, and elastomericstrips are accessible and can be replaced asneeded.Do not allow the LCD to get wet.Before installing a new LCD, make sure thatall connector contact points are clean.CautionDo not touch the conductive edges of theelastomeric strips or the contacts on thekeypad assembly. If they are ontaminated,clean them with isopropyl alcohol.11. To reinsert the pca: Place the pca over the fourscrew posts in the case top.Gently press on the center of the pca while usingthe small flat-edge screwdriver to shoehorn thepca under the snap on a side of the case top.Repeat on the other side and the top.12. To reassemble to Calibrator: Reassembling theCalibrator is the reverse of disassembling it.After the Calibrator is reassembled, perform theverfication test to confirm that the LoopCalibrator is working properly.32SnapSnapsSnap1Figure 3. Removing and Reinserting the Printed Cirsuit Assembly (PCA)AAK02F.EPS5
<strong>Fluke</strong> <strong>705</strong>Calibration InformationRecommended Test EquipmentA list of recommended equipment for theperformance verification tests and calibrationadjustment procedure is shown in Table 3.Performance Verification Procedures WarningTo avoid electric shock, do not performthe verification tests unless the LoopCalibrator is fully assembled.Perform the following tests to check the accuracy ofeach of the Loop Calibrator’s functions against itsspecifications.If the Loop Calibrator fails any of these tests,calibration adjustment or repair is required.DC Current Source Mode1. Rotate the Loop Calibrator’s function switchfrom OFF to the mA / SOURCE / SIMULATE /MEASURE position.The Loop Calibrator should display 4.000 mA. Ifit is displaying 0.000 mA, turn the LoopCalibrator off, press hold . Turn on the LoopCalibrator to the mA position. Continue to hold until 4.000 mA is displayed (about threeseconds).2. Connect the Loop Calibrator’s [+] terminal to theHP 3458A I input, and the COM terminal to theHP 3458 LO input.Verify that the display shows SOURCE in theupper-left corner.Refer to Table 4 to verify the readings on the HP3458A for the following tests. (No adjustment isnecessary for test 1.)4. Test 2: Press the key twice to select 12.000mA. Verify the readings.5. Test 3: Press the key twice to select 20.000mA/ Press and hold the key until 24.000 mAis displayed. Verify the readings.DC Current Measurement Mode1. Press the key twice to get into themeasurement mode.The Loop Calibrator’s display should readMEASURE.2. Disconnect the HP 3458A from the LoopCalibrator.3. Connect the test leads from the AUX terminals ofthe <strong>Fluke</strong> 5500A to the terminals on the LoopCalibrator (Black to COM and red to [+]).4. Set the <strong>Fluke</strong> 5500A to test 4 in Table 4 andverify the display readings on the LoopCalibrator.Repeat for tests 5 and 6.The reading on the Loop Calibrator’s displayshould be within the minimum and maximumvalues shown in Table 4.3. Set the HP 3458A to measure DC Amps (DCI).Table 3. Recommended EquipmentEquipment Minimum Specification Recommended Model or EquivalentDC CalibratorDigital MultimeterFlexible TestLeadsDC Voltage: 0 to 30 VAccuracy: ± 0.005 % +50 µVDC Current 0 to 24 mA Accuracy: ± 0.01% +0.25 µADC Current: 0 to 26 mAAccuracy: ± 73 ppm<strong>Fluke</strong> 5500A Multi-Product CalibratorHP 3458A<strong>Fluke</strong> TL246
Loop CalibratorCalibration Adjustment ProcedureTable 4. DC Current Source / Current Measure / Voltage Measure Mode TestsTest No. <strong>705</strong> Loop Calibrator Output SwitchPositionHP 3458A MinimumHP 3458A Maximum14.000 mACenter3.997 mA4.003 mA212.000 mACenter11.995 mA2.005 mA324.000 mACenter23.993 mA24.007 mA5500A Calibrator OutputSwitchPosition<strong>Fluke</strong> <strong>705</strong> Minimum<strong>Fluke</strong> <strong>705</strong> Maximum44.000 mACenter3.997 mA4.003 mA512.000 mACenter11.995 mA12.005 mA624.000 mACenter23.993 mA24.007 mA5500A Calibrator OutputSwitchPosition<strong>Fluke</strong> <strong>705</strong> Minimum<strong>Fluke</strong> <strong>705</strong> Maximum70.000 VRight-0.001 V0.001 V814.000 VRight13.995 V14.005 V928.000 VRight27.992 V28.008 VDC Current Measurement Mode1. Set the rotary switch on the Loop Calibrator toV MEASURE.The Loop Calibrator’s display should read V.2. Connect the test leads from the output NORMALterminals of the <strong>Fluke</strong> 5500A to the inputterminals on the Loop Calibrator (Black to COMand red to [+] ).3. Set the <strong>Fluke</strong> 5500A to test 7 in Table 4 andverify the display reading on the Loop Calibrator.Repeat for tests 8 and 9.The reading on the display should be within theminimum and maximum values shown inTable 4.4. Set 5500A output to 0 V (zero), and set output toSTANDBY.5. Turn the rotary switch of the Loop Calibrator toOFF and disconnect the Loop Calibrator from the5500A.The performance verification tests are nowcomplete.If the Loop Calibrator failed any of these tests,calibration adjustment or repair is required.Calibration Adjustment ProcedurePerform the following calibration adjustmentprocedures if the Loop Calibrator fails theperformance verification test.NotesMake sure that the Loop Calibrator has anew battery before starting the calibrationprocedure. Calibration will not functionproperly if low battery indicator is on.Because the <strong>Fluke</strong> <strong>705</strong> Loop Calibratorincorporates several key hold start upfeatures, entering the CAL mode through thekeypad requires an exact key hold sequence.1. With the rotary switch in the OFF position, holddown the key and turn the rotary switch to VMEASURE.2. When CAL appears, press and hold the andthe keys. Immediately release both keys whenCAL disappears. Verify that the display showsMEASURE 0.000V with no – sign or fluctuatingdigits. If it does not, CAL mode has not beensuccessfully entered.3. Connect the test leads from the output NORMALterminals of the <strong>Fluke</strong> 5500A to the terminals onthe Loop Calibrator (Black to COM and redto [+] ).7
<strong>Fluke</strong> <strong>705</strong>Calibration Information4. Set the 5500A output to 0 V dc and select O.5. Press any key until the Loop Calibrator’s displaychanges.6. When the display shows 28.000 V, set the 5500Aoutput to 28 V dc.7. Press any key until the Loop Calibrator’s displaychanges.8. When the display shows HHHH, place the 5500Ain the STANDBY mode.9. Press any key until the Loop Calibrator’s displaychanges.10. Turn the Loop Calibrator’s rotary switch to mA.11. Press any key until the Loop Calibrator’s displaychanges.12. Connect the test leads from the AUX terminals ofthe <strong>Fluke</strong> 5500A to the terminals on the LoopCalibrator (black to COM and red to [+]).13. Set the 5500A output to 0 mA dc and select O.14. Press any key until the Loop Calibrator’s displaychanges.15. When the display shows 20.000 mA, set the5500A output to 20.000 mA.16. Press any key until the Loop Calibrator’s displaychanges.17. When the display shows HHHH, place the 5500Ain the STANDBY mode and remove any test leadconnections to the Loop Calibrator.18. Short the terminals and press any key. The LoopCalibrator now enters a self-source calibrationadjustment process. The output must be shortedduring this step.The Loop Calibrator resets power when the selfsourcecalibration adjustment is complete.NoteThe Loop Calibrator resets to the currentsource function prior to entering the selfsourcecalibration procedure, i.e., 0.000 mAfor 0-20 mA loop or 4.000 mA for 4-20 mAloop.19. Remove all connections and place the rotaryswitch of the Loop Calibrator to OFF.The calibration procedure is now complete.User-Replaceable PartsUser-replaceable parts, are listed in Table 5 andshown in in Figure 3.Table 5. User-Replaceable PartsItem Description Part No. QuantityLens 665114 1Case top 665098 1LCD 665122 1Elastomeric strip (LCD to PCA) 867247 1Elastomeric strip 867242 1Keypad assembly 665117 1Actuator switch 203445 1Switch support assembly 879031 1Case bottom 665109 1Screws, phillips-head 832246 4Foot, non-skid (rubber) 885884 1Battery, 9V ANSI/NEDA 1604A or IEC6LR61 696534 1Battery door 665106 1Main PCA 800893 18