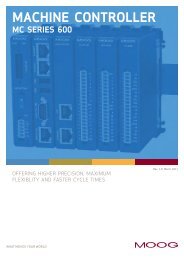
User Manual M3000® Automation System / MSC II (Moog Servo ...
User Manual M3000® Automation System / MSC II (Moog Servo ...
User Manual M3000® Automation System / MSC II (Moog Servo ...

You also want an ePaper? Increase the reach of your titles
YUMPU automatically turns print PDFs into web optimized ePapers that Google loves.
5 Mechanical Installation DIN Rail Modules<br />
Procedure for removing DIN rail modules:<br />
1. Unlock the module to be removed and, if needed, adjacent modules, by<br />
pulling out the two red locking slides.<br />
Figure 25: Unlocking a DIN Rail Module<br />
2. Pull the modules at least 1 cm apart.<br />
CAUTION To avoid damaging the locating pins of the modules,<br />
make sure the DIN rail modules are at least 1 cm apart<br />
when removing them from the DIN top-hat rail.<br />
X1 X3<br />
X2<br />
WCAN<br />
L1+ TRM I/O1 I/O2 I/O3 I/O4 WCAN LCAN EBus Rx Tx Aux1 Aux2 Aux3 Aux4 OutEN<br />
1 2 3 4 5 6 7 8 9<br />
L1+ L1+ M1 M1 L2+ L2+ M2 M2 M2 X2<br />
X1<br />
X3<br />
OutEn I/O1 I/O2 I/O3 I/O4 M2 M2 M2 M2 X4<br />
WCAN WCAN<br />
Run<br />
X13<br />
X14<br />
X15 X16<br />
Stop !<br />
LAN RT-ETH1 RT-ETH2<br />
Reset<br />
X11 X12<br />
USB1 USB2 Link 100MB/s Link 100MB/s Link 100MB/s<br />
LK<br />
SIO F-Bus<br />
1 2 3 4 5 6 7 8 9 10<br />
X6<br />
X7<br />
X5 CLK+ CLK- A+ A- B+ B- Z+ Z- +5V DGND X8<br />
X9<br />
X10<br />
A1 B1 Z1 A2 B2 Z2 A3 B3 Z3 A4 B4 Z4 LED1 LED2 LED3 Error<br />
Figure 26: Pulling apart DIN Rail Modules<br />
3. Lift off the module from the DIN top-hat rail.<br />
X4<br />
X5 S1<br />
X8<br />
X6 S2<br />
X7<br />
1<br />
1 1 10<br />
SIO F-Bus<br />
X9 X10<br />
WCAN<br />
1 10<br />
Off On<br />
S3<br />
S4<br />
Figure 27: Lifting off a DIN Rail Module from the DIN Top-Hat Rail<br />
Removing<br />
DIN Rail Modules<br />
© <strong>Moog</strong> GmbH <strong>User</strong> <strong>Manual</strong> M3000 ® and <strong>MSC</strong> <strong>II</strong> (CA65865-001; Version 1.1, 08/08) 36