Daytime Fan-Aspirated Radiation Shield Kit Installation Manual
Daytime Fan-Aspirated Radiation Shield Kit Installation Manual
Daytime Fan-Aspirated Radiation Shield Kit Installation Manual
- No tags were found...

Create successful ePaper yourself
Turn your PDF publications into a flip-book with our unique Google optimized e-Paper software.
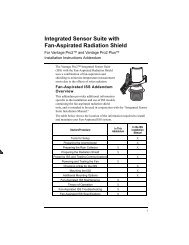
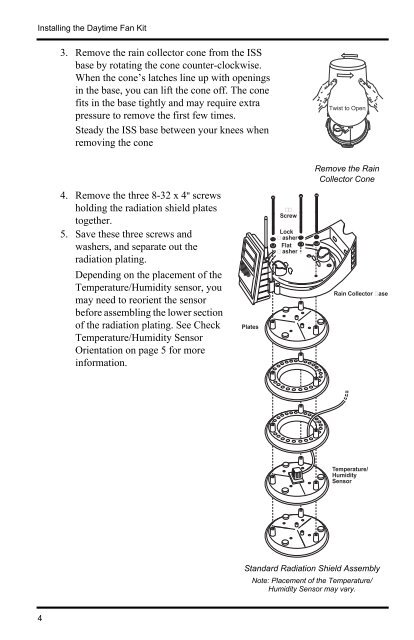
Installing the <strong>Daytime</strong> <strong>Fan</strong> <strong>Kit</strong>3. Remove the rain collector cone from the ISSbase by rotating the cone counter-clockwise.When the cone’s latches line up with openingsin the base, you can lift the cone off. The conefits in the base tightly and may require extrapressure to remove the first few times.Steady the ISS base between your knees whenremoving the coneTwist to Open4. Remove the three 8-32 x 4'' screwsholding the radiation shield platestogether.5. Save these three screws andwashers, and separate out theradiation plating.Depending on the placement of theTemperature/Humidity sensor, youmay need to reorient the sensorbefore assembling the lower sectionof the radiation plating. See CheckTemperature/Humidity SensorOrientation on page 5 for moreinformation.PlatesScrewLock asherFlat asherRemove the RainCollector ConeRain Collector aseTemperature/HumiditySensorStandard <strong>Radiation</strong> <strong>Shield</strong> AssemblyNote: Placement of the Temperature/Humidity Sensor may vary.4