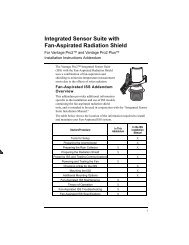
Daytime Fan-Aspirated Radiation Shield Kit Installation Manual
Daytime Fan-Aspirated Radiation Shield Kit Installation Manual
Daytime Fan-Aspirated Radiation Shield Kit Installation Manual
- No tags were found...

Create successful ePaper yourself
Turn your PDF publications into a flip-book with our unique Google optimized e-Paper software.
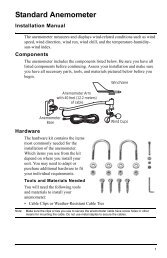
21. Lower the ISS baseonto the stack so thatthe screw goes into theboss. Turn the screw afew times to engagethe threads.22. Place a lock washerand flat washer on theother two 3 1/4''screws then insertthem through the othertwo screw holes.23. Tighten all threescrews to securelyfasten the radiationshield to the ISS base.Re-Install the ISS1. Install the raincollector cone and lockit in place.2. Slide theTemperature/Humiditycable and thefan-aspirated unit’ssolar power cableassembly through thecable access port of theSIM box.3. Connect theTemperature/Humiditysensor cable.#8-32 x3-1/4" Screws (3)#8 Lock Washers#8 Flat WashersTemperature/HumidityCablePower CableAssemblyInstalling the <strong>Daytime</strong> <strong>Fan</strong> <strong>Kit</strong>Insert front screwfirstSIM HousingISS BaseClosed Cap PlateOpen Cap Plate(hole in center)<strong>Fan</strong> PlateReconnecting the <strong>Radiation</strong> <strong>Shield</strong> to theRain Collector4. Close the SIM cover temporarily without connecting the solar panelcables.5. Test communication between the ISS and the console. To testcommunication, take the console out of Setup Mode and make sure theconsole is receiving data from the ISS. See the ISS manual for moreinformation on testing communication.6. Reinstall the ISS in its previous location.7. Open the SIM cover and connect the WIND (anemometer) cable.8. Cabled ISS Only: Connect the console cable.13