DuceramPlus directions for use (GB) - NEW - DeguDent
DuceramPlus directions for use (GB) - NEW - DeguDent
DuceramPlus directions for use (GB) - NEW - DeguDent
You also want an ePaper? Increase the reach of your titles
YUMPU automatically turns print PDFs into web optimized ePapers that Google loves.
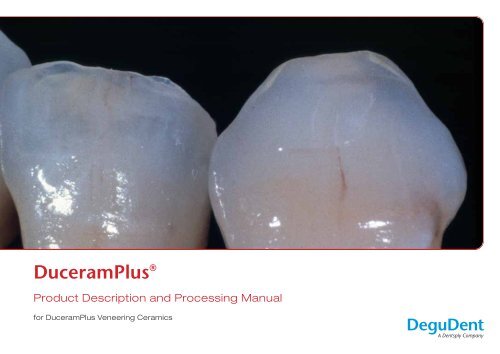
<strong>DuceramPlus</strong> ®Product Description and Processing Manual<strong>for</strong> <strong>DuceramPlus</strong> Veneering Ceramics
Logical – innovative – proven.0124General notes on <strong>DuceramPlus</strong>Indications:Veneering of metal framework and copings <strong>for</strong> thepreparation of crowns and bridges.Contraindications:Contraindicated <strong>for</strong> <strong>use</strong> with alloys other than high fusingalloys with CTE values between 13.8 and 15.4 µm/m·K.Precautions:Use only alloys with a minimum solidus temperature of 1030 °C.Data:– CTE Dentine 13.0 µm/m·K– Dental ceramics, type 1, class 2–8 acc. to DIN EN ISO 6872– Metall-ceramic bond characterization, flexural strengthand chemical solubility acc. to DIN EN ISO 9693Transport and storage:– Protect the liquids from temperature below freezing.Store con tainers tightly closed at temperatures between10 and 25 °C.– Powders and pastes: Keep away from sunlight.Store in a vibration-free place.– Protect from humiditySafety notes:– Do not inhale dust particles during grinding.2
ContentIntroductionThe company 4The veneering ceramics 5ProcessingServiceGeneral firing instructions 6Preparations 7Application of opaques 8–9Standard layering technique 10–11Professional layering technique 12–13Glaze firing 14Shoulder layering technique 15The <strong>DuceramPlus</strong> range 16–17Troubleshooting 18Firing recommendations 19–22Abbreviations 23–24Contact 253
The future belongs to high-tech ceramics.You can <strong>use</strong> high-tech ceramics today.<strong>DeguDent</strong>:For many, many decades, the extraordinaryToday, <strong>DeguDent</strong> offers time-proven specialist<strong>DeguDent</strong> ceramics meets the demands andinnovator andaesthetics and specific material properties haveceramics <strong>for</strong> the entire range of dental applica-requirements of an increasing number oftechnologymade ceramics a focus of attention in dentaltions – from veneering ceramics such asinnovative dentists and educated patients <strong>for</strong>leader in dentaltechnology. But only after concentrated re -Duceragold and the Cergo ® Press pressablestate-of-the-art biocompatibility and impeccableceramics.search and development ef<strong>for</strong>t had been madeceramics all the way to the Cercon ® CAD/CAMaesthetics. Other benefits of <strong>DeguDent</strong> cera-and comprehensive tests had been conductedall-ceramic system.mics are their excellent handling and the manydid ceramics become available <strong>for</strong> actual clinicalpossibilities <strong>for</strong> creative refinement – <strong>for</strong> example<strong>use</strong> – and they fast became a roaring success.the <strong>DuceramPlus</strong> veneering ceramics.4 Introduction
One material.Many benefits.<strong>DuceramPlus</strong> metal ceramics is a no-compromisesuccessor to Duceram metal ceramicsproven clinically and aesthetically in the dentallaboratory since 1985.When working with <strong>DuceramPlus</strong>, you can relyon components that combine in perfect har -mony and are easy to handle. <strong>DuceramPlus</strong> isoffered in convenient sets designed <strong>for</strong> individualrequirements or as single components.Advantages• Problem-free application to all high-fusingalloys with CTE values between 13.8 and15.4 µm/m · K thanks to its linear thermalexpansion curve• Excellent aesthetics in translucency,opalescence and fluorescence• Combines with phosphate-bonded diematerials (Ducera Lay) <strong>for</strong> the fabricationof all-ceramic inlays• Stable shades even in combination with lowpricehigh-silver alloys• High stability in layering, easy to model andeasy to sculpt• Low firing shrinkage• Smooth, homogenous surface• Exceeds current ISO standards• Harmonized shade matching• Natural white fluorescence in powder andpaste opaques• Consistently high quality across batchesthanks to continuous quality checks• Flexible, controllable opaque temperatures(e.g. reducing firing temperatures by usingthe neutral)Introduction5
General firing instructionsGeneral firinginstructionsBe<strong>for</strong>e firing your first <strong>DuceramPlus</strong>object, please note our general firinginstructions:• On completed pre-drying/pre-heating, fullvacuum must be applied at baseline temperature.This helps avoid microporosities thatwould adversely affect transparency.• For alloys with a CTE of > 14.2 µ/m · K(25–600 °C), we recommend slow cooling ora tempering phase of 3–5 min at 850 °C.* Important note:The SMH shoulder materialhas been renamed<strong>DuceramPlus</strong> Margin.• Gaseous enclosures in the ceramic massresult in clouding, with colours appearingpaler and brighter.• Since the firing per<strong>for</strong>mance of individualceramic furnaces varies widely, firing temperaturesmay have to be adjusted to thespecific device on hand.General Pre- Drying Heating Firing Holding Vacuum Extendedfiring program heating rate cooling°C min °C/min °C min hPa1st paste opaque firing 575 6:00 55 930 3:00 50 –2nd paste opaque firing 575 6:00 55 930 2:00 50 –1st powder opaque firing 600 2:00 55 930 3:00 50 –2nd powder opaque firing 600 4:00 55 930 2:00 50 –Margin firing* 600 6:00–9:00 55 920 1:00 50 –1st dentine firing 600 6:00–9:00 55 910 1:00 50 –2nd dentine firing 600 4:00–6:00 55 900 1:00 50 –Glaze firing 600 4:00 55 890 1:00–3:00 – –Correction firing 600 4:00 55 880 1:00 50 –6 Processing
Wachsaustreiben/VorwärmenSchmelzen und GießenPreparationsFramework preparationPreparation and oxidationAfter finishing, unless otherwise recommendedby the alloy manufacturer, sandblast the metalframeworks with alumina (100–150 µm) at apressure of 2 bars (non-precious alloys: up to4 bars).Oxidize the finished metal frameworks accord ingto manufacturer’s recommendations. Unlessotherwise recommended, the oxide shouldsubsequently be removed as described above.Finishing the alloyRemoving the oxide by sandblastingProcessing7
Application of opaquesPowder opaqueApplying opaqueMix opaque powder to a creamy consistencywith O or OL modelling liquid. Use a brush or glassinstrument to apply the opaque to the metalframe. The framework should be well covered.Fire according to firing recommendations.Paste opaqueUse the enclosed paste opaque brush to apply athin but even layer of <strong>DuceramPlus</strong> paste opaqueto the dry framework. The surface should becovered completely. The texture of the pasteopaque is controlled by the paste liquid. Due tothe organic particles contained in the paste, pasteopaque takes longer to dry, requiring a longer predryingtime and a basic temperature specific tothe furnace <strong>use</strong>d. For details, please refer to thefiring instructions <strong>for</strong> <strong>DuceramPlus</strong> paste opaque.Applying powder opaque with a brushApplying powder opaque with a glass instrumentApplying paste opaque8 Processing
Application of opaquesGeneral In<strong>for</strong>mationAlloy-dependent opaque firing• However, the maximum firing temperature <strong>for</strong>Individual shades using opaque modifierstemperaturesthe opaque firing should always be at leastSeven paste and powder opaque modifiersThe final temperature of the 1st opaque firing100 °C below the alloy manufacturer’s quoted(intensives) are available <strong>for</strong> individual charac -depends on the type of alloy <strong>use</strong>d.melting temperature.terization of the opaque layer.• Alloys with a high melting point, such as nonpreciousalloys and palladium-based alloys,should be fired about 50 °C higher in order tooptimize wetting of the metal surface.• For alloys with a low melting point, such ashigh-precious or “bio” alloys, a neutral shouldbe <strong>use</strong>d to reduce to the oxide firing temperatures(900 °C).General firing program, neutralPre-heating Drying time Heating rate Firing Holding time Vacuumtemperature °C min °C/min temperature °C min hPaNeutral 575 7:00 55 900 3:00 50Characterization of the opaque layerProcessing9
Standard layering techniqueShade combination tableShades A1 A2 A3 A3,5 A4 B1 B2 B3 B4 C1 C2 C3 C4 D2 D3 D4Opaques OA1 OA2 OA3 OA3,5 OA4 OB1 OB2 OB3 OB4 OC1 OC2 OC3 OC4 OD2 OD3 OD4Dentines DA1 DA2 DA3 DA3,5 DA4 DB1 DB2 DB3 DB4 DC1 DC2 DC3 DC4 DD2 DD3 DD4Incisals 1 2 3 3 6 1 1 4 6 1 5 5 6 2 4 4Opal Incisals OS 2 OS 2 OS 3 OS 3 OS 4 OS1 OS 3 OS 3 OS 3 OS 4 OS 3 OS 3 OS 4 OS 4 OS 3 OS 3Shades A1 A2 A3 A3,5 A4 B1 B2 B3 B4 C1 C2 C3 C4 D2 D3 D43 D dentines A A A A A B B B B C C C C C C CChroma dentines CDA1 CDA2 CDDA3 CDA3,5 CDA4 CDB1 CDB2 CDB3 CDB4 CDC1 CDC2 CDC3 CDC4 CDD2 CDD3 CDD4Margins 1 2 3 3 4 2 + Flu 5 6 7 2 4 + 7 4 + 7 4 + 7 4 + 6 6 6Standard anteriorlayering techniqueIncisalsDentineOpaque10 Processing
Wachsaustreiben/VorwärmenSchmelzen und GießenStandard layering techniqueStandard layeringtechniqueCrown after 2nd opaque firing. The second opaquelayer serves to improve the masking effect.Build up the dentine to full contour to get a feel <strong>for</strong> toothsize, shape and position.Then cut back the dentine to the actual core.Transparents enliven the incisal area with their differentreflective properties.Correction after 1st dentine firingCrown after 2nd firingProcessing11
Professional layering techniqueShade combinationtable, professionallayering techniqueShades A1 A2 A3 A3,5 A4 B1 B2 B3 B4 C1 C2 C3 C4 D2 D3 D4ModifiersFlamingo X XBambus X X XIvory X X X X X X X X X X X X X X X XCreme X X X X X XSolaris X XPeach X XMangoXIncisalYellowish incisalBluish incisalModifiers or flu dentineCaramel X X X XPearl X X X XSafari X X X X XFlu dentineSunny X X X X X X X X XModifierOrange X X X X X XCreme X X X XFlu dentineOpal incisalOpal incisalOS1OS 2 X XXDentineOpaqueModifierOS 3 X X X X X X X X XOS 4 X X X X* Opal incisals OS10, 15, 50, 10 G or 10 B can be <strong>use</strong>d individually <strong>for</strong> all shades. There is no specific shade table.12 Processing
Wachsaustreiben/VorwärmenSchmelzen und GießenProfessional layering techniqueProfessionallayering technique3D dentines are <strong>use</strong>d to emphasize the shades ofcer vi cal, interdental and palatal areas. They help givethe restoration a more pronounced three-dimensionalcharacter, even where the veneer is very thin.For even more chroma, <strong>use</strong> the corresponding chromadentines instead of some or all of the regular dentines.Hue and Value remain unchanged.Transparents and incisals are layered in lamellar <strong>for</strong>m tosupport the individuality of the incisal areas.Please note:These pictures showthe Professional layer -ing technique. It startsafter the 2nd opaquefiring of the correctlyprepared and individuallydesigned framework.Completed crown with extended basic layering usingthe chroma dentine set available separately.Layering using the Professional materialsCompleted Professional crownProcessing13
Glaze firingGlaze firingWhen all necessary corrections have beenmade, the surface and contours are finishedwith diamond and tungsten-carbide burs.Small shade corrections and final characterizationsare added with Duceram LFC stainsand glaze.Shaping and surface finishingGlazing and surface stainingCompleted crown14 Processing
Wachsaustreiben/VorwärmenSchmelzen und GießenMargin layering techniqueMargin layeringThe crown margins can be created using the<strong>DuceramPlus</strong> margins, step by step4. Replace the framework on the master casttechniquestandard margin materials SM 1–SM 7 or in di -1. Reduce the crown margin by approximatelyand apply the margin material in the crown’svi dual using the SM Flu intensive. This highly0.5–0.8 mm. Mark and seal the preparationcervical region. You can avoid shading byfluorescent margin material provides goodmargin.placing SM Flu below the ceramic margin.masking even in aesthetically difficult situations2. Sandblast the firework, followed by the5. Allow margin material to dry or vacuum.such as discoloured tooth preparations, giving1st and 2nd opaque firings as per the pertinent6. Place the restoration on sprues (see page 6the ceramic margin a vital and natural appear -instructions.and pages 19–22 <strong>for</strong> firing recommendations).ance under any lighting conditions.3. The model is isolated with High or SEP7. Correct the margin without applying heat.Use the SD Quick modelling liquid orisolation.Isolate the model.<strong>DuceramPlus</strong> SMH liquid <strong>for</strong> <strong>DuceramPlus</strong>8. Apply the 2nd margin layer. Per<strong>for</strong>m 2ndmargin powder.margin firing as per recommendations.9. Complete the ceramic margin. The shouldershould be sufficiently stable where it overlapsthe opaque.10. Clean the restoration and proceed withlayering.1. Crown after 2nd opaque firing.Reduced metal margin, chamferexposed2. Margin applied 3. Margin firing completed, dentinesand incisals applied4. Finished crown after glaze firingProcessing15
The <strong>DuceramPlus</strong> rangeFor your success:The <strong>DuceramPlus</strong> rangeIf your greatest concern is optimal aestheticsand perfect restorative results, you shouldmake no compromises: With <strong>DuceramPlus</strong>,you can count on one of the largest and safestassortments of veneering ceramics in thedental market.Special compounds such as Gum (gingival),Bleach (very white, <strong>for</strong> bleached teeth) or opalincisals permit reconstruction even in difficultcases with special characteristics.<strong>DuceramPlus</strong> is as individual as your require-Duceram ®PlusPowder opaque set16x 20 g O A1–O D47x 20 g opaque modifier1x 50 ml OL modelling liquid1x shade indicatorPowder opaquesCover the metal framework anddetermine the basic shade ofthe veneer.Duceram ® PlusMetallkeramikBondingDuceramPorcelain®PastenopakerPlusPaste Opaque2 mlTG: 590 °C WAK (25 – 500 °C): 14,0Paste opaque set16x 2 ml O A1–O D47x 2 ml opaque modifier1x neutral material2x paste opaque brush1x shade indicator2x 2 ml paste opaque liquidPaste opaquesCover the metal framework anddetermine the basic shade ofthe veneer.Duceram ®PlusDentine set16x 20 g D A1– D D43x 20 g 3D dentines1x 50 ml SD modelling liquid1x shade indicatorDentinesFor creating the dentine core.ments. We offer everything from a well-balanc -ed base assortment to a broad variety of ad -ditional compounds <strong>for</strong> the true ceramics pro.Duceram ®PlusDuceram ®PlusDuceram ®PlusOf course, <strong>DuceramPlus</strong> is available in all16ServiceV shades. A test set is available in A2/A3.Each set is accompanied by original coloursamples of all ceramics materials in the <strong>for</strong>mof a shade indicator.Chroma dentine set16x 20 g CD A1 – CD D41x 50 ml SD modelling liquid1x shade indicatorChroma dentinesFor safe shade matching even invery thin layers and <strong>for</strong> transparentmodification of dentines.Incisal set6x 20 g S1–S63x 20 g transparents(TC, T, TO)3x 20 g creative incisals(reddish, bluish, yellowish)1x 20 g dentine gum 21x 20 g dentine gum 41x 20 g correction1x 20 g glaze1x 50 ml SD modelling liquid1x 10 ml SEP isolation1x 15 ml staining liquid1x shade indicatorIncisalsFor incisal build-up.Margin set7x 20 g SM 1–SM 71x 20 mg SM Flu1x 50 ml Quick liquid1x shade indicatorMarginFor all-ceramic crown margins.
Wachsaustreiben/VorwärmenSchmelzen und GießenThe <strong>DuceramPlus</strong> rangeDuceram ®PlusDuceram ®PlusDuceram ®PlusDuceram ®PlusDuceram ®PlusBleaching shades set3x 20 g bleach dentines1x 20 g bleach margin1x 2 ml bleach paste opaque1x 20 g transparent TO1x 15 ml SD modelling liquid1x 15 ml SM special modelling liquid1x 10 ml SEP isolation1x paste opaque brush1x shade indicatorBleaching shadesA material that is significantly brighterand whiter than A1, to be <strong>use</strong>d predominantlyin patients with bleachednatural teeth.Gum shades set5x 20 g gum1x 2 ml gum paste opaque1x shade indicator1x paste opaque brush1x 10 ml SEP isolation1x 15 ml SD modelling liquidGum shadesGum-coloured ceramics <strong>for</strong> gingivalreplication, e.g. <strong>for</strong> implant-supportedsuperstructures.Professional set4x 20 g OS 1–OS 4*5x 20 g OS 10–OS 50*4x 20 g Flu dentine10x 20 g modifier1x 50 ml SD modelling liquid1x shade indicatorModifiers<strong>for</strong> individual characterization.Opal incisalsNaturally opalescent incisals.Opal enamelNaturally opalescent enamels <strong>for</strong>individual characterization of theincisal region.* Opalescence incisalTest set<strong>DuceramPlus</strong> test set in two shades(A2/A3) <strong>for</strong> fabricating crowns or bridgeswith an individual characterization optionusing opal incisals.Contents:4 g each ofK Correction3D dentine 3DADentine DA 2Dentine DA 3Modifier #2 BambusModifier #7 MangoChroma dentine A2Chroma dentine A3Flu dentine #4 CremeFlu dentine #3BrightS1 incisalS2 incisalOS 2OS 3OS 101x 1 ml paste opaque PO A21x 1 ml paste opaque PO A31x 15 ml SD modelling liquid1x 15 ml SD Form modelling liquid1x paste opaque brushQuick referenceService17
TroubleshootingProblem• Porosities, cavities, fractures of the metal framework• Ceramic shades are too bright and too opaque• Ceramic material is porous• Ceramic surface too rough• Ceramic surface has too little lustre• Ceramic surface has too much lustre• Edges and contours are not clearly defined but rounded• Cracks ca<strong>use</strong>d by compression: horizontal cracks in theincisal region or in bridge pontics• Cracks ca<strong>use</strong>d by tension:Craquelé on the ceramic surface• Bubbles18 ServicePossible Ca<strong>use</strong>s• Sprueing recommendations or recommendations onpre-heating and casting temperatures were disregarded• Pre-heating temperature too high• Firing temperature too low• Vacuum pump actuated too late• Attained vacuum too low• Firing temperature too low• Holding time too short• Firing temperature too high• Holding time too long• Extended cooling required but not observed• Cooling temperature too low• Cooling phase too short• Incorrect alloy• Ceramics CTE too high due to extended coolingor low heating rates• Framework walls too thin• Metal or ceramic impurities ca<strong>use</strong>d by impropergrinding instruments• Pastes or opaque incorrectly pre-dried• Entrapped air• Too much opaque thinner• Paste applied too thicklyRecommended actions• See points 2, 4, 5 and 6 of the processing recommendations<strong>for</strong> precious dental alloys• Decrease pre-heating temperature• Increase firing temperature• Decrease pre-heating or vacuum start temperature• Check vacuum pump/furnace <strong>for</strong> leaks• Increase firing temperature• Extend holding time• Decrease firing temperature• Shorten holding time• Check the CTE of the alloy (if the CTE is >14.2 µm/m · K,<strong>use</strong> extended cooling or temper <strong>for</strong> 3 min at 850 °C)• Increase tempering temperature• Extend cooling phase• Check alloy <strong>for</strong> compatibility• Respect minimal wall thickness requirement• Use only tools specifically designed <strong>for</strong> metal or ceramics• Use only stagger-toothed tungsten-carbide cutters• Extend pre-drying phase
Wachsaustreiben/VorwärmenSchmelzen und GießenFiring recommendationsFiring recommendations<strong>for</strong> Cergo Compact/PressCergo Compact/Press<strong>DuceramPlus</strong> Pre-drying Pre-drying Closing Pre-heat. Pre-heat. Heating Vacuum Vacuum Vacuum End temp. Holding Holding Tempering Tempering Cooling°C min min °C min °C/min °C ON °C OFF °C V min °C1st paste op. firing 135 5:00 2:00 575 0:00 55 On 575 930 930 0:00 3:00 0:00 – 0:002nd paste op. firing 135 5:00 2:00 575 0:00 55 On 575 930 930 0:00 2:00 0:00 – 0:001st powd.op.firing 135 2:00 2:00 600 2:00 55 On 600 930 930 0:00 3:00 0:00 – 0:002nd powd. op. firing 135 2:00 2:00 600 0:00 55 On 600 930 930 0:00 2:00 0:00 – 0:00Margin firing 135 7:00 2:00 575 2:00 55 On 575 920 920 0:00 1:00 0:00 – 0:001st dentine firing 135 2:00 2:00 600 2:00 55 On 600 910 910 0:00 1:00 0:00 – 0:002nd dentine firing 135 2:00 2:00 600 2:00 55 On 600 900 900 0:00 1:00 0:00 – 0:00Glaze firing 135 2:00 2:00 600 2:00 55 Off – – 890 0:00 1:00 0:00 – 0:00Correction firing 135 2:00 2:00 600 1:00 55 On 600 880 880 0:00 1:00 0:00 – 0:00The values listed here are intended <strong>for</strong> orientation only and should be regarded only as guidelines. Your firing results may differ. All firing results depend on the per<strong>for</strong>mance of thefurnace <strong>use</strong>d, which in turn depends on the make, model and age of the furnace. There<strong>for</strong>e, the guideline values will have to be adapted individually <strong>for</strong> each firing. We recommendrunning a test firing cycle to evaluate the per<strong>for</strong>mance of the furnace <strong>use</strong>d. We have compiled and checked all values and other data with great care. However, we cannot under anycircumstances be liable <strong>for</strong> your results.Important note:Alloys with a CTE (25–600 °C)>14.2 require extendedcooling or tempering <strong>for</strong> 3 minat 850 °C.Service19
Firing recommendationsFiring recommendations<strong>for</strong> MultimatTouch & PressMultimat Touch & Press<strong>DuceramPlus</strong> Pre-heat. Drying Pre-heat. Vacuum Heat. rate Firing Vacuum Firing Tempering Tempering°C min min hPa °C/min temp.°C min min °C min1st paste op. firing 575 5:00 1:00 50 55 940 1:00 2:00 – –2nd paste op. firing 575 5:00 1:00 50 55 930 1:00 2:00 – –1st powder op. firing 575 2:00 1:00 50 55 940 1:00 2:00 – –2nd powder op. firing 600 3:00 3:00 50 55 930 1:00 2:00 – –Margin firing 600 6:00 3:00 50 55 925 1:00 2:00 – –1st dentine firing 600 6:00 3:00 50 55 925 1:00 2:00 – –2nd dentine firing 600 5:00 3:00 50 55 910 1:00 2:00 – –Glaze firing 600 4:00 3:00 – 55 900 – 1:00–3:00 – –Correction firing 600 3:00 3:00 50 55 880 1:00 2:00 – –Important note: Alloyswith a CTE (25–600 °C)>14.2 require extendedcooling or tempering<strong>for</strong> 3 min at 850 °C.Firing recommendations<strong>for</strong> Multimat MC II/Mach 2/Multimat CMultimat MC II/Mach 2/Multimat C<strong>DuceramPlus</strong> Pre-heating Drying Pre-heating Vacuum Firing Firing Heating rate Vacuum°C min min min min temp. °C °C/min1st paste op. firing 575 5:0 1:0 1:0 4:00 930 55 502nd paste op. firing 575 5:0 1:0 1:0 3:00 930 55 501st powder op. firing 600 1:0 1:0 1:0 4:00 930 55 502nd powder op. firing 600 3:0 3:0 1:0 3:00 930 55 50Margin firing 600 5:0 3:0 1:0 2:00 920 55 501st dentine firing 600 6:0 3:0 1:0 2:00 910 55 502nd dentine firing 600 5:0 3:0 1:0 2:00 900 55 50Glaze firing 600 4:0 3:0 0:0 1:00 – 3:00 890 55 –Correction firing 600 5:0 3:0 1:0 2:00 880 55 5020 ServiceThe values listed here are intended <strong>for</strong> orientation only and should be regarded only as guidelines. Your firing results may differ. All firingresults depend on the per<strong>for</strong>mance of the furnace <strong>use</strong>d, which in turn depends on the make, model and age of the furnace. There<strong>for</strong>e, theguideline values will have to be adapted individually <strong>for</strong> each firing. We recommend running a test firing cycle to evaluate the per<strong>for</strong>mance ofthe furnace <strong>use</strong>d. We have compiled and checked all values and other data with great care. However, we cannot under any circumstancesbe liable <strong>for</strong> your results.
Wachsaustreiben/VorwärmenSchmelzen und GießenFiring recommendationsFiring recommendations<strong>for</strong> Austromat 3001Austromat 3001<strong>DuceramPlus</strong>1st paste op. firing2nd paste op. firing1st powder op. firing2nd powder op. firingMargin firing1st dentine firing2nd dentine firingGlaze firingCorrection firingC575 T360 • T60L9 V9 T055 • C930 V0 T180 C0 L0 T2 C575C575 T360 T60 • L9 V9 T055 • C930 V0 T120 C0 L0 T2 C575C600 T60 • L9 V9 T055 • C930 V0 T180 C0 L0 T2 C450C600 T120 T180 • L9 T120 V9 T055 • C930 V0 T120 C0 L0 T2 C600C600 T180 T180 • L9 T180 V9 T055 • C920 V0 T60 C0 L0 T2 C600C600 T180 T180 • L9 T180 V9 T055 • C910 V0 T60 C0 L0 T2 C600C600 T180 T180 • L9 T180 V9 T055 • C900 V0 T60 C0 L0 T2 C600C600 T180 T180 • L9 T055 • C890 T60 C0 L0 T2 C600C600 T120 T180 • L9 T180 V9 T055 • C880 V0 T60 C0 L0 T2 C600Firing recommendations<strong>for</strong> Austromat MAustromat M<strong>DuceramPlus</strong> Start ➔ °C End ➔min➔➔➔1➔21st paste op. firing 575 6 1 0 9 55 930 3:00 0 02nd paste op. firing 575 6 1 0 9 55 930 2:00 0 01st powder op. firing 600 0 1 0 9 55 930 3:00 0 02nd powder op. firing 600 2 3 0 9 55 930 2:00 0 0Margin firing 600 2 3 3 9 55 920 1:00 0 01st dentine firing 600 2 3 3 9 55 910 1:00 0 02nd dentine firing 600 2 3 3 9 55 900 1:00 0 0Glaze firing 600 2 3 0 0 55 890 1:00 0 0Correction firing 600 2 3 3 9 55 880 1:00 0 0The values listed here are intended <strong>for</strong> orientation only and should be regarded only as guidelines. Your firing results may differ. All firingresults depend on the per<strong>for</strong>mance of the furnace <strong>use</strong>d, which in turn depends on the make, model and age of the furnace. There<strong>for</strong>e, theguideline values will have to be adapted individually <strong>for</strong> each firing. We recommend running a test firing cycle to evaluate the per<strong>for</strong>mance ofthe furnace <strong>use</strong>d. We have compiled and checked all values and other data with great care. However, we cannot under any circumstancesbe liable <strong>for</strong> your results.Important note: Alloyswith a CTE (25–600 °C)>14.2 require extendedcooling or tempering<strong>for</strong> 3 min at 850 °C.Service21
Firing recommendationsFiring recommendations<strong>for</strong> Vacumat 200/250/300Vacumat 200/250/300<strong>DuceramPlus</strong> Stand-by End temperature Pre-drying Heating time Holding time Vacuum timetemperature °C °C1st paste op. firing 450 930 6.0 6.0 1.0 6.02nd paste op. firing 450 930 6.0 6.0 1.0 6.01st powder op. firing 600 930 1.0 6.0 2.0 6.02nd powder op. firing 600 930 2.0 6.0 1.0 6.0Margin firing 600 920 6.0 6.0 1.0 6.01st dentine firing 600 910 6.0 6.0 1.0 6.02nd dentine firing 600 900 6.0 6.0 1.0 6.0Glaze firing 600 890 2.0 3.0 1.0-2.0 0.0Correction firing 600 880 6.0 6.0 1.0 6.0Firing recommendations<strong>for</strong> Programat P90/P95Programat P90/P95<strong>DuceramPlus</strong> Stand-by Temperature Firing Closing time Holding time Vacuum Vacuumtemperature °C increase °C temperature °C on °C off °C1st paste op. firing 500 55 930 6 3 600 9292nd paste op. firing 500 55 930 6 2 600 9291st powder op. firing 500 55 930 0.3 3 600 9292nd powder op. firing 500 55 930 4 2 600 929Margin firing 500 55 920 6 1 600 9191st dentine firing 500 55 910 7 1 600 9092nd dentine firing 500 55 900 6 1 600 899Glaze firing 500 55 890 5 1–2 No vacuum No vacuumCorrection firing 500 55 880 5 1 600 889Important note: Alloyswith a CTE (25–600 °C)>14.2 require extendedcooling or tempering<strong>for</strong> 3 min at 850 °C.22 ServiceThe values listed here are intended <strong>for</strong> orientation only and should be regarded only as guidelines. Your firing results may differ. All firingresults depend on the per<strong>for</strong>mance of the furnace <strong>use</strong>d, which in turn depends on the make, model and age of the furnace. There<strong>for</strong>e, theguideline values will have to be adapted individually <strong>for</strong> each firing. We recommend running a test firing cycle to evaluate the per<strong>for</strong>mance ofthe furnace <strong>use</strong>d. We have compiled and checked all values and other data with great care. However, we cannot under any circumstancesbe liable <strong>for</strong> your results.
Abbreviations3DFluPOSM3D dentine, can be mixed with anyFluorescent dentines (e.g. as modifiersPowder opaque, paste opaque – a linerMargin material <strong>for</strong> all-ceramic crownother material or <strong>use</strong>d by itself, e.g. <strong>for</strong><strong>for</strong> dentine mamelons) are dentines char -adapted to the corresponding toothmargins. Requires a bevelled shoulder orthin veneering layers in the cervicalacterized by pronounced fluorescence.shades. Its low transparency is the reasonchamfered margin.region or to increase the chroma in theThey increase the luminescence of the<strong>for</strong> its good masking capabilities.Tcentral occlusal region. Has the sameveneer. Short-wave invisible light is ab-STransparents, <strong>for</strong> additional individualtranslucency but more chroma thansorbed, long-wave visible light is emitted.Shade guide tooth incisal, various multi-transparent effects in the incisal regionthe corresponding dentines (D).purpose incisals, see under Dentine.and a more vivid light play.GlazeBleachExtra finely ground powder <strong>for</strong> finalSDOS 10A material that is significantly brighter andglazing of the ceramic restoration.Modelling liquid <strong>for</strong> mixing dentines,Opalescent, transparent enamel, awhiter than A1, to be <strong>use</strong>d predominantlymodifiers, incisals and transparents.dynamic luminous mass <strong>for</strong> adaptationin patients with bleached natural teeth.Gumto the shades of natural teeth. ThisGum-coloured ceramics <strong>for</strong> gingivalmaterial filters light, preventing absorp-Dreplication, e.g. <strong>for</strong> implant-supportedSD Colourtion and inhibiting the visual influence ofDentines, adapted to the correspondingsuperstructures.Modelling liquid <strong>for</strong> dyeing ceramic layers,the dark intraoral regions. The toothtooth shades, are <strong>use</strong>d <strong>for</strong> building ce -making the layering technique morecrown in the patient’s mouth shows noramic restorations that emulate natural teeth.Kefficient.greying effect.To avoid confusion, the materials areCorrection mass <strong>for</strong> additional firingsmarked with organic pigments that dis-after glaze firing.SD FormOS 15appear completely in the firing process.Modelling liquid; like SD, but increases theThis enamel has the same optical prop -“Mango”, “Ivory” etc.physical stability of the ceramic layers.erties as OS 10, but is more opalescent.CDModifiers <strong>for</strong> changing the basic coloursRequires extended pre-drying.Chroma dentines are dentines with higher<strong>for</strong> individual characterization.OS 50chroma (colour saturation) but identicalSD QuickEnamel with markedly more opalescencecolour and transparency.OLModelling liquid <strong>for</strong> mixing dentines,than OS 15.Mixing liquid <strong>for</strong> mixing all powdermodifiers, incisals and transparents,opaques. Gives the ceramic masswherever faster drying is desirable. UsedOS1–OS 4a creamy consistency so it can be<strong>for</strong> ceramic veneers, inlays, onlays, andOpalescent colour-keyed incisals repro-applied similar to a lacquer.corrections (e.g. contact points, due toducing the colour play of natural enamel.lower shrinkage).Service23
FascinationProsthetics<strong>GB</strong>22019Last revision: 04/2013<strong>DeguDent</strong> GmbHRodenbacher Chaussee 463457 Hanau-WolfgangGermanywww.degudent.com


