Vitosolic 100 Installation instructions870 KB - Viessmann
Vitosolic 100 Installation instructions870 KB - Viessmann
Vitosolic 100 Installation instructions870 KB - Viessmann
- No tags were found...

Create successful ePaper yourself
Turn your PDF publications into a flip-book with our unique Google optimized e-Paper software.
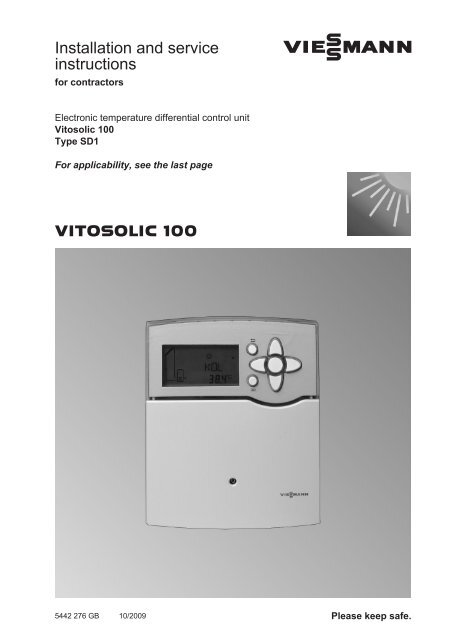
<strong>Installation</strong> and serviceinstructionsfor contractorsVIESMANNElectronic temperature differential control unit<strong>Vitosolic</strong> <strong>100</strong>Type SD1For applicability, see the last pageVITOSOLIC <strong>100</strong>5442 276 GB 10/2009 Please keep safe.
Safety instructionsSafety instructionsPlease follow these safety instructions closely to prevent accidents and materiallosses.Safety instructions explainedDangerThis symbol warns against therisk of injury.!Please noteThis symbol warns against therisk of material losses and environmentalpollution.NoteDetails identified by the word "Note" containadditional information.Target groupThese instructions are exclusivelydesigned for qualified personnel.■ Work on electrical equipment mustonly be carried out by a qualified electrician.■ The system must be commissioned bythe system installer or a qualified personauthorised by the installer.RegulationsWorking on the system■ Isolate the system from the power supplyand check that it is no longer 'live',e.g. by removing a separate fuse or bymeans of a main isolator.■ Safeguard the system against unauthorisedreconnection.Please note! Electronic modules can be damagedby electrostatic discharges.Touch earthed objects, such asheating or water pipes, to dischargestatic loads.Repair work!Please noteRepairing components that fulfil asafety function can compromisethe safe operation of your heatingsystem.Replace faulty components onlywith original <strong>Viessmann</strong> spareparts.Observe the following when working onthis system■ all legal instructions regarding the preventionof accidents,■ all legal instructions regarding environmentalprotection,■ the Code of Practice of relevant tradeassociations.■ all current safety regulations asdefined by DIN, EN, DVGW, VDE andall locally applicable standards5442 276 GB2
Safety instructionsSafety instructions (cont.)Ancillary components, spare andwearing partsPlease note! Spare and wearing parts thathave not been tested togetherwith the heating system can compromiseits function. Installingnon-authorised components andnon-approved modifications orconversions can compromisesafety and may invalidate ourwarranty.For replacements, use only originalspare parts supplied orapproved by <strong>Viessmann</strong>.5442 276 GB3
Index<strong>Installation</strong> instructionsPreparing for installation<strong>Installation</strong> information......................................................................................... 6System example 1................................................................................................ 6System example 2................................................................................................ 11System example 3................................................................................................ 18System example 4................................................................................................ 25<strong>Installation</strong> sequenceFitting the solar control unit.................................................................................. 32Overview of electrical connections....................................................................... 33Solar circuit pump................................................................................................. 33Pump/valve at output R2...................................................................................... 35High limit safety cut-out........................................................................................ 36Collector temperature sensor............................................................................... 37Cylinder temperature sensor................................................................................ 38Temperature sensor............................................................................................. 38Power supply........................................................................................................ 39Service instructionsCommissioningSwitching the power ON....................................................................................... 41Navigation through the menu............................................................................... 41Selecting the system scheme............................................................................... 43Setting system parameters................................................................................... 43Resetting system parameters............................................................................... 43Carrying out a relay test....................................................................................... 43Service scansScanning temperatures and operating conditions................................................ 45TroubleshootingFault messages.................................................................................................... 46Checking sensors................................................................................................. 46Changing the fuse................................................................................................ 47Function descriptionParameter overview............................................................................................. 48System scheme.................................................................................................... 51Collector limit temperature................................................................................... 61Collector cooling function..................................................................................... 61Minimum collector temperature limit..................................................................... 614Index5442 276 GB
IndexIndex (cont.)Frost protection function....................................................................................... 62Reverse cooling function...................................................................................... 62Interval function.................................................................................................... 62Heat statement..................................................................................................... 63Speed control....................................................................................................... 63Parts list.............................................................................................................. 65Specification....................................................................................................... 66Appendix............................................................................................................. 67CertificatesDeclaration of conformity...................................................................................... 68Keyword index.................................................................................................... 695442 276 GB5
Preparing for installation<strong>Installation</strong> informationDangerSubject to system configuration,DHW temperatures above 60 °Ccan occur. DHW with temperaturesin excess of 60 °C cancause scalding.To limit the temperature to 60 °C,install mixing equipment, e.g. athermostatically controlled mixingvalve (accessory). Install amixer tap as anti-scalding deviceat the draw-off point.System example 1DHW heating with dual-mode DHW cylinderMain components■ <strong>Viessmann</strong> solar collectors■ DHW cylinders Vitocell <strong>100</strong>-B orVitocell 300-B■ <strong>Vitosolic</strong> <strong>100</strong>, type SD1■ Solar-Divicon■ Wall mounted oil/gas boiler or oil/gasboilerFunction descriptionDHW heating with solar energySolar circuit pump R1 eE starts andDHW cylinder qP is heated up if the temperaturedifferential between collectortemperature sensor S1 eQ and cylindertemperature sensor S2 qQ exceeds thestarting temperature differential DT E.Solar circuit pump R1 eE stops if:■ The actual temperature falls below thestop temperature differential DT A■ The electronic temperature limit ofcontrol unit eZ is exceeded (max.90 °C)■ The temperature selected at high limitsafety cut-out qW (if installed) isreachedAdditional function for DHW heatingThe requirements for the additional functionare achieved through circulationpump R2 qT.Suppression of DHW cylinder reheatingby the boilerCoding address "67" in boiler control unit2 defaults a third set DHW temperature(setting range 10 to 95 °C). This valuemust be below the first set DHW temperature.DHW cylinder qP will only beheated by boiler 1 (solar circuitpump R1 eE runs) if this set value cannotbe achieved by the solar thermal system.DHW heating without solar energyThe upper section of DHW cylinder qP isheated by boiler 1. The cylinder thermostatwith cylinder temperature sensor3 of boiler control unit 2 regulatescylinder heating 4.5442 276 GB6
Preparing for installationSystem example 1 (cont.)Required settings at the solar control unitParam Delivered DescriptionSettingeter conditionANL 1 Without auxiliary function for DHW heating 1With auxiliary function for DHW heating (see4page 55)DT E 8° C Start temperature differential for solar circuit pumpat R1DT A 4 °C Stop temperature differential for solar circuit pumpat R1S SL 60 °C Set cylinder temperature (see page 52)For further functions, see chapter "Function description" from page 48.Note"DT E" can be set at least 0.5 K higherthan "DT A" and up to 0.5 K lower than"DT S" (see page 50)."DT A" can be set up to 0.5 K below"DT E".Information regarding speed controlof the solar circuit pumpObserve chapter "Speed control" (seepage 63).5442 276 GB<strong>Installation</strong>7
Preparing for installationSystem example 1 (cont.)Hydraulic installation scheme ID: 4605028_0906_02eQeWeEPePqRqTS1 S2eZqPR2 R1230 V / 50 HzqEqW3qQ21421MKM BUS5442 276 GB8
Preparing for installationSystem example 1 (cont.)Equipment requiredID: 4605028_0906_02Pos. Description1 Oil/gas boiler or wall mounted oil/gas boilerwith2 Boiler and heating circuit control unit3 Cylinder temperature sensor4 Circulation pump for cylinder heating(integrated for wall mounted oil/gas boiler)qP Dual-mode DHW cylinderqQ Cylinder temperature sensor S2qW High limit safety cut-out (accessory)qE DHW circulation pump (on site)(internal/external extension may be required for connecting a wall mountedoil/gas boiler)qR Thermostatic mixing valve (accessory)qT Circulation pump R2 (transfer) (on site)eP Solar collectorseQ Collector temperature sensor S1eW Solar-Divicon (accessory)witheE Solar circuit pump R1eZ <strong>Vitosolic</strong> <strong>100</strong>, type SD1eU Junction box (on site)eI ON/OFF switch (on site)5442 276 GB<strong>Installation</strong>9
Preparing for installationSystem example 1 (cont.)Electrical installation schemeeZeI230 V / 50 Hz?2120151918? 14eU230 V / 50 HzM1~ R1eESTB qW1716? 13M1~R2qT1451211KM BUS 2Low voltage1096543SOLqQ21KOLeQID: 4605028_0906_025442 276 GB10
Preparing for installationSystem example 2Vitodens – DHW heating and central heating backup with a multimodeheating water buffer cylinder5442 276 GBMain components■ <strong>Viessmann</strong> solar collectors■ Vitocell 340-M or Vitocell 360-M multimodeheating water buffer cylinderwith integral DHW heating, with orwithout stratification system■ <strong>Vitosolic</strong> <strong>100</strong>, type SD1■ Solar-Divicon■ Wall mounted gas boiler from the yearof manufacture 2008– Vitodens 200-W, type WB2B– Vitodens 300-W, type WB3CFunction descriptionDHW heating with solar energySolar circuit pump R1 eE starts andheating water buffer cylinder qP isheated up if the temperature differentialbetween collector temperature sensorS1 and cylinder temperature sensorS2 qQ exceeds the start temperaturedifferential DT E.Solar circuit pump R1 eE stops if:■ The actual temperature falls below thestop temperature differential DT A■ The electronic temperature limit ofcontrol unit eZ is exceeded (max.90°C)■ The temperature selected at high limitsafety cut-out qW (if installed) isreachedEntire heating water buffer cylinder qP isheated by the solar thermal system if theinsolation is adequate.The upper part of heating water buffercylinder qP will only be reheated byboiler 1 if the actual water temperaturefalls below the set temperature selectedat boiler control unit 2.If the solar energy is inadequate to coverthe entire heating demand, the DHW inthe lower part of heating water buffer cylinderqP will be preheated by solarenergy. The DHW in the upper part of thecylinder is heated to the required temperatureby boiler 1.The burner starts and three-way divertervalve rZ switches to position "AB-A" viacylinder temperature sensor qZ of theboiler control unit. When the set DHWtemperature has been reached, theburner stops and three-way divertervalve rZ switches to position "AB-B".Suppression of DHW cylinder reheatingby the boilerCoding address "67" in boiler controlunit 2 defaults a third set DHW temperature(setting range 10 to 95 °C). Thisvalue must be below the first set DHWtemperature. Heating water buffer cylinderqP is only heated by boiler 1 (solarcircuit pump R1 eE runs) if this set valuecannot be achieved by the solar thermalsystem.11<strong>Installation</strong>
Preparing for installationSystem example 2 (cont.)DHW heating without solar energyThe upper area of heating water buffercylinder qP is heated by boiler 1. Theintegral instantaneous water heater/standby section is heated by the surroundingbuffer cylinder water.The cylinder thermostat with cylindertemperature sensor qZ of boiler controlunit 2 controlsthree-way diverter valve rZ.Central heating with solar energyCentral heating without solar energyIf the temperature at sensor qT is inadequate,the burner and circulation pumpin the Vitodens are started. The areabetween HV2/HR1 and HR2 in heatingwater buffer cylinder qP is heated up tothe set temperature for the heating circuitsin weather-compensated mode.When this set temperature is exceeded,the burner and, after a delay, the circulationpump in the Vitodens are stopped.The system provides central heating ifthe temperature at sensor qT is adequate.Required settings at the solar control unitParam Delivered DescriptionSettingeter conditionANL 1 Without auxiliary function for DHW heating 1DT E 8° C Start temperature differential for solar circuit pumpat R1DT A 4 °C Stop temperature differential for solar circuit pumpat R1S SL 60 °C Set cylinder temperature (see page 52)For further functions, see chapter "Function description" from page 48.Note"DT E" can be set at least 0.5 K higherthan "DT A" and up to 0.5 K lower than"DT S" (see page 50)."DT A" can be set up to 0.5 K below"DT E".Information regarding speed controlof the solar circuit pumpObserve chapter "Speed control" (seepage 63).5442 276 GB12
Preparing for installationSystem example 2 (cont.)Codes required at the boiler and heating circuit control unitCodeFunction51:1 The internal circulation pump is only switched on when the burnerhas been started (time delay off)53:3 System without DHW circulation pump:Three-way diverter valve rZ is connected to output sK of internalextension H1 or H25b:1 Internal diverter valve without function(DHW cylinder connected downstream of three-way divertervalve rZ)5442 276 GB<strong>Installation</strong>13
Preparing for installationSystem example 2 (cont.)Hydraulic installation scheme ID: 4605029_0906_02eQeWeEPePqWqZqTqQS1 S2R2 R1eZqP230 V / 50 HzqRHV1wWHV2/HR1HR2HR3qE5/282MrZ5/2151MKM BUS5442 276 GB14
Preparing for installationSystem example 2 (cont.)Equipment requiredID: 4605029_0906_02Pos. Description1 Wall mounted gas boilerwith2 Boiler and heating circuit control unit3 Internal extension H1 (standard delivery for the Vitodens 300-W)or4 Internal extension H2 (accessory)orSystem with DHW circulation pump:5 External extension H1 (accessory)6 KM BUS distributor (accessory)qP Heating water buffer cylinderwithwW Threaded DHW circulation pump (accessory)qT Temperature sensor (flow temperature sensor for low loss header; in thisscheme with heating water buffer cylinder) (accessory)qZ Cylinder temperature sensor (accessory)qQ Cylinder temperature sensor S2qW High limit safety cut-out (accessory)qE DHW circulation pump (on site)qR Thermostatic mixing valve (accessory)eP Solar collectorseQ Collector temperature sensor S1eW Solar-Divicon (accessory)witheE Solar circuit pump R1eZ <strong>Vitosolic</strong> <strong>100</strong>, type SD1eU Junction box (on site)eI ON/OFF switch (on site)rZ Three-way diverter valve (accessory)5442 276 GB<strong>Installation</strong>15
Preparing for installationSystem example 2 (cont.)Electrical installation scheme<strong>Vitosolic</strong> <strong>100</strong>eZeI230 V / 50 Hz?2120151918? 141716? 13eU230 V / 50 HzM1~ R1eEHigh limit qW safety cut-out1451211ALow voltage1096543SOLqQ21KOLeQID: 4605029_0906_025442 276 GB16
Preparing for installationSystem example 2 (cont.)Control unit, wall mounted gas boiler2fÖL?230 V / 50 Hz3 4lH lH5230 V / 50 HzlH?1gDsK?aBJsK ??fÖsÖ?sA ?M1~rZ<strong>Installation</strong>sK ?gÖM1~ ZP qEaVG 2 1Low voltage% STS qZ45676qTaVG21 2aVGaVG1212A5442 276 GBID: 4605029_0906_0217
Preparing for installationSystem example 3Vitodens – DHW heating with freshwater module and centralheating backup with heating water buffer cylinderMain components■ <strong>Viessmann</strong> solar collectors■ Freshwater module■ Heating water buffer cylinderVitocell140-E or Vitocell 160-E■ <strong>Vitosolic</strong> <strong>100</strong>, type SD1■ Solar-Divicon■ Wall mounted gas boiler from the yearof manufacture 2008– Vitodens 200-W, type WB2B– Vitodens 300-W, type WB3CFunction descriptionFreshwater module qP heats DHWwhen hot water is drawn. The energysupply to freshwater module qP is providedvia heating water buffer cylinderrP. Buffer cylinder rP is heated bythe solar thermal system or, in the upperarea, by boiler 1.The heated DHW is heated by freshwatermodule qP according to the instantaneouswater heater principle. An internalpump transports the heating water fromheating water buffer cylinder rP into thefreshwater module qP. This heats theDHW in the heat exchanger of the freshwatermodule qP according to the countercurrentprinciple. The freshwatermodule qP is regulated by its internalcontrol unit.When utilising the freshwater modulewith integral DHW circulation pump, thethree-way diverter valve qQ in conjunctionwith sensors S3 qE and S4 qW of thefreshwater module qP can be regulatedby its control unit to provide an optimumstratification of the return water into theheating water buffer cylinder rP.DHW heating with solar energySolar circuit pump R1 eE starts andheating water buffer cylinder rP isheated up if the temperature differentialbetween collector temperature sensorS1 eQ and cylinder temperature sensorS2 rQ exceeds the start temperature differentialDT E.Solar circuit pump R1 eE stops if:■ The actual temperature falls below thestop temperature differential DT A■ The electronic temperature limit ofcontrol unit eZ is exceeded (max.90°C)■ The temperature selected at high limitsafety cut-out rR (if installed) isreachedEntire heating water buffer cylinderrP isheated by the solar thermal system if theinsolation is adequate.The upper part of heating water buffercylinder rP will only be reheated byboiler 1 if the actual water temperaturefalls below the set temperature selectedat boiler control unit 2.5442 276 GB18
Preparing for installationSystem example 3 (cont.)The burner starts and three-way divertervalve rZ switches to position "AB-A" viacylinder temperature sensor rW of theboiler control unit. When the set DHWtemperature has been reached, theburner stops and three-way divertervalve rZ switches to position "AB-B".Suppression of DHW cylinder reheatingby the boilerCoding address "67" in boiler controlunit 2 defaults a third set DHW temperature(setting range 10 to 95 °C). Thisvalue must be below the first set DHWtemperature. Heating water buffer cylinderrP is only heated by the boiler (solarcircuit pump R1 eE runs) if this set valuecannot be achieved by the solar thermalsystem.DHW heating without solar energyThe upper area of heating water buffercylinder rP is heated by boiler 1.The cylinder thermostat with cylindertemperature sensor rW of boiler controlunit 2 controlsthree-way diverter valve rZ.Central heating with solar energyCentral heating is provided via heatingwater buffer cylinder rP if the temperatureat sensor rE is adequate.Central heating without solar energyIf the temperature at sensor rE is inadequate,the burner and circulation pumpin the Vitodens are started. The areabetween HV3/HR1 and HR3 in heatingwater buffer cylinder rP is heated up tothe set temperature for the heating circuitsin weather-compensated mode.When this set temperature is exceeded,the burner and, after a delay, the circulationpump in the Vitodens are stopped.<strong>Installation</strong>Required settings on the solar control unitParam Delivered DescriptionSettingeter conditionANL 1 Without auxiliary function for DHW heating 1DT E 8° C Start temperature differential for solar circuit pumpat R1DT A 4 °C Stop temperature differential for solar circuit pumpat R1S SL 60 °C Set cylinder temperature (see page 52)For further functions, see chapter "Functions" from page 48.5442 276 GB19
Preparing for installationSystem example 3 (cont.)Note"DT E" can be set at least 0.5 K higherthan "DT A" and up to 0.5 K lower than"DT S" (see page 50)."DT A" can be set up to 0.5 K below"DT E".Information regarding speed controlof the solar circuit pumpObserve chapter "Speed control" (seepage 63).Codes required on the boiler and heating circuit control unitCodeFunction51:1 The internal circulation pump is only switched on when theburner has been started (time delay off)53:3 System without DHW circulation pump:Three-way diverter valve rZ is connected to output sK of internalextension H1 or H25b:1 Internal diverter valve without function(DHW cylinder connected downstream of three-way divertervalve rZ)5442 276 GB20
Preparing for installationSystem example 3 (cont.)Hydraulic installation scheme ID: 4605030_0906_2eQeWeErRrWrErQqEPePrPS1 S2eZHV1HV2HV3/HR1HR2HR3HR4qQMR2 R1qW230 V / 50 HzqPMrZM21KM BUS5442 276 GB<strong>Installation</strong>21
Preparing for installationSystem example 3 (cont.)Equipment requiredID: 4605030_0906_2Pos. Description1 Wall mounted gas boilerwith2 Boiler and heating circuit control unitrW Cylinder temperature sensor STS3 Internal extension H1 (standard delivery for the Vitodens 300-W)or4 Internal extension H2 (accessory)qP Freshwater moduleqQ Three-way diverter valve R3 (accessory for qP)qW Temperature sensor S4 (accessory for qP)qE Temperature sensor S3 (accessory for qP)qR ON/OFF switch (on site)rP Heating water buffer cylinderrQ Cylinder temperature sensor S2rR High limit safety cut-out (accessory)eP Solar collectorseQ Collector temperature sensor S1eW Solar-Divicon (accessory)witheE Solar circuit pump R1eZ <strong>Vitosolic</strong> <strong>100</strong>, type SD1eU Junction box (on site)eI ON/OFF switch (on site)rE Temperature sensor (flow temperature sensor for low loss header) (accessory)rZ Three-way diverter valve (accessory)5442 276 GB22
Preparing for installationSystem example 3 (cont.)Electrical installation scheme<strong>Vitosolic</strong> <strong>100</strong>eZeI230 V / 50 Hz?2120151918? 141716? 13eU230 V / 50 HzM1~ R1eEHigh limit rR safety cut-out<strong>Installation</strong>1451211ALow voltage1096543SOLrQ21KOLeQID: 4605030_0906_25442 276 GB23
Preparing for installationSystem example 3 (cont.)Control unit, wall mounted gas boiler2fÖL?230 V / 50 Hz3 4lHlH230 V / 50 HzlH?1gDsK?aBJsK?M1~rZLow voltage% STS rW4567ArEID: 4605030_0906_25442 276 GB24
Preparing for installationSystem example 3 (cont.)Control unit, freshwater moduleGNDS1S2S3S4S5S6S7R5-AR5-MR5-RR4R3R2R1L NNqP?<strong>Installation</strong>M1~qE qW qQqR? N L230 V / 50 HzID: 4605030_0906_2System example 4DHW heating with solar retrofit system5442 276 GBThere are two control versions for thissystem example:■ Version A:Anti-stratification with sensor S3 inDHW cylinder 2 (existing)Differential temperature control■ Version B:Transfer with sensor S3 in DHW cylinder1 (retrofit)Control via thermostat functionIf it is possible to position the temperaturesensor for the DHW circulationtransfer in the existing cylinder, we recommendversion A.Main components■ <strong>Viessmann</strong> solar collectors■ Mono-mode DHW cylinder (existing)25
Preparing for installationSystem example 4 (cont.)■ Solar retrofit system with the followingcomponents:– Solar-Divicon SR– <strong>Vitosolic</strong> <strong>100</strong>, type SD1– DHW cylinder Vitocell <strong>100</strong>-W, typeCUG■ Wall mounted oil/gas boiler or oil/gasboiler (existing)Function descriptionDHW heating with solar energySolar circuit pump R1eE starts and DHWcylinder qP is heated up if the temperaturedifferential between collector temperaturesensor S1 eQ and cylinder temperaturesensor S2 qQ exceeds the starttemperature differential DT E.Solar circuit pump R1 eE stops if:■ The actual temperature falls below thestop temperature differential DT A■ The electronic temperature limit ofcontrol unit eZ is exceeded (max.90°C)■ The temperature selected at high limitsafety cut-out qW (if installed) isreachedVersion ATransfer pump R2 qT starts if the temperaturedifferential between sensor S2qQ and sensor S3 qU exceeds the starttemperature differential DT 3E. Thewater heated in DHW cylinder qP istransferred to DHW cylinder 2 qI.The transfer pump R2 qT also starts ifthere is a demand for DHW heatingissued by the auxiliary function.Transfer pump R2 qT stops if:■ The actual temperature falls below theshutdown temperature differentialDT 3A■ When the auxiliary function for DHWheating endsDHW circulation pump qE (if installed)for DHW cylinder 2 qI is controlled byboiler control unit 2.Version BTransfer pump R2 qT starts if the temperatureat sensor S3 qU exceeds thestart temperature NH E.The water heated in DHW cylinder qP istransferred to DHW cylinder 2 qI.The transfer pump R2 qT also starts ifthere is a demand for DHW heatingissued by the auxiliary function.Transfer pump R2 qT stops if:■ The actual temperature falls below thestop temperature N HA■ When the auxiliary function for DHWheating endsDHW circulation pump qE (if installed)for DHW cylinder 2 qI is controlled byboiler control unit 2.Suppression of DHW cylinder reheatingby the boilerCoding address "67" in boiler control unit2 defaults a third set DHW temperature(setting range 10 to 95 °C). This valuemust be below the first set DHW temperature.DHW cylinder 2 qI will only beheated by boiler 1 (solar circuitpump R1 eE runs) if this set value cannotbe achieved by the solar thermal system.5442 276 GB26
Preparing for installationSystem example 4 (cont.)DHW heating without solar energyDHW cylinder 2 qI is heated by boiler1. The cylinder thermostat with cylindertemperature sensor 3 of boiler controlunit 2 regulates cylinder heating.Required settings on the solar control unitVersion AParameterDeliveredconditionDescriptionANL 1 With auxiliary function for DHW heating (seepage 55)DT E 8° C Start temperature differential for solar circuit pumpat R1DT A 4 °C Stop temperature differential for solar circuit pumpat R1DT 3E 8° C Start temperature differential for transfer pump atR2DT 3A 4 °C Stop temperature differential for transfer pump atR2S SL 60 °C Set cylinder temperature (see page 52)For further functions, see chapter "Function description" from page 48.Setting8<strong>Installation</strong>Version BParam Delivered DescriptionSettingeter conditionANL 1 With auxiliary function for DHW heating (see9page 55)DT E 8° C Start temperature differential for solar circuitpump at R1DT A 4 °C Stop temperature differential for solar circuitpump at R1N HE 40° C Start temperature for transfer pump at R2 WW set + 4 KN HA 45 °C Stop temperature for transfer pump at R2 WW set + 2 KS Sl 60 °C Set cylinder temperature (see page 52)For further functions, see chapter "Function description" from page 48.5442 276 GB27
Preparing for installationSystem example 4 (cont.)Note■ "DT E" can be set at least 0.5 K higherthan "DT A" and up to 0.5 K lower than"DT S" (see page 50).■ "DT A" can be set up to 0.5 K below"DT E".■ WW set is the set DHW temperature ofthe DHW cylinder 2 (existing). Scanthis value at the boiler control unit.When adjusting "N HE" observe theset cylinder temperature "S SL". Ifnecessary, adjust the set DHW temperatureof DHW cylinder 2 a littlelower at the boiler control unit.Information regarding speed controlof the solar circuit pumpObserve chapter "Speed control" (seepage 63).<strong>Installation</strong> and service instructionsof the boiler control unit5442 276 GB28
Preparing for installationSystem example 4 (cont.)Hydraulic installation scheme ID: 4605031_0906_01ePeQS1 S2eZR2 R1230 V / 50 HzeWPqEeEqRqTB qU qW2 AqU13qQqPqI21421MKM BUSS35442 276 GB<strong>Installation</strong>A/B For a description of these versions,see page 26.29
Preparing for installationSystem example 4 (cont.)Equipment requiredID: 4605031_0906_01Pos. Description1 Oil/gas boiler or wall mounted oil/gas boilerwith2 Boiler and heating circuit control unit3 Cylinder temperature sensor4 Circulation pump for cylinder heating(integrated for wall mounted oil/gas boiler)qI DHW cylinder 2, mono-mode (existing)qP DHW cylinder 1, mono-mode (solar retrofit system)qQ Cylinder temperature sensor S2qW High limit safety cut-out (accessory)qE DHW circulation pump (on site)(internal/external extension may be required for connecting a wall mountedoil/gas boiler)qR Thermostatic mixing valve (accessory)eP Solar collectorseQ Collector temperature sensor S1eW Solar-Divicon SR (solar retrofit system)witheE Solar circuit pump R1andeZ <strong>Vitosolic</strong> <strong>100</strong>, type SD1eU Junction box (on site)eI ON/OFF switch (on site)DHW circulation diversionqT Circulation pump R2 (transfer) (accessory)qU Temperature sensor S35442 276 GB30
Preparing for installationSystem example 4 (cont.)Electrical installation schemeeZeI230 V / 50 Hz?2120151918? 141716? 13eU230 V / 50 HzM1~ R1M1~eESTB qWR2qT<strong>Installation</strong>1451211KM BUS 2Low voltage109654qU3SOLqQ21KOLeQID: 4605031_0906_015442 276 GB31
<strong>Installation</strong> sequenceFitting the solar control unitSelect an installation location near theDHW cylinder, taking account of theelectrical connections and their cablelengths.3.4.2x5.1556.2.1501.Before closing the solar control unit,make all electrical connections andapply a strain relief to all cables/leads.5442 276 GB32
<strong>Installation</strong> sequenceOverview of electrical connectionsT 4 A250 VEAR1R2P = 2 VAAC 250 V 0,8 AAC 250 V 4(2) AIP 20, l, T40 230 V50 HzS11 2S23 4S35 6PWMGND +9 1014511 12? N R2 N R1 N L13 14 15 16 17 18 19 20 21B C DA Wiring chamber of the solar controlunitB Sensor inputsC PWM signal for the solar circuitpumpD KM BUSE Fuse, 4.0 A (slow)R1 Semiconductor relay (suitable forspeed control)R2 Electromechanical relay<strong>Installation</strong>Solar circuit pumpPossible pumpsStandard solar circuit pumpsWithout individualspeed control(with integral auxiliarycapacitor)With individualspeed control"RPM" = 1 "RPM" = 0Delivered conditionHigh efficiencypumps"RPM" = 0Pumps with PWMinputNoteUse only solarpumps, not heatingcircuit pumps.■ WILO pumps:"RPM" = 2■ GRUNDFOSpumps:"RPM" = 35442 276 GB33
<strong>Installation</strong> sequenceSolar circuit pump (cont.)<strong>Installation</strong>The circulation pump with connectingcable is part of the Solar-Divicon pumpstation.Alternative pumps must be type-testedand installed in accordance with themanufacturer's details.Separate installation and serviceinstructionsConnection3-core cable with a cross-section of0.75 mm 2 .Rated current: 0.8 ANotePumps that draw more than 190 W mustbe connected via an additional relay(coupler relay). Disable the speed controlfor this pump (see chapter "Speedcontrol").Standard pumpAM1~A Wiring chamber of the solar controlunitR1 Solar circuit pump5442 276 GB34
<strong>Installation</strong> sequenceSolar circuit pump (cont.)Pump with PWM inputAAM1~Wiring chamber of the solarcontrol unitR1/PWM Solar circuit pump<strong>Installation</strong>Pump/valve at output R2<strong>Installation</strong>Pump and valve must be type-tested andinstalled in accordance with manufacturer'sdetails.Connection3-core cable with a cross-section of0.75 mm 2 .Rated current: max. 4(2) A5442 276 GB35
<strong>Installation</strong> sequencePump/valve at output R2 (cont.)AM1~A Wiring chamber of the solar controlunitBB Pump or valveHigh limit safety cut-outA high limit safety cut-out in the consumeris required when less than40 litres cylinder volume is available perm 2 absorber area. This installation safelyprevents temperatures in excess of95 °C in the consumer.NoteFor the Vitocell <strong>100</strong>, observe the max.collector area that can be connected.<strong>Installation</strong>Install the sensor of the high limit safetycut-out inside the cylinder cap (Vitocell300 accessory).Cylinder cap installation instructionsConnection3-core cable with a cross-section of1.5 mm 2 .5442 276 GB36
<strong>Installation</strong> sequenceHigh limit safety cut-out (cont.)AC Solar circuit pumpD Junction box (on site)DM1~CB<strong>Installation</strong>A Wiring chamber of the solar controlunitB High limit safety cut-outTemperature settingDelivered condition: 120 °CRequires adjustment to 95 °CHigh limit safety cut-out installationinstructionsCollector temperature sensor<strong>Installation</strong>Collector installation instructionsConnection5442 276 GBConnect the sensor to S1 (terminals 1and 2).Extension of the connecting cable:2-core cable with a cross-section of1.5 mm 2 .NoteNever route this cable immediately nextto 230/400 V cables.37
<strong>Installation</strong> sequenceCylinder temperature sensor<strong>Installation</strong>With the threaded elbow.DHW cylinder installation instructionsConnectionConnect the sensor to S2 (terminals 3and 4).Extension of the connecting cable:2-core cable with a cross-section of1.5 mm 2 .NoteNever route this cable immediately nextto 230/400 V cables.Temperature sensor<strong>Installation</strong>1.2.4.3.5442 276 GB38
<strong>Installation</strong> sequenceTemperature sensor (cont.)NoteNever wrap insulating tape around thesensor.Seal in the sensor well.ConnectionConnect the sensor to S3 (terminals 5and 6).Extension of the connecting cable:2-core cable with a cross-section of1.5 mm 2 .Power supplyRegulationsCarry out the power supply connectionand all earthing measures (i.e. RCD circuit)in accordance with IEC 364, therequirements of your local power supplyutility, VDE or national regulations.NoteNever route this cable immediately nextto 230/400 V cables.Protect the power cable to the controlunit with an appropriate fuse/MCB.5442 276 GB<strong>Installation</strong>39
<strong>Installation</strong> sequencePower supply (cont.)AProvide the power supply connection(230 V~) via a two-pole mains isolator(on site).Disconnect the system by means of adevice which simultaneously separatesall non-earthed conductors with at least3 mm contact separation.?NCLBDangerIncorrect core termination cancause severe injuries and damageto the equipment.Never interchange cores "L" and"N":L Terminal 21N Terminal 20A Solar control unit wiring chamberB ON/OFF switch (on site)C Mains voltage 230 V/50 Hz5442 276 GB40
CommissioningSwitching the power ON1. Check whether all electrical connectionshave been correctly made.2. Check that the high limit safety cutout(if required) is connected.4. Check which type of solar circuitpump is connected and set parameter"RPM" accordingly (seepages 33 and 43).3. Switch ON the power; the solar controlunit then implements an initiationphase.The solar control unit is now in automaticmode.Navigation through the menuControlsKOL°CServiceBA5442 276 GBABOK key; to confirm your menuselection or adjustmentSymbols lineTerminating an adjustmentalready begun (the value revertsto its previous setting)/ Cursor keysNavigation through the menu/ Cursor keysTo set a valueFlashing "SET" means that valuescan be changed.41
CommissioningNavigation through the menu (cont.)Calling up the menuThe symbol line on the displayshows which keys to use to makeadjustments and scans.NoteAfter approx. 4 min, the display changesto show the collector temperature, if nofurther adjustments are made.Symbols on the displayThese symbols are not always displayed,but appear subject to the systemoperating condition.Symbol Permanent display FlashingFully functioning system —ÂRelay 1 ON—(solar circuit pump)à Relay 2 ON —ÈSet DHW temperaturereachedCollector cooling function,return cooling enabledÇ Frost protection active Failed to reach minimum collectortemperature¨ — Emergency collector shutdown(collector limit temperaturereached) or cylinderemergency stop active¨+Ä Sensor fault:Ĩ¨+Æ Manual mode:ƨSET Parameters can be changed Change parameter with /5442 276 GB42
CommissioningSelecting the system schemePress the following keys:1. "ANL 1" and the display willshow the respective scheme.2. OK "SET" flashes.3. for the required scheme.4. OK to confirm.See system scheme from page 51.Setting system parametersPress the following keys:1. "ANL" and the display willshow the respective scheme.2. until the required parameter isshown (see table onpage 48).3. OK "SET" flashes.4. / for the selected value.5. OK to confirm.Resetting system parametersIf a different system scheme is selected,all parameters are returned to their originalstate.Carrying out a relay testPress the following keys:1. "ANL" and the display willshow the respective scheme.3. OK "SET" flashes.Service5442 276 GB2. select "HND 1" or "HND 2".HND 1 Relay 1HND 2 Relay 243
CommissioningCarrying out a relay test (cont.)4. / for the required setting.Auto Control modeOn in (<strong>100</strong>%)"Æ" and "Â" or "Ã" aredisplayed and "¨"flashes.OFF OFF"Æ" is shown and "¨"flashes.5. OK to confirm.6. After the relay test has been completed,select "Auto".5442 276 GB44
Service scansScanning temperatures and operating conditionsSubject to system configuration and settingsmade, the following values can bescanned with keys / :Display DescriptionKOL °C Collector temperatureTSPU °C DHW temperatureS3 °C Temperature at a sensor S3 that may beconnectedn1 % Relative speed of the solar circuit pumpn2 Status of relay R2:OFF: Relay offOn: Relay onhP1 h Hours run of the device at output relay R1(solar circuit pump)hP2 h Hours run of the device at output relayR2kWhMWhAmount of heat if a heat meter is enabledNoteAdd the values for MWh and kWhtogether.Resetting the hours run and theenergy volumeWhilst this value is displayed, press thefollowing keys:1. OK "SET" flashes; value 0 is displayed.Service2. OK to confirm.5442 276 GB45
TroubleshootingFault messagesSensor faults:■ Display background light flashes■ The sensor symbol in the systemscheme flashes quickly■ ¨ flashesExample - collector temperature sensorshort circuitPossible displays:–88.8 Sensor short circuit888.8 Sensor breakNoteFurther scans can be carried out withkeys / .KOL°CChecking sensors<strong>100</strong>Resistance in kΩ101BA0.10 20 25 40 60 80 <strong>100</strong> 120 140Temperature in °CA Resistor 20 kΩ (sensor S1, collectortemperature sensor)1. Disconnect the respective sensorand measure its resistance.B Resistor 10 kΩ (sensors S2 andS3)2. Compare the measurement with theactual temperature (for scanning seepage 45). Check the installation and,in case of severe deviation, replacethe sensor.5442 276 GB46
TroubleshootingChecking sensors (cont.)SpecificationSensor NTC 10 kΩ at 25 °C 20 kΩ at 25 °CIP rating IP 53 IP 53Permissible ambienttemperature■ during operation −20 to + 90 °C −20 to + 200 °C■ during storage andtransport−20 to + 70 °C −20 to + 70 °CChanging the fuseABA Solar control unit wiring chamberB Fuse, 4 A (slow)Open the solar control unit wiring chamber.A spare fuse is included in the fuseholder.5442 276 GBService47
Function descriptionParameter overviewThe following parameters can be set subject to the actual system configuration:Display Parameter DeliveredconditionSetting range SystemschemeANL System scheme 1 1–10 —DT E Start temperature differentialfor solar circuitpump R18 °C 1.5 – 20 °CDT E < DT SDT A Stop temperature differential4 °C 1.0 – 19.5 °C 1 to 9for solar circuitpump R1S SL Set cylinder temperature 60 °C 4 – 90 °C(see page 52)DT 1E Start temperature differential8 °C 1.5 – 20 °Cfor solar circuit pump R1(consumer 1)DT 1E < DT 1SDT 1A Stop temperature differential4 °C 1.0 – 19.5 °Cfor solar circuit pump R1(consumer 1)S 1SL Set cylinder temperature 60 °C 4 – 90 °C(consumer 1)(see page 52)DT 2E Start temperature differential8 °C 1.5 – 20 °C10for solar circuit pump R1and valve R2 (consumer 2)DT 2E < DT 2SDT 2A Stop temperature differential4 °C 1.0 – 19.5 °Cfor solar circuit pump R1and valve R2 (consumer 2)S 2SL Set cylinder temperature(consumer 2)(see page 52)60 °C 4 – 90 °C5442 276 GB48
Function descriptionParameter overview (cont.)Display Parameter DeliveredconditionSetting range SystemschemeNOT Collector limit temperature(see page 61)130 °C 110 – 200 °COKX Collector cooling function OFF OFF/ONKMX (maximum collector temperature110 °C 90 – 190 °Climit)(see page 61)1 to 10OKN Minimum collector temperatureOFF OFF/ONKMNlimit10 °C 10 – 90 °C(see page 61)OKF Frost protectionOFF OFF/ONKFR (see page 62)4 °C −10 – +10 °CPRIO Sequence in which the consumersare heated up1 0 – 2ISP Pump run break duration, 2 min 1 – 30 min10cycle pause timetUMW Break intervals 15 min 1 – 30 minORUE Return cooling functionOFF OFF/ON(see page 62)ORK Interval functionOFF OFF/ON1 to 10(see page 62)DT 3E Start temperature differential8 °C 0 – 20 °Cfor transfer pump R2DT 3A Stop temperature differential4 °C 0.5 – 19.5 °Cfor transfer pump R2MX3E Maximum limit S3 on 58 °C 0 – 94.5 °C7MX3A Maximum limit S3 off 60 °C 0.5 – 95 °CMN3E Minimum limit S3 on 10 °C 0.5 – 90 °CMN3A Minimum limit S3 off 5 °C 0 – 89.5 °CNH E Starting temperature for the 40 °C 0 – 89.5 °C 3, 5, 9thermostat functionNH A Switch-off temperature forthe thermostat function45 °C 0.5 – 90 °C 3, 5, 95442 276 GBService49
Function descriptionParameter overview (cont.)Display Parameter DeliveredconditionSetting range SystemschemeOWMZ Heat statementOFF OFF/ONVMAX (see page 63)5.0 l/min 0.1 – 20 l/minat <strong>100</strong>%pumpspeedMEDT 3 0 – 3 1 to 10MED% 40 20 – 70RPM Speed control0 0 – 3(see page 63)n1MN *1 Minimum speed30 % 30/20 – <strong>100</strong> %(see page 63)DT S *1 Differential temperature forthe start of the speed regulation(see page 63)10 K 0.5 – 30 K1 to 9ANS *1 Rise2 K 1 – 20 K(see page 63)DT 1S *1 Differential temperature for 10 K 0.5 – 30 Kthe start of speed regulation(consumer 1)(see page 63)ANS1 *1 Rise (consumer 1)2 K 1 – 20 K(see page 63)DT 2S *1 Differential temperature for 10 K 0.5 – 30K10the start of speed regulation(consumer 2)(see page 63)ANS2 *1 Rise (consumer 2)2 K 1 – 20 K(see page 63)HND1 Manual mode relay 1AUTO OFF/ON(see page 43)HND2 Manual mode relay 2AUTO OFF/ON1 to 10(see page 43)PROG Software version of the solar — — —control unitVERS Hardware version — — —*1Only adjustable with setting RPM > 0.5442 276 GB50
Function descriptionSystem scheme10 system schemes can be achievedwith the solar control unit. Selection viaparameter "ANL" (see page 43). All systemschemes include the "ANL 1" functions(system scheme 1):■ Dual-mode DHW heating■ Suppression of reheating by the boilerin conjunction with control units withKM BUS■ Maximum DHW cylinder temperaturelimit■ Collector minimum temperature limit(see page 61)■ Frost protection function (seepage 62)■ Reverse cooling function (seepage 62)■ Interval function (see page 62)■ Heat statement (see page 63)■ Speed control (see page 63)Auxiliary functions can be enabled forevery system scheme.■ Collector limit temperature (seepage 61)■ Collector cooling function (seepage 61)5442 276 GBService51
Function descriptionSystem scheme (cont.)"ANL" = 1— Standard schemeDual-mode DHW heating with suppression of reheating by the boiler in conjunctionwith control units with KM BUSDisplayTemperature differential controlDetermination of the temperature differential between collectortemperature sensor S1 and cylinder temperaturesensor S2.■ Solar circuit pump R1 on:"DT E" is exceeded■ Solar circuit pump R1 off:The actual temperature falls below the stop temperaturedifferential "DT A"Cylinder temperature limitSolar circuit pump R1 off:When reaching the set cylinder temperature "S SL".Symbol "È" is shown.Suppression of reheating by the boiler in conjunctionwith control units with KM BUS■ Function enabled:– The DHW cylinder is heated by the solar thermal system.– Connection of the KM BUS to terminals 11 and 12 inthe solar control unit.■ In the boiler control unit, coding address "67" defaults athird set DHW temperature(This value must be below the first set DHW temperature).See the installation and service instructions of the boilercontrol unit.■ The DHW cylinder will only be heated by the boiler, if thisset value cannot be achieved by the solar thermal system.NoteIn some boiler control units, the PCB must be replaced (seepage 67).5442 276 GB52
Function descriptionSystem scheme (cont.)"ANL" = 2Dual-mode DHW heating with suppression of reheating by the boiler in conjunctionwith control units without KM BUS and/or control of the secondarypump of an external heat exchangerDisplaySuppression of reheating by the boiler in conjunctionwith control units without KM BUS■ Relay R2 is started in parallel with the solar circuit pump.■ Function enabled:– The DHW cylinder is heated by the solar thermal system.– A resistor simulates an actual DHW temperature thatis 10 K higher (for connections, see the followingtable).■ The DHW cylinder will only be heated by the boiler, if theset DHW temperature cannot be achieved by the solarthermal system.System with an external heat exchangerS1R1S2R25442 276 GBService53
Function descriptionSystem scheme (cont.)Cylinder temperature sensor as PTCAIP 20, l, T40 230 V50 Hz? N R2 N R1 N L13 14 15 16 17 18 19 20 21Cylinder temperature sensor as NTCAIP 20, l, T40 230 V50 Hz? N R2 N R1 N L13 14 15 16 17 18 19 20 21BBCCDEDEC Resistor 20 Ω, 0.25 W (on site)C Resistor 10 kΩ, 0.25 W (on site)A Solar control unit wiring chamberB Contactor relayE To the boiler control unit; connection for cylinder temperature sensorD Cylinder temperature sensor of the boiler control unit5442 276 GB54
Function descriptionSystem scheme (cont.)"ANL" = 3Dual-mode DHW heating and thermostat functionDisplayThermostat functionOutput R2 is used for this function.Relay R2 switches subject to the temperature at S3 (seethe following table).Different effects can be achieved by determining the start and stop temperatures:"NH E" < "NH A" "NH E" > "NH A"e.g. for reheatinge.g. for utilising excess heatThoffThonR2onR2offThonThoffR2onR2off"ANL" = 4Dual-mode DHW heating and auxiliary functionDisplayAdditional function for DHW heating■ Connection of the transfer pump at R2.■ Signal for starting the transfer pump R2 via the KM BUSof the boiler control unit. This also heats the lower areaof the DHW cylinder to the required temperature.ServiceNoteIn some boiler control units, the PCB must be replaced (seepage 67).5442 276 GB55
Function descriptionSystem scheme (cont.)1. Connect the KM BUS at terminals 11and 12 in the solar control unit.2. Program the second set DHW temperatureat the boiler control unit.<strong>Installation</strong> and serviceinstructions; boiler controlunit3. Adjust the fourth DHW phase at theboiler control unit.DangerDHW with temperatures inexcess of 60 °C can cause scalding.To limit the temperature to 60 °C,install mixing equipment, e.g. athermostatically controlled mixingvalve (accessory). Install amixer tap as anti-scalding deviceat the draw-off point."ANL" = 5Operating instructions, boilercontrol unitDual-mode DHW heating, thermostat function and auxiliary functionDisplay Output R2 enables the thermostat function (see page 55)and the auxiliary function (see page 55) to be achieved.5442 276 GB56
Function descriptionSystem scheme (cont.)"ANL" = 6Dual-mode DHW heating and maximum cylinder temperature controlDisplay■ When exceeding the set cylinder temperature "S SL"(see page 52) the transfer pump R2 will start.■ Excess heat is transferred, e.g. to the pre-heating stage."ANL" = 7Dual-mode DHW heating and transferDisplayDetermination of the temperature differential between collectortemperature sensor S2 and cylinder temperaturesensor S3.■ Transfer pump R2 on:"DT 3E" is exceeded■ Transfer pump R2 off:The actual temperature falls below the stop temperaturedifferential "DT 3A""ANL" = 8Dual-mode DHW heating, auxiliary function and transfer with sensor S3 in DHWcylinder 2 (existing)DisplayThe transfer pump R2 circulates the heating water to preventstratification (see page 57) and implements the auxiliaryfunction (see page 55).5442 276 GBService57
Function descriptionSystem scheme (cont.)"ANL" = 9Dual-mode DHW heating, auxiliary function and transfer with sensor S3 in DHWcylinder 1 (retrofit)DisplayThe transfer pump R2 circulates the heating water to preventstratification (see page 57) and implements the auxiliaryfunction (see page 55).5442 276 GB58
Function descriptionSystem scheme (cont.)"ANL" = 10Dual-mode DHW heating, heating of consumer 2 via the three-way divertervalveDisplayTemperature differential controlDetermination of the temperature differential between collectortemperature sensor S1 and cylinder temperaturesensor S2.■ Solar circuit pump R1 on:"DT 1E" is exceededConsumer 1 is being heated.■ Solar circuit pump R1 off:The actual temperature falls below the stop temperaturedifferential "DT 1A"Determination of the temperature differential between collectortemperature sensor S1 and cylinder temperaturesensor S3.■ Solar circuit pump R1 and three-way diverter valve R2on:"DT 2E" is exceeded.Consumer 2 is being heated.■ Solar circuit pump R1 and three-way diverter valve R2off:The actual temperature falls below the stop temperaturedifferential "DT 2A"Cyclical heating■ If the DHW cylinder cannot be heated with priority("PRIO" 1), the next consumer in line will be heated foran adjustable cycle time "tUMW".■ After expiry of this time, the solar control unit checks thetemperature rise at the collector during the cycle pausetime "tSP".■ As soon as the start conditions for the consumer withpriority ("PRIO" 1) have been met, that consumer will beheated again. Otherwise, the consumer with lower rankingwill continue to be heated.■ Once the consumer with priority has reached its set temperature"S SL", no cyclical heating will be implemented.5442 276 GBService59
Function descriptionSystem scheme (cont.)Consumer 1Parameter Delivered condition Setting rangeDT 1E 8.0 K 1.5 – 20.0 KDT 1A 4.0 K 1.0 – 19.5 KS1 SL 60 °C 4 – 90 °CNote"DT 1E" can be set at least 0.5 K higherthan "DT 1A" and up to 0.5 K lower than"DT 1S" (see page 50)."DT 1A/" can be set at least 0.5 K lowerthan "DT 1E".Consumer 2Parameter Delivered condition Setting rangeDT 2E 8.0 K 1.5 – 20.0 KDT 2A 4.0 K 1.0 – 19.5 KS2 SL 60 °C 4 – 90 °CNote"DT 2E" can be set at least 0.5 K higherthan "DT 2A" and up to 0.5 K lower than"DT 2S" (see page 50)."DT 2A" can be set at least 0.5 K lowerthan "DT 2E".Parameter Delivered condition Setting rangePRIO 1 0 – 2tSP 2 min 1 – 30 mintUMW 15 1 – 30 min0 Priority consumer 1, no cyclical heating1 Priority consumer 1, with cyclicalheating2 Priority consumer 2, with cyclicalheating5442 276 GB60
Function descriptionCollector limit temperatureThe solar circuit pump is switched OFFto protect the system components if the"NOT" temperature has been exceeded;the symbol "¨" flashes.Set value for "NOT" (see page 43).Setting parameters Delivered condition Setting rangeNOT 130 °C 110 – 200 °CNoteThis function is disabled at setting200 °C.Collector cooling functionThe solar circuit pump will be switchedoff when the set cylinder temperature"S SL" is reached.If the collector temperature rises to theset maximum collector temperature"KMX", the pump will be switched onlong enough to enable this temperatureto fall 5 K lower (the symbol "È" flashes).The cylinder temperature can then riseagain, but only up to 90 °C; at that point,the solar circuit pump is switched off (thesymbol "¨" flashes).1. Set "OKX" to "ON" (see page 43).2. Select the "KMX" value.Setting parameters Delivered condition Setting rangeKMX 110 °C 90 – 190 °CMinimum collector temperature limitService5442 276 GBMinimum starting temperature "KMN"that must be exceeded before the solarcircuit pump can start.This prevents the pump starting too frequently(cycling).The pump is switched off, if the actualtemperature falls 5 K below this temperature;symbol "e" flashes.1. Set "OKN" to "ON" (see page 43).2. Select the "KMN" value.61
Function descriptionMinimum collector temperature limit (cont.)Setting parameters Delivered condition Setting rangeKMN 10 °C 10 – 90 °CFrost protection functionEnable this function only when usingwater as heat transfer medium.The solar circuit pump will be switchedon to avoid collector damage, if the collectortemperature falls below the"KFR" value.The symbol "e" is displayed if this functionis enabled and flashes if the solarcircuit pump is running.1. Set "OKF" to "ON" (see page 43).2. Select the "KFR" value.Setting parameters Delivered condition Setting rangeKFR 4 °C −10 – +10 °CReverse cooling functionEnable only in systems with flat-platecollectors.The "ORUE" function only makes senseif the collector cooling function has beenenabled (see page 61).The collector cooling function enablesthe heating of the DHW cylinder to ahigher temperature than "S SL" (seepage 52).In the evening, the pump will continue torun (symbol "È" flashes) until the DHWcylinder has been cooled down via thecollector and the pipework to the set cylindertemperature "S SL".Set "ORUE" to "ON" (see page 43).Interval functionActivate the interval function in systemswhere the collector temperature sensoris not in an ideal location to prevent atime delay in capturing the collector temperature.For this, the solar circuit pump is startedfor 30 s when the collector temperaturerises by 2 K.Set "ORK" to "ON" (see page 43).5442 276 GB62
Function descriptionHeat statementThe heat statement is calculated fromthe temperature differential between thecollector and cylinder temperature aswell as the selected throughput (seeservice instructions "Vitosol").1. Set "OWMZ" to "ON" (seepage 43).3. Adjusting the frost protection of theheat transfer medium "MEDT".4. If necessary, adjust the mixing ratioof the heat transfer medium "MED%".2. Check the throughput at the flowmeter of the Solar-Divicon at <strong>100</strong> %speed and set that value as"VMAX".MEDT setting Heat transfer medium0 Water1 Propylene glycol2 Ethylene glycol3 <strong>Viessmann</strong> heat transfer mediumSetting parameters Delivered condition Setting rangeVMAX 5.0 l/min 0.1 – 20 l/minMEDT 3 0 – 3MED % 40 % 20 – 70 %Speed controlSpeed control is disabled at the factory("RPM" set to 0, see page 33). It canonly be enabled for relay output R1(solar circuit pump).The solar circuit pump must not have itsown speed control. Set multi-stagepumps to the required stage.NoteWhen using pumps with their own variablespeed control, set "RPM" to 0.The solar circuit pump will be switchedon, if "DT E" is exceeded.If the temperature differential rises to"DT S" (differential temperature for thestart of the speed control), the speed isincreased by 10% with every rise by thevalue selected in "ANS" (rise).5442 276 GBService63
Function descriptionSpeed control (cont.)Setting parameters Delivered condition Setting rangen1MN 30 % 30 – <strong>100</strong> %DT S 10 K 0.5 – 30 KANS 2 K 1 – 20 KExampleSpeed in %60 DT E = 5 K50DT S = 10 K40ANS = 2 K3020<strong>100</strong>0 2 4 6 8 10 12 14Temperature differential in KEnabling speed controlSet the required value for "RPM" (seepage 33).1 Standard solar circuit pumps (withintegral auxiliary capacitor)2 WILO pump with PWM input3 GRUNDFOS pump with PWM input5442 276 GB64
Parts listParts listWhen ordering spare partsQuote the part and serial no. (see typeplate) and the position no. of the requiredpart (as per this parts list).Obtain standard parts from your localsupplier.Parts010 Collector temperature sensor020 Cylinder temperature sensor030 Strain relief pack, capacitor andfuse040 Fuse, 4 A (slow)050 <strong>Installation</strong> and service instructions060 Operating instructions5442 276 GBService65
SpecificationSpecification204170 47Rated voltage 230 V~Rated frequency50 HzRated current4 A∼Power consumption2 W(in standby mode 0.7 W)Protection classIIIP ratingIP 20 D to EN 60529, ensure through design/installationFunction Type 1 B to EN 60730-1Permiss. ambient temperature■ during operation 0 to +40 °C<strong>Installation</strong> in living spaces or boiler rooms (standardambient conditions)■ during storage and transport -20 to +65 °CRated breaking capacity of the relayoutputs at 230 V~:■ R10.8 A∼■ R24 (2) A ∼5442 276 GB66
AppendixAppendixReplace the PCB in the stated boilercontrol units in conjunction with the followingfunctions:■ Suppression of reheating by the boiler■ Auxiliary function for DHW heating,achieved by the solar control unitControl unitVitotronic 200, type KW1,Part no. 7450 351, 7450 740Vitotronic 200, type KW2,Part no. 7450 352, 7450 750Vitotronic 300, type KW3,Part no. 7450 353, 7450 760Vitotronic 200, type GW1,Part no. 7143 006Vitotronic 300, type GW2,Part no. 7143 156Vitotronic 333, type MW1,Part no. 7143 421PCBPart no. 7828 192Part no. 7828 193Part no. 7824 0305442 276 GBService67
CertificatesDeclaration of conformityWe, <strong>Viessmann</strong> Werke GmbH & Co KG, D-35107 Allendorf, confirm as sole responsiblebody that the product <strong>Vitosolic</strong> <strong>100</strong> complies with the following standards:EN 55 014-1EN 60 730This product is designated _ in accordance with the following Directives:2004/108/EC2006/95/ECAllendorf, 1 October 2009<strong>Viessmann</strong> Werke GmbH&Co KGpp. Manfred Sommer5442 276 GB68
Keyword indexKeyword index5442 276 GBAAnti-scalding protection..................6, 56Applicability........................................72Automatic mode...........................41, 43Auxiliary function for DHW heating....55CChanging settings..............................43Changing the fuse..............................47Changing values................................43Checking sensors..............................46Collector cooling function...................61Collector limit temperature.................61Collector temperature sensor.............37Commissioning..................................41Cyclical heating..................................59Cylinder temperature limit..................52Cylinder temperature sensor..............38DDeclaration of conformity...................68EExternal heat exchanger....................53FFault messages..................................46Fitting the solar control unit................32Frost protection function....................62HHardware version...............................50Heat statement...................................63High limit safety cut-out......................36IInterval function..................................62MManual mode.....................................43Manual operation...............................43Maximum collector temperature limit. 61Maximum cylinder temperaturecontrol................................................57Minimum collector temperature limit..61NNavigation through the menu.............41OOperating steps..................................41Overview of electrical connections.....33PParts list.............................................65Power supply.....................................39Pump at R2........................................35Pumps................................................33RRelay test...........................................43Restoring the delivered condition.......43Reverse cooling function....................62SScanning temperatures......................45Selecting the system scheme............43Setting system parameters................43Software version of the solar controlunit.....................................................50Solar circuit pump..............................33Spare fuse..........................................47Speed control.....................................63Starting the solar control unit.............41Suppressing reheating■ Control units with KM BUS.............52■ Control units without KM BUS........53Switching the power ON....................41TTemperature differential control...52, 59Temperature sensor...........................38Thermostat function...........................55Transfer..............................................5769
Keyword indexKeyword index (cont.)VValve at R2........................................355442 276 GB70
5442 276 GB71
Printed on environmentally friendly,chlorine-free bleached paperApplicabilityApplicable for the <strong>Vitosolic</strong> <strong>100</strong>, type SD1Part no. 7438 086Part no. 7418 199Part no. 7418 200Part no. 7418 20172<strong>Viessmann</strong> Werke GmbH&Co KGD-35107 AllendorfTelephone: +49 6452 70-0Fax: +49 6452 70-2780www.viessmann.com<strong>Viessmann</strong> LimitedHortonwood 30, TelfordShropshire, TF1 7YP, GBTelephone: +44 1952 675000Fax: +44 1952 675040E-mail: info-uk@viessmann.com5442 276 GB Subject to technical modifications.