C 550 Rockland Manual - Inglenook Energy Center
C 550 Rockland Manual - Inglenook Energy Center
C 550 Rockland Manual - Inglenook Energy Center

Create successful ePaper yourself
Turn your PDF publications into a flip-book with our unique Google optimized e-Paper software.
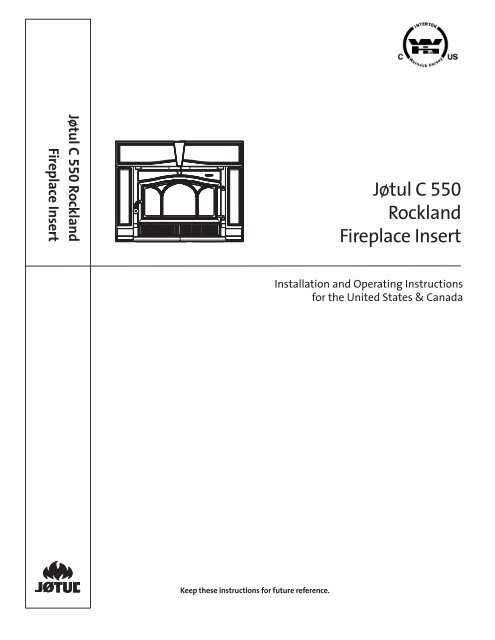
Jøtul C <strong>550</strong> <strong>Rockland</strong>Jøtul C <strong>550</strong> <strong>Rockland</strong>Fireplace InsertJøtul C <strong>550</strong><strong>Rockland</strong>Fireplace InsertInstallation and Operating Instructionsfor the United States & CanadaKeep these instructions for future reference.1
Jøtul C <strong>550</strong> <strong>Rockland</strong>NOTICE:YOU SHOULD CONSULT THE AUTHORITYHAVING JURISDICTION IN YOUR LOCALE(SUCH AS MUNICIPAL BUILDINGDEPARTMENT, FIRE DEPARTMENT, FIREPREVENTIOIN BUREAU, ETC.) BEFOREINSTALLATION TO DETERMINE THE NEEDTO OBTAIN A PERMIT.2
Jøtul C <strong>550</strong>Table of ContentsStandards and Safety NoticesStandards / Codes ....................................................... 4Safety Notices .............................................................. 5Preparation ................................................................... 5Unpacking the Firebox .............................................. 5SpecificationsJøtul C <strong>550</strong> <strong>Rockland</strong> Fireplace Insert .................... 6InstallationMasonry Fireplace Requirements ............................ 7Factory-built Fireplace Requirements .................... 7Chimney Height .......................................................... 7Hearth Protection ....................................................... 8Clearance to Combustibles ...................................... 9Chimney Connection ................................................ 10Firebox Installation ................................................... 12Surround Assembly ...................................................13For Your Records...Record the following information to help yourdealer determine what you will need shouldyour fireplace ever require parts or service.The serial number and manufacturing date arelocated on the permanent label on the back ofthe firebox. You may also wish to attach yoursales receipt to this manual for future reference.Model: Jøtul C <strong>550</strong>OperationWood Fuel ................................................................... 14Air Control ................................................................... 14Starting / Maintaining the Fire ...............................15Formation of Creosote ..............................................15Blower .......................................................................... 16MaintenanceAsh Removal ................................................................17Glass Care .....................................................................17General Maintenance .............................................. 18Gaskets ........................................................................ 18Illustrated Parts BreakdownExploded View .......................................................... 20Parts Listing ................................................................ 21Appendix AAlternate Hearth Protection ................................. 22Leg Leveler Installation ........................................... 22Door Knob Assembly ................................................ 233
Jøtul C <strong>550</strong> <strong>Rockland</strong>Installation and Operation Instructions for USA/CanadaInstallation et fonctionnement pour CanadaSAFETY NOTICE: IF THIS SOLID FUEL ROOM HEATER IS NOT PROPERLY INSTALLED, AHOUSE FIRE MAY RESULT. FOR YOUR SAFETY, FOLLOW THE INSTALLATIONDIRECTIONS. CONTACT LOCAL BUILDING OR FIRE OFFICIALS ABOUT RESTRICTIONSAND INSTALLATION INSPECTION REQUIREMENTS IN YOUR AREA. SAVE THESEINSTRUCTIONS FOR FUTURE REFERENCE.Avis de sécurité: Une installation non appropriée de ce poêle de chauffage risque deprovoquer un incendie. Assurez votre sécurité en respectant les directivesd’installation suivantes. Consultez les autorités locales du bâtiment ou de laprévention des incendies au sujet des restrictions et exigences relatives auxinspections d’installations dans votre région.Tested and listed by ITS, Intertek Testing Services, Middleton, Wisconsin.Tested to U.S. Standards: ANSI/UL 1482, Canadian Standards: CAN/ULC-S627-M93StandardsThe Jøtul C <strong>550</strong> Fireplace Insert has been testedand listed to: U.S: ANSI/UL 1482Canada: CAN/ULC-S628-93Tests performed by:Intertek Testing Services, Middleton, WIManufactured and distributed by:Jøtul North America55 Hutcherson Dr.Gorham, ME 04036N.Y.C. Dept of Buildings MEA 429-07-EThis heater meets the U.S. Environment ProtectionAgency’s Phase II emissions limits for woodheaters manufactured and sold after July 1, 1990.This appliance is not approved for use inmobile homes.This appliance is listed to burn wood only.Do not burn other fuels.Read this manual before you install anduse your fireplace insert.Save these instructions and make themavailable to anyone using or servicing thefireplace insert.Check Building CodesWhen installing, operating and maintaining yourJøtul C <strong>550</strong> Fireplace Insert, follow the guidelinespresented in these instructions, and make themavailable to anyone using or servicing the stove.Your city, town, county or province may require abuilding permit to install a solid fuel burningappliance.In the U.S., guidelines established by UL 1777, theNational Fire Protection Association’s Code, NFPA211, Standards for Chimneys, Fireplaces, Vents andSolid Fuel Burning Appliances, or similar regulations,may apply to the installation of a solid fuelburning appliance in your area. For further informationon using your heater safely, obtain a copyof the NFPA publication “Using Coal and WoodStoves Safely,” NFPA No. HS-8-1974, available fromNFPA470 Atlantic Ave.Boston, MA 02210.In Canada, the guidelines are established by ULC-S635, and the CSA Standard, CAN/CSA-B365-M93,Installation Code for Solid-Fuel-Burning Appliancesand Equipment.Always consult your local building inspector orauthority having jurisdiction to determine whatregulations apply in your area.4
Jøtul C <strong>550</strong> <strong>Rockland</strong>Safety Notices• BURN SOLID WOOD FUEL ONLY• DO NOT USE CHEMICALS OR FLUIDS TO STARTTHE FIRE. DO NOT BURN Garbage OR FLAM-MABLE FLUIDS.• IF THIS ROOM HEATER IS NOT PROPERLYINSTALLED, A HOUSE FIRE MAY RESULT. TOREDUCE THE RISK OF FIRE, FOLLOW THEINSTALLATION INSTRUCTIONS. FAILURE TOFOLLOW THESE INSTRUCTIONS MAY RESULTIN PROPERTY DAMAGE, BODILY INJURY, ORLOSS OF LIFE.• CONTACT THE LOCAL BUILDING OR FIREOFFICIALS ABOUT RESTRICTIONS ANDINSTALLATION INSPECTION REQUIREMENTSIN YOUR AREA. WHEN NOT ADDRESSED INTHIS MANUAL, OR BY LOCAL CODE AUTHORI-TIES, INSTALLATION SPECIFICATIONS ANDREQUIREMENTS DEFER TO NFPA 211 OR CSA B365• DO NOT CONNECT THIS FIREPLACE TO ANYAIR DISTRIBUTION DUCT OR SYSTEM .• EXTREMELY HOT WHILE IN OPERATION! KEEPCHILDREN, CLOTHING AND FURNITURE AWAY.CONTACT WILL CAUSE SKIN BURNS.• NEVER OPERATE THE FIREPLACE WITH ACRACKED OR BROKEN GLASS PANEL.• Install smoke detectors in the living areasand bedrooms of your home. Test themregularly and install new batteries twiceannually. When installed in the same roomas the stove, a smoke detector should belocated as far from the stove as possible toprevent it from sounding when adding fuelto the fire.• Avoid creating a low pressure condition in theroom where the stove is operating. Be awarethat operation of an exhaust fan or clothesdryer can create a low pressure area andconsequently promote flow reversal throughthe stove and chimney system. The chimneyand building, however, always work togetheras a system - provision of outside air, directlyor indirectly to an atmospherically ventedappliance will not guarantee proper chimneyperformance. Consult your local Jøtul authorizeddealer regarding specific installation/performance issues.InstallationPreparationWe strongly urge you to have your authorized Jøtuldealer install your new Jøtul C <strong>550</strong> Fireplace Insert.• Check with local building officials to determinewhat permits may be required before installation.• Notify your insurance company before installingthis fireplace.Unpacking the FireplaceAll firebox components of the Jøtul C <strong>550</strong> FireplaceInsert are contained within the carton on a singlepallet. The Surround Kit is packaged separately.As you unpack the contents, inspect each item fordamage. Notify your dealer of any damage such asdents, cracked glass, or broken bricks.Contents:• Firebox Assembly - including Firebricks• Draw-Down Flue Collar Adaptor - including Pins• Stove Hardware Bag• Fireplace Conversion Notice Plate• Blower Power Cord• AC Power Receptacle Lead• Blower Control Knob• Leg Levelers, (2) See Apendix, pg. 22.• Door Knob parts See Apendix, pg. 23.Tools & Materials Required:• work gloves • safety glasses• tape measure • Phillips screwdriver• power drill / 1/8” bit • flashlight• High-temperature sealant• 1” (25 mm) masonry anchors or nails (two)• 1/4” x 3/4” self-tapping screws (three)• 10 mm (1/4”) open end wrench or socket driverRemoving the Firebox from Pallet1. Inspect the firebox assembly for damage andcontact your dealer if any is found.2. The firebox may be lightened by removing thedoor, firebricks and baffle plates. See page 12 for detailson baffle plate removal.3. The firebox is secured to the pallet by a steelbracket on each side and one screw in the bottomat the front. Use a 1/4 socket to remove these fivescrews and lift the firebox to disengage thebrackets. Discard brackets.4. Install the Door Knob parts in the order shown infig. 21, page 22. Install the Blower Control Knob,found in the Miscellaneous Kit bag.5
Jøtul C <strong>550</strong> <strong>Rockland</strong>Jøtul C <strong>550</strong> <strong>Rockland</strong>SpecificationsPerformanceFuel:up to 24” LogsHeat Output 1 :65,000 BTU/Hr.Heating Capacity 2 : up to 2000 sq. ft.Overall Efficiency 3 : 71%Emissions:7.1 g/hr.Burn Time: up to 10 hrs.Dual Blowers:90 cfm. eachShipping Weight: <strong>550</strong> lbs. (250kg.)1Maximum Heat Output based on total kilogramsof dry wood burned in a one hourperiod. Under specific EPA test conditions, thisheater has generated heat output ratesranging from 12,034 to 36,669 BTU’s per hour.Heat output in residential installations mayvary depending upon site-specific conditions.The Jøtul C <strong>550</strong> <strong>Rockland</strong> Fireplace Insert meets U.S.EPA emission limits for wood heaters sold afterJuly 1990, and is tested and listed to ANSI/UL 1482,and CAN/ULC S628.93. It is intended for installationin accordance with NFPA 211 or CAN/CSA B365.2Heating Capacity and Maximum Burn Time will varydepending on design of home, climate, wood typeand operation.3Overall Efficiency is based on a burn rate of .99 kgwood per hour.30”762 mm23 3/4”603 mm2 744”1117 mm1 1/8”28 mm12”305 mmOptionalExtended SurroundPanel(Backing Plate)156432 Matte Black156433 Jøtul IronOptional WideSurround Panel156432 Matte Black Paint156433 Jøtul Iron Paint34 “406 mm35”863 mm40”1016 mm1 1/4”32 mmStandoff from fireplace facewith optional Wide Surround31 5/8”803 mm21 3/4”552 mm23 3/4”602 mm18”458 mmFigure 1. Jøtul C <strong>550</strong> <strong>Rockland</strong> Critical dimensions.6
Jøtul C <strong>550</strong> <strong>Rockland</strong>InstallationMasonry Fireplace Requirements• The entire fireplace and chimney must becleaned and inspected to NFPA 211 Level IIstandards before installation. The system mustmeet local building code requirements.• The structure and components must be free ofany defects such as cracks or broken bricks or fluetiles. Any damage must be repaired beforeinstallation of the fireplace insert.Any opening that may exist between themasonry of the fireplace and the facing masonrymust be permanently sealed.• The chimney must have a clay tile liner or astainless steel liner utilizing a positive connection.• Do not remove bricks or mortar from the fireplaceor chimney. However, masonry or steel maybe removed from the smoke shelf and adjacentdamper frame area to accommodate installationof a chimney liner, provided that their removalwill not weaken the structure of the fireplace orchimney, and will not reduce protection forcombustible materials.• Chimney Height:Minimum - 15 ft. ( 4.57 meters)Maximum - 33 ft. (10.5 meters)Minimum Fireplace DimensionsA: Front Width* ..................................... 33” (838 mm)B: Height ........................................ 23 3/4” (603 mm)C: Rear Width ...................................... 24” (610 mm)D: Rear Height ..................................... 22” (559 mm)E: Depth ................................................ 18” (457 mm)*NOTE: Width dimension accommodates clearance forblower power cord routing.Factory-Built Fireplace RequirementsThe Jøtul C <strong>550</strong> <strong>Rockland</strong> may be installed into afactory-built fireplace with the following conditions:• The factory-built fireplace must be listed perUL 127 or ULC S610.• The factory-built chimney system must be fullylinedwith listed chimney liner meeting type HTrequirements (2100°F) per UL 1777 (U.S.) or ULCS635 (CAN). Some liner manufacturers requireinsulation in order to achieve a UL 1777 or ULC-S635 listing. Check with the liner manufacturerto determine if insulation is required. Insulationis recommended, especially if the chimney islocated in a chase outside of the building envelope.The liner must be securely attached to theinsert flue collar and the chimney top.• THE TOP PLATE OF THE LINER SYSTEM MUST NOTBLOCK AIRFLOW BETWEEN THE COOLING WALLSOF THE FACTORY-BUILT AIR-COOLED CHIMNEYSYSTEM. These airways MUST be left open underall conditions to maintain proper air-cooling ofthe chimney system. See fig. 3.• The damper area or fireplace front must be sealed toprevent passage of room air into the chimney cavity.DO NOT BLOCK OFFTHE CHIMNEY TOP.Clearance to combustiblematerials must bemaintained in accordancewith the fireplacemanufacturer’s listing.Built-in airwaysmust not bemodified orobstructed.ConvectionAir FlowScreenedprefabricatedChimney TopAdaptor allows airflow out frombetween chimneyand liner.Prefabricated,Listed ChimneyListed, HTstainless steelchimney linerSteel Block-off Plateseals chimney flueListed, prefabricatedzero-clearancefireplaceECDBHearth protection mustbe maintained inaccordance with thefireplace manufacturer’slisting.Supplementalsupport materialmust be noncombustible.Figure 2. Minimum fireplace dimensions.AFigure 3.Prefabricated fireplace installation requirements.7
Jøtul C <strong>550</strong> <strong>Rockland</strong>Factory-Built Fireplace Requirements, cont’d.• The convection chamber/louvers of the zeroclearancefireplace MUST NOT be blocked off. Theuse of the cast iron surround panels may not bepossible in these instances. A custom-builtsurround panel system may be used provided itdoes not interfere with air circulation through theconvection chamber/ louvers.• Air flow within and around the factory-built fireplaceshall not be altered by installation of the insert.• Alteration of the fireplace in any manner is notpermitted; i.e. firebrick or refractory panels MUSTNOT be removed in order to accommodate theinsert. Exceptions to this are:a. External trim pieces, that do not affect thefunction of the fireplace, may be removedproviding they can be stored on or withinthe fireplace for reassembly if the insertwere to be removed.b. The chimney damper may be removed toinstall the chimney liner.• Inserts that project from the factory-built fireplacemust be furnished with appropriate means ofsupport. The weight of the insert must not compromisethe means of support for the factory-builtfireplace.• Fireplace Conversion Notice 220508 must be permanentlyattached to the back of the fireplace. Thismetal label is included in the bag containing thismanual.• Final approval is contingent on the authority havinglocal jurisdiction.Hearth Protection RequirementsThe floor area in front of fireplace insert must beprotected from live sparks and radiant heat.• Materials: Hearth protection must be noncombustible insulating board such as 1/2” millboard,or the equivalent mortared masonrymaterial. Alternate protection must be composedof materials as specified by NFPA 211.• Protected Area:U.S: 16” Deep x 37” WideCAN: 20” Deep x 37” WideSee exception for 18” depth below.U.S. : Front -The protection must extend at least 16 inchesforward from the fireplace insert door opening asin fig. 4. (14 7/8” from Surround facing).Canada: Front -The protection must extend at least 20 in.forward from the fireplace insert door opening,(18 7/8” from Surround facing).Front protection may be reduced to 18” under thefollowing conditions:a) it is composed of noncombustible materialhaving an R value of .5 or higher such as 1/2” thickmillboard. See Appendix A on page 23 for examples.b) it is raised a minimum of 2 1/2” and constructedon noncombustible materials in a codeapprovedmasonry fireplace. See fig. 5.U.S. & Canada: Sides - Protection must extend aminimum 18 1/2 in. to both sides of the centerlineof the insert. See fig 6, A.CombustibleFlooringMin.16” U.S.20” CANfrom dooropeningMin.14 7/8” U.S.18 7/8” CANfromsurround face2 1/2”Min.18” fromdooropeningFigure 4. Required hearth protection if flush withcombustible floor materials.Figure 5. Canada only:Minimum depth with code-approved raised hearth.8
Jøtul C <strong>550</strong> <strong>Rockland</strong>Clearance to Combustible Materials• There may be no combustible materials locatedanywhere within 36” (914 mm) of the front ofthe fireplace insert. This precaution includesitems such as drapes or doors that could swinginto the area within 36” of the insert.• Specific clearance (open space) must be maintainedbetween the fireplace insert and combustiblematerials located above and to theside.See figures 5-6 for minimum dimensions.Minimum ClearancesClearances are measured from the hearthsurface, door opening, or centerline as notedbelow.A: Hearth Protection, width from centerline: ................................................................ 18 1/2” (470 mm)B: Hearth Protection, forward from door opening:.................................. US: 16” / CAN: 20”(508 mm)C: To Side Trim, 1” max. thickness, from centerline............................................................. 21 3/4” (552 mm)D: To Side Room Wall, from centerline: ................................................................................ 54” (1372 mm)E: To Top Trim, 1” max. thickness, from hearth:..................... US: 51 3/4” / CAN: 57 1/2” (1460 mm)F: To Mantel, 3 1/2” max. depth, from hearth:..................... US: 51 3/4” / CAN: 57 1/2” (1460 mm)To Mantel, 11 1/2” max. depth, from hearth..................... US: 57 3/4” / CAN: 63 1/2” (1613 mm)See fig. 7 for clearances with Mantel Heat Shield.Mantel ClearancesThe installation must conform to the minimimummantel clearances specified in the chart below. Theseclearances may be reduced with installation of JøtulMantel Heat Shield 156448 as specified in the chart.Clearance reduction to mantel construction may also bemade in conformance to NFPA 211 or CAN/CSA B365.ABCDEMANTELAREA3.5”5.5”7.5”9.5”11.5”Figure 7. Mantel Clearance Detail - measured fromthe hearth surface to the lowest mantel surface.A B C D EU.S: 57 3/4” 56 1/4” 54 3/4” 53 1/4” 51 3/4”CAN: 63 1/2” 62” 60 1/2” 59” 57 1/2”161.3 cm 157.4 cm 153.7 cm 150 cm 146 cmU.S. & CAN: With Mantel Heat Shield 15644848” 46 1/2” 45” 43 1/2” 42”127.9 cm 118.1 cm 114.3 cm 110.4 cm 106.6cmFEBCADFigure 6. Minimum clearance to combustible materials.9
Jøtul C <strong>550</strong> <strong>Rockland</strong>Chimney Connection RequirementsU.S. Only Requirements:1. The insert must be connected to a code-approvedmasonry chimney with a direct (positive) flueconnector into the first chimney liner section.2. The cross-sectional area of the chimney flue maynot be less than the cross-sectional area of theflue collar..3. A sealed block-off plate must be installed at thedamper area of the existing fireplace, unless theliner is connected to the top of the chimney. Seefig. 8.4. For internal chimneys, (no sides of the chimneyexposed to the outside below the roofline,) apositive connection into the first flue tile is acceptableprovided the tile is no larger than 8” x 12”.5. For external chimneys, (one or more sides areexposed to the outside below the roof line,including garages), a positive connection to thefirst flue tile is acceptable provided the tile is nolarger than 8” x 8”.6. A 6”, 7”, or 8” stainless steel liner, extending thefull height of the chimney, is required for thoseinstallations where the flue tile is greater than8” x 12” for internal chimneys, or8” x 8” for external chimneys.In this case, a damper block-off plate is notrequired.Canada Requirement:The insert must be installed with a continuouschimney liner of 6” (152 mm) diameter extendingfrom the fireplace insert to the top of the chimney.The chimney liner must conform to the Class 3requirements of CAN/ULC-S635, Standard for LiningSystems for Existing Masonry or Factory-BuiltChimneys and Vents, or CAN/ULC-S640, Standard forLining Systems for New Masonry Chimneys.See fig. 9.Do not use aluminum or galvanized steel pipe forchimney connection components - these materialsare not suitable for use with solid fuel.Flex ConnectorPipe extendsinto the first fluetileApply sealantaround damperopeningFlexConnectorAdjustableSealing PlateDamperFrameLockingBracketAttach FireplaceConversionNotice Plate toRear Wall ofFireplaceFigure 8. Positive Chimney Connection with anexample of a damper block-off plate - U.S. only.10
Jøtul C <strong>550</strong> <strong>Rockland</strong>Fireplace Chimney Preparation1. Remove the existing damper and linkage componentsfrom the fireplace. Alternatively, you canwire the damper plate to lock it in the openposition. Thoroughly clean the firebox andsmokeshelf area with a wire brush.2. If the fireplace has been modified to accommodateinstallation, use anchors or masonry nails toattach the metal Fireplace Conversion NoticePlate (PN 220508) to the back wall of the masonryfireplace firebox where it will be readily seenshould the insert be removed.3. If appropriate, install the damper sealing plateaccording to the manufacturer’s instructions. Thesealing plate may require trimming to accommodateyour specific fireplace damper frame.Masonry or ListedHT PrefabricatedChimney CapSealedconnection tochimney capDamper linkageremoved andplate is removedor locked openAttachFireplaceConversionNotice Plateto Rear Wallof FireplaceFigure 9. A fully-relined chimney is required inCanada and highly recommended in the U.S.11
Jøtul C <strong>550</strong> <strong>Rockland</strong>12Installing the Fireplace InsertPower Cord Orientation1. Determine to which side the blower power cordwill be routed. DO NOT ROUTE THE POWER CORDACROSS THE FRONT OF THE FIREPLACE.2. Insert the AC power receptacle lead through theappropriate inlet in the side of the firebox. See fig.10. Remove the #8 x 5/8” phillips screw already inplace and engage the receptacle bracket with thetab in the inlet opening. Reinstall the screw.3. Route the AC power wire harness through the holein the Inner Shroud and around the front of theblower. Plug the male quick-connector into thecorresponding female connector on the blowerwire harness, located between the two blowers.Loosen the Control Switchplate wingnut to swingthe switch assembly out for better access to thefemale connector.After connection, relocate the whole wire harnessbehind the blower and resecure the switchplate.4. Plug the power cord into the receptacle, but do notplug it into the wall outlet until the installation iscomplete.Install the Draw-Down Adaptor1. Insert the end of the chimney flue flex pipe as far as it willgo into the non-crimped end of the adaptor or, if appropriate,the adaptor that may be supplied by the flex linermanufacturer.Orient the draw-down adaptor so that the retainer pinwill be parallel with the front of the fireplace. This willease locating the cotter pin hole. Fig. 11.2. Drill holes through the flex pipe at the three pilothole locations in the adaptor and secure with sheetmetal screws.Install the FireboxThe cast iron baffles must be removed to secure thedraw-down adaptor to the firebox. The Left Baffle hastwo bosses cast into it that engage with correspondingholes in the air tubes to lock each tube in correctposition. Use a flashlight to locate the bosses by liftingup on the Left Baffle. See fig. 12.1. Lift up the Left Cast Iron Baffle to disengage thelocator boss from the Front Air Tube, and pull the airtube forward and out of the side manifolds.2. Keeping the Rear Air Tube in place, push up on theRight Baffle and remove the Left Baffle, dropping itdown and out.3. Lift and remove the Right Baffle.4. Locate the fireplace insert in its final position. Fromwithin the firebox, reach up and pull the Draw-downAdaptor into the insert flue collar.PhillipsscrewReceptacleBracketFigure 11.InstallDraw-DownAdaptorLeft BaffleInner ShroudRear Secondary Air TubeWire Harness LeadFigure 10.Routing the AC wire harness leads.Cotter PinQuik-connectorsFlexible FlueLinerFlex LinerAdaptor(if appropriate)Draw-downAdaptorRetainer PinLocator BossRight BaffleFront Secondary Air TubeFigure 12.Remove baffles and Front Secondary Air Tube..ControlSwitchplate5. Insert the retainer pin through the appropriate holesin the adaptor ears, and lock the retainer pin in placeusing the cotter pin.6. Replace first the right baffle, then the left baffle,followed by the air tubes. ADJUST THE AIR TUBES ASNECESSARY TO BE SURE EACH IS PROPERLY ENGAGEDWITH THE ADJACENT LOCATOR BOSSES ON THE LEFTBAFFLE.
Jøtul C <strong>550</strong> <strong>Rockland</strong>Figure 13.Surround Panel assemblyviewed from backside.Right BreastplateLeft BreastplateTools Requirequired:ed:• 10 mm socket or wrenchAlignment Set ScrewHang TabsRight LegAll fasteners are M6 x 10 mm hexhead bolts, pre-installed.Left LegHangTabsFront GrilleRight Bottom TrimTrim MountingBracketLeft Bottom TrimFigure 14. Bottom Surround Trim assembly.Surround AssemblyAll fasteners have already been installed in theappropriate locations at the factory. You will need toremove them, attach the parts together as describedbelow and reinstall the fasteners at those locations.1. Layout the parts. Place the castings face downon a protective surface such as carpeting, blanketsor a sheet of cardboard. See fig. 13.2. Attach the Breastplates to each other.Use a 10 mm socket or wrench with two M6 x 10hex head flange bolts. Adjust the set screw toobtain parallel alignment of the two plates.3. Attach the Leg plates. The Legs must be orientedwith the Hang Tabs on the inside edges as showninfig. 12. Use the two remaining M6 x 12 hex headflange bolts to attach the Legs to the Breastplateassembly.4. Attach the two Bottom Surround Trim panelstogether with the single M6 x 10 hex bolt. Attachthe Trim Mounting Bracket to the back of theBottom Trim assembly using the other two M6 x10 bolts and washers. Orient the bracket asshown in fig. 14.5. If appropriate, attach the Extended SurroundPanel to the firebox. See illustration on page 6.With the painted side facing out, engage thehooked tabs on panel with the slots in thebackside of the Surround Brackets on the firebox.Extend the blower power cord out beyond thefront of surround panel.6. Attach the Bottom Trim assembly to the twostuds located in the firebox floor between theblowers using the M6 nuts already in place.7. Attach the Surround assembly to the Firebox.Lift the entire assembly upright and position it infront of the insert firebox. The four Hang Tabs onthe surround legs must engage with the adjacentcutouts in the two brackets on the sides of thefirebox opening. The surround will easily engagewith these brackets if the firebox is slightly proudof the fireplace opening.8. Check the alignment of the breastplates for“bowing” and adjust the set screw as necessary.9. Push the entire unit into position so that thesurround is flush against the fireplace face.13
Jøtul C <strong>550</strong> <strong>Rockland</strong>OperationRead the following section carefully before buildinga fire in your fireplace insert..FuelThis stove is designed to burn natural wood ONLY.Wood that has been air-dried for a period of 6 to 14months will provide the cleanest, most efficientheat. Frequent use of green or inadequately seasonedwood is conducive to creosote accumulationand generally poor performance.DO NOT T BURN...•Coal •Treated or painted wood•Garbage •Chemical Chimney cleaners•Cardboard •Colored paper•Solvents •Any synthetic fuel or logsThe burning of any of these materials can result inthe release of toxic fumes. NEVER USE GASOLINE,GASOLINE-TYPE LANTERN FUEL, KEROSENE, CHAR-COAL LIGHTER FLUID, OR SIMILAR LIQUIDS TO STARTOR “FRESHEN-UP” THE FIRE. Always keep suchliquids away from the heater at all times.Air Control SettingsA single lever regulates the Primary Air flow thatcontrols the intensity of the fire and consequentheat output and burn time. This lever is locatedwithin the slot on the upper right front of thefireplace insert.When first starting or reviving the fire, thecontrol lever should be set at the far right positionto allow the maximum amount of air into the stove.See fig.15. After the fire is well-established, the levershould be set at position to moderate incoming airto maintain the desired long term heat output and/or burn time.In general, the more air made available to thefuel will result in the hottest fire intensity and thefastest fuel consumption. Alternatively, the less airmade available to the firebox will result in low heatoutput and slow fuel consumption.Blower Settings / Air ControlUse the following guide for best performance.Burn Rate Air Control Setting Blower SpeedLow Fully Closed Low / On at 30 min.Med. Low 1/16”-1/8”Open Low / On at 30 min.Med. High 3/16”-1/4”Open Low / On at 30 min.High Max. Open High / OnWARNINGNEVER ALLOW THE FIRE TO RESTDIRECTLY ON THE GLASS. THELOGS SHOULD ALWAYS BE SPACEDAT LEAST ONE INCH FROM THEGLASS TO ALLOW FOR PROPER AIRFLOW WITHIN THE STOVE.OPERATE THIS FIREPLACE INSERTONLY WITH THE FRONT DOOR FULLYCLOSED. OPERATION WITH A PAR-TIALLY OPENED DOOR MAY RESULTIN OVER-FIRING. ALSO, IF THE DOORIS LEFT PARTLY OPEN, GAS ANDFLAME MAY BE DRAWN OUT OF THESTOVE OPENING, CREATING RISKSFROM BOTH FIRE AND SMOKE.FULLYCLOSED1/8”1/4”FULLYOPENBlower Speed ControlFigure 15. Air Control Setting14
Jøtul C <strong>550</strong> <strong>Rockland</strong>Starting and Maintaining a FireBurn only solid wood directly on the bottom plate ofthe stove. Do not elevate the fire in any way.1. Set the Air Control Lever in the full open position.2. Crumple several sheets of newspaper directlyon the bottom plate..2. Place several pieces of small dry kindling (approx.1” in diameter) on top of the newspaper, with twoto three small logs (approx. 2” to 3” in diameter)on top.3. Light the fire and close the door. Gradually buildthe fire by adding larger and larger logs as thefire develops a bed of coals.4. When you have added the final logs, adjust theAir Control Lever to provide the desired fireintensity.Experiment with a variety of air control settingsto determine the best one for your individualcircumstances. Remember that fuel characteristics,chimney system condition, building design, andweather conditions all affect the performance ofyour fireplace insert. In time, you will discover howthese elements combine and how you can workwith them to achieve satisfactory performance.Break-in PeriodThe cast iron parts of your fireplace insert require abreak-in process to allow them to gradually adjustto thermal expansion and contraction. This isaccomplished by building a series of three or fourfires, each somewhat hotter than the last. Allow thefireplace insert to cool completely before buildingthe next fire.Limit the first fire to just kindling and a coupleof 1 -2 inch logs and add progressively more andlarger logs to subsequent fires, keeping the AirControl set to the fully open position.It is normal for a new fireplace insert to emitodor and possibly smoke during the first few fires.This is characteristic of the burn-off of residues fromthe manufacturing process and the curing ofpainted surfaces. Open a window near the fireplaceinsert to provide plenty of fresh air to the roomduring this “seasoning” period.WARARNING!NG!NEVER OVERVER-FI-FIRE THE STOVE.IF ANY PARART OFTHE STOVE OR CHIMNIMNEY GLOWS, YOU OU AREOVERVER-FI-FIRING.A HOUSE FIRE OR SERIOUSDAMAGETO THE E STOVE OR CHIMNIMNEY COUOULDRESUESULT. IF THIS IS CONONDIDITION ION OCCUCURS,IMMEDIATELELY CLOSETHE AIR CONONTROLOL.Adding Fuel to the FireWhen reloading the stove while a bed of hot embersstill exists, follow this reloading procedure:• Always wear stove gloves when tending to thefire.• Push the Air Control Lever to the full open position(far right).• Always wait a few seconds before opening thedoor. This allows the renewed air circulation toclear unburned gases from the firebox.• Use a stove tool or poker to distribute the hotembers equally around the firebox.• Load the fuel, usually with smaller logs first.Keep logs behind the andirons. See fig. 16.• Close the doors and secure the latch.• Wait 5 – 10 minutes for the fire to reestablishbefore adjusting the Air Control Lever for thedesired heat output. If a thick bed of live coals ispresent, you may be able to add fuel and immediatelyset the air control without waiting for thefire to be reestablished.Creosote FormationAndironsFigure 16.Fuel load area - keep logs behind the andirons.This appliance is designed to burn wood cleanly andefficiently when operated as described in thismanual. However, when wood is burned slowly andat low temperatures, tar and other organic vaporsare produced which condense on the relativelycooler chimney flue surfaces to form creosote.Failure to keep the chimney system free of creosotebuild up could result in a chimney fire.The creosote that accumulates in the chimney ishighly flammable and is the fuel of chimney fires. Toprevent chimney fires, it is important to have thechimney flue and connector pipe cleaned andinspected at the beginning of the heating seasonand then inspected twice per month during frequentuse. Clean the chimney whenever creosoteaccumulation of 1/4” or more is evident. A qualifiedchimney sweep or other authorized service personcan provide this service.15
Jøtul C <strong>550</strong> <strong>Rockland</strong>It is also important to remember that chimneysize, temperature and height all affect draft which inturn affects the formation of creosote. An exteriorchimney, whether masonry or prefabricated steel, willbe exposed to cold outside temperatures, and consequently,will be more prone to creosote accumulationthan an interior flue.A chimney flue located within the home interiorwill benefit from the insulating characteristics of thebuilding itself. Consequently, the flue system will beless conducive to condensation of unburned gases andminimal creosote accumulation will result.As a general rule, try to avoid burning the insert atthe lowest air control settings. Although a low settingwill prolong burn time, it may also result in incompletecombustion. In reducing the fire intensity, draft isweakened and the chimney flue cools. This, togetherwith the increase in unburned gases, leads to rapidcreosote accumulation.Blower OperationAccess the blower control panel by lifting the castiron lower grille up off the insert.The dual blowers will enhance heat circulationaround the firebox and out into the room. In theAutomatic setting, the blowers are controlled by aheat activated switch (snapstat) that will onlyfunction when the speed control is ON. After the firehas been burning for a time, the snapstat will reactto the heat and activate the blowers. Conversely,the blower will continue to operate until thesnapstat cools as the fire wanes. The blowers willthen shut off automatically.The <strong>Manual</strong> setting overrides the snapstatfunctionality allowing blower operation regardlessof temperatures.For best performance, do not turn the switch onuntil after the fire is well-established.If the blower is not needed, place the blowercontrol switch in the OFF position.GPOWERSUPPLYBRBKBKAUTOCIRCUITGGSNAPSTATWARNING !• THIS BLOWER MUST BEELECTRICALLY GROUNDED INACCORDANCE WITH LOCAL CODESOR, IN THE ABSENCE OF LOCALCODES, WITH THE CURRENT ANSI/NFPA 70, NATIONAL ELECTRICALCODE OR CSA C22.1-CANADIANELECTRICAL CODE.• THIS UNIT IS SUPPLIED WITH ATHREE-PRONG (GROUNDING)PLUG FOR PROTECTION AGAINSTSHOCK HAZARD AND SHOULD BEPLUGGED DIRECTLY INTO APROPERLY GROUNDED THREE-PRONG RECEPTACLE. DO NOTCUT OR REMOVE THE GROUNDINGPRONG FROM THE PLUG.DO NOT USE ANY POWER SUPPLYCORD OTHER THAN THATSUPPLIED WITH THIS UNIT.• ALWAYS DISCONNECT THEPOWER SUPPLY WHENPERFORMING ANY SERVICE ONTHE FIREPLACE INSERT.BLBLOWERBKBKBLOWERBKBKSWITCHBRBKBRBRBRMANUALCIRCUITColor KeyBR - BrownBL - BlueBK - BlackG - GreenBKRHEOSTATBKMAN OFF AUTOHIGHOFFLOWNOTE: Terminals and switch markings are onopposite ends of the switch. See below.Auto SwitchPosition<strong>Manual</strong> CircuitTerminalAuto CircuitTerminal<strong>Manual</strong> SwitchPosition16Figure 17. Blower and speed controls.Figure 18. C <strong>550</strong> Wiring diagram.
Jøtul C <strong>550</strong> <strong>Rockland</strong>MaintenanceAsh RemovalAlways wear stove gloves when handling ashes.Ash removal will be required periodically dependingon how frequently the stove is used. Use a steel ashshovel and metal container with a tight-fitting lid.NEVER USE A PAPER OR PLASTIC BAG AS AN ASHRECEPTACLE.The container of ashes should be placed on anoncombustible floor or on the ground, well awayfrom all combustible materials, pending finaldisposal. If the ashes are disposed of by burial in soilor otherwise dispersed, they should be kept in theclosed container until all coals and cinders havethoroughly cooled.Glass CareCleaningOccasionally it will be necessary to clean the carbondeposits and fly ash off of the glass. If deposits areallowed to remain on the glass for an extendedperiod of time, the glass may become etched andcloudy.Creosote deposits should burn off during the nexthot fire.1. The glass must be COMPLETELY COOL.2. Only use a cleaner that is specifically designed forthis purpose. DO NOT USE ABRASIVE CLEANINGAGENTS. The use of abrasives will damage theglass, leaving a frosted surface. Crumpled newspaperis an especially good cleaning material.3. Rinse and dry glass completely before lighting a fire.M6 x 8 PanHd ScrewPN 117505GasketedGlass ClipPN 153620Glass GasketPN 200024Glass ReplacementAlways operate the doors slowly and cautiously toavoid cracking or breaking the glass. Never use thedoor to push wood into the firebox. If the glassbecomes cracked or broken follow the replacementprocedure below.IMPORTANT:NEVER OPERATE THE STOVE WITH ACRACKED OR BROKEN GLASS PANEL.Replace glass only with part # 156467specifically designed for the Jøtul C <strong>550</strong><strong>Rockland</strong> Fireplace insert. Do not usesubstitutes. Replacement glass can beordered from your Jøtul dealer.1. Remove the door from the stove and place on aflat surface.2. First loosen and then carefully remove all of theglass clips from the inside of the door. See fig. 19.3. Remove all pieces of the glass panel and gasketing.4. Remove all remaining debris from the glass areausing a wire brush.5. Apply a small bead of gasket/stove cement andthe new gasket. Do not overlap the ends of thegasket rope.6. Orient the glass with the IR Coating label facingout. Hold the glass at an angle to see the word“COATED” located at the lower edge. This sideshould face out when placed in the door. <strong>Center</strong>the new glass panel over the gasket and looselyreinstall the glass clips. Tighten the clips, alternatingat opposite corners. Avoid applying unevenpressure on the glass..7. It may be necessary to retighten the glass clipsafter the stove has burned and the gasketing hasseated.Door GasketPN 100038Glass PanelPN 222219Figure 19.Replacing thedoor glass andgaskets.17
Jøtul C <strong>550</strong> <strong>Rockland</strong>General MaintenanceRegular maintenance will assure proper performanceand prolong the life of your fireplace insert..The following procedures do not take long and aregenerally inexpensive. When done consistently,they will help increase the life of your fireplaceinsert and assure satisfactory performance.• Thoroughly clean the insert. Enamel surfacesshould be cleaned with a moist cloth andpolished dry..• Empty firebox of all soot and ashes. Never use ahousehold vacuum cleaner to remove ashes.Only a shop vacuum with a metal container isacceptable and only when you are certain theashes are cold.• Inspect the firebox using a utility light insideand out for cracks or leaks. Replace all crackedbricks and repair leaks with furnace cement.Canada Installations (Full Reline):The chimney liner can be swept directly into abucket placed under the flue outlet, with removal ofthe two cast iron baffle plates.1. Lift up the Left Cast Iron Baffle to disengage thelocator boss from the Front Air Tube, and pull the airtube forward and out of the side manifolds.2. Keeping the Rear Air Tube in place, push up on theRight Baffle and remove the Left Baffle.3. Lift and remove the Right Baffle.4. Slide the Rear Air Tube to one side to disengage itfrom the Side Manifolds.5. Reassemble in the reverse order, being sure toengage the locator bosses on the Left Baffle withthe corresponding holes in the Secondary Air Tubes.Removing the Insert for CleaningU.S. Direct-connection Only:1. Disconnect the blower power cord from itsoutlet.2. Open the firebox door and pull the insert outenough to disengage the surround panelassemblies by lifting up off of the brackets.3. Lift up the Left Cast Iron Baffle to disengage thelocator boss from the Front Air Tube, and pull theair tube forward and out of the side manifolds.4. Keeping the Rear Air Tube in place, push up on theRight Baffle and remove the Left Baffle.5. Lift and remove the Right Baffle.6. Slide the Rear Air Tube to one side to disengageit from the Side Manifolds.7. Remove the retainer pin from the Draw-downAdaptor. Push up on the draw-down bar todisengage the adaptor from the insert8. Pull the firebox and cabinet forward as a unit.The flue connector, liner, and chimney can nowbe inspected and cleaned.9. See page 12 for reassembly procedures.GasketsCheck door and glass gaskets for seal integrity.The gaskets should be soft enough to be somewhatresilient to the touch. Over time, gaskets willcompress and harden. Replace worn-out or hardenedgaskets with the appropriate size materialavailable from your local Authorized Jøtul Dealer.To check the seal of the front doors, close and latchthe doors on a dollar bill and slowly try to pull thedollar bill free. The seal is too loose if the bill can beeasily removed. Adjust the door latch and testagain.Replacement GasketsGlassLD .250 Fiberglass Rope 66” 200024DoorLD2 .350 Fiberglass Rope 70” 100038FronontLD2 .360 Fiberglass Rope 90.5” 117587Air Manifold,OuterLD2 .250 SA Fiberglass Rope 30” 129644Air Manifold,Inner.125 x 8 mm Flat SA 24” 12721518
Jøtul C <strong>550</strong> <strong>Rockland</strong>Gasket ReplacementSee the chart below for replacement gasket specifications.See also figs. 19-20 for locations.1. Remove the old gasket material with a pliers andthoroughly clean the channel with a wire brush.2. Lay out the new gasket around the channel todetermine length. Trim the gasket to leave 1” excess.3. Apply a small bead of gasket or furnace cementin the channel.4. Lightly press the new gasket into the channel,being careful to avoid compressing or stretchingit. Trim the gasket further as necessary to allowthe tail end to slightly overlap the other end.5. Wait ten minutes to allow the cement to set andthen close and latch the doors. Reopen the doorsand use a damp cloth to wipe away any excesscement that may be squeezed out from under thegasket.19
Jøtul C <strong>550</strong> <strong>Rockland</strong>Use only genuine Jøtul replacement parts.Do not substitute parts from any othermanufacturer. See your local AuthorizedJøtul Dealer or contact us directly:81827358Jøtul North America55 Hutcherson Dr.Gorham, Maine 040381857973 80837378237773Jøtul C <strong>550</strong> <strong>Rockland</strong> Illustrated Parts Diagram76754725678910117173 746915403532 33 34 358930 311216 183616 8417 3 38 3918 2268416742376648654529916463431213141517181920211223248745 9049 50 51 52 53 54 55 56 12 60 61 62573725 8626 27 2859884644 47Figure 20.1620
Jøtul C <strong>550</strong> <strong>Rockland</strong>Jøtul C <strong>550</strong> <strong>Rockland</strong> Parts ListNo.DescriptionParart Number1. Rear Shroud 2220272. Screw, #8 x 1/2” Hex Slt 1179173. Nut, M6 Flange 1179684. Right Baffle Plate 1043145. Left Baffle Plate 1043136. Secondary Air Tube, Front 2220967. Secondary Air Tube, Rear 2222968. Bolt, M6 x 40 SS Hex Hd 1179979. Brick Retainer, Cast Iron 10430010. Firebox Cavity 22202611. Surround Support, Left 22220112. Nut, M6 Hex 993013. Secondary Air Channel 22227114. Blower Shield Assembly 22175015. Bolt, M6 x 12 Hex Hd Flange 11713016. Brick, 4.5 x 9.0 Refractory 12908217. Brick, 3.0 x 9.0 Refractory 22051818. Brick, 3.5 x 9.0 Refractory 22222619. Firebox Grate Plate 10431220. Insulating Panel, Grate 22243321. Shroud Assembly, Base 22202822. AC Power Receptacle 22179023. Clip, Attachment 22209624. Spacer, .250 x .500 11799425. Nut, M6 Wing 11797526. Receptacle Mounting Plate 22244227. Gasket, Receptacle Mounting Plate 12967028. Weld nut, M4 11806729. Screw, M4 x 8 Ph PH ZINC 11792030. Firebox Support 22222331. Surround Support, Right 22220032. Bolt, M6 x 16 Flange Head 9962533. Air Wash Manifold 10431034. Bolt, M6 x 60 Hex Head Serr. Flange 9910135. Gasket, LD .250 SA Fiberglass Rope- Outer, Air Manifold 12964436. Bolt, M6 x 20 Hex Head 11711737. Screw, #8 x .50 Hex Slot 11791738. Cast Attachment Plate 15679239. Bolt, M6 x 25 Flange Hex 11801940. Rope Gasket, Fiberglass - LD .360 x 6.5 ft. - Front Plate 10003841. Shroud, Blower 22222142. Snapstat, 110°F - 20°F 22075543. Knob, Rheostat 22178844. Rheostat, Solid State Variable Speed 22178745. Blower Base 22222046. Rocker Switch 22070347. Controls Bracket 22222248. Blower, 60 cfm Crossflow, RT DR. 15647749. Screw, M6 x 12 Pan Head 11750<strong>550</strong>. Glass Clip w/ gasket 15362051. Ceramic Glass panel 22221952. Rope Gasket, Fiberglass LD .250 x 5.5’ - Glass Panel 20002453. Rope Gasket, Fiberglass LD .360 x 70” - Door 10003854. Door Latch Bolt 22172055. Washer, Door Handle 11758756. Compression Spring, Door Handle 12616457. Blower, 60 cfm Crossflow, LFT DR 15647658. Extended Surround (optional) / Matte Black Paint 156432*Does not include #87 Dooor Knob KitNo.DescriptionParart Number58. Extended Surround (optional) / Jøtul Iron Paint 15643359.* Front & Door Asy, Complete / Matte Black Paint 156482Front & Door Asy, Complete / Blue Black Enamel 156483Front & Door Asy, Complete / Jøtul Iron Paint 15648460. Cast Iron Door Handle 10371261. Roll Pin, 5 mm x 24 mm 11773362. Washer, Insulating 12438563. Bolt, M6 x 40 PHP 11779664. Door Knob, Wooden 12624465. Sleeve, Door Handle 12622966. Washer 11090467. Washer, M6, 12 x .05 11758868. Hinge Pin 12707569. Air Cover Plate, Matte Black Paint 156496Air Cover Plate, Blue Black Enamel 156486Air Cover Plate, Jøtul Iron Paint 15649771. Air Slider, Matte Black Paint 156712Air Slider, Jøtul Iron Paint 156713Air Slider, Nickel Plated 15671472. Gasket, .125 x 8 mm Flat SA - Inner, Air Manifold 12721573. Bolt, M6 x 10 Hex Hd Flange 996274. Bracket, Bottom Trim 22242775. Trim, Bottom Left - Matte Black Paint 156706Trim, Bottom Left - Blue Black Enamel 156491Trim, Bottom Left - Jøtul Iron Paint 15670776. Trim, Bottom Right - Matte Black Paint 156708Trim, Bottom Right - Blue Black Enamel 156492Trim, Bottom Right - Jøtul Iron Paint 15670977. Control Door, Matte Black Paint, inc. hardware 156479Control Door, Blue Black Enamel 156480Control Door, Jøtul Iron Paint 15648178. Hang Tab 12968079. Surround Leg, Right - Matte Black Paint 156704Surround Leg, Right - Blue Black Enamel 156490Surround leg, Right - Jøtul Iron Paint 15670580. Hang Tab 12840181. Surround Panel, Breastplate, Right - Matte Black 156700Surround Panel, Breastplate, Right - Blue Black 156488Surround Panel, Breastplate, Right - Jøtul Iron 15670182. Surround Panel, Breastplate, Left - Matte Black 156498Surround Panel, Breastplate, Left - Blue Black 156487Surround Panel, Breastplate, Left - Jøtul Iron 15649983. Surround Leg, Left - Matte Black Paint 156702Surround Leg, Left - Blue Black Enamel 156489Surround Leg, Left - Jøtul Iron Paint 15670384. AC Harness w/ Receptacle, Replacement 15648585. Set Screw, M6 x 10 mm - Surround adjustment 04-11772086. Blower Power Cord, HT - Offset Angle 22209387. Wooden Knob Replacement Kit 15199188. Handle Asy, Complete / Matte Black Paint 156320Handle Asy, Complete / Nickel Plated 15602189. Airwash Manifold, inc. gasket / Matte Black Paint 156710Airwash Manifold, inc. gasket / Jøtul Iron Paint 15671190. Blower Control Module, inc. #43, 44, 46, 47 15671591. Draw-down Adaptor 156073Jøtul C <strong>550</strong> OptionsExtended Surround Panel, Matte Black Paint 156432Extended Surround Panel, Jøtul Iron Paint 156433Mantel Heat Shield 15644821
Jøtul C <strong>550</strong> <strong>Rockland</strong>Appendix AAlternate Hearth ProtectionAll hearth protection materials must be noncombustible;i.e: metal, brick, stone, or mineral fiber boards. Any combustiblematerial may not be used.Follow the procedures below to determine if a proposedalternate floor material meets requirements listed inthis manual.R-value = thermal resistancek-value = thermal conductivityC-value = thermal conductance1. Convert the specification to R-value:a. If r-value is given, no conversion is needed.b. If k-value is given with a required thickness (T)in inches: R= 1/k x T.c. If C-value is given: R= 1/C.2. Determine the R-value of the proposed alternate floorprotector.a. Use the formula in Step 1 to convert valuesnot expressed as “R”.b. For multiple layers, add R-values of each layerto determine overall R-value.c. If the overall R-value of the system is greaterthan the R-value of the specified floor protector,the alternate is acceptable.Example:The specified floor protector should be 3/4” thick materialwith a k-factor of 0.84. The proposed alternate is 4” brickwith a C-factor of 1.25 over 1/8” mineral board with a k-factor of 0.29.Step 1. Use the formula above to convert specifications toR-value. R = 1 x T = 1/.84 x .75 = .893Step 2. Calculate R of proposed system.• 4” brick of C = 1.25, therefore• R brick = 1/C = 1/1.25 = 0.80• 1/8” mineral board of k = 0.29, therefore• R mineral board = 1/.29 x 0.125 = 0.431Total R = R brick + R mineral board = 0.8 + 0.431 = 1.231Step 3. Compare proposed system R = 1.231 to specified Rof 0.893. Since R is greater than required, the system isacceptable.Definitions:Thermal conductance =C = Btu = W(hr)(ft2)(F) (m2)(K)Thermal conductivity =k = Btu = W = (Btu)(hr)(ft2)(F) (m2)(K) (hr)(ft)(F)Thermal resistance =R = (ft2)(hr(F) = (m2)(K)BtuWLeg Leveler InstallationTwo leg leveler bolts are contained within theMiscellaneous Kit included inside the firebox. Thebolts are intended to help level and plumb thefirebox if irregularities exist between the front andrear of the fireplace hearth.Examine the hearth floor to determine anydifference in height between the front and rear orside to side. Slide the firebox into the fireplace toconfirm whether or not the leveler bolts will benecessary.Ifappropriate, install the bolts through thetapped holes located in the firebox floor approximately6” from the rear of the firebox. Adjust asnecessary to achieve correct lateral level andvertical plumb.Figure 21.Surroundassembly isout of plumbbecausefirebox is notlevel.Figure 22.Install levelerbolts to levelthe firebox andachieve correctsurroundassemblyalignment.LevelerBolt22
Jøtul C <strong>550</strong> <strong>Rockland</strong>Door Knob InstallationThe Door Knob components are included in aseparate bag contained within the Miscellaneous Kitincluded with the firebox. Install the parts in theorder shown in fig. 22. Phillips screwdriver required.Door HandleWooden KnobM6 hex nutWasherInsulated WasherKnob SleeveFigure 23. Door knob assembly.M6 x 40 PhillipsHead Bolt23
Jøtul C <strong>550</strong> <strong>Rockland</strong>Cat.no 138741-BNovember, 2008This appliance must be installed in conformance with local and national building regulations.It is important that the these instructions be carefully read and understood before beginning theinstallation. Jøtul pursues a policy of continual product development. Consequently, products may differin specification, color or type of accessories from those illustrated or described in various publications.Jøtul vise sans cesse a ameliorer ses produits. C’est pourquoi, il se reserve le droit de modifier les specifications,couleurs et equipement sans avis prelable.Jøtul North America, Inc.55 Hutcherson Dr.Gorham, Maine 04038USAJøtul ASP.O. Box 1411N-1602 Fredrikstad,Norway24