XT-1 Quick Reference Guide.pdf
XT-1 Quick Reference Guide.pdf
XT-1 Quick Reference Guide.pdf

You also want an ePaper? Increase the reach of your titles
YUMPU automatically turns print PDFs into web optimized ePapers that Google loves.
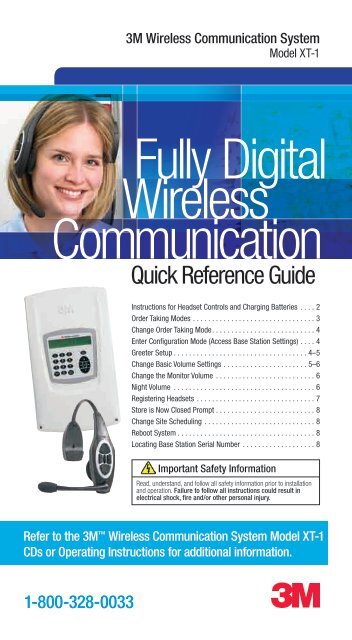
Instructions for Headset Controls and Charging BatteriesHeadset Controls:Talk Button Lane 2Indicator LED– Green is on– Red is assigned tocurrent order takerVolume DownPage Button–Tap to changeorder takerVolume UpTalk Button Lane 1Removing Batteries:• Slide and hold the battery release.• Remove the discharged battery from the battery housing.• Insert a fully charged battery in the housing with the notchfacing the battery release. Make sure the battery is fullyinserted (battery release clicks).Charging Batteries:To charge a battery, insert the battery in oneof the charging slots as shown.• The indicator lights RED to indicate the battery is charging.• The indicator lights GREEN to indicate the battery is charged.• Charge batteries after every shift.Remove BatteryRemove BatteryReplace BatteryReplace BatteryChargingChargingStatusIndicatorHeadset Cleaning:For good health and hygiene, every headset should be cleaned on a regular schedule.Before cleaning, remove the soft foam ear pad and microphone windscreen—if used.Wipe the surfaces clean. Remove particles from switches and clear plugged holes in thespeaker and microphone tip. DO NOT soak the headset or immerse it in water. DO NOTbend the battery contact or microphone boom. Clean the battery contacts periodicallyusing a water-moistened swab.2 1-800-328-0033
Order Taking ModesSee your Manager to confirm which Order Taking Mode your headset is using.(ML) Manual Listen:• Headset beeps when vehicle is detected.• Tap Talk button to turn on Customer Order Point microphone and hear the customer.• Customer Order Point microphone stays on until vehicle departs.(AL) Automatic Listen:• Headset beeps when vehicle detected; no buttons to push — automaticallyhear the customer.• Customer Order Point microphone automatically turns on and stays on untilvehicle departs.(PTT) Push To Talk:• Push and Hold the Talk button to talk to the customer.• Release the Talk button to turn off microphone so customer cannot hear you (Mute).(MLT) Manual Latching Talk:• Tap the Talk button to talk to the customer.• Customer Order Point and Headset microphones stay on until you tap the Talkbutton again or vehicle departs.OrderTaking Mode Listen TalkVehicleDetectorAutomaticStandbyOrderPointML/PTT Manual Push to Talk Presence On UsedML/MLTManualManualLatchingPresence On UsedAL/PTT Automatic Push to Talk Presence On UsedAL/MTTAutomaticManualLatchingPresence On UsedHands Free Automatic Automatic Presence On UsedOutsideManualManualLatchingIgnored Off Not UsedAlways On Always OnManualLatchingIgnored Off UsedRefer to the 3M Wireless Communication System Model <strong>XT</strong>-1CDs or Operating Instructions for additional information.31-800-328-0033
Change Order Taking ModeThere are seven order taking modes, which offer different combinations ofspeaking, listening, automatic standby, vehicle detector, and order point modes.Perform the following procedure to switch to a different order taker mode:1. Press t until the Mode selection is highlighted.2. Press Enter.3. Press s,t, or to select a new order taker mode. Your choices are ML/PTT, ML/MLT,AL/PTT, AL/MLT, Hands Free, Outside, and Always On. See “Order Taking Modes” on page 4.Note: Your system may be configured with fewer order taking mode options than thenumber described in this section. You must enter User configuration (passcode required) toenable or disable individual order taking modes.Enter Configuration Mode (Access Base Station Settings)Configuration mode is a passcode-protected area that contains most of the configurationoptions for the base station system. Using the access provided for users it is possible toset up all of the functionality of the system. To enter the configuration mode:1. From the Run mode menu, press and hold Mode.2. While continuing to hold Mode, enter your user passcode.3. Release Mode. The display will show the user name and ID number (e.g., User1 ID = 1)Greeter SetupThe greeter module is an accessory that stores prerecorded messages and plays them backwhen vehicles arrive. You can record a series of messages then select or combine them toconvey standard messages and reduce time and errors.Enter the Greeter Configuration MenuAll of the greeter settings are located in a top-level “Greeter Setup” configuration menu.Perform the following procedure to enter the greeter configuration menu:1. Enter the base station configuration mode.2. Press and release Mode until the Greeter Setup menu appears.Record (Store) New Greeter MessagesPerform the following procedure to record (store) a new greeter message using a headset:Note: If you store a new greeter message in an occupied slot, the old greeter message willbe permanently erased. Each recorded message can be no more than 15 seconds long.1. Put on a working headset with the power on.2. At the base station, enter the greeter configuration menu.3. Select 2 Record Greeter Messages > Record Message >X< where “X” represents thegreeting number you want to record (1–4).4. Scroll to and select Record.5. Press and hold the Page button on the headset (raised middle button).4 1-800-328-0033
Store is Now Closed PromptPerform the following procedure to enable or disable the automatic storeclosed prompt to let customers know in your absence that the store is closed.Note: Make sure that you disable the automatic store closed prompt in stores that are open 24 hours.1. Enter the base station configuration mode.2. Change the value for 07 Global Settings > “Store is Now Closed” Prompt? to Yes or No.Change Site SchedulingThe site schedule is the calendar of store open and closing times.Note: All timekeeping is done using a 24 hour clock (e.g., 6:00 p.m. appears as 18:00).Regular Site Schedule:The regular site schedule is the opening and closing times for each day of the week andthe times assigned as “Day” and “Night,” which determine when the day and night volumesettings change. Perform the following procedure to set the regular site schedule:1. Enter the base station configuration mode.2. Navigate to 10 Site Scheduling > Regular Site Schedule.3. Change the value for each day of the week and each of the four defined fields(Open, Day, Night, and Close). Press s,t, and to scroll up and down the list.Holiday/Exception Schedule:The holiday/exception schedule can be used to identify up to 12 days in the year on whichthe store schedule is different than it would have been otherwise. The holiday/exceptionschedule should be updated at least once a year to ensure it conforms to the current year’scalendar. Perform the following procedure to set the holiday/exception schedule:1. Enter the base station configuration mode.2. Navigate to 10 Site Scheduling > Holiday/Exception Schedule.3. For each day that needs a non-typical schedule, enter the three-letter month and two digitdate under Date, then change the open and close times on the line to the right of the date.Press s,t, and to scroll through the fields.Reboot SystemPerform the following procedure to cleanly power down, then power up without unpluggingthe system:1. Enter the configuration mode.2. Select 17 Reboot System.3. Change the value of Power Cycle Complete System to Yes.4. Press Service.Locating Base Station Serial NumberPerform the following procedure to view the revision levels and serial numbers ofyour base station:1. Enter the configuration mode.2. Select 18 Revision Levels.8Food Services DepartmentBuilding and CommercialServices Division3M Center, Building 223-2N-21St. Paul, MN 55144-1000USAwww.3M.com/<strong>XT</strong>-13M is a trademark of 3M company.Please recycle. Printed in the U.S.A.© 3M 2010. All rights reserved.78-8134-0427-0 (60.15)ii