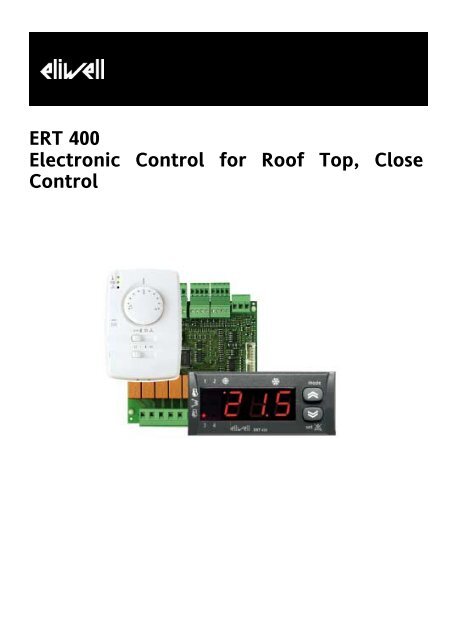
ERT 400 Electronic Control for Roof Top, Close Control - Klima-Therm
ERT 400 Electronic Control for Roof Top, Close Control - Klima-Therm
ERT 400 Electronic Control for Roof Top, Close Control - Klima-Therm

Create successful ePaper yourself
Turn your PDF publications into a flip-book with our unique Google optimized e-Paper software.
340,1250 35<strong>ERT</strong> <strong>400</strong><strong>Electronic</strong> <strong>Control</strong> <strong>for</strong> <strong>Roof</strong> <strong>Top</strong>, <strong>Close</strong><strong>Control</strong>
CONTENTS1 How to use this manual........................................................................................................................................ 52 Introduction ............................................................................................................................................................. 62.1 Main characteristics......................................................................................................................................................................... 62.2 Components and models............................................................................................................................................................... 72.3 Diagnostics......................................................................................................................................................................................... 82.4 Protocols............................................................................................................................................................................................. 83 Mechanical Mounting............................................................................................................................................ 93.1 Dimensions ........................................................................................................................................................................................ 93.2 Mechanical assembly of keyboards........................................................................................................................................... 113.2.1 EKW <strong>400</strong> keyboard connections.................................................................................................................................................................................................. 113.2.2 Mechanical assembly of EKW <strong>400</strong> keyboard............................................................................................................................................................................ 123.2.3 Mechanical assembly of EKP <strong>400</strong> keyboard ............................................................................................................................................................................. 123.2.4 Panel cut-out..................................................................................................................................................................................................................................... 133.2.5 Mounting of EKF<strong>400</strong> ....................................................................................................................................................................................................................... 134 Installation..............................................................................................................................................................144.1 Wiring diagrams.............................................................................................................................................................................. 144.2 Configuration of analogue inputs.............................................................................................................................................. 204.3 Configuration of digital inputs ................................................................................................................................................... 204.4 Power output configuration........................................................................................................................................................ 224.5 Low voltage output configuration............................................................................................................................................. 234.6 Remote keyboard output............................................................................................................................................................. 244.7 Serial output.................................................................................................................................................................................... 244.7.1 Copy Card device ............................................................................................................................................................................................................................. 254.8 Units of measurement .................................................................................................................................................................. 255 User Interface........................................................................................................................................................265.1 EKF<strong>400</strong>-RT keyboard ..................................................................................................................................................................... 265.2 EKP<strong>400</strong>-RT keyboard ..................................................................................................................................................................... 285.2.1 Buttons................................................................................................................................................................................................................................................ 285.2.2 Displays ............................................................................................................................................................................................................................................... 295.2.3 Display................................................................................................................................................................................................................................................. 295.2.4 LED ....................................................................................................................................................................................................................................................... 295.3 EKW<strong>400</strong>-RT/S keyboard................................................................................................................................................................ 305.4 Programming of parameters – Menu levels............................................................................................................................ 305.4.1 Visibility of parameters and submenus ..................................................................................................................................................................................... 336 System Configuration..........................................................................................................................................346.1 Compressors.................................................................................................................................................................................... 346.2 Configuration of compressors .................................................................................................................................................... 346.2.1 Compressor start/shutdown sequence (or power step) ....................................................................................................................................................... 356.2.2 Compressor timing .......................................................................................................................................................................................................................... 376.3 Condensation fan........................................................................................................................................................................... 386.3.1 <strong>Control</strong> probes.................................................................................................................................................................................................................................. 386.3.2 Configuration of fan........................................................................................................................................................................................................................ 386.3.3 Configuration of fan regulator..................................................................................................................................................................................................... 396.4 Reversing valves.............................................................................................................................................................................. 396.5 Anti-freeze/integrated electric heaters .................................................................................................................................... 406.5.1 Electric heaters in Defrosting mode ........................................................................................................................................................................................... 406.5.2 Integrated electric heaters ............................................................................................................................................................................................................ 406.5.3 Electric heaters in dehumidification mode............................................................................................................................................................................... 406.5.4 Hot water coil in Dehumidification mode ................................................................................................................................................................................ 416.6 Condensation/Defrosting probes............................................................................................................................................... 426.7 Hot water coil ................................................................................................................................................................................. 426.8 Evaporator fan ................................................................................................................................................................................ 426.9 Damper opening digital input..................................................................................................................................................... 437 Temperature <strong>Control</strong> Functions.......................................................................................................................447.1.1 Auto operating mode ..................................................................................................................................................................................................................... 457.1.2 Night purging operating mode: ................................................................................................................................................................................................... 457.1.3 Economy operating mode ............................................................................................................................................................................................................. 457.1.4 Fan operating mode........................................................................................................................................................................................................................ 45
7.2 <strong>Control</strong> probe ................................................................................................................................................................................. 457.3 Digital regulation............................................................................................................................................................................ 467.4 Configuring the set points ........................................................................................................................................................... 467.5 Dynamic set point.......................................................................................................................................................................... 477.6 Load control .................................................................................................................................................................................... 477.6.1 <strong>Control</strong> of compressors – temperature controller................................................................................................................................................................. 477.6.2 Condensation fan control.............................................................................................................................................................................................................. 497.6.3 Single or separate condensation ................................................................................................................................................................................................. 507.6.4 <strong>Control</strong> of anti-freeze electrical heaters ................................................................................................................................................................................... 507.6.5 <strong>Control</strong> of integrated electrical heaters .................................................................................................................................................................................... 517.6.6 <strong>Control</strong> of hot water coil in anti-freeze mode........................................................................................................................................................................ 537.6.7 <strong>Control</strong> of integrated hot water coil (heating)........................................................................................................................................................................ 538 Functions.................................................................................................................................................................558.1 Recording of operating hours..................................................................................................................................................... 558.2 Defrosting......................................................................................................................................................................................... 558.2.1 Start of Defrosting........................................................................................................................................................................................................................... 558.2.2 <strong>Control</strong> during defrosting.............................................................................................................................................................................................................. 568.2.3 End of Defrosting............................................................................................................................................................................................................................. 568.3 Dehumidification............................................................................................................................................................................ 578.4 Humidification ................................................................................................................................................................................ 588.5 Economizer ...................................................................................................................................................................................... 588.5.1 Freecooling/Freeheating in Cooling mode ............................................................................................................................................................................... 598.5.2 Freecooling/Freeheating in Heating mode............................................................................................................................................................................... 608.5.3 Freecooling/Freeheating in Enthalpy.......................................................................................................................................................................................... 618.6 Air Pollution..................................................................................................................................................................................... 628.7 Loss of voltage ................................................................................................................................................................................ 638.8 Heat pump shut-down.................................................................................................................................................................. 638.9 Output temperature control....................................................................................................................................................... 639 Parameters..............................................................................................................................................................649.1 Description of parameters........................................................................................................................................................... 649.1.1 Configuration parameters (CnF).................................................................................................................................................................................................. 649.1.2 Alarm Parameters (ALL) ................................................................................................................................................................................................................. 679.1.3 Compressor parameters (CP)........................................................................................................................................................................................................ 689.1.4 Regulator (RE) ................................................................................................................................................................................................................................... 699.1.5 Ventilation parameters (FAn) ....................................................................................................................................................................................................... 699.1.6 Pump / evaporator fan parameters (PUP) ................................................................................................................................................................................ 709.1.7 Anti-freeze/boiler parameters (FRO).......................................................................................................................................................................................... 709.1.8 Defrosting parameters (dFr) ......................................................................................................................................................................................................... 719.1.9 Expansion module parameters (ESP).......................................................................................................................................................................................... 719.1.10 Freecooling / Humidity parameters (FrC) ........................................................................................................................................................................... 729.1.11 Table of parameters .................................................................................................................................................................................................................. 7310 Diagnostics .............................................................................................................................................................7810.1 List of alarms ................................................................................................................................................................................... 7810.2 Table of digital alarms .................................................................................................................................................................. 8710.3 Table of analogue alarms............................................................................................................................................................. 8811 Technical Features................................................................................................................................................8911.1 Technical data................................................................................................................................................................................. 8911.2 Electromechanical data ................................................................................................................................................................ 8911.3 Standards.......................................................................................................................................................................................... 8912 Use of the device..................................................................................................................................................9012.1 Permitted use.................................................................................................................................................................................. 9012.2 Forbidden use ................................................................................................................................................................................. 9013 Responsibility and Residual Risks.....................................................................................................................9114 Disclaimer ...............................................................................................................................................................9215 Glossary ...................................................................................................................................................................9316 Components and Accessories (Appendix).....................................................................................................9516.1 Accessories....................................................................................................................................................................................... 9516.1.1 Keyboards..................................................................................................................................................................................................................................... 96
16.1.2 CF Modules .................................................................................................................................................................................................................................. 9716.1.3 Copy Card..................................................................................................................................................................................................................................... 9916.2 Probes ............................................................................................................................................................................................... 9916.2.1 EMC filter...................................................................................................................................................................................................................................... 9917 Analitic Index.......................................................................................................................................................102
1 HOW TO USE THIS MANUALThis manual is designed to permit quick, easy reference with the following features:ReferencesReferences column:A column to the left of the text contains references to subjects discussed in the text to help you locate the in<strong>for</strong>mationyou need quickly and easily.Cross referencesCross references:All words written in italics are referenced in the subject index to help you find the page containing details on this subject;supposing you read the following text:”when the alarm is triggered, the compressors will be shut down”The italics mean that you will find a reference to the page on the topic of compressors listed under the item compressorsin the index.If you are consulting the manual “on-line” (using a computer), words which appear in italics are hyperlinks: just click on aword in italics with the mouse to go directly to the part of the manual that discusses this topic.Icons <strong>for</strong> emphasisSome segments of text are marked by icons appearing in the references column with the meanings specified below:Take note: in<strong>for</strong>mation on the topic under discussion which the user ought to keep in mindTip: a recommendation which may help the user to understand and make use of the in<strong>for</strong>mation supplied on the topicunder discussion.Warning! : in<strong>for</strong>mation which is essential <strong>for</strong> preventing negative consequences <strong>for</strong> the system or a hazard topersonnel, instruments, data, etc., and which users MUST read with care.
2 INTRODUCTION<strong>ERT</strong><strong>400</strong> is a unit designed <strong>for</strong>:• medium-sized roof-top units• air handling units• close controls, packaged units• water/air and air/air chillersConfigurabilityI/O configurability2.1 Main characteristics• Management of 1, 2, 3, 4 compressors• Management of 1, 2, 3 capacity steps per compressor• Management of 1,2 circuits• Cold/heat pump• Up to 13 configurable relays• 15 configurable digital inputs• 0-10 V analogue outputsUp to 8 Analogue Inputs configurable as:• 3 NTC or Digital Inputs• 2 NTC or 4-20 mA Inputs• 1 0-5V or Digital Input• 2 4-20 mA or Digital InputsAvailablefunctions• Operating mode: cool, heat, fan• Automatic change-over based on temperature of inlet air• Dynamic set point• <strong>Therm</strong>odynamic optimization of circuits• Temperature control• Heat pump• <strong>Control</strong> of reversing valve• <strong>Control</strong> of defrosting• <strong>Control</strong> of condensation• <strong>Control</strong> of ventilation• <strong>Control</strong> of electric heaters• <strong>Control</strong> of humidification/dehumidification• Temperature/Enthalpy• <strong>Control</strong> of air pollution (CO2)• Proportional control of hot water coil• “NIGHT” function• Economy function (ECO)<strong>ERT</strong> <strong>400</strong> User Manual6/104
2.2 Components and modelsEnergy <strong>400</strong> RT consists of a base module with resources that can be extended using special expansion modules. It iscontrolled by using special keyboards connected to it.Components and accessoriesBase = Master CardExpansion 1 = EXP402 expansion cardExpansion 2 = EXP405RH expansion cardKeyb. EKF<strong>400</strong>-RT = ‘simplified’ wall keyboardKeyb. EKP<strong>400</strong>-RT = panel keyboardKeyb. EKW<strong>400</strong>-RT/S =wall keyboard<strong>ERT</strong> <strong>400</strong> User Manual7/104
Models availableDifferent models with different types of terminals that use Modbus or Televis communication protocols are available <strong>for</strong>some elements: refer to the summary table below:BASERelay basic model: Molex quick plug-in terminals on With Modbus protocol Code MW324060low voltage, Faston connectors on relay connections,screw connectors on keyboard With TELEVIS protocol Code MW324050EXPANSION 1 Single model Code MW324100EXPANSION 2 Model with plug-in terminals: plug-in screw terminalson high and low voltageCode MW324115KEYBOARDEKW<strong>400</strong>-RT/SSingle modelcode MW324630KEYBOARDEKP<strong>400</strong>-RTSingle modelcode MW324680KEYBOARDEKF<strong>400</strong>-RTSingle modelCode MW3247002.3 Diagnostics<strong>ERT</strong> <strong>400</strong> has an effective alarm system and protection functions:• High and low pressure digital alarms• Single compressor shut-down alarm• Condenser fan thermal switch alarm• Evaporator fan thermal switch alarm• Worn filter alarm:• Outlet air temperature too cold alarm• High and low inlet temperature alarm• Heat pump shut down when external temperature is too low2.4 Protocols<strong>ERT</strong> <strong>400</strong> can be fitted with 2 different types of communication protocol:• Eliwell protocol <strong>for</strong> integration with Televis system• Modbus protocol<strong>ERT</strong> <strong>400</strong> User Manual8/104
3 MECHANICAL MOUNTING3.1 DimensionsDimensions ofbase moduleDimensions of power board (base module)108.6Dimensions of expansion modulesDimensions ofexpansion moduleEXP 402351 3φ 4 (x4)4 24107.512.5311107.54φ 4 (x4)4 64.5 3φ 2.1(x2)3 31.6φ 2.1(x2)3 131.6<strong>ERT</strong> <strong>400</strong> User Manual9/104
Dimensions ofexpansion moduleEXP 405701 34 24107.5312.5φ 4 (x4)φ 2.1(x2)3 131.6Dimensions of keyboardsDimensions of EKP<strong>400</strong> keyboardmode28mm:set34mmonoff !70mm76mmDimensions ofEKW <strong>400</strong> keyboard12.10 55.80 12.1012.10 99.50 12.1080.0055mm60mm124.0025.00<strong>ERT</strong> <strong>400</strong> User Manual10/104
Dimensions ofEKF<strong>400</strong> keyboard3.2 Mechanical assembly of keyboards3.2.1 EKW <strong>400</strong> keyboard connectionsThe remote keyboard is connected by way of a screw terminal block situated inside the front section (see the baseunit/keyboard connection diagram) which can be accessed by removing the front (with a screwdriver or a similar tool),asshown in the figure.The connections between the terminal block of the remote keyboard and the main unit are shown in the keyboard-baseunit connection diagram. The cables must pass through the central hole in the rear section (see the EKW dimensionsdiagram).<strong>ERT</strong> <strong>400</strong> User Manual11/104
424,9338,35020,050-1410,25331,53.2.2 Mechanical assembly of EKW <strong>400</strong> keyboardThe keyboard is designed to be wall-mounted (see diagram). After removing the front part, drill four 4 mm diameter holesin the wall at the recommended distances (see the EKW dimensions diagram). Fix the black rear side to the wall with fourscrews. After carrying out the necessary connections, close the front section of the keyboard by simply pushing it in place.3.2.3 Mechanical assembly of EKP <strong>400</strong> keyboardThe keyboard is designed to be panel-mounted (see diagram).Drill a 29x71 mm hole, insert a tool and fix it in place with the brackets provided. Do not assemble the keyboard inexcessively dirty and/or dirty locations because it is designed to be used in locations with normal degrees of pollution.Always make sure that the area near the cooling slits of the device is adequately ventilated.<strong>ERT</strong> <strong>400</strong> User Manual12/104
2971(A) PANEL THICKNESS 0.5-1-1.5-2-2.5-3 mmA3.2.4 Panel cut-out3.2.5 Mounting of EKF<strong>400</strong>EKF <strong>400</strong> <strong>for</strong> wall mounting consists of two parts:the first (connector master card) is fastened to the wall and contains only the connectors;the second (main interface) contains the electronics and all the controls and can be connected to the first part with asimple snap-on connector.This makes installation easy and removes the risk of damaging the electronic parts during installation.Use a small screwdriver to separate the connector master card from the main interface. Place the screwdriver in thespecial holes (in the side of the container) and twist slightly until the two parts come apart.<strong>ERT</strong> <strong>400</strong> User Manual13/104
368,5351,10228,350-1354344,254 INSTALLATIONBe<strong>for</strong>e per<strong>for</strong>ming any operations, make sure that an adequate external trans<strong>for</strong>mer has been installed on theunit. Always follow the instructions given below when connecting the cards:Do not apply loads exceeding those indicated in this specification to the outputs;Connect the loads following the directions given in the wiring diagram;Always use separate cables <strong>for</strong> high and low voltage loads.4.1 Wiring diagramsConnection ofbase unitCONN ACONN B- S +ABCPEXPD E F G H I LMNOQ1 2 3 4 5 6 7 8 9 10SERIALBase unit– Model with part plug-in terminals<strong>ERT</strong> <strong>400</strong> User Manual14/104
368,3312,60228,359-1353,55305,35CONN. ACONN. B- S +CABPEXPD E F G H I L M N1 2 3 4 5 6 7 8 9 10QOBase unit – Model with plug-in terminalsA: Connector AAIx: Analogue input xIDx: Digital input xANx: 4...20 mA output <strong>for</strong> fan control in circuit xTCx: Output <strong>for</strong> external fan modules circuit xB: Connector BNC: not connected12 V dcGNDC: Connection to remote keyboardD: Compressor, relay 1E…L: configuration relay E…LM: alarm relayN: shared alarm relayO: serialP: connection to expansion moduleQ: relay outputs not powered 1: compressor, relay 12…7: configuration of relays 2…78: shared9: alarm relay10: shared alarm relay<strong>ERT</strong> <strong>400</strong> User Manual15/104
IMG INFO2 examples of NTC probe and pressure probe connections are shown below:Wiring diagramwith NTCC12~ AN1 GND GND AI4 AI3 AI2 AI112~ 12c TC1 ID5 ID4 ID3 ID2 ID1D12~ AN2 GND GND AN3 ID11 AI6 AI512~ 12c TC2 ID10 ID9 ID8 ID7 ID6BBALineConnection with NTC sensorsA: LC filter (using only CF <strong>Control</strong>)B: Phase cutting fan moduleC: Connector AD: Connector BAIx: Analogue input xIDx: Digital input xANx: 0-10VDC output <strong>for</strong> fan control in circuit xTCx: Output <strong>for</strong> external fan modules circuit xNC: not connected12 V dcGND<strong>ERT</strong> <strong>400</strong> User Manual16/104
IMG INFOWiring diagramwith pressureprobesCD12~ AN1 GND GND AI4 AI3 AI2 AI112~ 12c TC1 ID5 ID4 ID3 ID2 ID112~ AN2 GND GND AN3 ID11 AI6 AI512~ 12c TC2 ID10 ID9 ID8 ID7 ID6BBALineConnection with 4…20mA inputsA: LC filter (using only CF <strong>Control</strong>)B: Phase cutting fan moduleC: Connector AD: Connector BAIx: Analogue input xIDx: Digital input xANx: 0-10VDC output <strong>for</strong> fan control in circuit xTCx: Output <strong>for</strong> external fan modules circuit xNC: not connected12 V dcGND<strong>ERT</strong> <strong>400</strong> User Manual17/104
368,45124,10228,350368,45322,150228,350-1354,15315,25Exp 402 expansionmoduleconnections (type1)54321ABC14131211Exp 402 expansion module (type 1)A: Screw connectors 1: Shared Digital Input2…5: Digital inputs 12…15B: Connection to base moduleC: Relay outputs not powered 11: relay 9 configurable13: relay 10 configurable12-14: sharedD13121110987654321A%RH%RH%RH%RHBC262524232221201918171615Exp 405RHexpansion moduleconnections (type2)Exp 405 RH expansion module (type 2)A: Screw connectors 1: common <strong>for</strong> ID12…ID152…5: Digital inputs ID12…ID156-7: AI7 if configured as digital input6-8: AI7 if configured as 4-20mA input10-11: AI8 if configured as digital input10-12: AI8 if configured as 4-20mA inputB: Connection to base moduleC: Relay outputs not powered 15: relay 9 configurable16: relay 10 configurable17: common relays 15-1618-19-20: relay 11 SPDT* configurable21-22-23: relay 12 SPDT* configurable24-25-26: relay 13 SPDT* configurableD: Jumper function if Jumper J1 inserted: input AI7 = 4-20mA<strong>ERT</strong> <strong>400</strong> User Manual18/104
198,365,702113,4-712,8-1183,8558,5if Jumper J1 not inserted:AI7 = Digital inputif Jumper inserted: input AI8 = 4-20mAif Jumper J2 not inserted:AI8 = Digital input*Single point double terminalFRONTUPThe previous diagrams refer to cards with molex connectors;The pin configuration is the same <strong>for</strong> plug-in connectors (Phoenix), the only difference being that the first row of terminalsis situated in the front part of the connector.The devices are configured according to the values of the parameters associated with the inputs and outputs.<strong>ERT</strong> <strong>400</strong> User Manual19/104
Analogue inputs4.2 Configuration of analogue inputsThere are 6 analogue inputs on the base unit (2 on the 405RH expansion module):• 3 NTC or Digital Inputs• 2 NTC or 4-20ma Inputs• 1 0-5v or digital Input• 2 4…20mA or digital InputsThe inputs can be configured as in the following table.Analogue inputs:configurationtableProbe Parameter Value 0 Value 1 Value 2 Value 3AI 1 H11 No probe NTC inputMulti-functional digital Not permittedInlet airinputAI 2 H12 No probe NTC inputAnti-freeze / TemperaturecontrolMulti-functional digitalinputNot permittedAI 3 H13 No probe NTC input condensationcircuit 1AI 4 H14 No probe NTC input externaltemperatureAI 5 H15 No probe Multi-functional digitalinputAI 6 H16 No probe NTC input condensationcircuit 24-20mA input condensationcircuit 1Multi-functional digitalinput0-5 V inputFilter differential pressure4-20mA input condensationCircuit 24-20mA externalenvironment humidityinputNot permitted0-5Vdc CO2 input4-20mA recirculated airhumidity inputAI 7exp.N11 No probe 4-20mA recirculated airhumidity inputAI 8 N12 No probe 4-20mA externalexp.environment humidityinput*(*) The jumper on the expansion module must be installed(**) The jumper on the expansion module must not be installedMulti-functional digitalinput **4-20mA CO2 input*Not permittedMulti-functional digitalinput **All parameters related to inputs configured as digital inputs.If the inputs AI3, AI6, AI7 or AI8 are defined as 4-20mA inputs, the following parameters are also significant:H17 = Pressure bottom scale value (kPa*10) <strong>for</strong> inputs AI3, AI6 if configured <strong>for</strong> condensation control (externalheat exchanger)• H21 = Pressure top scale value (% rh) <strong>for</strong> inputs AI3-6-7-8 if configured <strong>for</strong> humidity control.• H22 = Pressure top scale value (% rh) <strong>for</strong> inputs AI3-6-7-8 if configured <strong>for</strong> humidity control.If input AI5 is configured as 0-5V input (H15=2 or 3), the bottom scale value is given by:• Par H34 = Bottom scale value (measurement unit related to sensor used) <strong>for</strong> input AI5.Digital inputs4.3 Configuration of digital inputsThere are 11 voltage-free digital inputs on the base unit (4 on the expansion module).AI1-2-4-5 and 7-8 (405RH expansion module) can also be added if these are configured as digital inputs using theparameters H11-12-14-15, N11-12.Digital inputs:polarityDigital input polarity is defined by special parameters:• ID1, ID2, ID3, ID4 is defined by parameter H18,• ID5, ID6, ID7, ID8 is defined by parameter H19• ID9, ID10, ID11 is defined by parameter H20• AI1-2-4-5, if configured as multifunctional digital inputs, is defined by parameter H73• ID12,ID13,ID14,ID15 on the expansion module is defined by parameter N01• AI7-8 on the 405RH expansion module is defined by parameter N13Refer to the following tables:<strong>ERT</strong> <strong>400</strong> User Manual20/104
H18 ID1 ID2 ID3 ID4 H19 ID5 ID6 ID7 ID8 H20 ID9 ID10 ID110 0 0 0 0 0 0 0 0 0 0 0 0 01 1 0 0 0 1 1 0 0 0 1 1 0 02 0 1 0 0 2 0 1 0 0 2 0 1 03 1 1 0 0 3 1 1 0 0 3 1 1 04 0 0 1 0 4 0 0 1 0 4 0 0 15 1 0 1 0 5 1 0 1 0 5 1 0 16 0 1 1 0 6 0 1 1 0 6 0 1 17 1 1 1 0 7 1 1 1 0 7 1 1 18 0 0 0 1 8 0 0 0 1 8 0 0 09 1 0 0 1 9 1 0 0 1 9 1 0 010 0 1 0 1 10 0 1 0 1 10 0 1 011 1 1 0 1 11 1 1 0 1 11 1 1 012 0 0 1 1 12 0 0 1 1 12 0 0 113 1 0 1 1 13 1 0 1 1 13 1 0 114 0 1 1 1 14 0 1 1 1 14 0 1 115 1 1 1 1 15 1 1 1 1 15 1 1 1H73 AI1 AI2 AI4 AI5 N01 ID12 ID13 ID14 ID15 N13 AI7 AI80 0 0 0 0 0 0 0 0 0 0 0 01 1 0 0 0 1 1 0 0 0 1 1 02 0 1 0 0 2 0 1 0 0 2 0 13 1 1 0 0 3 1 1 0 0 3 1 14 0 0 1 0 4 0 0 1 05 1 0 1 0 5 1 0 1 06 0 1 1 0 6 0 1 1 07 1 1 1 0 7 1 1 1 08 0 0 0 1 8 0 0 0 19 1 0 0 1 9 1 0 0 110 0 1 0 1 10 0 1 0 111 1 1 0 1 11 1 1 0 112 0 0 1 1 12 0 0 1 113 1 0 1 1 13 1 0 1 114 0 1 1 1 14 0 1 1 115 1 1 1 1 15 1 1 1 10= Active with closed contact1= Active with open contact1- If all inputs must be active with open contact, set H18=H19=H202- Inputs on base unit active with closed contact. All inputs <strong>for</strong> expansion module active with open contacts (useful whendetermining accident disconnection of the expansion module)The digital inputs per<strong>for</strong>m the functions described below by setting the parameters from H23 to H33 and from N02 - N05(expansion). Parameters H74…H77, N14-N15 (analogue inputs configured as digital inputs).Digital inputs:settingParameter value Description0 Disabled input1 Internal fan protection low criticality2 Remote OFF3 Remote Heat/Cool4 <strong>Therm</strong>al switch of compressor 15 <strong>Therm</strong>al switch of compressor 26 <strong>Therm</strong>al switch of compressor 37 <strong>Therm</strong>al switch of compressor 48 <strong>Therm</strong>al switch of external fans (condensation) circuit 19 <strong>Therm</strong>al switch of external fans (condensation) circuit 210 High pressure circuit 111 High pressure circuit 212 Low pressure circuit 113 Low pressure circuit 214 End of defrosting circuit 115 End of defrosting circuit 216 Window input (economy set point )17 Fire/smoke alarm18 Damper <strong>for</strong>ced open19 Humidifier alarm20 <strong>Therm</strong>al switch of electric heaters 1 and 221 <strong>Therm</strong>al switch of electric heaters 3 and 422 Request 1 cooling step23 Request 1 heating step24 Request 2 step25 Internal fan protection high criticalityIf several inputs are configured with the same value, the functions associated with the input per<strong>for</strong>m a logical OR betweenthe inputs<strong>ERT</strong> <strong>400</strong> User Manual21/104
A digital input configured as below sets off an alarm:1 internal fan protection low criticality – immediate intervention and configurable reset4…7 thermal switch of compressor – immediate intervention and configurable reset8…9 external fan thermal switch (condensation) on circuit – configurable reset10…11 high pressure on circuit – manual reset12…13 low pressure on circuit – immediate intervention and configurable reset17 Fire/smoke alarm – automatic reset19 humidifier alarm – automatic reset20…21 thermal switch of electric heaters – manual reset25 internal fan protection high criticality – manual resetThe digital input configured as remote 2 – OFF also activates an alarm according to parameter A32For further details, refer to the Diagnostic sectionEKF<strong>400</strong> RT: DigitalInputsThe keyboard has 2 digital inputs (terminals) that are not configurable <strong>for</strong> remote control:• IDR1 : Night Purging• IDR2 : ECOIt operates as indicated in the table below:IDR2 OPENIDR2 CLOSEDIDR1 OPEN Activates selection from keyboard EconomyIDR1 CLOSED Night Purging Remote OFFThe digital inputs have priority over the keyboard except in OFF status when the conditioner is switched off irrespective ofthe state of the inputs.If moving the slide switches causes several configuration digital inputs to close (e.g. both cool and heat modes are active),the device does not effect a change-over.This is to prevent undefined states.The control is fitted with jumpers that select if the control probe is on the base unit or the remote keyboard.Power outputs4.4 Power output configurationThe base module has 8 power outputs (relays) of which 6 are fully configurable:• NO1 - compressor 1. 5 A resistive (125/230VAC)(¼ HP 230VAC, 1/8 HP 125VAC);• NO2 - configurable, 5 A resistive (125/230VAC)(¼ HP 230VAC, 1/8 HP 125VAC);• NO3 - configurable, 5 A resistive (125/230VAC)(¼ HP 230VAC, 1/8 HP 125VAC);• NO4 - configurable, 5 A resistive (125/230VAC)(¼ HP 230VAC, 1/8 HP 125VAC);• NO5 - configurable, 5 A resistive (125/230VAC)(¼ HP 230VAC, 1/8 HP 125VAC);• NO6 - configurable, 5 A resistive (125/230VAC)(¼ HP 230VAC, 1/8 HP 125VAC);• NO7 - configurable, 5 A resistive (125/230VAC)(¼ HP 230VAC, 1/8 HP 125VAC);• NO8 – cumulative alarm, 5 A 125VAC/230VAC Res; ¼ HP 230VAC, 1/8 HP 125VAC;• NO9 - configurable, 5 A resistive (125/230VAC)(¼ HP 230VAC, 1/8 HP 125VAC);• NO10 - configurable, 5 A resistive (125/230VAC)(¼ HP 230VAC, 1/8 HP 125VAC);• NO11 - configurable, 8 A resistive (125/230VAC)(¼ HP 230VAC, 1/8 HP 125VAC) (Exp 405RH expansion module);• NO12 - configurable, 8 A resistive (125/230VAC)(¼ HP 230VAC, 1/8 HP 125VAC) (Exp 405RH expansionmodule);• NO13 - configurable, 8 A resistive (125/230VAC)(¼ HP 230VAC, 1/8 HP 125VAC); (Exp 405RH expansionmodule);The outputs NO2…NO7 can be configured with the parameters H35 … H40 with values assigned as indicated below:Value Description0 Disabled1 Reverse valve circuit 12 Reverse valve circuit 23 Condenser fan circuit 14 Condenser fan circuit 25 Hot water pump6 Evaporator fan7 Power step 28 Power step 39 Power step 410 Humidifier11 Heater step 112 Heater step 2<strong>ERT</strong> <strong>400</strong> User Manual22/104
13 Heater step 314 Heater step 415 Damper16 Defrost relayPolarity of relaysThe polarity of outputs NO2 … NO5 can be configured with the parameters H41 … H45, the polarity of output NO8 canbe configured with the parameter H45:• 0= relay on <strong>for</strong> active output• 1= relay off <strong>for</strong> active outputThe other relays have relay on polarity if the output is activeOutputs onexpansion boardsThe power outputs on the expansion boards can be configured with the parameters N06, N07, N08* … N10* (* <strong>for</strong> Exp405RH expansion module) in the same way as above.The outputs on the expansion boards have relay on polarity if the output is activeIf several outputs are configured with the same resource, the outputs will be activated in parallel.The maximum load on the different outputs at the same time MUST NOT exceed 8ALow voltageoutputs4.5 Low voltage output configurationThe base module has 5 low voltage outputs:• TC1 - PWM output <strong>for</strong> external module – fan control on first circuit.• TC2 - PWM output <strong>for</strong> external module – fan control on second circuit.• AN1 - 0-10Vdc output fan control on first circuit• AN2 - 0-10Vdc output fan control <strong>for</strong> second circuit/hot water valve• AN3 – 0-10 Vdc output <strong>for</strong> damper control (freecooling)Although outputs AN1 and AN2 have separate connections, they can be used instead of TC1 and TC2 and are selected bymeans of parameters H46 and H47Configuration offan outputs.Value0 1 2H46 PWM output circuit 1 0-10Vdc output fan 1 Not permittedH47 PWM output circuit 2 0-10Vdc output fan 2 0-10Vdc output hot water valve<strong>ERT</strong> <strong>400</strong> User Manual23/104
368,5188,30228,350-1354,2181,3283,1301,10270,90-1268,7293,84.6 Remote keyboard outputThe base unit has an asynchronous serial output that enables it to be connected to the remote keyboard:• 12 Vdc• 2<strong>400</strong> baud• parity: EVEN• 8 data bits• 1 stop bitPlease refer to the connection diagram below:REMOTE KEYBOARD (PANEL)EKF<strong>400</strong>-RTREMOTE KEYBOARD (WALL)EKW<strong>400</strong>-RT/S / EKP<strong>400</strong>-RT1 2 31 2 31 3CONN ACONN B- S +C1 2 3AB4.7 Serial outputThe base unit has an asynchronous serial output that enables it to be connected to a Personal Computer or Copy CardFor connection to a PC, a special interface module (RS232-TTL) is necessaryA PC or Copy Card is connected by a 5-way TTL cable (30 cm) as shown in the diagram below:DCEARS232-TTLconverterBA: Copy Card deviceE: Connection by TTL cableB: interface module RS232-TTLC: serial output D: base module<strong>ERT</strong> <strong>400</strong> User Manual24/104
4.7.1 Copy Card deviceData is downloaded and uploaded as follows.UPLOAD (data copied from UNIT to COPY CARD)Programming parameters are uploaded to the Copy Card.This operation can be per<strong>for</strong>med as described below.• Insert the Copy Card when the unit is on• Go to menu PSS• The message - - - is displayed.• Enter the password that corresponds to the value of parameter H70• Press both keys <strong>for</strong> a few minutes until PSS reappears on the display• Disconnect the Copy CardThe Copy Card is <strong>for</strong>matted be<strong>for</strong>e the UPLOAD.This operation deletes all the data on the Copy Card.This operation is irreversible.DOWNLOAD (data copied from a COPY CARD to a UNIT)Programming parameters are loaded into the unit.This operation can be per<strong>for</strong>med as described below.• Insert the Copy Card when the unit is off.• Turn the unit on.• Occ is displayed when uploading is completed.• Err is displayed if the copy operation fails.• Turn the unit off.• Disconnect the Copy Card• Turn the unit on.4.8 Units of measurementParameter H66 can be used to display the temperature in °C or °F:Units ofmeasurement:selectionUnit ofH66measurement0 °C degrees1 °F degreesRemember the relationship between the two units of measurement: °F = °C x 9/5 + 32<strong>ERT</strong> <strong>400</strong> User Manual25/104
226,65294,950299,259-1212,152885 USER INTERFACEThe user interface consists of keyboards that can be connected to the unit: each type of keyboard provides differentcontrols and functions.Three types of keyboard can be connected:• EKF<strong>400</strong>-RT (‘simplified’ wall mounted)• EKW<strong>400</strong>-RT/S (wall mounted)• EKP<strong>400</strong>-RT (recessed/panel)Up to 2 of the above keyboards can be connected to the same unit as described in paragraph 6.5.<strong>ERT</strong> <strong>400</strong> can also be used without a keyboard and the parameters are checked by interfacing with a PC or are downloadedfrom a Copy Card.The EKF EKW keyboards have an internal sensor that can be used instead of input A11 <strong>for</strong> temperature control. If this isthe case, the following conditions must be complied with:1) EKP - H80=0 always; regulation only on AI12) EKF - H80=0 indifferent (parameters are not accessible)• Jumper closed, regulation on EKF probe• Jumper open, regulation only on AI13) EKW• H80=0 regulation on AI1• H80=1 regulation on EKW probe4) EKP+EKW-H80=0 always; regulation only on AI15) EKP+EKF-H80=0 always; regulation only on AI16) EKW+EKF:• EKF jumper closed; H80 indifferent regulation on EKF probe• EKF jumper open; H80=1 regulation on EKW probe• EKF jumper open; H80=0 regulation on AI1 (base unit probe)5.1 EKF<strong>400</strong>-RT keyboardA: MACHINE STATE D: KNOBB: OPERATING MODE E: STATUS LEDC: DAMPER MODEThe switch is used to set the unit to one of 4 possible states:• 1: ON• 0: Standby<strong>ERT</strong> <strong>400</strong> User Manual26/104
28,3• : Economy mode• : Night PurgingThe switch can be used to set the unit to one of 4 possible operating modes:• : Fan• : Cool• : Heat• : AutoThe slide control is used to control the way the damper is opened:• : automatically controlled by unit• : damper <strong>for</strong>ced openThe state can also be set using the digital input; digital inputs on the EKF are called IDR1, IDR2Refer to the table below:IDR1 IDR2 STATEOPEN OPEN “STATUS” SELECTOR SET FOR “NIGHT”OR “ECO”OPEN CLOSED “ECO”CLOSED OPEN “NIGHT”CLOSED CLOSED “OFF”• If the “ECO” and “NIGHT” states are <strong>for</strong>ced, the machine can still be switched off using the status selector• The “ECO” state can also be activated using the digital input (on base or expansion module) with correspondingparameter =16• The “Damper <strong>for</strong>ced open” state can also be activated using the digital input (on base or expansion module)with corresponding parameter =18• The “OFF” state can also be activated using the digital input (on base or expansion module) with correspondingparameter =2<strong>ERT</strong> <strong>400</strong> User Manual27/104
56,6533,91251-16,95-14226,556,722,4156,6525,55125156,6548,11251-24,05-14256,6546,751251-23,35-14256,6589,11251-44,55-14281,75254,95107,150285,050-1240,45100,3Status LED:This LED indicates if the temperature has been reached:• GREEN: control resources ON• not lit: control resources OFFThis LED indicates the operating mode:• GREEN: cooling mode• RED: heating mode• NOT LIT: standbyThis LED indicates the state of the evaporation fan:• NOT LIT: fan OFF• GREEN: fan operating correctly• GREEN BLINKING: dirty filters• RED BLINKING: clogged filters• RED: alarm condition – one or more of the alarms specified in the diagnostic chapter are presentThe conditions are only indicated if the filter differential pressure analogue input is enabled andthe correct alarm parameters have been setTHERMOSTATThe knob is used to set a deviation from the set point (according to the heat / cool mode in use);the deviation is algebraically added to the active set point; the maximum value (from halfway point to each of the limitswitches) is factory-set (+/- 5°C)5.2 EKP<strong>400</strong>-RT keyboardA: COMPRESSOR LED C: MODE LED (heat/cool)B: RESISTANCE/BOILER LED D:SET BUTTONSmode5.2.1 ButtonsOnly selects the operating mode if H49= 0 and no EKF<strong>400</strong> RT keyboard is connected. If the heat mode is activated (H48=0), each time you press the button the following sequence appears:• Stand-by ! cool ! heat ! stand-byIf the heat mode is not activated ( H48=1)• Stand-by ! cool ! stand-byIn Menu mode, the button becomes the SCROLL UP or UP (value increase) button.setIt resets the alarms and changes the set point.Press the button once to reset all inactive alarms that can be reset manually.If the button is pressed <strong>for</strong> 2 seconds, the unit displays the set point of the set mode. The value can be changed bypressing the UP or DOWN buttons. The value is saved by pressing the two buttons or when timed out.modeIn Menu mode it displays the next label or decreases the displayed value (depending on context)Buttons pressed simultaneously. If you press both buttons simultaneously and release them after 2 seconds, you go downone level in the display menu. To move up one level, press both buttons simultaneously <strong>for</strong> more than 2 seconds.If the last level of a menu is displayed, press the button and release it within two seconds to go up one level.set<strong>ERT</strong> <strong>400</strong> User Manual28/104
IMG INFOIMG INFO42,4538,751IMG INFO5.2.2 DisplaysThe unit displays in<strong>for</strong>mation on its status, configuration and alarms on the display and the LEDs on the front panel.5.2.3 DisplayIn Normal mode, the unit displays:• The control temperature, in tenths of Celsius degrees with a decimal point or in Fahrenheit with no decimal point.• The alarm code, if at least one is activated. If several alarms are active, the unit displays the first alarm listed in theAlarm Table.• If temperature control is not based on the analogue inputs and is linked to the status of a digital input (AI1 or AI2configured as digital inputs), the “On” or “Off” label will be displayed, depending on whether temperature control isactive or not.• In Menu mode, what the unit displays depends on its position. Special labels and codes are used to help users identifythe function set.• Decimal point: when the operating hours are displayed, it indicates that the value must be multiplied x 100.345.2.4 LEDCompressor 1 LED.• ON if compressor 1 is active• OFF if compressor 1 is inactive• BLINKING at a rate of 1Hz (1 blink per second) if safety timing is in progress• BLINKING slowly if compressor is defrostingCompressor 2 LED (or capacity step)• ON if compressor (capacity step) is active• OFF if compressor (capacity step) is inactive• BLINKING at a rate of 1Hz (1 blink per second) if safety timing is in progress• BLINKING slowly if compressor is defrostingCompressor 2 LED (or capacity step)• ON if compressor (capacity step) is active• OFF if compressor (capacity step) is inactive• BLINKING at a rate of 1Hz (1 blink per second) if safety timing is in progress• BLINKING slowly if compressor is defrostingCompressor 2 LED (or capacity step)• ON if compressor (capacity step) is on• OFF if compressor (capacity step) is off• BLINKING at a rate of 1Hz (1 blink per second) if safety timing is in progress• BLINKING slowly if compressor is defrostingResistance/Boiler LED• ON if the internal anti-freeze electric heater or the boiler are on• OFF if the internal anti-freeze electric heater or the boiler are offHeating LED• ON if the unit is in Heating mode.Cooling LED• ON if the controller is in Cooling modeIf HEAT or COOL LEDs are not lit, the controller is in STANDBY mode.<strong>ERT</strong> <strong>400</strong> User Manual29/104
5.3 EKW<strong>400</strong>-RT/S keyboardThis is the same version as the EKP<strong>400</strong> RT keyboard <strong>for</strong> wall mounting.x100The displays, buttons and functions are identical but the UP and DOWN buttons (value increase and decrease) areseparated by MODE and ON/OFF buttons.The temperature sensor is always present on this keyboard5.4 Programming of parameters – Menu levelsUnit parameters can be changed using a Personal Computer (with special software, interface module and suitable cables)or a keyboard.If a keyboard is used, the parameters can be accessed through a hierarchy of levels by simultaneously pressing the “Mode”and “On-off” buttons (as described above).Each menu level is identified by a mnemonic code on the display.<strong>ERT</strong> <strong>400</strong> User Manual30/104
Menu structureIt is structured as shown in the following diagram:Livello 0 Livello 1 Livello 2 Livello 3Livello 4Sonda regolazioneAllarme attivoSet point SEtLabel set cooling CooValore set coolingLabel set heating HEAValore set heatingIngressi analogici tPCodice ingresso t01...t06Valore ingresso analogicoAllarmi ErrCodice allarmi attivi E00Ingressi digitali idCodice ingresso i01-i11Stato ingresso digitaleParametri PArParametro configurazione CnFIndice parametro H01...Valore parametroParametro allarmi ALLIndice parametro A01...Valore parametroParametro compressore CPIndice parametro C01...Valore parametroParametro regolazione rEIndice parametro b01...Valore parametroParametro ventilazione FAnIndice parametro F01...Valore parametroParametro pompa PUPIndice parametro P01...Valore parametroParametro antigelo FroIndice parametro r01...Valore parametroParametro sbrinamento dFrIndice parametro d01... Valore parametroParametro espansione ESPIndice parametro n01...Valore parametroParametro freecooling FrCIndice parametro L01...Valore parametroPassword PSSValore passwordOre funzioamento 0HrOre compressore 0H1-0H4Numero oreOre pompe 0HPNumero ore671 2<strong>ERT</strong> <strong>400</strong> User Manual31/104
<strong>ERT</strong> <strong>400</strong> User Manual32/104
5.4.1 Visibility of parameters and submenusBy using a PC, an interface key (Copy card), suitable cables and the “Param Manager” software, you can prevent specificparameters and entire submenus from being displayed or changed.Each parameter can be associated to a "visibility value" as described below.LabelValueDescription0003 The parameter or label is always visible0258 The parameter or label is visible if the user password has been enteredcorrectly (password = H69).0770 The parameter or label is visible if the user password has been enteredcorrectly (password = H69). The parameter cannot be changed.0768 The parameter can be only displayed using a PCVisibility of some parameters or labels is already preset.For further in<strong>for</strong>mation, see the instructions related to "Param. Manager".<strong>ERT</strong> <strong>400</strong> User Manual33/104
6 SYSTEM CONFIGURATIONThis chapter explains how to configure the parameters of the different loads according to the type of plant that has to becontrolled.6.1 Compressors<strong>ERT</strong> <strong>400</strong> is able to control plants with a maximum of two cooling circuits and 1 to 4 compressors.Each compressor is energized by a device relay (power outputs).Each capacity step requires an additional output.The first compressor must be connected to output NO1; the other outputs (NO2…NO7) (NO9…NO13 on the expansionmodule) can be freely assigned by setting the values of parameters H35 …. H40 ( N06 … N010 if the expansion module ispresent).The compressors are turned on and off according to the measured temperatures and the temperature control functions set(see chapter <strong>Control</strong> of Compressors – Temperature <strong>Control</strong>ler).A compressor is turned off if:• no relay is associated with the compressor• A compressor shut-down alarm has been generated (refer to alarm table)• safety timing is in progress• the delay between pump on and compressor on is in progress• there is a delayed start up between two compressors• pre-ventilation is in Cooling mode• <strong>ERT</strong> <strong>400</strong> is on stand-by or off• the control probe is not on the base unit (AI1) or the EKF<strong>400</strong>RT keyboard.6.2 Configuration of compressorsPower stepsTurning on another compressor (or capacity step) is considered a power step.It is very important to identify the index of the active compressor so that the digital inputs connected to thecompressor alarms can be set correctly. For example, by setting a unit with 2 circuits and one compressor percircuit (see table below) compressors 1 and 3 are enabled; if the digital input of the thermal switch of compressor2 is activated and connected to the compressor on the second circuit (compressor 3), even if the alarm isdisplayed, the compressor is not turned off since the compressor index is not 2.The capacity steps are turned off if the compressor to which they are related is in alarm mode.The LEDs of the activated compressors refer to the step index.Compressors without capacity steps ( H07=0) can be configured as follows:Compressorswithout capacitystepsNumber of compressors per circuit1 ( H06=1) 2 ( H06=2)Number of circuits1 ( H05=1) NO1=Comp.1 circ.1 (alarm index 1)2 ( H05=2)NO1=Comp.1 circ.1 (alarm index 1)Step3= Comp.1 circ.2 (alarm index 3)NO1=Comp.1 circ.1 (alarm index 1)Step2 = Comp.2 circ.1 (alarm index 2)NO1=Comp.1 circ.1 (alarm index 1)Step2 = Comp.2 circ.1 (alarm index 2)Step3= Comp.3 circ.2 (alarm index 3)Step4 = Comp.4 circ.2 (alarm index 4)Number of compressors per circuit3 ( H06=3) 4 ( H06=4)Number of circuits1 ( H05=1)NO1=Comp.1 circ.1 (alarm index 1)Step2 = Comp.2 circ.1 (alarm index 2)Step3= Comp.3 circ.1 (alarm index 3)NO1=comp. 1 circ.1 (alarm index 1)Step2 = Comp.2 circ.1 (alarm index 2)Step3= Comp.3 circ.1 (alarm index 3)Step4= Comp.4 circ.1 (alarm index 4)2 ( H05=2) Configuration error Configuration error<strong>ERT</strong> <strong>400</strong> User Manual34/104
Compressors with 1 capacity step ( H07=1) can be configured as follows:Compressors with1 capacity stepNumber of compressors per circuit1 ( H06=1) 2 ( H06=2)Number of circuits1 ( H05=1)2 ( H05=2)NO1=Comp.1 circ.1 (alarm index 1)Step2 = Capacity step 1 comp.1 circ.1NO1=Comp.1 circ.1 (alarm index 1)Step2 = Capacity step 1 comp.1 circ.1Step3= Comp.1 circ.2 (alarm index 3)Step4 = Capacity step 1 comp.3 circ.2NO1=Comp.1 circ.1 (alarm index 1)Step2 = Capacity step 1 comp.1 circ.1Step3 = Comp.2 circ.1 (alarm index 2)Step4 = Capacity step 1 comp.2 circ.1Configuration errorCompressors with 2 or 3 capacity steps ( H07=2 or H07= 3) can be configured as follows:Compressors with2 or 3 capacitystepsNumber of circuits1 ( H05=1)2 capacity steps per compressor1 ( H06=1 and H07=2)NO1=Comp.1 circ.1 (alarm index 1)Step2 = Capacity step 1 comp.1 circ.1Step4 = Capacity step 2 comp.1 circ.1Number of compressors per circuit3 capacity steps per compressor2 ( H06=2 and H07=3)NO1=Comp.1 circ.1 (alarm index 1)Step2 = Capacity step 1 comp.1 circ.1Step3 = Capacity step 2 comp.1 circ.1Step4 = Capacity step 3 comp.1 circ.12 ( H05=2) Configuration error Configuration errorIf 2 circuits and 2 compressors are set per circuit a special combination of “unbalanced” compressors can be configuredwith 2 compressors in the first circuit and 1 in the second.This configuration is activated by setting H79= 1.UnbalancedcircuitsNumber of compressors per circuit2 compressors per circuitH06=2Numberofcircuits2 ( H05=2)NO1=Comp.1 circ.1 (alarm index 1)Step2 = Comp.2 circ.1 (alarm index 2)Step3= Comp.1 circ.2 (alarm index 3)6.2.1 Compressor start/shutdown sequence (or power step)Depending on the temperature conditions detected by the probes, the temperature control functions on the “<strong>ERT</strong> <strong>400</strong>”device may require the activation or de-activation of the compressors/capacity steps (of the power steps).The sequence with which compressors/capacity steps (steps) are activated/de-activated can be determined by using thecorresponding H08 and H09 parameter values as explained below.Parameter valuePar. Description 0 1H08 Step start-up sequence Depending on operating hours Fixed start-up sequenceH09 Circuit balancing Circuit saturation Circuit balancingA start sequence that varies according to the operating hours means that if 2 compressors are available, the one with feweroperating hours is turned on first whereas the one with more operating hours is turned off first. In a fixed start-upsequence, the first compressor to be turned on is the one with the lower index (compressor 1 is turned on be<strong>for</strong>ecompressor 2) whereas the first compressor to be turned off is the one with the higher index.The circuit balancing parameter is only significant if there are 2 circuits and 2 steps per circuit. If H09=0 is selected, all thepower steps on one circuit are turned on followed by those of the other circuit. When H09=1 (balancing), the power stepsare turned on so that both circuits supply the same amount of power or that the maximum difference is equivalent to onestep.The different combinations are described in detail below :<strong>ERT</strong> <strong>400</strong> User Manual35/104
Compressors:start-up based onoperating hoursand saturation ofcircuitsH08=0 H09=0EXAMPLE 1 COMPRESSOR WITH ONE CAPACITY STEPPER CIRCUITThe first compressor to be turned on is the one with thelowest number of operating hours followed by the capacitystep linked to the circuit, the compressor of the othercircuit and finally the capacity step of this circuit. The firstitem to be shut down is the compressor capacity step withthe highest number of operating hours followed by therelated compressor, the capacity step of the othercompressor and finally the last compressor.Example:Let's imagine that the system is configured as follows:NO1=Compressor 1 circuit 1Step2 = Capacity step of compressor 1Step3 = Compressor 3 circuit 2Step4 = Capacity step of compressor 3Ifhours comp.1 > hours comp.3the start-up sequence is:Step3!Step4!NO1!Step2The shutdown sequence is:Step2!NO1!Step4!Step3EXAMPLE 2 COMPRESSORS PER CIRCUITIf all the compressors are off, the first item to be turned onis the circuit that has the lowest number of averageoperating hours. In this circuit, the first compressor to bestarted is the one with the lowest number of operatinghours followed by the other compressor in the same circuit:this saturates the circuit. The next step is selected from thetwo compressors on the other circuit with less hours.Example:Let's imagine that the system is configured as follows:NO1=Compressor 1 circuit 1Step2 = Compressor 2 Circuit 1Step3 = Compressor 3 circuit 2Step4 = Compressor 4 Circuit 2IfHours of comp. 1 > Hours of comp. 2Hours of comp. 4 > Hours of comp. 3(hours comp.1 + hours comp.2)/2>(hours comp.4 +hours comp.3)/2the start-up sequence is:Step3!Step4!Step2!NO1The shutdown sequence is:NO1!Step2!Step4!Step3Compressors:start-up based onoperating hoursand balancing ofcircuitsH08=0 and H09=1EXAMPLE 1 COMPRESSOR WITH ONE CAPACITY STEPEXAMPLE 2 COMPRESSORS PER CIRCUITPER CIRCUITThe first compressor to be turned on is the one with feweroperating hours followed by the compressor on the othercircuit, the capacity step on the first circuit and theremaining capacity step. The first item to be shut down isthe compressor capacity step with less operating hoursfollowed by the other compressor, the compressor withmore operating hours and finally the remaining compressor.Example:Let's imagine that the system is configured as follows:NO1=Compressor 1 circuit 1Step2 = Capacity step of compressor 1Step3 = Compressor 3 circuit 2Step4 = Capacity step of compressor 3Ifhours comp.1 > hours comp.3the start-up sequence isStep3!NO1!Step4!Step2The shutdown sequence isStep2!Step4!NO1!Step3If all the compressors are off, the first item to be turned onis the circuit that has the lowest average operating hours.The average is calculated as the ratio between the totalhours of compressors available and the number ofcompressors on the circuit. In this circuit, the firstcompressor to be started is the one with fewer operatinghours followed by the compressor on the other circuit withfewest hours, the compressor on the first circuit and finallythe last compressor.Example:Let's imagine that the system is configured as follows:NO1=Compressor 1 circuit 1Step2 = Compressor 2 Circuit 1Step3 = Compressor 3 circuit 2Step4 = Compressor 4 Circuit 2Ifhours of comp. 1 > hours of comp. 2hours of comp. 4 > hours of comp. 3(hours comp.1 + hours comp.2)/2>(hours comp.4 +hours comp.3)/2the start-up sequence isStep3!Step2!Step4!NO1The shutdown sequence isNO1!Step4!Step2!Step3Compressors: fixedstart-up sequenceand saturation ofcircuitsH08=1 and H09=0EXAMPLE 1 COMPRESSOR WITH ONE CAPACITY STEPEXAMPLE 2 COMPRESSORS PER CIRCUITPER CIRCUITThe first compressor to be turned on is the one with the As above.lowest index, followed by the capacity step, the compressoron the other circuit and its capacity step. The first item tobe shut down is the capacity step of the compressor withthe highest index, followed by the compressor, the capacitystep on the other compressor and the last compressor.Example:Let's imagine that the system is configured as follows:NO1=Compressor 1 circuit 1Step2 = Capacity step of compressor 1Step3 = Compressor 3 circuit 2Step4 = Capacity step of compressor 3the start-up sequence isNO1!Step2!Step3!Step4The shutdown sequence isStep4!Step3!Step2!NO1<strong>ERT</strong> <strong>400</strong> User Manual36/104
Compressors: fixedstart-up sequenceand balancing ofcircuitsH08=1 and H09=1EXAMPLE 1 COMPRESSOR WITH ONE CAPACITY STEPEXAMPLE 2 COMPRESSORS PER CIRCUITPER CIRCUITThe first compressor to be turned on is the one with the As above.lowest index, followed by the compressor on the othercircuit, the capacity step on the first circuit and the capacitystep on the second one. The sequence is reversed duringshutdown.Example:Let's imagine that the system is configured as follows:NO1=Compressor 1 circuit 1Step2 = Capacity step of compressor 1Step3 = Compressor 3 circuit 2Step4 = Capacity step of compressor 3the start-up sequence isNO1!Step3!Step2!Step4The shutdown sequence isStep4!Step2!Step3!NO1If the compressor with the lowest index is not available in the fixed start-up sequence, the first compressor to be turnedon is the one with the highest index.If the compressor becomes available and the power requested is equal to the power supplied, the unit remains in the lastoperating status: the compressor with the highest index is not turned off to enable the one with the lowest index.If a compressor is shut down by an alarm or is counting safety timing, it is not available and is there<strong>for</strong>e bypassedby the selection algorithm.Safety timingOn/off timingOn/on timingOff-on and on-onsequence 1 comp.6.2.2 Compressor timingThe compressor start and stop operations should be compliant with the safety times set by the user using the parametersdescribed below.The interval between the start and stop of a compressor must be compliant with the safety interval controlled byparameter C01 (safety time of compressor start/stop);This interval of time also applies to the start up of “<strong>ERT</strong> <strong>400</strong>”.The interval between a start operation and the next must be compliant with the safety interval controlled by parameterC02 (safety time of compressor start/stop)COMPRONOFFC02C01TimeCOMPR: CompressorTime: TimeOn-on and off-offtiming 2 comp.If the machine has several power steps, the interval of time between 2 compressor starts ( C03) and stops ( C04) is alsoobserved. Time C05 (delay of capacity step start-up) is always observed between the start of a compressor or capacity stepand the shut-down of another compressor or capacity step on the machine. The maximum safety time among all thoseavailable is always observed. The stop time between compressors is not observed if a compressor shut-down alarm isgenerated. In this case, the compressor is shut down immediately.<strong>ERT</strong> <strong>400</strong> User Manual37/104
On-on and off-off2 comp sequence.COMPR1ONOFFCOMPR2ONTimeOFFC03C04TimeCOMPR1: Compressor 1COMPR2: Compressor 2Time: TimeDuring defrosting only the d14 time is observed and the other timing signals are ignored. This safety timing is activebetween the compressors, between the capacity steps and between the compressors and capacity steps.6.3 Condensation fanThis involves the fan unit located outside near the heat exchanger that normally serves as a condenser. Obviously, in heatpump operating mode, the heat exchanger operates as an evaporator.The “<strong>ERT</strong> <strong>400</strong>” has 3 connection/configuration modes <strong>for</strong> the condensation fans:Mode Output Characteristics DescriptionTC Low voltage outputs <strong>Control</strong> signal <strong>for</strong> CF modules (500w, Connection to CF modules1500w, 2200w)StandardcommandLow voltage outputs 4-20mA or 0-10V Standard command <strong>for</strong> fan control by wayof external module (inverter)* Do not exceed the maximum permitted loadThe fan will be turned off if:• a condensing fan shut-down alarm has been generated (refer to alarm table)• <strong>ERT</strong> <strong>400</strong> is on stand-by or off6.3.1 <strong>Control</strong> probesCondensation can be regulated by controlling the circuit pressure or controlling the temperature of the exchanger coil.The analogue inputs (probes) used <strong>for</strong> controlling are:• AI3 <strong>for</strong> circuit 1• AI6 <strong>for</strong> circuit 2If A13 is configured as a temperature input ( H13= 1) the condensation on circuit 1 is regulated according to thetemperature and all the regulator parameters must be considered as temperature values.If ST3 is configured as current input, condensation is regulated according to the exchanger pressure and the parametersmust be considered pressure values.The same applies <strong>for</strong> ST6 and the second circuit.6.3.2 Configuration of fanThere are two possibilities:• Module connected to a power output (TK mode) ….<strong>ERT</strong> <strong>400</strong> User Manual38/104
• Module connected to a low voltage output (TC mode or Standard Command)Fan on highvoltage outputsIf some of the relays have been configured as condensation fan outputs ( H35-H40 and N06-N010=3 or 4) they are on ifthe output of the regulator of each fan is greater than 0 and off in all other cases.Fan on low voltageoutputsThe type of analogue output that the fan control module(s) is/are connected to must first be configured correctly:the parameters used <strong>for</strong> this operation are H46 <strong>for</strong> the first circuit and H47 <strong>for</strong> the second one as show in the followingtable:Parameter value Circuit 1 – H46 Circuit 2 – H47Enables TC output <strong>for</strong> the cutting Enables TC output <strong>for</strong> the cutting0phasephaseEnables output 4-20 mA (0-10V)1 Enables output 4-20 mA (0-10V) AN1AN2The PICK-UP, PHASE SHIFT AND IMPULSE DURATION parameters are important.Pick-upEvery time the external fan is started, the exchanger fan is supplied with maximum voltage. There<strong>for</strong>e, the fan runs atmaximum speed <strong>for</strong> a time equivalent to F02 counted in tenths of seconds after which it continues at the speed set on theregulator.F02 = Fan pick-up time (in tenths of a second)Phase shiftIf defines the delay that can be used to compensate <strong>for</strong> the different electric characteristics of the fan motors:F03 = duration, in microseconds * 200, of fan phase shift.Impulse durationIt defines the duration, in microseconds * 10, of the impulse that energizes the TC outputF04= duration of triac energizing impulse6.3.3 Configuration of fan regulatorThe fan regulator can be configured to generate a proportional output (0-100%) or “ON OFF” output by setting the valuesof parameter F01:F01 = Selects the type of output on regulatorConfiguration offan: selection ofthe type of outputF01 = 0F01 = 1F01 = 2Proportional fan output (from 0 to 100% depending on parameters).Fan “on-off” output; in this mode the regulator per<strong>for</strong>ms the same calculations asthe proportional output. The only difference is that if it reads a value above 0, theregulator output becomes 100.On-off operation set by the compressor; in this mode the output is 0 if no circuitcompressor is on and 100% if at least one circuit compressor is on.If some of the relays have been configured as condensation fan outputs ( H35-H40 and N06-N010=3 or 4) they are on ifthe output of the regulator of each fan is greater than 0 and off in all other cases.Reversing valve6.4 Reversing valvesThe reversing valve can only be used with a "heat pump".<strong>ERT</strong> <strong>400</strong> can control a maximum of 2 reversing valves on plants with 2 circuits.The reversing valve on circuit 1 is only active if:• a relay (power outputs) is configured as reversing valve circuit 1 ( H35- H40 or N06 and N10= 1).The reversing valve on circuit 2 is only active if:• a relay (power outputs) is configured as reversing valve circuit 2 ( H35- H40 or N06 and N10= 2)• There are 2 circuits.Both reversing valves are active only ifthe heat pump is active ( H10=1)The reversing valve is off in Off and standby modesThe valve is OFF in cooling and ON in heating modes. In defrosting mode the valve is OFF (see relevant paragraph).<strong>ERT</strong> <strong>400</strong> User Manual39/104
If the relay (power outputs) configured as reversing valve is an output ranging between NO2 and NO5, the polarity of thevalves can be reversed with parameters H41- H44.6.5 Anti-freeze/integrated electric heaters<strong>ERT</strong> <strong>400</strong> can control up to 4 anti-freeze/integrated electric heaters.The electric heater output is only active if the relays (power outputs) are configured as electric heater 1-4 ( H35- H40 orN06- N10= 11 - 14) .Parameter r05 sets the number of electric heaters present;Refer to the summary table below:r05Electric heater1Electric heater2Electric heater3Electric heater401 X2 X X3 X X X4 X X X XIf the outputs are configured as follows, they control the activation and de-activation of the electric heaters according tothe r01 … r06 configuration parameters as described below.ConfigurationParameterr01r02r03r06DescriptionConfiguration inDefrosting modeConfiguration in CoolingmodeConfiguration inHeating modeConfiguration in OFF orSTANDBYValue0 1On only when requested by the Always on in Defrosting moderegulatorOff in Cooling modeOn in Cooling mode (depending onthe anti-freeze electric heatersregulator)Off in Heating modeOn in Heating mode (depending onthe anti-freeze electric heatersregulator)Off in OFF and STANDBY Electric heaters on in OFF andSTANDBYConfiguration ofelectric heaterprobeThe r04 parameter selects which probe the electric heaters regulate.Value of r04 parameters Description0 Electric heater off1 Regulation on AI12 Regulation on AI23 Regulation on AI4If the selected probe is missing or configured as digital input, the electric heaters are turned off.6.5.1 Electric heaters in Defrosting modeThe r01 parameter can be used to decide whether to activate the electric heaters during defrosting. All the electricalheaters will be activated in parallelr01: configuration of electrical heaters/hot water coil in defrosting• 0 = On only when requested by the antifreeze/integrated regulators• 1 = always on6.5.2 Integrated electric heatersIf r15 =1 the electric heaters act as both antifreeze and integrated electrical heaters.The paragraph on Integrated Electric heater <strong>Control</strong>ler describes how they operate6.5.3 Electric heaters in dehumidification mode<strong>ERT</strong> <strong>400</strong> can control the electric heaters in dehumidification mode;In this case, the function is enabled with parameter r16;The control set point is the cooling set point. See the diagram below:<strong>ERT</strong> <strong>400</strong> User Manual40/104
368,35298,050228,350-1354291Electric heter (EH)EH 4EH 3EH 2SET POINT COOLINGEH 1B03Temp AI1EHx: electric heater xTEMP AI1: AI1 probe temperature6.5.4 Hot water coil in Dehumidification modeThe hot water valve is enabled in dehumidification mode with r16 = 1;The control set point is the cooling set point.Analog output100%Set point cooling0%B06AI1Water pumpONOFFr18See the diagram below:Analog output: Analogue outputTEMP AI1: AI1 probe temperature<strong>ERT</strong> <strong>400</strong> User Manual41/104
Water pump: Water pump6.6 Condensation/Defrosting probes“<strong>ERT</strong> <strong>400</strong>” can control the defrosting of one or two circuits depending on plant configuration.Defrosting probesDefrosting is activated if:• it has been stated by parameter “Enable defrosting” ( d01 = 1)• the condensation probe of the first circuit is present (and connected to analogue input AI3) with parameter set asH13 = 1 (NTC probe) or H13 = 2 (4-20mA probe) and AI4 = 1• a reversing valve is presentFor plants with 2 circuits, defrosting can be carried out separately or together (on plants with one condenser), dependingon parameter F22 (type of condensation).Separate or singlecondensationF22 = 0F22 = 1separatesingleThe defrosting input and output changes according to the condensation probe values which can be configured as follows:1 circuit2 circuits2 circuitsseparate defrosting single defrosting (*)Defrosting circuit 1 AI3 AI3 MIN(AI3;AI6)Defrosting circuit 2 --- AI6 MIN(AI3;AI6)(*) If A and B are control probes, MIN(A;B) stands <strong>for</strong> the minimum value between A and B if A and B are present. Value Ais taken if B is not present. A must always be declared present.6.7 Hot water coilThe hot water coil unit consists of a 0-10Vdc modulating output and a water circulation pump.The analogue output is active if parameter H47 = 2;the integrated pump is active if one of the parameters H35- H40 and N06- N10 is set to 5 and the device is in antifreezeor heating mode.See the diagram below:set heatingonPUMPoffAI1b01r17b07 / b08SET HEATING: Heating set pointPUMP: Hot water pumpAI1: AI1 probe6.8 Evaporator fanThe fan is only active if at least one relay is configured as evaporator fan output ( H35- H40 or N06- N010= 6 ) .The fan will be turned off if• a fan shut-down alarm has been generated• it is in off mode.It is active in OFF mode if the electric heater or hot water coil regulator in antifreeze mode requires heating.Pump-fan delay atstart upIf the machine goes from OFF to ON (using the keyboard or remote input) and the conditioner is in heating mode, the fanobserves a delay in activation of the hot water pump set with parameter P01.This function prevents any cold water from freezing the water coil.If the unit is OFF and the electric heater or hot water coil regulator in antifreeze mode requires heating, the fan observes adelay in activation of the hot water pump set with parameter P01.When going from OFF to ON and when heating is necessary in integration or antifreeze mode, the hot water pump isalways activated and the fan is switched on after a period of P01.<strong>ERT</strong> <strong>400</strong> User Manual42/104
IMG INFOFan ONcompressors ONdelayThe compressors are activated with a delay in fan start up set using parameter P02When passing from ON to OFF (with keyboard or remote input) the fan is turned off with a delay set with parameter PO3after shutdown of the last compressor or electric heaterIf heating is not necessary when passing from OFF to ON, there is no delay.See the diagram below:onDEVICEoffonPUMPoffonCOMPoffonFANoffTimeP01P02P03DEVICE: <strong>ERT</strong> <strong>400</strong>PUMP: Hot water pumpCOMP: CompressorFAN: Evaporator fan6.9 Damper opening digital inputIf a digital input (digital inputs) is configured as damper input ( H23 - H33 and PaN02 - PaN05=18) with input active, thedamper is <strong>for</strong>ced to maximum opening (100%).This function has priority over everything else including alarms.This function is useful when the operator notices that air circulation in an environment is insufficient and decides to <strong>for</strong>cethe damper to maximum opening.<strong>ERT</strong> <strong>400</strong> User Manual43/104
7 TEMPERATURE CONTROL FUNCTIONSOnce the <strong>ERT</strong> <strong>400</strong> has been configured, it is ready to control the loads according to the temperatures and pressuresmeasured by the probes and the temperature control functions set using special parameters.Operating modesCoolingHeatingNightAutoStand-byDevice off (Off)There are 6 operating modes:• Cooling• Heating• Stand-by• Night• Auto• OffCooling: this is the "summer" operating mode; in this mode the unit is configured to generate cold air.Heating: this is the "winter" operating mode; in this mode the unit is configured to generate hot air.Night: this is the “night-time” operating mode; the unit controls air circulation (during night hours)Auto: this is the automatic operating mode: the unit automatically controls the heating or cooling state according to thevalues detected by the probesStand-by: in this mode the unit does not per<strong>for</strong>m temperature control functions and all the alarms remain active.Off: the unit is off.Stand-by mode can only be selected with the EKW<strong>400</strong>-RT/S or EKP<strong>400</strong>RT keyboard“Night” and “auto” modes can only be selected with the EKF<strong>400</strong> RT keyboardThe operating mode varies according to the keyboard settings and the following.Parameters:• Operating mode selection parameter ( H49)• Presence of heat pump parameter ( H10)• Heating mode disabling parameter ( H48)• Heating/cooling time parameter ( H72 )Operating mode selection parameter ( H49)• 0= Selection from keyboard• 1= Selection from digital input• 2= Automatic selection of modeIf H49 = 2 the mode setting is always automatic and cannot be set using a keyboard.In auto mode, set with a parameter (H49=2) or keyboard, there is a minimum holding time during which even if theregulator requests a change-over this is not allowed.The holding time can be set using parameter H72.The timer begins counting from when the last load shuts down because the temperature controller is satisfied.With EKF keyboardWith EKP/EKWkeyboardsThe heating mode is only enabled if the parameter H48=0. If not, with the selector on Heating, the unit is on Standby.If the parameter H49=0 the mode set on this keyboard restricts the mode on the other keyboards.The operating mode varies according to the keyboard settings and the following.Parameters:Configuration parameter <strong>for</strong> AI1 ( H11) (see Analogue inputs: configuration table)Configuration parameter <strong>for</strong> AI2 ( H12) (see Analogue inputs: configuration table)Operating mode selection parameter ( H49)Presence of heat pump parameter ( H10)Operating mode selection parameter ( H49)0= Selection from keyboard1= Selection from digital input (see Digital Inputs)Presence of heat pump parameter ( H10)0= Heat pump not present0= Heat pump presentOperating modes:configurationtableThe combination of parameters generates the following rules:Operating modeMode selection AI1 configuration AI2 configurationparameterH49parameterH11parameterH12The operating mode is selected using the 0 Not 2 Not 2keyboardThe operating mode is selected using the digital 1 Not 2 Not 2inputIf input AI1 is active, the operating mode is Any 2 Not 2<strong>ERT</strong> <strong>400</strong> User Manual44/104
Operating modeheating; otherwise it is stand-byIf input AI2 is active, the operating mode isCooling; otherwise it is stand-byIf input AI1 is active, the operating mode isheating; if AI2 is active, the operating mode isCooling; if AI1 and AI2 are both active, theoperating mode signals an error; if none of themare active, the unit is in stand-byMode selectionparameterH49AI1 configurationparameterH11Any Not 2 2Any 2 2AI2 configurationparameterH127.1.1 Auto operating modeIn automatic mode, the unit goes to heating mode if the AI1 temperature is lower than the heat set point minus theRegulation band <strong>for</strong> compressors in heating mode. It goes to cool mode if the temperature is greater than the cool setpoint plus the Regulation band <strong>for</strong> compressors in cooling modeSetpoint heatingSetpoint coolingHeatingCoolingb 02b 017.1.2 Night purging operating mode:This function can only be activated with the EKF<strong>400</strong>RT keyboard, using the slide switch or the digital input on the back.The function is enabled if:• the temperature probe H14=1 is present; if not, the unit goes into Standby mode• the temperature read by the external probe is greater than L24• L23>0; if L23=0 the unit goes directly into Standby modeIf the conditions listed above are not present:• the damper is opened to 100%• the evaporator fan is activated <strong>for</strong> a period set on L23.• all other regulators are disabled.There are three ways of deactivating the function:• with a time-out; in this case, at the end of the period L23, the unit goes into Standby mode• when the external temperature drops i.e. when the probe value AI4< L24 the function is deactivated and theunit goes into Standby mode• with a function change (ECO, ON, OFF)If the unit goes into Standby mode, it remains in this mode until the condition that activated the function disappears (thedigital input is opened or the slide switch moved)7.1.3 Economy operating modeThe economy function can be activated with the EKF<strong>400</strong> RT keyboard, using the slide switch or the digital input on theback.If the function is activated:• the L25 value is added to the cooling set point• the L25 value is subtracted from the heating set point.The function is active until the condition that activated it disappears (the digital input is opened or the slide switch moved)7.1.4 Fan operating modeThis function can only be activated with the EKF<strong>400</strong> RT keyboard, using the slide switch or the digital input on the back.If the function is activated:• the evaporator fan is switched on• the only active regulator is the economizer if it is parameter enabled (see section on economizer)The unit will stay in FAN mode until the condition that activated the function disappears (the slide switch is moved to heat,cool or auto or the digital input is closed)7.2 <strong>Control</strong> probeThe temperature controller calculates the load to be supplied through the compressors <strong>for</strong> both Heating and Coolingmodes.<strong>ERT</strong> <strong>400</strong> User Manual45/104
The control probe is:• probe ST1 connected to the base unit if H80=0 (regulation on EKW enabled)• the probe on the EKF remote keyboard if the DIP SWITCH on the EKF keyboard is closed• the probe on the EKW keyboard if the keyboard is connected, H80=1 and the dip switch on EKF is opendo not enable the probe on EKW if the EKP keyboard is installed. If this is the case, all the keyboards areperiodically reset.If the EKF remote keyboard is present the value set by the potentiometer is added to the regulation set point parameter.7.3 Digital regulation<strong>ERT</strong> <strong>400</strong> can be connected to 1 heating step + 1 cooling step or 2 heating step and 2 cooling step type digital thermostats.If this is the case, the thermostat does not in<strong>for</strong>m the <strong>ERT</strong> of the temperature probe reading but sends digital signals:• 1 st cooling step request• 2 nd cooling step request• 1 st heating step request• 2 nd heating step requestAs a result <strong>ERT</strong> <strong>400</strong> activates the resources.Digital regulation is active if• the parameter H78=1 (digital regulation enabled)• some digital inputs are configured as heating/cooling step request digital inputs ( H23- H33 N02- N05 =22-24).In heat pump operating, the electric heaters are considered steps that are less important then compressors, i.e. they areonly activated once the available compressors/capacity steps have been activatedThe hot water coil is not activated.The tables below define the activation sequence of the resources according to the state of the digital inputs:Digital regulationuser activationExample 2 compressors, heat pump present (reverse cycle)Comp1 Comp2 Electric heater 1 Electric heater1 st cooling step request X (change-over)2 nd cooling step request X X1 st heating step request X (change-over)2 nd heating step request X XExample compressors, heat pump not present or disabled (ST4< r12)Comp1 Comp2 Electric heater 1 Electric heater 21 st cooling step request X2 nd cooling step request X X1 st heating step request X (if present)2 nd heating step request X (if present) X (if present)Example with 1 compressor heat pump presentComp1 Comp2 Electric heater 1 Electric heater 21 st cooling step request X2 nd cooling step request X1 st heating step request X2 nd heating step request X X (if present)The EKF<strong>400</strong> RT keyboard is ignored.7.4 Configuring the set pointsProvided that the unit is not configured as a condensing unit, activation or de-activation of the loads varies dynamicallyaccording to the selected temperature control functions, the temperature/pressure values measured by the probes and theconfigured set points.Set pointsTwo set points are defined.Cooling set point : this is the reference set point when the unit is regulated in Cooling modeHeating set point : this is the reference set point when the device is regulated in Heating modeSet points are changed by modifying the relative parameters:• G01 cooling set point• G02 heating set pointThe set points can be changed:• from the EKW<strong>400</strong> RT/S or EKP<strong>400</strong>RT keyboards by accessing the "SET" submenu (see menu layout)• from a PC with special interfacing (hardware-software)Set points can be assigned values in a range determined by parameters H02 – H01 (Heating) and H04 – H03 (Cooling)With the EKF<strong>400</strong>RT keyboard the set points can only be modified by +-5 C° using the thermostat<strong>ERT</strong> <strong>400</strong> User Manual46/104
56,657.5 Dynamic set pointThe regulator can be used to change the set point automatically according to external conditions.This is done by adding a positive or negative value (offset) to the set point depending on the temperature of the externalprobe:This function has two purposes: to save energy or operate the machine in particularly harsh outdoor temperatures.The dynamic set point is active if:• The activation parameter is: H50 = 1• the AI4 probe (analogue inputs) is configured as external temperature input ( H14 = 3)• one of the digital inputs is configured as Window Input: in these circumstances if the input is active the maximumoffset in cooling ( H51) or heating ( H52) is added to the set pointRegulationparametersDynamic set point control parameters:H51= Max. offset in Cooling mode H52= Max. offset in Heating modeH53= External temperature set point in CoolingmodeH54= External temperature set point in HeatingmodeH55= Temperature delta in Cooling mode H56= Temperature delta in Heating modeThe interaction of these parameters is illustrated in the graphs below:Modificationbased on outdoortemperature withpositive offsetPositive offsetH53 (cooling) o H54 (heating)Delta < 0 Delta > 0 TempModificationbased on outdoortemperature withnegative offsetNegative offsetH53 (cooling) o H54 (heating)Delta < 0 Delta > 0 Temp7.6 Load controlTemp: temperatureHow to set the parameters used to control the loads according to the temperature/pressure conditions detected by theprobes is described below.7.6.1 <strong>Control</strong> of compressors – temperature controllerThe temperature controller calculates the load to be supplied through the compressors <strong>for</strong> both Heating and Coolingmodes. Temperature controller in Cooling modeTEMPERATURE CONTROLLER IN COOLING MODEIf probe AI1 (analogue inputs) is configured as an NTC inlet air input ( H11= 1), the compressor is controlled inaccordance with the ambient temperature and SET POINT.• AI1 = Temperature of inlet water or air• SET COOL= Cooling set point entered using keyboard• B01 = regulator proportional band in cooling mode<strong>ERT</strong> <strong>400</strong> User Manual47/104
PowerSET POINTSTEP 4STEP 3STEP 2STEP 1Temp AI1B01Power: power STEP 1: 1 st step STEP 2: 2 nd stepSTEP 3: 3 rd step STEP 4: 4 th step Temp AI1: AI1 probe temperatureTemperaturecontroller inHeating modeTEMPERATURE CONTROLLER IN HEATING MODEIf probe AI1 (analogue inputs) is configured as an NTC inlet air input ( H11= 1), the compressor is controlled inaccordance with the ambient temperature and SET POINT.• AI1 = temperature of inlet water or air• SET HEAT= Cooling set point entered using keyboard• B02 = regulator proportional band in heating modePowerSTEP 4STEP 3STEP 2SET POINTSTEP 1B 02Temp AI1Power: power STEP 1: 1 st step STEP 2: 2 nd stepSTEP 3: 3 rd step STEP 4: 4 th step Temp AI1: AI1 probe temperature<strong>ERT</strong> <strong>400</strong> User Manual48/104
56,65IMG INFO7.6.2 Condensation fan controlThe condensation fan control varies according to the temperature or condensation pressure of the circuit.The regulator will be on if:• at least one probe per circuit is configured as a condensation probe (pressure or temperature). Otherwise, the fan <strong>for</strong>the circuit activates and de-activates according to the circuit compressors.The fan control may be carried out independently of the compressor or every time a request is received from thecompressors.The operating mode is set with parameter F05:F05: fan output mode The fan is off if all the circuitcompressors are offValue0 1<strong>Control</strong> of condensation is carried outindependently of the compressorThe cut-off is bypassed <strong>for</strong> the amount of time (F12) calculated from compressor start-up. If the regulator requests thecut-off during this period, the fan will run at minimum speed.If parameter F05 is set to 1, the condensation control is linked to the condensation temperature or pressure, depending onhow the following parameters are set:Cooling modeCONDENSATION FAN CONTROL IN COOLING MODEF06 = Minimum fan speed in COOLING modeF07 = Maximum fan silent speed in COOLING modeF08 = Minimum fan speed temperature/pressure set point in COOLING modeF09 = Proportional band. Fan in COOLING mode.F10 = Fan cut-off deltaF11 = Cut-off hysteresisF13 = Maximum fan speed in COOLING modeF14= Maximum fan speed temperature/pressure set point in COOLING modeFan control inCooling mode:diagramAn example of interaction of these parameters is shown in the figure below:Speed (%)F13F14F07F08F06OFFF11F10F09F11Temp/PressSpeed: speedTemp: temperaturePress: pressureIf the Cooling mode is activated and F05= 0 (if the compressor is off, the fan is also off) to), parameter F21 (preventilationof external fan) is also activated. Be<strong>for</strong>e switching on the circuit compressors, the fan is operated <strong>for</strong> a period ofF21. Its ventilation speed is proportional to the condensation temperature. However, during this interval of time, if theregulator requests cut-off, the fan returns to the minimum set speed.This parameter prevents the compressor from starting at excessively high condensation speeds.Heating modeCONDENSATION FAN CONTROL IN HEATING MODEF15 = Minimum fan speed in HEATING modeF16 = Maximum silent speed of fan in HEATING modeF17 = Minimum fan speed temperature/pressure set point in HEATING modeF18 = Proportional band Fan in HEATING modeF10 = Fan cut-off deltaF11 = Cut-off hysteresis<strong>ERT</strong> <strong>400</strong> User Manual49/104
IMG INFOF19 = Maximum fan speed in HEATING modeF20 = Maximum fan speed temperature/pressure set point in HEATING modeAn example of interaction of these parameters is shown in the figure below:Fan control inHeating mode:diagramSpeed (%)F19F20F16F17F15OFFF11F18F10F11Temp/PressSpeed: speedTemp: temperaturePress: pressureIf the circuit is in Defrosting mode and the condensation pressure is below (F23- F24), the fan is switched OFF. If thepressure is above F23, it is switched ON. In the coil drainage phase, when parameter d07 is not 0, the fans run at themaximum speed in order to quickly disperse the water from the coil.The cut-off is bypassed <strong>for</strong> a period of time (F12) calculated from compressor start-up.If the regulator requests a cut-off during this interval of time, the fan runs at minimum speed.The fan will always be turned off if:a condensing fan shut-down alarm has been generated (refer to alarm table).<strong>ERT</strong> <strong>400</strong> is on stand-by or off7.6.3 Single or separate condensationParameter F22 can be used to configure the units with 2 circuits and a single condenser.Value0 1F22: type of condensation separate condensers single condensationIf F22 = 0, the two fans operate independently and are regulated by the condensation pressure/temperature and the statusof the circuit compressors.If F22= 1, the outputs of the 2 fans are in parallel and regulation is effected on:• the maximum value between the condensation probes of the circuits in Cooling mode• the minimum value between the condensation probes of the circuits in Cooling mode7.6.4 <strong>Control</strong> of anti-freeze electrical heaters<strong>ERT</strong> <strong>400</strong> can control 4 anti-freeze electric heaters;The electric heaters serve two purposes – they prevent ice from <strong>for</strong>ming (in the exchangers and the environment) and actas regulators.If they are used to prevent the <strong>for</strong>mation of ice all the electric heaters are activated at the same time.They are switched off if an alarm that shuts down the evaporation fan is present.Each electric heater has its own set point <strong>for</strong> the Heating and Cooling modes, and can there<strong>for</strong>e be activated using thefollowing parameters:• r07: electrical heater set point in Heating mode• r08: electrical heater set point in Cooling modeThe two anti-freeze electrical heater set points fall between minimum and maximum values which the user may set usingthe following parameters:<strong>ERT</strong> <strong>400</strong> User Manual50/104
• r09: maximum set point of anti-freeze electrical heaters• r10: minimum set point of anti-frost electrical heatersIf the off, stand-by and “night” operating modes control is effected on the cooling set point, using the same control probe.Parameter r11 determines the hysteresis <strong>for</strong> the set points of the anti-freeze/integrated electric heaters.An example of operation is shown in the diagram below:Diagram of theantifreeze/integratedelectric heatersPowerONSET POINTOFFr11TempPower: powerTemp: temperature7.6.5 <strong>Control</strong> of integrated electrical heatersIf r15= 1 the electric heaters are enabled to per<strong>for</strong>m regulation as integrated heaters in Heating mode.If this is the case, in addition to being activated on the anti-freeze regulator, the electric heaters operate as in the diagramsbelow:Example with 4electric heaters (r05=4)Electric heter (EH)EH 4EH 3EH 2SET POINT HEATINGEH 1B03B04B05Temp AI1EHx: electric heater x<strong>ERT</strong> <strong>400</strong> User Manual51/104
TEMP AI1: AI1 probe temperatureExample with 2electric heaters (r05=2)Electric heter (EH)EH 3SET POINT HEATINGEH 1B03B04B05Temp AI1EHx: electric heater xTEMP AI1: AI1 probe temperatureThe cases in which r05 = 3 and r05 = 1 can be easily deduced.Example of r05=4The hysteresis <strong>for</strong> each step is determined by the regulation band divided by the number of electric heaters present.There are 2 deltas <strong>for</strong> the heating set point:• b04 is the delta with the activated heat pump (external temperature
IMG INFO368 3Example of r05=2Electric heter (EH)SET POINT HEATINGEH 3B03B04B05Temp AI1EHx: electric heater xTEMP AI1: AI1 probe temperatureIf the heat pump is disabled because the external temperature is too cold, parameter B04 is put to B05 and regulationtakes place on the heating set point.7.6.6 <strong>Control</strong> of hot water coil in anti-freeze modeThe hot water coil serves two purposes – it prevents ice from <strong>for</strong>ming (in the exchangers and the environment) and acts asa regulator.It is activated in anti-freeze mode if r11= 1 according to the same rules as the anti-freeze electric heaters. if present, thewater pump is activated and the valve fully opened.7.6.7 <strong>Control</strong> of integrated hot water coil (heating)The integrated hot water valve is regulated according to the following parameters:• Temperature of inlet air• Heating set point• B06 = Regulation band <strong>for</strong> hot water valve on electric heaters in heating mode• B07 = -Regulation delta hot water valve with pump activated• B08 = -Regulation delta hot water valve with pump not activated• r17 = Hysteresis <strong>for</strong> deactivation of hot water pumpAnalog output100%Set point heating0%B06B07B08AI1Water pumpONOFFr17See the diagram below:<strong>ERT</strong> <strong>400</strong> User Manual53/104
Analog output: analogue outputWater pump: water pumpTEMP AI1: AI1 probe temperatureThe pump has a minimum activation time equal to r18.In heat pump mode, the active parameter is B07When the heat pump is not activated, the active parameter is B08If the hot water pump is activated when the fan is switched off, there is a delay between activation of the pump and thefan.<strong>ERT</strong> <strong>400</strong> User Manual54/104
IMG INFO8 FUNCTIONS8.1 Recording of operating hoursThe device stores the number of operating hours <strong>for</strong> the following in the non volatile memory:• fan• compressorsInternal resolution is in minutes.The values can be displayed by accessing the menu called Ohr (see menu layout).The whole value is displayed <strong>for</strong> values below 999 whereas the hours/100 value along with the decimal point is displayed<strong>for</strong> values above 999.For example, 1234 hours are displayed as follows:The hours can be reset by pressing the DOWN button <strong>for</strong> two seconds (see buttons) while the operating hours aredisplayed.35.48 35In the event of a power failure, the last fraction of hour recorded is set to 0 and the duration is rounded off by default:8.2 DefrostingThe defrosting function is only active in Heating mode.This function is used to prevent the <strong>for</strong>mation of ice on the surface of the external heat exchanger.The <strong>for</strong>mation of ice on the external heat exchanger often occurs when the external air is very cold and humid.This condition significantly reduces the thermodynamic per<strong>for</strong>mance of the unit and could cause it severe damage.Defrosting is only possible if:• d01 = 1 (Enable defrosting)• There is a condensation probe on the first circuit ( H13= 1 or H13 = 2)• A reversing valve is presentWhen there are 2 circuits, defrosting may occur separately or togetherThe defrosting regulator controls the compressors on the circuit.Circuit compressors cannot there<strong>for</strong>e be used by the temperature controller until defrosting has terminated on that circuit.For single defrosting on two circuits, please note that even if one circuit has completed defrosting (and the compressor isoff), it cannot be used by the temperature controller.The input and output of defrosting changes according to the values of the condensation probes (see defrosting probes) andthe settings <strong>for</strong> the following parameters:8.2.1 Start of DefrostingThe activation of the defrosting phase is essentially determined by 2 parameters:• d02 : start of defrosting temperature/pressure• d03 : defrosting timeWhen the probe detects temperature/pressure values that are below the value of parameter d02 and the compressor is on,it starts counting (timer) the number of minutes set on parameter d03 and the defrosting phase then starts.Interruption oftimerTimer resetTiming is interrupted if:• The temperature/pressure rises above the value set <strong>for</strong> parameter d02• The compressor is off•The timer is reset if:• the defrosting cycle has ended• the “<strong>ERT</strong> <strong>400</strong>” has been shut down• the operating mode has changed (see operating modes)• the temperature rises above the value set <strong>for</strong> parameter d04 (end of defrosting temperature/pressure)<strong>ERT</strong> <strong>400</strong> User Manual55/104
Defrosting: controlof compressorsDuring defrosting, all compressors are controlled as follows:• single defrosting: all compressors are turned on at full power• separate defrosting all compressors in the circuit are turned on at full power• at start up a time of d14 is observedDuring the defrosting phases, the safety intervals of compressors and capacity steps are bypassed and only parameter d11is taken into account (delay between defrosting of circuits). This delay is valid both <strong>for</strong> activation of the compressors andcapacity steps.Defrosting can only occur if the following conditions are present:• The safety timers of the circuit compressors must be set to 0• After the last defrosting, the delay between the defrosting operations of circuits must have elapsed ( d11)If the unit has 2 circuits and single defrosting, the following conditions must be present:• the circuit that is not the one requesting the start of defrosting must have a compressor with a safety time set to= 0 (see safety timer) so that both circuits can start simultaneously.Defrosting startsequenceAt defrosting start up, if the 4 way compressor-valve waiting time d06 = 0 and the valve-compressor waiting time d07=0,the compressor remains on; if not, regulation is per<strong>for</strong>med as shown below.SDCOMPRONOFFRVONOFFd06d07COMPR: compressor RV: reversing valve SD: start of defrosting8.2.2 <strong>Control</strong> during defrostingDuring the defrosting cycle, loads are controlled as follows.CompressorsThe compressors on the circuit being defrosted are turned on at full power or remain in this status.Reversing valvethe reversing valve of the defrosting circuit operates in the same way as in the summer cycle.When the valve is reversed, the timer starts counting a bypass time <strong>for</strong> the minimum pressure time on the circuit which isequivalent to the "bypass minimum time in Cooling mode" (A01).Condensation fansIf the condensation pressure is below (F23-F24), the fan is OFF, if it is above F23, it is ON at full power. During the coildrainage phase the fans run at maximum speed in order to remove the water from the coil quickly. this function can bedeactivated by setting d10 = 0.Evaporation fansIn the following situations• there is a unit with single condensation ( F22= 1)• parameter P04= 1 (fan shut down in defrosting)the fan will be turned offIn all other situations, it is always on8.2.3 End of DefrostingThe de-activation of defrosting can be regulated by the temperature/pressure value of the analogue probes AI3…A18(analogue inputs) or the digital input (digital inputs).The configuration parameters are:• d12 : Probe <strong>for</strong> end of defrosting circuit 1• d13 : Probe <strong>for</strong> end of defrosting circuit 2<strong>ERT</strong> <strong>400</strong> User Manual56/104
ConfigurationparametersThese parameters can acquire the values and meanings shown in the following table:Value ofDescriptionparameters0 End of defrosting on digital input1 End of defrosting on AI32 End of defrosting on AI6If d09=0 (end of defrosting from digital input), the unit also takes into account the digital input configured as "End ofdefrosting circuit 1" (digital inputs); if d10=0, it takes into account the "End of defrosting circuit 2" (digital inputs).In this configuration, as soon as the input is activated, circuit defrosting is deactivated.If an analogue input is selected <strong>for</strong> the end of defrosting, it ends when the pressure/temperature rises above parameterd04 (end of defrosting temperature/pressure).If the input is not configured, defrosting only ends when the limit set <strong>for</strong> parameter d05 is exceeded (maximum defrostingtime).Defrosting ends if it exceeds the duration set with parameter d05.Coil drainage timeAt the end of defrosting regulation is per<strong>for</strong>med as shown in the diagram below:Defrosting endsequenceEDCOMPRONOFFRVONOFFd08d09COMPR: compressor RV: reversing valve ED: End of defrostingDuring this cycle the compressor safety times except delay d14 are ignored.8.3 DehumidificationThe function is activated in the following conditions:• cooling mode active• number of active steps during dehumidification greater than 0 ( L22 > 0)• an ambient humidity probe is present•Regulation is effected by activating a number of compressors (steps) as specified in parameter L22 when relative humidityexceeds set point L19.The hysteresis is equal to parameter L20.If the inside temperature is lower than the cooling set point – L21, the function is not active.Dehumidification is reactivated when the temperature goes above set point L21/2<strong>ERT</strong> <strong>400</strong> User Manual57/104
IMG INFORefer to the following diagrams if there are 2 active steps during dehumidification:COMPRDHSET = L19INT TEMPL20int humiditySET COOLINGSET - L21/2SET - L 21INT HUMIDITYSET - L 19SET - L19 - L20COMPRtimetimetimeCOMPR: compressor DHSET: dehumidification set point time: timeINT HUMIDITY: internal humidity SET COOLING: cooling set point INT TEMP: inside temperature8.4 HumidificationThe humidifying function activates a humidifier by way of a relay output if the ambient humidity is too low.The function is activated in the following conditions;• a relay is configured as humidifier output ( H35- H40 and N06- N10 = 10)• an ambient humidity probe is present• parameter L16 (humidify set point) is greater than 0• no humidifier alarm is presentThe function has two different set points: one <strong>for</strong> heating mode ( L16) and one <strong>for</strong> cooling mode ( L17).The hysteresis is the same <strong>for</strong> both modes ( L18)Please refer to the diagram below:HSET = L16 / L17H OUTL18internal humidityH OUT: humidification relay output HSET: humidification set pointINT HUMIDITY: internal humidity8.5 EconomizerFreecoolingFreeheatingMixing recirculated air with air from outside to heat or cool the environment can often be useful;This practice is commonly referred to as “freecooling” and “freeheating”<strong>ERT</strong> <strong>400</strong> User Manual58/104
DamperThe external air enters the external environment through a damper that mixes it with the recirculated air from inside.Damper control is proportional.The function is only activated if:• free-cooling is enabled ( L01=1)• the AI1 probe is configured as NTC/inlet air analogue input ( H11 = 1)• the AI4 probe is configured as NTC/outdoor temperature analogue input ( H14 = 1)• An analogue or digital output is used as damper control:• AN3: a 0-10Vdc dedicated output; control is proportional• A relay (power outputs) is configured as damper control ( H35– H 40 = 15 or N06- N10 = 15 onexpansion module).• outdoor temperature exceeds L08 + L09 (freecooling/freeheating block conditions)If the outdoor temperature (AI4) goes below the value set in L08, the economizer is disabled and the damper goes tominimum opening ( L07); when the temperature goes above L08 + L09 the function is reactivated and damper opening iscontrolled by the economizer once more.Opening and closing of the damper depends on the parameters that have been set as shown in the following sub-sections:The freecooling set point and freeheating set point variables are mutually exclusive in that the damper controller eitherregulates the freecooling set point or the freeheating set point and both are never used at the same timeIf the damper is controlled by relays, it is disabled if the proportional output of the economizer is less or equal toparameter L07 and is activated if the proportional output is at 100% (maximum opening).The damper is switched OFF if alarms that determine its closure are active.8.5.1 Freecooling/Freeheating in Cooling mode2 cases may arise:OUTDOOR TEMPERATURE < COOLING SETPOINTThe freecooling set point is calculated by subtracting the value in parameter L02 from the cooling set point (freecoolingoffset in cooling mode).In line with the freecooling value, the damper is positioned at minimum opening ( L07).If the indoor temperature falls below the freecooling set point and below the outdoor temperature value, the damper isfully opened to heat the environment and the indoor temperature is brought close to the cooling set point.If the freecooling set point were to coincide with the cooling set point, the damper would close as the same time as thecompressors are switched off and any energy saved by using colder outdoor air would be lost. For this reason,FREECOOLING SETPOINT = COOLING SETPOINT – L02.Please refer to the diagram below:DamperFreecooling Setpoint = Cooling Setpoint - L02Outdoor temperature100%L07 %L06L03Inside temperatureDamper= Damper Outdoor temperature = Outdoor temperature Inside Temperature = inside temperatureOUTDOOR TEMPERATURE > COOLING SETPOINTIn these conditions the outdoor temperature cannot be used to cool the environment unless the indoor temperature ishigher than the outdoor temperature (if so, the damper is completely open).Outdoor air can however be used to heat the environment if the indoor temperature is below the cooling set point. If thisis the case, the freeheating set point is the same as the cooling set point<strong>ERT</strong> <strong>400</strong> User Manual59/104
Please refer to the diagram below:DamperFreeheating Setpoint = Cooling SetpointOutdoor temperature100%L07 %L03L06Inside temperatureDamper= Damper Outdoor temperature = Outdoor temperature Inside Temperature = inside temperature8.5.2 Freecooling/Freeheating in Heating modeFor heating mode, the same logics apply but the other way round when calculating the freecooling and freeheating setpointsOUTDOOR TEMPERATURE < HEATING SETPOINTIn these conditions the outdoor temperature cannot be used to heat the environment unless the indoor temperature islower than the outdoor temperature (if this is the case, the damper is completely open).Outdoor air can however be used to cool the environment if the indoor temperature is higher than the cooling set point. Ifthis is the case, the freecooling set point is the same as the heating set point.Please refer to the diagram below:DamperFreecooling Setpoint = Heating SetpointOutdoor temperature100%L07 %L06L05Inside temperatureDamper= Damper Outdoor temperature = Outdoor temperature Inside Temperature = inside temperatureOUTDOOR TEMPERATURE > HEATING SETPOINTThe freeheating set point is calculated by subtracting the value in parameter L04 from the heating set point (freecoolingoffset in heating mode).In line with the freeheating value, the shutter is positioned at minimum opening.If the indoor temperature rises above the freeheating set point and above the outdoor temperature value, the shutter isfully opened to cool down the environment and the indoor temperature is brought close to the heating set point.<strong>ERT</strong> <strong>400</strong> User Manual60/104
If the freeheating set point were to coincide with the heating set point, the shutter would close as the same time as thecompressors are switched off and any energy saved by using warmer outdoor air would be lost. For this reason,FREEHEATING SETPOINT = HEATING SETPOINT + L04.Please refer to the diagram below:DamperFreeheating Setpoint = Heating Setpoint + L04Outdoor temperature100%L07 %L05L06Inside temperatureDamper= Damper Outdoor temperature = Outdoor temperature Inside Temperature = inside temperature8.5.3 Freecooling/Freeheating in EnthalpyThe <strong>ERT</strong> <strong>400</strong> economizer can also regulate the enthalpy of the air as well as the temperature(Enthalpy is a thermodynamic property that takes into account both the temperature and the humidity of the air).Enthalpic regulation is only possible if:• free-cooling is enabled ( L01=1)• the AI4 probe is configured as NTC/external temperature analogue input ( H14 = 1)• the AI3 probe is configured as 4-20mA external environment humidity input ( H13 = 3) or the AI8 probe(expansion) is configured as 4-20mA external environment humidity input ( N12 = 1)• the AI6 probe is configured as 4-20mA recirculated environment humidity input ( H16 = 3) or the AI7 probe(expansion) is configured as 4-20mA recirculated environment humidity input ( N11 = 1)If no probe has been configured as an external air humidity probe, then by setting the parameter L15 to a value that is not0, this value is considered to be the external air humidity needed to calculate the enthalpy.If probe AI4 is present and freecooling is enabled, the control per<strong>for</strong>ms temperature freecooling at least. If the 2 humidityprobes are also present, freecooling becomes enthalpic. The external humidity probe is considered present even if there isno probe but the hypothetical humidity is not 0 ( L15) .Regulation in heating or cooling mode is the same. The difference lies in the set point parameters and the regulation band2 cases may arise:OUTDOOR ENTHALPY < ENTHALPY SETPOINTThe enthalpy set point is set using parameter L10 (enthalpy set point in cooling mode) / L12 (enthalpy set point in heatingmode. In line with the set point value, the damper is positioned to minimum openingIf the indoor enthalpy falls below the set point and below the outdoor enthalpy value, the shutter is fully opened and theindoor enthalpy is brought close to the set point.Please refer to the diagram below:<strong>ERT</strong> <strong>400</strong> User Manual61/104
DamperHentalpy Setpoint = L10 or L12Outdoor hentalpy100%L07 %L14L11 or L13Inside HentalpyDamper= Damper Outdoor hentalpy = Outdoor enthalpy Inside hentalpy = inside enthalpyOUTDOOR ENTHALPY > ENTHALPY SETPOINTIn these conditions the outdoor enthalpy cannot be used to lower the environment enthalpy unless the indoor enthalpy ishigher than the outdoor enthalpy (if so, the damper is completely open). Outdoor air can however be used to increase theenvironment enthalpy if it is lower than the set point.Please refer to the diagram below:DamperHentalpy Setpoint = L10 or L12Outdoor hentalpy100%L07 %L11 or L13L14Inside HentalpyDamper= Damper Outdoor hentalpy = Outdoor enthalpy Inside hentalpy = inside enthalpy8.6 Air PollutionThis function controls the opening of the damper on the economizer according to the quantity of CO2 (carbon dioxide) inthe air.The position of the damper will be determined by the maximum value required by the air pollution function and the valuerequired by the economizer.The function supports 2 types of sensor:• the first with 4-20mA output to be connected to the AI8 input• the second with a 0-5 Vdc output to be connected to the AI5 input.The function is activated in the following conditions;• the economizer is enabled• the air pollution function is enabled i.e. the AI8 probe (4-20mA) is configured as CO2 input (N12=1) or the AI5probe (0-5 Vdc) is set as CO2 input ( H15= 3)Please refer to the diagram below:<strong>ERT</strong> <strong>400</strong> User Manual62/104
396,6129,302OPEN100%L070%0% L26100%CO2 (%)OPEN: Damper opening (%) CO2: Carbon dioxide (%)8.7 Loss of voltageIf there is a loss of voltage the control returns to the state prior to the loss of voltage.If defrosting is underway, the procedure is cancelled.All timing in progress is cancelled and restarted.8.8 Heat pump shut-downThis function shuts down the heat pump if the outdoor temperature is below r13.The pump is reactivated when the outdoor temperature rises above r13 + r14.The function is active if r12= 1 (activation of heat pump shut-down) and the AI4 probe (analogue inputs) is configured asoutdoor temperature input ( H14 =1).If the integrated electric heaters and the hot water coil are activated, the regulation deltas are changed according to theheating set points .8.9 Output temperature controlIf the output temperature read by the AI2 probe ( H12=1) is too high or too low, the outputs are proportionallydeactivated so that the temperature falls within the established limitsPlease refer to the diagram below:POWER100%A30A29A31A31AI2If probe A12 is not present the function is disabled.POWER: Power (%) AI2: Analogue input 2All the active outputs (compressors, electric heaters, water valve and hot water coil) can supply maximum power from thisregulator. There is no overriding and all outputs behave in the same way.<strong>ERT</strong> <strong>400</strong> User Manual63/104
9 PARAMETERSThe parameters can be set so that the <strong>ERT</strong><strong>400</strong> is fully configurable.Parameters can be changed with:• Keyboard (only EKW<strong>400</strong>-RT/S and EKP<strong>400</strong>-RT)• PC (if the special connection and "Param manager" software are available)• Copy CardAll the parameters are described in detail and divided into categories in the following chapters.9.1 Description of parametersAll the parameters are described in detail and divided into categories in the following chapters.9.1.1 Configuration parameters (CnF)These parameters define the unit characteristics.If one or more parameters in this category is changed, the controller must be turned off and on again to operate correctly.G01G02H01H02H03H04H05H06H07H08H09H10H11H12H13H14H15"Cooling" set pointSets the set point in Cooling mode"Heating" set pointSets the set point in Heating modeMaximum "heating" set pointSets the maximum set point in "heating" modeMinimum "Heating" set pointSets the minimum set point in Heating modeMaximum "Cooling" set pointSets the maximum set point in Cooling modeMinimum "cooling" set pointSets the minimum set point in Cooling modeNumber of circuits on the unit ∗ Selects the number of cooling circuits.0= Not admitted1= 1 Cooling circuit2= 2 Cooling circuitsNumber of compressors per circuit (∗)0= No compressor1= 1 Compressor2= 2 Compressors3= 3 Compressors4= 4 CompressorsNumber of capacity steps per circuit (∗)0= No capacity step1= 1 Capacity step per compressor2= 2 Capacity steps per compressor3= 3 Capacity steps per compressorCompressor start-up sequence0= Based on operating hours1= Fixed start-up sequenceCompressor selection algorithm0= Circuit saturation1= Circuit balancingPresence of heat pump0= Pump not present1= Pump presentConfiguration of input AI1Configures analogue input AI10= No probe1= NTC inlet air input2= Multi-functional digital inputConfiguration of input AI2Configures analogue input AI20= No probe1= Anti-freeze / Temperature control NTC input2= Multi-functional digital inputConfiguration of input AI3Configures analogue input AI30= No probe1= NTC input <strong>for</strong> condensation circuit 12= 4...20 mA input <strong>for</strong> condensation circuit 13= 4...20 mA external environment humidity inputConfiguration of input AI4Configures analogue input AI40= No probe1= NTC input <strong>for</strong> external temperature2= Multi-functional digital inputConfiguration of input AI5Configures analogue input AI50= No probe1= Multi-functional digital input<strong>ERT</strong> <strong>400</strong> User Manual64/104
H16H17H18H19H20H21H22H23H24H25H26H27H28H29H30H31H32H33H34H352 = 0-5V input Filter differential pressure3 = CO2 0-5Vdc inputConfiguration of input AI6Configures analogue input AI60= No probe1= NTC condensation input circuit 22= 4...20 mA input <strong>for</strong> condensation circuit 23= 4...20 mA humidity input recirculated airPressure bottom scale valuePressure value associated with an analogue input value (AI3 or AI6) of 20mA (if configured as current input). Example:if a pressure transducer configured with 0-30.0 Bar/4-20mA threshold is used, it is necessary to set H17=300.Polarity of digital inputs ID1,ID2,ID3,ID4Polarity of digital inputs ID5,ID6,ID7,ID8Polarity of digital inputs ID9,ID10,ID11Humidity top scale valueMinimum humidity value; sets a value that corresponds to a current of 4mA.Humidity bottom scale valueMaximum humidity value; sets a value that corresponds to a current of 20mA.Configuration of digital input ID10=Disabled input1=Differential pressure switch / evaporator fan thermal switch2=remote OFF3=Remote Heat/Cool4=<strong>Therm</strong>al switch compressor 15=<strong>Therm</strong>al switch compressor 26=<strong>Therm</strong>al switch compressor 37=<strong>Therm</strong>al switch compressor 48=<strong>Therm</strong>al switch of fan circuit 19=<strong>Therm</strong>al switch of fan circuit 210=High pressure circuit 111=High pressure circuit 212=Low pressure circuit 113=Low pressure circuit 214=End of defrosting circuit 115=End of defrosting circuit 216=Window input17=Smoke18=Damper open19=Humidifier alarm20=<strong>Therm</strong>al switch of electric heaters 1 and 221=<strong>Therm</strong>al switch of electric heaters 3 and 422 =Request 1 cooling step23=Request 1 heating step24=Request 2 steps25=<strong>Therm</strong>al switch of evaporator fanConfiguration of digital input ID2As <strong>for</strong> H23Configuration of digital input ID3As <strong>for</strong> H23Configuration of digital input ID4As <strong>for</strong> H23Configuration of digital input ID5As <strong>for</strong> H23Configuration of digital input ID6As <strong>for</strong> H23Configuration of digital input ID7As <strong>for</strong> H23Configuration of digital input ID8As <strong>for</strong> H23Configuration of digital input ID9As <strong>for</strong> H23Configuration of digital input ID10As <strong>for</strong> H23Configuration of digital input ID11As <strong>for</strong> H23Differential pressure bottom scale valuePar H34 = Maximum fan filter differential pressure value; sets the value corresponding to a 5Vdc voltage expressed inmillibar; the value corresponding to a voltage of 0V will be 0 millibar.Configuration of output NO2 (relay)0 = Disabled1= Reversing valve circuit 12= Reversing valve circuit 23 = Condenser fan circuit 14 = Condenser fan circuit 25 = Hot water pump6 = Evaporator fan7= Power step 28= Power step 39= Power step 410 = Humidifier<strong>ERT</strong> <strong>400</strong> User Manual65/104
H36H37H38H39H40H41H42H43H44H45H46H47H48H49H50H51H52H53H54H55H56H57H58H59H60H61H62H63H6411 = 1 step electric heaters12 = 2 step electric heaters13 = 3 step electric heaters14 = 4 step electric heaters15 = Damper16 = Defrost relayConfiguration of output NO3 (relay)As <strong>for</strong> H35Configuration of output NO4 (relay)As <strong>for</strong> H35Configuration of output NO5 (relay)As <strong>for</strong> H35Configuration of output NO6 (relay)As <strong>for</strong> H35Configuration of output NO7 (relay)As <strong>for</strong> H35Polarity of output NO2 (relay)Polarity of output NO3 (relay)Polarity of output NO4 (relay)Polarity of output NO5 (relay)Polarity of alarm relay outputThe relay output can be set <strong>for</strong> the corresponding outputs.0= Relay on with open output1= Relay on with inactive outputConfiguration of analogue output 1 (AN1 or TC1)The output to control condensation fans can be configured with 2 types of signals0= Cutting phase fan control signal1= 4-20mA outputConfiguration of analogue output 2 (AN2 or TC2)The output to control condensation fans can be configured with 2 types of signals0= Cutting phase fan control signal1= 4-20mA outputActivation of heating mode0= the Heating mode is activated1= the Heating mode is not activated: with the selector on Heating, the unit is in Standby.Selection of operating mode0= Selection from keyboard1= Selection from digital input2 = Automatic selectionActivation of dynamic set pointIf activated, this function can be used to change the working set-point automatically according to the outdoortemperature or analogue 4-20mA input. This parameter is not relevant if H13≠3 or H14≠3.0= Function de-activated1= Function activatedMaximum dynamic offset in Cooling modeThis is the maximum value that is added to the set point configured in Cooling mode (Coo) when the DYNAMIC SET POINTfunction is activated.Maximum dynamic offset in Heating modeThis is the maximum value that is added to the set point configured in Heating mode when the DYNAMIC SET POINTfunction is activated.Outdoor temperature set point in Cooling modeThis parameter is only relevant if the dynamic set point function is activated and if probe AI4 is configured as outdoortemperature probe.Outdoor temperature set point in Heating modeThis parameter is only relevant if the dynamic set point function is activated and if probe AI4 is configured as outdoortemperature probe.Outdoor pressure differential in Cooling modeThis parameter is only relevant if the dynamic set point function is activated and if probe AI4 is configured as outdoortemperature probe.Outdoor pressure differential in Heating modeThis parameter is only relevant if the dynamic set point function is activated and if probe AI4 is configured as outdoortemperature probe.Offset AI1,This parameter can be used to compensate the error that may occur between the temperature (or pressure) read and theactual value.Offset AI2,as <strong>for</strong> H57Offset AI3These parameters can be used to compensate <strong>for</strong> the error that may occur between the temperature (or pressure) readand the actual value.Offset AI4as <strong>for</strong> H57Offset AI5as <strong>for</strong> H57Offset AI6as <strong>for</strong> H57Offset AI7as <strong>for</strong> H57Offset AI8as <strong>for</strong> H57<strong>ERT</strong> <strong>400</strong> User Manual66/104
H65H66H67H68H69H70H71H72H73H74H75H76H77H78H79H80Mains frequencyMains frequency 50 HzMains frequency 60 Hz°C or °F selection0= °C1= °FSerial address of seriesSerial address of deviceThese parameters can be used to address the device if it connected to a personal computer or a supervision system. Theseparameters are normally set to 0.User passwordCan be used enter the password required to access second level parameters. It can also be used to copy the parameters ofthe unit onto the Copy Card.Password <strong>for</strong> parameter writingIt represents the value that the password must acquire to copy the parameters onto the Copy Card.Keyboard presenceHolding time in heating or cooling modeMinimum status (heating cooling) holding time even if the temperature control requests a change over. Time expressed inminutes.Polarity AI1, AI2, AI3, AI40= Relay on with open input1= Relay on with inactive inputConfiguration of AI1 if digitalAs <strong>for</strong> H23Configuration of AI2 if digitalAs <strong>for</strong> H23Configuration of AI3 if digitalAs <strong>for</strong> H23Configuration of AI4 if digitalAs <strong>for</strong> H23Activates digital regulation0=digital regulation not activated1= digital activation activatedActivates unbalanced circuits0=unbalanced circuits not activated1=unbalanced circuits activatedActivates probe on remote keyboard0=control probe on local keyboard1= control probe on remote keyboard9.1.2 Alarm Parameters (ALL)A01A02A03A04A05A06A07A08A09A10A11A12A13Low pressure pressure switch by-pass time.The delay between start-up of compressor and start-up of low pressure digital alarm diagnostics. It is expressed in secondsNumber of low pressure events per hourNumber of low pressure digital alarm events per hour. If exceeded, the alarm will switch from automatic reset to manualreset.Pressure switch bypass time from fan start-upDelay between start-up of fan and start-up of pressure switch alarm diagnostics. It is expressed in secondsActive flow switch input timeTime that flow switch digital input must remain active in order to generate the flow switch alarm. The timer starts after theflow switch bypass time. It is expressed in seconds.Inactive flow switch input timeTime that flow switch digital input must remain inactive in order to reset the alarm. It is expressed in seconds.Number of pressure switch events per hourNumber of pressure switch digital alarm events per hour. If exceeded, the alarm will switch from automatic reset tomanual reset. The external fan is de-activated when the alarm switches from automatic to manual reset.Compressor thermal switch by-pass time from compressor start-upThe delay between start-up of compressor and start-up of compressor thermal switch digital alarm diagnostics. It isexpressed in secondsNumber of compressor thermal switch events per hourNumber of compressor thermal switch digital alarm events per hour. If exceeded, the alarm will switch from automaticreset to manual reset.Number of condensing fan thermal switch events per hourNumber of condensing fan thermal switch digital alarm events per hour. If exceeded, the alarm will switch from automaticreset to manual reset.Anti-freeze alarm by-pass timeThe delay between machine start-up (selection of operating mode or switching from OFF->ON) and start-up ofcompressor thermal switch digital alarm diagnostics. It is expressed in seconds. This bypass time is only active in Heatingmode.Anti-freeze alarm set pointTemperature below which the anti-freeze alarm is activated.Anti-freeze alarm hysteresisDifferential <strong>for</strong> A11 anti-freeze alarm temperature limit; also acts as differential (with sign inverted) <strong>for</strong> A15 overtemperaturealarm.Number of anti-freeze alarm events per hourNumber of anti-freeze alarm events per hour. If exceeded, the alarm will switch from automatic reset to manual reset.<strong>ERT</strong> <strong>400</strong> User Manual67/104
A14A15A16A17A18A19A20A21A22A23A24A25A26A27A28A29A30A31A32Anti-freeze alarm probeThis parameter can be used to disable the alarm or select the alarm control probe0 = alarm inactive1 = AI1 probe on base unit or remote keyboard2 = probe AI23 = probe AI3Activation of fan shut-down with anti-freeze alarm0 = fan not shut down1 = fan shut downFan status with fire alarm0 = fan off and damper closed1 = fan on and damper closed2 = fan on and damper open3 = fan off and damper openCompressor status caused by over-temperature alarmDisables shut-down of compressors if temperature is too highDuration of over-temperatureDetermines the time elapsing be<strong>for</strong>e high temperature alarm is activatedDeactivation of compressors with high temperatureDetermines the status of the compressors if high temperature alarm is activated:0=compressors on1=compressors offDirty fan operating hours thresholdDetermines the time (measured in hours*100) after which the dirty filter alarm is generatedClogged fan operating hours thresholdDetermines the time (measured in hours*100) after which the clogged filter alarm is generatedActivate fan shut-down with clogged filtersDetermines shut-down of the fan if clogged filter fan is generated0=fan on1=fan offFilter differential pressure bypass time from fan start-upDetermines the delay between start-up of fan and start-up of alarm diagnostics:• Worn filters• Dirty filters• Evaporator fan shut downShut-down fan differential pressure set pointST5 value below which the shut-down fan error is generatedDirty fan differential pressure set pointMinimum value of ST5 (A25 – A26) range in which the dirty filter error is generated.Worn fan differential pressure set pointMaximum value of ST5 (A25 – A26) range in which the dirty filter error is generated. If this value is exceeded, the wornfilter alarm is activated.Duration of differential pressure activated by dirty or clogged fan alarmDetermines the duration of the dirty or worn filter alarmDuration of differential pressure activated by shut-down fan alarmDetermines the duration of the shut-down fan alarm.Maximum temperature of outlet airMaximum value <strong>for</strong> values read by AI2. If exceeded, the outputs are proportionally deactivated so that the temperaturefalls within the specified limits.Minimum temperature of outlet airMaximum value <strong>for</strong> values read by AI2. If exceeded, the outputs are proportionally deactivated so that the temperaturefalls within the specified limits.Outlet air regulation bandTemperature band related to A30 and A29 temperature limits in which the maximum power of the installation is regulatedaccording to the air temperature in order to control the temperature of the outlet air.Alarm relay status with remote ON/OFFDetermines activation of the remote ON/OFF alarm function1=alarm relay ON9.1.3 Compressor parameters (CP)C01C02C03C04C05Safety time OFF-ONIt represents the minimum time that must pass between the shutdown and start-up of the compressor. It is expressed intenths of seconds.Safety time ON-ONIt represents the minimum time that must pass between two subsequent starts of the compressor. It is expressed in tenthsof seconds.Compressor start intervalIt can be used to set a delay <strong>for</strong> the start of two compressors.Compressor shutdown intervalIt can be used to set a delay <strong>for</strong> the shutdown of two compressors.Interval between capacity stepsIt can be used to set a delay between the activation of the compressor and capacity steps.<strong>ERT</strong> <strong>400</strong> User Manual68/104
9.1.4 Regulator (RE)b01b02b03b04b05b06b07b08Regulation band <strong>for</strong> compressors in cooling modeSee <strong>Control</strong> of compressors – temperature controllerRegulation band <strong>for</strong> compressors in heating modeSee <strong>Control</strong> of compressors – temperature controllerRegulation band <strong>for</strong> integrated electric heatersSee <strong>Control</strong> of integrated electrical heatersRegulation delta <strong>for</strong> integrated electric heaters with heat pump activatedSee <strong>Control</strong> of integrated electrical heatersRegulation delta <strong>for</strong> integrated electric heaters with heat pump not activatedSee <strong>Control</strong> of integrated electrical heatersRegulation band <strong>for</strong> integrated hot water coilSee <strong>Control</strong> of integrated hot water coilRegulation delta hot water coil with heat pump activatedSee <strong>Control</strong> of integrated hot water coilRegulation delta hot water coil with heat pump not activatedSee <strong>Control</strong> of integrated hot water coil9.1.5 Ventilation parameters (FAn)F01F02F03F04F05F06F07F08F09F10F11F12F13F14F15F16F17F18F19F20F21F22Configuration of fan outputs0= Proportional fan output (from 0 to 100% depending on parameters)1= Fan “on-off” output; in this mode the regulator per<strong>for</strong>ms the same calculations as the proportional output. The onlydifference is that if it reads a value above 0, it outputs 100.2 = On-off operation on compressor request. In this mode, if the output is 0 and no circuit compressor is on, it is 100% ifat least one circuit compressor is on.Fan pick-up timeTime during which the fan runs at maximum speed after start-up. This is expressed in tenths of seconds.Fan phase shiftThis parameter calibrates the fan control output according to the different types of fans, adjusting the current/voltagephase shift of each fan.It is measured in microseconds * 200Duration of triac activation impulseIt changes the length of the triac command impulse.Operation on compressor request0= If the compressor and fan are off1= The condensation control operates independently of the compressorMinimum speed in Cooling modeMinimum proportional regulation <strong>for</strong> the fan in Cooling mode. It is expressed as a percentage, from 0 to 100%, of thesupply voltage.Maximum silent speed in Heating modeMaximum proportional regulation <strong>for</strong> the fan in Heating mode. It is expressed as a percentage from 0 to 100% of thesupply voltage.Minimum fan speed temperature/pressure set point in Cooling modeCondensation temperature/pressure value below which the fan runs at minimum speed in Cooling mode.Proportional band in Cooling modeDifference in temperature/pressure that corresponds to a variation from minimum silent to maximum silent of the fanspeed in Cooling mode (F07).Fan cut-off differentialCondensation temperature/pressure differential as compared to the temperature/pressure set point (F08 or F14) abovewhich the fan is turned off.Hysteresis cut-off .Condensation temperature/pressure differential <strong>for</strong> the cut-off feature.Cut-off bypass timeIt sets a delay between activation of the cut-off function and the compressor start up. It is expressed in seconds.Maximum speed in Cooling modeIt sets a speed step in relation to a specific temperature/pressure value in Cooling mode.Maximum fan speed temperature/pressure set point in Cooling modeCondensation temperature/pressure value related to the speed of fan referred to in parameter F13.Minimum speed in Heating modeMinimum proportional regulation <strong>for</strong> the fan in Heating mode. It is expressed as a percentage from 0 to 100% of thesupply voltage.Maximum silent speed in Heating modeMaximum proportional regulation <strong>for</strong> the fan in Heating mode. It is expressed as a percentage from 0 to 100% of thesupply voltage.Minimum fan speed temperature/pressure set point in Heating modeCondensation temperature/pressure value above which the fan runs at minimum speed in Heating mode.Proportional band in Heating modeTemperature/pressure differential that corresponds to a variation from minimum silent to maximum silent of the fanspeed in Heating mode ( F16).Maximum speed in Heating modeIt sets a speed step in relation to a specific temperature/pressure value in Heating mode.Maximum fan speed temperature/pressure set point in Heating modeCondensation temperature/pressure value related to the speed of fan referred to in parameter F19.Pre-ventilation in Cooling modeIt sets a pre-ventilation time in Cooling mode be<strong>for</strong>e the compressor starts up.Separate or single ventilationParameter F22 can be used to configure the units with 2 circuits and a single condenser.<strong>ERT</strong> <strong>400</strong> User Manual69/104
F23F24Parameter F22, type of condensation0= Separate condensers1= Single condenserIf F22 = 0, the two fans are independent and vary according to the condensation pressures/temperatures and the status ofthe compressors. If F22= 1, the outputs of the 2 fans are in parallel and regulation is effected using:the maximum value between the condensation probes of the circuits in Cooling modethe minimum value between the condensation probes of the circuits in Cooling modeIf one of the 2 circuits has no condensation probe, a configuration alarm is generated.Fan activation temperature/pressure set point in Defrosting modeIf the temperature/pressure measured during the defrosting cycle exceeds the "Start fans in Defrosting mode" threshold(F23), fans are activated at full power.Hysteresis of fan activation in Defrosting modeCondensation temperature/pressure differential <strong>for</strong> regulation of the fan in Defrosting mode.9.1.6 Pump / evaporator fan parameters (PUP)P01P02P03P04pump ON compressor ON delayIt sets a delay between the start up of the pump and the compressor. It is expressed in tenths of seconds.Fan ON compressor ON delayIt sets a delay between the start up of the fan and the compressor. It is expressed in seconds.Unit OFF fan OFF delayIt sets a delay between the shutdown of the unit and the fan. It is expressed in secondsActivation of fan shut-down in Defrosting mode9.1.7 Anti-freeze/boiler parameters (FRO)r01r02r03r04r05r06r07r08r09r10r11r12r13r14r15r16r17r18Configuration of electric heaters in Defrosting modeDetermines the operation of the electric heaters when the anti-freeze function is activated0=On only when requested by temperature controller1=Always on in Defrosting modeConfiguration of electric heaters activated in Cooling modeDetermines electric heater operating in Cooling mode0=Off in Cooling mode1=On in cooling mode (depending on the anti-freeze electric heater regulators)Configuration of electric heaters activated in Heating modeDetermines electric heater operating in Heating mode0=Off in Heating mode1=On in Heating mode (depending on the anti-freeze electric heater regulator)Configuration of control probe <strong>for</strong> antifreeze electric heatersDetermines the control probe of the electric heaters in Heating mode0= Not present1=Regulation on probe AI12=Regulation on probe AI23= Regulation on probe AI5Number of electric heaters present0=No electric heater present1= 1 electric heater present (1)2= 2 electric heaters present (1-3)3= 3 electric heaters present (1-2-3)4= 4 electric heaters present (1-2-3-4)Configuration of electric heaters in OFF or Stand-by modeDetermines the status of electric heaters when the unit is in OFF or Stand-by mode0=Always off in OFF or stand-by1=On in OFF or stand-by (depending on the anti-freeze electric heater regulator)Anti-freeze/boiler electric heater set point in Heating modeIt represents the temperature, in Heating mode, below which anti-freeze electric heaters are activated.Anti-freeze/boiler electric heater set point in Cooling modeIt represents the temperature, in Cooling mode, below which anti-freeze electric heaters are activated.Maximum set point limit <strong>for</strong> anti-freeze electric heatersSets the maximum set point <strong>for</strong> anti-freeze electric heaters.Minimum set point limit <strong>for</strong> anti-freeze electric heatersSets the minimum set point <strong>for</strong> anti-freeze electric heaters.Anti-freeze electric heater hysteresisAnti-freeze electric heater hysteresisActivation of heat pump shut-downSee Heat pump shut-downHeat pump shut-down set pointSee Heat pump shut-downHeat pump shut-down hysteresisSee Heat pump shut-downEnable integrated electric heaters in heating mode0= Integrated electric heaters not activated1= Integrated electric heaters activatedActivate electric heaters/H2O valve in dehumidification0=Hot water valve in dehumidification not activated1=Hot water valve in dehumidification activatedHot water pump deactivation hysteresisMinimum activation time of hot water pump<strong>ERT</strong> <strong>400</strong> User Manual70/104
19See <strong>Control</strong> of integrated hot water coilActivate hot water coil in anti-freeze mode0=Hot water coil in anti-freeze mode not activated1=Hot water coil in anti-freeze mode activated9.1.8 Defrosting parameters (dFr)d01d02d03d04d05d06d07d08d09d10d11d12d13Activation of defrosting0= Defrosting de-activated1= Defrosting activatedStart of defrosting temperature/pressureIt represents the temperature/pressure below which the defrosting cycle is activated.Defrosting interval (request time)It represents the time interval during which the probe remains below the defrosting start temperature/pressure. It isexpressed in minutes.End of defrosting temperature/pressureIt represents the temperature/pressure above which defrosting starts.Maximum defrosting time (time out)It represents the maximum duration of defrosting. It is expressed in minutes.Compressor-valve waiting time (anti-vent)It represents the waiting time, at the beginning of the defrosting cycle, between the shutdown of the compressor and thereversing of the 4 way valve.Valve-compressor waiting time at start of defrostingIt represents the waiting time, at the beginning of the defrosting cycle, between the reversing of the 4 way valve andshutdown of the compressor.Compressor-valve waiting time at start of defrostingIt represents the waiting time, at the end of the defrosting cycle, between the shutdown of the compressors and thereversing of the 4 way valve.Valve-compressor waiting time at start of defrostingActivation of fan at end of DefrostingIt activates the fans during phases d08 and d09Defrosting intervalIt represents the interval between the end of a defrosting cycle and the next one (not dependant on the circuit that hasper<strong>for</strong>med the defrosting operation)Probe <strong>for</strong> end of defrosting circuit 1Probe <strong>for</strong> end of defrosting circuit 2These parameters can be assigned the values and meanings shown in the following table:Value ofDescriptionparameters0 End of defrosting on digital input1 End of defrosting on AI32 End of defrosting on AI43 End of defrosting on AI6d14Delayed start of compressors in defrosting modeThis is the only safety limit observed by both the capacity steps and the compressors during the defrosting phases.9.1.9 Expansion module parameters (ESP)N01N02N03N04N05N06N07N08N09N10N11N12N13N14Polarity of ID12 ID13 ID14 ID15As <strong>for</strong> H23Configuration of ID12As <strong>for</strong> H23Configuration of ID13As <strong>for</strong> H23Configuration of ID14As <strong>for</strong> H23Configuration of ID15As <strong>for</strong> H23Configuration of relay 9As <strong>for</strong> H23Configuration of relay 10As <strong>for</strong> H23Configuration of relay 11As <strong>for</strong> H23Configuration of relay 12As <strong>for</strong> H23Configuration of relay 13As <strong>for</strong> H23Configuration of ST7As <strong>for</strong> H23Configuration of ST8As <strong>for</strong> H23Polarity of ST7 ST8As <strong>for</strong> H23Configuration of ST7 if digitalAs <strong>for</strong> H23<strong>ERT</strong> <strong>400</strong> User Manual71/104
N15Configuration of ST8 if digitalAs <strong>for</strong> H239.1.10 Freecooling / Humidity parameters (FrC)L01L02L03L04L05L06L07L08L09L10L11L12L13L14L15L16L17L18L19L20L21L22L23L24L25L26Enable free-cooling0=Freecooling/freeheating not enabled1=Freecooling/freeheating enabledFreecooling offset in Cooling modeThe freecooling set point is calculated by subtracting the value in parameter L02 measured in °C from the cooling set point.Freecooling/Freeheating band in Cooling modeSee EconomizerFreecooling offset in Heating modeSee EconomizerFreecooling/Freeheating band in Heating modeSee EconomizerFreecooling/freeheating activation deltaSee EconomizerMinimum damper openingSee EconomizerFreecooling shut-down set pointSee EconomizerFreecooling shut-down deltaSee EconomizerEnthalpic freecooling/freeheating set point in Cooling modeFreecooling/freeheating set point in Cooling mode; measured in Kj/KgEnthalpic freecooling/freeheating band in Cooling modeSee Freecooling/Freeheating in EnthalpyEnthalpic freecooling/freeheating set point in Heating modeFreecooling/freeheating set point in Heating mode; measured in Kj/KgEnthalpic freecooling/freeheating band in Heating modeSee Freecooling/Freeheating in EnthalpyFreecooling/freeheating activation delta in enthalpySee Freecooling/Freeheating in EnthalpyExternal humidity simulationIn Freecooling/Freeheating in Enthalpy with no humidity probe, it replaces the reading by setting a constant valuemeasured as a %Humidify set point in Heating modeSee humidificationHumidify set point in Cooling modeSee humidificationHumidify hysteresisSee humidificationDehumidify set pointSee DehumidificationDehumidify hysteresisSee DehumidificationDehumidify shut-down temperature differentialSee DehumidificationNumber of active steps in dehumidificationSee DehumidificationNIGHT function activation timeSee Night purgingNIGHT function activation set pointSee Night purgingECO offset in Heating/Cooling modeIf the EKF<strong>400</strong> RT keyboard is used, the value is added to/subtracted from the cooling/heating set point. It is measured in°CMinimum damper opening CO2 set pointSee Air Pollution<strong>ERT</strong> <strong>400</strong> User Manual72/104
9.1.11 Table of parametersThe following table summarizes all the <strong>ERT</strong> <strong>400</strong> parameters.Table of set pointparametersTable ofconfigurationparametersSET POINT PARAMETERSPar. Description Min. Max. Unit ofmeasurementG01 Cooling set point H04 H03 CG02 Heating set point H02 H01 CCONFIGURATION PARAMETERS*Par. Description Min. Max. Unit ofmeasurementH01 Maximum Heating set point G02 G01 CH02 Minimum Heating set point -40.0 G02 CH03 Maximum cooling set point G01 90,0 CH04 Minimum cooling set point G02 G01 CH05 Number of circuits on unit 0 2 NumH06 Number of compressors per circuit 0 4 NumH07 Number of capacity steps per circuit 0 3 NumH08 Compressor start-up sequence 0 1 FlagH09 Circuit balancing 0 1 FlagH10 Presence of heat pump 0 1 FlagH11 ST1 configuration 0 2 NumH12 ST2 configuration 0 2 NumH13 ST3 configuration 0 3 NumH14 ST4 configuration 0 2 NumH15 ST5 configuration 0 2 NumH16 ST6 configuration 0 3 NumH17 Pressure bottom scale value 0 350 KPa*10H18 Polarity of ID1 ID2 ID3 ID4 0 15 NumH19 Polarity of ID5 ID6 ID7 ID8 0 15 NumH20 Polarity of ID9 ID10 ID11 0 15 NumH21 Humidity top scale value 0 100 %H22 Humidity bottom scale value 0 100 %H23 Configuration of ID1 0 25 NumH24 Configuration of ID2 0 25 NumH25 Configuration of ID3 0 25 NumH26 Configuration of ID4 0 25 NumH27 Configuration of ID5 0 25 NumH28 Configuration of ID6 0 25 NumH29 Configuration of ID7 0 25 NumH30 Configuration of ID8 0 25 NumH31 Configuration of ID9 0 25 NumH32 Configuration of ID10 0 25 NumH33 Configuration of ID11 0 25 NumH34 Differential pressure bottom scale value 0 255 NumH35 Configuration of relay 2 0 16 NumH36 Configuration of relay 3 0 16 NumH37 Configuration of relay 4 0 16 NumH38 Configuration of relay 5 0 16 NumH39 Configuration of relay 6 0 16 NumH40 Configuration of relay 7 0 16 NumH41 Polarity RL2 0 1 FlagH42 Polarity RL3 0 1 FlagH43 Polarity RL4 0 1 FlagH44 Polarity RL5 0 1 FlagH45 Polarity of alarm relay 0 1 FlagH46 Configuration of output fan 1 0 1 FlagH47 Configuration of output fan 2 0 2 FlagH48 Disabling heating mode 0 1 FlagH49 Selection of operating mode 0 2 NumH50 Activation of dynamic set point 0 1 FlagH51 Offset in Cooling mode with dynamic set point -50.0 80,0 CH52 Offset in Heating mode with dynamic set point -50.0 80,0 CH53 Ext. temp. set point in Cooling mode with dynamic set point -127 127 CH54 Ext. temp. set point in Heating mode with dynamic set point -127 127 CH55 Ext. temp. delta in Cooling mode with dynamic set point -50.0 80,0 CH56 Ext. temp. delta in Heating mode with dynamic set point -50.0 80,0 CH57 Offset ST1 -12.7 12,7 CH58 Offset ST2 -12.7 12,7 CH59 Offset ST3 -127 127 C/10-Kpa*10H60 Offset ST4 -12.7 12,7 C<strong>ERT</strong> <strong>400</strong> User Manual73/104
H61 Offset ST5 -12.7 12,7 CH62 Offset ST6 -127 127 C/10-Kpa*10H63 Offset ST7 -12.7 12,7 CH64 Offset ST8 -12.7 12,7 CH65 0=50 Hz 1=60 Hz 0 1 FlagH66 0= °C 1=°F 0 1 FlagH67 Serial address of series 0 14 NumH68 Serial address of device 0 14 NumH69 User password 0 255 NumH70 Copy card password 0 255 NumH71 Keyboard present 0 1 FlagH72 Holding time in heating or cooling mode 0 255 MinutesH73 Polarity ST1 ST2 ST4 ST5 0 15 NumH74 Configuration of ST1 if digital 0 24 NumH75 Configuration of ST2 if digital 0 24 NumH76 Configuration of ST4 if digital 0 24 NumH77 Configuration of ST5 if digital 0 24 NumH78 Activates digital regulation 0 1 NumH79 Activates unbalanced circuits 0 1 NumH80 Activates probe on remote keyboard 0 1 Num* If one or more parameters in this category is changed, the controller must be turned off and on again after the change ismade in order to operate correctly.Table of AlarmParametersALARM PARAMETERSPar. Description Min. Max. Unit ofmeasurementA01 Bypass time <strong>for</strong> low pressure pressure switch 0 255 SecondsA02 Number of low pressure events per hour 0 255 NumA03 Pressure switch bypass from fan start 0 255 SecondsA04 Input activation time with active pressure switch 0 255 SecondsA05 Input activation time with pressure switch not active 0 255 SecondsA06 Number of events per hour <strong>for</strong> pressure switch 0 255 NumA07 Compressor thermal switch by-pass activated by compressor 0 255 SecondsA08 Number of events/hour of thermal switches of compressors 1 and 0 255 Num2A09 Number of fan thermal switch events per hour 0 255 NumA10 Anti-frost alarm from ON-OFF bypass 0 255 MinutesA11 Anti-freeze alarm activation set point -127 127 CA12 Anti-freeze alarm hysteresis 0 25,5 CA13 Number of events per hour <strong>for</strong> anti-freeze alarm 0 255 NumA14 Anti-freeze alarm probe 0 3 NumA15 Activation of fan shut-down with anti-freeze alarm 0 1 FlagA16 Fan status with fire alarm 0 3 NumA17 Over-temperature set point 0 255 CA18 Duration in over-temperature 0 255 S*10A19 Deactivation of compressors with high temperature 0 1 FlagA20 Dirty fan operating hours threshold 0 999 hours*100A21 Clogged fan operating hours threshold 0 999 hours*100A22 Activate fan with clogged filter shut-down 0 1 FlagA23 Fan activated filter differential pressure bypass 0 255 SecondsA24 Shut-down fan differential pressure set point 0 255 NumA25 Dirty fan differential pressure set point 0 255 NumA26 Clogged fan differential pressure set point 0 255 NumA27 Duration of differential pressure activated by dirty or clogged 0 255 Secondsfilter signalA28 Duration of differential pressure activated by shut-down fan 0 255 SecondssignalA29 Maximum temperature of outlet air -127 127 CA30 Minimum temperature of outlet air -127 127 CA31 Outlet air regulation band 0 25,5 CA32 Alarm relay status with remote ON/OFF 0 1 FlagTable ofCompressorParametersCOMPRESSOR PARAMETERSPar. Description Min. Max. Unit ofmeasurementC01 Safety time <strong>for</strong> on/off 0 255 Seconds*10C02 Safety timing between two subsequent starts 0 255 Seconds*10C03 Compressor/Compressor start-up interval 0 255 SecondsC04 Compressor/Compressor shutdown interval 0 255 SecondsC05 Interval between capacity steps 0 255 Seconds<strong>ERT</strong> <strong>400</strong> User Manual74/104
Table of RegulatorParametersREGULATOR PARAMETERSPar. Description Min. Max. Unit ofmeasurementb01 Regulation band <strong>for</strong> compressors in cooling mode 0 25,5 Cb02 Regulation band <strong>for</strong> compressors in heating mode 0 25,5 Cb03 Regulation band <strong>for</strong> integrated electric heaters 0 25,5 Cb04 Regulation delta <strong>for</strong> integrated electric heaters with heat pump 0 25,5 Cactiveb05 Regulation delta <strong>for</strong> integrated electric heaters with heat pump 0 25,5 Cnot activeb06 Regulation band <strong>for</strong> integrated hot water coil 0 25,5 Cb07 Regulation delta hot water coil with heat pump activated 0 25,5 Cb08 Regulation delta hot water coil with heat pump not activated 0 25,5 CTable of FanParametersFAN PARAMETERSPar. Description Min. Max. Unit ofmeasurementF01 Fan output mode 0 2 NumF02 Fan pick-up time 0 255 Seconds/10F03 Fan phase shift 0 100 microseconds *200F04 Duration of triac activation impulse 0 255 uS*100F05 Operation on compressor request 0 1 FlagF06 Minimum speed in Cooling mode 0 100 %F07 Maximum silent speed in Cooling mode 0 100 %F08 Set minimum temperature/pressure of fan speed in Cooling -500 800 C/10-Kpa*10modeF09 Proportional band in Cooling mode 0 255 C/10-Kpa*10F10 Delta cut-off 0 255 C/10-Kpa*10F11 Hysteresis cut-off . 0 255 C/10-Kpa*10F12 Cut-off bypass time 0 255 SecondsF13 Max speed in Cooling mode 0 100 %F14 Maximum temperature/pressure of fan speed set point in Cooling -500 800 C/10-Kpa*10modeF15 Minimum speed in Heating mode 0 100 %F16 Maximum silent speed in Heating mode 0 100 %F17 Minimum temperature/pressure set point of fan speed in Heating -500 800 C/10-Kpa*10modeF18 Proportional band in Heating mode 0 255 C/10-Kpa*10F19 Maximum speed in Heating mode 0 100 %F20 Maximum temperature/pressure set point of fan speed in Heating -500 800 C/10-Kpa*10modeF21 Pre-ventilation in Cooling mode 0 255 SecondsF22 Separate or single ventilation 0 1 FlagF23 Fan activation temperature/pressure set point in Defrosting mode -500 800 C/10-Kpa*10F24 Fan activation hysteresis in Defrosting mode 0 255 C/10-Kpa*10Table of Pump /Evaporator FanParametersPUMP / EVAPORATOR FAN PARAMETERSPar. Description Min. Max. Unit ofmeasurementP01 Hot water pump ON fan ON delay 0 255 Seconds*10P02 Fan ON compressors ON delay 0 255 SecondsP03 Unit OFF fan OFF delay 0 255 SecondsP04 Activation of fan shut-down in Defrosting mode 0 1 FlagTable of ElectricHeaters/Hot H2OCoil ParametersELECTRIC HEATERS/HOT WATER COIL PARAMETERSPar. Description Min. Max. Unit ofmeasurementr01 Configuration of electric heaters in Defrosting mode 0 1 Flagr02 Configuration of anti-freeze electric heaters activated in Cooling 0 1 Flagmoder03 Configuration of electric heaters activated in Heating mode 0 1 Flagr04 Configuration of control probe <strong>for</strong> antifreeze electric heaters 0 3 Numr05 Number of electric heaters present 0 4 Numr06 Configuration of electric heaters in OFF and Stand-by mode 0 1 Flagr07 Electric heaters/hot water coil set point in Heating mode Pr09 Pr10 Cr08 Electric heaters/hot water coil set point in cooling/off mode Pr09 Pr10 Cr09 Max. electric heater set point Pr10 127 Cr10 Min. electric heater set point -127 Pr09 Cr11 Anti-freeze electric heater hysteresis 0 25,5 Cr12 Activation of heat pump shut-down 0 1 Flag<strong>ERT</strong> <strong>400</strong> User Manual75/104
13 Heat pump shut-down set point -127 127 Cr14 Heat pump shut-down hysteresis 0 25,5 Cr15 Enable integrated electric heaters in heating mode 0 1 Flagr16 Activate electric heaters/H2O valve in dehumidification 0 1 Flagr17 Hot water pump deactivation hysteresis 0 25,5 Cr18 Minimum activation time of hot water pump 0 255 Seconds*10r19 Activate hot water coil in anti-freeze mode 0 1 FlagTable ofDefrostingParametersDEFROSTING PARAMETERSPar. Description Min. Max. Unit ofmeasurementd01 Activation of defrosting 0 1 Flagd02 Start of defrosting temperature/pressure -500 800 C/10-Kpa*10d03 Defrosting interval 0 255 Minutesd04 End of defrosting temperature/pressure -500 800 C/10-Kpa*10d05 Maximum defrosting time 0 255 Minutesd06 Compressor-valve waiting time at start of defrosting 0 255 Secondsd07 Valve-compressor waiting time at start of defrosting 0 255 Secondsd08 Compressor-valve waiting time at start of defrosting 0 255 Secondsd09 Valve-compressor waiting time at start of defrosting 0 255 Secondsd10 Activation of fan at end of Defrosting 0 1 Flagd11 Delay between circuit defrosting 0 255 Minutesd12 Probe <strong>for</strong> end of defrosting circuit 1 0 2 Numd13 Probe <strong>for</strong> end of defrosting circuit 2 0 2 Numd14 Delayed start of compressors in defrosting mode 0 255 SecondsTable of ExpansionModuleParametersTable ofFreecooling /humidityparametersEXPANSION MODULE PARAMETERSPar. Description Min. Max. Unit ofmeasurementN01 Polarity of ID12 ID13 ID14 ID15 0 15 NumN02 Configuration of ID12 0 24 NumN03 Configuration of ID13 0 24 NumN04 Configuration of ID14 0 24 NumN05 Configuration of ID15 0 24 NumN06 Configuration of relay 9 0 15 NumN07 Configuration of relay 10 0 15 NumN08 Configuration of relay 11 0 15 NumN09 Configuration of relay 12 0 15 NumN10 Configuration of relay 13 0 15 NumN11 Configuration of ST7 0 2 NumN12 Configuration of ST8 0 3 NumN13 Polarity of ST7 ST8 0 3 NumN14 Configuration of ST7 if digital 0 24 NumN15 Configuration of ST8 if digital 0 24 NumFREECOOLING/HUMIDITY PARAMETERSPar. Description Min. Max. Unit ofmeasurementL01 Enable free-cooling 0 1 FlagL02 Freecooling offset in Cooling mode 0 25,5 CL03 Freecooling/Freeheating band in Cooling mode 0 25,5 CL04 Freecooling offset in Heating mode 0 25,5 CL05 Freecooling/Freeheating band in Heating mode 0 25,5 CL06 Freecooling/freeheating activation delta 0 25,5 CL07 Minimum damper opening 0 100 %L08 Freecooling shut-down set point -127 127 CL09 Freecooling shut-down delta 0 25,5 CL10 Enthalpic freecooling/freeheating set point in Cooling mode 0 255 KJ/KgL11 Enthalpic freecooling/freeheating band in Cooling mode 0 255 KJ/KgL12 Enthalpic freecooling/freeheating set point in Heating mode 0 255 KJ/KgL13 Enthalpic freecooling/freeheating band in Heating mode 0 255 KJ/KgL14 Freecooling/freeheating activation delta in enthalpy 0 255 KJ/KgL15 External humidity simulation 0 100 %L16 Humidify set point in heating mode 0 100 %L17 Humidify set point in Cooling mode 0 100 %L18 Humidify hysteresis 0 100 %L19 Dehumidify set point 0 100 %L20 Dehumidify hysteresis 0 100 %L21 Dehumidify shut-down temperature differential 0 25,5 CL22 Number of active steps in dehumidification 0 4 NumL23 NIGHT function activation time 0 255 Min*10L24 NIGHT function activation set point -127 127 °CL25 ECO offset in Heating/Cooling mode -12,7 12,7 °C<strong>ERT</strong> <strong>400</strong> User Manual76/104
L26 Minimum damper opening CO2 set point 0 100 %<strong>ERT</strong> <strong>400</strong> User Manual77/104
56,6510 DIAGNOSTICSAlarms<strong>ERT</strong> <strong>400</strong> can per<strong>for</strong>m a complete self-diagnostics of the system by reporting a series of alarms.Alarms can be activated and reset using parameters A01 - A32.Some alarms can be de-activated <strong>for</strong> a preset interval of time configured with the relative parameter.Number of eventsper hourThe unit is also able to count the actual events <strong>for</strong> specific alarms: if the number of alarms over the last hour exceeds thethreshold set <strong>for</strong> the parameter, the alarm switches from automatic to manual reset mode.Alarms are sampled every 226 seconds.Example: if the number of events is set to 3, the duration of the alarm must be set on a value ranging from 2*226 secondsto 3*226 seconds to allow switching from automatic to manual reset.AM1 2 3AlarmSampling226 s 226 s 226 s 226 sTimeA: automatic reset M: manual resetAlarm: alarmSampling: samplingTime: timeAlarms occurring several times within the set sampling period (226 seconds) will be counted once only.To reset alarms configured <strong>for</strong> manual reset, press and release key ON-OFF.A manual reset shuts down corresponding loads, thus prompting the operator to take the necessary corrective action(reset the alarm using the ON-OFF control).This type of manually reset alarm is used to signal potential problems that could damage the system.10.1 List of alarmsThe activation of an alarm have two effects:· It stops the loads involved· It is displayed on the keyboardThe signal consists of an "Enn" code (where nn stands <strong>for</strong> a two digit number that identifies the type of alarm; i.e. E00, E25,E39….).The following table lists all possible alarms with their codes and block of loads.---> X indicates load(s) OFF<strong>ERT</strong> <strong>400</strong> User Manual78/104
CODE TYPE DESCRIPTION SingleCOMP.Comp/circuitAll COMP. Cond.fan/circuitAll cond.fanInternalfanElect.heater 1-2Elect.heater 3-4humid. Valve +H2OpumpDamp. By pass ResetE00 RemoteOffactivated by digitalinput configuredas “remote off”RL ALL activated ifA32=1X X XA X A X A X X X AutomaticApex A – antifreezeload ishandled if enabledwith r06E01 HIGHpressurecirc 1activated by digitalinput configuredas “High pressurecircuit...”X (1) ManualE02 LOWpressurecirc. 1E03 <strong>Therm</strong>alswitchcompressor 1E04 <strong>Therm</strong>alswitch(condensation) circ.1activated by digitalinput configuredas “Low pressurecircuit...”Apex F – only ifF22=0activated by digitalinput configuredas “<strong>Therm</strong>alswitch...”activated bydigital inputconfigured as“<strong>Therm</strong>al switch offan circuit...”X (1) X F Notactivated<strong>for</strong> A01withcompressorstart up orvalvereversing,circuitrelatedX Notactivated<strong>for</strong> A07withcompressorstart upautomaticreset up tonumber ofevents/hour A02automaticreset up tonumber ofevents/hour equal toA08X (1) X G X X G X automaticreset up tonumber ofevents/hour A09Apex G – only ifF22=1<strong>ERT</strong> <strong>400</strong> User Manual79/104
CODE TYPE DESCRIPTION SingleCOMP.Comp/circuitAll COMP. Cond.fan/circuitAll cond.fanInternalfanElect.heater 1-2Elect.heater 3-4humid. Valve +H2OpumpDamp. By pass ResetE05 Antifreezeenabled withrelative input withA14activated if inputvalue < A11hysteresis A12shutdown ofcondensation fansand compressorson unitApex H – only ifA15=1X X X H X H X H X H X H not active<strong>for</strong> A10fromactivationof heatmode onlystartingwith standbyorremote offautomaticreset up tonumber ofevents/hour equal toA13<strong>for</strong> manualreset: resetis alsopossible <strong>for</strong>changeover,remote offE06 Failure ofprobe AI2activated if input...configured asanalogue has shortcircuited, trippedor is out of rangeX X X X X X ? XE07 Failure ofprobe AI3activated if input...configured asanalogue has shortcircuited, trippedor is out of rangeX X X XE13 <strong>Therm</strong>alswitchcompressor 2E21 HIGHpressurecirc 2activated by digitalinput configuredas “<strong>Therm</strong>alswitch...”activated by digitalinput configuredas “High pressurecircuit...”X Notactivated<strong>for</strong> A07withcompressorstart up.automaticreset up tonumber ofevents/hour equal toA08X (2) ManualE22 LOWpressurecirc.2activated by digitalinput configuredas “Low pressurecircuit...”automatic reset upto number ofevents/hour A02Apex F – only ifF22 = 0X (2) X F Notactivated<strong>for</strong> A01withcompressorstart up orvalvereversing,circuitrelated<strong>ERT</strong> <strong>400</strong> User Manual80/104
CODE TYPE DESCRIPTION SingleCOMP.Comp/circuitAll COMP. Cond.fan/circuitAll cond.fanInternalfanElect.heater 1-2Elect.heater 3-4humid. Valve +H2OpumpDamp. By pass ResetE23 <strong>Therm</strong>alswitchcompressor 3E24 <strong>Therm</strong>alswitch(condensation) circ.2activated by digitalinput configuredas “<strong>Therm</strong>alswitch...”activated by digitalinput configuredas “<strong>Therm</strong>al switchof fan circuit...”Apex G – only ifF22 = 1X Notactivated<strong>for</strong> A07withcompressorstart up.automaticreset up tonumber ofevents/hour equal toA08X (2) X G X X G automaticreset up tonumber ofevents/hour A09E26 Failure ofprobe AI5activated if input...configured asanalogue has shortcircuited, trippedor is out of rangeX X X X X X X XE27 Failure ofprobe AI6activated if input...configured asanalogue has shortcircuited, trippedor is out of rangeX X XE33 <strong>Therm</strong>alswitchcompressor 4E40 Failure ofprobe AI1activated by digitalinput configuredas “<strong>Therm</strong>alswitch...”activated if input...configured asanalogue has shortcircuited, trippedor is out of rangeX Notactivated<strong>for</strong> A07withcompressorstart up.X X X X X X X Xautomaticreset up tonumber ofevents/hour equal toA08<strong>ERT</strong> <strong>400</strong> User Manual81/104
CODE TYPE DESCRIPTION SingleCOMP.E41 Differential pressureswitch/thermalswitchactivated by digitalinput configuredas “INTERNAL FANPROTECTION LOWCRITICALITY”activated afterperiod in alarmstate <strong>for</strong> A04shutdown afterperiod in normalstate <strong>for</strong> A05Apex J – if A06 =20 signal onlyE42 Failure ofprobe AI4activated if inputconfigured asanalogue has shortcircuited, trippedor is out of rangeE43 Evaporator fanthermalswitchINTERNALFANPROTECTION HIGHCRITICALITYE45 Configurationusing digital inputconfigured as“INTERNAL FANPROTECTIONHIGHCRITICALITY”immediateactivationactive if at leastone of thefollowingconditions occurs:- configuration ofnumber ofcompressors /capacity steps > 4- keyboarddeclared present(H71=1) but thereis nocommunicationbetween keyboardand base unit.Comp/circuitAll COMP. Cond.fan/circuitAll cond.fanInternalfanElect.heater 1-2Elect.heater 3-4humid. Valve +H2OpumpDamp. By pass ResetX J X J X J X J X J X J X J X J Not active<strong>for</strong> A03fromactivationof internalfanautomaticreset up tonumber ofevents/hour equal toA06X X X X X X X XX X X X X ManualX X X X X X X X<strong>ERT</strong> <strong>400</strong> User Manual82/104
CODE TYPE DESCRIPTION SingleCOMP.E46 Hightemperatureactive if probevalue AI1 > A17<strong>for</strong> time A18 incooling modehysteresis A12Apex K – if A19 =1E48 AI7 probefaultactivated if inputconfigured asanalogue has shortcircuited, trippedor is out of rangeE49 Failure ofprobe AI8activated if inputconfigured asanalogue has shortcircuited, trippedor is out of rangeE62 Dirtyfilterssignal onlyenabled if AI5configured(H15=2)activated if valueAI5> A25 and
CODE TYPE DESCRIPTION SingleCOMP.E61 Cloggedfiltersenabled if AI5configured(H15=2)active if valueAI5> A26, <strong>for</strong> timeequal to A27also activated bynumber ofinternal fanoperating hoursequal to A21Apex L – if A22 =1, if not, signalonlyE60 Evaporator fan shutdownenabled if AI5configured(H15=2)active if valueAI5< A24, <strong>for</strong> timeequal to A28E63 <strong>Therm</strong>alswitch ofelectricheaters 1-2Activated bydigital inputconfigured as“thermal switch ofelectric heaters...”immediateactivationE64 <strong>Therm</strong>alswitch ofelectricheaters 3-4Activated bydigital inputconfigured as“thermal switch ofelectric heaters...”immediateactivationE65 Humidifier Activatedby digital inputconfigured as“humidifierprotection”Comp/circuitAll COMP. Cond.fan/circuitAll cond.fanInternalfanElect.heater 1-2Elect.heater 3-4humid. Valve +H2OpumpDamp. By pass ResetX L X L X L X L X L X L X L X L notactivated ifinternal fanis off and<strong>for</strong> A23fromactivationof fanManualX X X X X X X X notactivated ifinternal fanis off and<strong>for</strong> A23fromactivationof fanManualX ManualX ManualX Automatic<strong>ERT</strong> <strong>400</strong> User Manual84/104
CODE TYPE DESCRIPTION SingleCOMP.Comp/circuitAll COMP. Cond.fan/circuitAll cond.fanInternalfanElect.heater 1-2Elect.heater 3-4humid. Valve +H2OpumpDamp. By pass ResetE66 Smoke enabled if digitalinput configuredas “Fire/smokealarm” or if AI8configured <strong>for</strong>determination ofCO2 (N12=2) –threshold?X X XM X X X X XM AutomaticApex M –evaporator fanand damper aresubject to A16Note 1: the outputs defined as capacity steps are in x if the compressor that they belong to is in alarm mode.Note 2: alarm E41 is useful when any digital state needs to be displayed without blocking other loads<strong>ERT</strong> <strong>400</strong> User Manual85/104
Alarm TablePlease note that the outputs defined as capacity steps are off if the compressor that they belong to is in alarm mode.• If it belongs to circuit 1 (1)• If it belongs to circuit 2 (2)• Only if A15 = 1 (Apex H)• If A06 is not 20 otherwise, signal only (Apex J)• f A19 = 1 otherwise, signal only (Apex K)• f A22 = 1 otherwise, signal only (Apex L)• f r06 = 0 otherwise ON in anti-freeze mode (Apex A)• If separate condensation F22=0 (Apex F)• If single condensation F22=1 (Apex G)• If A16=0 or A16=3 (Apex M)• If A16=0 or A16=1 (Apex N)<strong>ERT</strong> <strong>400</strong> User Manual86/104
(*)If input AI5 is declared present (H15=1) the alarms related to the differential pressure of the filter are activated. There arethree types of signalling:• Clogged filters• Dirty filters• Fan shutdownNone of these alarms is active if the fan is deactivated (unit OFF) and reading of the input is bypassed <strong>for</strong> a period of timeequal to A23 from activation of the fan.See the diagram below:FANAI5TimeA26A25A24OBSTRUCTEDDIRTYREGULAROFFA23FAN: Evaporator fanAI5: probe AI5 (analogue inputs)Time: timeOBSTRUCTED: Clogged filterDIRTY: Dirty filterREGULAR: Correct operatingOFF: Fan shut-downFan OperatingHoursIf the number of operating hours of the fan reaches the parameter A20 a dirty filter alarm is generated. A20 must begreater than 0 <strong>for</strong> the alarm to be activated.If the number of operating hours reaches the parameter A21 a clogged filter alarm is generated.A21 must be greater than 0 <strong>for</strong> the alarm to be activated.By setting A22= 1, the clogged filters alarm blocks all the unit loads.10.2 Table of digital alarmsAlarm Name Bypass activation event Bypass time ActivationtimeDeactivationtimeNumber of eventsper hourHigh pressure alarm, None Not present Not present Not present Manual resetcircuitLow pressure alarm Enabling of oneA01 Not present Not present A02compressor on the circuitor reversal of 4-way valvePressureFan activated A03 A04 A05 A06switch/evaporator fanthermal switch alarmEvaporator fan thermal None Not present Not present Not present Manual resetswitch<strong>Therm</strong>al switch of Start up of one of the A07 Not present Not present A08compressors 1,2,3,4 compressors<strong>Therm</strong>al switch of fan 1,2 None Not present Not present Not present A09Electric heaters 1-2 None Not present Not present Not present Manual resetElectric heaters 3-4 None Not present Not present Not present Manual resetHumidifier None Not present Not present Not present automaticSmoke None Not present Not present Not present Automatic reset<strong>ERT</strong> <strong>400</strong> User Manual87/104
10.3 Table of analogue alarmsAlarm Name Event BypasstimeAnti-freeze alarmHightemperaturealarm onregulationsystemOn Off, input inHeating mode, remoteon offActivationSET POINTDuration Hysteresis Number ofevents perhour<strong>Control</strong> probeA10 A11 N/A A12 positive A13 If A14 = 0 alarmnot activeIf A14 = 1 probeAI1If A14 = 2 probeAI2If A14 = 3 probeAI4AI1None Not present A17 A18 A12 negative AutomaticresetDirty filters Fan activated A23 A25 A27 N/A Manual reset AI5Clogged filters Fan activated A23 A26 A27 N/A Manual reset AI5Fan shut down Fan activated A23 A24 A28 N/A Manual reset AI5<strong>ERT</strong> <strong>400</strong> User Manual88/104
11 TECHNICAL FEATURES11.1 Technical dataTypical Min. Max.Supply voltage 12V~ 10.8V~ 13.2V~Supply frequency 50Hz/60Hz --- ---Power 11VA --- ---Insulation class 1 --- ---Degree of protection Front IP0 --- ---Operating ambient temperature 25°C -10°C 60°COperating ambient humidity (non condensing) 30% 10% 90%Ambient storage temperature 25°C -20°C 85°CAmbient storage humidity (non condensing) 30% 10% 90%11.2 Electromechanical data110/230 V digital outputs 8 relays 5 A, resistive; ¼ hp 230V~; 1/8 hp 125V~The total current on the relays should not exceed 10°2 relays 5 A, resistive; ¼ hp 230V~; 1/8 hp 125V~ normally open (exp. type 1)Analogue outputs2 relays 5A resistive normally open. Shared. (exp. type 2)3 change-over relays 8 A resistive (exp. type 2)2 energizing triac or 4-20 mA configurable outputs1 0-10Vdc output2 12Vdc power supplies min. current 46 mA (exp. type 2)2 5 Vdc power supplies min. current 10mA (exp. type 2)Analogue inputs n° 4 NTC R25 10KΩ, reading range –30°C ÷ 90°C2 configurable inputs 4-20mA / NTC R25 10KΩ, reading range –30°C ÷ 90°CDigital inputs2 4-20mA or NTC R25 10KΩ hardware configurable inputs (jumpers) (exp. type 2).11 voltage free digital inputs4 voltage free digital inputs (expansion modules)Terminals and connectors 1 10-way connector, high voltage, step 7.52 16-way snap-on connectors, low voltage, step 4,2, AWG 16-281 5-way connector, step 2,5, remote control and copy card, AWG 24-301 20-way connector <strong>for</strong> expansion connection1 3-way screw terminal <strong>for</strong> remote keyboard1 5-way connector, digital inputs, step 5 (exp. type 1)1 4-way connector, step 7.5, relay output (exp. type 1)1 20-way connector with base unit (exp. type 1)1 12-way connector, high voltage, pitch 5 (exp. type 2)1 flat cable welded to 20-way PCB <strong>for</strong> connection to base unit (exp. type 2)1 13-way screw terminal <strong>for</strong> low voltage contacts (exp. type 2)Serial connections 1 serial connection 96001 serial connection 2<strong>400</strong> (remote keyboard output)Trans<strong>for</strong>merThe unit must be powered by an adequate trans<strong>for</strong>mer with the following characteristics:• Primary voltage: 230V~±10%; 110V~±10%• Secondary voltage: 12V~• Supply frequency: 50Hz; 60Hz• Power: 11VA11.3 StandardsThe unit complies with the following European Union Directives:EU Directive 73/23/EEC and subsequent amendmentsEU Directive 89/336/EEC and subsequent amendmentsand is compliant with the following harmonized standardsLOW VOLTAGE: EN60335, where applicableEMISSIONS: EN50081-1 (EN55022)IMMUNITY: EN50082-1 (IEC 1000-4-2/3/4/5)<strong>ERT</strong> <strong>400</strong> User Manual89/104
12 USE OF THE DEVICE12.1 Permitted useThis product is used to control roof top controllers.To ensure safety, the controller must be installed and operated in accordance with the instructions supplied, and access tohigh voltage components must be prevented under regular operating conditions. The device shall be properly protectedagainst water and dust and shall be accessible by using a tool only. The device is suitable <strong>for</strong> incorporation in a householdappliance and/or similar air conditioning device.According to the reference regulations, it is classified:• In terms of construction, as an automatic electronic control device to be incorporated with independent assembly orintegrated;• In terms of automatic operating features, as a type 1 action control device, with reference to manufacturingtolerances and drifts;• As a class 2 device in relation to protection against electrical shock;• As a class A device in relation to software structure and class.12.2 Forbidden useAny use other than the permitted use is <strong>for</strong>bidden.Please note that relay contacts supplied are functional and are subject to fault (in that they are controlled by an electroniccomponent and be shorted or remain open); protection devices recommended by product standards or suggested bycommon sense in response to evident safety requirements shall be implemented outside of the instrument.<strong>ERT</strong> <strong>400</strong> User Manual90/104
13 RESPONSIBILITY AND RESIDUAL RISKSEliwell & <strong>Control</strong>li srl shall not be held liable <strong>for</strong> any damage incurred as a result of:installation/use other than those intended, and, in particular, failure to comply with the safety instructions specified byapplicable regulations and/or provided in this document;use with equipment which does not provide adequate protection against electric shocks, water and dust under theeffective conditions of installation;use with equipment which permits access to hazardous parts without the use of tools;installation/use with equipment which does not comply with current regulations and legislation.<strong>ERT</strong> <strong>400</strong> User Manual91/104
14 DISCLAIM<strong>ERT</strong>his manual and its contents remain the sole property of Eliwell & <strong>Control</strong>li s.r.l. and shall not be reproduced ordistributed without authorization. Although great care has been exercised in the preparation of this document, Eliwell &<strong>Control</strong>li s.r.l., its employees or its vendors, cannot accept any liability whatsoever connected with its useEliwell &<strong>Control</strong>li s.r.l. reserves the right to make any changes or improvements without prior notice.<strong>ERT</strong> <strong>400</strong> User Manual92/104
15 GLOSSARYLogical ORScroll upStand-byResetResettingManual resetScroll downBLINKAverage hoursLoadsSet PointRangeHysteresisNon volatilememoryChange overLabelSeveral inputs that are linked in an OR relation is equivalent to a single input with the following status:• active if at least one input is active;• inactive if no input is active.Scrolling up a menu means viewing all the parameters from the bottom to the top (08 -> 09 -> 10 ....).Means that the unit is in waiting mode and that all the functions are temporarily interrupted.Means to restore to zero.Resetting an alarm means correcting the error condition and re-activating the alarm so that it can emit new signals.A manually resettable alarm can only be reset using the keyboard.Scrolling down a menu means viewing all the parameters from top to bottom (10 -> 09 -> 08 ....).This term generally refers to LEDs.The average is calculated as the ratio between the total hours of compressors available and the number of compressors onthe circuit.These identify the various devices in a plant such as compressors, fans, hydraulic pump and anti-freeze electric heaters.This represents the reference value (that can be set by the user) that defines the operating status of the plant. A typicalexample is the thermostat that regulates the temperature in our homes: to maintain a temperature of 20 °C, we must set aset point of 20°C (the heating system will start if the ambient temperature measured is below 20°C and will be turned offotherwise.This represents a set of values; i.e. Range 1...100 includes all the values between 1 and 100.Hysteresis is generally defined in connection with a set point to avoid frequent oscillations in the status of the controlledload.Example: let’s define a set point of 20 °C on a probe that detects ambient temperature so that the compressor starts everytime the limit value is exceeded.When ambient temperature reaches values that are close to the set point (20 °C), a phase of instability occurs during whichthe relay, which starts the compressor, frequently changes its status from ON to OFF. This condition can severely damagesystem operating.To prevent this problem, hysteresis is defined as a tolerance range in which no status change occurs; in our specific case, ifhysteresis of 1 °C is set, the compressor starts at 21 °C (set point + hysteresis) and stops at 19 °C (set point - hysteresis).This memory stores the data even when the unit is turned off (as opposed to a volatile memory that deletes the data assoon as the unit is turned off).This term indicates the switching of an operating mode (example: from Cooling to Heating mode).The label found on the inside of the device is illustrated below:BRANDPRODUCT NAMEPRODUCT CODECUSTOMER REF.POWER SUPPLYC<strong>ERT</strong>IFICATEFIRMWAREDESTINATIONIt contains the following in<strong>for</strong>mation:• BRAND : brand of the manufacturer• PRODUCT NAME : name of the product• PRODUCT CODE : product ID• CUSTOMER REF. : customer code• POWER SUPPLY : power supply of the device• FIRMWARE : software version• DESTINATION : where device will be used• C<strong>ERT</strong>IFICATE : product certificationEnthalpyEnthalpy is a thermodynamic property that takes into account both the temperature and the humidity of the air. In simplerterms, if is like heat that is subtracted from or added to air to go from one humidity or temperature value to another.Enthalpy is calculated using special tables or hygrometric <strong>for</strong>mulas.The first of these can be used to calculate the saturation pressure of steam and is called Liley’s equation.Pg = exp(14.43509-5333.3/T)Where T is absolute temperatureFrom the definition of relative humidity we have:<strong>ERT</strong> <strong>400</strong> User Manual93/104
Pv=RH*PgWhere Pv is the steam pressure and RH relative humidityThe specific humidity is given by the <strong>for</strong>mulaω = 0.622*Pv/(P-Pv)where P is atmospheric pressureThe enthalpy is given by the <strong>for</strong>mulah=1.005*t+ ω*(2500+1.86*t) KJ/Kgwhere t is expressed in degrees Celsius.Using the previous <strong>for</strong>mula as a starting point, enthalpy can be roughly calculated without resorting to floating pointarithmetic .Liley’s <strong>for</strong>mula is calculated at between 15°C and 40°C with second order polynomial interpolation to give:Pg= 0.005756*t^2-0.08636*t+1.7017<strong>ERT</strong> <strong>400</strong> User Manual94/104
16 COMPONENTS AND ACCESSORIES (APPENDIX)16.1 AccessoriesName Code DescriptionMODULE CF-05 MW991000 Open board (assembly on back of board) <strong>for</strong>control of fan speed by phase cutting.Characteristics of this model:• power 500W; maximum current10A• Faston connectorsMODULE CF-15 MW991100 Open board (assembly on back of board) <strong>for</strong>control of fan speed by phase cutting.Characteristics of this model:• power 1500W; maximum current8A• Faston connectorsMODULE CF-22 MW991200 Open board (assembly on back of board) <strong>for</strong>control of fan speed by phase cutting.Characteristics of this model:• power 2200W; maximum current10A• Faston connectorsMODULE CF-REL MW991300 Open board to switch condensation fansON/OFFCharacteristics of this model:• maximum current 6A• Faston connectorsPCInterface 2150PCI5A3000000RS232-RS485/TTl converter with 12V~auxiliary outputTRANSFORMER TF411210 Trans<strong>for</strong>mer 230V~/12A 5,6VACOPY CARD MW320500 Parameter programming keyTHREE-PHASE FAN REGULATORL D 312 42 0T1S0012A 420V~ Triac (PWM)Box: IP55L D 320 42 0T1S0020A 420V~ Triac (PWM)Box: IP55L D 312 42 0T1G0012A 420V~ Triac (PWM)Box: IP22L D 320 42 0T1G0020A 420V~ Triac (PWM)Box: IP22WIRING (*) COLV0100 Wiring (connector + 1m long cables) <strong>for</strong>connection of low voltage inputs andoutputs.EMC FILTER (**) FT111201 LC mains filter.PROBESN691150Temperature probe NTC 103AT 1.5 mImmersion probe.SN8S0A1500Temperature probe NTC 6X40, 1.5 mSILICONESN8S0A3000Temperature probe NTC 6X40, 3 m SILICONECable RS 232 1500128 Length 1.8 m (**)TTL cable 1500180 Length 0.3 m (30 cm) (****)Param Manager SLP05MX000000 +PCI5A3000000Software used to control unit from a PCParam Manager + Interface module alsocalled PCIFRONT PROTECTION(*****) PR111120 Rubber front sheath to guarantee a highdegree of protection from externalatmospheric agents.Bus Adapter 150 BA10000R3700 Interface module <strong>for</strong> multipoint ModBusTD transducersHumidity probesSN52-0000SN56-0000Several models: see List of fan modules orcontact the Sales Office
16.1.1 KeyboardsThere are 3 different types of keyboard:EKW<strong>400</strong>-RT/SDisplayAnalogue inputsTerminalsKeysDimensionsMountingFunctions3 digits with sign8 LEDs (including the decimal point)1 ambient temperature NTC1 3-way screw connector4 keys122x80 mmWall-mountedChanging operating mode, setting parameters, displaying analogue and digital inputs; cannotbe used to set auto and fan modesEKP<strong>400</strong>-RTDisplayAnalogue inputsTerminalsKeysDimensionsMountingFunctions3 digits with sign8 LEDs (including the decimal point)None1 3-way screw connector2 keys34x76 mmPanel-mounted using special fixing holeChanging operating mode, setting parameters, displaying analogue and digital inputs; cannotbe used to set auto and fan modesEKF<strong>400</strong>-RTLEDsAnalogue inputsDigital inputsTerminalsButtons/switchesDimensionsMountingFunctions3 LEDs1 ambient temperature NTC1 potentiometer <strong>for</strong> modifying set point2 clean contactsECONOMYFAN MODE2 Screw connectors4-way <strong>for</strong> digital inputs3-way <strong>for</strong> communication with base unit2 4-position slides1 2-position slideknob <strong>for</strong> modifying set point +/-5°C110x80 mmWall-mountedAll operating modes can be set including Auto, Fan; Eco, Night, open Damper functions canalso be activated(*) No cable <strong>for</strong> version /V.(**) EMC filter is used if the fan is to be modulated (i.e. by phase cutting)(***) Other lengths available on request. It is advisable to use a 1.8 m long cable. The maximum length varies according tothe data transmission speed.(****) Other lengths available on request. It is advisable to use a 0.3 m long cable. Longer lengths may be used dependingon the electromagnetic disturbance in the environment.(*****) Front protection only applies to the EKP keyboard.<strong>ERT</strong> <strong>400</strong> User Manual96/104
56 6516.1.2 CF ModulesCF series units are optional modules that can be connected to main control modules in order to allow the fans to beadjusted with currents ranging from 2 A to 10 A.These modules can be supplied as "open cards" and in several models:• CF-REL <strong>for</strong> ordinary ON/OFF commands• CF-05 <strong>for</strong> cutting phase commands up to maximum powers of 500 W• CF-15 <strong>for</strong> cutting phase commands up to maximum powers of 1,500 W• CF-22 <strong>for</strong> cutting phase commands up to maximum powers of 2,200 WCF modules:technicalspecificationsSupply voltage: 230V~.Type of current on load:• CF-05: 500 W max.• CF-15: 1500 W max.• CF-22: 2200 W max.Maximum absorption current:• CF-05: 2.5 A max current at 230 V~• CF-15: 8 A max current at 230 V~• CF-22: 12 A max current at 230 V~Values and types of fuses:• CF-05: 5x20 2.5 A lagged• CF-15: 5x20 8 A lagged• CF-22: 5x20 12 A laggedThe ratings <strong>for</strong> the fuse refer to the maximum load (this is the fuse supplied as standard). This fuse has been specificallydesigned to protect the power components of the fan module. A fuse with a higher capacity should never be used. Thevalue of the fuse must always be dimensioned in function of the fan and of the load being controlled (though the valuemust always be below the maximum one). If correctly dimensioned, the fuse also protects the load.• Power employed: varying, depending on model (500W/1500W/2200W).• Type of control signal: impulse modulation.• Protection class: IP00 (open card).CF modules:connections<strong>ERT</strong> <strong>400</strong> User Manual97/104
339 85B7 632 31 30 29(max 500 Watt)28 27 26 25 24 23 22 21 N6 N5CF-RELCF-051 2 3 4 5A33 34 35 36N4 N3 N2 N1F4 F3 F2 F1BA(max 1.500 Watt)(max 2.200 Watt)32 31 30 2928 27 26 25 24 23 22 21 N6 N532 31 30 2928 27 26 25 24 23 22 21 N6 N5CF-15CF-2233 34 35 36N4 N3 N2 N1F4 F3 F2 F133 34 35 36N4 N3 N2 N1F4 F3 F2 F1BABAA: Power supply B: <strong>Control</strong> signalPer<strong>for</strong>m all operations on the connections when the unit is OFF. All operations must be per<strong>for</strong>med by qualifiedpersonnel only.Power cards are designed to be fitted on the rear of boards.The dimensions of the card models are shown in the following layout:CF modules:mechanicalassembly50.064.026.0CF-RELCF-05fl 4.0CF-15CF-22fl 4.047.025.07.025.07.059.056.059.056.083.083.072.05.085.05.085.090.090.0<strong>ERT</strong> <strong>400</strong> User Manual98/104
226,7119,30299,250-1212,25111,75IMG INFOCopy Card photo16.1.3 Copy CardThis device is used to upload and download the device parameter map.copy CardA: Copy Card viewed from below: dimensions 4x2x1.3cmB: Copy Card and TTL cable (length 30 cm)C: Copy Card, viewed from 3/4The following conventions are usually applicable:• UPLOAD means copying parameters from a unit to COPYCARD• DOWNLOAD means copying the parameters from a COPY CARD to a unit16.2 ProbesADBCA: Humidity probe EWHS280: dimensions 103x25 mmB: Humidity probe EWHS300: dimensions 80x80x52 mmC: Pressure probe EWPA007D: NTC temperature probe16.2.1 EMC filterIf the fans are regulated by means of the cutting phase, it is necessary to install a noise filter upstream from the powersupply. This filter removes the electromagnetic noise this control emits into the mains.Param ManagerIf you have an adequate Personal Computer running Windows 95 or a higher version, the Param Manager software, and anadequate interface module and proper wiring, it is possible to control all the device parameters by means of a PersonalComputer.The unit is easy to program thanks to a series of interfaces that offer a logical, controlled, fast and simple approach.<strong>ERT</strong> <strong>400</strong> User Manual99/104
! For further in<strong>for</strong>mation, see the Param Manager manual.PCInterface interface moduleThis device enables the controller to interface with the PC.! For in<strong>for</strong>mation on how to connect the device, see the Param Manager Manual.! For in<strong>for</strong>mation on the technical specifications of PCI2150, see the instruction sheet.PCI2150The PC must be connected with the interface module, and the interface module with the device, with no poweron to any of the devices, and in compliance with current safety regulations. It is also important to avoidelectroshocks, especially on the open metal surfaces of each unit. It is there<strong>for</strong>e necessary to adopt specialmeasures to convey electrostatic currents to the ground.<strong>ERT</strong> <strong>400</strong> User Manual100/104
17 ANALITIC INDEXAAccessories..................................................................... 93Air Pollution .................................................................... 60Alarm Parameters (ALL)............................................... 65Alarm Table..................................................................... 84Alarms .............................................................................. 76Analogue inputs............................................................. 18Analogue inputs: configuration table....................... 18Anti-freeze/boiler parameters (FRO) ......................... 68Anti-freeze/integrated electric heaters ..................... 38Anti-freeze/integrated electricheaters:Configuration ........................................... 38Anti-freeze/integrated electric heaters:Configurationof electric heater probe............................................ 38Auto................................................................................... 42Auto operating mode.................................................... 43Available functions...........................................................4Average hours................................................................. 91BBLINK ................................................................................ 91Buttons ............................................................................. 26CCF Modules...................................................................... 95CF modules: connections.............................................. 95CF modules: mechanical assembly ............................ 96CF modules: technical specifications......................... 95Change over .................................................................... 91Coil drainage time ......................................................... 55COMPONENTS AND ACCESSORIES (APPENDIX).... 93Components and models ................................................5Compressor parameters (CP) ...................................... 66Compressor start/shutdown sequence (or powerstep) .............................................................................. 33Compressor timing ........................................................ 35Compressor timing:....................................................... 36Compressor timing:Off-on and on-on sequence 1comp............................................................................. 35Compressor timing:On/off timing .............................. 35Compressor timing:On/on timing .............................. 35Compressor timing:On-on and off-off 2 compsequence. ..................................................................... 36Compressor timing:On-on and off-off timing 2comp............................................................................. 35Compressors .................................................................... 32Compressors: fixed start-up sequence andbalancing of circuits.............................................. 35Compressors: fixed start-up sequence andsaturation of circuits............................................. 34Compressors: start-up based on operating hoursand balancing of circuits..................................... 34Compressors: start-up based on operating hoursand saturation of circuits ....................................34Condensation fan ...........................................................36Condensation fan control.............................................47Condensation fan control:Cooling mode .................47Condensation fan control:Heating mode .................47Condensation/Defrosting probes................................40Condensation/Defrosting probes:Separate orsingle condensation................................................40Configurability .................................................................. 4Configuration of analogue inputs..............................18Configuration of compressors .....................................32Configuration of compressors:Compressors with1 capacity step .........................................................33Configuration of compressors:Compressors with2 or 3 capacity steps..............................................33Configuration of compressors:Compressorswithout capacity steps..........................................32Configuration of compressors:Unbalancedcircuits .........................................................................33Configuration of digital inputs....................................18Configuration of fan ......................................................36Configuration of fan outputs..................................21Configuration of fan regulator....................................37Configuration of fan: selection of the type ofoutput..........................................................................37Configuration parameters (CnF).................................62Configuring the set points............................................44Connection of base unit................................................12<strong>Control</strong> during defrosting.............................................54<strong>Control</strong> during defrosting:Compressors ....................54<strong>Control</strong> during defrosting:Condensation fans .........54<strong>Control</strong> during defrosting:Evaporation fans ............54<strong>Control</strong> during defrosting:Reversing valve................54<strong>Control</strong> of anti-freeze electrical heaters....................48<strong>Control</strong> of anti-freeze electrical heaters:Diagram ofthe anti-freeze/integrated electric heaters ..........49<strong>Control</strong> of compressors – temperature controller ..45<strong>Control</strong> of hot water coil in anti-freeze mode .........51<strong>Control</strong> of integrated electrical heaters....................49<strong>Control</strong> of integrated electrical heaters:Example ofr05=2.............................................................................51<strong>Control</strong> of integrated electrical heaters:Example ofr05=4.............................................................................50<strong>Control</strong> of integrated electrical heaters:Examplewith 2 electric heaters ( r05=2)...............................50<strong>Control</strong> of integrated electrical heaters:Examplewith 4 electric heaters ( r05=4)...............................49<strong>Control</strong> of integrated hot water coil (heating) .......51<strong>Control</strong> probe ..................................................................43<strong>Control</strong> probes ................................................................36
Cooling ............................................................................. 42copy Card......................................................................... 97Copy Card ........................................................................ 97Copy Card device............................................................ 23Copy Card photo............................................................ 97DDamper............................................................................. 57Damper opening digital input .................................... 41Defrosting ........................................................................ 53Defrosting parameters (dFr)........................................ 69Defrosting probes........................................................... 40Defrosting: control of compressors............................ 54Dehumidification ........................................................... 55Description of parameters ........................................... 62Device off (Off)................................................................ 42Diagnostics .........................................................................6DIAGNOSTICS ................................................................. 76Digital inputs .................................................................. 18Digital inputs: polarity.................................................. 18Digital inputs: setting................................................ 19Digital regulation........................................................... 44Digital regulation user activation.............................. 44Dimensions .........................................................................7Dimensions of base module .......................................7Dimensions of EKF<strong>400</strong> keyboard ...................................9Dimensions of EKP <strong>400</strong> keyboard ..................................8Dimensions of EKW <strong>400</strong> keyboard ................................8Dimensions of expansion module .................................7Dimensions of expansion module EXP 405 .................8DISCLAIMER..................................................................... 90Display.............................................................................. 27Displays ............................................................................ 27Dynamic set point.......................................................... 45Dynamic set point:Modification based on outdoortemperature with negative offset........................... 45Dynamic set point:Modification based on outdoortemperature with positive offset ............................ 45Dynamic set point:Regulation parameters .............. 45EEconomizer ...................................................................... 56Economy operating mode............................................ 43EKF<strong>400</strong> RT: Digital Inputs............................................. 20EKF<strong>400</strong>-RT keyboard .................................................. 24EKP<strong>400</strong>-RT keyboard ..................................................... 26EKW <strong>400</strong> keyboard connections ....................................9EKW<strong>400</strong>-RT/S keyboard................................................ 28Electric heaters in Defrosting mode........................... 38Electric heaters in dehumidification mode .............. 38Electromechanical data ............................................... 87EMC filter ......................................................................... 97End of Defrosting............................................................ 54End of Defrosting:Configuration parameters .......... 55End of Defrosting:Defrosting end sequence ............. 55Enthalpy............................................................................91Evaporator fan ................................................................40EXP 402 ............................................................................... 7Exp 402 expansion module connections (type 1)....16Exp 405RH expansion module connections (type 2)........................................................................................16Expansion module parameters (ESP).........................69FFan control in Cooling mode: diagram.....................47Fan control in Heating mode: diagram ....................48Fan ON compressors ON delay ...................................41Fan on high voltage outputs .......................................37Fan on low voltage outputs.........................................37Fan Operating Hours .....................................................85Fan operating mode ......................................................43Forbidden use..................................................................88Freecooling.......................................................................56Freecooling / Humidity parameters (FrC).................70Freecooling/Freeheating in Cooling mode...............57Freecooling/Freeheating in Enthalpy.........................59Freecooling/Freeheating in Heating mode...............58Freeheating......................................................................56FUNCTIONS .....................................................................53GGLOSSARY ........................................................................91HH10....................................................................................62Heat pump shut-down ..................................................61Heating .............................................................................42Hot water coil..................................................................40Hot water coil in Dehumidification mode ................39HOW TO USE THIS MANUAL ......................................... 3Humidification ................................................................56Hysteresis..........................................................................91II/O configurability............................................................ 4Impulse duration ............................................................37INSTALLATION ..............................................................12Integrated electric heaters ...........................................38INTRODUCTION................................................................ 4KKeyboards.........................................................................94LLabel ..........................................................................31; 91LED.....................................................................................27List of alarms ...................................................................76Load control ....................................................................45Loads .................................................................................91Logical OR........................................................................91Loss of voltage.................................................................61Low voltage output configuration .............................21Low voltage outputs...................................................21MMain characteristics ........................................................ 4<strong>ERT</strong> <strong>400</strong> User Manual103/104
Manual reset ................................................................... 91Mechanical assembly of EKP <strong>400</strong> keyboard............. 10Mechanical assembly of EKW <strong>400</strong> keyboard........... 10Mechanical assembly of keyboards..............................9MECHANICAL MOUNTING .............................................7Menu structure ............................................................... 29Models available...............................................................6Mounting of EKF<strong>400</strong>...................................................... 11NNight ................................................................................. 42Night purging operating mode: ................................. 43Non volatile memory .................................................... 91Number of events per hour.......................................... 76OOperating modes ........................................................... 42Operating modes: configuration table ..................... 42Output temperature control ....................................... 61Outputs on expansion boards..................................... 21PPanel cut-out .................................................................. 11PARAMETERS .................................................................. 62PCI2150 ............................................................................ 98Permitted use .................................................................. 88Phase shift........................................................................ 37Pick-up.............................................................................. 37Polarity of relays............................................................. 21Power output configuration........................................ 20Power outputs................................................................. 20Power steps...................................................................... 32Probes ............................................................................... 97Programming of parameters – Menu levels ............ 28Protocols .............................................................................6Pump / evaporator fan parameters (PUP)............... 68Pump-fan delay at start up ......................................... 40RRange................................................................................ 91Recording of operating hours ..................................... 53Regulator (RE)................................................................. 67Remote keyboard output ............................................. 22Reset.................................................................................. 91Resetting .......................................................................... 91RESPONSIBILITY AND RESIDUAL RISKS.............. 89Reversing valve ............................................................... 37Reversing valves.............................................................. 37SSafety timing................................................................... 35Scroll down...................................................................... 91Scroll up ........................................................................... 91Serial output....................................................................22Set Point ...........................................................................91Set points..........................................................................44Single or separate condensation ................................48Standards .........................................................................87Stand-by ....................................................................42; 91Start of Defrosting..........................................................53Start of Defrosting:Defrosting start sequence..........54Start of Defrosting:Interruption of timer...................53Start of Defrosting:Timer reset ....................................53SYSTEM CONFIGURATION ...........................................32TTable of Alarm Parameters......................................72Table of analogue alarms ............................................86Table of Compressor Parameters ..........................72Table of configuration parameters ............................71Table of Defrosting Parameters.............................74Table of digital alarms..............................................85Table of Electric Heaters/Hot H2O Coil Parameters........................................................................................73Table of Expansion Module Parameters.............74Table of Fan Parameters ..........................................73Table of Freecooling / humidity parameters ....74Table of parameters.......................................................71Table of Pump / Evaporator Fan Parameters ..........73Table of Regulator Parameters..............................73Table of set point parameters ................................71Technical data ................................................................87TECHNICAL FEATURES ..................................................87TEMPERATURE CONTROL FUNCTIONS.....................42Temperature controller in Heating mode.................46Trans<strong>for</strong>mer .....................................................................87UUnits of measurement ...................................................23Units of measurement: selection ...........................23USE OF THE DEVICE .......................................................88USER INTERFACE.............................................................24VVentilation parameters (FAn)......................................67Visibility of parameters and submenus .....................31WWiring diagram with NTC ............................................14Wiring diagram with pressure probes .......................15Wiring diagrams.............................................................12With EKF keyboard.........................................................42With EKP/EKW keyboards.............................................42Eliwell & <strong>Control</strong>li s.r.l.Via dell’Industria, 15 Zona Industriale Paludi32010 Pieve d’Alpago (BL) ITALYTelephone +39 0437 986111Facsimile +39 0437 989066Internet http://www.eliwell.itTechnical Customer Support:Telephone +39 0437 986300Email: techsuppeliwell@invensys.comInvensys <strong>Control</strong>s EuropeAn Invensys Company<strong>ERT</strong> <strong>400</strong> User Manual2005/9/<strong>ERT</strong> <strong>400</strong> User ManualCod: 8MA10030104/104