BT4 Slice Manual - Paintball Solutions
BT4 Slice Manual - Paintball Solutions
BT4 Slice Manual - Paintball Solutions
- No tags were found...

You also want an ePaper? Increase the reach of your titles
YUMPU automatically turns print PDFs into web optimized ePapers that Google loves.
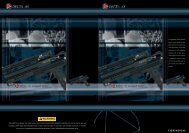
Safe ModeIn this manual, you will see the term “SAFE” mode. ThePower should be OFF (Fig. 3.1) on electronic grips, or theSafety should be set to “SAFE” (red marking on safety willnot be visible) Fig. 3.2. Make sure your marker is set to“SAFE” mode when indicated to do so.Barrel InstallationSafety ONMake sure marker is degassed, hopper removed, nopaintballs in the feed port or breech and the marker isin “Safe” mode.1. While pointing marker in a safe direction, place the Fig. 3.3threaded end of the barrel into the front opening ofthe marker body (Fig. 3.3).2. Turn the barrel clockwise until it stops (do not overtighten).3. Adjust the barrel accessories if necessary.4. Install a barrel blocking device. This can be a barrelplug or other such device that prevents the accidental discharge of a paintball.Feed Elbow and Loader InstallationFig. 3.41. Press and hold the retention button located on theside of the Slide-Away elbow.2. Slide the elbow onto the front narrow gap of thepicatinny rail. (fig. 3.4)3. Line up the elbow with the feed hole on the rightside receiver.4. Check that the elbow is locked in place and properly aligned.Note: Spring-loaded retention button must line up in a gap on the Picatinny rail.Safety OFFStandard Loader1. To install a loader check the Slide-Away elbow and loader to make sure theyare free from debris and obstructions.2. Position Slide-Away elbow onto your marker’s receiver.3. Release the Clamp Arm to allow the loader to slide into the top of the elbow.Fig. 3.1Fig. 3.24. Press the loader into the opening of the Elbow until it stops.5. Align the loader so that the lid is pointing to the rear and the loader is parallelwith the marker.6. Clamp the loader in place by closing the clamping arm. Do not over tighten theloader.Note: It might be necessary to adjust the clamping feed elbow screw to fit your loader. Using a 3/32" hex wrench, turn thescrew clockwise to increase the clamping force or counter-clockwise to decrease the clamping force.Air Cylinder InstallationConsult the place where you purchased your Empire BT-4 <strong>Slice</strong> Marker, or a recognizedand competent air smith, for instruction in the safe handling of compressed-aircylinders before purchasing or connecting one to your Empire BT-4 <strong>Slice</strong> Marker.Before Pressurizing Your Marker1. Check to make sure that you and anyone within range are wearing eye protectiondesigned specifically for paintball.2. Double check that all screws are tightened and no parts are loose before installingyour tank.3. Ensure you have a barrel plug, barrel sock or other specifically designed barrelblockingdevice in place.4. Make sure there are no paintballs in the marker.5. Set marker to “SAFE” mode.Pressurizing your Marker1. While pointing the marker in a safe direction,cock the marker by pulling the T-handle, locatedin the rear of the body, back until it clicks and stops.2. Release the cocking handle, the marker isnow cocked.3. Locate the Air Source Adapter (ASA) located at the base of the pistol grip.4. Position the Empire BT marker so that the ASA is pointed upwards while keepingthe muzzle of the marker pointed in a safe direction.5. Insert the threaded cylinder valve end into the ASA.6. Without forcing the cylinder, twist the cylinder clockwise and allow the threadsto draw the cylinder into the marker until it stops. Your marker is now charged.2E M P I R E B A T T L E T E S T E D . C O M