Cascada Lab Water System - Pall Corporation (PLL)
Cascada Lab Water System - Pall Corporation (PLL)
Cascada Lab Water System - Pall Corporation (PLL)
You also want an ePaper? Increase the reach of your titles
YUMPU automatically turns print PDFs into web optimized ePapers that Google loves.
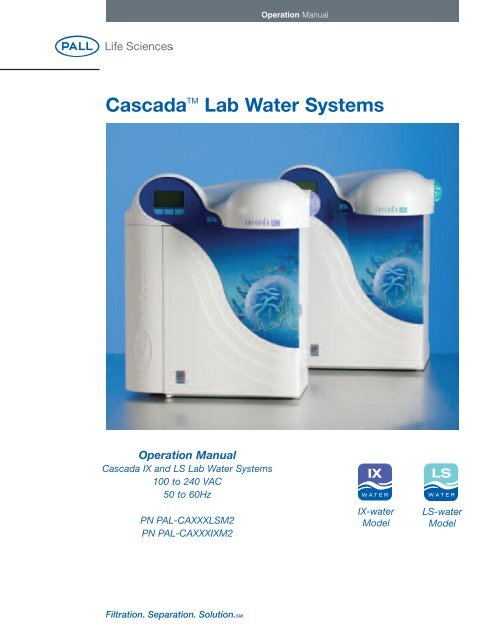
Operation Manual<strong>Cascada</strong> TM <strong>Lab</strong> <strong>Water</strong> <strong>System</strong>sOperation Manual<strong>Cascada</strong> IX and LS <strong>Lab</strong> <strong>Water</strong> <strong>System</strong>s100 to 240 VAC50 to 60HzPN PAL-CAXXXLSM2PN PAL-CAXXXIXM2IX-waterModelLS-waterModel
ForewordThis manual is provided to serve as the installation,operation, and maintenance guide for the <strong>Cascada</strong><strong>Lab</strong> <strong>Water</strong> system models:<strong>Cascada</strong> IX-water for general science applications<strong>Cascada</strong> LS-water for life science applicationsPart NumberPAL-CAXXXIXM2PAL-CAXXXLSM2Description<strong>Cascada</strong> IX-<strong>Water</strong> <strong>System</strong><strong>Cascada</strong> LS-<strong>Water</strong> <strong>System</strong>The manual should be read before attempting anycycle of installation, operation, and maintenance.If the instructions in this manual are not followed,the performance of this product and/or the safetyof the user may be compromised.Unpack and inspect all items carefully to ensure they havenot been damaged in transit.Service support and consumable items are available fromyour local <strong>Pall</strong> office or distributor. Refer to customer servicecontact information on back cover.FOREWORD
Table of ContentsSAFETY INSTRUCTIONS 1User's Responsibility 1Electrical 1Pressure 1Ultraviolet (UV) Light 2Sanitization Chemicals 2Control of Substances Hazardous to Health (COSHH) 2INTRODUCTION 3Product Description 3Purification <strong>System</strong> Flow (IX-water) 3Purification <strong>System</strong> Flow (LS-water) 4TECHNICAL SPECIFICATIONS 5CONTROLS 7INSTALLATION INSTRUCTIONS 8Unpacking the <strong>Cascada</strong> TM <strong>Lab</strong> <strong>Water</strong> <strong>System</strong> 8Positioning the <strong>Cascada</strong> <strong>Lab</strong> <strong>Water</strong> <strong>System</strong> 8Connecting the <strong>Cascada</strong> <strong>Lab</strong> <strong>Water</strong> <strong>System</strong> 9Initial Controller Set-Up 11Setting Up Password/Resetting 14Replacement TimersInitial Start Up 16Point-of-Use (POU) Filter Installation (PAL-C166) – 18Optional AccessoryOPERATION 19Intermittent or Continuous Recirculation 19Manual Dispense 19MAINTENANCE 20Replacing the Purification Pack 20Replacing the Ultrafilter (UF) Cartridge (PAL-C184) 21Replacing the Ultraviolet (UV) Lamp (PAL-C151) 23Replacing the Point-of-Use (POU) Filter (PAL-C166) 25Cleaning the Inlet Strainer 26SANITIZATION PROCEDURE 27PAL-C100 Sanitization Tablet - Safety Information 29TROUBLESHOOTING 30CONSUMABLES AND ACCESSORIES 31KEY TO CONTROL PANEL 32Icons 32Alarm Conditions 32Replacement Timers 33Quality Alarms 33WARRANTY/CONDITIONS OF SALE 34www.pall.com/labTABLE OF CONTENTS
User’s ResponsibilityDo not attempt to operate or maintain the systemwithout first reading this manual.The basic rules of safety set forth in this manual areintended as a guide for safe operation of <strong>Pall</strong> <strong>Corporation</strong>equipment. This general safety information, along withexplicit service, maintenance, and operational materials forthe specific machine, make up the complete instructionmanual. All personnel who will operate, service, or beinvolved with this equipment in any way should becompletely familiar with this information prior to start-up.It is the user’s responsibility to make certain that theprocedures set forth are followed.<strong>Cascada</strong> <strong>Lab</strong> <strong>Water</strong> <strong>System</strong>s have been designed to besafe, however, it is important that personnel working onthese units understand any potential dangers. All safetyinformation detailed in this manual is highlighted asWARNING and CAUTION instructions. These areused as follows:WARNING!CAUTION!WARNINGS ARE GIVEN WHEREFAILURE TO OBSERVE THEINSTRUCTION COULD RESULT ININJURY OR DEATH TO PERSONS.Cautions are given where failureto observe the instruction couldresult in damage to the equipment,associated equipment, and processes.ElectricalIt is essential that the power switch on the <strong>Cascada</strong> <strong>Lab</strong><strong>Water</strong> system is turned off before any items are changed ormaintenance work performed.The On/Off switch is located at the left-hand side ofthe unit. The main power cord is located just behind theOn/Off switch.WARNING!THIS APPLIANCE MUST BEGROUNDED. PLUG INTO A PROPERLYGROUNDED (GFI) WALL OUTLET.Power socketPower cordElectrical ConnectionsFusesOn/Off power switchPressureThe main water supply valve should be turned off andresidual pressure released prior to removal of any cartridgesor carrying out work on the unit.CAUTION!Switching off the electrical power willisolate the source of pressure, butpressure trapped within the unit shouldbe released.SAFETY INSTRUCTIONS1
Ultraviolet (UV) LightWARNING!UNDER NO CIRCUMSTANCESSHOULD THE LAMP BE CONNECTEDAND ACTIVATED WHEN OUTSIDETHE HOUSING.The <strong>Cascada</strong> LS-water unit is fitted with a UV lamp that isenclosed in a stainless steel chamber ensuring that theoperator will not be exposed to UV light.Location of Purification PacksSanitization ChemicalsDuring the sanitization cycle, a PAL-C100 sanitization tabletis used and relevant safety information is included in thismanual. A safety data sheet conforming to COSHH and/orOSHA regulations is also provided with the tablets andshould be read before a tablet is used.Control of Substances Hazardous to Health (COSHH)Material safety data sheets covering the various replaceablePurification Packs are available upon request. Contact yourlocal <strong>Pall</strong> supplier or distributor.www.pall.com/lab 2SAFETY INSTRUCTIONS
Product Description<strong>Pall</strong>’s <strong>Cascada</strong> <strong>Lab</strong> <strong>Water</strong> purification unit is engineeredto provide ultrapure water with extremely low levels ofimpurities for critical laboratory applications.The system is designed for benchtop, under bench, or wallmounting with an optional wall mounting kit. A range ofaccessories are available to complement the unit. SeeConsumables and Accessories section for details (page 31).The <strong>Cascada</strong> <strong>Lab</strong> <strong>Water</strong> <strong>System</strong> range of water purificationunits has been designed to provide the ultimate in highpurity water for laboratory applications. The units mustbe fed with pre-treated water, typically from a reverseosmosis supply. They can be operated directly from apurification loop as point-of-use polishers, with or withoutlocal buffer storage, using a Docking Vessel or suitablereservoir. Alternatively, they can be supplied from a localpre-treatment/storage system, for example a <strong>Cascada</strong>RO-<strong>Water</strong> unit and Docking Vessel combination.ControlpanelDoor<strong>Cascada</strong> <strong>Lab</strong> <strong>Water</strong> <strong>System</strong>DispensecontrollerDispensenozzlePurification <strong>System</strong> Flow<strong>Cascada</strong> IX-water <strong>System</strong>Pre-treated water enters via an inlet solenoid and isthen pumped through the polishing purification packand temperature and water quality sensors before beingdispensed or recirculated through a non-return valveback to the pump inlet.Ionic and organic impurities are removed by the polishingpurification pack. Product water resistivity and temperatureare measured before dispense and will indicate when thepurification pack needs to be replaced.The water within the unit is recirculated through thepurification technologies to maintain purity. To reduce heatbuild up, the recirculation is at a reduced flow rate and isset to be intermittent (5 minutes every hour).An optional Point-of-Use (POU) filter (Part No. PAL-C166) isavailable if required to protect the outlet from bacterialcontamination.<strong>Cascada</strong> IX-water <strong>System</strong>UINTRODUCTION3
Purification <strong>System</strong> Flow (continued)<strong>Cascada</strong> LS-water <strong>System</strong>Pre-treated water enters via an inlet solenoid and is thenpumped through the UV chamber, a polishing purificationpack, an ultrafilter, and temperature and water qualitysensors before being dispensed or recirculated througha non-return valve back to the pump inlet.Purified water flows directly through the UV chamber whereit is exposed to intense UV radiation at wavelengths of254 nm and 185 nm to provide continuous bacterial controland the photo-oxidation of residual organic impurities.Ionic and organic impurities are removed by the polishingpurification pack. The ultrafilter removes pyrogens, bacteria,and other microbial impurities as well as particles. Productwater resistivity and temperature are measured beforedispense and will indicate when the purification packneeds to be replaced.The water within the unit is recirculated through thepurification technologies to maintain purity. To reduceheat build up, the recirculation is at a reduced flow rateand is set to be intermittent (5 minutes every hour).An optional POU filter (Part No. PAL-C166) is available ifrequired to protect the outlet from bacterial contamination.<strong>Cascada</strong> LS-water <strong>System</strong>www.pall.com/lab 4INTRODUCTION
Technical SpecificationsFeed <strong>Water</strong>*ParameterSource - pre-treatedpotable waterLimitsPreferably reverse osmosis (RO),filtered service deionization(SDI), or distilled.Note: mixed bed or twin beddeionized supplies should becation limited at exhaustion.Fouling index (max) 1 for all models. A 0.2 µmmembrane prefilter isrecommended for allnon-RO feeds.Service deionization(SDI) - MV-cmReverse osmosis(RO) - µS/cmFree chlorineTOCCarbon dioxideSilica1 MV-cm minimum resistivityat exhaustionRecommended < 30 µS/cm≤ 0.05 ppmRecommended ≤ 50 ppb≤ 30 ppm≤ 2 ppmParticulates Filtration down to 0.2 µmadvisable to protect internaland/or point-of-use filtersTemperatureFlow RateMaximum1-40 °C (34-104 ºF)Recommended 10-15 °C(50-59 ºF)130 L/hrDrain requirements Up to 2 L/min(gravity fall with air gap),maximum during serviceFeed <strong>Water</strong> Pressure0.07 bar (7 kPa, 1.0 psi) to0.7 bar (70 kPa,10 psi)DimensionsHeightWidthDepthWeightIX-waterLS-waterConnectionsInlet-quick connectDrainFlush - LS-waterPositioning520 mm (20.5 in.)460 mm (18.2 in.)375 mm (14.8 in.)14.5 Kg (32 lbs.)15.5 Kg (34.2 lbs.)8 mm (5/16 in.) OD8 mm (5/16 in.) OD8 mm (5/16 in.) ODWall, bench, or underbench mountedEnvironment Indoor use only. Temp 5-40 °C(41-104 ºF). Humidity ≤ 80%(non-condensing).Electrical RequirementsElectrical input<strong>System</strong> voltagePower consumptionduring recirculationPower consumptionduring dispenseFusesReservoir levelconnectionNoise level duringrecirculation100-240V AC, 50-60Hzall models24V DC60VA75VA2 x T6.3 AmpJack plug 3.5 mm< 40 dBANote: Different system configurations are available for differentfeed water sources. See system set up.TECHNICAL SPECIFICATIONS5
Technical Specifications (continued)User InterfaceDisplayContinuous graphical quality displayGraphical flow schematic on screenwith mimic displayIntuitive iconsAdjustable Display viewing angle Adjustableelectronically<strong>Water</strong> quality units<strong>Water</strong> quality alarmDate/timeAuto restart afterpower failureAudible alarmTemperature controlReservoirSelectable (MV-cmor µS/cm)Selectable alarmset pointsAdjustableSelectable (On/Off)Selectable (On/Off)Selectable alarmset pointsSelectable (On/Off)Indicators Product water quality Resistivity orconductivityTemperaturePurification packUV lamp**Filter*Degrees centigradeReplacement dateReplacement dateReplacement dateAlarms- Purified water purity Below set pointAudiovisualalarmOutputsTemperatureUV lamp operation**Purification packUV lamp**Filter**ReservoirRS232 printer connectionAbove set pointalarmImminent lampfailure or failureto startChange reminderChange reminderChange reminderLow level/levelcontrol disconnectalarmRS232 remote display connectionVolt free contact-internalRemote dispenseFeaturesSafetyPower fail safe<strong>Water</strong> temperature alarm<strong>Water</strong> quality alarmPurification pack interlockUV current monitoringTimeout of dispenseLow operating voltage 24VVolt free contact alarm connectionVisual alarmsAudible alarmsOperational Low noise levels – minimum intrusionVariable dispense flow rateRestart on power interruptOptional printer kit to record operatingparametersOptional remote displayPurified <strong>Water</strong> SpecificationIX-waterLS-waterFlow rate 1.5 L/min maximum 1.24 L/min maximumInorganic Resistivity Resistivity18.2 MV-cm 18.2 MV-cm(0.055 µS/cm) (0.055 µS/cm)TOC < 15 ppb*** < 3 ppb***Bacteria < 1 cfu/mL < 1 cfu/mLPyrogens — < 0.05 EU/mLpH Effectively neutral Effectively neutralParticles 0.2 µm**** UltrafiltrationRNase-/ — —DNaseConforms to ASTM Type 1, BS3978 Grade 1 Specification,USP 27, and EP (5th ed.).*Contact technical support for advice on feed watersoutside the range listed**On <strong>Cascada</strong> LS-<strong>Water</strong> <strong>System</strong> models only.***Dependant on feedwater — recommended RO feed < 50ppb TOC.****With POU filter fitted.As part of our commitment to continual improvement, wereserve the right to update the specifications given in thisdocument.www.pall.com/lab 6TECHNICAL SPECIFICATIONS
ControlsThe <strong>Cascada</strong> <strong>Lab</strong> <strong>Water</strong> <strong>System</strong> operates with a tactilemembrane touch pad control panel. It has a graphicsdisplay window and four multi-purpose control buttons.Details of how to use the controls will be given in theappropriate sections.CASCADA LSControl PanelProcessbuttonThe <strong>Cascada</strong> <strong>Lab</strong> <strong>Water</strong> <strong>System</strong> control panel hasa range of control icons as follows:Button Icon FunctionProcessLeftTurns the processon/offEscape fromany featureMenuScrollCenterAcceptRightMute alarmLeft-handcontrol buttonCentercontrol buttonRight-handcontrol buttonPrinterCONTROLS7
Unpacking the <strong>Cascada</strong> <strong>Lab</strong> <strong>Water</strong> <strong>System</strong>The following items are supplied with your <strong>Cascada</strong><strong>Lab</strong> <strong>Water</strong> <strong>System</strong>:1. <strong>Cascada</strong> <strong>Lab</strong> <strong>Water</strong> unit.2. One sanitization by-pass block PAL-A671(fitted in unit).3. 6 meters (19.6 ft.) of 8 mm (5/16 in.) O/D tube.4. One pack of PAL-C100 tablets.5. One strainer assembly.6. Operation manual.7. Power cord.8. Reservoir level connecting lead.Positioning the <strong>Cascada</strong> <strong>Lab</strong> <strong>Water</strong> <strong>System</strong>Before installation and operation of the <strong>Cascada</strong> <strong>Lab</strong> <strong>Water</strong>unit, please read and observe the following points.EnvironmentThe unit should be installed on a flat, level surface in aclean, dry environment. The unit can also be wall mountedagainst a vertical wall capable of supporting the weight (usewall mounting kit Part No. PAL-A643 on substantialbrick/concrete walls or PAL-A655 for stud partition walls).WARNING!IF UNIT IS TO BE WALL MOUNTED,ENSURE IT IS MOUNTED USING THECORRECT WALL MOUNTING KIT ANDTHAT THE WALL IS CAPABLE OFSUPPORTING THE OPERATING WEIGHTOF THE SYSTEM. CAREFULLYFOLLOW THE INSTRUCTIONSINCLUDED IN THE KIT.Note: Refer to specifications on page 5 for unit weights.Unit Rear Mounting PointsRearmountingpointsThe unit is designed to operate safely under the followingconditions:• Indoor use.• Altitude up to 2,000 meters (6,561 ft.).• Temperature range 5-40 °C (41-104 ºF).• Maximum relative humidity 80% @ 31 °C (88 ºF)decreasing linearly to 50% @ 40 °C (104 ºF),non-condensating.The unit is in Installation Category II, Pollution Degree 2,as per IEC1010-1.ElectricalThe units can be connected universally to any electricalsupply in the range of 100-240V and 50-60Hz. The powercord is supplied with a molded plug on one end and amolded connector to the unit on the other. The unit shouldbe connected to a grounded outlet. The unit includes abattery, which will require changing on a periodic basis,typically every 3-5 years. (Contact your local <strong>Pall</strong> Serviceprovider.)WARNING!DANGER OF EXPLOSION IF BATTERYIS INCORRECTLY REPLACED.REPLACE ONLY WITH THE SAME OREQUIVALENT TYPE RECOMMENDEDBY THE MANUFACTURER (3 VOLTS,LITHIUM CR2032). DISPOSE OF USEDBATTERIES ACCORDING TO THEMANUFACTURER’S INSTRUCTIONS.Electrical ConnectionsPower socketFusesOn/Off power switchPower cordwww.pall.com/lab 8INSTALLATION INSTRUCTIONS
Positioning the <strong>Cascada</strong> <strong>Lab</strong> <strong>Water</strong> <strong>System</strong> (continued)DrainA semi-rigid flexible connection to a sink or suitable draincapable of handling at least 2.0 L/min is required for the<strong>Cascada</strong> LS-water model. The drain point should have agravity fall below the level of the unit and any connectionsdirect to drain should have an air-break device fitted. Aflexible tube should be temporarily connected to thedispense outlet and directed to drain during rinsing ofpurification packs and sanitization.Feed <strong>Water</strong>Use potable feed water pre-purified by reverse osmosis,deionization, or distillation. If using a supply other thanreverse osmosis treated, it is strongly recommended that a0.2 µm membrane filter is installed within the feed line toremove colloidal impurities. The feed water should enter the<strong>Cascada</strong> <strong>Lab</strong> <strong>Water</strong> unit via an 8 mm (5/16 in.) O/D semirigidtube, and should be in the temperature range of 1-40 °C(34-104 °F). To ensure optimum performance, it isrecommended that the feed water temperature be between10-15 °C (50-59 ºF).CAUTION!Operating with feed watertemperatures outside the range of1-40 °C (34-104 °F) will causedamage to the <strong>Cascada</strong> <strong>Lab</strong> <strong>Water</strong> unit.For pressurized feeds, the minimum direct inlet pressureneeded is 0.07 bar (7 kPa, 1.0 psi) and maximum inletpressure is 0.7 bar (70 kPa, 10 psi). Feed water pressuresabove 0.7 bar must be reduced using a pressure regulatingvalve. Feed pressure between 0.7 and 4.0 bar can bereduced with a pressure regulatory valve. (Part No. PAL-A500).CAUTION!Failure to install a pressure regulatorwill cause damage to the <strong>Cascada</strong> <strong>Lab</strong><strong>Water</strong> unit.Reservoir feeds to the <strong>Cascada</strong> <strong>Lab</strong> <strong>Water</strong> unit shouldbe positioned at the same height, or above the unit, toprovide a positive flooded inlet pressure.Connecting the <strong>Cascada</strong> <strong>Lab</strong> <strong>Water</strong> <strong>System</strong>Once the <strong>Cascada</strong> <strong>Lab</strong> <strong>Water</strong> unit has been positionedeither on a wall or on a bench, it should be connectedas follows:• Main water inlet tube• Drain tube - to drainConnectorFitting TubesCollet(press in)Blanking transit plug(pull out)Step 1 - Remove Transit Plugs1. Push in collet on connector.2. Pull out transit plug.3. Cut a clean, square end on an 8 mm (5/16 in.)OD semi-rigid drain tube.4. Push tube into connector.Tube 8 mm O/D(clean square cut end)CAUTION!Do not restrict drain line.Simply push in tube to attachCAUTION!If the water supply is at a pressuregreater than 2.0 bar (200 kPa, 30 psi),fit a pressure regulator (Part No.PAL-A500).Tube in secured positionINSTALLATION INSTRUCTIONS9
Connecting the <strong>Cascada</strong> <strong>Lab</strong> <strong>Water</strong> Unit (continued)Step 2 - Connect <strong>Water</strong> Inlet1. Connect 8 mm (5/16 in.) tube from the <strong>Cascada</strong> <strong>Lab</strong><strong>Water</strong> unit inlet to the inlet strainer.2. Connect the inlet strainer to the pre-purified water supply.Step 4 - Connect Electrical Supply1. Plug power cord into the power socket on theleft-hand side of the <strong>Cascada</strong> <strong>Lab</strong> <strong>Water</strong> unit.2. Plug power cord into grounded electrical wall outlet.Feed <strong>Water</strong> InletElectrical ConnectionsDirection ofwater flowPower socketFusesOn/Off power switchCollarMesh filterCollarPower cordStrainerInletStep 3 - Connect Drains1. Connect 8 mm (5/16 in.) tube from the drain and UFdrain (if fitted) and direct to a suitable drainage point.CAUTION!The drain and flush lines shouldallow a gravity fall to drain withno restrictions.Step 5 - Resevoir Level Connection1. Insert jack plugs into the level control socket located atrear of unit and reservoir.Note: If wall mounting the unit, it is recommended that thejack plug be inserted prior to hanging the unit on the wallmounting bracket.<strong>Cascada</strong> LS-<strong>Water</strong> <strong>System</strong>Inlet and Drain ConnectionReservoir Level ConnectionUF drainRS232Level controlReservoir levelconnectionDrainInlet<strong>Cascada</strong> IX-<strong>Water</strong> <strong>System</strong>Inlet and Drain ConnectionInletwww.pall.com/lab 10INSTALLATION INSTRUCTIONS
Initial Controller Set-UpThe <strong>Cascada</strong> <strong>Lab</strong> <strong>Water</strong> unit control panel is fitted withfour control buttons. These are:1. The Process button, which switches the purificationprocess on and off.2. Three software controlled touch pad buttons that areused to control set-up and process control functions.3. A Dispense Knob is used for control set-up process.Start Up ScreenCASCADA LSControl PanelCASCADA LSProcessbuttonStep 2 - PasswordRestricts access to set up menu sequence.1. Rotate Dispense Controller to enter password code. Thedefault password code is 000.2. Press checkmark button to accept.Note: To reset password, refer to Resetting PasswordSection (page 14).Left-handcontrol buttonCentercontrol buttonRight-handcontrol buttonPassword ScreenWhen the <strong>Cascada</strong> <strong>Lab</strong> <strong>Water</strong> unit is started for the firsttime after installation, the following steps should be carriedout to set up system preferences:Step 1 - Setting Up Menu Options1. Switch the power on to initialize the controller hardwareset-up sequence.Note: Always allow the initialization process to complete.With the by-pass blocks in place, press the Process buttonto return to the initial power up screen.2. Press menu button to go to the next screen toactivate the set-up menu sequence.A series of set-up screens will now be displayed. Variouscontrol icons are used to allow you to step through theset-up instruction process. These icons include:• A "scroll" icon indicated by an arrow .• An "accept" icon indicated by a checkmark .• A "selection" icon indicated by a .At any stage during the Controller Set-up, the Processbutton can be pressed to escape back to the initialpower-up screen.Step 3 - ClockSet to display the current local time.1. Press Dispense Controller once. A cursor will appearunder hour.2. Rotate Dispense Controller to increase ordecrease hour.3. Press Dispense Controller once to step cursor ontominute.4. Rotate Dispense Controller to increase ordecrease minute.5. Press Dispense Controller once to accept the minutesetting and set the seconds to 00.6. Press checkmark button to accept.INSTALLATION INSTRUCTIONS11
Initial Controller Set-Up (continued)Clock ScreensStep 5 - Audible Alarm Enabled/DisabledThis display provides the option of either enabling theaudible alarm, causing it to sound (while the alarm iconflashes), or disabling the audible alarm causing it toremain muted.1. Press scroll button to highlight box.2. Press checkmark button to accept.Note: The visual alarm cannot be disabled.Audible Alarm Enable/Disable ScreenStep 4 - DateNote: Confirm that the correct date has been enteredbefore installing consumables or changing replacementdates.The date is used to instigate change reminders. It willappear on printed records.1. Press Dispense Controller once. A cursor will appearunder day.2. Rotate Dispense Controller to increase ordecrease day.3. Press Dispense Controller once to step cursoronto month.4. Rotate Dispense Controller to increaseor decrease month.5. Press Dispense Controller once to step cursoronto year.6. Rotate Dispense Controller to increaseor decrease year.7. Press checkmark button to accept the date.Step 6 - <strong>Water</strong> Purity Unit SettingThis screen allows preferred units of water purity to be setto either MV-cm or µS/cm.1. Press scroll button to highlight appropriate box.2. Press checkmark button to accept.<strong>Water</strong> Purity Unit Setting ScreenDate ScreensStep 7 - Uncompensated <strong>Water</strong> QualityA “U” will indicate uncompensated readings in the normalprocess screen.1. Press scroll button to highlight box if uncompensatedreading is required.2. Press checkmark button to accept.Note: The on-going display of uncompensated values isgenerally not recommended. It can lead to confusionamong users and increase the possibilities of dispensingwater of inadequate purity.www.pall.com/lab 12INSTALLATION INSTRUCTIONS
Initial Controller Set-Up (continued)Uncompensated <strong>Water</strong> Quality ScreenTemperature Alarm Setting ScreenStep 8 - Product <strong>Water</strong> Purity Alarm SettingsThis screen is used for setting the purity value at which theproduct water purity alarm will activate. The unit will alarmif this level is passed but will not switch off the process.The alarm will automatically clear if the water purityreturns above its specified limit.1. Press scroll button to highlight appropriate box.2. Press checkmark button to accept.Product <strong>Water</strong> Purity Alarm Setting ScreenStep 10 - Display Viewing Angle AdjustmentThe angle of the display can be electronically adjusted upand down to optimize the display graphics visibility.1. Rotate Dispense Controller slowly to adjustviewing angle.2. Press checkmark button to accept.Display Viewing Angle Adjustment ScreenStep 9 - Temperature Alarm SettingThe temperature of the water is constantly monitored toensure it does not increase to an unacceptable level. The<strong>Cascada</strong> <strong>Lab</strong> <strong>Water</strong> <strong>System</strong> will alarm and switch theprocess off if the alarm point is exceeded.1. Press scroll button to highlight appropriate box.Note: To operate the unit without a temperature alarm,press scroll button until all boxes are not highlighted.The unit will switch the process mode off at 50 °C (130 ºF)to prevent any damage to the unit.2. Press checkmark button to accept.Step 11 - Auto-RestartThis allows the selection of the auto/manual restart option.If auto restart is selected, the unit will automatically restartafter a temporary loss of power to the unit. In manualmode, the unit will remain in standby mode.1. Press scroll button to highlight appropriate box.2. Press checkmark button to accept.Auto-Restart ScreenINSTALLATION INSTRUCTIONS13
Initial Controller Set-Up (continued)Step 12 - Reservoir LevelWhen operating the system from a reservoir, it isrecommended that a low-level switch be connected toprotect the system from running dry.1. Press scroll button to highlight appropriate box.2. Press checkmark button to accept.The Controller Set-up is now complete.Note: To escape from any of the set-up screens, pressthe Process button.Reservoir Level ScreenSetting Up Password/Resetting Replacement TimersCAUTION!Before resetting any of theConsumable Replacement/ReminderDates, ensure that the appropriate newConsumable has been correctlyinstalled and securely located in the<strong>Cascada</strong> <strong>Lab</strong> <strong>Water</strong> unit.Step 1 - Enter Consumable ReplacementTimer Set-up1. Switch off at power switch.2. Press and hold left-hand button and switch unit back on.The unit will now enter the Consumable Timer set-updisplay.3. Release left-hand button.Step 3 - UV Lamp Replacement Date (<strong>Cascada</strong>LS-water system only)1. Press reset button to reset UV Replacement Date orpress checkmark button to accept Replacement Dateand proceed to Filter Replacement.2. Press checkmark button to confirm that resetting isrequired or press cross button to abort reset.3. Press checkmark button to accept.UV Lamp Replacement Date ScreensStep 2 - Password ChangeNote: If you do not wish to change password, presscheckmark and proceed to Step 3.1. Rotate Dispense Controller to enter password code. Thedefault password is 000.2. Press Dispense Controller once.3. Rotate Dispense Controller to enter new password.4. Record password in a secure location.5. Press checkmark button to accept new password.Password Screenwww.pall.com/lab 14INSTALLATION INSTRUCTIONS
Setting Up Password/Resetting Replacement Timers (continued)Step 4 - Filter Replacement Date (on <strong>Cascada</strong>LS-water only)1. Press reset button to reset the Filter ReplacementDate or press checkmark button to acceptReplacement Date and proceed to SanitizationReminder.2. Press checkmark button to confirm that resetting isrequired or press cross button to abort reset.3. Press checkmark button to accept.Filter Replacement Date ScreensStep 5 - Sanitization Reminder ResetThe Sanitization Reminder will appear at the end of thesanitization routine and can be reset for a monthly reminder.1. Press reset button to reset Sanitization ReminderDate, or press checkmark button to acceptReminder Date, or press cross button to clear theReminder Date. Proceed to #3 to confirm.2. Press checkmark button to confirm that resetting isrequired or press cross button to abort reset.3. Press checkmark button to accept.Sanitization Reminder Reset ScreensINSTALLATION INSTRUCTIONS15
Initial Start UpStep 1 - Prepare <strong>Water</strong> Supply1. The <strong>Cascada</strong> <strong>Lab</strong> <strong>Water</strong> <strong>System</strong> should be installedcorrectly as described in the Installation Instructions –Connecting Section (page 9).2. Turn on the feed water supply to the unit and adjust theinlet pressure.Note: Refer to page 9 for appropriate pressure feeds.3. Check to make sure all tube connections are watertightand that there are no leaks.Step 2 - Prepare Sanitization By-pass Block1. Open front door.2. Check to make sure by-pass block is correctly locatedand locked in place.3. Close door.Step 3 - Initial Rinse1. Connect a temporary tube from the dispense outlet to asuitable drain or sink.2. Switch on electrical power switch.3. Press the dispense controller. The unit will automaticallygo into a rinse procedure (36 minutes) to rinsebacteriostatic agents from the unit. This rinse must becompleted. The process function will be inhibited untilthe rinse is complete.4. Upon completion of the rinse, the unit will beep.5. Remove temporary tube from dispense outlet.Initial Rinse ScreenCAUTION!Unit contains 1% peroxide solution,which must be flushed to drain.CASCADA LSLocation of By-pass BlocksLocation ofby-pass blocks(in use)Step 4 - Remove Sanitization By-pass Block1. Switch off power.2. Open the door.3. Remove by-pass block and pour contents out.4. Store by-pass block at bottom of unit.CAUTION!Before installing the purification pack,ensure the correct date has been setas described in Installation Instructions,Initial Controller Set-up Section, Step 4,Date (page 12). Failure to enter thecorrect date may result in prematurereplacement of the Purification Pack.www.pall.com/lab 16INSTALLATION INSTRUCTIONS
Initial Start Up (continued)Step 5 - Fit Polishing Purification Pack1. Remove a new Purification Pack from its packaging.2. Remove the sealing plugs from inlet and outlet ports.3. Wet O-rings and slide new Purification Pack into theright-hand position pushing upwards against pack readercontacts.4. Position Purification Pack onto spigots.5. Push into unit.6. Ensure the Purification Pack is fully engagedand dropped down past the retainers.Location of Purification PacksPolishingpurificationpackStep 7 - Final Rinse/Air Bleed1. Press Process button . Allow calibration routine to becompleted and process screen to appear.2. Press Dispense Controller. Slowly rotate knob clockwiseto increase flow. Direct dispense flow to drain or collectin suitable container (
Point-of-Use (POU) Filter Installation (PAL-C166) - Optional AccessoryThe POU filter is necessary for the <strong>Cascada</strong> IX-water unitto meet the specifications for particles and bacteria. The<strong>Cascada</strong> LS-water unit incorporates internal filtration anddoes not require a POU filter to achieve particles andbacteria specification when operated as described inthis manual. However, a POU filter is recommended toachieve additional laboratory-specific applicationrequirements.Location of POU FilterStep 1 - POU Filter Installation1. Locate the fixed dispense point and unscrewthe nozzle.2. Ensure O-ring seal is still properly located.Step 2 - Replace POU Filter1. Aseptically, remove the new filter fromits packaging.2. Hand-tighten the filter into the fixed dispenser untilresistance against the O-ring seal is felt.CAUTION!Do not over-tighten.Dispensepoint(under cover)POU filter3. Push clear bell cover supplied with the filter ontothe outlet of the filter.Step 3 - Bleed POU Filter1. Switch on the <strong>Cascada</strong> <strong>Lab</strong> <strong>Water</strong> unit.2. Press Process button .3. Place a beaker under the dispenser.4. Press Dispense Controller button.5. Open the top air bleed valve until water poursfrom the bleed valve, then close.6. Dispense at full flow for approximately 5 minutes.7. Discard water.www.pall.com/lab 18INSTALLATION INSTRUCTIONS
OperationThe <strong>Cascada</strong> <strong>Lab</strong> <strong>Water</strong> units have the following modesof operation:• Intermittent recirculation.• Manual dispense.• Sanitization cycle (see Sanitization Proceduresection, page 27)Intermittent or Continuous RecirculationThe <strong>Cascada</strong> <strong>Lab</strong> <strong>Water</strong> unit intermittently recirculatesinternally to maintain water quality. It will circulate the waterfor 5 minutes every 60 minutes in whisper mode.After dispense, the unit will continue to recirculate for ashort period before returning to the intermittent routine.CAUTION! If the Process button is doubleclicked, the unit will switch off.To maintain water quality, the unitshould be left on.Manual DispenseStep 1 - Product Quality1. Ensure <strong>Cascada</strong> <strong>Lab</strong> <strong>Water</strong> unit is in processmode and the water quality is satisfactory.Manual Dispense Screen2. Position suitable receptacle under fixed position.Step 2 - Dispense1. Press Dispense Controller once.2. Rotate Dispense Controller clockwise.3. Adjust the flow from the unit by rotating theDispense Controller as necessary.4. Press Dispense Controller once to stop dispensingand return to recirculation mode.INSTALLATION INSTRUCTIONS19
MaintenanceAny maintenance work not detailed in this manual shouldbe carried out by an approved supplier or distributor. Iffurther information is required on any aspect ofmaintenance, please contact Technical Service.WARNING!ALWAYS CHECK THAT THEELECTRICAL POWER SWITCH ANDFEED WATER SUPPLY ARE SWITCHEDOFF BEFORE ATTEMPTING TOCHANGE A CONSUMABLE ITEM.Replacing the Purification PackThe Purification Pack should be replaced in the followingcircumstances:• The quality monitor indicates that the packrequires changing.• If the system is being recommissioned or sanitized afteran extended period during which it was not used.• If the pack has exceeded 12 months use as indicated bythe consumable reminder alarm.Use Purification Pack Part No. PAL-C195.Location of Purification PacksStep 1 - Removal of Purification Pack1. Switch off <strong>Cascada</strong> <strong>Lab</strong> <strong>Water</strong> unit at thepower switch.2. Turn off the inlet water supply valve.3. Remove POU filter, if fitted.4. Open the front door.5. Remove the purification pack by pushing the packforward. Tilt by lifting the lower front of pack and thenslide pack backward out of unit.6. Discard the purification pack.Removal of Purification PackPolishingpurificationpackTop cap1 Push2 Tilt3 Slide outStep 2 - Fit New Polishing Purification Pack1. Remove a new Purification Pack from its packaging.2. Remove the sealing plugs from inlet and outlet port.3. Wet O-rings and slide the new Purification Pack into theright-hand position.4. Position this Purification Pack onto spigots.5. Push into unit.6. Ensure the Purification Pack is fully engagedand dropped down past the pack retainers.www.pall.com/lab 20INSTALLATION INSTRUCTIONS
Replacing the Purification Pack (continued)Step 3 - Acceptance of Purification Pack Installation1. Turn on the inlet water supply valve.2. Switch on power.3. Press checkmark button to accept the PurificationPack installation date (upper date).4. Press checkmark button to calculate ReplacementDate.Step 4 - Rinse Purification Pack1. Position a container under the dispense outlet.2. Press Process button . The unit will start.3. Press the Dispense Controller.Note: The unit will start. Initially during this stage,air/water will be purged from the unit.4. Dispense water for 5 minutes. Empty the container asnecessary.5. Press the Dispense Controller to stop dispense andreturn the unit to recirculation.PAL-C195Replacing the Ultrafilter (UF) Cartridge (PAL-C184)The UF should be replaced in the following circumstances:• If indicated by the Consumable Reminder Alarm.• When low pyrogen levels can no longer be maintained.• When the required flow rate can no longerbe maintained.Step 1 - Switch Unit Off1. Switch off <strong>Cascada</strong> <strong>Lab</strong> <strong>Water</strong> unit at thepower switch.2. Turn off the inlet water supply valve.3. Remove POU filter, if fitted.4. Open the front door.Location of UltrafilterUltrafilter(PAL-C184)Step 2 - Remove Purification Pack1. See Maintenance Section, Replacing the PurificationPack, Step 1 – Removal of Purification Pack (page 23).2. Insert by-pass block but DO NOT add a chlorine tablet.See Sanitization Procedures Section, Step 4, Fit By-passBlock (page 28).Step 3 - Remove the UV Lamp1. See Maintenance Section, Replacing the UltravioletLamp, Step 2, Remove UV Lamp (page 23).UltrafilterINSTALLATION INSTRUCTIONS21
Replacing the Ultrafilter (UF) Cartridge (PAL-C184)Step 4 - Remove the UF Cartridge1. Unclip UF from spring clips.2. Pull UF forward to allow access to rear connection.3. Push back outer sleeve of quick connect coupling.4. Unscrew bottom cap from UF housing.5. Locate a suitable beaker under the UF.6. Unscrew the top cap from the UF housing and allow thewater to drain into the beaker.7. Remove the UF from the <strong>Cascada</strong> <strong>Lab</strong> <strong>Water</strong> system.8. Dry spilt water from inside the unit.Step 5 - Ready New UF Cartridge1. Unpack new Ultrafilter.2. Remove the top and bottom brown caps and discard.Step 6 - Fit New UF Cartridge1. Refit top and bottom connectors to new UF ensuring theO-rings are correctly located at each end.2. Reconnect quick connect coupling.CAUTION!Ensure tubes are fitted to correct ports.3. Clip the new UF into spring clips.4. Refit the UV housing on securing screws.5. Tighten securing screws.3. Connect a temporary tube from the dispense outlet toa suitable drain or sink.4. Open the flush valve and press the dispense knob. Thesystem will begin its flush sequence.5. After approximately 3 minutes (countdown is indicatedon the display), the unit will sound a buzzer and stop.The unit will display "Close Flush Valve" indicatingthat the flush valve should be closed.6. Close the flush valve and press the dispense knob. Thesystem will begin its rinse sequence.7. Upon completion of the rinse sequence, the "OpenFlush Valve" icon will appear again. Open the flushvalve and press the dispense knob to start the 3 minuteflush sequence again.8. Once flush sequence has been completed, the "CloseFlush Valve" icon will appear again. Close the flushvalve and press the dispense knob to continue. Theflush is then complete after a 5-second flush to drain.9. Ignore the prompt to reset the sanitization date.Press checkmark button .10. Remove temporary tube from dispense outlet.11. Reconnect POU if fitted (see page 18).Step 9 - Set UF Change Reminder1. See Installation Instructions Section, Setting UpPassword/Replacement Timers (page 14).Step 7 - Replace the UV Lamp1. See Maintenance Section, Replacing the UltravioletLamp, Step 5, Replace UV Lamp (page 23).Step 8 - Rinse New UF CartridgeCAUTION! The new UF cartridge must be rinsedusing the Sanitization Procedure (page27). Ensure the by-pass block iscorrectly fitted and that NO tabletshave been inserted.1. Switch on power. The unit will enter sanitization mode.The insert tablet icon will appear, press checkmarkbutton to continue. (DO NOT insert a PAL-C100tablet). The sanitization recirculation icon will appear.Press checkmark icon to continue. The unit will begin a10 minute recirculation.2. Once the cycle has been completed, the unit will display"Open Flush Valve" indicating that the manual flushvalve should be opened.www.pall.com/lab 22INSTALLATION INSTRUCTIONS
Replacing the Ultraviolet (UV) Lamp (PAL-C151)The UV lamp should be replaced in the followingcircumstances:• If indicated by the Consumable Reminder Alarm or after12 months use. This avoids the decline in the short waveradiation used to destroy the micro-organisms and tooxidize organics.• If Lamp Fail Alarm occurs repeatedly.Step 2 - Remove UV Lamp from <strong>Cascada</strong> <strong>Lab</strong> <strong>Water</strong>unit1. Loosen two securing screws which retain UV lamp.2. Lift and remove UV lamp from the securing screws.3. Remove top and bottom retaining clips.4. Unplug the white lamp clip fitted to the bottomof the UV unit.Location of UV LampCAUTION!Hold on to the pins on the UV lampto ensure it does not fall out and break.Step 3 - Remove Lamp Plates1. Undo screws in plate at top.2. Remove plate at top.3. Undo screws in plate at bottom.4. Remove plate at bottom.5. Remove O-rings from the UV lamp and retain.Step 1 - Switch Unit Off1. Switch off <strong>Cascada</strong> <strong>Lab</strong> <strong>Water</strong> unit at thepower switch.2. Turn off the water supply valve.3. Remove POU filter, if fitted.4. Open the front door.Retaining clipWhite lamp clipScrewTop plateO ringLampStainless steelchamberUV lampPAL-C151 LampCAUTION!Hold on to UV lamp while removingplates to ensure it does not fall outand break.Step 4 - Remove UV Lamp1. Remove old UV lamp from the center bore of thehousing.Step 5 - Replace UV Lamp1. Unpack the new UV lamp.CAUTION!Take care not to touch the surface ofthe glass. Wear gloves, handle with softcloth, and wipe the surface with alcoholbefore fitting into the housing.1. Slide the new UV lamp into the center bore ofthe UV housing.2. Note orientation of pins on each end.Step 6 - Replace Lamp Plates1. Replace O-rings on the end of the UV lamp.2. Push O-rings into recesses.3. Refit plate on the bottom of the unit.4. Tighten screws on the plate.5. Fit plate on top of UV lamp assembly.6. Tighten screws on top plate.MAINTENANCE23
Replacing the Ultraviolet (UV) Lamp (PAL-C151) (continued)Step 7 - Assemble UV Lamp1. Plug the white lamp clip into the bottomof the UV unit.2. Refit spring clip.3. Plug in the white lamp clip into the top of the UV unit.4. Refit spring clip.5. Refit the UV housing on securing screws.6. Tighten securing screws.Step 8 - Set UV Lamp Change Reminder1. See Installation Instructions Section, Setting UpPassword/Resetting Replacement Timers (page 14).www.pall.com/lab 24MAINTENANCE
Replacing the Point-of-Use (POU) Filter (PAL-C166)Location of POU FilterStep 2 - Replace POU Filter1. Aseptically remove new filter from its packaging.2. Hand-tighten the filter into the fixed dispenser untilresistance against the O-ring seal is felt.CAUTION!Do not over-tighten.POUfilterStep 1 - Remove POU Filter1. Unscrew the old filter from the fixed dispenser anddiscard.2. Ensure O-ring seal is still properly located.3. Rinse connection with Isopropyl alcohol (IPA) or ethanol.Dispense water from the unit for several minutes to flushconnection.3. Push clear bell cover supplied with the filter onto theoutlet of filter.Step 3 - Bleed POU Filter1. Switch on the <strong>Cascada</strong> <strong>Lab</strong> <strong>Water</strong> unit.2. Press Process button.3. Place a beaker under the dispenser.4. Press Dispense Controller button.5. Open the top air bleed valve until water pours from thebleed valve, then close.6. Dispense at full flow for approximately 5 minutes.7. Discard water.8. Flush the Inlet Strainer (External) with water.MAINTENANCE25
Cleaning the Inlet StrainerThe Inlet Strainer should be checked and cleanedevery six months to ensure the strainer does not becomeclogged.CollarDirection ofwater flowInlet StrainerMesh filterStep 1 - Remove the Inlet StrainerCollarStrainer1. Turn off inlet water supply valve.2. Switch off electrical power switch.3. Open front door.4. Depress collars on both sides of strainer and disconnecttubing.5. Remove the inlet strainer from its position.Step 2 - Dismantle the Inlet Strainer1. Hold inlet strainer over a sink or receptacle.2. Unscrew inlet strainer.3. Remove mesh filter.4. Check mesh filter for signs of wear or damage,replace or flush with water as necessary.Step 3 - Reassemble the Inlet Strainer1. Insert mesh filter into strainer. Ensure it is facingthe correct direction (see diagram).2. Screw in the inlet strainer.Step 4 - Replace the Inlet Strainer1. Reposition the inlet strainer.2. Refit tubes to inlet strainer. Ensure it is facing thecorrect direction.3. Turn on inlet water supply valve.4. Switch on power.www.pall.com/lab 26MAINTENANCE
Sanitization ProcedureThe unit is sanitized to destroy the bacteria within thepipework and the filters of the unit. Read this entire sectionto become familiar with the procedure before you start.Sanitization may be required in the following circumstances:• Once a month to maintain low bacterial counts.• If the unit has not been used for a prolongedperiod of time.• If the product water is used for particularlystringent applications.Location of By-pass BlockPolishingpurificationpackStep 1 - Start Sanitization Cycle1. Ensure unit is ready to use.2. Turn off the electrical power switch.3. Remove POU filter, if fitted.4. Open the door.By-pass blockStep 2 - Insert PAL-C100 Tablet into SanitizationBy-pass Block1. Remove the by-pass block located at the bottom ofthe unit.Step 3 - Remove the Purification Pack1. Remove Polishing Purification Pack. See MaintenanceSection, Replacing the Purification Pack (page 20).2. Invert the by-pass block.3. Unscrew cap on sanitization by-pass block.4. Insert PAL-C100 cleaning tablet.5. Refit cap on by-pass block and hand-tighten.Insert PAL-C100 Cleaning TabletCapPAL-C100 cleaningtabletSANITIZATION PROCEDURE27
Sanitization Procedure (continued)Step 4 - Fit By-pass Block1. Wet O-rings on by-pass block.2. Slide by-pass block into unit.3. Position by-pass block onto appropriate spigots.4. Ensure by-pass is locked in place.5. Connect temporary tube from the dispense outlet to asuitable drain or sink.6. Switch on power. The screen will display the inserttablet icon , press to continue.7. The unit will display the sanitization recirculation iconto indicate that the unit is ready to commence thesanitization procedure. Press to continue orto cancel sanitization procedure.8. Upon selecting to continue the sanitization procedure,the unit will enter a 10 minute recirculation cycle.9. On completion of this cycle, the <strong>Cascada</strong> IX-waterversion will automatically start a 44 minute rinsesequence.The <strong>Cascada</strong> LS-water version will display the UF"Flush Valve Open" icon indicating that the manualUF rinse valve must be opened.10. Press the dispense knob to continue and the unit willcommence the flush sequence.11. The LS-water model will display the UF "Flush ValveOpen" icon indicating that the manual UF rinse valvemust be opened. Open the valve and press thedispense knob to continue. The unit will commence theflush sequence. The LS-water model will dispense todrain for 3 minutes (countdown is indicated on thedisplay), the unit will then sound a buzzer and stop. TheUF "Flush Valve Close" icon will appear indicating themanual UF flush valve should be closed.12. Disconnect the temporary drain line.13. On completion of the rinse the sanitization cycle is nowfinished. The unit will display the next sanitization datereminder screen. To set the sanitization reminder alarm,press or to cancel the next reminder.Fit By-pass BlockStep 5 - Remove By-pass Block1. Push and tilt by-pass block.2. Slide out of unit.3. Place at the bottom of the unit.Remove By-pass Block3 Slide out 2 Tilt1 PushSpigotsBy-passblockwww.pall.com/lab 28SANITIZATION PROCEDURE
Sanitization Procedure (continued)Step 6 - Replace Purification Pack1. Insert Polishing Purification Pack into right-hand sideof the compartment (see page 20). Allow the <strong>Cascada</strong><strong>Lab</strong> <strong>Water</strong> unit to recognize the Purification Pack andensure that it has been replaced into the correct position.2. Ensure Purification Pack is locked into position.3. Close front door.Step 7 - Return to Normal Operation1. Press Process button twice. The unit has now beensanitized but should be allowed to rinse to a suitablequality. For particularly sensitive applications, it isrecommended that this occur overnight.Note: Once a sanitization cycle has commenced, the<strong>Cascada</strong> <strong>Lab</strong> <strong>Water</strong> unit cannot be used to purify water untilthe cycle has been completed. If the electricity supply to the<strong>Cascada</strong> <strong>Lab</strong> <strong>Water</strong> unit is interrupted while the cycle is inprocess, the unit will resume sanitization at point ofinterruption when it is restarted.PAL-C100 Sanitization Tablet - Safety InformationGeneral Description:White, solid tablet which rapidly dissolves in water and isused for sanitization applications.Hazard Assessment:Contains sodium dichloroisocyanurate dihydrateand is toxic by inhalation, ingestion, and skin contact.Properties:Soluble in water and pH 6. Non-combustible.Handling Precautions:Keep container tightly closed in a dry place. Wear protectiveclothing when handling.Spillages:If tablets are dry and uncontaminated, gather and place inheavy-duty plastic bag. Do not return to original container.Wash away any residues with copious amounts of water.Toxicity:Serious risk of poisoning by inhalation or ingestion. Irritatingto skin, eyes, and respiratory system.First Aid:Eyes - thoroughly wash out with clean water for at least 15minutes. Seek medical advice.Inhalation - remove from chemical exposure, rest, andexpose self to fresh air. In severe cases, obtain medicalattention and treat for acute chlorine poisoning.Skin - drench the skin with plenty of water. Removecontaminated clothing and wash before reuse. Obtainmedical advice in severe cases.Mouth - wash out the mouth thoroughly with water andgive a large quantity of milk to drink. Obtain medical advice.Note: A comprehensive data sheet is available on requestand is supplied with each packet of tablets.SANITIZATION PROCEDURE29
TroubleshootingThis section highlights the problems that could occurwith the <strong>Cascada</strong> <strong>Lab</strong> <strong>Water</strong> system and how to rectifythem. The unit will normally sound an alarm and therespective icons will flash. Silence the alarm by pressing themute button. If the problem cannot be solved using thismanual, please call either your local <strong>Pall</strong> office or distributor.See Contact Information on back cover.ProblemsNo display messageAlarm and flashingquality valueActionCheck main power supplyand cord.Check that the main poweris switched on.Check fuses in power inletmodule and replace if blown.Mute alarm. Check alarm setvalue is correct. See InstallationInstructions Section, InitialController Set-up, Step 8,Purity Alarm Settings (page 13).Dispense approximately10 liters of water to drain.Check UF, if fitted.If problem persists, replacepolishing Purification Pack.See Maintenance Section,Replacing the Purification Pack(page 20).If problem persists, callTechnical Service.=== MV-cm Feature out of measurementrange. Allow unit to recirculate.Replace Purification Packs.See Maintenance Section,Replacing the Purification Pack(page 20).If problem persists, callTechnical Service.High watertemperature alarmCheck correct alarm point is set.See Installation InstructionsSection, Initial ControllerSet-up, Step 9, TemperatureAlarm Setting (page 13).Check feed water temperaturehas not risen suddenly. Dispensesome water to allow cold waterto be drawn into the unit.Operate unit in intermittentoperation to minimizetemperature rising.Purification packchange reminderalarmUF changereminder alarmUV changereminder alarmSanitizationreminder alarmReservoir lowlevel alarmReservoir leveldisconnectfault alarmReduced flowfrom dispenserUnit noisyUnit will not operateMute alarm. ReplacePurification Pack.See Maintenance Section,Replacing a Purification Pack(page 20).Mute alarm. Replace UF filter.See Maintenance Section,Replacing the UF Filter (page 21).Mute alarm. Replace UV filter.See Maintenance Section,Replacing the UV Lamp (page 23).Mute alarm. Initiate SanitizationProcedure. See SanitizationProcedure Section (page 27).Mute alarm. Ensure unit is fedfrom a reservoir and the correctfeature has been set.See Installation InstructionsSection, Initial Controller Set-up,Step 12, Reservoir Level(page 14).Check feed to the reservoir isoperational and the reservoir isfilling.Mute alarm. Ensure controllead from reservoir is properlyconnected. Note: unit must bepowered down to clear alarm.Check inlet water strainer.Replace POU filter if fitted.Replace UF if fitted.Pump worn, callTechnical Service.Open front door and securepipework to stop vibration.Ensure that the Purification Packis correctly installed. SeeMaintenance Section (page 20).Ensure Purification Pack has avalid consumable date and thatthe reminder has not over run 12months.www.pall.com/lab 30TROUBLESHOOTING
Consumables and AccessoriesConsumable Maximum MaximumService Life* Shelf LifePAL-C195 Purification Pack- 12 monthsRO Feed (Americas, China,Asia)2 yearsPAL-C184 UF Filter 24 months 2 yearsPAL-C151 UV Lamp 185 12 months 5 yearsPAL-C166 POU Filter 6 months 2 yearsPAL-C100 1 per month 2 years(Sanitization tablets)AccessoryInstallation kitPressure regulator valve (feedwaterpressures > 0.7 bar (70 kPa,10 psi)but < 4.0 bar (400 kPa, 60 psi)Wall mounting kit (Europe, Japan)Wall mounting kit (Americas, China, Asia)Part NumberPAL-A675PAL-A500PAL-A643PAL-A65525 liter reservoir PAL-A64440 liter reservoir PAL-A64575 liter reservoir PAL-A646PAL-C169** 6 months 2 years(Composite Vent Filter)* Service life is an estimate only and will depend on theapplication and feed water quality. Care should be takento order the correct consumable items.** Required for reservoirs (PAL-A644, PAL-A645, PAL-A646, PAL-A653).Wall mounting kit (25 and 40 liter reservoir)Wall mounting kit (75 liter reservoir)RS232 printer kitDocking vessel – 35 LiterSanitization blockPAL-A624PAL-A625LA618PAL-A653PAL-A671CONSUMABLES AND ACCESSORIES31
Key to Control PanelIconsAlarm ConditionsIconDescriptionIconAlarm ConditionsMute AlarmUV Lamp Failure(Flashing)AcceptSanitization Tablet Reminder(Flashing)ScrollBy-pass Fitted - Warning(Flashing)Auto RestartPurification Pack Not in Place(Flashing)Manual RestartReinstall Purification Pack(Flashing)Set Up MenuClock Stopped(Flashing)Cursor Option Choice(Flashing)Reservoir Level –Disconnect FaultCursor Selection ChoiceIncorrect Password(Flashing)CancelOpen UF Flush Valve(Flashing)ResetClosed UF Flush Valve(Flashing)PrinterIntermittent RecirculationReplacement Datewww.pall.com/lab 32KEY TO CONTROL PANEL
Key to Control Panel (continued)Replacement TimersIcon Replacement Time PresetUV Lamp1 yearReplacementQuality AlarmsScreenDescriptionOutlet Purity AlarmPurification PackReplacementUF Filter Replacement12 months2 yearsTemperature AlarmKEY TO CONTROL PANEL33
Warranty, Limitation of Liability and Remedies:1. There is no warranty of merchantability or fitness for anyparticular purpose with respect to any of the products,nor is there any other warranty expressed or implied,except as provided for herein.2. For a period of 12 months from the date of deliveryfrom Seller (the “Warranty Period”), Seller warrantsthat products manufactured by Seller, when properlyinstalled and maintained, and operated at ratings,specifications, and design conditions, will be freefrom defects in material and workmanship.3. Seller’s liability under any warranty is limited solely(in Seller’s discretion) to replacing (F.O.B. original shippoint), repairing, or issuing credit for products whichbecome defective during the Warranty Period. Purchasershall notify Seller promptly in writing of any claims andprovide Seller with an opportunity to inspect and testthe product claimed to be defective.Buyer shall provide Seller with a copy of the originalinvoice for the product, and prepay all freights chargesto return any products to Seller’s factory, or other facilitydesignated by Seller. All claims must be accompanied byfull particulars, including system operating conditions,if applicable.4. In no event shall Seller be liable for any productaltered outside of the Seller’s factory by someoneother than Seller or for a product subjected to misuse,abuse, improper installation, application, operation,maintenance or repair, alteration, accident ornegligence in use, storage, transportation, or handling.5. In no event will Seller be liable for any damages,incidental, consequential or otherwise, whetherarising out of or in connection with the manufacture,packaging, delivery, storage, use, misuse, or nonuseof any of its products or any other cause whatsoever.<strong>Water</strong> <strong>System</strong> Limited WarrantyPALL CORPORATION WARRANTS THE CASCADA LABWATER SYSTEMS, EXCLUDING MEMBRANES ANDCARTRIDGES, AGAINST DEFECTS IN MATERIALS ANDWORKMANSHIP WHEN USED IN ACCORDANCE WITH THEAPPLICABLE INSTRUCTIONS AND WITHIN THE OPERATINGCONDITIONS SPECIFIED FOR THE SYSTEMS FOR A PERIODOF ONE YEAR FROM THE EARLIER OF:A) THE DATE OF INSTALLATION, ORB) THE 120 TH DAY FOLLOWING THE DATE OF SHIPMENT.PALL CORPORATION MAKES NO OTHER WARRANTY,EXPRESSED OR IMPLIED. THERE IS NO WARRANTY OFMERCHANTABILITY OR FITNESS FOR A PARTICULARPURPOSE. THE WARRANTY PROVIDED HEREIN AND THEDATA, SPECIFICATIONS AND DESCRIPTIONS OF THE PALLCORPORATION CASCADA LAB WATER SYSTEMS APPEARINGIN PALL PRODUCT LITERATURE MAY NOT BE ALTEREDEXCEPT BY EXPRESS WRITTEN AGREEMENT SIGNED BY ANOFFICER OF PALL CORPORATION. REPRESENTATIONS, ORALOR WRITTEN, WHICH ARE INCONSISTENT WITH THISWARRANTY OR SUCH PUBLICATIONS ARE NOT AUTHORIZEDAND, IF GIVEN, SHOULD NOT BE RELIED UPON.IN THE EVENT OF A BREACH OF THE FOREGOINGWARRANTY, PALL CORPORATION’S SOLE OBLIGATIONSHALL BE TO REPAIR OR REPLACE, AT ITS OPTION, ANYPRODUCT OR PART THEREOF THAT PROVES TO BEDEFECTIVE IN MATERIALS OR WORKMANSHIP WITHIN THEWARRANTY PERIOD, PROVIDED THE CUSTOMER NOTIFIESPALL CORPORATION PROMPTLY OF ANY SUCH DEFECT. THECOST OF LABOR FOR THE FIRST NINETY (90) DAYS OF THEABOVE WARRANTY PERIOD IS INCLUDED IN THE WARRANTY;THEREAFTER, LABOR COST SHALL BE AT THE CUSTOMER’SEXPENSE. THE EXCLUSIVE REMEDY PROVIDED HEREINSHALL NOT BE DEEMED TO HAVE FAILED OF ITS ESSENTIALPURPOSE SO LONG AS PALL CORPORATION IS WILLING ANDABLE TO REPAIR OR REPLACE ANY NONCONFORMING PALLCORPORATION SYSTEM OR COMPONENT PART. PALLCORPORATION SHALL NOT BE LIABLE FORCONSEQUENTIAL, INCIDENTAL, SPECIAL OR ANY OTHERINDIRECT DAMAGES RESULTING FROM ECONOMIC LOSS ORPROPERTY DAMAGE SUSTAINED BY ANY CUSTOMER FROMTHE USE OF ITS PROCESS SYSTEMS.NOTICE<strong>Pall</strong> <strong>Corporation</strong> is continually striving to improve its productsand services. Consequently, the information in this documentis subject to change without notice and should not be construedas a commitment by <strong>Pall</strong> <strong>Corporation</strong>. Also, <strong>Pall</strong> <strong>Corporation</strong>assumes no responsibility for any errors that may appear in thisdocument. This manual is believed to be complete and accurateat the time of publication. In no event shall <strong>Pall</strong> <strong>Corporation</strong> beliable for incidental or consequential damages in connection withor arising from the use of this manual.<strong>Pall</strong> <strong>Corporation</strong> warrants its products against defects inmaterials and workmanship as described in the Warrantystatement.Copyright NoteThe written text, technical information and illustrations, containedin this document are the property of ELGA <strong>Lab</strong><strong>Water</strong>, a divisionof VWS (UK) Ltd, and protected by copyright law. Permission for thisinformation to be reproduced in this Operation Manual has been dulyauthorized by ELGA <strong>Lab</strong><strong>Water</strong> under the terms of the supply anddistribution agreement with <strong>Pall</strong> <strong>Corporation</strong>.The information is supplied without liability for errors or omissions.No part of the Manual may be copied, reproduced, transmitted inany form or by any means, electronic, mechanical, magnetic, ormanual including photocopying, recording, or information storageand retrieval systems, or disclosed to third parties, or used forany purpose other than the purchaser's personal use, withoutthe express written permission from ELGA <strong>Lab</strong><strong>Water</strong>.ELGA <strong>Lab</strong><strong>Water</strong>, as exclusive supplier to <strong>Pall</strong>, reserves the right toalter without notice to the purchaser the text, technical informationand illustrations contained in this Operation Manual.www.pall.com/lab 34WARRANTY/CONDITIONS OF SALE
Contact Information<strong>Pall</strong> Life Sciences filtration products can be orderedthrough <strong>Pall</strong> Life Sciences offices and distributorsworldwide. For information contact:<strong>Pall</strong> Life Sciences600 South Wagner RoadAnn Arbor, MI 48103-9019USATel: 800.521.1520 (in USA)734.665.0651Fax: 734.913.6114Customer Service:Tel: 800.521.1520 (in USA)734.913.6194Fax: 734.913.6495Technical Service:Tel: 800.521.1520 (in USA)734.913.6123Fax: 734.913.6576Email: <strong>Lab</strong>@pall.comLive help: www.pall.com/labWorldwide OfficesAustraliaCheltenham, VICTel: 03 8586 81501800-635 082Fax: 1800 228 825AustriaWienTel: 00 43 2236 533880Fax: 00 43 2236 53389CanadaOntarioTel: 905-542-0330800-263-5910(in Canada)Fax: 905-542-0331CanadaQuébecTel: 514-332-7255800-435-6268 (in Canada)Fax: 514-332-0996800-808-6268 (in Canada)ChinaP. R., BeijingTel: 86-10 8458 4010Fax: 86-10 8458 4001FranceSt. Germain-en-LayeTel: 01 30 61 39 92Fax: 01 30 61 58 01<strong>Lab</strong>-FR@pall.comGermanyDreieichTel: 06103-307 333Fax: 06103-307 399<strong>Lab</strong>-de@pall.comIndiaMumbaiTel: 91-22-55995555Fax: 91-22-55995556ItalyMilanoTel: 02-477961Fax: 02-47796394or 02-4122985JapanTokyoTel: 03-6901-5800Fax: 03-5322-2134KoreaSeoulTel: 2-560-7834Fax: 2-560-7822MalaysiaSelangorTel: 60 3 5569 4892Fax: 60 3 5569 4896New ZealandHamiltonTel: +64 7 957 9510Fax: +64 7 957 9513PolandWarszawaTel: (+ 48 22) 510 2100Fax: (+ 48 22) 510 2101RussiaMoscowTel: 00 75 01 787 76 14Fax: 00 75 01 787 76 15SingaporeTel: (65)389-6500Fax: (65)389-6501South AfricaJohannesburgTel: +27-11-2662300Fax: +27-11-3253243SpainMadridTel: 91-657-9876Fax: 91-657-9836SwedenLundTel: +46 (0)46 158400Fax: +46 (0)46 320781SwitzerlandBaselTel: 061-638 39 00Fax: 061-638 39 40TaiwanTaipeiTel: 2-2545-5991Fax: 2-2545-5990ThailandBangkokTel: 66 2937 1055Fax: 66 2937 1066United KingdomFarlingtonTel: 023 92 302600Fax: 023 92 303424<strong>Lab</strong>-UK@europe.pall.comVisit us on the Web at www.pall.com/labE-mail us at <strong>Lab</strong>@pall.com© 2006, <strong>Pall</strong> <strong>Corporation</strong>. <strong>Pall</strong>, , and <strong>Cascada</strong> are trademarks of <strong>Pall</strong> <strong>Corporation</strong>.is a service mark of <strong>Pall</strong> <strong>Corporation</strong>. ELGA ® <strong>Lab</strong><strong>Water</strong> is the global laboratorywater brand of Veolia <strong>Water</strong>.12/06, GN06.1547 (CID)© ELGA <strong>Lab</strong><strong>Water</strong> / Veolia <strong>Water</strong> <strong>System</strong>s Ltd. 2004. All rights reserved.Publication ref : PAL-MANU38437 Version 2, November 2006


