
You also want an ePaper? Increase the reach of your titles
YUMPU automatically turns print PDFs into web optimized ePapers that Google loves.
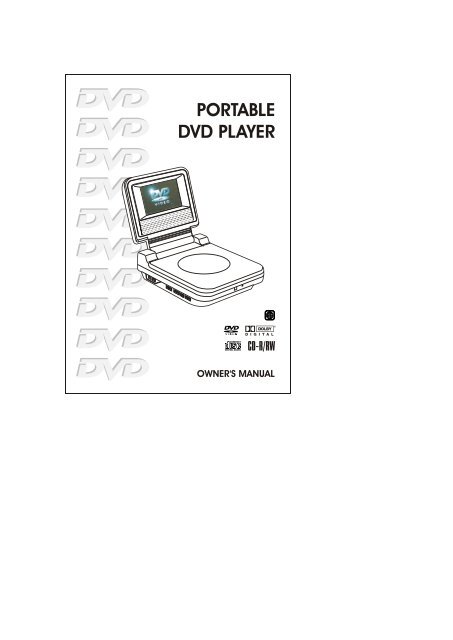
<strong>PORTABLE</strong><strong>DVD</strong> <strong>PLAYER</strong>OWNER'S MANUAL
SAFETY PRECAUTIONSCAUTIONWARNING: TO REDUCE THE RISK OFELECTRIC SHOCK, DO NOT REMOVECOVER (OR BACK). NO USER-SERVICEABLE PARTS INSIDE. REFERSERVICING TO QUALIFIED SERVICEPERSONNEL.The lightning flash with anarrowhead symbol, within theequilateral triangle, is intendedto alert the user to the presenceof uninsulated "dangerous voltage" withinthe product's enclosure that may be ofsufficient magnitude to cause an electricshock.The exclamation point withinthe equilateral triangle isintended to alert the user tothe presence of importantoperating and maintenance (servicing)instructions in this owner manual.* SEE BOTTOM OF UNIT FOR GRAPHIC SYMBOLS *WARNING:TO PREVENT FIRE OR SHOCK HAZARD, DO NOT EXPOSE THIS APPLIANCE TORAIN OR MOISTURE.CAUTION:TO PREVENT ELECTRIC SHOCK, MATCH WIDE BLADE OF PLUG TO WIDE SLOT,FULLY INSERT.DANGER OF EXPLOSION IF BATTERY IS INCORRECTLY REPLACED. REPLACEONLY WITH THE SAME OR EQUIVALENT TYPE.CAUTIONINVISIBLE LASER RADIATIONWHEN OPEN AND INTERLOCKSDEFEATED.AVOID EXPOSURE TO BEAM.This productcontains a lowpower laser device.E - 2
SAFETY PRECAUTIONSOn Placement• Do not use the unit in places which are extremely hot, cold, dusty, or humid.• Place the unit on a flat and even surface.• Do not restrict the air flow of the unit by placing it in a place with poor air flow,by covering it with a cloth, or by placing it on carpeting.FCC InformationThis device complies with Part 15 of FCC Rules.Operation is subject to the following two conditions:(1) This device may not cause harmful interference, and(2) This device must accept any interference received, including interference thatmay cause undesirable operation.On Safety• When connecting or disconnecting the AC cord, grip the plug and not the corditself. Pulling the cord may damage it and create a hazard.• When you are not going to use the unit for a long period of time, disconnectthe AC power cord.On Condensation• When left in a heated room where it is warm and damp, water droplets orcondensation may form inside the unit. When there is condensation inside theunit, the unit may not function normally. Let the unit stand for 1 to 2 hoursbefore turning the power on, or gradually heat the room up and dry the unitbefore use.Rating Plate Location• The rating plate location is on the bottom of unit.WARNING:• Should any trouble occur, disconnect the AC power cord and refer servicing toa qualified technician.Notes on CopyrightIt is forbidden by law to copy, broadcast, show, broadcast on cable, play in public,rent copyrighted material without permission.Apparatus Claims of U.S. Patent Nos. 4,631,603; 4,577,216; 4,819,098 and4,907,093 licensed for limited viewing uses only.<strong>DVD</strong> video discs are copy protected, and any recordings made from these discswill be distorted. This product incorporates copyright protection technology thatis protected by method claims of certain U.S. patents and other intellectualproperty rights owned by Macrovision Corporation and other rights owners. Useof this copyright protection technology must be authorized by MacrovisionCorporation, and is intended for home and other limited viewing uses only, unlessotherwise authorized by Macrovision Corporation. Reverse engineering ordisassembly is prohibited.E - 3
IMPORTANT SAFETYINSTRUCTIONS1. Read Instructions - All the safety and operating instructions should be readbefore the appliance is operated.2. Retain Instructions - The safety and operating instructions should be retainedfor future reference.3. Heed Warnings - All warnings on the appliance and in the operating instructionsshould be adhered to.4. Follow Instructions - All operating and use instructions should be followed.5. Water and Moisture - The appliance should not be used near water - forexample, near a bathtub, washbowl, kitchen sink, laundry tub, in a wetbasement, or near a swimming pool, and the like.6. Carts and Stands - The appliance should be used onlywith a cart or stand that is recommended by themanufacturer.6A. An appliance and cart combination should be moved withcare. Quick stops, excessive force, and uneven surfacesmay cause the appliance and cart combination to overturn.7. Wall or Ceiling Mounting - The appliance should bemounted to a wall or ceiling only as recommended by themanufacturer.8. Ventilation - The appliance should be situated so that its location or positiondoes not interfere with its proper ventilation. For example, the appliance shouldnot be situated on a bed, sofa, rug, or similar surface that may block theventilation openings; or, placed in a built-in installation, such as a book caseor cabinet, that may impede the flow of air through the ventilation openings.9. Heat - The appliance should be situated away from heat sources such asradiators, heat registers, stoves, or other appliances (including amplifiers) thatproduce heat.10. Power Sources - The appliance should be connected to a power supply onlyof the type described in the operating instructions or as marked on theappliance.11. Grounding or Polarization - Precautions should be taken so that the groundingor polarization means of an appliance are not defeated.12. Power-Cord Protection - Power-supply cords should be routed so that theyare not likely to be walked on or pinched by items placed upon or against them,paying particular attention to cords at plugs, convenience receptacles, andthe point where they exit from the appliance.13. Cleaning - The appliance should be cleaned only as recommended by themanufacturer.14. Power Lines - An outdoor antenna should be located away from power lines.E - 4
15. Outdoor Antenna Grounding - If an outside antenna is connected to thereceiver, be sure the antenna system is grounded so as to provide someprotection against voltage surges and built up static charges. Section 810 ofthe National Electrical Code, ANSI/NFPA No. 70, provides information withrespect to proper grounding of the mast and supporting structure, groundingof the lead-in wire to an antenna discharge unit, size of grounding conductors,location of antenna-discharge unit, connection to grounding electrodes, andrequirements for the grounding electrode. See Figure 1.16. Nonuse Periods - The power cord of the appliance should be unplugged fromthe outlet when left unused for a long period of time.17. Object and Liquid Entry - Care should be taken so that objects do not fall,and liquids are not spilled, into the enclosure through openings.18. Damage Requiring Service - The appliance should be serviced by qualifiedservice personnel when:A. The power-supply cord or the plug has been damaged; orB. Objects have fallen, or liquid has been spilled, into the appliance; orC. The appliance has been exposed to rain; orD. The appliance does not appear to operate normally or exhibits a markedchange in performance; orE. The appliance has been dropped, or the enclosure damaged.19. Servicing - The user should not attempt to service the appliance beyond thatdescribed in the operating instructions. All other servicing should be referredto qualified service personnel.E - 5
Safety Precautions ......................... 1Important Safety Instruction ............ 2Table Of Contents .......................... 3Disc Formats ................................. 4Accessories .................................. 5Remote Control .............................. 5Control Reference Guide .............. 6-7Power Supply ............................ 8-10Using the AC adapter ................. 8Using the car plug adapter ......... 8Using the rechargeable battery pack........................................... 9-10Turning on the unit ................. 10Connections ............................ 11-12Connecting a TV .................... 11Another source connection ..... 11Using headphones / earphones . 12Sound System .............................. 12Playing a Disc .......................... 13-15Playing a Disc ......................... 13Pausing playback (still mode)............................................. 13Stopping playback ................... 13To skip to a different track ......... 13Fast Foward/Fast Reverse ........ 14Skip (Forward/Reverse) ............ 14Zooming into an image ............. 14Angle selection ....................... 15Audio selection ....................... 15Subtitle selection .................... 15Special Functions ................... 16-18Display function ...................... 16Locating a specific title ............ 17Locating a specific title/chapter/track ..................................... 17Locating a specific time ............ 18Angle setting .......................... 18Audio setting .......................... 18Subtitle setting ....................... 18CD / <strong>DVD</strong> programmable memory .... 19<strong>DVD</strong> programmable memory ... 19CD programmable memory ..... 19TABLE OF CONTENTSRepeat Playback ........................ 20Repeating a title/chapter (<strong>DVD</strong>) .. 20Repeating a single track/whole disc(CD) ....................................... 20Playing MP3 and Picture File Disc............................................. 21-22Playing a MP3 file disc ............. 21Playing a Picture file disc ......... 22Playing a MP3/Picture file disc ... 22Customizing the Function Settings............................................... 23-26LANGUAGE setting .................... 23VIDEO setting ...................... 23-24AUDIO setting ...................... 24-25RATING setting ..................... 25-26Language Code List for Disc Language.................................................. 27Maintenance ............................... 28Cleaning Disc .......................... 28Cleaning the Unit ..................... 28Important Note ........................ 28Trouble Shooting Guide ................ 29E - 6
TThe unit can playback.<strong>DVD</strong>s[8cm/12cm disc]Region Management InformationRegion Management Information: This unit is designed and manufactured to respondto the Region Management Information that is encoded on <strong>DVD</strong> discs. If the Regionnumber printed on the <strong>DVD</strong> disc does not correspond to the Region number of this unit,this unit cannot play that disc.The region number of this unit is 1. 1Disc Function or Operation that is Not AvailableWhen the symbol appears on the screen, it indicates that the function or operationattempted is not available at that time. This occurs because the <strong>DVD</strong> disc manufacturerdetermines the specific functions. Certain functions may not be available on somediscs. Be sure to read the documentation provided with the <strong>DVD</strong>.Icons Used on <strong>DVD</strong>sSample lconsDISC FORMATSTitle, Chapter and Tracks• <strong>DVD</strong>s are divided into “titles” and“chapters”. If the disc has more than onemovie on it, each movie would be a separate“title”. “Chapters” are sections of titles.• Audio CDs are divided into “tracks”. A“track” is usually one song on an Audio CD.2221. English2. French1. English2. FrenchAudio CDs[8cm/12cm disc]Language selections for audioE - 7CompatibleLanguage selections for subtitlesScreen aspect ratioMultiple camera anglesRegion code indicatorNotes:• This Unit supports 2-channel (L/R) audio and 5.1ch (Multi-channel) MPEG Audio1/2 (only when the DIGITAL AUDIO OUT coaxial jack is used for connection). It doesnot support 7.1 channel MPEG Audio Version 2.0.• When playing back a CD-G (Graphics) or CD EXTRA disc, the audio portion will beplayed, but the graphic images will not be shown.Chapter 1 Chapter 2 Chapter 3 Chapter 1 Chapter 2Track 1 Track 2 Track 3 Track 4 Track 5Note :• Numbers identify each title, chapter, and track on a disc. Most discs have thesenumbers recorded on them, but some do not.Notes on Unauthorized DiscsYou may not be able to play back some <strong>DVD</strong> discs on this unit if they were purchasedfrom outside your geographic area or made for business purposes.
ACCESSORIESPlease check and identify the supplied accessories.Use numbers indicated in parentheses when asking for replacement parts.• To order accessories contact 1-800-252-6123 or web site (http://www.18002526123.com)Remote control (with battery) (043-R13232-020) ....................................... x 1AC adapter (133-010901-000) ............................................................... x 1Rechargeable battery pack (Model no.: RCBC-02) .................................... x 1REMOTE CONTROLUsing the Remote Control• Point the Remote Control at the REMOTE SENSOR located on the unit.• When there is a strong ambient light source, the performance of the infrared REMOTESENSOR may be degraded, causing unreliable operation.• The recommended effective distance for remote operation is about 16 feet (5 meters).Take out the PVC sheet before operating the Remote Control.TO CHANGE REMOTE BATTERY1. Open the battery door. 2. Insert one CR2025 (3V) size battery.BATTERY REPLACEMENTWhen battery becomes weak, the operating distance of the Remote Control willgreatly reduced and you will need to replace the battery.NOTE:• If the Remote Control is not to be used for a long time, remove the battery to avoiddamage caused by battery leakage corrosion.• WARNING: Do not dispose of batteries in fire, batteries may explode or leak.E - 8
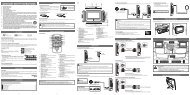
Remote Control1234567TV MODEZOOMSTOP PLAY PAUSEPREVMEM /ANGLESEARCHENTER2 34 5 67 8 9M 0VOLCONTROL REFERENCE GUIDESETUP / REPVOLMENUNEXTAUDIOSUBTITLE / RETURNGOTODISPLAY891011121314151) ZOOM buttonZoom into an image of a <strong>DVD</strong>.TV MODE buttonIn stop mode, select whether tooutput the video signal. TV shows"AUTO" means output signal dependson <strong>DVD</strong> (either NTSC or PAL). TVshows "PAL" or "NTSC" which meansoutput signal fixed to PAL or NTSC.2) STOP buttonStop playing a disc.PLAY buttonPress to start or resume playback adisc.PAUSE buttonPause playback, frame advance.3) PREV buttonMove reverse through titles, chaptersor tracks on a disc.4) / SEARCH buttonsSEARCH: Fast reverse playback.SEARCH: Fast forward playback.E - 95) Number (0 - 9) buttonsUse when creating programmes, andentering a parental level password. Toselect a CD/MP3 track directly.6) MEM / ANGLE buttonIn stop mode, enter the number of aselected chapter or track.During <strong>DVD</strong> playing, switch the cameraangle of the video presentation whenscenes with multiple camera anglesare recorded on a <strong>DVD</strong>.7) VOLUME + / - controlsAdjust the volume.8) MENU buttonOpen and close <strong>DVD</strong> menu.9) NEXT buttonMove forward through titles, chaptersor tracks on a disc.10) Cursor ( , , , ) buttonsUse to highlight selections on amenu screen and make adjust certainsettings.ENTER buttonConfirm selections on a menu screen.11) AUDIO buttonSelect one of the audio sound tracksprogrammed on a <strong>DVD</strong> or selects theaudio output mode on a AUDIO CD.12) SUBTITLE ..... / RETURN buttonSelect one of the subtitle languagesprogrammed on a <strong>DVD</strong>.Return to the normal operation afterusing the SETUP menu of a <strong>DVD</strong>.13) GOTO buttonSkip directly to a specific location ona <strong>DVD</strong> disc.14) DISPLAY buttonChange disc status informationdisplayed on the screen.15) SETUP / REP (REPEAT) buttonIn stop mode, Open and close theSETUP menu of the unit.Repeat chapter or title of a <strong>DVD</strong>.Repeat single track or whole CD.
CONTROL REFERENCE GUIDEUnit1 2 315141312111091) OPEN buttonOpen the disc door.2) Headphone jack3) SCREEN switch16:9 Wide-screen4:3 Pan screen4) BRIGHTNESS buttonAdjust the relative lightness ordarkness of the colour.5) AUDIO OUT L / R jacksLINE OUT (VOL MAX) jacksAdjust the VOLUME to MAX positionwhen connect another equipment.VIDEO OUT jack6) Disc DoorClose tray by pushing the disc door.7) POWER ON indicatorSlide the POWER ON / OFF switch toON position, the light will illuminate.8) Remote sensorReceive the remote control unit signals.9) PAUSE buttonPress to pause playback of disc. Each85time you press the PAUSE button thepicture advances one frame. Press thePLAY button to resume playback.PLAY buttonPress to start or resume playback a disc.10) STOP buttonStop playing a disc.11) PREV buttonPress PREV button to go back toprevious chapters /tracks. Press andhold PREV button to begin fastscan. Four speeds are available.NEXT buttonPress NEXT button to advance tochapters / tracks. Press and holdNEXT button to begin fast scan. Fourspeeds are available.12) VOLUME + / - controlsAdjust the volume.13) POWER ON / OFF switch14) DC IN 9V - 12V jack15) DIGITAL OUT jack746E - 10
POWER SUPPLYA. Using the AC adapterThis AC adapter operates on AC 100V -120V.Cautions:• The included AC adapter is for use withthis unit only. Do not use them withother equipment.• When the unit is not going to be usedfor long time, disconnect the AC adapterfrom the AC outlet.LEFT SIDE OF UNIT1To "DC IN9V-12V"jack2To ACoutletAC AdapterB. Using a car plug adapterA 12V car plug adapter allows the playersto be used with vehicles that have a 12V,negative ground electrical system.LEFT SIDE OF UNITTo the cigarette2 lighter socketWARNING:Disconnect the car plugadapter when not inCar plug adapteruse. Not for use in 24Vvehicles.Cautions:• When purchasing a car plug adapter, seek expert advice to ensure it is fully compatiblewith the <strong>DVD</strong> players.• In the interests of the traffic safety, do not perform operations on the unit or view videosoftware while driving a vehicle.• Make sure the unit is fastened correctly to prevent from falling in the vehicle in the eventof an accident.• When the inside of the cigarette lighter socket is dirty with ashes or dust, the plug sectionmay become hot due to poor contact. Be sure to clean the cigarette lighter socket beforeuse.• After use, disconnect the 12V car plug adapter from both the unit and cigarette lightersocket.E - 111To "DC IN9V-12V" jack
C.Using the rechargeable battery pack• Charge the rechargeable battery pack before using them for the first time.• The rechargeable battery pack is suitable when adapting the unit for portable useand when it is convenient for you to enjoy the unique functions of the unit out ofdoors.To recharge the batteryAC ADAPTERRemove the rechargeablebattery pack from the unit (ifbeing used).Cautions:• The included AC adapter isfor use with this unit only. Donot use them with otherequipment.• When the unit is not going tobe used for long time,disconnect the AC adapterfrom the AC outlet.• You must disconnect therechargeable battery packfrom the unit when yourecharge the battery.POWER SUPPLYTo"BATTERYCHARGEIN" jack• Recharging is complete when charging indicator goes out. Unplug the AC adapterfrom the rechargeable battery pack.To attach rechargeable battery packAttach it at the corresponding position at the back of the unit.1POWERindicatorCHARGINGindicator2To ACoutletRECHARGEABLEBATTERY PACK(Li-lon 7.4V 2500mA)3Attachrechargeablebattery pack toUnitREAR OF UNITREAR OF UNITRECHARGEABLEBATTERY PACKRECHARGEABLEBATTERY PACKE - 124To "DC IN 9V" jack
POWER SUPPLYDisconnecting the rechargeable battery pack from the unit.REAR OFUNITPush the button to disconnect theRECHARGEABLE BATTERY PACKRECHARGEABLEBATTERY PACKCondition and attention:• When RECHARGEABLE BATTERY PACK POWER is low, the player will stop playing.• Do not short-circuit the terminals.• Use only the supplied AC ADAPTER and RECHARGEABLE BATTERY PACK to rechargethe battery pack.• Detach the rechargeable battery pack. (Even if the unit is off, it still uses some power.This can lead to over discharging of the battery and malfunction.)• Recharge the battery pack when you are ready to use it again.• If the rechargeable battery pack is not to be used for a long period of time, dischargeit and store it in a place that is cool, dry and dark.• While using the rechargeable battery pack, the environmental temperature should be 5°C(41°F) to 35°C (95°F).• To get the longest service life of the rechargeable battery pack, charge at indoortemperature.• Never dispose of in fire, water or heat up.• Do not open the rechargeable battery pack, refer servicing only to qualified servicepersonnel.Turning on the unit1. Slide the POWER ON/OFF switch to "ON" position on the left side of unit.2. The <strong>DVD</strong> logo (start-up picture) will appear on unit screen.E - 13
RIGHT SIDE OF UNITCONNECTIONSA. Connecting a TV• If your TV has Audio/Video inputs, you can also connect the unit to your TV usingAudio/Video cable.TVTo VIDEO INjacksAUDIO / VIDEOCABLEWatching a <strong>DVD</strong> on your TV1. Turn on the unit.2. Turn on the TV and set it to <strong>DVD</strong> mode.AUDIOINRLVIDEOINB. Another source connectionDigital connectionThis unit can play Dolby Digital, but only in two channels.REAR OF UNITCOAXIAL DIGITALAUDIO CABLEAudio equipmentwith digital audioinput jackDIGITAL INE - 14COAXIALListening to another audio equipment1. Turn on the Unit.2. Turn on your audio equipment and follow the instructions included with it to selectthe DIGITAL IN function.Notes:• If the external equipment is a television and this audio system is close to it, youmay experience interference if the tuner function is selected while the televisionis working.• Due to copyright protection, <strong>DVD</strong> movies cannot be copied. If you copy a <strong>DVD</strong>movie onto a videotape, the resulting copy will be unclear, with poor sound quality.This is NOT caused by a defective <strong>DVD</strong> system.
CONNECTIONSUsing Headphones / Earphones• Turn down the volume before connection, and then adjust the level.• When headphones / earphones are connected, no sound will be output from theunit's speakers.RIGHT SIDE OF UNITHeadphones / Earphones(3.5mm diameter plug)Caution:• Avoid listening to sound at levels which may be harmful to your ears.SOUND SYSTEMDolby DigitalDolby Digital is a technology developed by Dolby Laboratories. Soundtracks encodedin Dolby Digital can reproduce from one to 5.1 discrete channels of excellent qualityaudio.The unit automatically recognizes the Dolby Digital bitstream and provides a downmixsuitable for two-channel listening. An additional Dolby Digital decoder is required forreproduction of the discrete multi-channel soundtracks available on many <strong>DVD</strong>s.Manufactured under license from Dolby Laboratories.'Dolby' and the double-D symbol are trademarks of Dolby Laboratories.E - 15
PLAYING A DISCBasic playback<strong>DVD</strong>CDThis owner’s manual explains the basic instructions of this unit. Some <strong>DVD</strong>discs are produced in a manner that allows specific or limited operationduring playback. Such as, the unit may not respond to all operating commands.This is not a defect in the unit. Refer to the instruction notes of discs.“ ” may appear on the screen during operation. A “ ” means that thedesired operation is not permitted by the unit or disc.Playing a Disc1. Slide the POWER ON/OFF switch on the left side of unit into on mode.See CUSTOMIZING THE FUNCTION SETTINGS (page 23 to 26) before proceedingto step 2.2. Slide the OPEN switch to open the disc door.3. Hold the disc by its sides and carefully make it fit onto the central support ofcompartment with the label side facing up until you hear a “click”.4. Close the disc door.It takes a short while for your unit to load the disc. After loading, for some discs,the unit will automatically start playback of the disc.5. Press the PLAY button.Pausing playback (still mode)Press the II PAUSE button. To resume normal playback, press thePLAY button.Stopping playbackPress the STOP button at the location where you want to interrupt playback. Toresume playback at the position where the disc was stopped, press the PLAYbutton.If you press the STOP button twice, the unit’s memory will be cleared and pressingthe PLAY button will reset the disc to the beginning.To skip to a different track• Press the PREV button repeatedly to skip to the start of the current orprevious track.• Press the NEXT button to skip to the next track.• For audio CD disc, use the number buttons (remote control only) to jump straightto that track number.E - 16
PLAYING A DISCFast Forward/Fast Reverse<strong>DVD</strong> CD1. Press the SEARCH or SEARCH buttonwhen a disc is playing.• The disc begins fast scan at x2 speed.• Four speeds are available. Each timeSEARCH or SEARCH button ispressed, the speed of fast scan changes inthe following sequence:Note:You also can press and hold / (PREV / NEXT) buttons on the unit repeatedlyto select different fast scan speeds.2. Press the PLAY button when you reach the desired point to resume playbackat normal speed.<strong>DVD</strong> CDSKIP (Forward / Reverse)While you are playing a disc, press the NEXT button to move to the beginning ofthe next chapter or track. Press the PREV button to move to the previous chapteror track and automatically start playing it.Zooming into an image <strong>DVD</strong>While a disc is playing, press the ZOOM button.• While an image is zoomed, youcan use , , and buttonto shift the view and displaythe part you want.• To return to the normal view,press the ZOOM button until the" off" symbol shows. Thescreen will return to normal• When you reach the edge ofthe image, the display will notshift anymore in that direction.E - 17
<strong>DVD</strong>PLAYING A DISCAngle selectionSome <strong>DVD</strong>s contain scenes which have been shot from a number of different angles.For these discs, the same scene can be viewed from each of these different angles.1. While you are playing a <strong>DVD</strong> with different anglesrecorded, press the MEM / ANGLE button toview the number of the current angle.2. Press the MEM / ANGLE button repeatedly tochange the scene to the next angle in thoserecorded.• About two seconds later, playback continuesfrom the new angle you selected.• If no button is pressed within 10 seconds,playback continues without changing thecurrent angle.Sequence of angle shots(Example)Notes:• This function can only be used for discs on which scenes shot from multipleangles have been recorded.• If only one angle is recorded, “ 1/1 ” is displayed.Audio selectionOn some discs, the sound is recorded in two or more formats. Follow the directionsbelow to select the type of playback.1. While a disc is playing, press the AUDIObutton to show the current audio formatnumber.2. Press the AUDIO button repeatedly to selectthe desired audio format.Recorded audio format number changessequentially. (The maximum number of possibleaudio formats is 8)Notes :• If only one audio format is recorded, the number does not change.• About two seconds later, playback continues in the new audio format.Subtitle selection1. While a <strong>DVD</strong> is playing, press the SUBTITLE /RETURN button to display the current languagesetting, as shown in the example below.2. Press the SUBTITLE / RETURN button repeatedlyto select the desired subtitle language.E - 182/3 SpaRecorded language changes sequentially.(The maximum number of possible subtitles is 8)Notes :• If only one language is recorded, the language does not change.• About two seconds later, playback continues with the new subtitle you selected.• The number of languages recorded differs depending on the disc.• If no button is pressed within a few seconds, playback continues without changing thecurrent subtitle.• This function can only be used for discs on which subtitles have been recorded inmultiple languages.• On some <strong>DVD</strong>s, subtitles are activated from the main menu of the <strong>DVD</strong>. Press the MENUbutton to activate the main menu.
<strong>DVD</strong>SPECIAL FUNCTIONSDISPLAY functionUsing DISPLAY, you can check and change the current settings of the following items:ANGLE, AUDIO and SUBTITLE.• While the disc is playing, press the DISPLAY button to display the screen shown below.Elapsed time: Elapsed time from thebeginning of the chapter which is currentlyplaying.Remaining time: Remaining time of thetitle which is currently playing.Elapsed Time Remaining Time• Press the DISPLAY button twice to display the screen shown as below.• Press the ANGLE, AUDIO and SUBTITLE button to change the selected item.Chapter TimeTitleAudio settingSubtitle settingBit rate information<strong>DVD</strong> 00:09:29 01:25: 27Title 1/10 Chapter 3/15 Angle 1/3AudioSubtitle 2/3 SpaBitRate 7.1 MbpssAngle settingTitle skip• The number of the title currently playingand total titles of disc.• Press the GOTO button to set yourdesired title, then press the ENTERbutton to confirm.Chapter skip• The number of the chapter currentlyplaying and total chapters of the currentlyplayed title.• Press the GOTO button to set yourdesired chapter, then press the ENTERbutton to confirm.Time skip• Elapsed time from the beginning of thecurrently playing chapter and theremaining time from the beginning of thecurrently playing title.• Press the GOTO button to set yourdesired point to start playback, thenpress the ENTER button to confirm.Angle setting• The current angle is displayed. When adisc with only one angle is played back,“1/1” is displayed.• Press the ANGLE button to select thedesired angle.Audio setting• The type of audio currently selected isdisplayed.• Press the AUDIO button to select yourdesired type of audio.E - 19Subtitle setting• The subtitle number and languagecurrently selected is displayed. When adisc with only one subtitle is played back,“ 1/1 Eng” is displayed.• Press the SUBTITLE button to selectyour desired language.Bit rate information• Amount of picture, sound and subtitledata in the <strong>DVD</strong> video disc transferredper second. The larger the value is, themore data processed, but this does notnecessarily insure better picture quality.GOTO functionThis function allows you to skip directlyto any part of the disc while a disc isplaying.Note :• After settings, press the DISPLAY buttonagain to return to the normal screen.
SPECIAL FUNCTIONSLocating a specific title <strong>DVD</strong>If a <strong>DVD</strong> disc contains title numbers, you can locate a specific title by directlyselecting a title number.1. In stop mode, press the GOTO button.2. Press , or button to highlight a specific field and press the correspondingnumber button(s) for the title you want.3. Press the ENTER button to confirm. The Unit will start playback about 3 secondslater.Locating a specific title / chapter / track<strong>DVD</strong> CDIf you know the title / chapter / track number you want to play, you can locate aspecifc title / chapter / track by directly selecting a title / chapter / track number.1. Press the GOTO button to search your desired title / chapter / track.2. Press , or button to highlight a title / chapter / track and press thecorresponding number button(s) for the chapter you want.3. Press the ENTER button to confirm. The Unit will start playback about 3 secondslater.<strong>DVD</strong>CDSearchTime - - : - - : - -Track - - - -E - 20
SPECIAL FUNCTIONSLocating a specific time <strong>DVD</strong> CDYou can move to a specific location by entering its corresponding time (hours,minutes, seconds)1. Press the GOTO button.2. Press or button to highlight time.<strong>DVD</strong>3. Press the corresponding number buttons for the setting point you want.• The first two numbers you entered represent hours.• The second two numbers you entered represent minutes.• The third two numbers you entered represent seconds.4. Press the ENTER button to confirm. The Unit will start playback about 3 seconds later.Notes :• Some discs may not respond to this process.• Some scenes may not be located as precisely as you specified.• This method for accessing specific locations is available only within the current title ofthe <strong>DVD</strong> disc.• You can move through the menu by pressing the and buttons.CDSearchTime - - : - - : - -Track - - - -<strong>DVD</strong>Angle setting1. Press the DISPLAY button twice. The FUNCTIONmenu is displayed on the screen and you can seehow many angles are recorded on the disc.2. Press the ANGLE button repeatedly to select yourdesired angle.3. The Unit change to your desired angle at once.<strong>DVD</strong>Audio setting1. Press the DISPLAY button twice. The FUNCTIONmenu is displayed on the screen and you can seehow many audio formats are recorded on the disc.2. Press the AUDIO button repeatedly to select yourdesired type of audio.3. The Unit change to your desired type audioat once.<strong>DVD</strong> 00:09:29 01:25: 27Title 3/15 Angle 1/31/10 ChapterAudioSubtitle 2/3 SpaBitRate 7.1 Mbpss1/3 2/3 3/300:09:29 01:25: 27<strong>DVD</strong>Title 3/15 Angle 1/31/10 ChapterAudioSubtitle 2/3 SpaBitRate 7.1 Mbpss<strong>DVD</strong>Subtitle setting1. Press the DISPLAY button twice. The FUNCTIONmenu is displayed on the screen and you can seehow many subtitle formats are recorded on the disc.2. Press the SUBTITLE button repeatedly to select yourdesired language.3. The Unit will change to your desired languageabout 3 seconds later.E - 21<strong>DVD</strong> 00:09:29 01:25: 27Title 1/10 Chapter 3/15 Angle 1/3AudioSubtitle 2/3 SpaBitRate 7.1 Mbpss1/3 Fre 2/3 Spa 3/3 Eng Off
CD / <strong>DVD</strong> PROGRAMMABLE MEMORYProgrammable memory <strong>DVD</strong>The two types of programmed playback provided by this Unit are title programmedplayback and chapter programmed playback.Title / Chapter programmed playback1. Press the MEM / ANGLE button while the disc is stopped.2. Enter the title numbers in - - . Use or button to move the highlight to chapterand enter the chapter numbers in - - .3. Use , , or button to move to the other field.4. Repeat steps 2 to 3.5. Press the PLAY button to start the programmed playback.TitleChapterNote :• If you press the STOP button twice, the programmed selections will becleared.Programmable memoryCDTrack programmed playback1. Press the MEM / ANGLE button while the disc is stopped.2. Enter the track numbers in - - - .Track3. Use , , or button to other field.4. Repeat steps 2 to 3.5. Press the PLAY button to start the programmed playback.E - 22
REPEAT PLAYBACKYou can play a specific title or chapter repeatedly.(Title repeat, chapter repeat)Repeating a chapter<strong>DVD</strong>You can play the same chapter repeatedly.1. While the disc is playing, press the SETUP/REP buttonuntil the “ Repeat Chapter ” indicator displays on the screen.The current chapter is played repeatedly.Repeating a titleYou can play the same title repeatedly.2. While the disc is playing, press the SETUP/REP buttonuntil the “ Repeat Title ” indicator displays on the screen.The current title is played repeatedly.To resume normal playback3. While the disc is playing, press the SETUP/REP buttonuntil the “ Off ” indicator displays on the screen.You can play a single track and whole disc repeatedly.CDRepeating a single trackYou can play the same track repeatedly.1. While the disc is playing, press the SETUP/REP buttonuntil the “ Repeat Single ” indicator displays on the screen.The current track is played repeatedly.Repeating a whole disc2. While the disc is playing, press the SETUP/REPbutton until the “ Repeat All ” indicator displays on thescreen. The whole disc is played repeatedly.To resume normal playback3. Press the SETUP/REP button until the “ Off ” indicatordisplays on the screen.E - 23
PLAYING MP3 AND PICTURE FILE DISCThis unit can play MP3 and Picture files recorded on CD-R and CD-RW discs.Playing a MP3 file disc1. Slide the OPEN switch to open the disc door.2. Hold a MP3 file disc by its sides and carefully make it fitonto the central support of compartment with the labelside facing up you until you hear a “click”.3. Push the door to close.4. The unit will take a short while to load the disc, automaticallybegin playback and screen display of MP3 files.5. Press the , , or CURSOR button to view andselect the files, you want to listen to then press ENTERbutton to confirm and this selected file will be playbacked.CD-ROM[Root]1 Folk2 Rock3 Pop4 Jazz5 ModernFile:Folk1/117 00:00:356 Single7 Brother8 SongTo pause playback• Press the PAUSE button. To resume playback again, press the PLAY button.To stop playback• Press the STOP button.To skip to the next or previous file• Press the NEXT button on the remote control or on the top of unit briefly whileplaying, to skip ahead to the beginning of the next file. Each time you press the buttonconsecutively, the beginning of the next file is located and played back.• Press the PREV (Previous) button on the remote control or on the top of unit brieflywhile playing, to skip back to the beginning of the previous file. Each time you press thebutton consecutively, the beginning of the previous files is located and played back.• You also can press the GOTO button, set the track number you want and then pressthe ENTER button.1. You can not play in Fast reverse or Fast forward during MP3 playback.2. During MP3 playback, if you press the STOP button twice and then press PLAYbutton again, it will start to play from the beginning of the file which you stopped. If youpress the STOP button once and then press PLAY button again. It will resumeplayback from the location where you stopped playback.Notes:The ability of this unit to read MP3 discs is dependent on the following:• The Bit Rate must be within 64 - 256 kbps.• The total number of files on the disc should not exceed 254.• The maximum number of directories should not exceed 32.• The maximum depth level of directories should not exceed 4.• File names should be named using 7 or fewer letters and/or numbers, and mustincorporate the “MP3” file extension. EXAMPLE: *******.MP3 where each * is a letteror number.• Use only letters and / or numbers in file names. If you use special characters, the fileand/or folder names may not be displayed correctly on the on-screen display.• When recording on CD-R discs, use 74-minute (650MB) discs.• The CD-R or CD-RW discs should be “finalized” in computer by “single session format”.• See your CD/MP3 creation software for details.E - 24
PLAYING MP3 AND PICTURE FILE DISCPlaying a Picture file disc1. Slide the OPEN swtich to open the disc door.2. Hold the Picture file disc by its sides and carefully make it fit onto the centralsupport of compartment with the label side facing up you until you hear a “click”.3. Push the door to close.4. The unit will take a short while to load the disc, automatically begin playback. Thenext picture will automatically display after 6 seconds.Full-ScreenReviewThumbnailReviewNotes:• If you press the MENU button on the remote in full-screen review, the Unit willdisplay a menu of 9 thumbnail images.• Use the cursor to highlight NEXT or PREV in thumbnail screen andthen press the ENTER button to review other images. If you want to review oneimage in full-screen, you can use the CURSOR , , or buttons tohighlight the image and then press the ENTER button to confirm. The imageyou selected will show on TV in Full-Screen and automatically display one byone again in about 6 seconds intervals.• You can press the PAUSE button to interrupt playback, and press the PLAYbutton to resume playback.• You also can use GOTO function or use the numbered buttons to enter thenumber to quickly select any image.• You can press the ZOOM button to enlarge the picture in 3 levels.• Press the ANGLE button on the remote control to rotate the picture orientationby 90°.Playing a MP3/Picture file disc1. Slide the OPEN switch to open the disc door.2. Hold a MP3 files/Picture file disc by its sides and carefullymake it fit onto the central support of compartment withthe label side facing up you until you hear a “click”.3. Push the door to close.4. The unit will take a short while to load the disc, automaticallybegin playback. The MP3 files or Picture files will beplayback one by one.E - 25
CUSTOMIZING THE FUNCTION SETTINGSLANGUAGE setting1. Press the SETUP button in stop mode.2. Use or button to one language, then press theENTER button. The screen will change to your selectedlanguage wordings immediately.3. To exit the SETUP MENU and return to the normalscreen, press the RETURN button.LanguageEnglishDeutschFrançaisEspañolItalianoSvenskaPortuguêsSTEP 1Video Audio RatingVIDEO settingTV Shape1. Press the SETUP button in stop mode.2. Use or button to select Video, then press the ENTER button.3. Use or button to select TV Shape, then press the ENTER button.4. Use or button to shift and select the TV type, then press the ENTER button.5. To exit the FUNCTION SETUP MENU and return to the normal screen, press theRETURN button.STEP 2 STEP 3 STEP 4Language Language LanguageVideo Video VideoAudio Audio AudioRating Rating RatingTV Shape4:3 Letter BoxTV Shape4:3 Letter Box 4:3 Pan ScanBrightnessOffBrightnessOff4:3 Letter BoxEdgesOffEdgesOff16:9Cut off when a wide-screenvideo image is played.4:3 Pan Scan• When wide-screen video material is played, this mode clipsthe right and left sides of the image so that it can be viewedon a conventional screen.• Some wide-screen <strong>DVD</strong>s that do not permit Pan Scan modeplayback are automatically played in letterbox mode (blackbands top and bottom).4:3 Letter Box• When wide-screen video material is played in this mode ona conventional screen, black bands appear at the top andbottom of the screen.16:9 Wide-screen• This is the correct mode for playing wide-screen videos ona wide-screen.Notes :• The displayable picture size is preset on the <strong>DVD</strong> disc. Therefore the playback pictureof some <strong>DVD</strong> discs may not conform to the picture size you select.• When you play <strong>DVD</strong> discs recorded in the 16:9 picture size only, the playback picturealways appears in the 16:9 picture size regardless of the TV shape setting.E - 26
CUSTOMIZING THE FUNCTION SETTINGSBrightness1. Press the SETUP button in stop mode.2. Use or button to select Video, then press the ENTER button.3. Use or button to select Brightness, and then press the ENTER button.4. Use or button to shift and select the Off/On, then press the ENTER button.5. If you want to exit the SETUP MENU and return to the normal screen, press theRETURN button.STEP 2 STEP 3 STEP 4Language Language LanguageVideo Video VideoAudio Audio AudioRating Rating RatingTV Shape4:3 Letter BoxTV Shape4:3 Letter BoxBrightnessOffBrightnessOffOffEdgesOffEdgesOffOnOn : Picture will be brighter to clarify details.Off : Picture will have deepened colors.Edges1. Press the SETUP button in stop mode.2. Use or button to select Video, then press the ENTER button.3. Use or button to select Edges, and then press the ENTER button.4. Use or button to shift and select the Sharpen / Soften / Off, then press theENTER button.5. If you want to exit the SETUP MENU and return to the normal screen, press theRETURN button.STEP 2 STEP 3 STEP 4Language Language LanguageVideo Video VideoAudio Audio AudioRating Rating RatingTV Shape4:3 Letter BoxTV Shape4:3 Letter BoxBrightnessOffBrightnessOffEdgesOffEdgesOffOffSharpenSoftenSharpen : Fine detail will be easier to see.Soften : Soft-focus effect.Off : Picture will be returned to normal.AUDIO settingDigital Out1. Press the SETUP button in stop mode.2. Use or button to select Audio, press the ENTER button.3. Press the ENTER button repeatedly to select Digital Out type.4. To exit the FUNCTION SETUP MENU and return to the normal screen, press theRETURN button.Digital OutVirtual EffectOffE - 27Raw :Use this setting when the unit isconnected to an external DolbyDigital decoder.PCM :Use this setting when the unit isconnected to an externalsurround decoder or stereo.
CUSTOMIZING THE FUNCTION SETTINGSVirtual Effect (for CD and <strong>DVD</strong> only)If you want to obtain expansive virtual surround sound effects from just two speakers.1. Press the SETUP button in stop mode.2. Press or button to select Audio, press the ENTER button.3. Press or button to select Virtual Effect, then press the ENTER button.4. Press or button to select ON or OFF, then press the ENTER button.5. To exit the SETUP MENU and return to the normal screen, press the RETURNbutton.STEP 4Digital OutVirtual EffectDigital OutVirtual EffectOff Off OffOnRATING settingFactory SetIf you want to return the initial language setting to the factory default, do thefollowing:1. Press the SETUP button in stop mode.2. Use or button to select the Rating, then press the ENTER button.3. Use or button to shift and select the Factory Set, then press the ENTERbutton.4. Use or button to shift and select Yes, then press the ENTER button.5. To exit the SETUP MENU and return to the normal screen, press the RETURNbutton.STEP 2 STEP 3 STEP 4Language Language LanguageVideo Video VideoAudio Audio AudioRating Rating RatingPassword- - - -Password- - - -Parental lock8. AdultParental lock8. AdultFactory SetNoFactory SetNoNoYesNote:When you reset the Unit to the factory default, the Unit will take 3-5 seconds toreset.E - 28
CUSTOMIZING THE FUNCTION SETTINGSPassword / Parental lock<strong>DVD</strong> discs equipped with the password function are rated according to their content.The contents allowed by a parental lock level and the way a <strong>DVD</strong> disc can becontrolled may vary from disc to disc.For example, if the disc allowed, you could edit out violent scenes unsuitable forchildren and replace them with more suitable scenes, or you could lock out playbackof the disc altogether.1. Press the SETUP button in stop mode.2. Use or button to select Rating, press the ENTER button.3. Use or button to select parental lock and then press the ENTER buttonrepeatedly to set the parental lock level.4. Use or button to shift and select Password, enter your 4-digit security codeand then press the ENTER button.You cannot play <strong>DVD</strong> discs rated higher than the level you selected unless youcancel the parental lock function.The parental lock level is equivalent to the following ratings.Level 1 : Kid SafeLevel 2 : GLevel 3 : PGLevel 4 : PG_13Level 5 : PG_RLevel 6 : RLevel 7 : NC_17Level 8 : Adult5. To exit the SETUP MENU and return to the normal screen, press the RETURNbutton.Indicates Parental lock is NOT active.The Parental lock is active.STEP 2 STEP 3 STEP 4Language Language LanguageVideo Video VideoAudio Audio AudioRating Rating RatingPasswordParental lockFactory Set- - - -8. AdultNoPasswordParental lockFactory Set----8. AdultNoIf you forget the password, you can erase your current password bypressing number button 8 on the remote four times, then press theENTER button to confirm the setting.PASSWORD : 8 8 8 8E - 29
E - 30LANGUAGE CODE LIST FOR DISC LANGUAGECodeAAABAFAMARASAYAZBABEBGBHBIBNBOBRCACOCSCYDADEDZELENEOESETEUFAFIFJFOFRCodeFYGAGBGLGNGUHAHIHRHUHYIAIEIKINISITIWJAJIJWKAKKKLKMKNKOKSKUKYLALNLOLTLVLanguage NameFrisianIrishScots GaelicGalicianGuaraniGujaratiHausaHindiCroatianHungarianArmenianInterlinguaInterlingueInupiakIndonesianIcelandicItalianHebrewJapaneseYiddishJavaneseGeorgianKazakhGreenlandicCambodianKannadaKoreanKashmiriKurdishKirghizLatinLingalaLaothianLithuanianLatvian, LettishLanguage NameMalagasyMaoriMacedonianMalayalamMongolianMoldavianMarathiMalayMalteseBurmeseNauruNepaliDutchNorwegianOccitan(Afan) OromoOriyaPanjabiPolishPashto, PushtoPortugueseQuechuaRhaeto-RomanceKirundiRomanianRussianKinyarwandaSanskritSindhiSanghoSerbo-CroatianSinghaleseSlovakLanguage NameSlovenianSamoanShonaSomaliAlbanianSerbianSiswatSesothoSundaneseSwedishSwahiliTamilTeluguTajikThaiTigrinyaTurkmenTagalogSetswanaTongaTurishTsongaTatarTwiUkrainianUrduUzbekVietnameseVolapükWolofXhosaYorubaChineseZuluCodeMGMIMKMLMNMOMRMSMTMYNANENLNOOCOMORPAPLPSPTQURMRNRORURWSASDSGSHSISKCodeSLSMSNSOSQSRSSSTSUSVSWTATETGTHTITKTLTNTOTRTSTTTWUKURUZVIVOWOXHYOZHZULanguage NameAfarAbkhazianAfrikaansAmeharicArabicAssameseAymaraAzerbaijaniBashkirByerlorussianBulgarianBihariBislamaBengaliBanglaTibetanBretonCatalanCorsicanCzechWelshDanishGermanBhutaniGreekEnglishEsperantoSpanishEstonianBasquePersianFinnishFijiFaroeseFrench
MAINTENANCECleaning DiscA defective or soiled disc inserted into the unit can cause sound to drop out duringplayback.Handle the disc by holding its inner and outer edges.• Do NOT touch the surface of the unlabeled side ofthe disc.• Do NOT stick paper or tape on the surface.• Do NOT expose the disc to direct sunlight orexcessive heat.• Clean the disc before playback. Wipe the disc fromthe center outward with a cleaning cloth.• NEVER use solvents such as benzine or alcohol toclean the disc.• Do NOT use irregular shape discs (example : heart shaped, octagonal, etc.). Theymay cause malfunctions.Cleaning the unit• Be sure to turn the unit off and disconnect the AC power cord before maintainingthe unit.• Wipe the unit with a dry soft cloth.If the surfaces are extremely dirty, wipe clean with a cloth which has been dippedin a weak soap-and-water solution and wrung out thoroughly, then wipe with a drycloth.• Never use alcohol, benzine, thinner, cleaning fluid or other chemicals. Do NOT usecompressed air to remove dust.Important NoteBefore transporting the unit, remove disc from the disc compartment.E - 31
TROUBLE SHOOTING GUIDESYMPTOMNo power.The remotedoes notfunction.<strong>DVD</strong>No sound oronly a verylow-levelsound isheard.No pictureThe picture isnot clearSevere hum ornoise is heard.The disc doesnot play.NeedMoreHelp?CAUSE (AND REMEDY)• Check that the AC adapter is connected.• You did not turn on the unit.• Remove any obstacles between the remote and the unit.• Use the remote near the unit.• Point the remote at the remote sensor on the unit.• Replace all the battery in the remote with new ones.• Make sure that you've select <strong>DVD</strong> mode.• The system is in pause mode. Press the PLAY button to returnto normal play mode.• Fast forward or fast reverse is performed. Press the PLAYbutton to return to normal play mode.• Make sure that AUDIO / VIDEO output connections are correct.• The DTS <strong>DVD</strong> disc cannot be decoded to have speaker output.• This unit is too hot, shut off the unit for 30 minutes to cool down.• The region number of the disc doesn't match the region numberof this unit.• Clean the disc.• The disc is scratched.• The plugs and jacks are dirty. Wipe them with a cloth slightlymoistened with alcohol.• Clean the disc.• There is no disc inside ("No Disc" appears on the screen).• Insert the disc correctly with the playback side facing down.• Clean the disc.• A non-NTSC disc has been inserted. The unit and disc regionnumber are incompatible.• Condensation may have formed inside the unit due to a suddenchange in temperature. Wait about an hour for it to clear and tryagain.DO NOT RETURN THIS TO THE STOREPlease call Customer Service at 1-800-252-6123or visit online help at http://Www.18002526123.comPrinted in ChinaE - 32811-122B91-051