RS Media User Manual - The Old Robot's Web Site
RS Media User Manual - The Old Robot's Web Site RS Media User Manual - The Old Robot's Web Site
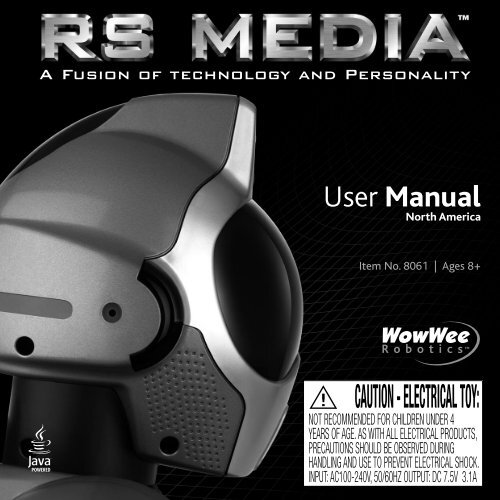
A Fusion of technology and PersonalityUser ManualNorth AmericaItem No. 8061 | Ages 8+CAUTION - ELECTRICAL TOY:NOT RECOMMENDED FOR CHILDREN UNDER 4YEARS OF AGE. AS WITH ALL ELECTRICAL PRODUCTS,PRECAUTIONS SHOULD BE OBSERVED DURINGHANDLING AND USE TO PREVENT ELECTRICAL SHOCK.INPUT: AC100-240V, 50/60HZ OUTPUT: DC 7.5V 3.1A
- Page 2 and 3: COPYRIGHT INFORMATIONRS Media, Robo
- Page 4 and 5: contentsWelcome 3Quick start 6-7Pow
- Page 6 and 7: QUICK STARTTo sample some of RS Med
- Page 8 and 9: Power and battery detailsThis secti
- Page 10 and 11: RS Media overviewRS Media is equipp
- Page 12 and 13: asic movements overviewThis section
- Page 14 and 15: Remote controller overviewLeft Shif
- Page 16 and 17: Interacting with rs media/control m
- Page 18 and 19: control mode mapping chartright Shi
- Page 20 and 21: arm mode mapping chartDescription o
- Page 22 and 23: arm mode mapping chartRight ShiftBo
- Page 24 and 25: description of media modeIn Media m
- Page 26 and 27: Media format compatibilityRS Media
- Page 28 and 29: audio controls chartno ShiftRecord
- Page 30 and 31: Photo controls chartno ShiftTake Pi
- Page 32 and 33: video controls chartno ShiftPlay /
- Page 34 and 35: Descriptions of Media mode menus/ga
- Page 36 and 37: Description of gamesVortex RacerDoc
- Page 38 and 39: Media mode mapping chartno ShiftMen
- Page 40 and 41: Media mode mapping chartright Shift
- Page 42 and 43: RS Media’s sensorsSonic sensorsFu
- Page 44 and 45: Vision systemsObstacle avoidanceRS
- Page 46 and 47: obot interactionRS Media can intera
- Page 48 and 49: Advanced interaction with RS MediaP
- Page 50 and 51: Advanced interaction with RS MediaP
A Fusion of technology and Personality<strong>User</strong> <strong>Manual</strong>North AmericaItem No. 8061 | Ages 8+CAUTION - ELECTRICAL TOY:NOT RECOMMENDED FOR CHILDREN UNDER 4YEA<strong>RS</strong> OF AGE. AS WITH ALL ELECTRICAL PRODUCTS,PRECAUTIONS SHOULD BE OBSERVED DURINGHANDLING AND USE TO PREVENT ELECTRICAL SHOCK.INPUT: AC100-240V, 50/60HZ OUTPUT: DC 7.5V 3.1A
COPYRIGHT INFORMATION<strong>RS</strong> <strong>Media</strong>, Robosapien, Robosapien V2,Roboreptile, Robopet, and Roboraptorare copyright and trademarked by Wowwee Ltd.Sun Microsystems and Java are registeredtrademarks of Sun Microsystems, Inc.All other copyrights are hereby acknowledged.system requirementsMinimum system requirements for running<strong>RS</strong> <strong>Media</strong> Editing Suite.Microsoft® Windows® XP SP2 or higher (English Edition)(Compatible with German, Spanish, French, and ItalianWindows® XP SP2 or higher)PC with PIII 1.5GHz equivalent or higher processor256 MB of system RAM16 MB video card recommended200 MB available hard disk spaceCD-ROM driveSupply of this product does not convey a license nor implyany right to distribute content created with this product inrevenue-generating broadcast systems (terrestrial, satellite,cable and/or other distribution channels), streamingapplications (via Internet, intranets and/or other networks),other content distribution systems (pay-audio or audio-ondemandapplications and the like) or on physical media(compact discs, digital versatile discs, semiconductor chips,hard drives, memory cards and the like). An independentlicense for such use is required.For details, please visit http://mp3licensing.com.
WELCOMECongratulations on choosing <strong>RS</strong> <strong>Media</strong> , the next generation of Robosapientechnology and personality.<strong>RS</strong> <strong>Media</strong> is a complete multimedia robotic experience with the unique ability to be fully customized.<strong>The</strong> perfect fusion of cutting-edge technology and personality modeling software, <strong>RS</strong> <strong>Media</strong> allowsyou to take total control.Before using this product, take a few moments to read this manual and retain it for future reference.Package contentsThis package contains:1 x <strong>RS</strong> <strong>Media</strong>1 x Controller1 x USB Cable1 x CD <strong>RS</strong> <strong>Media</strong> software1 x AC/DC power adapter
contentsWelcome 3Quick start 6-7Power and Battery details 8-9<strong>RS</strong> <strong>Media</strong> overview 10LCD screen 11Sensors overview 11<strong>RS</strong> <strong>Media</strong> basics 11Sleep mode and power down 11Basic movements 12Basic arm movements 13Basic media mode functions 13Remote controller overview 14Hand controls basics 15Introduction to <strong>RS</strong> <strong>Media</strong>’s modes 16Description of Control mode 16Control mode mapping chart 16-19Description of Arm mode 20Arm mode mapping chart 20-23Description of <strong>Media</strong> mode 24<strong>Media</strong> mode functions overview 25Hand controls 25<strong>Media</strong> format compatibility 26Descriptions of <strong>Media</strong> mode menus 27Audio controls chart 28Photo menu 29Photo controls chart 30Video menu 31Video controls chart 32Personality menu 33Personality controls chart 33Games menu 34Games controls overview 34Description of games 35Ghost Force 35Vortex Racer 36Bubble Soccer 36Options menu 37<strong>Media</strong> mode mapping chart 38-41Sonic sensors 42Tilt sensors 42Grip sensors 42Foot sensors 42Infrared vision systems 43Flinch response 43Long-range infrared vision 43Close-range infrared vision 43Obstacle avoidance 44Color recognition 44
contentsIdentifying and tracking 44Tracking timeout 44Object disappears 44Still objects 44Color camera settings 45Blinking 45Blinking in Programming modes 45Guard Mode 45<strong>RS</strong> <strong>Media</strong> / Robosapien V2 interaction 46Roboreptile interaction 46Roboraptor interaction 46Robopet interaction 47Advanced interaction with <strong>RS</strong> <strong>Media</strong> 47Programming capability 47Directly programming <strong>RS</strong> <strong>Media</strong> 47Puppet Mode (Positional programming) 48Puppet Mode: Foot sensors 48Puppet Mode: Left and Right side programming 48Main Program Mode 49Subroutines 49Sound and Vision subroutines 49Positional subroutines 50Guard subroutine 50Introduction to the <strong>RS</strong> <strong>Media</strong> Editing Suite 51Installing the software 51Running the software 51Software overview 51Help file 52Personality editor overview 52Macro editor overview 52BodyCon editor overview 53<strong>Media</strong> Organizer overview 53Onboard memory vs. expandable memory 54Using the SD card 54USB Connection 54Playing audio from an external source 55Caring for your <strong>RS</strong> <strong>Media</strong> 55-56Glossary 56Warranty information 57FAQs 57Support 57Index 58
QUICK STARTTo sample some of <strong>RS</strong> <strong>Media</strong>’s functions immediately, insert his batteries (see p.8-9) turn him on (see p.11)and follow this brief overview of some of his functions in each Mode.See page 14 for full details of controller button symbols used throughout this manual.Left Shiftsignal indicator lightright ShiftStop PADPlay/Pause PadSelect Buttoncamera Buttonstop Buttonplay / pause ButtonLEFT DIRECTION padright DIRECTION padMode Change ButtonDemo Button
QUICK STARTMode selection. Pressto cycle through <strong>RS</strong> <strong>Media</strong>’s three modes.CONTROL MODE -CONTROLLER LEVEL 1StopDance DemoMovementHead & Upper BodyChange PersonalityFree Roam ToggleUpper Body Only +Personality Demo +Lie/Sit/Get up +Guard Mode +Sleep/Power down +Arm MODE -CONTROLLER LEVEL 2Right ArmLeft ArmLeft/Right Arm Drop /Left/Right Arm Grab /Left/Right Arm Throw /Left/Right Arm Chop + /Left/Right Arm Pick up + /Left/Right Arm Roll + /Left/Right Arm Place + /Left/Right Arm High Pick Up + /Left/Right Arm Push + /media MODE -CONTROLLER LEVEL 3Menu NavigationMenu SelectVolume Up & DownPlay / Pause <strong>Media</strong>Previous TrackNext TrackTake PhotoTrack & Photo HumanGame Menu<strong>Media</strong> Menu +<strong>Media</strong> Demo +
Power and battery detailsThis section describes the battery and power requirements for <strong>RS</strong> <strong>Media</strong>.<strong>RS</strong> <strong>Media</strong> tells you when his batteries are running low, after which he willshut down. When he does this, you will need to replace all the batteriesin the robot.If <strong>RS</strong> <strong>Media</strong> is not responding well to controller commands, you mightneed to replace the batteries in the controller.<strong>RS</strong> <strong>Media</strong>Battery requirementsYour <strong>RS</strong> <strong>Media</strong> is powered by 6 x “D” size batteries (not included) and 4 x“AA” size batteries (not included). We recommend using only top-qualityalkaline batteries.Battery installationNOTE: Before installing or changing batteries, makes sure that <strong>RS</strong><strong>Media</strong> is turned off (switch is set to the OFF position).To install or change batteries in <strong>RS</strong> <strong>Media</strong>:1. On <strong>RS</strong> <strong>Media</strong>, locate the battery compartments(on the underside of each foot).2. Using a Phillips screwdriver (not included), remove the batterycompartment covers.3. Insert batteries into the <strong>RS</strong> <strong>Media</strong> battery compartments as illustratedin the diagram.4. Replace the battery compartment covers and then replace the screws.bottom view of the rs mediaPower adapter<strong>RS</strong> <strong>Media</strong> can be powered by an Output 7.5V AC/DC, 3.1 Amp,center-positive adapter.NOTE: Before operating <strong>RS</strong> <strong>Media</strong> using an adapter,make sure that <strong>RS</strong> <strong>Media</strong> is turned off (button is setto the OFF position).To operate <strong>RS</strong> <strong>Media</strong> using an adapter:1. Insert the jack of the adapter into the AC/DC socket in <strong>RS</strong> <strong>Media</strong>’sright foot (see <strong>RS</strong> <strong>Media</strong> Overview p.10)2. Plug the adapter into a wall socket.3. Turn <strong>RS</strong> <strong>Media</strong> on by setting the power button to the ON position.NOTE: <strong>RS</strong> <strong>Media</strong> will only perform upper body and media functions(i.e. he will not perform any leg actions or bend at the waist) whenbeing powered by an adapter.AC/DC adapter inputImportant power adapter informationExamine the AC/DC adapter regularly for damage to the cord, plug, enclosureand other parts.<strong>The</strong> AC/DC adapter is not a toy.<strong>The</strong> toy must only be used with the recommended transformer.If you wish to clean <strong>RS</strong> <strong>Media</strong> ensure that the power is disconnected first.Wipe only with a soft dry cloth.
Power and battery details<strong>RS</strong> <strong>Media</strong> remote controllerBattery requirementsYour <strong>RS</strong> <strong>Media</strong> remote controller is powered by 3 x “AA” size batteries(not included). We recommend using only top-quality alkalinebatteries.Battery installationTo install or change batteries in <strong>RS</strong> <strong>Media</strong> remote controller:1. Locate the battery compartment on the underside of theremote controller.2. Using a Phillips screwdriver (not included), remove the batterycompartment cover.3. Insert batteries into the remote controller as illustrated in thediagram.4. Replace the battery compartment covers and then replacethe screw.Important battery information• Use only fresh batteries of the required size and recommended type.• Do not mix old and new batteries, different types of batteries[standard (Carbon-Zinc), Alkaline or rechargeable] or rechargeablebatteries of different capacities.• Rechargeable batteries are only to be charged under adult supervision.• Respect the correct polarity, (+) and (-) as indicated.• Do not try to recharge non-rechargeable batteries.• Do not dispose of batteries in fire. Batteries might explode or leak.• Do not use different type/brand of batteries at the same time.• <strong>The</strong> supply terminals are not to be short-circuited.• Remove exhausted batteries from the toy.• Batteries should be replaced by adults.• Remove batteries if the toy is not going to be played with forsome time.• <strong>The</strong> packaging should be kept since it contains important information.• Rechargeable batteries are to be removed from <strong>RS</strong> <strong>Media</strong> and thecontroller before being charged.back view of the controller
<strong>RS</strong> <strong>Media</strong> overview<strong>RS</strong> <strong>Media</strong> is equipped with a multitude of features that really makes him a multi-media experience contained in a robot.Refer to the illustration for an overview of his features.IR Vision Sensors and Camera EyesEyesSonic SensorSD CardCompartmentLine In / USBCompartmentLCD ScreenWooferRight HandSpeakerOn/OffButtonLeft HandSpeakerHand ControlsFront footsensors10Back footsensorsAC/DC Power Point
<strong>RS</strong> media basicsLCD screenIn addition to <strong>RS</strong> <strong>Media</strong>’s status, the LCD screen located on <strong>RS</strong> <strong>Media</strong>’schest is used to display media files such as photos, videos, and MP3file information. Refer to page 56 for information on caring for the LCDscreen.Sensors overview<strong>RS</strong> <strong>Media</strong> is equipped with numerous types of sensors. He has sonicsensors, infrared sensors, tilt sensors, grip sensors, and foot sensors. Heis also equipped with comprehensive vision systems. See the section <strong>RS</strong><strong>Media</strong>’s sensors on page 42.<strong>RS</strong> <strong>Media</strong> basicsBasic powering functionsThis section describes the basic <strong>RS</strong> <strong>Media</strong> functions, such as powerfunctions and sleep functions.Powering ON/OFF<strong>RS</strong> <strong>Media</strong>’s power button is located on his back, just below the woofer, asillustrated. To turn <strong>RS</strong> <strong>Media</strong> on, press the power button to set it to theON position; to turn him off, press the power button to set it in the OFFposition.Sleep mode and Power down<strong>RS</strong> <strong>Media</strong> conserves power using Sleep mode and Power down.• Sleep mode. In Sleep mode, the backlight on <strong>RS</strong> <strong>Media</strong>’s LCD screenwill turn off after about 2 minutes of inactivity to conserve power. <strong>RS</strong><strong>Media</strong> will wake up as soon as he receives a command from theremote controller.• Power down. <strong>RS</strong> <strong>Media</strong> completely powers down after about 10minutes of inactivity. You can turn him back on by toggling his powerbutton (setting it to the OFF position, then turning him back on again).NOTE: <strong>RS</strong> <strong>Media</strong> will not Power down if he is playing media orbeing powered by the AC/DC adapter.NOTE: You can also manually put <strong>RS</strong> <strong>Media</strong> in Sleep mode or use thePower down function. Refer to Enabling, Disabling, and Resetting <strong>RS</strong><strong>Media</strong> (page 17).NOTE: Wait 5 seconds after turning <strong>RS</strong> <strong>Media</strong> off before turning himback on again.During the boot up sequence, <strong>RS</strong> <strong>Media</strong> displays a Wowwee splash screenon his LCD screen, which cannot be interrupted. Once powered on, therobot goes into Control mode.You can cycle through three different modes on <strong>RS</strong> <strong>Media</strong>using the remote controller’s Mode button.<strong>The</strong> different modes are described in detail in the chapterInteracting with <strong>RS</strong> <strong>Media</strong>.11
asic movements overviewThis section describes basic remote controller movement and functions on <strong>RS</strong> <strong>Media</strong>.Basic movementsThis section describes basic movements on <strong>RS</strong> <strong>Media</strong> using the remote controller functions.Mode Button No shift Left shift Right shift Both shiftsControl mode Multi- Upper Bulldozer and Move both armsdirectional body Left/Right kickwalking:movement- Forward*- Backward- Left**- Right**Head and upper Hips and waist Head movement Move both armsbody movementmovementGait control ***/ Lie down/ Sit/ Get upQuick resetStand upStop / Full reset Sleep/Power down Stop all movementsArm mode Right arm movement Move both arms Move both arms Move both armsLeft arm movement Move both arms Move both arms Move both armsQuick reset Lie down/ Sit/ Get upStand upStop / Full reset Sleep / Power down Stop all movementsRight waveLeft wave* <strong>RS</strong> <strong>Media</strong> has two (2) walking speeds. Press forward on the directional pad while he is walking to toggle between the two walking speeds.** When you press the left or right on the directional pad in Control mode, <strong>RS</strong> <strong>Media</strong> will turn on the spot, that is, he will not perform a walking turn.*** <strong>RS</strong> <strong>Media</strong> has three (3) walking gaits. Press the Select button while he is walking to toggle between the walking gaits.12
asic arm movements/basic media mode functionsBasic arm movementsThis section describes basic arm movements in Arm mode on <strong>RS</strong> <strong>Media</strong> using the remote controller.Arm mode Button No shift Left shift Right shiftRight arm Drop Chop PlaceGrab Low pick up High pick upThrow Roll PushLeft arm Throw Roll PushGrab Low pick up High pick upDrop Chop PlaceBasic <strong>Media</strong> mode functionsThis section describes basic media functions on <strong>RS</strong> <strong>Media</strong> using the remote controller.Mode Button combination DescriptionControl mode + Plays back a sound memo, if one is saved.+ Records a short sound memo.+ Records a short video memo.+ Plays back a short video memo, if one is saved.All modesPlays or pauses audio or video file.Hold this button for three (3) secondsto stop media playback.Takes a photo.+ Records a video.13
Remote controller overviewLeft Shiftsignal indicator lightright ShiftStop PADPlay/Pause PadSelect Buttoncamera Buttonstop Buttonplay / pause ButtonLEFT DIRECTION padright DIRECTION padMode Change ButtonDemo Button14
hand controls basicsLeft Hand ControlsRight Hand ControlsHand controls basicsYou can use <strong>RS</strong> <strong>Media</strong>’s hand controls to navigate between modes bypressing the outer buttons simultaneously. Press both outer buttons againto toggle to the next mode.NOTE: In <strong>Media</strong> Mode, you can use his hand controls to navigatebetween functions in the on-screen menu or when playing mediafiles.LeftOuterButtonLeftinnerButtonrightinnerButtonRightOuterButtonhand control specifications - media mode onlyMenu Function<strong>Media</strong> Playback FunctionLeft Inner Scroll Down Scroll to previous media fileRight Inner Scroll Up Scroll to next media fileLeft Outer Back or Exit Menu Back/exit/stop/play media file(pause if playing)Right Outer Select Option Play media file(pause if playing)Both Outer Buttons Change Mode Change ModeNOTE: You can hold the UP or DOWN direction on the controller or inner hand controls to make the selection scroll faster.NOTE: When you reach the last item in the menu, the menu will restart with the first item on the list.15
Interacting with rs media/control mode mapping chartThis chapter deals with different ways you can interact with <strong>RS</strong> <strong>Media</strong>.Introduction to <strong>RS</strong> <strong>Media</strong>’s modes<strong>RS</strong> <strong>Media</strong> is equipped with three modes:• Control mode. Allows you to control his full body movements andfunctions.• Arm mode. Allows you to control his arm movements and functions.• <strong>Media</strong> mode. Allows you to access his media and connectivityfunctions.Refer to the function mapping charts for Control mode and Arm mode onpages 16 to 23.For the function mapping chart for <strong>Media</strong> mode, refer to pages 25 to 34.NOTE: <strong>The</strong> functions in the following function charts that can beprogrammed are denoted with the Programmable symbol.Refer to the section Advanced interaction with <strong>RS</strong> <strong>Media</strong> for moreinformation on using <strong>RS</strong> <strong>Media</strong>’s programmable capabilities.Description of Control modeIn Control mode, you can control <strong>RS</strong> <strong>Media</strong>’s body movements andfunctions using the remote controller or directly on <strong>RS</strong> <strong>Media</strong>.No ShiftMovementHead & Upper BodyQuick ResetTake PhotoDance DemoPuppet Mode EnterChange PersonalityHearing OFF/ONStop / Full ResetVision OFF/ONFree Roam TogglePuppet Mode PlayPlay / Pause <strong>Media</strong>= ProgrammableControl <strong>RS</strong> <strong>Media</strong>’s multi-directional walking with the Left Control Pad.Control the basic upper body movement with the Right Control Pad.Press to return <strong>RS</strong> <strong>Media</strong> to his default standing position, when not walking.Press twice to make <strong>RS</strong> <strong>Media</strong> take a photo.Press to make <strong>RS</strong> <strong>Media</strong> perform a dance routine.Press to enter puppet mode programming.Press to toggle to <strong>RS</strong> <strong>Media</strong>’s next personality, including those entered by user.Press once to disable <strong>RS</strong> <strong>Media</strong>’s hearing. Press again to enable <strong>RS</strong> <strong>Media</strong>’s hearing.Press to stop <strong>RS</strong> <strong>Media</strong> from performing his current action.Press and hold for about 3 seconds to perform a full reset to default body position.Press once to disable <strong>RS</strong> <strong>Media</strong>’s vision. Press again to enable <strong>RS</strong> <strong>Media</strong>’s vision.Put <strong>RS</strong> <strong>Media</strong> into Free Roam mode so he can explore his environment independently.Press to play the main puppet mode program entered into <strong>RS</strong> <strong>Media</strong>.Press to play or pause the current MP3 or MPEG4.16
control mode mapping chartleft ShiftUpper Body OnlyHips and WaistLie / Sit / Get upVideo RecordPersonality DemoMain Program EnterClear EntrySound Program EnterSleep / Power DownVision Program EnterGuard ModeClear ProgramMain Program PlayControl the upper body with the Left Control Pad.Control the hips and waist with the Right Control Pad.With each press, <strong>RS</strong> <strong>Media</strong> will toggle through one step in this routine.Press twice to record a short video. (<strong>The</strong> second press can be without Left Shift)Press to make <strong>RS</strong> <strong>Media</strong> perform a Personality Demo.Press to enter <strong>RS</strong> <strong>Media</strong>’s Main Program Mode.Press to clear the last entry made.Press to enter <strong>RS</strong> <strong>Media</strong>’s Sound Program Mode.Press once to make <strong>RS</strong> <strong>Media</strong> enter Sleep Mode.Press when already in Sleep Mode and he will Power down.Press to enter <strong>RS</strong> <strong>Media</strong>’s Vision Program Mode.Press to put <strong>RS</strong> <strong>Media</strong> into Guard Mode.Press to clear the selected Program.Press to play <strong>RS</strong> <strong>Media</strong>’s Main Program Mode.= Programmable17
control mode mapping chartright ShiftBulldozer & L/R KicksHead OnlyGet upTake PhotoRoboreptile InteractionSound Memo PlaybackSound Memo RecordSound Program PlayStop MovementVision Program PlayRobot Voice Mute ToggleVideo Memo RecordVideo Memo PlaybackPress forwards or backwards and <strong>RS</strong> <strong>Media</strong> will Bulldozer in that direction.Press left or right to make <strong>RS</strong> <strong>Media</strong> perform a kick with that foot.Move <strong>RS</strong> <strong>Media</strong>’s head around using the Right Control Pad.Press to make <strong>RS</strong> <strong>Media</strong> stand straight up, whether lying or sitting.Press twice to make <strong>RS</strong> <strong>Media</strong> take a photo.Press to initiate an interaction between <strong>RS</strong> <strong>Media</strong> and Roboreptile.Press to play back a Sound Memo track, if one is present.Press to record a short Sound Memo track.Press to play <strong>RS</strong> <strong>Media</strong>’s Sound Program, if one is present.Press to stop <strong>RS</strong> <strong>Media</strong> from performing any movement. Any <strong>Media</strong> playing will not be affected.Press to play back a Vision Program, if one is present.Press to toggle between <strong>RS</strong> <strong>Media</strong>’s robot voice being ON or OFF.Press to record a short Video Memo track.Press to play back a Video Memo track, if one is present.= Programmable18
control mode mapping chartleft & right ShiftBoth ArmsBoth Arms<strong>User</strong> BodyCon 1<strong>User</strong> BodyCon 2Dance Routine<strong>User</strong> BodyCon 3<strong>User</strong> BodyCon 4<strong>User</strong> BodyCon 5<strong>User</strong> BodyCon 6<strong>User</strong> BodyCon 7<strong>User</strong> BodyCon 8<strong>User</strong> BodyCon 9<strong>User</strong> BodyCon 10<strong>Media</strong> DemoControl <strong>RS</strong> <strong>Media</strong>’s left and right arms simultaneouslyControl <strong>RS</strong> <strong>Media</strong>’s left and right arms simultaneously<strong>User</strong> BodyCon / Macro slot<strong>User</strong> BodyCon / Macro slot<strong>User</strong> BodyCon / Macro slot<strong>User</strong> BodyCon / Macro slot<strong>User</strong> BodyCon / Macro slot<strong>User</strong> BodyCon / Macro slot<strong>User</strong> BodyCon / Macro slot<strong>User</strong> BodyCon / Macro slot<strong>User</strong> BodyCon / Macro slot<strong>User</strong> BodyCon / Macro slot<strong>User</strong> BodyCon / Macro slot<strong>User</strong> BodyCon / Macro slot= Programmable19
arm mode mapping chartDescription of Arm modeIn Arm mode, you can control <strong>RS</strong> <strong>Media</strong>’s arm movements using the remote controller. For instance, you can make him pick up or throw items.No ShiftRight ArmLeft ArmQuick ResetTake Photo<strong>RS</strong>V2 / <strong>RS</strong> <strong>Media</strong> InteractionRight Arm DropRight Arm GrabRight Arm ThrowStop / Full ResetLeft Arm ThrowLeft Arm GrabLeft Arm DropPlay / Pause <strong>Media</strong>Control <strong>RS</strong> <strong>Media</strong>’s right arm independentlyControl <strong>RS</strong> <strong>Media</strong>’s left arm independentlyPress to return <strong>RS</strong> <strong>Media</strong> to his default standing position., when not walking.Press twice to make <strong>RS</strong> <strong>Media</strong> take a photo.Press to initiate an interaction between <strong>RS</strong> <strong>Media</strong> and Robosapien V2, or another <strong>RS</strong> <strong>Media</strong>.Press to make <strong>RS</strong> <strong>Media</strong> perform a Right Arm Drop.Press to make <strong>RS</strong> <strong>Media</strong> perform a Right Arm Grab.Press to make <strong>RS</strong> <strong>Media</strong> perform a Right Arm Throw.Press to stop <strong>RS</strong> <strong>Media</strong> from performing his current action.Press and hold for about 3 seconds to perform a full reset to default body position.Press to make <strong>RS</strong> <strong>Media</strong> perform a Left Arm Throw.Press to make <strong>RS</strong> <strong>Media</strong> perform a Left Arm Grab.Press to make <strong>RS</strong> <strong>Media</strong> perform a Left Arm DropPress to play or pause the current MP3 or MPEG4.= Programmable20
arm mode mapping chartleft ShiftBoth ArmsBoth ArmsLie / Sit / Get upVideo RecordControl <strong>RS</strong> <strong>Media</strong>’s arms simultaneously.Control <strong>RS</strong> <strong>Media</strong>’s arms simultaneously.With each press, <strong>RS</strong> <strong>Media</strong> will toggle through one step in this routine.Press twice to make <strong>RS</strong> <strong>Media</strong> record a short video. (<strong>The</strong> second press can be without Left Shift)Roboraptor Interaction Press to initiate an interaction between <strong>RS</strong> <strong>Media</strong> and Roboraptor .Right Arm ChopRight Arm Low Pick UpRight Arm RollSleep / Power DownLeft Arm RollLeft Arm Low Pick UpLeft Arm ChopRight WavePress to make <strong>RS</strong> <strong>Media</strong> perform a Right Arm Chop.Press to make <strong>RS</strong> <strong>Media</strong> perform a Right Arm Low Pick up.Press to make <strong>RS</strong> <strong>Media</strong> perform a Right Arm Roll.Press once to make <strong>RS</strong> <strong>Media</strong> enter Sleep Mode.Press when already in Sleep Mode and he will Power down.Press to make <strong>RS</strong> <strong>Media</strong> perform a Left Arm Roll.Press to make <strong>RS</strong> <strong>Media</strong> perform a Left Arm Low Pick up.Press to make <strong>RS</strong> <strong>Media</strong> perform a Left Arm Chop.Press to make <strong>RS</strong> <strong>Media</strong> perform a Right Arm Wave.= Programmable21
arm mode mapping chartRight ShiftBoth ArmsBoth ArmsGet upTake PhotoRobopet InteractionRight Arm PlaceRight Arm High Pick UpRight Arm PushStop MovementLeft Arm PushLeft Arm High Pick UpLeft Arm PlaceLeft WaveControl <strong>RS</strong> <strong>Media</strong>’s left and right arms simultaneously.Control <strong>RS</strong> <strong>Media</strong>’s left and right arms simultaneously.Press to make <strong>RS</strong> <strong>Media</strong> stand straight up, whether lying or sitting.Press twice to make <strong>RS</strong> <strong>Media</strong> take a photo.Press to initiate an interaction between <strong>RS</strong> <strong>Media</strong> and Robopet.Press to make <strong>RS</strong> <strong>Media</strong> perform a Right Arm Place.Press to make <strong>RS</strong> <strong>Media</strong> perform a Right Arm High Pick Up.Press to make <strong>RS</strong> <strong>Media</strong> perform a Right Arm Push.Press to stop <strong>RS</strong> <strong>Media</strong> performing any movement. Any media playing will not be affected.Press to make <strong>RS</strong> <strong>Media</strong> perform a Left Arm Push.Press to make <strong>RS</strong> <strong>Media</strong> perform a Left Arm High Pick Up.Press to make <strong>RS</strong> <strong>Media</strong> perform a Left Arm Place.Press to make <strong>RS</strong> <strong>Media</strong> perform a Left Arm Wave.= Programmable22
arm mode mapping chartleft and right ShiftBoth ArmsBoth Arms<strong>User</strong> BodyCon 1<strong>User</strong> BodyCon 2Dance Routine<strong>User</strong> BodyCon 3<strong>User</strong> BodyCon 4<strong>User</strong> BodyCon 5<strong>User</strong> BodyCon 6<strong>User</strong> BodyCon 7<strong>User</strong> BodyCon 8<strong>User</strong> BodyCon 9<strong>User</strong> BodyCon 10<strong>Media</strong> DemoControl <strong>RS</strong> <strong>Media</strong>’s left and right arms simultaneouslyControl <strong>RS</strong> <strong>Media</strong>’s left and right arms simultaneously<strong>User</strong> BodyCon / Macro slot<strong>User</strong> BodyCon / Macro slot<strong>User</strong> BodyCon / Macro slot<strong>User</strong> BodyCon/ Macro slot<strong>User</strong> BodyCon / Macro slot<strong>User</strong> BodyCon / Macro slot<strong>User</strong> BodyCon / Macro slot<strong>User</strong> BodyCon / Macro slot<strong>User</strong> BodyCon / Macro slot<strong>User</strong> BodyCon / Macro slot<strong>User</strong> BodyCon / Macro slot<strong>User</strong> BodyCon / Macro slot= Programmable23
description of media modeIn <strong>Media</strong> mode, you can take advantage of <strong>RS</strong> <strong>Media</strong>’s head-mountedcamera, color LCD screen on his chest, full speaker system embedded inhis armor, internal (built-in) memory and external memory card slot (SDmemory card not included). Refer to the section Memory expansion fordetails.In <strong>Media</strong> mode, you can access his media and PC connectivity functionsusing the remote controller or his hand controls.<strong>RS</strong> <strong>Media</strong> can play MP3 (.mp3) and MPEG4 (.avi) files, take and displayphotos, and record and playback video files and audio clips. <strong>RS</strong> <strong>Media</strong> alsocomes with 3 pre-installed challenging Java games.NOTE: Video and photo files will switch off if you change <strong>RS</strong> <strong>Media</strong>’smodes while they are displayed on the LCD screen.Audio files continue to play when you change <strong>RS</strong> <strong>Media</strong>’s modes unlessthe audio file is pause, in which case, it will turn off the audio filecompletely.When audio is playing in Control mode or Arm mode, <strong>RS</strong> <strong>Media</strong> will makeno other sounds.<strong>The</strong> functions in <strong>Media</strong> mode are organized into submenus (folders).<strong>The</strong> <strong>Media</strong> mode submenus are described in detail later on. <strong>The</strong>y are asfollows:Menu icon Menu option DescriptionAudioPhotosVideoPersonalityGamesOptionsBrowse, delete or play back audio files.Refer to page 27.Browse, delete, display or take photos.Refer to page 29.Browse, delete, record or play back video files.Refer to page 31.Browse, select and audition personalities.Refer to page 33.Play Java games.Refer to page 34.Enable USB and line-in connectivity; adjust volume levels, camera frequency, and white balance;adjust camera tracking settings; display <strong>RS</strong> <strong>Media</strong> information.Refer to page 37.24
<strong>Media</strong> mode functions overview/hand controls<strong>The</strong> following is an overview of some of the main functions in <strong>Media</strong> mode:Function Button combination DescriptionVolume up/downMenu NavigationPress up or down to adjust <strong>RS</strong> <strong>Media</strong>’s volume.Press up or down to navigate <strong>RS</strong> <strong>Media</strong>’s menu.<strong>Media</strong> Demo + Enables the demonstration of <strong>Media</strong> mode functions.Change personalityToggle personalities available on <strong>RS</strong> <strong>Media</strong>.Return to main menu + Returns to the main menus in <strong>Media</strong> mode.Select item in menuReturn to previous menuSelects item in menu.Navigates back up a step in the current menu.Hand controlsYou can use <strong>RS</strong> <strong>Media</strong>’s hand controls in <strong>Media</strong> mode to navigate through the <strong>Media</strong> mode menu.NOTE: You can only use the outer buttons on <strong>RS</strong> <strong>Media</strong>’s hand controls in Control mode and Arm mode to toggle through <strong>RS</strong> <strong>Media</strong>’s modes.Function Hand control DescriptionNavigate + Both outer buttons Change modes.Scroll up Right inner button Navigates to the previous item in the menu.(<strong>RS</strong> <strong>Media</strong>’s left arm)Scroll down Left inner button Navigates to the following item in the menu.(<strong>RS</strong> <strong>Media</strong>’s right arm)Select Right outer button Selects highlighted item.(<strong>RS</strong> <strong>Media</strong>’s left arm)Exit Left outer button Exits the current option.(<strong>RS</strong> <strong>Media</strong>’s right arm)25
<strong>Media</strong> format compatibility<strong>RS</strong> <strong>Media</strong> supports only certain media files for playback and only certainimage formats. This means if you try to upload other types of files on<strong>RS</strong> <strong>Media</strong> to the <strong>RS</strong> Editing Suite or directly onto <strong>RS</strong> <strong>Media</strong>, he will notrecognize the format and not be able to display it on his LCD screen.Also, you can upload Java format games to <strong>RS</strong> <strong>Media</strong>. Refer to the sectionon <strong>RS</strong> <strong>Media</strong> Editing Suite for more details.<strong>The</strong> following chart outlines the media and image formats <strong>RS</strong> <strong>Media</strong>supports.<strong>Media</strong> File File Descriptiontype type extensionVideo MPEG4 *.avi A standard format for compressing audio and video data files.<strong>RS</strong> <strong>Media</strong> supports *.avi files with a resolution up to 320 x 240 pixels (QVGA).NOTE: You need to have the required codecs on your computer to play back *.avi files properly.Music MP3 *.mp3 A standard format for compressing audio files.In the <strong>RS</strong> <strong>Media</strong> Editing Suite, you can use *.mp3 files in your Personalities, Macros orBodyCons. You can even upload *.mp3 files to <strong>RS</strong> <strong>Media</strong> to play as if he was a stereo system.<strong>RS</strong> <strong>Media</strong> supports *.mp3 sampling bitrates up to 192 Kbps. Supportedfrequencies: 16 kHz, 22.05 kHz, 32 kHz, and 44.1 kHz.On <strong>RS</strong> <strong>Media</strong>, you should use *.mp3 files no larger than 10 MB.NOTE: In the Personality editor, you can only use *.mp3 files up to 1024 kb (1 MB) in size.WAVE *.wav A standard lossless format for audio files. <strong>The</strong>se types of files are usually uncompressed,therefore usually providing the best quality.In the <strong>RS</strong> <strong>Media</strong> Editing Suite, you can use *.wav files in your Macros or BodyCons. You caneven upload *.wav files to <strong>RS</strong> <strong>Media</strong> to play as if he was a stereo system.On <strong>RS</strong> <strong>Media</strong>, you should use *.wav files no larger than 10 MB.Image JPEG *.jpg or *.jpeg A standard format for compressing still images, for instance, those used on digital still cameras.<strong>RS</strong> <strong>Media</strong> supports *.jpeg files with a resolution up to 1024 x 768 pixels.Games JAVA *.jar Games programmed using Java, an object-oriented programming language developed by Sun(Java games)Microsystems.26
Descriptions of <strong>Media</strong> mode menusAudio menu<strong>The</strong> Audio menu allows you to browse, select, adjust or deleteaudio features available on <strong>RS</strong> <strong>Media</strong>.Note that you can also play music from an external source through <strong>RS</strong><strong>Media</strong>. Refer to the section on Line-in option of the Options menu formore information.To select a function in the Audio menu, use the Left directional arrow onthe remote controller (or hand controls) to navigate to the function youwant, and then press the Select button.Menu itemBrowseDeleteRecordNow PlayingOptionsDescriptionAllows you to look through the list of available audio files on <strong>RS</strong> <strong>Media</strong>.Allows you to delete an audio file.Allows you to record an audio clip. Options include Start Recording and Set Record Volume (Under the Options menu).Displays information on audio file currently playing.If no audio file is playing when you select this menu item, nothing happens.Allows you to select audio playback options. Options include Repeat Once, Repeat All, and Shuffle.- Repeat Once Repeats each audio track once.- Repeat All Repeats all audio tracks.- Shuffle Randomizes audio file playback. Once a song begins to play, the Now Playing screen appears.27
audio controls chartno ShiftRecord AudioPrevious TrackNext TrackPlay / Pause <strong>Media</strong>Press twice to start recording audio.Press to select previous track.Press to select the next track.Press to play or pause the current MP3.left ShiftSound Memo PlaybackRewindFast ForwardCamera SettingPress to play back a Sound Memo, if one is present.Press to Rewind the audio file currently playing.Press to Fast Forward the audio file currently playing.Press to display <strong>RS</strong> <strong>Media</strong>’s camera settings.right ShiftAudio FolderRewind X 2Fast Forward X 2Press to enter <strong>RS</strong> <strong>Media</strong>’s Audio menu.Press to Rewind X 2 the audio file currently playing.Press to Fast Forward X 2 the audio file currently playing.28
Descriptions of <strong>Media</strong> mode menusPhoto menu<strong>The</strong> Photo menu allows you to browse, delete, or take photos.In this menu, you can also set your photo display options includingslideshow and photo timer options.To select a function in the Photo menu, use the Left directional arrow onthe remote controller (or hand controls) to navigate to the function youwant, and then press the Select button.Menu itemBrowseDeleteTake photoOptionsDescriptionAllows you to browse through the list of and display available photo files on <strong>RS</strong> <strong>Media</strong>.Allows you to delete a photo file.Allows you to take a photo using <strong>RS</strong> <strong>Media</strong>’s camera and display the image on <strong>RS</strong> <strong>Media</strong>’s LCD screen.Press the camera button to take a photo.Allows you to select slideshow and Photo Timer.- Slideshow Timer Displays images in a series.- Off Slideshow setting is disabled. Default setting.- 2 Seconds Sets slideshow delay between images to 2 seconds.- 5 Seconds Sets slideshow delay between images to 5 seconds.- 10 Seconds Sets slideshow delay between images to 10 seconds.- Photo Timer Sets the self-timer delay on <strong>RS</strong> <strong>Media</strong> before taking a photo.- Off Photo timer is disabled. Default setting.- 2 Seconds Sets photo timer delay before taking a photo to 2 seconds.- 5 Seconds Sets photo timer delay before taking a photo to 5 seconds.- 10 Seconds Sets photo timer delay before taking a photo to 10 seconds.29
Photo controls chartno ShiftTake PicturePrevious TrackTrack & Photo HumanNext TrackPress twice to take a photo.Press to select the previous photo.Track a human and take a photo.Press to select the next photo.left ShiftTrack & Photo RedCamera SettingPress to make <strong>RS</strong> <strong>Media</strong> track the color Red and take a photo.Press to display <strong>RS</strong> <strong>Media</strong>’s camera settings.right ShiftPhoto FolderTrack & Photo GreenTrack & Photo BluePress to enter <strong>RS</strong> <strong>Media</strong>’s Photo folder.Press to make <strong>RS</strong> <strong>Media</strong> track the color Green and take a photo.Press to make <strong>RS</strong> <strong>Media</strong> track the color Blue and take a photo.30
Descriptions of <strong>Media</strong> mode menusVideo menu<strong>The</strong> Video menu allows you to browse, delete, or take videos.To select a function in the Video menu, use the Left directional arrow onthe remote controller (or hand controls) to navigate to the function youwant, and then press the Select button.Note that video files can only be played in <strong>Media</strong> mode.Menu itemBrowseDeleteTake VideoDescriptionAllows you to browse through the list of and play back available video files on <strong>RS</strong> <strong>Media</strong>.Allows you to delete a video file.Allows you to record a video clip using <strong>RS</strong> <strong>Media</strong>’s camera and display the video on <strong>RS</strong> <strong>Media</strong>’s LCD screen.Press the camera button on the remote controller to record video.31
video controls chartno ShiftPlay / Pause <strong>Media</strong>Press to play or pause the current video.left ShiftVideo RecordRewindFast ForwardCamera SettingPress twice to record a short video. (<strong>The</strong> second press can be without Left Shift)NOTE: Each track is a maximum of approximately 8 minutesPress to Rewind the video currently playing.Press to Fast Forward the video currently playing.Press to display camera settings.right ShiftVideo FolderVideo memo PlaybackRewind X 2Fast Forward X 2Press to enter <strong>RS</strong> <strong>Media</strong>’s Video folder.Press to play back a Video Memo track, if one is present.Press to Rewind X 2 the video currently playing.Press to Fast Forward X 2 the video currently playing.32
Descriptions of <strong>Media</strong> mode menus/personality controls chartPersonality menu<strong>The</strong> Personality menu allows you to browse and select oneof <strong>RS</strong> <strong>Media</strong>’s four built-in personalities, or one of your owncustomized personalities. You can upload your own customized<strong>RS</strong> <strong>Media</strong> personality to the robot using the <strong>RS</strong> <strong>Media</strong> EditingSuite. Refer to page 52-53 for more information.To select a personality in the Personality menu, use the Left directionalarrow on the remote controller (or hand controls) to navigate to thefunction you want, and then press the Select button.Menu itemPersonalityAuditionDescriptionAllows you to change the current personality and select a new personality.Allows you to preview BodyCon files in the current personalityPersonality controls chartno ShiftChange PersonalityPress to toggle through <strong>RS</strong> <strong>Media</strong>’s personalities, including those entered by the user.left ShiftPersonality FolderPress to enter <strong>RS</strong> <strong>Media</strong>’s Personality folder.33
Descriptions of <strong>Media</strong> mode menus/game controls overviewGames menu<strong>The</strong> Games menu allows you to browse and select one of<strong>RS</strong> <strong>Media</strong>’s three preinstalled Java games. <strong>The</strong> three gamesincluded are:• Bubble Soccer• Ghost Force• Vortex RacerFor a description of the game play and controls, refer to the next section,Game controls overview below.To select a game in the Games menu, use the Left directional arrow onthe remote controller (or hand controls) to navigate to the game youwant, and then press the Select button.You can download more Java games and upload them to <strong>RS</strong> <strong>Media</strong> usingthe <strong>RS</strong> <strong>Media</strong> Editing Suite.Menu itemBubble SoccerGhost ForceVortex RacerDescriptionSelects the game Bubble Soccer.Selects the game Ghost Force.Selects the game Vortex Racer.Games controls overviewNOTE: When using the Games controls, you can only use the rightdirectional pad and right-side buttons on the remote controller.button function DescriptionDirectional controlLeft soft keyRight soft keySelect actionQuit gameControls the direction of the objects in the game.Controls the left onscreen function.Controls the right onscreen function.Selects or confirms an item or action.Quits the game and returns to <strong>Media</strong> mode. To return to the game mainmenu, use the Quit command in the actual game menu, instead of the Stop button.34
game controls overview /Description of gamesIf you do upload new Java games to <strong>RS</strong> <strong>Media</strong>, refer to the gameplaymapping of the keys for <strong>RS</strong> <strong>Media</strong> remote controller as follows:Mobile phone keyNUM1NUM2NUM3NUM4<strong>RS</strong> <strong>Media</strong> remoteCONTROLLER buttonGame strategyGhost Force is a shoot ‘em up in the best tradition of the golden age ofthe greatest arcade games. Rediscover the mood of the games arcadewith this sublime first person shooter with its incredible technical featuresand a gameplay that is synchronized like a watch. Are you ready for thechallenge?Ghost Force game controlsButton Function DescriptionDirectional controlControls the direction of theobjects in the game.NUM5NUM6NUM7NUM8NUM9SOFT1SOFT2Left soft keyRight soft keyMissileExit gameControls the left onscreenfunction.Controls the right onscreenfunction.Launches missiles.Exits the game and returns to<strong>Media</strong> mode. To return to thegame main menu, use the Quitcommand in the actual gamemenu, instead of the Stop button.Description of games<strong>The</strong> following are descriptions of the pre-installed games on <strong>RS</strong> <strong>Media</strong>.Ghost ForceThree law enforcers are sworn in to create the Ghost Force squad to goand fight the flying army of Commander Boralo and free Doctor Larsonwho has been kidnapped for his extraordinary scientific knowledge. <strong>The</strong>yare convinced that they will succeed. If they are successful, they will haveavoided the Commander’s dictatorship and Doctor Larson will have endedpollution on our planet thanks to his work on non-toxic fuels.35
Description of gamesVortex RacerDoctor Geek has gathered the best pilots in the Galaxy in order todetermine who will be the first to use his brand new invention: a vesselcapable of travelling through the Vortexes.Game strategyTravel through planets with spectacular backgrounds, but be careful, youdon’t have time for tourist visits: you’re going to have to face merciless,frighteningly intelligent opponents, at speeds that defy the imagination.Superb graphics and impeccable technical production will get you hookedon this futuristic racing game.Vortex Racer game controlsButton Function DescriptionDirectional controlLeft soft keyRight soft keyBoost upControls the direction of the racerleft or right.Controls the left onscreenfunction.Controls the right onscreenfunction.Boost your fuel.Bubble SoccerThis remake of an old classic arcade game, Bubble Soccer needs yourhelp!Game strategyYou must shoot away all the footballs that are lying on the soccer fields,otherwise the big championship cannot take place! <strong>The</strong> increasing needfor speed and logic at each level makes it hard to finish the 50 levels! Butif you keep in mind that the next ball coming might change the order ofplay, you might finish before the time runs out!Bubble Soccer game controlsButton Function DescriptionDirectional controlLeft soft keyRight soft keyKickControls the direction of thesoccer ball left or right.Controls the left onscreenfunction.Controls the right onscreenfunction.Launches the soccer ball.MissileExit gameLaunches missiles.Exits the game and returns to<strong>Media</strong> mode. To return to thegame main menu, use the Quitcommand in the actual gamemenu, instead of the Stop button.Exit gameExits the game and returns to<strong>Media</strong> mode. To return to thegame main menu, use the Quitcommand in the actual gamemenu, instead of the Stop button.36
Options menuOptions menu<strong>The</strong> Options menu allows you to adjust <strong>RS</strong> <strong>Media</strong>’s systemsettings (including volume level, camera, and displayconfigurations), control USB and line-in connectivity, and set<strong>RS</strong> <strong>Media</strong> tracking options.To adjust any of the settings available in the options menu, select thesetting you want to change, then press the right directional pad arrows toincrease or decrease the levels of the setting accordingly.MENU ITEMUSB ModeVolumeLine InCamera FreqWhite BalanceCamera TrackingUSB NetAboutDescriptionAllows you to connect your <strong>RS</strong> <strong>Media</strong> to your computer.Allows you to adjust the audio levels.- Volume level Allows you to set the volume level on <strong>RS</strong> <strong>Media</strong>.- Rec Level Allows you to set the audio recording level on <strong>RS</strong> <strong>Media</strong>.- Equalizer Allows you to set the equalizer levels for bass and treble frequencies on <strong>RS</strong> <strong>Media</strong>.- Bass Allows you to adjust the bass frequency levels.- Treble Allows you to adjust the treble frequency levels.Allows you to enable an external audio source to play through <strong>RS</strong> <strong>Media</strong> using the line-in jack.- On Enables an external audio source to play through <strong>RS</strong> <strong>Media</strong>.NOTE: When the external audio source is enabled, <strong>RS</strong> <strong>Media</strong> will not play any internal sounds.- Off Disables any external audio source to play through <strong>RS</strong> <strong>Media</strong>.Allows you to adjust camera frequencies.- Auto Allow <strong>RS</strong> <strong>Media</strong> to automatically adjust camera frequency.- 50 Hz Set the camera frequency to 50 Hz.- 60 Hz Set the camera frequency to 60 Hz.Adjusts the color temperature settings on <strong>RS</strong> <strong>Media</strong>. This function compensates for different colors of light emittedby various light sources.- Auto Allows <strong>RS</strong> <strong>Media</strong> to automatically adjust the white balance settings.- Indoor Yellow Adjusts <strong>RS</strong> <strong>Media</strong>’s white balance settings to indoor incandescent lighting (i.e. standard lightbulbs)- Indoor White Adjusts <strong>RS</strong> <strong>Media</strong>’s white balance settings to indoor non-incandescent lighting (i.e. fluorescent lights).- Sunlight Adjusts <strong>RS</strong> <strong>Media</strong>’s white balance settings to sunlight.NOTE: Avoid using <strong>RS</strong> <strong>Media</strong> in direct sunlight for extended periods of time.Allows you to enable camera tracking on <strong>RS</strong> <strong>Media</strong>.- Off Disables camera tracking.- Human Uses camera to track human objects.- Red Uses camera to track red objects.- Green Uses camera to track green objects.- Blue Uses camera to track blue objects.Connect <strong>RS</strong> <strong>Media</strong> to a network- On Enable network connection.- Off Disable network connection.Java games will be listed in the “Game” optionDisplays information about your <strong>RS</strong> <strong>Media</strong>37
<strong>Media</strong> mode mapping chartno ShiftMenu NavigationVolume Up & DownMenu SelectTake PictureGame MenuPrevious MenuChange PersonalityRecord AudioStop / Full ResetPrevious TrackTrack & Photo HumanNext TrackPlay / Pause <strong>Media</strong>Press up or down to navigate <strong>RS</strong> <strong>Media</strong>’s menu.Press up or down to adjust <strong>RS</strong> <strong>Media</strong>’s volume.Press to select from <strong>RS</strong> <strong>Media</strong>’s menu.Press twice to take a photo.Press to select Game menu.Press to select the previous menu.Press to toggle through <strong>RS</strong> <strong>Media</strong>’s personalities, including those entered by the user.Press to start recording audio.Press to stop <strong>RS</strong> <strong>Media</strong> from performing his current action.Press and hold for about 3 seconds to perform a full reset to default.Press to select the previous track. (Not available while playing video)Track a human and take a photo.Press to select the next track if media is playing. (Not available for video)Press to play or pause the current MP3 or MPEG4.38
<strong>Media</strong> mode mapping chartleft ShiftUpper Body OnlyHead OnlyMenu SelectVideo Record<strong>Media</strong> Demo<strong>Media</strong> MenuPersonality FolderSound Memo PlaybackSleep / Power DownRewindTrack & Photo RedFast ForwardCamera SettingControl upper body with the Left Control Pad.Control head with the Right Control Pad.Press to select from <strong>RS</strong> <strong>Media</strong>’s menu.Press twice to record a short video. (<strong>The</strong> second press can be without Left Shift)Press to perform his <strong>Media</strong> demo.Press to enter <strong>RS</strong> <strong>Media</strong>’s <strong>Media</strong> Menu.Press to enter <strong>RS</strong> <strong>Media</strong>’s Personality folder.Press to play back a Sound Memo track, if one is present.Press once to make <strong>RS</strong> <strong>Media</strong> enter Sleep Mode.Press when already in Sleep Mode and he will Power down.Press to Rewind the video or song currently playing.Press to make <strong>RS</strong> <strong>Media</strong> track the color Red and take a photo.Press to Fast Forward the video or song currently playing.Press to display <strong>RS</strong> <strong>Media</strong>’s camera settings.39
<strong>Media</strong> mode mapping chartright ShiftUpper Body OnlyHead OnlyMenu SelectPhoto FolderAudio FolderVideo FolderVideo Memo PlaybackStop MovementRewindTrack & Photo GreenFast ForwardTrack & Photo BlueControl upper body with the Left Control Pad.Control head with the Right Control Pad.Press to select the currently highlighted menu option.Press to enter <strong>RS</strong> <strong>Media</strong>’s Photo folder.Press to enter <strong>RS</strong> <strong>Media</strong>’s Audio folder.Press to enter <strong>RS</strong> <strong>Media</strong>’s Video folder.Press to play back a Video Memo track, if one is present.Press to stop <strong>RS</strong> <strong>Media</strong> from performing any movement. Any media playing will not be affected.Press to Rewind X 2 the video or song currently playing.Press to make <strong>RS</strong> <strong>Media</strong> track the color Green and take a photo.Press to Fast Forward X 2 the video or song currently playing.Press to make <strong>RS</strong> <strong>Media</strong> track the color Blue and take a photo.40
<strong>Media</strong> mode mapping chartleft and right ShiftBoth ArmsBoth Arms<strong>User</strong> BodyCon 1<strong>User</strong> BodyCon 2Dance Routine<strong>User</strong> BodyCon 3<strong>User</strong> BodyCon 4<strong>User</strong> BodyCon 5<strong>User</strong> BodyCon 6<strong>User</strong> BodyCon 7<strong>User</strong> BodyCon 8<strong>User</strong> BodyCon 9<strong>User</strong> BodyCon 10<strong>Media</strong> DemoControl <strong>RS</strong> <strong>Media</strong>’s left and right arms simultaneouslyControl <strong>RS</strong> <strong>Media</strong>’s left and right arms simultaneously<strong>User</strong> BodyCon / Macro slot<strong>User</strong> BodyCon / Macro slot<strong>User</strong> BodyCon / Macro slot<strong>User</strong> BodyCon / Macro slot<strong>User</strong> BodyCon / Macro slot<strong>User</strong> BodyCon / Macro slot<strong>User</strong> BodyCon / Macro slot<strong>User</strong> BodyCon / Macro slot<strong>User</strong> BodyCon / Macro slot<strong>User</strong> BodyCon / Macro slot<strong>User</strong> BodyCon / Macro slot<strong>User</strong> BodyCon / Macro slot41
<strong>RS</strong> <strong>Media</strong>’s sensorsSonic sensorsFunction Mode Button DESTRIPTIONToggle Control Turn the sonichearingsensor on or offOn/Off<strong>RS</strong> <strong>Media</strong> has stereo sonic sensors that can detect sharp, loud soundssuch as a handclap. He listens for sounds when he is stationary and/orquiet; he will not be able to listen to sounds when he is lying down orsitting.ListeningWhen <strong>RS</strong> <strong>Media</strong> first hears a sound, he will turn his vision systems off andlisten for more sounds. If he hears too many sounds and is not able toidentify the direction from which they come, he will turn his sonicsensors off. You can turn the sonic sensors back on using the remotecontroller.If he hears a sound to the side, he will turn towards the source; if he hearsa sound directly in front of him, he will acknowledge the source with avoice file.If empty handed<strong>RS</strong> <strong>Media</strong> will walk towards the source (approximately 1 meter / 3 feet),but you can stop him by putting your hand in front of his face.If object in hand<strong>RS</strong> <strong>Media</strong> will wait 4 seconds and then walk towards the source and dropthe object he is carrying. However, you can make him throw the objectby making a sound during the 4 second wait period.Tilt sensors<strong>RS</strong> <strong>Media</strong> is equipped with tilt sensors that interrupt most functions toprevent any damage if he is knocked over. If he is turned over face-down,for instance, he will stop functioning. If <strong>RS</strong> <strong>Media</strong> falls on his back, hewill stop what he is doing. When trying to control <strong>RS</strong> <strong>Media</strong>, if he is notstanding, you will be informed by him that he cannot perform certaincommands or that he needs to be standing, and so will get up.To make <strong>RS</strong> <strong>Media</strong> stand up from a sitting or lying position, use thefollowing command:Function Mode Button combinationStand upControl ModeArm ModeGrip sensorsWhen you command <strong>RS</strong> <strong>Media</strong> to pick up or grab something, he willcheck his grip sensors to see if the pick-up attempt was successful. If hedoes not have anything in his hands he will automatically repeat theaction one more time.Foot sensors<strong>RS</strong> <strong>Media</strong> has two touch sensors on each foot, one at the front and oneat the back. <strong>The</strong>y serve as detectors while he explores his environment,enabling him to avoid obstacles. Sentence should now read “You cantrigger either of his back foot sensors for an emergency stop by touchingthe back foot sensors directly while he is walking forward.<strong>The</strong> foot sensors are also used for Puppet Mode (PositionalProgramming). See p.48.+NOTE: If his upper body is twisted and he has to turn before walkingtowards the sound, he will turn his vision off and not respond to ahand in front of his face while he turns.<strong>RS</strong> <strong>Media</strong> will not listen for sounds while he is performing anymovements, or if he is tracking anything with his vision systems.<strong>RS</strong> <strong>Media</strong> assumes all sounds come from the direction he is facing (left,right, or ahead).42
Vision systems<strong>RS</strong> <strong>Media</strong> is equipped with two sets of vision systems. One vision systemtracks movements and detects obstacles; the other system differentiatesbetween certain colors.Infrared vision systems<strong>RS</strong> <strong>Media</strong>’s infrared vision system allows him to respond to commandsfrom the remote controller.Function Mode Button DescriptionCOMBINATIONToggle vision Control Turn the IR sensoron/offon or offFlinch responseIf <strong>RS</strong> <strong>Media</strong> is not already tracking something, and you place somethingvery close to his eyes, he will perform a flinch response.He will turn his color camera ON when he does this. If the object remainsclose and stationary for a few seconds he will try to identify the color.(See Color Recognition, page 44).If you do not hold the object stationary in front of his face, he will startto track the movement with his IR vision.NOTE: To make <strong>RS</strong> <strong>Media</strong> perform a flinch you must hold the objectclose enough to his face to cover all sensors, as shown in thediagram.Long-range infrared vision<strong>RS</strong> <strong>Media</strong>’s long-range IR vision enables him to track objects within hislong-range IR vision. He will track the object using both his head andupper body.He will not make comments on objects tracked using long-range IRvision.When he tracks long-range movement, his eyes flash at a slow rate.(See Blinking on page 45).Close-range infrared visionWhen tracking something at a close range, <strong>RS</strong> <strong>Media</strong> will follow it as faras his head turns.He will make comments about objects seen using the close-range IRvision. When he tracks close-range movement, his eyes flash at a fastrate. (See Blinking on page 45).If an object that <strong>RS</strong> <strong>Media</strong> is tracking with his close-range IR visionremains stationary for a few seconds, he might ask you to give it to him.CAUTION: Be careful when offering <strong>RS</strong> <strong>Media</strong> an object; he will dropanything he is already holding.NOTE: If you make <strong>RS</strong> <strong>Media</strong> track an object with his close rangevision for too long he will get bored and stop tracking the object.Cover the ear and mouthsensors to flinch <strong>RS</strong> <strong>Media</strong>43
Vision systemsObstacle avoidance<strong>RS</strong> <strong>Media</strong> uses his IR Vision System to avoid obstacles while walking.CAUTION: <strong>RS</strong> <strong>Media</strong> is not able to detect the edge of tables. Makesure he does not walk near stairs or steps.<strong>RS</strong> <strong>Media</strong>’s IR vision does not function while he is walking backwards orturning, and may result in him bumping into things.While the camera is on (while checking the color or tracking it), his eyeswill flash at a medium rate (See Blinking on page 45).Identifying and trackingWhen <strong>RS</strong> <strong>Media</strong> identifies the color of an object, he will track the object’smovements. While he tracks the object, <strong>RS</strong> <strong>Media</strong> will say that he istracking the object.<strong>RS</strong> <strong>Media</strong> is sometimes too cautious and may refuse to walkthrough openings that he is able to pass through. If this happens youcan turn off his Vision Systems. He will use his foot sensors to react toobstacles when his Vision Systems are off (See foot Sensors on page 42).<strong>RS</strong> <strong>Media</strong>’s infrared visionsystem is based on reflection.This means that he can seehighly reflective surfaces likewhite walls or mirrors moreeasily and at greater distancesthan he can see matte or blacksurfaces.Color recognition<strong>RS</strong> <strong>Media</strong> has a unique color visionsystem. <strong>RS</strong> <strong>Media</strong> can identify pureprimary colors - red, green and blue.He can also recognize skin tones based on the color of the palms of yourhands. <strong>The</strong> color camera is activated with a flinch (see page 43).NOTE: For accurate color detection, you should adjust the whitebalance setting for the lighting conditions in which you are using <strong>RS</strong><strong>Media</strong>. Refer to Color Camera Settings on p.45When an object suddenly appears in front of him (and he was notpreviously looking at something), <strong>RS</strong> <strong>Media</strong> will flinch and turn on hiscolor camera.If the object stays stationary and within 1-inch (2.5 cm) of the camera,he will try to identify the color of the object.If the object does not stay close he will turn his color camera off.44Tracking timeout<strong>RS</strong> <strong>Media</strong> will time out after tracking for about 30 seconds and exit colorcamera mode.Object disappearsIf <strong>RS</strong> <strong>Media</strong> loses the object he is tracking, he will inform the user andexit the color camera mode.Still objectsIf <strong>RS</strong> <strong>Media</strong> sees a red, green, or blue object held still in front of him, hewill perform a grab BodyCon. If the pick up isn’t successful the colorcamera mode will end. If the pick up is successful, he will look for asimilar colored object.If he cannot find a similar colored object, he will exit color camera mode.If he finds a similar colored object, he will throw whatever is in his handat the object. This will end color camera mode.
Vision systems / Guard modeColor camera settings<strong>RS</strong> <strong>Media</strong>’s color camera might sometimes have problems identifyingcertain colors, especially skin-tones and the color blue, under differentlight conditions. You can change the white-balance setting manually bychoosing white balance under options in <strong>Media</strong> Mode.SettingAutoBalanceIndoorYellowIndoorWhiteSunlightDescription<strong>RS</strong> <strong>Media</strong> automatically determines the best colorcamera settings and adjusts them for the lightingin his current environment.NOTE: If Photo or Video quality is poor,changing the color camera settings might helpimprove the image.This is the default setting.Adjusts the color camera setting for artificialtungsten lighting (i.e. common household lightbulbs) as the dominant light source.Adjusts the color camera setting for white-tonedindoor lighting (i.e. fluorescent bulbs) as thedominant light source.Adjusts the color camera setting for naturalsunlight as the dominant light source.NOTE: When <strong>RS</strong> <strong>Media</strong> tracks colored objects, he will respond to thelargest object of the correct color. If the colored object is in front ofa colorful background, this can interfere with his color tracking.When it is too dark, <strong>RS</strong> <strong>Media</strong> will have trouble correctly identifyingcolors, will give false readings, and will not be able to track objects usinghis color camera.Blinking<strong>RS</strong> <strong>Media</strong>’s eyes blink to indicate the status of his vision or soundsystems.Eyes Status Possible status descriptionsEyes OFF<strong>RS</strong> <strong>Media</strong> is turned OFF.<strong>RS</strong> <strong>Media</strong> in Sleep Mode.Eyes ONNo object detected, and vision is ON(constant light) and active.Very slow blinking <strong>RS</strong> <strong>Media</strong> in Guard Mode.Slow blinking Distant object detected. Refer to page 43.Medium blinking Color checking and tracking.(medium periods of Refer to page 44.eyes ON with shortperiods of eyes OFF)Medium reverse <strong>RS</strong> <strong>Media</strong>’s vision is shut down.blinking (medium <strong>RS</strong> <strong>Media</strong> is listening to sounds.periods of eyes OFFwith short periods ofeyes ON)Fast blinking Close object detected. Refer to page 43.Blinking in Programming modes<strong>RS</strong> <strong>Media</strong>s eyes blink very quickly when waiting for a visual cue, or blinkslowly when waiting for a sonic cue in a programming mode.Guard ModeFunctionControl Mode +Button combinationPut <strong>RS</strong> <strong>Media</strong> into Guard Mode and he will become stationary.His infrared vision sensors and stereo sonic sensors will sound an alarmor perform a program assigned to them when triggered by audio or visualstimuli.If there is no program stored in Vision or Sound then <strong>RS</strong> <strong>Media</strong> will performhis default Guard Mode reaction.<strong>RS</strong> <strong>Media</strong> will leave Guard Mode at the touch of ANY controller button(except Left Shift & Right Shift buttons).If he hears ten sounds in a row with no vision disturbances in between, hewill turn his sound sensors off. If he has 10 vision disturbances in a rowwith no sound disturbances between them, he will turn his vision sensorsoff. If both are turned OFF in this manner he will exit Guard Mode.CautionAs <strong>RS</strong> <strong>Media</strong> will become animated during Guard Mode, Do not toleave him near the edge of a table.NoteTouch sensors do not function in Guard Mode. <strong>RS</strong> <strong>Media</strong> will go toSleep Mode after about 30 minutes in Guard Mode. Any disturbanceduring Guard Mode will reset the 30 minutes time out.45
obot interaction<strong>RS</strong> <strong>Media</strong> can interact with any one of the following roboticcompanions at a time: Roboreptile, Robosapien V2, <strong>RS</strong> <strong>Media</strong>,Roboraptor, or Robopet.To have <strong>RS</strong> <strong>Media</strong> interact with his companions, align <strong>RS</strong> <strong>Media</strong> facing theother robot, on a level surface with a clear line of sight. Turn <strong>RS</strong> <strong>Media</strong>’scompanion on and then press the associated button combination on theremote controller to initiate the interaction.<strong>RS</strong> <strong>Media</strong> / Robosapien V2 interaction<strong>RS</strong> <strong>Media</strong>: To initiate the interaction between two <strong>RS</strong> <strong>Media</strong>s, you mustpoint the remote controller at only one <strong>RS</strong> <strong>Media</strong>.Robosapien V2: To initiate the interaction between <strong>RS</strong> <strong>Media</strong> andRobosapien V2, point the remote controller only at <strong>RS</strong> <strong>Media</strong>.NOTE: <strong>RS</strong> <strong>Media</strong>’s remote controller can also operate Robosapien V2.Roboreptile interactionWhen you turn Roboreptile on, he goes through a brief wait state.NOTE: You should initiate the interaction routine before Roboreptileenters Free Roam mode; otherwise, you will have to start theprocess over. To keep Roboreptile from entering Free Roam mode,press the stop button on Roboreptile’s remote controller.ModeControl mode +Distance: Around 24”Button combinationModeButton combinationArm modeRoboraptor interactionWhen you turn Roboraptor on, he goes through a brief wait state.Distance: Around 24”NOTE: You should initiate the interaction routine before Roboraptorenters Free Roam mode; otherwise, you will have to start theprocess over. To keep Roboraptor from entering Free Roam mode,press the stop button on Roboraptor’s remote controller.ModeButton combinationArm mode +Distance:Around 24”46
obot interaction/Advanced interaction with <strong>RS</strong> <strong>Media</strong>Robopet interactionTurn Robopet on, and then command him to sit down. Once he is sitting,you should initiate the interaction routine within 10 seconds before heenters Free Roam mode; otherwise, you will have to start the processover.NOTE: Robopet’s Edge Detect switch must be set to the OFF positionto perform this interaction.ModeArm mode +Button combinationDirectly programming <strong>RS</strong> <strong>Media</strong>You can directly program <strong>RS</strong> <strong>Media</strong> or program him using the remotecontroller. You can program <strong>RS</strong> <strong>Media</strong> directly in one of five (5) ways.ProgrammingMODEPuppet modeMain ProgrammodeDescriptionAllows you to directlyprogram a sequence ofmovements by manipulating<strong>RS</strong> <strong>Media</strong> directly.Allows you to program asequence of movements on<strong>RS</strong> <strong>Media</strong> by using commandsfrom the remote controller.Distance: Around 24”Sound ProgrammodeAllows you to assign asequence of movements thatare triggered by a sharp soundwhen <strong>RS</strong> <strong>Media</strong> is in Guardmode. Refer to page 28.Advanced interaction with <strong>RS</strong> <strong>Media</strong>This section describes advanced interactions you can have with your <strong>RS</strong><strong>Media</strong>. You can directly program <strong>RS</strong> <strong>Media</strong> (with or without the remotecontroller) or take advantage of the <strong>RS</strong> <strong>Media</strong> Editing Suite software tofully customize his features.Programming capabilityAny function from the Control or Arm mode function charts that can beprogrammed in all program modes (except Puppet mode) are denotedwith the following symbol:SymbolDescriptionFunction is programmable.Vision ProgrammodeEditing SuiteAllows you to assign asequence of movements thatare triggered by a close-rangemovement detected by the IRsensor when <strong>RS</strong> <strong>Media</strong> is inGuard mode. Refer to page 28.Allows you to customize andcreate your own Macros,BodyCons, and Personalitiesusing the <strong>RS</strong> <strong>Media</strong> EditingSuite, and upload them to yourrobot. Use this software alsoto manage files on <strong>RS</strong> <strong>Media</strong>.NOTE: <strong>Media</strong> Mode functions cannot be programmed as a step in aprogram.NOTE: Program modes are disabled in Control Mode and Arm Modewhen audio is playing.NOTE: All direct programming is stored on <strong>RS</strong> <strong>Media</strong> through ControlMode and Arm Mode. Main Program, Sound Program and VisionProgram have two screens to indicate the mode in which you areprogramming.47
Advanced interaction with <strong>RS</strong> <strong>Media</strong>Puppet Mode (Positional programming)Puppet mode is a method of programming a sequence ofmovements into <strong>RS</strong> <strong>Media</strong> by manipulating him manually.Function Mode Button DescriptionCOMBINATIONEnter Puppet Control Enters the mainModepuppet modeprogramming.Playback Puppet Control Plays back the mainModepuppet mode programstored in <strong>RS</strong> <strong>Media</strong>.<strong>The</strong> starting position for <strong>RS</strong> <strong>Media</strong> in this programming mode will be theposition his body is in when you begin. <strong>RS</strong> <strong>Media</strong> will return to thestarting position whenever the program is activated in this mode.Move his arms and upper body around manually.Each time you stop moving him, he will store the position andacknowledge it with a speech file. You can move the following:• Shoulders• Wrists• Waist (lean backwards and forwards)• Waist (lean side-to-side)• Waist (twist left or right)You can move more than one position at the same time. For instance,you can move both arms up together or you can make him reach out infront while bending him forward to the side.If you stop programming for about 3 seconds <strong>RS</strong> <strong>Media</strong> will exit theProgram mode and then repeat the moves.If you move <strong>RS</strong> <strong>Media</strong> into a position that is unsafe (for example, if youlean him forward too far, or backwards so that he falls over), he willadjust himself automatically when he plays the moves back.Puppet Mode: Foot sensorsYou can combine upper body movements with leg movements andwalking using the foot sensors in Puppet mode.ActionBoth front foot sensorspressed simultaneouslyBoth rear foot sensorsOne front sensor + rearsensor of the oppositelegFront and back sensor ofsame footDescription<strong>RS</strong> <strong>Media</strong> will take several steps forward.<strong>RS</strong> <strong>Media</strong> will take several steps backwards.<strong>RS</strong> <strong>Media</strong> will turn forwards in the directionof the foot sensor that was triggered on thefront.<strong>RS</strong> <strong>Media</strong> will kick forwards using thetriggered foot.• Main Positional Program Mode has a maximum of 12 moves.If you reach this maximum, the robot will tell you the memoryis full, exit the program mode, and play back the moves.• To clear a positional program, enter the mode and do not move therobot for about 3 seconds. He will automatically exit themode and tell you that the memory is cleared.Puppet Mode: Left and Right side programmingYou can assign different programs to the robot’s left and right footsensors using the left and right positional programming modes.• To enter one of these programming modes, tap one of his foot sensorbuttons twice within 1 second.• You can then program the robot in the same way that you do forMain Positional Program Mode.• You can clear the program by entering the programming mode andnot moving the robot for about 3 seconds.• To play back the program, single tap either one of his foot sensors onthe same side of the body to which you assigned the program.• Left and Right Puppet Modes have a maximum of 6 moves for eachfoot. If you reach this maximum, the robot will tell you the memory isfull, exit the program mode, and play back the moves.NOTE: Do not force <strong>RS</strong> <strong>Media</strong> to move beyond his mechanical limits,nor move him too fast.48NOTE: If <strong>RS</strong> <strong>Media</strong> detects anything in his vision or is tracking (hiseyes will be blinking. See p.45), he will not enter Puppet Mode.
Advanced interaction with <strong>RS</strong> <strong>Media</strong>Main Program ModeMain Program mode allows you to program asequence of movements into <strong>RS</strong> <strong>Media</strong> byentering commands from the remote controller.Function Mode Button DescriptionCOMBINATIONEnter Main Control + Enters the Main ProgramProgram modemodeMain Program Control + Plays back the MainPlaybackProgram mode routine.Exit Main Control + Exits the programmingProgram modemode.<strong>RS</strong> <strong>Media</strong> will play backthe program if one isstored.Clear last Control + Clears the last entry inentrythe programming routineClear program Control + Clears the currentprogramming routine.In this programming mode, when you use the remote controller to entercommands, <strong>RS</strong> <strong>Media</strong> will remember them in order.For example, you can enter walking steps, arm and upper bodymovements, demonstration routines and animations. Each one is a singlestep in the program.If you use single positional movements, such as an arm or waistmovements, the range of the movement is determined by the amount oftime you hold the controller button down. A full movement is reachedafter 3 seconds of holding the button down.If you enter a Stop command into a sequence, the robot will pause forabout 3 seconds during the program playback.Main Program Mode has a maximum of 20 moves. If the memory is full,when you enter the Main Program mode, <strong>RS</strong> <strong>Media</strong> will tell you there isno more room left.<strong>RS</strong> <strong>Media</strong> will automatically exit Main Program Mode after waitingfor about 90 seconds. If steps have been entered, he will play back theprogram.NOTE: All programming stays in the <strong>RS</strong> <strong>Media</strong>’s internal memoryeven after the robot is turned off.Subroutines<strong>RS</strong> <strong>Media</strong> can play back a stored sound, vision, or puppet program in MainProgram mode. <strong>The</strong>se actions and movements can also be entered as astep in a program; these steps are called subroutines.You can add subroutine programs into the Main Program mode toincrease the length of your stored programs.Sound and Vision subroutinesWhen you add a sound or vision subroutine, it will be entered as a step inthe program. When the program is played back and reaches thesubroutine step, the preprogrammed sound or vision routine will beperformed.If you add a sound or vision subroutine but there is nothing in the soundor vision program memory, then the robot will wait about 90 secondsbefore continuing with the programmed routine. If <strong>RS</strong> <strong>Media</strong> hears asharp sound or receives a close IR trigger before the 90 seconds timeout,depending on which subroutine was added, he will immediately continuewith the programmed routine.<strong>The</strong> following chart outlines the subroutine functions:Function Mode Button DescriptionCOMBINATIONEnter Sound Control + Enters the Soundsubroutinesubroutine in the MainProgram mode.Enter Vision Control + Enters the Visionsubroutinesubroutine in the MainProgram mode.49
Advanced interaction with <strong>RS</strong> <strong>Media</strong>Positional subroutinesPositional subroutines (puppet mode programs) can be added as a stepin your robot program. When the program is played back and reaches thesubroutine step, the preprogrammed positional routine will be performed.Function Mode Button DescriptionCOMBINATIONEnter Positional ControlsubroutineEnters the Positionalsubroutine in the MainProgram mode.If <strong>RS</strong> <strong>Media</strong> reaches this step in his programming and does not have astored Puppet Mode (positional) program, he will immediately skip to thenext step in the programmed routine.Guard subroutineGuard subroutines can be added as a step in your robot program.Function Mode Button DescriptionCOMBINATIONEnter Guard Control + Enters the Guardmodesubroutine in the MainsubroutineProgram mode.• He will wait about 90 seconds for a sharp sound or closeIR trigger before continuing with the programmedroutine.• If he gets a sound or vision trigger during this time he willperform the relevant sound or vision subroutine, or the defaultGuard Mode reaction before continuing with the remainingprogrammed routine.50
Programming <strong>RS</strong> <strong>Media</strong>using <strong>RS</strong> <strong>Media</strong> Editing SuiteIntroduction to the <strong>RS</strong> <strong>Media</strong> Editing Suite<strong>The</strong> <strong>RS</strong> <strong>Media</strong> Editing Suite is the perfect software companion thatcomplements the multimedia robotic experience of <strong>RS</strong> <strong>Media</strong>. It allowsyou to manage and customize data files, games and other programscreated on your <strong>RS</strong> <strong>Media</strong> or PC, giving you complete creative control ofcontent and reprogramming.<strong>The</strong> <strong>RS</strong> <strong>Media</strong> Editing Suite softwareCD is packaged with <strong>RS</strong> <strong>Media</strong>.Visit www.wowweeesupport.com to download any updates to the <strong>RS</strong><strong>Media</strong> Editing Suite software.Installing the softwareTo install <strong>RS</strong> <strong>Media</strong> Editing Suite from the provided CD, do the following:1. Insert the CD in the CD-ROM drive (or DVD-ROM if available).<strong>The</strong> <strong>RS</strong> <strong>Media</strong> Editing Suite welcome dialog appears.Running the softwareAfter installing the software, you can begin using it. To run the software:1. From your Windows Start menu, locate the Programs folder, then theWowwee folder.2. Select <strong>RS</strong> <strong>Media</strong> Editing Suite.<strong>The</strong> program will start up.NOTE: <strong>The</strong> program will automatically install any updates availablefrom the internet using an automatic web installer.NOTE: A shortcut to the <strong>RS</strong> <strong>Media</strong> Editing Suite software will becreated on your Windows desktop.Software overview<strong>The</strong> <strong>RS</strong> <strong>Media</strong> Editing Suite interface consists of four main componentsthat allow you to customize <strong>RS</strong> <strong>Media</strong>:• Personality editor• Macro editor• BodyCon editor• <strong>Media</strong> OrganizerEach component is represented by a tab in the <strong>RS</strong> <strong>Media</strong> Editing Suiteinterface. To navigate between each component, click on its associatedtab in the interface.NOTE: If the <strong>RS</strong> <strong>Media</strong> Editing Suite welcome dialogue does notappear, locate the <strong>RS</strong><strong>Media</strong>Setup.msi file on the CD drive anddouble-click on it to begin the installation process.Follow the instructions that appear onscreen to install the software.You can now use the <strong>RS</strong> <strong>Media</strong> Editing Suite to customize your <strong>RS</strong> <strong>Media</strong>.51
Programming <strong>RS</strong> <strong>Media</strong>using <strong>RS</strong> <strong>Media</strong> Editing SuiteHelp file<strong>The</strong> <strong>RS</strong> <strong>Media</strong> Editing Suite has a help file which contains generalinstructions and tutorials on using the software interface on yourcomputer.You can access the help file for the <strong>RS</strong> <strong>Media</strong> Editing Suite at any timeby clicking on the [?] button in the software interface. When you clickon the help button, the help file will open onto the page relevant to yourlocation in the software interface; this is called contextual help.You can download an updated help file from the Wowwee support siteand install it in your Program Files\Wowwee\<strong>RS</strong> <strong>Media</strong> Editing Suitedirectory.You can play with the pre-installed personality files on <strong>RS</strong> <strong>Media</strong>, or youcan customize the pre-installed personality files by modifying orsubstituting the existing audio files with ones of your choosing. Refer tothe Help file for more information.Macro editor overview<strong>The</strong> Macro editor allows you to create or edit macros or a sequence ofmacros to create a larger macro function which you can then upload toa Personality. In the <strong>RS</strong> <strong>Media</strong> Editing Suite, macros appear as buildingblocks in the My Macros library, which you can drag and drop into themacro workspace to create the macro function.Personality editor overview<strong>The</strong> Personality editor allows you to manage, customize and createpersonality files for your <strong>RS</strong> <strong>Media</strong>. You can use the Personality editorto manage multiple personalities on your computer that you can laterupload to your robot.<strong>RS</strong> <strong>Media</strong> comes with four pre-installed personalities:• <strong>RS</strong> <strong>Media</strong> (default personality)• Service Bot 3000• Billy Joe Sapien• Space Bot52
Programming <strong>RS</strong> <strong>Media</strong>using <strong>RS</strong> <strong>Media</strong> Editing SuiteBodyCon editor overview<strong>The</strong> BodyCon editor allows you to create and customize your own <strong>RS</strong><strong>Media</strong> movements and routines. It also allows you to preview yourcustomized movements and routines in a 3D animation window of <strong>RS</strong><strong>Media</strong>.<strong>Media</strong> Organizer overview<strong>The</strong> <strong>Media</strong> Organizer is the gateway between <strong>RS</strong> <strong>Media</strong> and yourcomputer. It allows you manage your media by allowing you to uploadand download video and audio files, personalities, Java games, and imagefiles between your computer and <strong>RS</strong> <strong>Media</strong>.NOTE: When you want to transfer files to <strong>RS</strong> <strong>Media</strong> from yourcomputer, or vice versa, you must make sure <strong>RS</strong> <strong>Media</strong> is ON andthat USB mode is enabled.For more information on the <strong>RS</strong> <strong>Media</strong> Editing Suite, refer to thesoftware’s Help file, which you can access through the software interfaceYou can create a sequence of movements, add voice and sound effects,and save it as a BodyCon file (*.bcn). This file can be added to anypersonality using the Personality Editor, or to a user-created Macro usingthe Macro Editor. <strong>The</strong>se personalities can then be uploaded to the robotusing the <strong>Media</strong> Organizer.53
Memory expansion / USB Connection<strong>RS</strong> <strong>Media</strong> has built in onboard memory on which you can store yourmedia files and personalities. You can expand the memory capacity on <strong>RS</strong><strong>Media</strong> using a SD card (sold separately) in the SD card slot.Onboard memory vs. expandable memory<strong>The</strong>re are two types of memory available on <strong>RS</strong> <strong>Media</strong>:• Onboard memory. Memory that is built-in on <strong>RS</strong> <strong>Media</strong> and cannotbe removed. <strong>The</strong>re is a total of 42 Mbytes of accessible memoryspace (about 22 Mbytes free space) in <strong>RS</strong> <strong>Media</strong> built-in onboardmemory.• Expandable memory. Memory that you can store on an SD card. Youcan increase <strong>RS</strong> <strong>Media</strong>’s memory space by using an SD card in thebuilt-in SD card slot. <strong>The</strong> maximum size for the SD card is 1 GByte.NOTE: When you use an SD card on <strong>RS</strong> <strong>Media</strong>, you will not be able toaccess any data saved on his onboard memory.Using the SD cardTo insert the SD card into the SD card slot:1. Make sure <strong>RS</strong> <strong>Media</strong> is turned off.NOTE: You cannot directly transfer data between the SD card and<strong>RS</strong> <strong>Media</strong>’s onboard memory. To transfer any data you have on theSD card onto <strong>RS</strong> <strong>Media</strong>’s onboard memory, first copy the files youwant onto your PC and then remove the SD card from <strong>RS</strong> <strong>Media</strong>’sSD card slot. Using <strong>RS</strong> <strong>Media</strong> Editing Suite, add the data into the <strong>RS</strong><strong>Media</strong> Editing Suite library, and then upload it to <strong>RS</strong> <strong>Media</strong>’s onboardmemory.To remove the SD card from the SD card slot:1. Make sure <strong>RS</strong> <strong>Media</strong> is turned off.2. Push the SD card inwards. <strong>The</strong> SD card will eject fromthe SD card slot.3. Remove the SD card.USB connectionYou can transfer files from a PC to an SD memory card inserted in <strong>RS</strong><strong>Media</strong> using the USB cable provided. Note that files that can be playedare limited to those file formats supported by the system and the EditingSuite software must be used for data transfer.Connecting <strong>RS</strong> <strong>Media</strong> to a PC using the USBcableYou can connect a USB cable to <strong>RS</strong> <strong>Media</strong> and a PC withoutturning off the power.1. Connect the USB cable to <strong>RS</strong> <strong>Media</strong> and your PC as shown.2. Select ‘USB Mode’ from the Optionsmenu on <strong>RS</strong> <strong>Media</strong>, and press theSelect button.2. Insert the SD card into the slot as illustrated. Push the card into theslot until it is seated properly (the card will click).3. Reboot <strong>RS</strong> <strong>Media</strong> after inserting the SD card.54NOTE: Using an adapter when <strong>RS</strong> <strong>Media</strong> is transferring data in USBmode is recommended as low battery levels could result in the lossor corruption of data.
Playing audio from an external audiosource / Caring for your <strong>RS</strong> <strong>Media</strong>Playing audio from an externalaudio sourceUsing Line In to play AudioYou can play audio from an external audio source through <strong>RS</strong> <strong>Media</strong>, justlike a speaker system. You must connect an audio cable (not included)from your audio source to the line-in connector, located in his USBcompartment. To do so:1. Connect one end of an audio cable to the line-out or headphoneconnector of your external audio source.2. Connect the opposite end of the audio cable (Ø3.5 stereo jack) to theline-in connector, located in the USB compartment.3. Enable the Line In option in <strong>Media</strong> Mode, by navigating to theOptions folder; select Line In, and then select the ON option.4. Play your external audio from your external audio source. <strong>The</strong> audiowill be played through <strong>RS</strong> <strong>Media</strong>’s speakers.NOTE: When you are notusing the external audiooption, disable the Line Inoption by setting the optionto OFF (see p.37 for details).If the Line In option isenabled when you are notusing an external source,<strong>RS</strong> <strong>Media</strong> will not play anyother audio.Caring for your <strong>RS</strong> <strong>Media</strong>This section outlines various precautions, instructions and warnings oncaring for your <strong>RS</strong> <strong>Media</strong>.PrecautionsBefore using this product, read this manual and retain it for futurereference.SafetyThis product has been designed with the highest concern for safety.However, note that any electrical device if used improperly has thepotential of causing fire, electrical shock or personal injury. To help ensureaccident-free operation, you should follow the guidelines outlined below:Observe all warnings, precautions, and instructions.If the device functions in an abnormal manner, produces unusual soundsor odors, or if it becomes hot to the touch, stop use, unplug the AC/DCadapter (if used) from the electrical outlet, and disconnect any othercables to the object immediately.Use and handling• Use in a well-lit area and keep the screen a safe distance fromyour face.• Do not use <strong>RS</strong> <strong>Media</strong> near water.• Do not immerse <strong>RS</strong> <strong>Media</strong> or any parts of him in water.• Do not expose <strong>RS</strong> <strong>Media</strong> to high temperatures, high humidity, ordirect sunlight.• Do not expose <strong>RS</strong> <strong>Media</strong> to dust, smoke or steam.• Do not allow liquid or small particles to get into <strong>RS</strong> <strong>Media</strong>.• Do not place <strong>RS</strong> <strong>Media</strong> on surfaces that are tilted, unstable orsubject to vibrations.• Do not throw or drop <strong>RS</strong> <strong>Media</strong>, or subject <strong>RS</strong> <strong>Media</strong> to strongphysical shock.• Avoid carrying <strong>RS</strong> <strong>Media</strong> by his head. <strong>The</strong> head contains manysensors and should be handled with care.• Do not place <strong>RS</strong> <strong>Media</strong> close to items with a magnetic strip, such asa credit card.• Do not give <strong>RS</strong> <strong>Media</strong> anything valuable or fragile to hold. He mightthrow or drop things unexpectedly.• <strong>RS</strong> <strong>Media</strong> will walk best on smooth surface. If he is having difficultywalking on a surface, try changing his gait (the way he walks) forbetter performance. <strong>RS</strong> <strong>Media</strong> responds best to remote controllercommands when you are located in front of him. If the controller isbehind him, he will not detect commands as well.• <strong>RS</strong> <strong>Media</strong> will set himself in the correct body position for walking.If you try to move his arms with the controller, he will stop walking.If you manually move his arms or waist while he is walking, he willcontinue to walk but might lose his balance and fall over.• When you first activate him (turn him on), <strong>RS</strong> <strong>Media</strong> will be sensitiveto sound, vision and touch input; this is the default setting. Thisbecomes his default setting every time he is activated after a fullpower down.• <strong>RS</strong> <strong>Media</strong>’s infrared vision system uses reflection. This means thathe can see highly reflective surfaces such as white walls or mirrorsmore easily and at greater distances than he can see matte or blacksurfaces.• Do not insert items into <strong>RS</strong> <strong>Media</strong>’s SD memory card slot that arenot SD memory cards.55
caring for your rs media /GlossaryLCD screenRed, blue or green spots (bright spots) or black spots (dark spots) mayappear in certain locations on the LCD screen. <strong>The</strong> appearance of suchspots is a normal occurrence associated with LCD screens and is not asign of a malfunction. LCD screens are made using highly precisetechnology. However, a very small number of dark pixels or continuouslylit pixels exist on each screen. Also, a distorted image may remain on thescreen for several seconds after the system has been turned off.Direct exposure to sunlight may damage the system’s LCD screen. Becareful when using the system outdoors or near a window. When usingthe system in a cold environment, you may notice shadows on thegraphics or the screen may appear darker than usual. This is not amalfunction, and the screen will return to normal when the temperaturegoes up.Do not leave still images displayed on the screen for an extended periodof time. This may cause a faint image to be left permanently on thescreen.CleaningFor safety reasons, unplug the power cord (if using - not included) fromthe electrical outlet and remove the batteries from <strong>RS</strong> <strong>Media</strong> beforecleaning.Cleaning the exterior surfaceWipe gently with a damp cloth, and then dry the surface. Do not usesolvents or other chemicals to clean the exterior of <strong>RS</strong> <strong>Media</strong>.Cleaning the LCD screenWipe gently with a soft dry cloth.GlossaryAll <strong>RS</strong> <strong>Media</strong> documentation uses certain common terminology todescribe components of the <strong>RS</strong> <strong>Media</strong> Editing Suite. <strong>The</strong> following are afew terms you might encounter throughout this manual and other <strong>RS</strong><strong>Media</strong> documentation:• BodyCon. A term used to describe any motion or sequence ofmotions associated with or without a specific audio file.In the <strong>RS</strong> <strong>Media</strong> Editing Suite, you can create <strong>User</strong> BodyCons orcustom-made BodyCons that you can upload to a Personality or toyour library of BodyCons.• Gait. A term to describe a particular way of moving, especially on theground, such as walking or running.• Macro. A type of short computer program that takes a simple inputcommand and outputs a new set of commands or instructions. <strong>RS</strong><strong>Media</strong> will play the macro back as if he was an actor reading a script.• In the <strong>RS</strong> <strong>Media</strong> Editing Suite, you can create macros to create yourown sequence of <strong>RS</strong> <strong>Media</strong> movements which you can then save toyour My Macros library or to a BodyCon slot in a Personality, and thenupload the Personality to your <strong>RS</strong> <strong>Media</strong>.Some macros contain conditions, which can allow more than onepossible outcome based upon feedback from the user or theenvironment.• Subroutine. In programming, a subroutine is a portion of a largerroutine that performs a specific task.56
Warranty information / FAQs / supportYour <strong>RS</strong> <strong>Media</strong> is warranted against defects for a period of 180 days.Wowwee Ltd. warrants to the original consumer purchasers that <strong>RS</strong><strong>Media</strong> (“Product”) will be free from defects in material and/orworkmanship under normal use for a period of180 days from the date ofpurchase. This Warranty is in lieu of all other express or impliedwarranties which might arise with respect to this Product, including thewarranties of merchantability or fitness for a particular purpose. INADDITION, INCIDENTAL AND CONSEQUENTIAL DAMAGES ARE HEREBYEXCLUDED BOTH FOR PROPERTY AND TO THE EXTENT PERMITTED BYLAW, FOR PE<strong>RS</strong>ONAL INJURY DAMAGE. Some states do not allow theexclusion of limitation of incidental and consequential damages.Should you experience any difficulty with your Product, please return itto the place of purchase, along with an original proof of purchase, andeither the original box or the UPC Code label from the box. You willreceive a replacement for the Product, or be issued a refund for thepurchase of the Product in the event a replacement is not available at theplace of purchase. Note that this warranty is automatically void for anyhardware modifications (including tampering or disassembly), accidentaldamage, damage outside what is considered normal use, or abuse.This warranty does not cover any hardware, software or other add-oncomponents installed by the end-user.Valid only in U.S.A.FAQsIf you have questions or issues with your <strong>RS</strong> <strong>Media</strong>, take some time to gothrough the following list of frequently asked questions.Q. My <strong>RS</strong> <strong>Media</strong> sometimes does not respond to controls.A. Low batteryIf <strong>RS</strong> <strong>Media</strong> is not responding well to controller commands, youmight need to replace the controller batteries (3 X “AA” size).If you do not notice any improvement in response after changing thebatteries in the controller, replace all the batteries in <strong>RS</strong> <strong>Media</strong>.Q. When I plug my headphones into to <strong>RS</strong> <strong>Media</strong>, they do not seemto work.A. <strong>RS</strong> <strong>Media</strong> does not have an output jack<strong>RS</strong> <strong>Media</strong> only supports a stereo input jack and not a headphone jack.This means that you can plug your <strong>RS</strong> <strong>Media</strong> to a computer or anMP3 player and use him as a stereo output (like speakers).To do this, switch to <strong>Media</strong> Mode and select Options. Select theLine-in option and set it to ON. Any audio media you play from thesource will now be output through <strong>RS</strong> <strong>Media</strong>.Q. I cannot install the CD that came with my robot.A. Does not meet system requirementsYour PC must meet the minimum system requirements in order toinstall the CD. <strong>The</strong>se minimum requirements are listed in the <strong>User</strong><strong>Manual</strong> provided with your <strong>RS</strong> <strong>Media</strong>.Q. My <strong>RS</strong> <strong>Media</strong> won’t take my picture and says “Flash memory full”.A. SD Card full, might need to delete/transfer some data<strong>RS</strong> <strong>Media</strong> will say “Flash memory full” when the SD Card inserted hasno more memory capacity left. You must delete or transfer somedata such as audio, images or video off the SD Card. You can deletefiles while in <strong>Media</strong> Mode, or if you want to save your data, transferthe data to your PC using a USB connection. Furthermore, you canalso power down your <strong>RS</strong> <strong>Media</strong>, remove the full SD Card and replaceit with an empty one. Recommended size of SD Card is 1GByte.SupportFor an updated list of troubleshooting tips or frequently asked questions,visit the <strong>RS</strong> <strong>Media</strong> support site at www.wowweesupport.com.IR sensor on the controller must point directly to IR sensor on<strong>RS</strong> <strong>Media</strong>’s head<strong>RS</strong> <strong>Media</strong>’s Infrared vision does not function while he is walkingbackwards or turning, and may result in him bumping into things. Tomake sure he responds to commands, point the controller towardsthe front of his head, where the sensor is located.57
Index—B—batteries, 8installing, 8remote controller, 9blinking, 45BodyCondefinition, 56BodyCon editor, 53—C—camera, 43-45camera settingswhite balance, 45color recognition, 44—E—external audio source, 55—F—features, 10flinch, 43foot sensors, 42frequently asked questions, 57—G—gaitdefinition, 56gaitswalking gaits, 12games, 34-36controls, 34glossary, 56grip sensors, 42Guard mode, 45,50—H—hand controls, 15handling <strong>RS</strong> <strong>Media</strong>, 55help file, 52—I—infrared vision, 43close-range, 43long-range, 43—L—LCD screen, 11, 56line-in, 55—M—macrodefinition, 56Macro editor, 52media formats, 26<strong>Media</strong> modeAudio menu, 27Games menu, 34Options menu, 37Personality menu, 33Photo menu, 29Video menu, 31<strong>Media</strong> Organizer, 53memory expansion, 54—O—objectscolor tracking, 44disappearing, 44tracking, 44obstacles, 44—P—package contents, 3personalities, 52Personality editor, 52photos, 29browse, 29delete, 29take, 29options, 29slideshow, 29timer, 29power down, 11powering <strong>RS</strong> <strong>Media</strong>, 11precautions, 55programmingusing <strong>RS</strong> <strong>Media</strong> Editing Suite, 51programming modes, 47Main Program mode, 49Puppet mode, 48Sound, 49Vision, 49—R—remote controlleroverview, 14robot interaction, 46Robopet, 47Roboraptor, 46Robosapien V2, 46Roboreptile, 46<strong>RS</strong> <strong>Media</strong> Editing Suite, 47, 51-53—S—safety, 55SD cardinserting, 54removing, 54using, 54sensors, 11foot, 42grip, 42tilt, 42Sleep mode, 11software, 51installing, 51running, 51subroutinedefinition, 56subroutines, 49guard, 50positional, 50sound, 49vision, 49support, 57—T—tilt sensors, 42trackingtimeout, 44—V—videos, 31browse, 31delete, 31take, 31visiontoggle on/off, 43—W—warranty, 57white balance, 44, 4558
CAUTIONChanges or modifications not expressly approved by the party responsible for compliance could void the user’sauthority to operate the equipment.NOTEThis equipment has been tested and found to comply with the limits for a class B digital device, pursuant to part 15 ofthe FCC rules. <strong>The</strong>se limits are designed to provide reasonable protection against harmful interference in a residentialinstallation. This equipment generates, uses and can radiate radio frequency energy and, if not installed and used inaccordance with the instructions, may cause harmful interference to radio communications.However, there is no guarantee that interference will not occur in a particular Installation. If this equipment does causeharmful interference to radio or television reception, which can be determined by turning the equipment off and on, theuser is encouraged to try to correct the interference by one or more of the following measures:- Reorient or relocate the receiving antenna- Increase the separation between the equipment and receiver- Connect the equipment into an outlet on a circuit different from that to which the receiver is connected- Consult the dealer or experienced radio/TV technician for helpThis device complies with Part 15 of the FCC Rules. Operation is subject to the following two conditions : (1) this devicemay not cause harmful interference, and (2) this device must accept any interference received, including interferencethat may cause undesired operation.WARNING! This equipment may experience difficulty and/or memory loss when subjected to any electrostaticdischarge, radio frequency interference, or sudden power surge/interruption . <strong>The</strong> user is encouraged to reset theequipment should any of these occur.Manufactured and distributed by © 2006 Wowwee Ltd. All Rights Reserved.Wowwee Limited Asia Office - Unit 301A-C, 92 Granville Rd, T.S.T. East, Hong KongWowwee Group North America Office - 6600 Decarie, Suite 200, Montreal, QC H3X 2K4, CanadaConsumer Hotline: 1-800-310-3033 Email: support@wowwee.comwww.wowwee.comwww.rsmediaonline.com8061US03FLA


