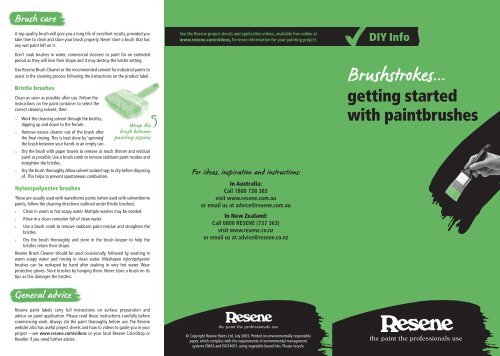
Getting started with brushes - Resene Paints
Getting started with brushes - Resene Paints
Getting started with brushes - Resene Paints

Create successful ePaper yourself
Turn your PDF publications into a flip-book with our unique Google optimized e-Paper software.
It takes time to become good, accurate and fast <strong>with</strong>a paintbrush. Have patience <strong>with</strong> yourself if you’rejust starting out. Work on your quality first, then onspeed. This way you will speed up your quality workrather than start and speed up sloppy work.Brushes vary greatly in quality and are available in two types – traditional hoghair bristled and synthetic bristled <strong>brushes</strong>. <strong>Resene</strong> has selected medium to highquality <strong>brushes</strong> for our core paintbrush range. Our ultra premium brush – the PALLegend – is a synthetic brush that is available in an oval shape for general use(ovals hold good quantities of paint so you don’t need to dip the brush as oftenand have a brush tip configuration that helps when cutting-in). The Legend is alsoavailable in three square ended or flat <strong>brushes</strong>, which have been developed forlarge weatherboards and trough sectional roofing and three cutting-in <strong>brushes</strong>,which have an angled brush tip to make cutting-in corners and edges easier.They are ideal for window joinery.Our premium offer consists of the PAL Basil, which is a synthetic brush, the PALBasin Hog and the Haydn Premier Oval, which are traditional hog bristled <strong>brushes</strong>.In the mid range we have the versatile PAL MacGyver brush.The traditional hog bristled <strong>brushes</strong> are ideal and recommended for solventborne(oil-based) enamels, varnishes and stains, while the synthetic <strong>brushes</strong> are able tobe used <strong>with</strong> both waterborne and solventborne paints. Synthetic <strong>brushes</strong> areespecially recommended for waterborne enamels – <strong>Resene</strong> Lustacryl, <strong>Resene</strong>Enamacryl and <strong>Resene</strong> SpaceCote.FIVE points...Critical to consider when selecting a paintbrush1. Your strength and experience. Using a large (88-100mm) brush or aheavy PAL Legend flat brush for extended periods will be tiring and put a lotof strain on your brush arm, so you may wish to select a smaller brush (63-75mm). More experienced painters will select larger <strong>brushes</strong> for cutting-in.2. What sort of brush do I need? There are three types – Oval <strong>brushes</strong>,which are good general purpose <strong>brushes</strong> for cutting-in, flat <strong>brushes</strong>, whichhold more paint but are less accurate and specialist cutting-in <strong>brushes</strong>, whichare ideal for cutting-in and fine finishing but do not hold as much paint.3. The project. If this is the start of a major repaint or refurbishment projectit makes sense to invest in top quality <strong>brushes</strong> that will last well. If this isjust a one-off project you may decide to choose a cheaper brush that willnot last as long.4. The surface you are planning to paint, and5. The type of paint being used.Refer to the information on the <strong>Resene</strong> brush stand or <strong>Resene</strong> ColorShop orReseller staff to determine the right paintbrush for your project.It is generally best to use a variety of brush sizes – you will get better results andsave time and effort. For example:› Use a 75-100mm oval brush – the PAL Legend or PAL Basil or the PAL Legend63-75mm flat brush for large exterior surfaces, such as weatherboards,roofing and for staining plywood.››Use a brush <strong>with</strong> a tapered edge for cutting-in corners and window joinery.Use a 25-63mm brush for trim and joinery.Applying paint by brushWhile the paintbrush is still clean, work it backand forth across your open fingers to remove anydust, dirt, loose bristles or unwanted particles.Lightly moisten a natural bristle brush <strong>with</strong> waterbefore applying waterborne paints to help youapply the paint more evenly.Hold your paintbrush like you would a pencil,near the base of the bristles, for a comfortable,controlled grip. Many painters prefer to extendthe grip over the top of the ferrule. Dip one-thirdto one-half the length of the bristles into the paintcontainer, then tap (not wipe!) the paintbrushagainst the side of the paint container.If you are working <strong>with</strong> afull paint container, pourpart of the can of paintinto a <strong>Resene</strong> paint pot andwork from that. Seal theoriginal container for uselater. You will find applyingthe paint and tapping thepaintbrush much easierusing a <strong>Resene</strong> paint pot.Pour part of paint into a <strong>Resene</strong>paint pot and work from that.Paint <strong>with</strong> the tips of yourpaintbrush, not the sides.Hold the paintbrush atabout a 45˚ angle to thesurface and work mostly<strong>with</strong> your wrist rather than your arms and shoulders. Apply the paint in longlight vertical strokes, lifting the brush up gradually at the end of each stroke.When stains or polyurethaning timber, always paint in the direction of thewood grain. Ideally stain one board at a time and work in the same direction.Paint exterior surfaces from the top toward the ground.To avoid lap marks, brush towards the unpainted area and then back into thejust-painted surface. This technique (brushing from ‘wet to dry’) will producea smooth uniform appearance.Avoid excessive re-brushing when using waterborne paints, especially semiglossor gloss finishes. A few strokes per waterborne paint brushload willachieve a thick paint film <strong>with</strong> good hiding.If your brushing strokes become stiff, sticky or non-flowing, you may need tothin the paint a little. Use the thinner recommended on your paint containersor <strong>Resene</strong> Hot Weather Additive for most waterborne paints.Wrap the bristles and ferrule in a piece of plastic cling wrap while you takebreaks and cover the paint container. This will keep the paintbrush moist andready to use after you have rested.Cutting-in‘Cutting-in’ refers to the application of paint to areas where one area of paintmeets another, such as where the walls meet ceilings or floors. As rollerscannot reach into these areas, <strong>brushes</strong> (generally 38-63mm) must be used.The angled cutting-in <strong>brushes</strong>, as their name suggests, are designed to makecutting-in easier and achieve a better finish. The most confident you are atpainting the longer the brush you could select for cutting-in.To cut in, paint the edge of the area you are painting <strong>with</strong> a brush, then rollthe large surface area taking the roller as close to the edge as possible tominimise the difference in appearance between the brushed and rolled area.If you are new to DIY, it is a good idea to mask off the edge of the adjacentarea <strong>with</strong> low tack masking tape to avoid painting the adjacent area or youcan hold a straight edge where the two areas meet and cut in to the edgeof the straight edge. Make sure you remove the masking tape before thepaint dries.Mastering skirting boardsApply low tack masking tape to the edge of the skirting that meets theflooring to protect carpet/flooring from undesirable paint drips. If needed,apply low tack masking tape above the skirting board to avoid overpaintingonto the wall area. Alternatively a stiff piece of card may be used to protectthe flooring.Using a 25mm-50mm brush, cut in approximately 30cm along the top edgeof the skirting board, then cut in the bottom edge by the same distance. Paintthe middle then lay-off left to right. Remove the masking tape before the paintdries. The middle portion of the skirting board may be painted <strong>with</strong> a smallroller if preferred. If right handed it is generally best to work from right to left,if left handed, work in the opposite direction.Skirting boards can be painted using the same colour and paint as the wall,especially if <strong>Resene</strong> SpaceCote is used. However this look doesn’t always suitthe aesthetics of the house and frame the wall colour well, particularly if largerskirting boards are used. Ideally the skirting boards should be completed inthe same colour and paint as the window and door frames. We recommend<strong>Resene</strong> Lustacryl (semi-gloss waterborne enamel) or <strong>Resene</strong> Enamacryl (glosswaterborne enamel) are used or <strong>Resene</strong> Super Gloss or <strong>Resene</strong> Lusta-Glo(semi-gloss) solventborne enamels.Creating feature walls/areasMask off the adjacent walls/areas <strong>with</strong> low tack masking tape. Cut in <strong>with</strong>a brush then apply the product by roller, taking it as close to the edge aspossible to minimise the difference between the brushed edge and the bodyof the coating that has been rolled. Remove the masking tape before thefeature wall paint is dry.View the <strong>Resene</strong> how to videos and project sheets at www.resene.com/videos.