

ASSEMBLY MANUAL B-25 Mitchell ARF - RC DEPOT
ASSEMBLY MANUAL B-25 Mitchell ARF - RC DEPOT
ASSEMBLY MANUAL B-25 Mitchell ARF - RC DEPOT

You also want an ePaper? Increase the reach of your titles
YUMPU automatically turns print PDFs into web optimized ePapers that Google loves.
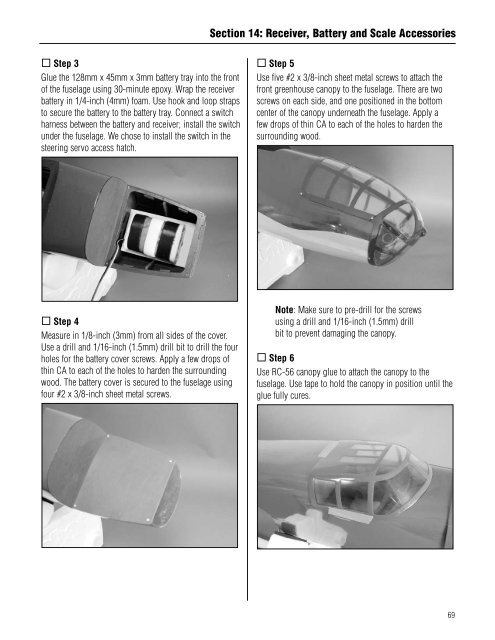
Section 14: Receiver, Battery and Scale Accessories Step 3Glue the 128mm x 45mm x 3mm battery tray into the frontof the fuselage using 30-minute epoxy. Wrap the receiverbattery in 1/4-inch (4mm) foam. Use hook and loop strapsto secure the battery to the battery tray. Connect a switchharness between the battery and receiver; install the switchunder the fuselage. We chose to install the switch in thesteering servo access hatch. Step 5Use five #2 x 3/8-inch sheet metal screws to attach thefront greenhouse canopy to the fuselage. There are twoscrews on each side, and one positioned in the bottomcenter of the canopy underneath the fuselage. Apply afew drops of thin CA to each of the holes to harden thesurrounding wood. Step 4Measure in 1/8-inch (3mm) from all sides of the cover.Use a drill and 1/16-inch (1.5mm) drill bit to drill the fourholes for the battery cover screws. Apply a few drops ofthin CA to each of the holes to harden the surroundingwood. The battery cover is secured to the fuselage usingfour #2 x 3/8-inch sheet metal screws.Note: Make sure to pre-drill for the screwsusing a drill and 1/16-inch (1.5mm) drillbit to prevent damaging the canopy. Step 6Use <strong>RC</strong>-56 canopy glue to attach the canopy to thefuselage. Use tape to hold the canopy in position until theglue fully cures.69


