
You also want an ePaper? Increase the reach of your titles
YUMPU automatically turns print PDFs into web optimized ePapers that Google loves.
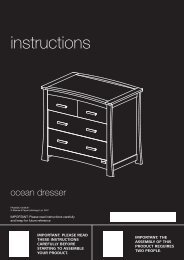
instructionsmodensa wardrobeIMPORTANT: Please read instructions carefullyand keep for future reference
MODENSA WARDROBETHESE INSTRUCTIONS ARE IMPORTANT. PLEASE READ THEM CAREFULLY AND RETAIN FOR FUTURE REFERENCE.Before assembling your wardrobe...Unpack all wooden components / fittings and identify them against the fittings and components lists.Do not discard any packaging until you are certain you have all the correct panels and fittingsIf any items are damaged or missing, please contact your retailer or <strong>Mamas</strong> & <strong>Papas</strong> on 01484 438222.Allow plenty of time and space when beginning the construction of your wardrobe. The constructions ofthis piece of furniture requires two people.WOODEN COMPONENTS111216131414121593210867145Item Name Part no. Qty1 Left drawer side panel 3568---00051 12 Right drawer side panel 3568---00052 13 Drawer back 3568---00053 14 Drawer base 3568---00054 15 Drawer front 3568---00055 16 Base 3568---00006 17 Feet 3523---00008 48 Left side panel 3568---00008 1Item Name Part no. Qty9 Right side panel 3568---00009 110 Fixed shelf 3568---00010 111 Top 3568---00011 112 Back panel 3568---00012 213 H-section 3568---00013 114 Doors 3568---00014 215 Adjustable shelf 3568---00015 116 Door strip 3568---00016 1- 2 -
TOOLSCross-head ScrewdriversTo fit: C, D, G, J, N & R.HammerTo be used for: A & M.Flat-head ScrewdriverTo fit: B, E & P.GLUING THE DOWELSWhen fitting the dowelsplace a small amount ofglue (U) in the holesprior to pushing thedowels into them.Any excess glue shouldbe wiped awayimmediately using adamp cloth.U2STEP 1Assembling thedrawers:Before fitting the drawercams ensure they are thecorrect ones, the drawercams are shorter thanthe carcass cams.Slot four drawer cams(B) into the large holesin the left (1) and right(2) drawer sides.Fit four dowels (A) intothe top and bottomholes in the ends of eachof the two sides.You may need to gentlytap the dowels fully inusing a small hammer.BA1- 4 -
32STEP 2Align the holes in thebacks of the side panels(1/2) align with theholes in the ends of theback panel (3).Check that the groovesin the panels are allaligned, see diagram.Fasten the panelstogether using thedrawer screws (D) and across-head screwdriver.1DSTEP 3Slot the base (4) intothe grooves on the twosides and push into thegroove in the back panel.Check to ensure the baseis fully slotted into thegroove in the back panel.4- 5 -
CSTEP 4Screw four cam studs(C) into the small holeson the back of thedrawer front (5) using across-head screwdriver,see diagram.Screw the two handles(F) to the drawer frontusing the four handlescrews (E) and a crossheadscrewdriver.5EFSTEP 5Slot the drawer frontonto the two drawersides, ensuring the baseslots into the groove inthe drawer front.Fasten the cams in thedrawer sides by turningthem clockwise with aflat bladed screwdriveruntil they are tight.- 6 -
STEP 6Attach the drawerrunners (H) to the sidesof the drawers using sixassembly screws (G).Ensure the runner ispushed hard against thedrawer front beforefixing in position andthat the wheel end ofthe runner is facing theback of the drawer, seediagram.HG7STEP 7Assembling thewardrobe:Screw the four feet (7)into the metal inserts inthe underside of thebase (6).6- 7 -
CSTEP 8Turn the base over andscrew four cam studs (C)into the smaller holes inthe top of the base usinga cross-head screwdriver,see diagram.P 10 ASTEP 9Slot four carcass cams(P) into the large holesin the underside of thefixed shelf (10).Ensure the arrow on thehead of the cam is facingthe connecting hole, seediagram.Slot six dowels (A) intothe holes in the side ofthe panel.You may need to use asmall hammer to fullyinsert the dowels.Turn the shelf over andattach one of the doorstops (O) to the pilotholes in the front edgeof the shelf using two ofthe door stop screws(N).NO- 8 -
AAPAPSTEP 10Slot six dowels (A) intothe holes in the top edgeof one of the side (8/9)panels. You may need touse a small hammer toknock the dowels fullyinto there holes.Slot four carcass cams(P) in the the large holesin the top and bottom ofthe side panel. Ensurethe arrow on the camshead points to theconnecting hole.Screw two cam studs (C)into the holes shown inthe diagram using across-head screwdriver.Attach three hinge plates(K) to the side panel inthe positions shown inthe diagram.Once you havecompleted one sidepanel, follow the sameprocedure on theremaining side panel.CKKKPCAPAA- 9 -
98STEP 11Attach the fixed shelf(10) to the two sidepanels (8/9) by aligningthe cam studs anddowels with the relevanthole.Push the side panelsonto the fixed shelf andfasten the cams byrotating them clockwiseuntil tight, using a flatbladedscrewdriver.1011STEP 12Screw four cam studs(C) into the smallerholes in the underside ofthe top panel (11), seediagram.Attach a door stop (O)to the front edge of thetop panel using twodoor stop screws (N)and the pre-drilled holes,see diagram.CNO- 10 -
11STEP 13Attach the top (11) tothe sides by aligning thecam studs and thedowels with theirrelevant holes andpushing together.Ensure the groove in theback of the top isaligned with the groovesin the back legs of theside panels.STEP 14Attach the base (6) tothe sides by aligning thecam studs and thedowels with thererelevant holes andpushing together.Ensure the groove in theback of the base isaligned with the groovesin the back legs of theside panels.6- 11 -
STEP 15Attach the carcassrunners (I) to the sidesof the wardrobe usingthe six carcass runnerscrews (J), see diagramfor correct screw holes inrunner.IJSTEP 16Before attaching theback panels you mustcheck that the wardrobeis square.To do this, measure fromthe bottom corner ofone side panel to the topcorner of the opposite,see diagram.Now measure theopposite diagonal, if thethe measurements areunequal then thewardrobe is not square.To square the wardrobe,gently push the topcorner of the longestdiagonal towards theshortest top corner andre-measure, continueuntil equal (a 2-3mmdifference is acceptable).- 12 -
Turn the wardrobe overso that the grooves inthe back legs and thetop and bottom panelsface upwards.Slot one of the backpanels (12) into thegroove in one of thelegs.Slot the H-section (13)onto the edge of theback panel.Slot the edge of theremaining back panelinto the other side ofthe H-section.Slot the back panels intothe grooves in the backsof the side panels andtop and bottom panels.121312STEP 17STEP 18Fix the back panels intoposition by hammeringthe nails (M) through theedges of the back panelsinto the recess in thesides and the top andbottom panels.Important: Do notposition the nails morethan 5mm from the edgeof the panels, as thiscould damage thewardrobes frame.Stand the unit on its feetagain and move it to itsfinal position, this willrequire two people.M- 13 -
1STEP 19The adjustable shelf canbe fitted in one of fourpositions.Choose the best positionfor your purpose andscrew the four shelfscrews (R) into theappropriate holes in bothof the shelf side panels.234RQSTEP 20Slot the four shelfinserts (Q) into the holesin the sides of the shelf,see diagram.Place the adjustableshelf (15) inside thewardrobe above theshelf studs.Push the shelf downuntil the studs locate inthe plastic slots in thesides of the shelf.15- 14 -
12The hanger rail can befitted in one of twopositions.STEP 21Choose the best positionfor you purpose andattach the two hangercups (S) to the sidepanels using fourassembly screws (G), seediagram.GSTSTEP 22Slot the hanger rail (T)into the wardrobe andposition over the hangercups. Pull the hanger raildown until it slots intothe two cups.- 15 -
STEP 23Attach the hinge arms(L) to the doors (14) byslotting the plates onthe arms into the largeholes in the inside faceof the door, seediagram.Fix the hinge arms inposition using twelveassembly screws (G).GL1416Attach the door strip(16) to the edge of thedoor with the pilot holesdrilled in it using sixdoor stop screws (N).NLoosen screw ‘A’ on thehinge plate and slide the‘U’ in the end of thehinge arm under thehead of the screw ‘A’ onthe hinge plate.STEP 24It is easiest to fit the tophinge first then thebottom.Note: Slide all of thehinge arms onto thehinge plates beforetightening screw ‘A’.Now gently close thedoors.A- 16 -
STEP 25Adjusting the angle ofthe door:Turn screw ‘B’ eitherclockwise or anticlockwiseuntil the doorlooks vertical.You may need to loosenscrew ‘A’ before turningscrew ‘B’.Always ensure screw ‘A’is fully tightened beforeusing the dresser.BASTEP 26Adjusting the height ofthe door:Loosen screws ‘C’ onboth of the hinge plates.Lift or lower the doorinto the desired positionand retighten all of thescrews.CC- 17 -
FSTEP 27Attach the handles (F) tothe doors using fourhandle screws (E) and across-head screwdriver.ESTEP 28Slot all of the drawersonto the runners in thecarcass.The wardrobe is nowready for use.- 18 -
STEP 29The wall attachmentstrap is used to securethe wardrobe to thewall to prevent it fromfalling over.Working at the back ofthe wardrobe, fix thewall attachment strap(V) to the wardrobeusing the screw and thewasher supplied. Threadthe wall attachmentstrap screw (W) throughthe wall attachmentstrap washer (X) andthen through the hole inthe end of the wallattachment strap andinto the wardrobe top(11). Tighten using across-head screwdriver.Do not fix the wallattachment strap toany other component.Secure the other end ofthe wall attachmentstrap to the wall.FITTING THE WALL ATTACHMENT STRAP• THE WALL ATTACHMENT STRAP IS ONLY INTENDED TO BE USED WITH THEMAMAS & PAPAS PRODUCT THAT IT IS SUPPLIED WITH.• Never attempt to modify or change the wall attachment strap in any way. Never useany other fittings for attaching the strap to your furniture than those supplied.• Never use the screw provided to attach the wall attachment strap to the wall.NO WALL ATTACHMENT FITTINGS ARE SUPPLIED. This is because the type offittings required to attach the wall attachment strap to the chosen wall is determinedby the walls composition.If you are in any doubt about the correct type of fittings to use when attachingyour wall attachment strap, consult a professional before attempting to fix it tothe wall.• The wall attachment strap must not be used to replace any other fitting supplied withyour piece of furniture.• Furniture falling over is generally due to the surface it is placed on. A warped floor orwall-to-wall carpeting will enable the furniture to rock, so greatly increasing thepotential for the furniture to fall. If the furniture is placed on a flat level wood or tiledfloor the risk is reduced, but we still recommend the wall strap is fitted.- 19 -
INSTRUCTIONS FOR SAFE USE & MAINTENANCE1. WARNING: Never leave your child unattended. The safety of your child is your responsibility.2. Before use, ensure the wardrobe is on a stable, level surface.3. Do not allow children to climb on the wardrobe.4. Never use the wardrobe if any parts are broken or missing.5. Wood is a natural product and as such it can be subject to occasional variations in colour. This isnot a defect and will not detract from the strength or performance of the dresser.6. Never pivot or drag the wardrobe on its feet, the wardrobe must always be lifted by at least twopeople when moved.7. Do not place the wardrobe in the near vicinity of open fires or other sources of strong heat, such aselectric or gas fires.8. Always leave the wardrobe clean and dry. Wipe away any spillage straight away. Thewardrobe can be cleaned with a damp cloth or silicon wax polish. Never use abrasive, bleach orstrong detergents.9. Check regularly that all fittings and screws are correctly tightened and are not damaged.Due to constant updating and improvements, some components may occasionally differ slightly from the diagrams shown inthese instructions. Any spare components should be thrown away after you have fully constructed your product. We reservethe right to change the specifications of any piece of furniture without prior notice.AFTER SALES SERVICE: If when you receive your <strong>Mamas</strong> & <strong>Papas</strong> product you needassistance, spare parts or if you are unhappy with any aspect of the goods, pleasecontact our Customer Care Helpline on: 01484 438222, or e-mail us oncustomer.care@mamasandpapas.co.uk where one of our trained advisors will be ableto help you.You can also visit our website at www.mamasandpapas.co.uk for the latest product information.I0151: <strong>V3</strong>/02/04ALL OUR PRODUCTS ARE MADE FROM THE FINEST QUALITY MATERIALSAND ARE MANUFACTURED UNDER THE STRICTEST QUALITY CONTROLSWe guarantee all our products or part thereof, for a period of six months from the date of delivery to the consumeragainst faulty manufacture. This guarantee is not effective against damage caused as a resultof incorrect usage of the product or accidental damage. This in no way affects your statutory rights.GUARANTEETo validate this guarantee, please fill in the coupon and return to:<strong>Mamas</strong> & <strong>Papas</strong> Ltd, Colne Bridge Road, Huddersfield, West Yorkshire. HD5 0RH.Or alternatively, call our Guarantee Registration Line on 01484 438225 with your details, or visit our website on: www.mamasandpapas.co.uk.NameAddressPostcodeRetailerHome Phone No.Baby’s date of birthItem purchased <strong>Modensa</strong> wardrobe Purchase Date PriceBy validating your guarantee, your information will be entered onto our database. If you do not wish to receive information from other reputable companies, please let us know.- 20 -