
You also want an ePaper? Increase the reach of your titles
YUMPU automatically turns print PDFs into web optimized ePapers that Google loves.
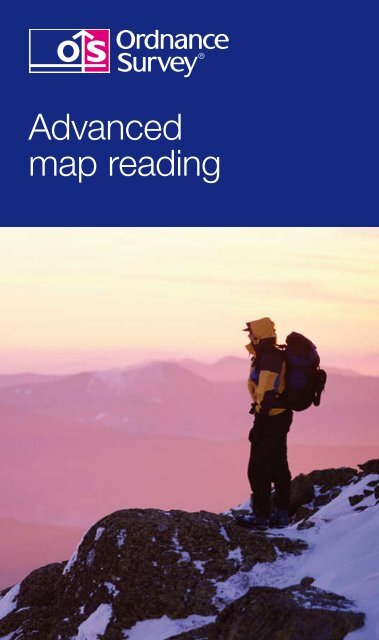
<strong>Advanced</strong><strong>map</strong> <strong>reading</strong>
Introduction to advanced <strong>map</strong> <strong>reading</strong>The aim of this leaflet is to introduce you to some advanced <strong>map</strong> <strong>reading</strong>techniques that can be useful when navigating. These techniques arelargely used when you are off the beaten track in mountainous or difficultterrain, where excellent navigation skills are essential.Before <strong>reading</strong> this leaflet you should have a good understanding of how touse a compass and <strong>map</strong> to navigate. Reading the Ordnance Survey leafletsIntroduction to <strong>map</strong>s and Map <strong>reading</strong> <strong>made</strong> <strong>easy</strong> will give you a goodunderstanding of basic techniques.Techniques to pinpoint your locationThere are several techniques to help pinpoint your location on a <strong>map</strong>.Pinpointing your location is useful to make sure you’re moving in the rightdirection or can help you to relocate if you are lost. These techniques canbe used very effectively once you’ve learned to interpret the features ofa <strong>map</strong>. Some methods will rely on your eyesight while others use yourcompass.
Pinpointing your location 1. Transit linesWhen you know two or more features on a <strong>map</strong> will line up with one anotheralong your journey you can form a transit line. As you walk along a track (whichappears on the <strong>map</strong>) there will only be a single point where two features appearin a direct line with each other.Draw a line on the <strong>map</strong> that crosses through both features and continuesacross the track you’re walking on. When you see the two features on thelandscape line up as you walk along the track you’ll be at the point where theline on your <strong>map</strong> crosses the track (as shown here).Site line through awood boundary anda far-off churchTrackIt’s also possible to create transit lines using linear features such as walls,fences or straight streams, even if the features won’t line up as they did above.By drawing lines on a <strong>map</strong>, extending the existing lines of linear features, youcan create several transit lines that will help you pinpoint your location (asshown below).ForestTrackWall
Pinpointing your location 2. Back bearingsAn alternative to using transit lines, and relying on sight, is to use a compass tolocate your position.If you are on a known track with an identifiable feature in sight (which alsoappears on your <strong>map</strong>) you can take a bearing in the direction of the feature anduse it to calculate your location. Looking at your compass, detect the directionthe feature is from your current location. With the direction of travel arrowpointing at the feature, turn the compass housing so the orienting line sitsunder the red half of the compass needle.This bearing is a magnetic bearing rather than a grid bearing, which your <strong>map</strong>uses. You need to deduct magnetic variation from the compass <strong>reading</strong> toconvert it. The magnetic variation is currently 2º to 6º throughout Great Britain(this amount changes annually, so check your Ordnance Survey <strong>map</strong> to workout the most current value). Revolve the compass housing 4º clockwise (forexample) to deduct magnetic variation, and place the compass on your <strong>map</strong>.Line the orienting lines up with the eastings (the grid lines running north–south)on your <strong>map</strong>. Now carefully slide the compass across the <strong>map</strong> so one of theedges of the base plate crosses the feature you spotted on the landscape onthe <strong>map</strong>. If possible, draw a line along the base plate. Where the line crossesthe track you are on is your approximate current location.Where the linecrosses the trackyou are on is yourapproximate currentlocation.Track
Pinpointing your location 3. ResectionA resection is similar to a back bearing but can be used if you are in the middleof open countryside or on an unknown track.You need to begin by taking the bearings of three features in sight, which arealso on your <strong>map</strong> (if there are no man-<strong>made</strong> features use natural features suchas the crests of hills).The three features should be spread out, ideally with 120º between each (forexample, one in front of you, one if you look over your right shoulder and theother over your left shoulder). It is possible to use two features, but this willseverely affect the accuracy of your pinpointing.Repeat the steps you took to obtain a single back bearing for all three featuresyou can see. You should now have three lines drawn on your <strong>map</strong>, creatinga small triangle where they cross one another. Inside the triangle is yourapproximate current location.Three back bearings crossto create a triangle – this isyour approximate location
Pinpointing your location 4. Aspect of slopeIf you are lost, slopes can often provide vital clues to help pinpoint yourlocation. You will need to know which km square on the <strong>map</strong>’s grid you arein. Stand facing directly down a slope, imagining you are at 90º to the contourlines of the slope. Using your compass, take a <strong>reading</strong> of the direction the hill issloping in and make a note of the <strong>reading</strong>. This <strong>reading</strong> is known as the ‘slopeaspect’.Looking at the km square on your <strong>map</strong>, try to find a slope that faces in thesame direction as the <strong>reading</strong> you’ve just taken. This will help you to establishan approximate location. Taking back bearings will also help. To improveaccuracy, walk to another nearby slope, take another <strong>reading</strong> and then look forthis on your <strong>map</strong>. If you come across a distinguishing feature, such as a spuror valley, measure its slope aspect and look for it on the <strong>map</strong>. This will help younarrow down or even pinpoint your location. Measuring the aspect of slope isparticularly useful if you are lost and find yourself in a bowl or on the end of aspur or ridge.
Feature interpretationIn remote and difficult terrain man-<strong>made</strong> features can often be rare. It’s alsopossible a man-<strong>made</strong> feature, such as a log cabin, can be added or removedfrom the landscape. Since natural features don’t change as quickly or easily astheir man-<strong>made</strong> counterparts, being able to use them to navigate is essential.Interpreting the shape of the land on a <strong>map</strong> using contour lines is an extremelyuseful navigational tool. Looking at the lines and creating a mental picture ofthe landscape will allow you to plan a journey effectively. Orange or browncontour lines on <strong>map</strong>s join points of equal height above sea level together, andare usually measured in 5- or 10-metre height intervals.One of the easiest ways to convert contour lines into a mental picture is toimagine the lines as high tide marks left by the sea. As the water level drops itleaves a line every 5 or 10 metres on the landscape, forming the contour lines.It’s worth bearing in mind that smaller features may be missed by contour lines.If a feature is 9 metres high on the land it may not appear on a <strong>map</strong> with contourlines at 10 metre intervals. This can be surprising when you see the actuallandscape and it contains features you haven’t imagined since they don’t appearon your <strong>map</strong>.When interpreting contour lines you can use symbols and features around themto get a better understanding of how the landscape will appear in reality. Inparticular, you should look for the symbols for cliffs, outcrops, scree and streams,as they will give you a valuable insight into the formation of a landscape.When calculating the distance of your journey on a <strong>map</strong> you need to rememberthe actual distance you are going to travel along the ground will be furtherthan the <strong>map</strong> implies. The two dimensions of a <strong>map</strong> don’t show you the actualdistances of slopes you will be travelling up and down, adding to the overalldistance you walk.Actual distance walked (500 m)Height gained(300 m)Linear distance on <strong>map</strong> (400 m)
ContouringWhen planning your route on a <strong>map</strong> it pays to remember that the straightestline between your starting point and destination may not be the easiest,quickest or safest. Examine the <strong>map</strong> of the area you are walking in verycarefully before planning a route. If you are going to be walking in mountainousor rough terrain it is often a good idea to plan a route following contour lines.This is called ‘contouring’.Contouring can allow you to avoid walking over the top of large hills andmountains, potentially saving you time and energy. When planning the routeyou should consider the distance of the journey, the weather conditions, theamount of equipment being carried and the fitness levels of the walkers beforedeciding whether to tackle the slopes or to contour around them.Many leisure walkers will avoid contouring in favour of climbing slopesfor a great view or sense of achievement. In harsh conditions, wherespeed and efficiency are essential, contouring is often the best option.
Measuring the distance travelled 1. On the groundYou now know the direction you need to be heading in, but it would beexpecting too much from both your equipment and yourself to be able toreach your target spot on. So you must be able to tell when you have missedyour target location and have gone too far. As much as possible you need totrack your position on the ground while you are walking. This can done usingfeatures both on the <strong>map</strong> and on the ground.The first step is to use your <strong>map</strong> to measure the distance to your nextcheckpoint. If you haven’t got a ruler, use the millimetre scale on your compass.On a <strong>map</strong> with a scale of 1:25 000 each millimetre is worth 25 metres, or on a1:50 000 scale <strong>map</strong> each is worth 50 metres, and so on.You then need to measure your distance on the ground. There are twoways of doing this:Pacing – To pace successfully you need to know in advance how many doublepaces you can take for every 100 metres. Double pacing is better than singleas it reduces the level of counting. It is estimated that a person of averageheight will take 65 double paces every 100 metres, but it is vital you work it outto your own pace count. Please do this by walking normally. Remember slopesor poor conditions underfoot will require an adjustment and steep slopes willshorten your stride dramatically.Timing – If you know, or can at least guess, how fast you are walking you canwork out how long it is going to take you to walk from your starting point toyour next target location. At 4 km/hr, which is an ‘average’ speed, it will takeyou 1.5 minutes to cover each 100 metres, so a leg of 700 metres should takeyou 10.5 minutes to walk. Again, as with pacing, this will be affected by slopes,poor underfoot conditions and other factors, so you will have to adjust yourtime accordingly.Measuring the distance travelled 2. Naismith’s ruleAs previously mentioned, measuring the time you take to travel a certaindistance is all well and good if you are travelling on a flat landscape. However,in reality this won’t be the case. With this in mind, a Scottish climber calledNaismith created a simple but effective formula that took into account thechanges in height while calculating speed over the ground – 5 km/hr plus ½hour for every 300 metres of ascent.For convenience, this formula is often expressed in terms of extra time requiredto climb a given number of contour lines – for example, it takes an additionalminute to climb one 10-metre contour line or an additional 5 minutes for eachthick contour line. On a descending slope it is assumed that you will be walkingfaster on shallow slopes but possibly a lot slower on steep descents – it istherefore taken that this will even out over the course of a day’s walk.
Can’t find your next location? Walking on a bearingAs you walk on a bearing, errors will undoubtedly creep into the actual directionyou are travelling in and the distance you have measured. For example, whenwalking across a slope on a compass bearing you will tend to stray off slightlydownhill. Also, your pacing may become inaccurate as a result of difficultterrain.To help counteract this, choose closer checkpoints, preferably between 1 000 mand 500 m – but this will ultimately depend on the terrain you are crossing. Also,try lining up a distant object on your bearing and walk towards it with your eyesconstantly on the object and not on your <strong>map</strong> and compass – this will help toprevent veering off course.There are a couple of methods you can use when walking on a bearingto help guarantee you reach your chosen checkpoint.Aiming off – If yourcheckpoint is on a linearfeature such as a streamor a track, by simplyaiming off slightly to oneside of the checkpoint,you can guarantee whichdirection you need tohead to reach yourcheckpoint upon hittingthe linear feature.StreamAim off andthen turn rightwhen you hit thestream.Direct pathIf you used thedirect path youmay end up eitherleft or right ofthe bridge dueto minor errors.Which way wouldyou turn in poorvisibility?Attack points – To locatedifficult features simplyfind another definite,prominent feature nearbyand make your way to thecentre of it. Once thereuse pacing to find theoriginal feature you arelooking for – as shown inthe diagram.WellAttack pointForestUse centre of the forestas an attack point to thenapproach the well on a newbearing and pacing.Currentlocation
Still can’t find your next location?If, after following one of the previous measuring methods, you arrive at an areabut cannot see your next chosen checkpoint – often due to poor visibility –refer back to your <strong>map</strong> and look for any distinguishing features or clues. If youcannot see what you are looking for you will have to do a systematic search of thearea to locate your next point. There are two types of search you can undertake:Spiral search – This is a good methodto use if you are alone and have limitedvisibility. From your current position, useyour compass and walk north to the limitof your visibility. Stop and use your compass,turn 90° to the right and walk twice the limit ofyour visibility (you will have to pace accurately).Stop again and turn right through another 90° andwalk three times the limit of your visibility. Keep repeating this process withlonger and longer legs until you find your checkpoint or object.Sweep search – A drawback of the sweep search is that it is difficult to carryout alone, but can be easily undertaken by a party of walkers. Using the sweepmethod is relatively simple. Space everyone out so that you are all still withinvisible contact and sweep backwards and forwards across the area to besearched until your checkpoint or object is located.Note: To work out the limit of visibility distance, ask someone to pace awayfrom you. Stop them when it becomes difficult to see them – this is yourdistance. If you are unable to do this guess the distance, making sure youunderestimate rather than overestimate it.Navigating at night or in bad weatherAll areas on search are visible at some point.Navigating in fair conditions should present no great problems to an advancedwalker. Poor conditions don’t require new techniques, just a more skilful anddetermined use of those you already possess. Nevertheless, it is important todraw attention to certain aspects that require special consideration that wouldprepare you for such conditions:• Your route plan should note possible escape paths along your route, havea record of compass bearings, distances and estimated times.• Check through your equipment before you set off to make sure everythingis in working order.• Make sure you have <strong>easy</strong> access to essential equipment when youpack your rucksack.• Use a <strong>map</strong> case to protect your <strong>map</strong> from bad weather or use anOS Explorer Map – Active.Remember, advanced planning can help ease stress if you find yourselfin a difficult situation.
1 2 31. Your passport totown and country2. The essential<strong>map</strong> for outdooractivities3. For people wholove extremes4 5 64. For touring andlocal routeplanning5. For regional routeplanning6. For national routeplanningOther titles in the seriesContact detailswww.ordnancesurvey.co.ukcustomerservices@ordnancesurvey.co.ukGeneral enquiries: +44 (0) 8456 05 05 05Dedicated Welsh Language HelpLine: 08456 05 05 04Textphone (deaf and hard of hearing users only please):+44 (0) 23 8079 2906Customer Service Centre, Ordnance Survey,Romsey Road, SOUTHAMPTON, SO16 4GU.Ordnance Survey, the OS Symbol, Explorer, Landranger and OS areregistered trademarks of Ordnance Survey, the national <strong>map</strong>pingagency of Great Britain.Ordnance Survey © Crown copyrightD04874c 1106