Lateral Line March 2011 - Hill Country Cichlid Club
Lateral Line March 2011 - Hill Country Cichlid Club Lateral Line March 2011 - Hill Country Cichlid Club
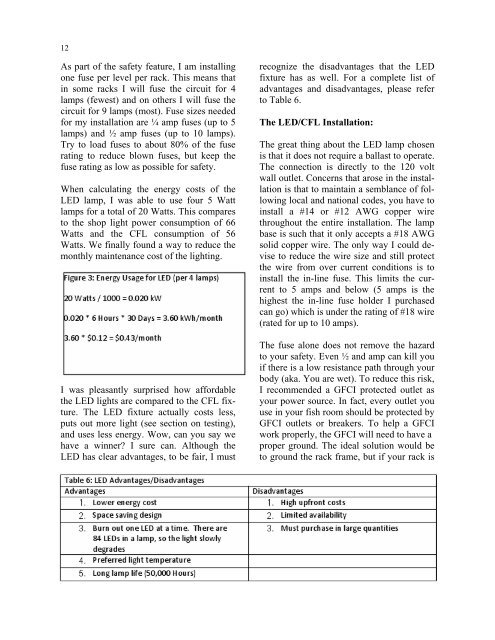
12As part of the safety feature, I am installingone fuse per level per rack. This means thatin some racks I will fuse the circuit for 4lamps (fewest) and on others I will fuse thecircuit for 9 lamps (most). Fuse sizes neededfor my installation are ¼ amp fuses (up to 5lamps) and ½ amp fuses (up to 10 lamps).Try to load fuses to about 80% of the fuserating to reduce blown fuses, but keep thefuse rating as low as possible for safety.When calculating the energy costs of theLED lamp, I was able to use four 5 Wattlamps for a total of 20 Watts. This comparesto the shop light power consumption of 66Watts and the CFL consumption of 56Watts. We finally found a way to reduce themonthly maintenance cost of the lighting.I was pleasantly surprised how affordablethe LED lights are compared to the CFL fixture.The LED fixture actually costs less,puts out more light (see section on testing),and uses less energy. Wow, can you say wehave a winner? I sure can. Although theLED has clear advantages, to be fair, I mustrecognize the disadvantages that the LEDfixture has as well. For a complete list ofadvantages and disadvantages, please referto Table 6.The LED/CFL Installation:The great thing about the LED lamp chosenis that it does not require a ballast to operate.The connection is directly to the 120 voltwall outlet. Concerns that arose in the installationis that to maintain a semblance of followinglocal and national codes, you have toinstall a #14 or #12 AWG copper wirethroughout the entire installation. The lampbase is such that it only accepts a #18 AWGsolid copper wire. The only way I could deviseto reduce the wire size and still protectthe wire from over current conditions is toinstall the in-line fuse. This limits the currentto 5 amps and below (5 amps is thehighest the in-line fuse holder I purchasedcan go) which is under the rating of #18 wire(rated for up to 10 amps).The fuse alone does not remove the hazardto your safety. Even ½ and amp can kill youif there is a low resistance path through yourbody (aka. You are wet). To reduce this risk,I recommended a GFCI protected outlet asyour power source. In fact, every outlet youuse in your fish room should be protected byGFCI outlets or breakers. To help a GFCIwork properly, the GFCI will need to have aproper ground. The ideal solution would beto ground the rack frame, but if your rack is
13rack frame, but if your rack is like mine,then you are up a creek. Wood is not a goodgrounding conductor.As a backup solution, I thought to install astainless steel foil sheet behind all of mylights. I need to ensure that I am touchingthe Stainless steel sheet whenever I amworking with the electricity in the fish room.Doing do will ensure that if I get shocked, Iwill probably not be killed. I selectedStainless steel foil for 2 reasons. (1) it doesn’trust and (2) aluminum was not a goodoption because it reacts in humid environmentswith copper and I am using copperwire.For other instructions on how to build thelight fixture, I recommend trial and error andlook at the pictures. It will be for me to explainever little thing that needs to be donewhen building the lights. I figured that thebest I can do is take pictures of the installationfrom every angle and let you figure itout for yourselves.The Testing:In an attempt to be as scientific and unbiasedas possible, I borrowed a light meter fromwork. I placed the light meter at ten inch intervalsdown the length of the rack. I placeda white reflector underneath the test meterand another white reflector on the shelfabove the test rack. The readings were takensix inches from the front of the rack and sixinches from the back of the rack. Figure 4displays the test locations while comparingthe three lighting systems. The measurementswere taken after each light had fiveminutes to warm up and with all other roomlights off.The test results are displayed in Table 7. Allunits of measurements are in Foot-Candles,a standard measuring unit for light levels.The T8 light fixture had by far the highestoutput light level of the 3 systems, but it alsohas the highest power input. The T8 lampswere also 3½ inches closer to the light meterbecause they intrude into the clearance spacebetween the rack and the aquarium. In acomparison of light per watt of electricity,the clear winner is the LED light fixture. Toincrease the light level, additional LEDlamps can be installed if desired.Cost of Ownership Analysis:As part of the cost of ownership I must includethe following items:1. Capital Installation Cost (100% in thefirst year)2. Monthly Electricity Cost3. Lamp Replacement CostCFL lamps have an average life of 10,000hours. This means that they will require replacementevery 4 ½ years. In comparison,the T8 florescent lamps have an average lifeof 25,000 years and will only need to be replacedevery 11.5 years. The LED lamps
- Page 2: 2The HCCC is a proud member ofthe F
- Page 5: 5#3 for this article. Lighting is t
- Page 9 and 10: 9The schematic used to wire LED lig
- Page 11: 11even get what I ordered, or that
- Page 16 and 17: 16Do you know? Aulonocara sp. "stua
- Page 18: 18ues in a convex curve over the ey
- Page 23 and 24: 23Schedule of EventsApril 9Amazonia
- Page 25 and 26: 25Multiple generations of bristleno
12As part of the safety feature, I am installingone fuse per level per rack. This means thatin some racks I will fuse the circuit for 4lamps (fewest) and on others I will fuse thecircuit for 9 lamps (most). Fuse sizes neededfor my installation are ¼ amp fuses (up to 5lamps) and ½ amp fuses (up to 10 lamps).Try to load fuses to about 80% of the fuserating to reduce blown fuses, but keep thefuse rating as low as possible for safety.When calculating the energy costs of theLED lamp, I was able to use four 5 Wattlamps for a total of 20 Watts. This comparesto the shop light power consumption of 66Watts and the CFL consumption of 56Watts. We finally found a way to reduce themonthly maintenance cost of the lighting.I was pleasantly surprised how affordablethe LED lights are compared to the CFL fixture.The LED fixture actually costs less,puts out more light (see section on testing),and uses less energy. Wow, can you say wehave a winner? I sure can. Although theLED has clear advantages, to be fair, I mustrecognize the disadvantages that the LEDfixture has as well. For a complete list ofadvantages and disadvantages, please referto Table 6.The LED/CFL Installation:The great thing about the LED lamp chosenis that it does not require a ballast to operate.The connection is directly to the 120 voltwall outlet. Concerns that arose in the installationis that to maintain a semblance of followinglocal and national codes, you have toinstall a #14 or #12 AWG copper wirethroughout the entire installation. The lampbase is such that it only accepts a #18 AWGsolid copper wire. The only way I could deviseto reduce the wire size and still protectthe wire from over current conditions is toinstall the in-line fuse. This limits the currentto 5 amps and below (5 amps is thehighest the in-line fuse holder I purchasedcan go) which is under the rating of #18 wire(rated for up to 10 amps).The fuse alone does not remove the hazardto your safety. Even ½ and amp can kill youif there is a low resistance path through yourbody (aka. You are wet). To reduce this risk,I recommended a GFCI protected outlet asyour power source. In fact, every outlet youuse in your fish room should be protected byGFCI outlets or breakers. To help a GFCIwork properly, the GFCI will need to have aproper ground. The ideal solution would beto ground the rack frame, but if your rack is


